
|
 06-01-2015, 07:52 PM
|
#2001 |
|
Senior Enthusiast
Join Date: Feb 2007
Location: Spokane Valley, WA
Posts: 8,356
|
Re: Markeb01 Build Thread
Yippee!!! The brown truck arrived about 14:15 with the new 140 amp alternator, so I set to work immediately getting it installed. The mechanical attachments were dirt simple, until I realized I misplaced one ¼ spacer. So I stuck 4 stainless flat washers together with Krazy Glue which will serve nicely until I can get my kid to machine up another cosmetically correct replacement.
Next up, I soon came to realize the power post on the back of the alternator was larger than any I have previously encountered. This took a few minutes to remedy, replacing the ¼ ring terminals with larger 5/16 components. They crimped in place nicely thanks to my professional ratcheting crimper, with the two biggest terminals placed back to back for ease of installation. Heres the completed install: 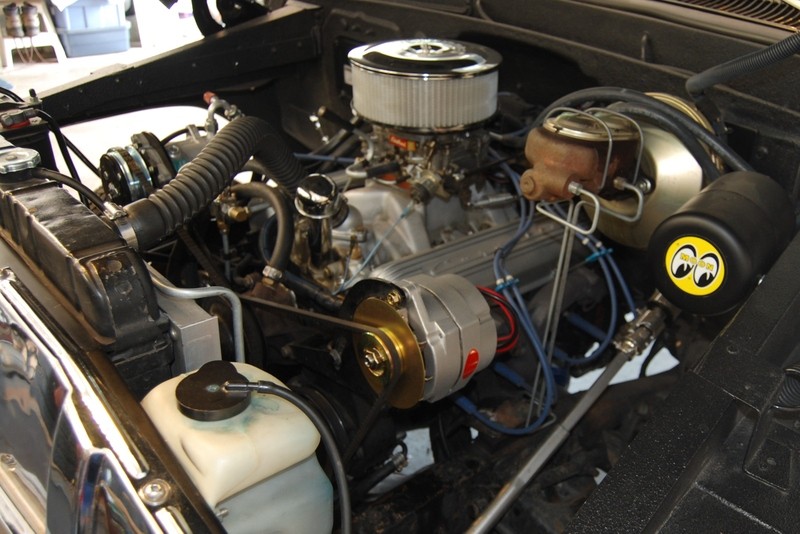 It turns out Summit Racing didnt exaggerate when they claimed the alternator was rated at 150 amps. The voltage set point was 14.8 on both alternators. The amp output specs on both alternators are as follows: Powermaster amps idle 105, cruise 127, top end 162 Napa amps 55 amps at 2000 rpms, 77 amps at 6000 rpms. My generic calculations indicate Ill be using about 110 amps when all the main devices are activated like headlights, fans, a/c, ignition, dash lights, etc. With a fully charged battery showing 13.6 volts - during a quick trip around the block the volt meter only dropped to 13.5 volts once when we stopped after everything had warmed. This was with everything running, and the A/C and fans cycling on and off. And this was with the passenger side spotlight illuminated! I didnt notice until after we got home. I probably bumped the switch while messing around in the glovebox wiring up the camera power. Its pretty obvious the old alternator never had a chance at keeping up with the electrical needs. Its also pretty apparent looking at the photo I could spend some time cleaning up my master cylinder!
__________________
My Build Thread: http://67-72chevytrucks.com/vboard/s...d.php?t=444502 |

|

|
|
06-01-2015, 08:57 PM
|
#2002 |
|
Registered User
Join Date: Sep 2012
Location: Leander, TX
Posts: 969
|
Re: Markeb01 Build Thread
Looks good Mark. I may have to upgrade to one of these down the road.
Not sure you have heard about it but I have been reading that DOT 4 brake fluid does not eat paint. However if you change over to it your whole system has to be cleaned as it can be mixed with DOT 3.
__________________
64' Build Thread http://67-72chevytrucks.com/vboard/s...d.php?t=586955 |
|
|
|
|
06-02-2015, 08:53 PM
|
#2003 |
|
Senior Enthusiast
Join Date: Feb 2007
Location: Spokane Valley, WA
Posts: 8,356
|
Re: Markeb01 Build Thread
I’ve thought about swapping out the brake fluid a few times, but I’m basically lazy and the effort needed to thoroughly clean out the old fluid is more work than I’m normally interested in investing.
My wife and I have been putting off a trip we both wanted to make for a while, pending health issues improving and getting the truck back in service as its much more fun to travel in that than our Honda jelly bean car. So today we took a 150 mile round trip, visiting the resting place of Ruthann’s late mom and husband. From that viewpoint the journey was a complete success. We both enjoyed the time together, paying our respects, taking a few pictures, and reminiscing. Here’s a shot of the truck at the cemetery: 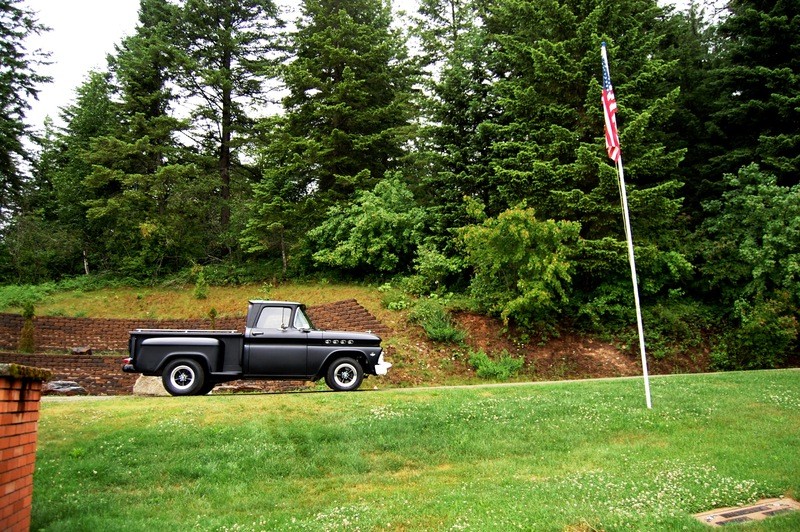 From a testing the truck standpoint, it wasn’t quite as productive. A few minutes into the trip I noticed the indicator needle on the new Sun Super Tach R wasn’t moving. It was stuck on 1800 rpms. After we stopped, the gauge was indicating normal functioning again, until it stopped moving at 2800 rpms. Again, after the truck was stopped and turned off the gauge fired up and worked normally until it again stopped moving at 2800 rpms once again! So far I haven’t found any internet threads addressing this problem, so I’ll be going back to my old half sweep tach while I wait for a response from either Sunpro or Bosch on possible resolutions. The second item on the testing schedule was the new GoPro camera. I made one major mistake which wiped out any viable results. I added a polarizing filter to the waterproof housing mainly for added protection to the lens. In the future, it may prove useful for hand held videos, but it is worthless in a vehicle. Since the polarizing filter is free to be rotated for preferred orientation, it is also free to rattle so loud it wipes out any other sounds or voices recorded. In addition, I didn’t really know what I was doing, so I inadvertently took one picture: 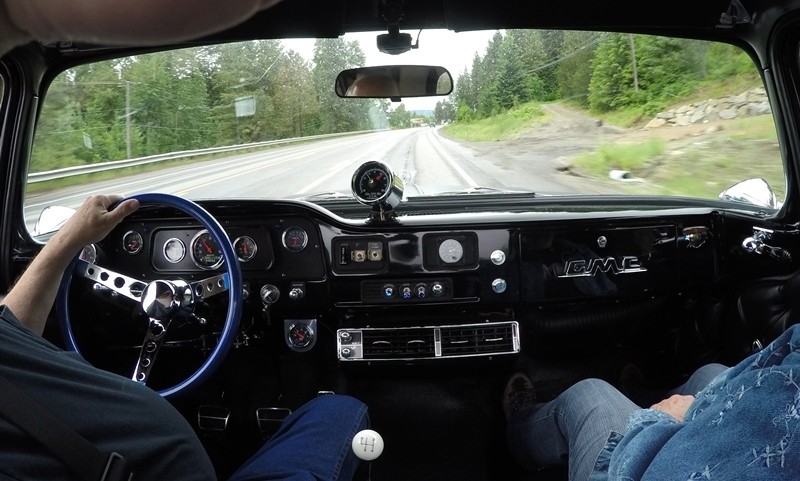 Yes that’s my hand in the upper left corner. I also wasted enough battery that I only recorded 17 minutes of the return trip, none of which is usable because of the incessant rattling of the filter! But none of that spoiled the trip. We had a great day, and I now have better data to work with. So I’ll make a few adjustments and try again.
__________________
My Build Thread: http://67-72chevytrucks.com/vboard/s...d.php?t=444502 Last edited by markeb01; 06-02-2015 at 09:14 PM. |
|
|
|
|
06-02-2015, 09:20 PM
|
#2004 |
|
Registered User
Join Date: Apr 2012
Location: Searcy, AR
Posts: 4,203
|
Re: Markeb01 Build Thread
Awesome trip, thanks for sharing
Hope you hear back about the tach soon...

__________________
DON Proverbs 27:17  US Air Force Retarded errr Retired My '65 Stepper Build:http://67-72chevytrucks.com/vboard/s...d.php?t=533920 My '60 Rusty Patina Build:http://67-72chevytrucks.com/vboard/s...66#post7402266 My '72 http://67-72chevytrucks.com/vboard/s...59#post7204359 SOLD |
|
|
|
|
06-03-2015, 11:28 AM
|
#2005 |
|
Registered User
Join Date: Jun 2012
Location: Selkirk Ontario Canada
Posts: 1,141
|
Re: Markeb01 Build Thread
mark just a heads up ...take some crazy glue and put it on the nuts on the mounts ,let them dry before you put the screws back in ..this is so you do not loss them
__________________
My 63 GMC Panel Slow Build http://67-72chevytrucks.com/vboard/s...=1#post5457281 63 
|
|
|
|
|
06-03-2015, 04:45 PM
|
#2006 |
|
Senior Enthusiast
Join Date: Feb 2007
Location: Spokane Valley, WA
Posts: 8,356
|
Re: Markeb01 Build Thread
Thanks for the tip. I’ve also learned a valuable lesson regarding genuine GoPro mounting pieces versus generic items. I bought a generous assortment of generic mounting brackets to save a few bucks, and although they look identical to the real things, they don’t fit the same. Either the female brackets are undersize, or the male counterparts are not as flexible as GoPro parts, making some connections so tight it risks damaging the camera trying to get them apart.
Like so many aftermarket parts in the classic truck world, you frequently get what you pay for, and OEM stands as the benchmark. I resent having to pay the hyper-inflated GoPro prices, but it’s probably cheaper than buying them twice. I also found the tech support contact for Bosch-Actron (the new owners of Sunpro) and sent them a help ticket. I'm hoping they have an easy solution to the tach problem.
__________________
My Build Thread: http://67-72chevytrucks.com/vboard/s...d.php?t=444502 Last edited by markeb01; 06-03-2015 at 06:16 PM. |
|
|
|
|
06-04-2015, 07:29 PM
|
#2007 |
|
Senior Enthusiast
Join Date: Feb 2007
Location: Spokane Valley, WA
Posts: 8,356
|
Re: Markeb01 Build Thread
On the plus side, I received a prompt, courteous and friendly email response from Bosch-Actron regarding my Sunpro tach technical inquiry. According to Gerald in Tech Support, they have no history of the problem I described with these tachometers. He did offer to replace it free of charge if it was less than one year old.
As much as that offer was appreciated, this wasn’t the answer I was looking for. The new Bosch-Actron version of the “Sun Super Tach” eliminated those words off the face, so cosmetically it wouldn’t be acceptable in my installation. I then spent several hours searching the web looking for similar tach related failures, and came up empty. So I started wondering if there was something wrong with my installation, even though both tach heads were installed seemingly exactly the same. I speculated maybe I pinched a wire when tightening the cup nut in the back, or perhaps one of the terminal posts was loose in the back of the gauge (under the wire terminal). So I pulled the new full sweep tach back out of the packaging, and was able to tighten the terminal posts another ¼ turn. I thought at first this might indicate the problem, but when I checked the half sweep head, I was able to tighten those posts up another ¼ turn as well. Once again I reinstalled the new Super Tach, and took the truck for a 20 minute ride. This time it worked perfectly, with no stalling of the indicator! I really have no idea why it quit working in the first place and now it doesn’t, but I’m pleased to have it back in the truck – functioning correctly! Let’s hope it stays that way for years into the future.
__________________
My Build Thread: http://67-72chevytrucks.com/vboard/s...d.php?t=444502 Last edited by markeb01; 06-04-2015 at 07:56 PM. |
|
|
|
|
06-04-2015, 09:46 PM
|
#2008 |
|
Registered User
Join Date: Apr 2012
Location: Searcy, AR
Posts: 4,203
|
Re: Markeb01 Build Thread
Glad to hear the Tach is working...

__________________
DON Proverbs 27:17 US Air Force Retarded errr Retired My '65 Stepper Build:http://67-72chevytrucks.com/vboard/s...d.php?t=533920 My '60 Rusty Patina Build:http://67-72chevytrucks.com/vboard/s...66#post7402266 My '72 http://67-72chevytrucks.com/vboard/s...59#post7204359 SOLD |
|
|
|
|
06-05-2015, 01:01 AM
|
#2009 |
|
Senior Enthusiast
Join Date: Feb 2007
Location: Spokane Valley, WA
Posts: 8,356
|
Re: Markeb01 Build Thread
Thanks Don, but it turns out my excitement about the Super Tach was a bit premature. On a longer ride tonight, as soon as the tach warmed up it again stopped functioning at 2800 rpms. It stayed stuck at that position even after the power was turned off for quite a while. Eventually the indicator needle dropped to the bottom, but that’s it – I’m done. The FZ88R is back in place functioning perfectly, and will remain there indefinitely.
__________________
My Build Thread: http://67-72chevytrucks.com/vboard/s...d.php?t=444502 |
|
|
|
|
06-05-2015, 11:43 AM
|
#2010 |
|
Registered User
Join Date: Jun 2012
Location: Selkirk Ontario Canada
Posts: 1,141
|
Re: Markeb01 Build Thread
that would have me mad too and i would send it back for full refund
__________________
My 63 GMC Panel Slow Build http://67-72chevytrucks.com/vboard/s...=1#post5457281 63
|
|
|
|
|
06-06-2015, 08:58 AM
|
#2011 | |
|
Registered User
Join Date: Apr 2012
Location: Searcy, AR
Posts: 4,203
|
Re: Markeb01 Build Thread
Quote:

__________________
DON Proverbs 27:17 US Air Force Retarded errr Retired My '65 Stepper Build:http://67-72chevytrucks.com/vboard/s...d.php?t=533920 My '60 Rusty Patina Build:http://67-72chevytrucks.com/vboard/s...66#post7402266 My '72 http://67-72chevytrucks.com/vboard/s...59#post7204359 SOLD |
|
|
|
|
|
06-06-2015, 12:05 PM
|
#2012 | |
|
Registered User
Join Date: Dec 2012
Location: Rochester, KENT
Posts: 10,480
|
Re: Markeb01 Build Thread
Quote:
I guess sometimes we need to just step away.
__________________
MY BUILD LINK: http://67-72chevytrucks.com/vboard/s...585901]Redneck Express - 1966 C10 Short Fleetside MY USA ROADTRIPS http://forum.retro-rides.org/thread/...2018-humdinger IF YOU CAN'T FIX IT WITH A HAMMER, YOU'VE GOT AN ELECTRICAL PROBLEM MATE. |
|
|
|
|
|
06-10-2015, 07:50 PM
|
#2013 |
|
Senior Enthusiast
Join Date: Feb 2007
Location: Spokane Valley, WA
Posts: 8,356
|
Re: Markeb01 Build Thread
Well were back in business. I picked up a second full sweep old school Sunpro tach, and will be sending the previous version back for replacement. The new one works perfectly no stalling at any rpm.
I also figured out how to get the GoPro to work. I still dont have anything video related worth posting, but on a run earlier this morning it captured some pretty nice scenes at the plant nursery and on the way home, so I took a couple of snap shots of the display for now, until I can figure a better way to do it electronically. Heres the truck sitting out front: 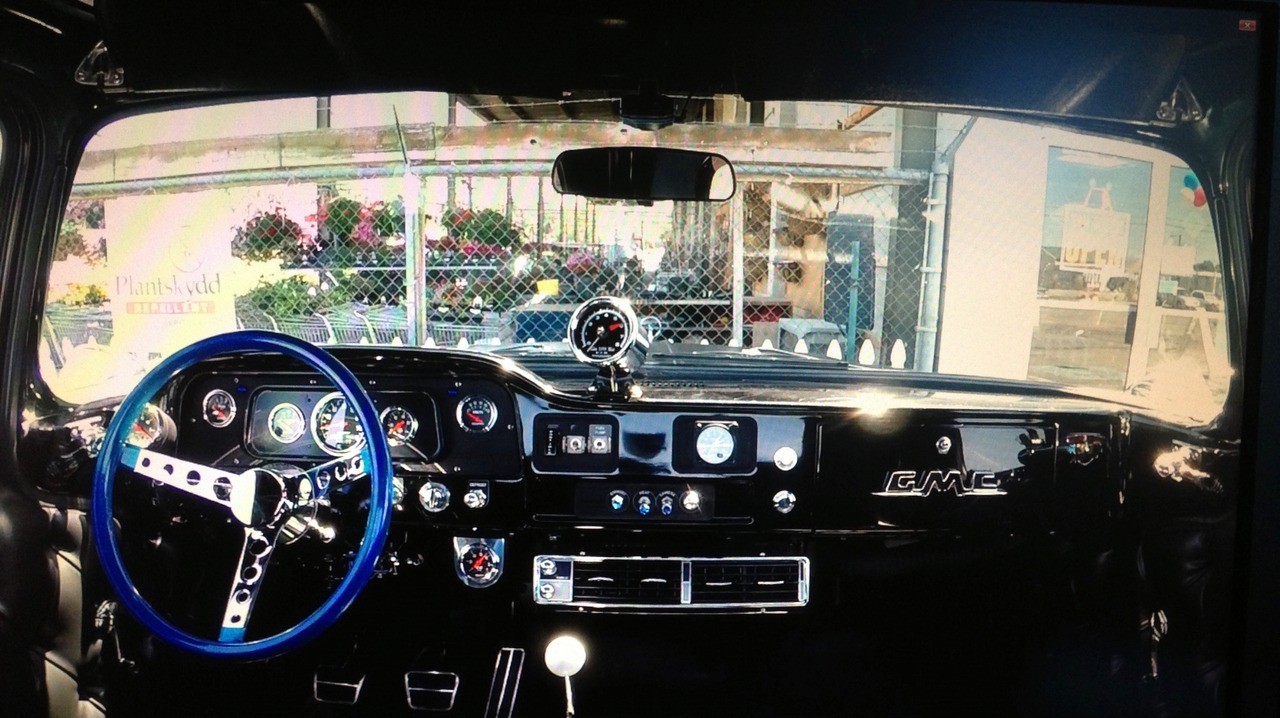 And here we are on the way home, plants in hand: 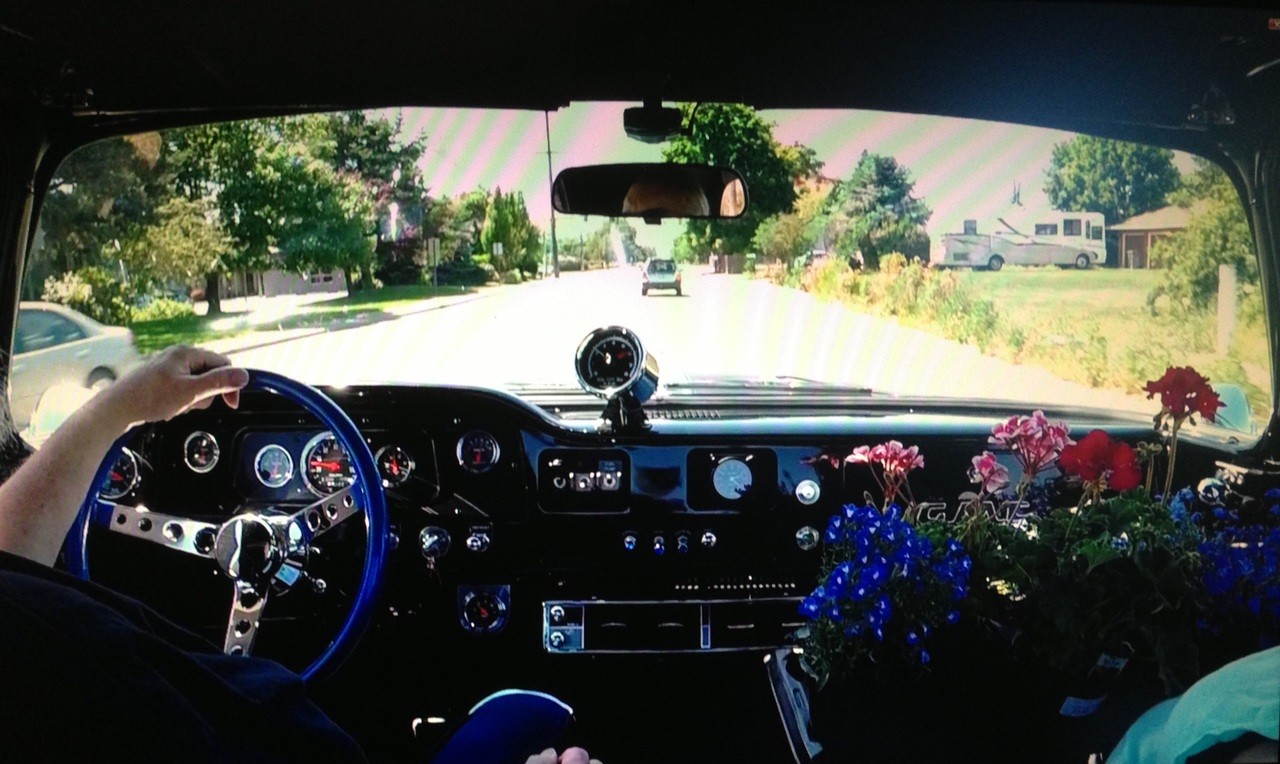 The alternator is also working perfectly with no more electrical smell. Last night I also switched back to the 160 degree Robertshaw thermostat. It flows much more coolant combined with the Stewarts high flow water pump. Sitting in 95 degree traffic it hovers around 190 rather than 200-210 like it did with the 185 degree standard flow thermostat. Since I dont press this truck into service that much during the winter months, Ill be staying with the cooler thermostat from now on.
__________________
My Build Thread: http://67-72chevytrucks.com/vboard/s...d.php?t=444502 |
|
|
|
|
06-10-2015, 10:20 PM
|
#2014 |
|
Registered User
Join Date: Apr 2012
Location: Searcy, AR
Posts: 4,203
|
Re: Markeb01 Build Thread
Glad to see all is well with the Tach issue, great images from the GoPro...
 and as always, thanks for the info on the thermostat, helpful info especially here in the southern latitudes where 100 degree plus days are plentiful... 
__________________
DON Proverbs 27:17 US Air Force Retarded errr Retired My '65 Stepper Build:http://67-72chevytrucks.com/vboard/s...d.php?t=533920 My '60 Rusty Patina Build:http://67-72chevytrucks.com/vboard/s...66#post7402266 My '72 http://67-72chevytrucks.com/vboard/s...59#post7204359 SOLD |
|
|
|
|
06-12-2015, 11:04 PM
|
#2015 |
|
Senior Enthusiast
Join Date: Feb 2007
Location: Spokane Valley, WA
Posts: 8,356
|
Re: Markeb01 Build Thread
Climbing out after another local journey, I noticed one of the strips of rubber had torn on the clutch pedal and was dangling over the trim. Heres a shot after I tore it off:
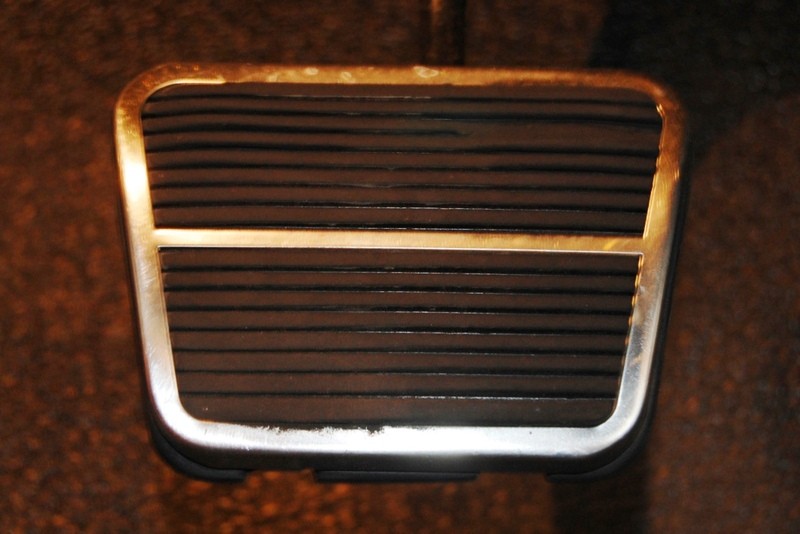 The missing strip can be seen in the upper right corner, but addition damage can be detected above the horizontal center area, and the last five rows on the lower left corner. The rubber material in the aftermarket pads is just too soft and wears quickly and is prone to tearing. The offset to this is they are much easier to install than OEM pads, as those can be so hard to get on its possible to tear the corners trying to stretch them over the steel support. So Im resurrecting one of my earlier fantasy projects, having a waffle pattern disc brake pad instead of a plain version or the later deluxe pads with trim: 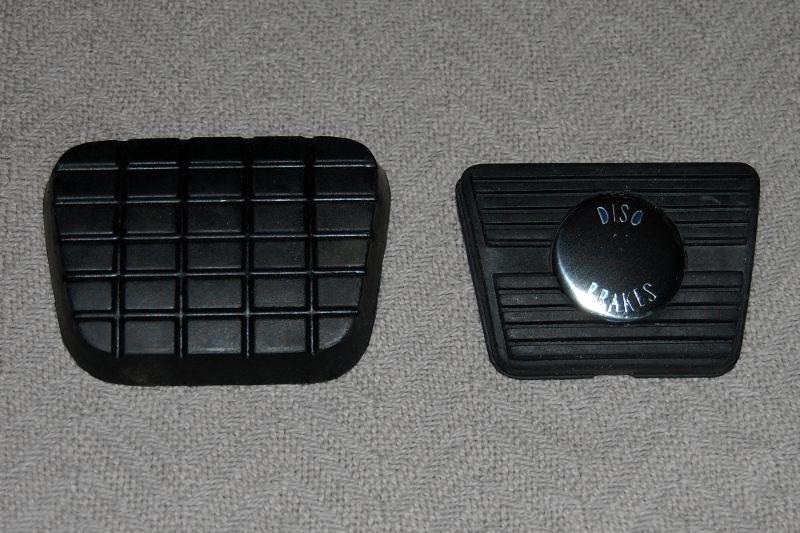 I really like how the trimmed pads look, but Im not crazy about having metal around the perimeter of the pad as my foot has slipped off the brake pedal several times, especially with wet shoes. This never happened during all the years I ran the waffle pads. I had considered cutting the metal portion of the pedal down to fit the Chevelle pad, but the edges are all curved and I wasnt sure it could be done successfully. I also didnt want to remove the pedals from the truck, nor lean over the seat long enough to trim the metal down to size with a Dremel tool and cutoff wheel. So my next thought was to modify the waffle pad and install the stainless Disc Brake insert on that pad instead. Ive worked on this off and on for a couple of years, but never came up with a good solution on three key points. 1. Cutting a neat enough hole for the insert in the waffle pad. Doing it by hand with a hole saw left a ragged edge. 2. Controlling the depth of the insert, so it would sit at just the right height, and 3. How to remove the excess material directly under the metal dome while leaving it perfectly smooth so the dome/insert isnt damaged by foot pressure. The answer finally occurred to me tonight. Cut the hole completely through the waffle pad, and install the stainless insert from the rear after cutting it out of the Chevelle pad complete with the rubber behind it. This way the depth of the insert can be set where preferred by how much material is placed between the insert and the steel brake pedal. A bit of weatherstrip adhesive and it will all be one piece again. What Ive done so far is order up three new replacement pads (1 extra just in case). Cut the insert and rubber support out of the Chevelle pad, to the outer diameter of the insert. This retained the ledge the outside of the inside rests upon: 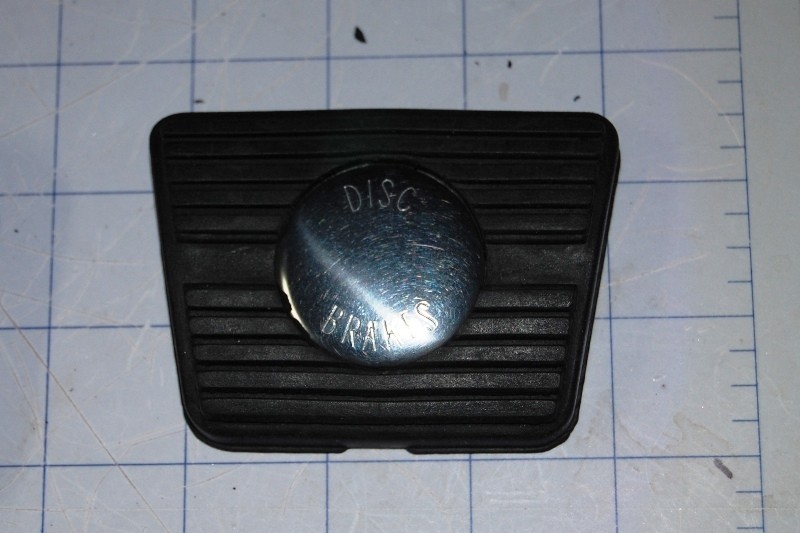 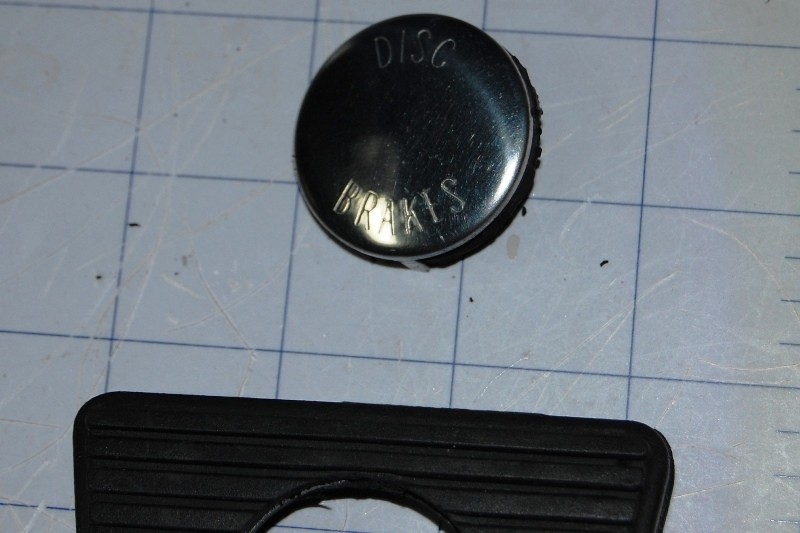 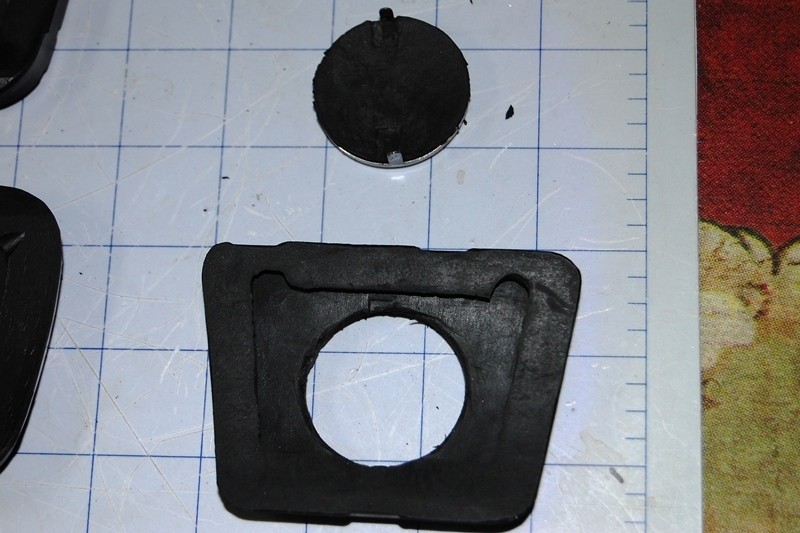 This is my old test mule pad in its modified form, and after cutting out the center: 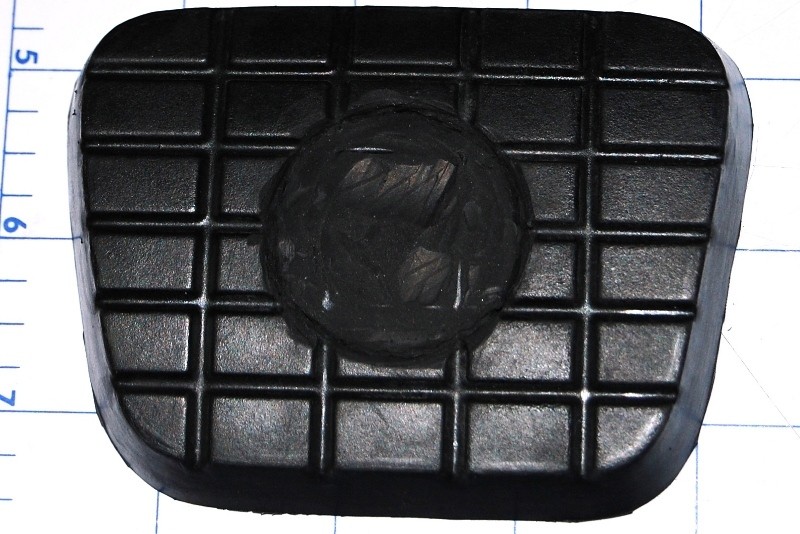 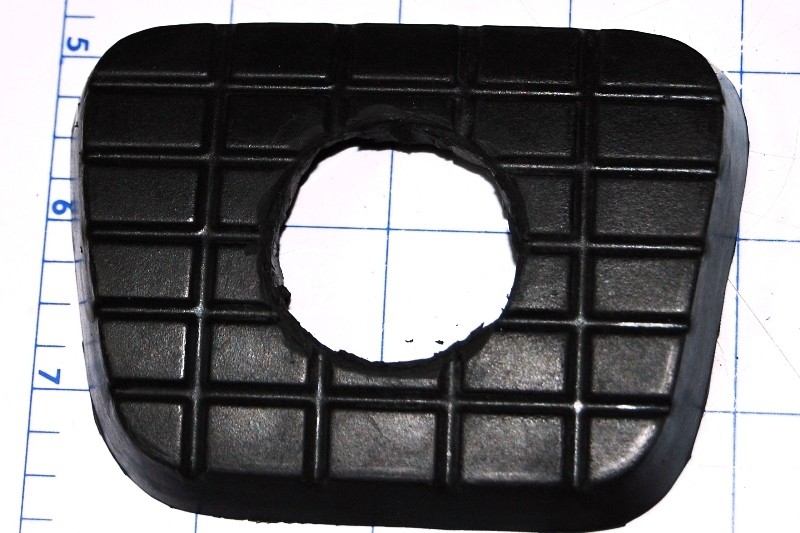 And this is a crude version of what it will look like when assembled: 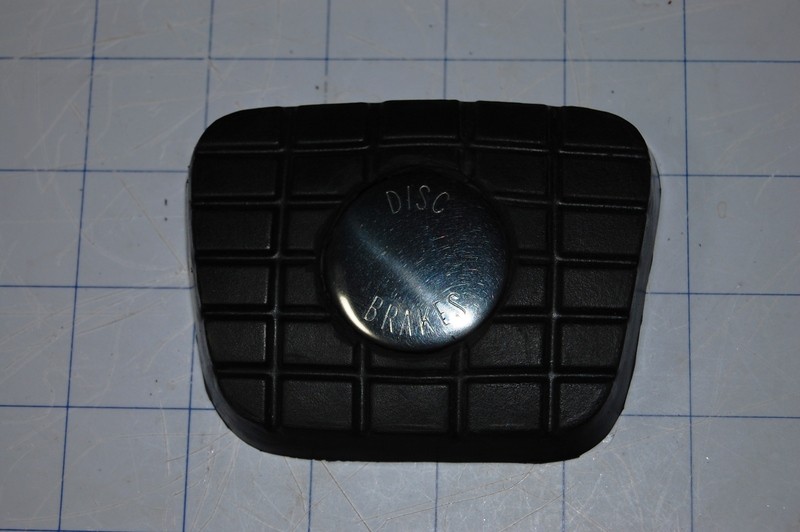
__________________
My Build Thread: http://67-72chevytrucks.com/vboard/s...d.php?t=444502 |
|
|
|
|
06-13-2015, 02:00 AM
|
#2016 |
|
meowMEOWmeowMEOW
Join Date: Sep 2009
Location: MKE WI
Posts: 7,128
|
Re: Markeb01 Build Thread
 I swear your truck is so far past "done" your just going out of your way to make projects hahah. Come to think of it....I just realized I've never had a rubber pad on my brake pedal at all...I feel like such a peasant.
__________________
'66 Short Step / SD Tuned / Big Cam LQ4 / Backhalfed /Built 4l80e / #REBUILDEVERYTHING  |
|
|
|
|
06-13-2015, 09:24 AM
|
#2017 |
|
Registered User
Join Date: Apr 2012
Location: Searcy, AR
Posts: 4,203
|
Re: Markeb01 Build Thread
Another great write-up on details
Great idea, stashed away with numerous others already squirreled away...
__________________
DON Proverbs 27:17 US Air Force Retarded errr Retired My '65 Stepper Build:http://67-72chevytrucks.com/vboard/s...d.php?t=533920 My '60 Rusty Patina Build:http://67-72chevytrucks.com/vboard/s...66#post7402266 My '72 http://67-72chevytrucks.com/vboard/s...59#post7204359 SOLD |
|
|
|
|
06-13-2015, 01:09 PM
|
#2018 | |
|
Rollin' Old Skool
Join Date: Jun 2007
Location: Hattiesburg, MS
Posts: 5,371
|
Re: Markeb01 Build Thread
Quote:
 The crazy thing though is, his ideas are always unique & well thought out. I don't recall ever reading about or seeing something he has done & thought, well that's just dumb, lol. Even if it might not be 100% necessary to many folks, tweaking/personalizing things to your liking is what it's all about. I keep thinking he's gonna run out of ideas one of these days, but he just keeps coming up with new projects to tackle. The crazy thing though is, his ideas are always unique & well thought out. I don't recall ever reading about or seeing something he has done & thought, well that's just dumb, lol. Even if it might not be 100% necessary to many folks, tweaking/personalizing things to your liking is what it's all about. I keep thinking he's gonna run out of ideas one of these days, but he just keeps coming up with new projects to tackle.
__________________
_____________________________________________ Phillip My Build threads: 1966 Chevy C-10 "Black Betty" shortbed, fleetside, BBW, 327 V8/ Powerglide (under construction) http://67-72chevytrucks.com/vboard/s...ighlight=betty 1997 Chevy Tahoe, 2dr/2wd, mild custom (Daily driver) http://67-72chevytrucks.com/vboard/s...d.php?t=601142 Pics: '66 C-10 https://flic.kr/s/aHsjHWD4h9 '97 Tahoe https://flic.kr/s/aHsjGZ7wKP '93 C-1500 https://flic.kr/s/aHskxdpdnQ '88 S-10 Blazer https://flic.kr/s/aHsjYGx4Md Previous Rides: 1993 Chevy S-10 ext. cab, 4.3L, 4/5 drop (Sold) 1993 Chevy C-1500 short/step Retro-Rod (Sold) 1988 S-10 Blazer 2dr/2wd mild custom (Sold) |
|
|
|
|
|
06-13-2015, 03:37 PM
|
#2019 |
|
Senior Enthusiast
Join Date: Feb 2007
Location: Spokane Valley, WA
Posts: 8,356
|
Re: Markeb01 Build Thread
Thanks for the comments guys. I’ve been telling my wife the truck is “done” for several years (something she routinely reminds me of!). I think her interpretation means I’m not supposed to spend any more money on it, which we all know is just plain silly!
But I’ve changed so many things so many times, I’m ultimately left with enough information to know what I really prefer – even if it requires a step backwards to achieve. I know a lot of my inspirations are not main stream popular, but figure if they’re worth doing they’re worth documenting. I’ve read so many articles over the years and either had a hard time figuring out how something was done (or never figured it out) – I’d at least take the time to make it easier for the next guy, should anyone else want to do something similar. It’s what I love about this forum. I’ve swiped many ideas from other contributors I would have never dreamed up on my own, and gained lots of insight into ideas I’d never want, just like so many others looking at my stuff!
__________________
My Build Thread: http://67-72chevytrucks.com/vboard/s...d.php?t=444502 |
|
|
|
|
06-13-2015, 03:42 PM
|
#2020 | |
|
Registered User
Join Date: Dec 2012
Location: Rochester, KENT
Posts: 10,480
|
Re: Markeb01 Build Thread
Quote:
Your thread is entertaining, informative, addictive and long may it live.. Your thread was the first I ever read on here, and was absolutely intoxicating and inspiring. I am sure your wife feels very pleased and proud of your family toy.
__________________
MY BUILD LINK: http://67-72chevytrucks.com/vboard/s...585901]Redneck Express - 1966 C10 Short Fleetside MY USA ROADTRIPS http://forum.retro-rides.org/thread/...2018-humdinger IF YOU CAN'T FIX IT WITH A HAMMER, YOU'VE GOT AN ELECTRICAL PROBLEM MATE. |
|
|
|
|
|
06-13-2015, 04:56 PM
|
#2021 |
|
Senior Enthusiast
Join Date: Feb 2007
Location: Spokane Valley, WA
Posts: 8,356
|
Re: Markeb01 Build Thread
Oh stop! My head is swelling so big it's wobbling back and forth and I'm having a hard time holding it up straight!
And you're right about Ruthann. She's loves the truck, me, and my hobbies. She's offered if my knees ever get so bad I can't drive a stick any longer, I won't need to swap over an automatic as she will be taking ownership of the truck and I get the Honda!
__________________
My Build Thread: http://67-72chevytrucks.com/vboard/s...d.php?t=444502 |
|
|
|
|
06-13-2015, 08:30 PM
|
#2022 |
|
Registered User
Join Date: Apr 2012
Location: Searcy, AR
Posts: 4,203
|
Re: Markeb01 Build Thread
Although I can't remember if your thread was the first I read, it may have been Alan's Vitamin C10, I concur with Rian
I always enjoy checking in
__________________
DON Proverbs 27:17 US Air Force Retarded errr Retired My '65 Stepper Build:http://67-72chevytrucks.com/vboard/s...d.php?t=533920 My '60 Rusty Patina Build:http://67-72chevytrucks.com/vboard/s...66#post7402266 My '72 http://67-72chevytrucks.com/vboard/s...59#post7204359 SOLD |
|
|
|
|
06-13-2015, 09:43 PM
|
#2023 |
|
Senior Enthusiast
Join Date: Feb 2007
Location: Spokane Valley, WA
Posts: 8,356
|
Re: Markeb01 Build Thread
All kidding aside, I really do appreciate the support from everyone that checks in here.
__________________
My Build Thread: http://67-72chevytrucks.com/vboard/s...d.php?t=444502 |
|
|
|
|
06-20-2015, 07:27 PM
|
#2024 |
|
Senior Enthusiast
Join Date: Feb 2007
Location: Spokane Valley, WA
Posts: 8,356
|
Re: Markeb01 Build Thread
When disc brakes first came out in the late 60s, the coolest part of having them wasnt their functionality. It was having that cool Disc Brake button on the brake pad that made them an instant hit with the drive-in crowd.
And heres the sample that sacrificed its emblem for the cause of creating the worlds first authentic OEM 1960 GMC Disc Brake pad! This is a replica for a 1967 Chevelle. The material was so thin and soft I just trimmed around the emblem with an Xacto knife. 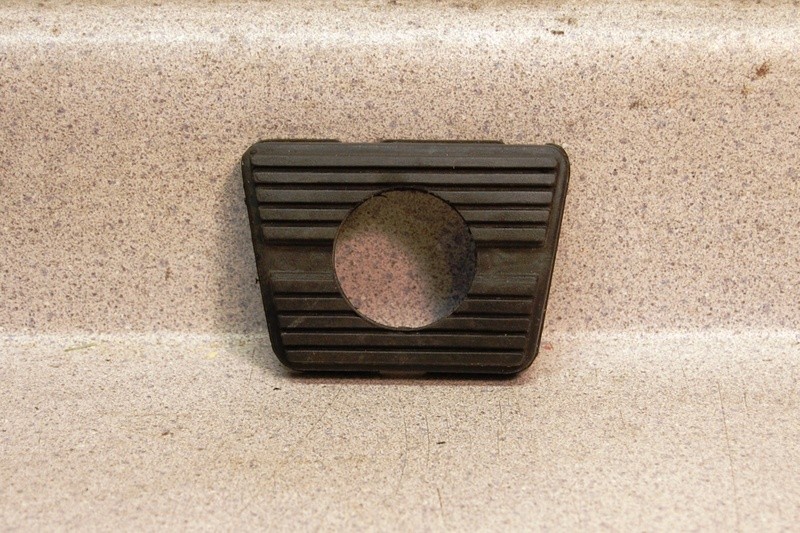 The tools used to make the 1960 GMC disc brake pedal pad were a step drill from Harbor Freight and a 1.5 chassis punch I picked up on Ebay:  I also used some silicone spray to keep from smoking the rubber as it was drilled. I tried making a prototype earlier in the week, but my original (OEM 1960) pedal pad was so stiff if was very hard to cut and ended up off center: 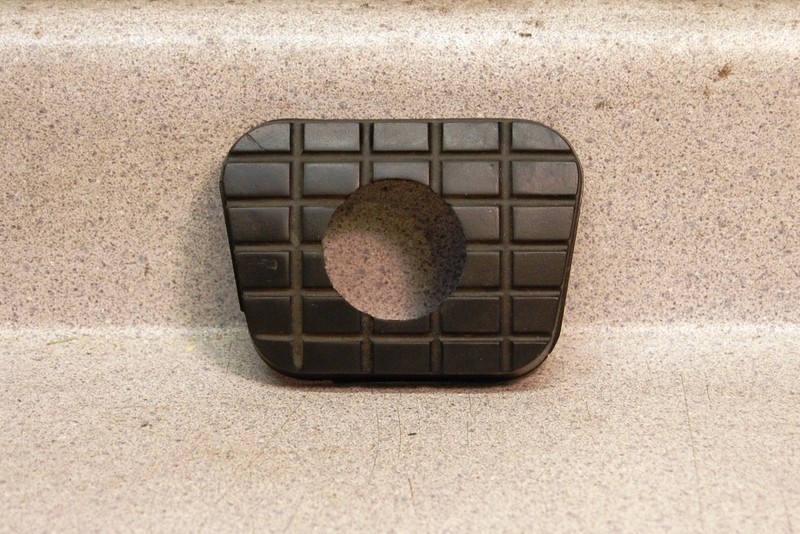 So when the new replacement pads arrived in the mail today, I punched the center of the face and bored a big enough hole for the chassis punch bolt to fit through: 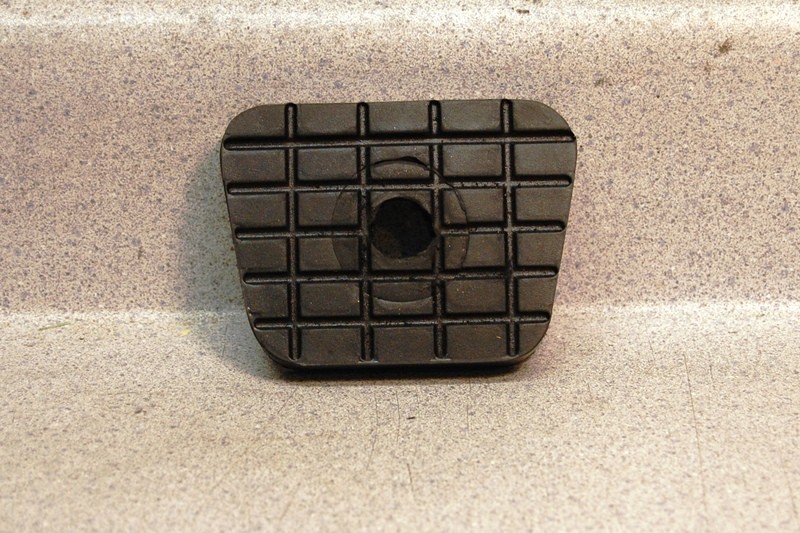 I then turned it over and placed the cutter on the back, with the bolt starting in from the front. This allowed me to center the cutter between the lumps on the backside: 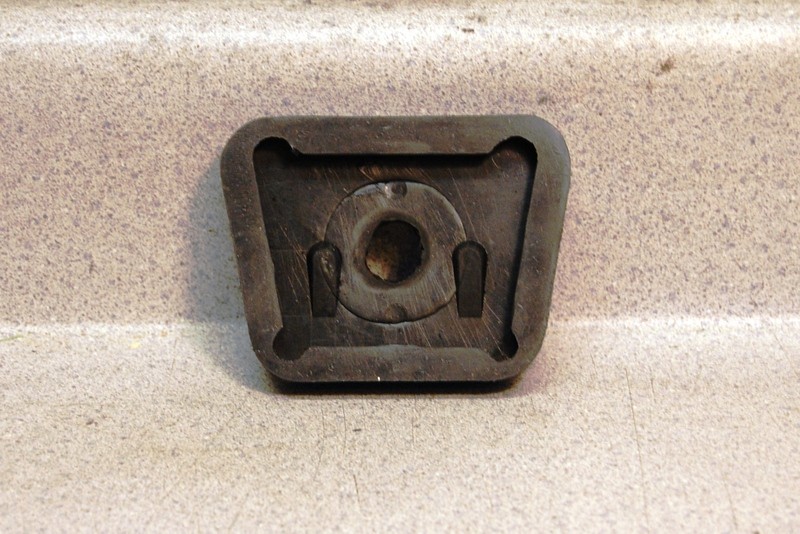 And this was the result - an OEM 1960 pedal pad for disc brake equipped trucks! I used duckbill pliers to bend the retaining tabs outboard so the emblem cannot extend any further toward the front than the preset depth: 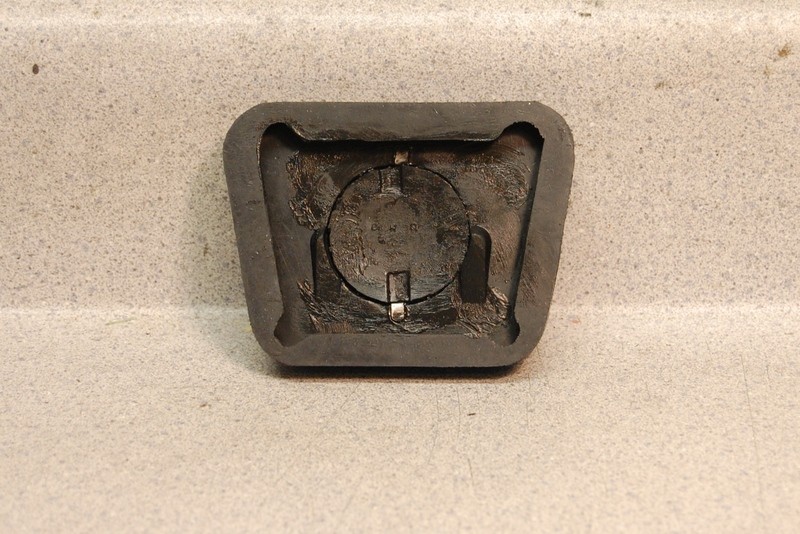 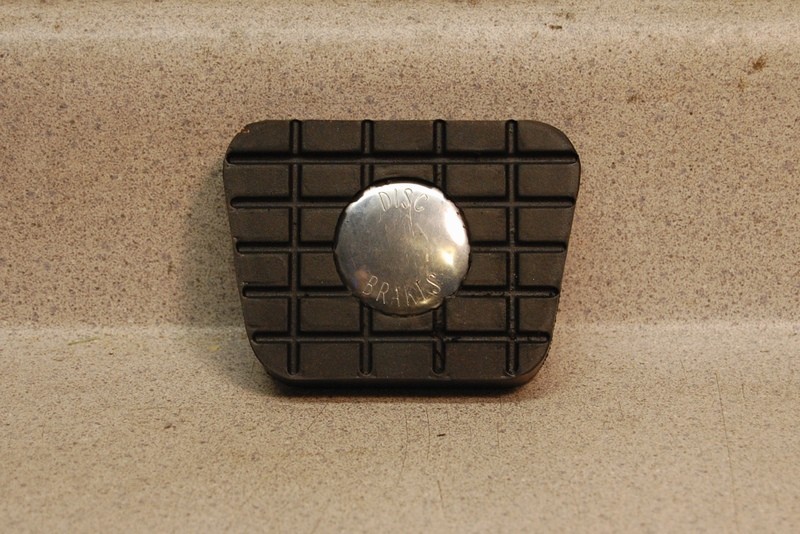 Here is how it looks in the truck along with a matching clutch pedal pad: 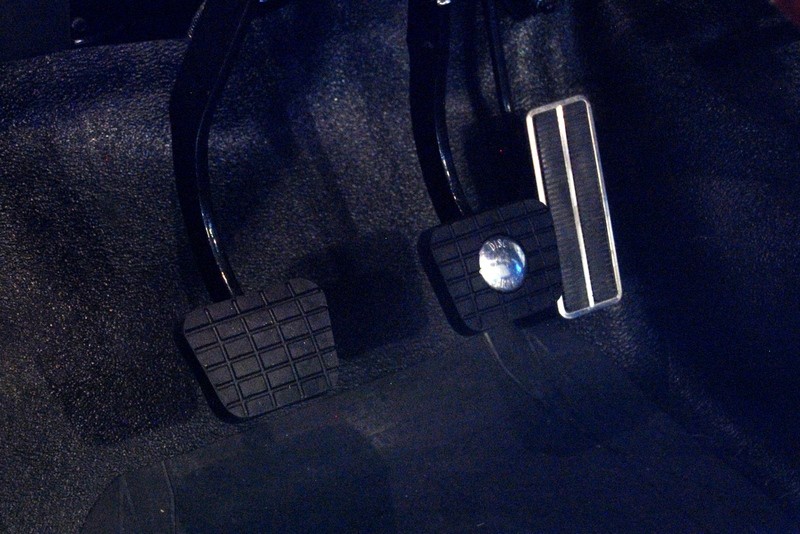 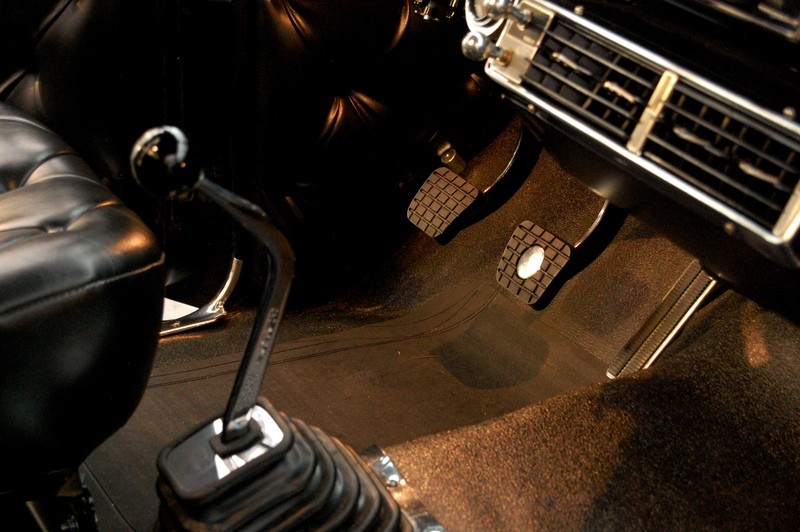 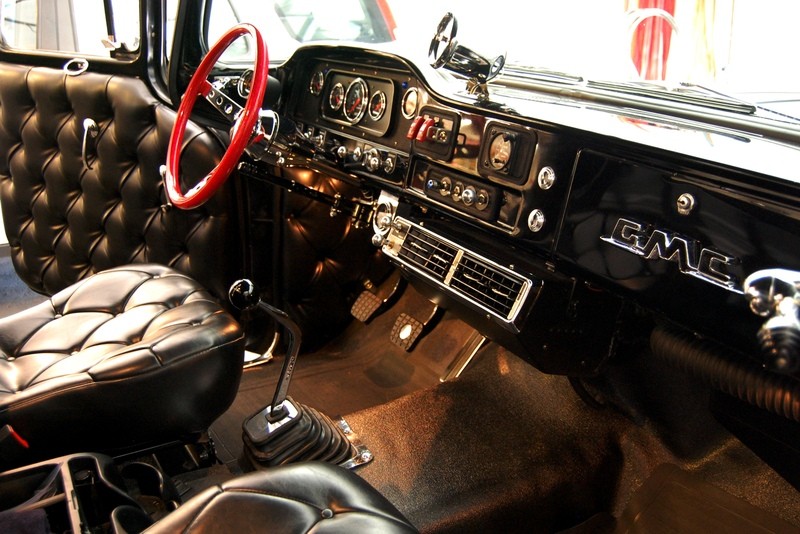 Im really happy with the results, although Im not sure how long these pads will last. They are also very soft and pliable just like the replica Chevelle pad. If they dont last Ill just repeat the process!
__________________
My Build Thread: http://67-72chevytrucks.com/vboard/s...d.php?t=444502 |
|
|
|
|
06-21-2015, 01:39 AM
|
#2025 |
|
Registered User
Join Date: Dec 2012
Location: Rochester, KENT
Posts: 10,480
|
Re: Markeb01 Build Thread
Pedals look great Mark, and I suspect they price in at a level where you can look at replacing them in future if their wear becomes unacceptable.
I love those step drill bits. Ta2don sent me a set last year, and I do keep them for Sunday Best, but every time I use them, they make me grin madly.
__________________
MY BUILD LINK: http://67-72chevytrucks.com/vboard/s...585901]Redneck Express - 1966 C10 Short Fleetside MY USA ROADTRIPS http://forum.retro-rides.org/thread/...2018-humdinger IF YOU CAN'T FIX IT WITH A HAMMER, YOU'VE GOT AN ELECTRICAL PROBLEM MATE. |
|
|
|
 |
| Bookmarks |
|
|


 \\ MY YOUTUBE CHANNEL


 Linear Mode

