
|
Register or Log In To remove these advertisements. |
|
|
|
|||||||
 |
|
|
Thread Tools | Display Modes |
 12-03-2017, 01:06 AM
|
#26 |
|
Registered User
Join Date: Mar 2010
Location: thomastown mississippi
Posts: 1,261
|
Re: rust repair on the '77...here goes nothin
[QUOTE=mickeykreg;
I was thinking since the motor was out and the floor was all cut up that now would be a good time for a NV4500. [url=https://flic.kr/p/GhtU62] 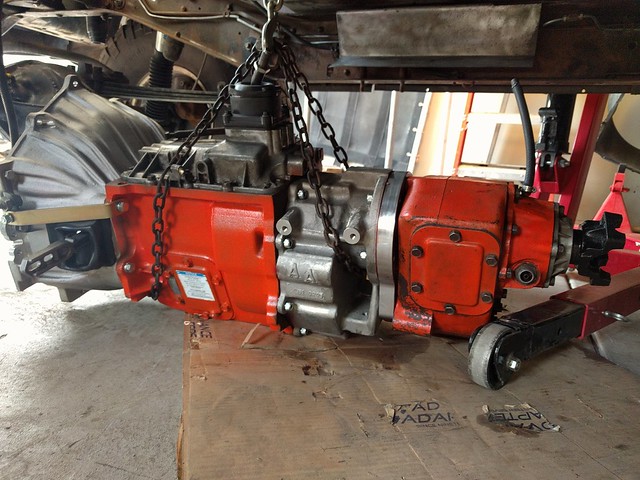 [/url] [/url]What is that horizontal bracket for on the left side of the trans over to the clutch housing above the release lever? That's an AA clutch housing, right? |

|

|
|
12-03-2017, 12:26 PM
|
#27 | |
|
Registered User
 Join Date: Mar 2009
Location: salt lake city, utah
Posts: 208
|
Re: rust repair on the '77...here goes nothin
Quote:
__________________
'80 SRW C35 - 355/700R4/4:11/2.5-3/DD '77 Cheyenne K5 - Roller cam 355/NV4500/205/4:88's/35's/DD rust repair on the '77 http://67-72chevytrucks.com/vboard/s...d.php?t=740291 |
|
|
|
|
|
12-03-2017, 01:22 PM
|
#28 |
|
Registered User
Join Date: Mar 2009
Location: salt lake city, utah
Posts: 208
|
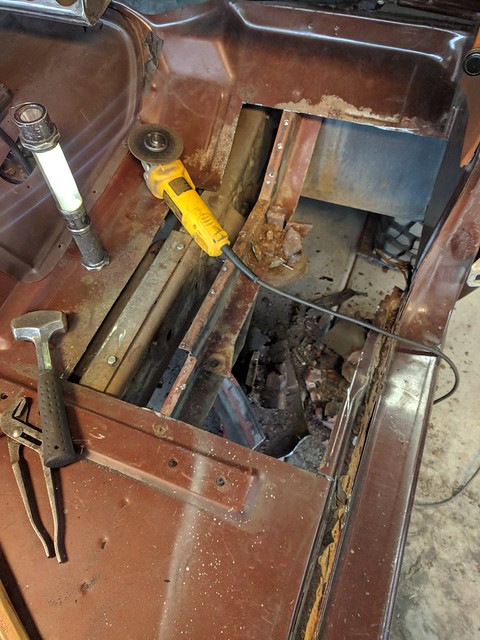
Re: rust repair on the '77...here goes nothin
Time for the floor:
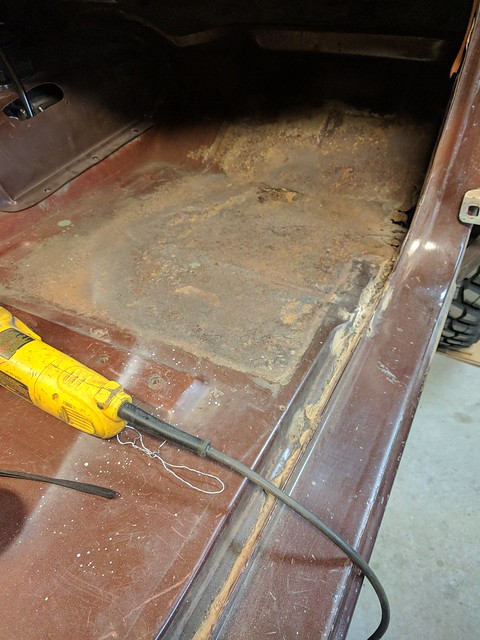
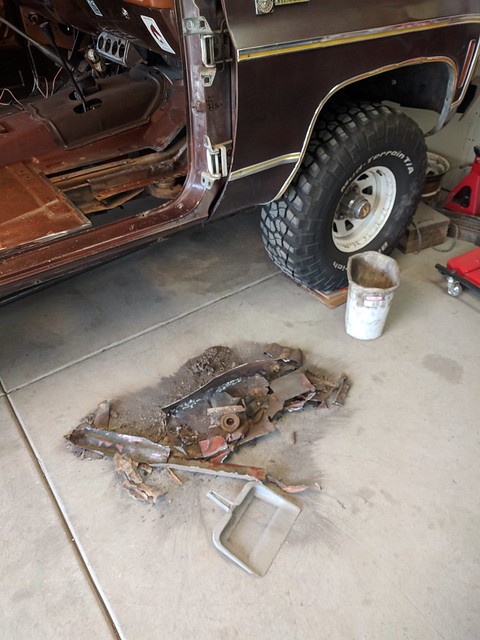
This is the single thing that drove me to begin this project in the first place. 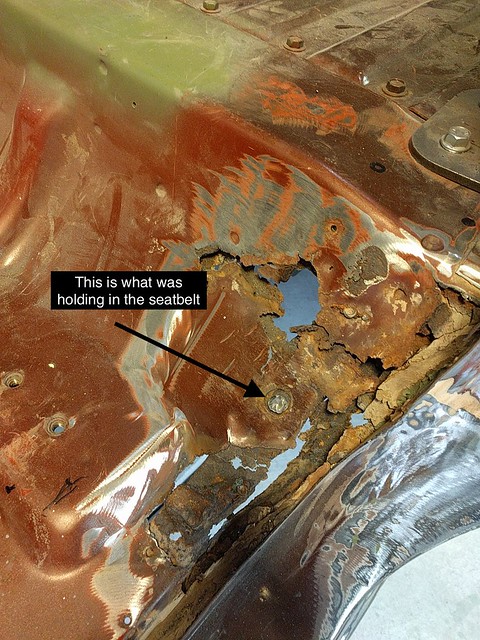 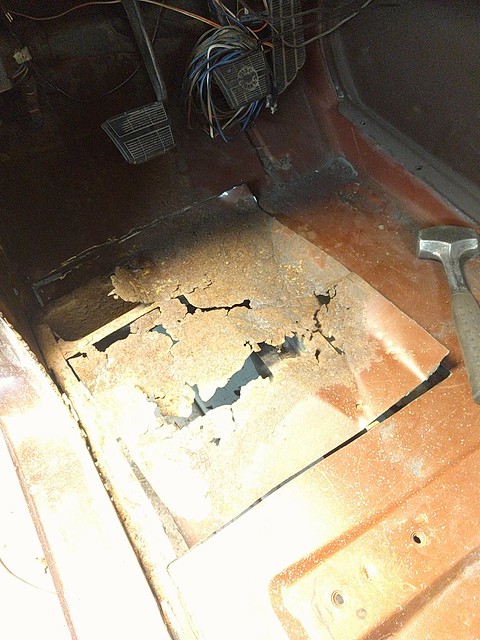  Amazingly this bolt turned out albeit with a breaker bar. 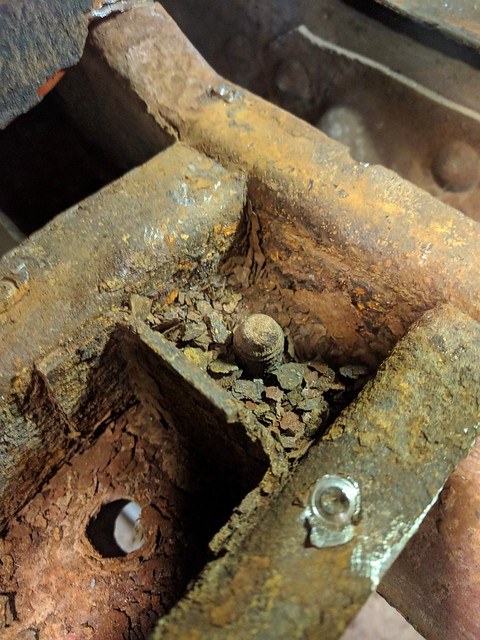 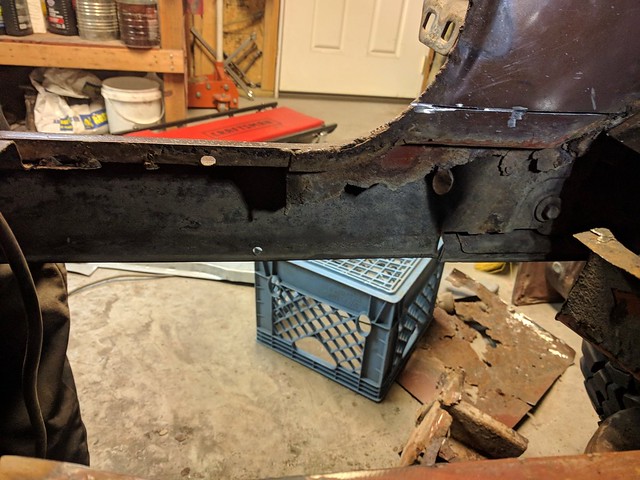 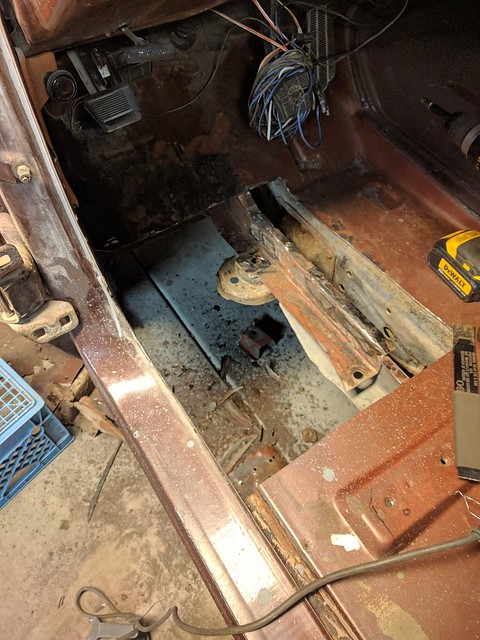 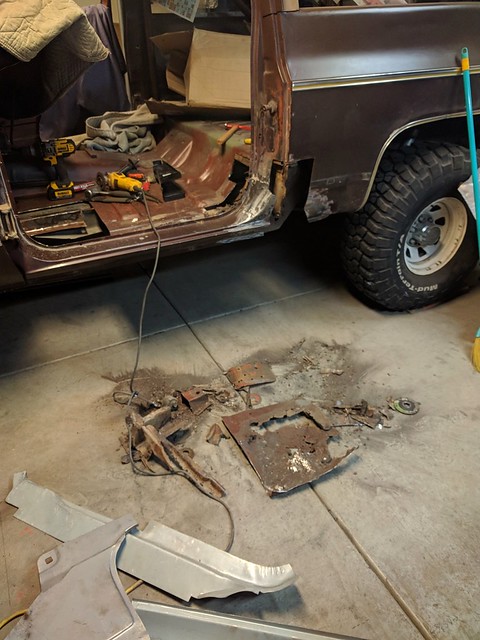 Outer rocker seemed ok so I cleaned it up and left it. 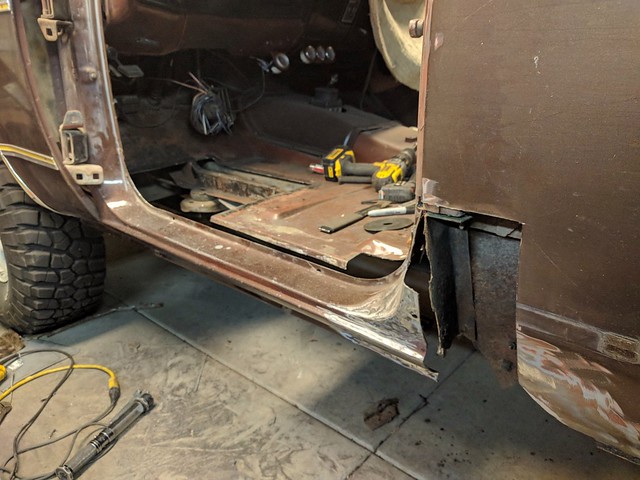 Now to put things back together. Mock up bottom of kick panel 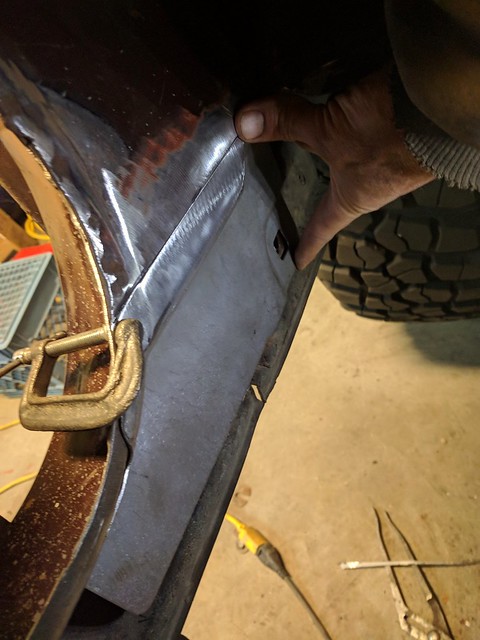 bottom of kick panel and inner rocker combo 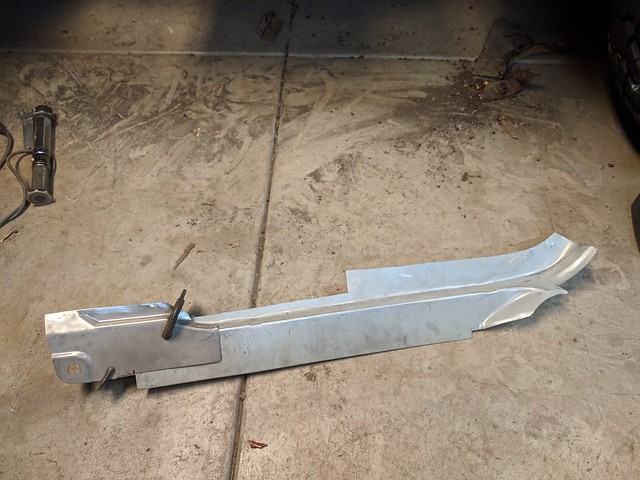 Inner rocker I got from Tabco had part of the outer floor molded in as one piece which was nice. 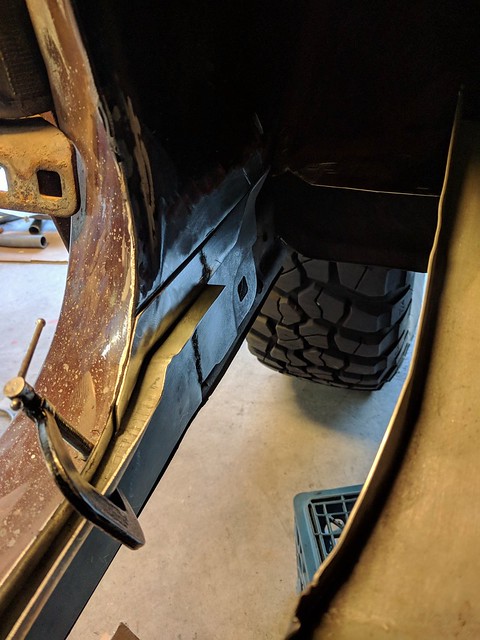 Inner rocker needed some larger drain holes to hopefully not trap as much debris and moisture 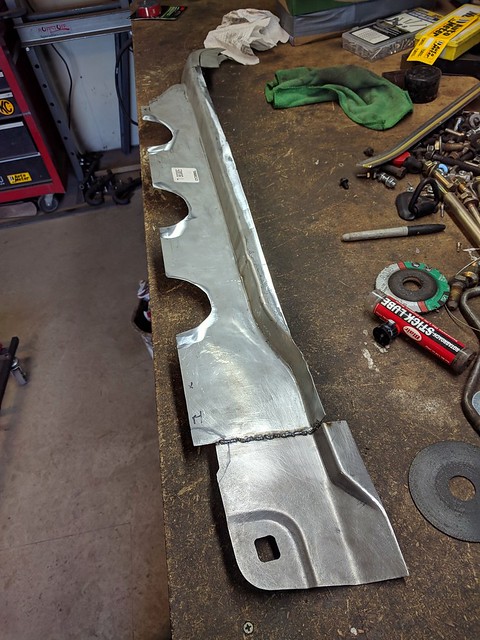 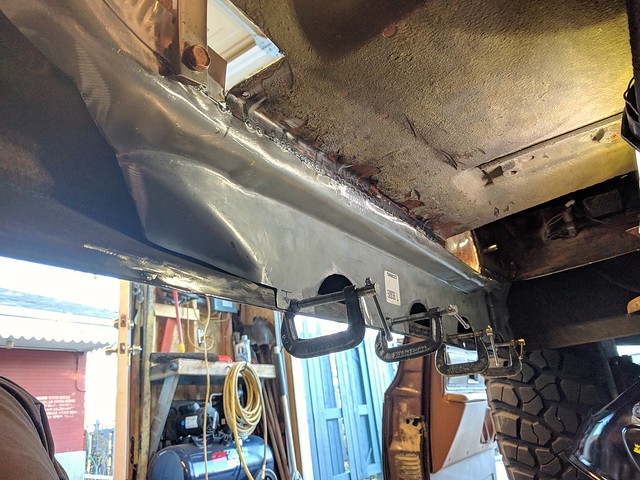 Got my $3 worth out of this disc.   New floor support  There was no saving this piece 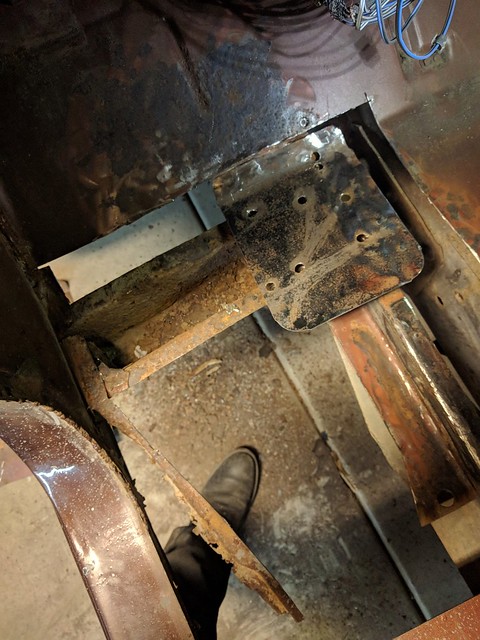 so I cut a new one out of the left over kick panel 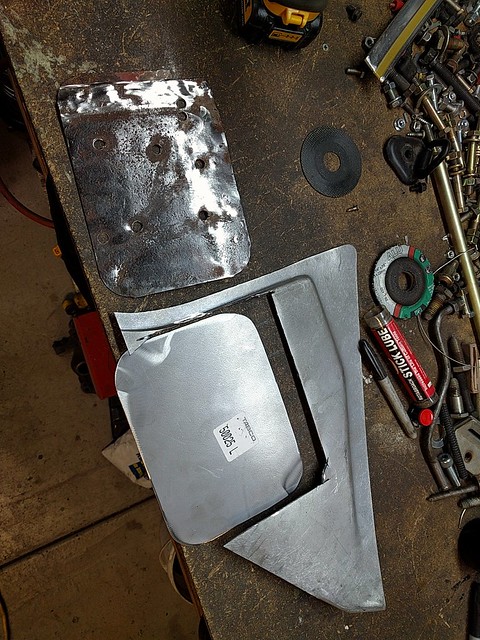 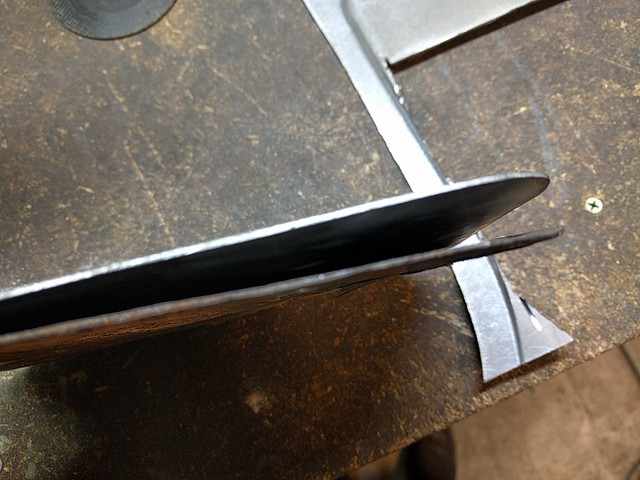 Floor reproduction from Tabco sucked because it was made for a truck, but I was able to make it work because the seat mount area was still ok. It's good heavy gauge material though. 16ga I think.  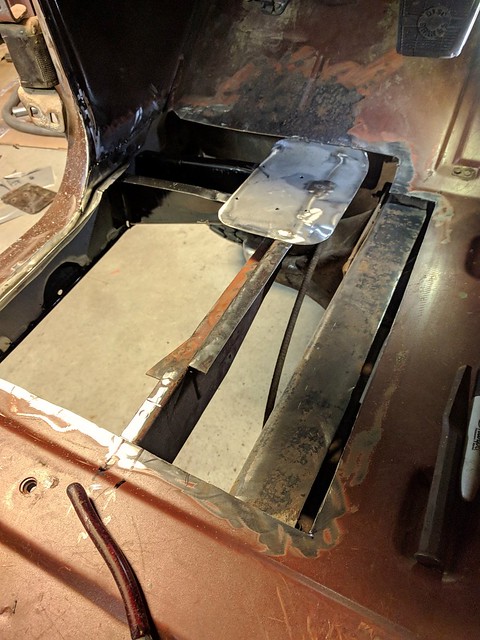 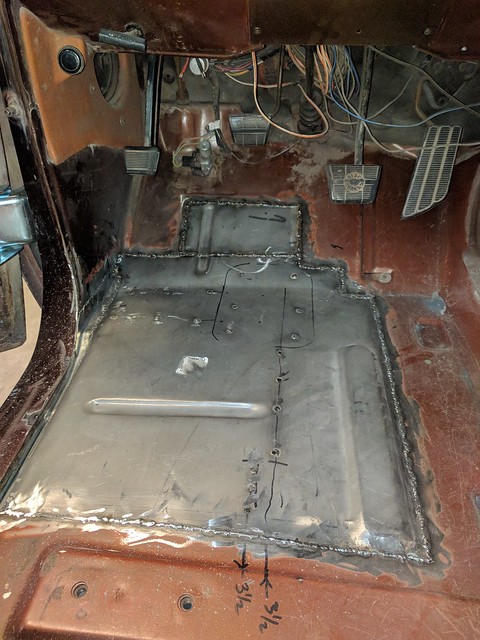 This area has no reproduction piece that I know of so I had to make it. Almost an entire day in this photo. 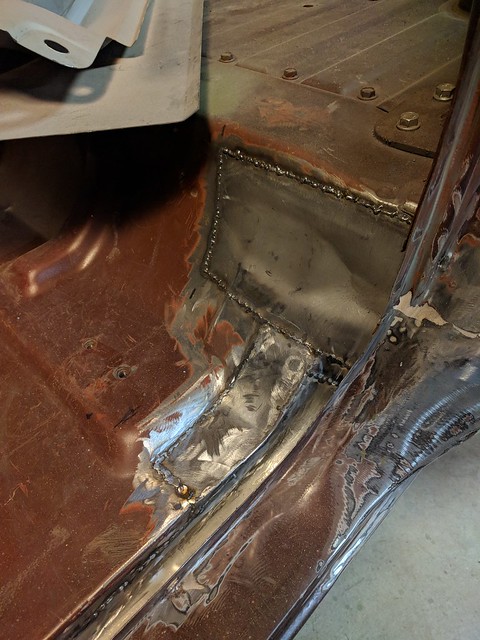 The edge of the left over truck floor had close to the right form so I used it.  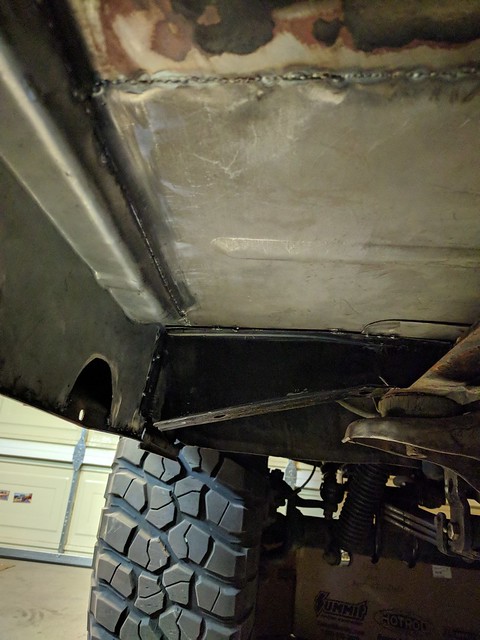 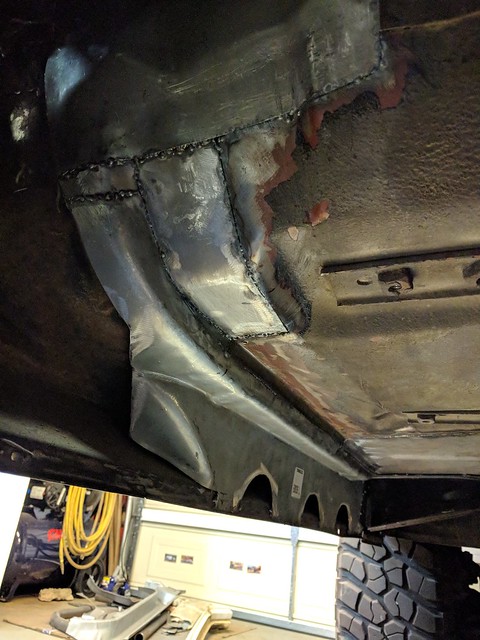
__________________
'80 SRW C35 - 355/700R4/4:11/2.5-3/DD '77 Cheyenne K5 - Roller cam 355/NV4500/205/4:88's/35's/DD rust repair on the '77 http://67-72chevytrucks.com/vboard/s...d.php?t=740291 Last edited by mickeykreg; 12-03-2017 at 01:31 PM. |
|
|
|
|
12-04-2017, 10:48 PM
|
#29 |
|
Registered User
Join Date: Mar 2009
Location: salt lake city, utah
Posts: 208
|
Re: rust repair on the '77...here goes nothin
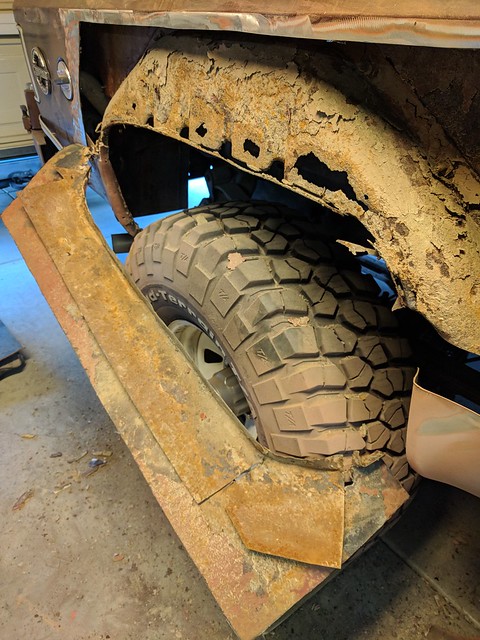
Rear fender:
the old: 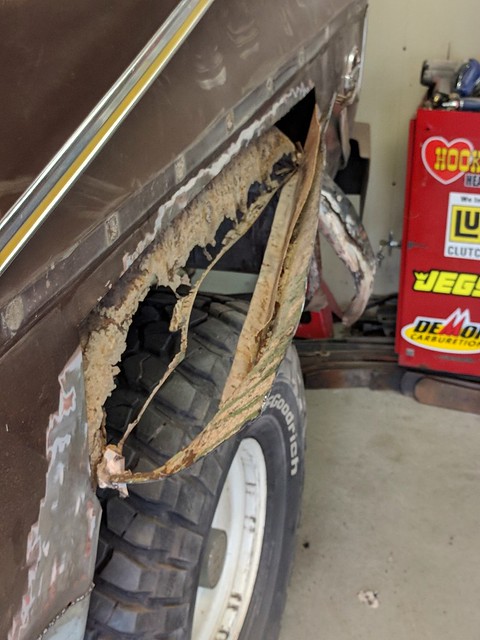 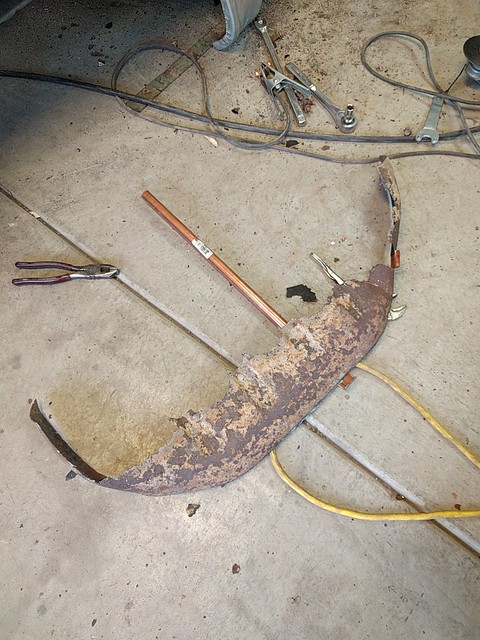 the new: 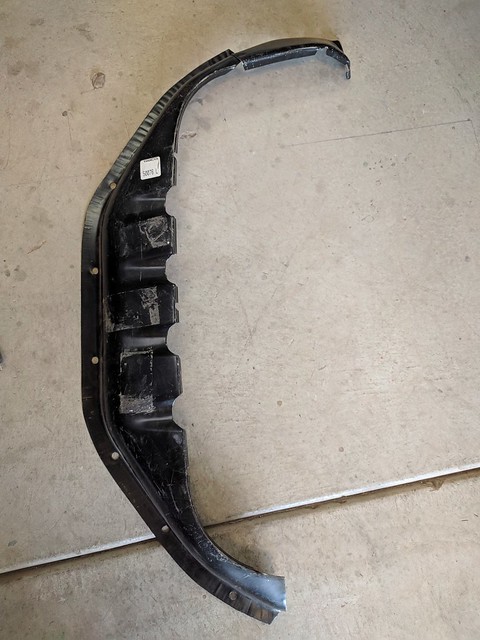  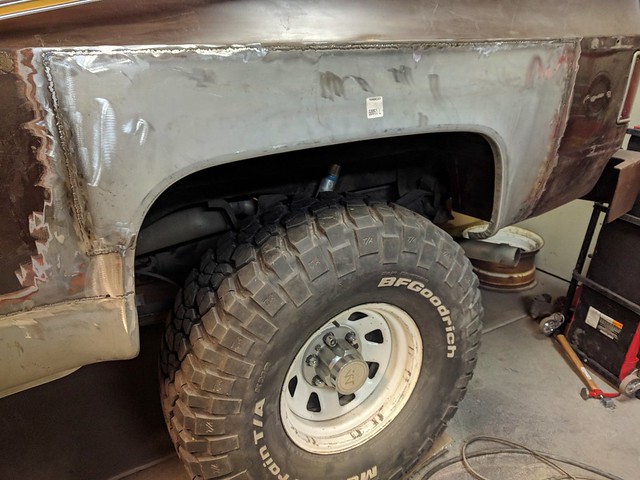
__________________
'80 SRW C35 - 355/700R4/4:11/2.5-3/DD '77 Cheyenne K5 - Roller cam 355/NV4500/205/4:88's/35's/DD rust repair on the '77 http://67-72chevytrucks.com/vboard/s...d.php?t=740291 |
|
|
|
|
12-15-2017, 11:01 AM
|
#30 |
|
Registered User
Join Date: Mar 2009
Location: salt lake city, utah
Posts: 208
|
Re: rust repair on the '77...here goes nothin
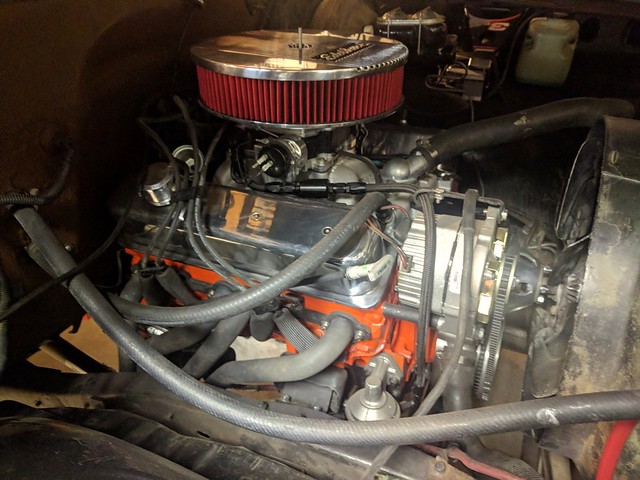
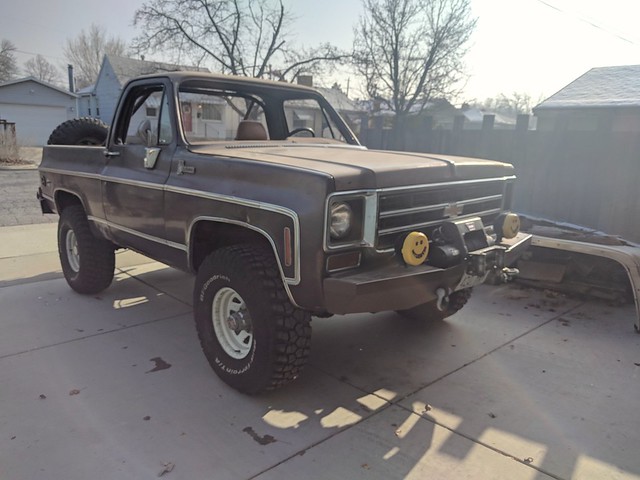
Got it started and moved outside long enough to clean up my dungeon. Drove around the block cause I couldn't not. 355 running good for the first time. Need to go break it in, but lots of work to do first.
  Got sick of bodywork so I built this out of a left over piece of rocker. Just messing around, don't know if I like it, but am looking for somewhere to put gauges, audio jacks, trailer controller, USB charging, without having stuff spread all over the place. 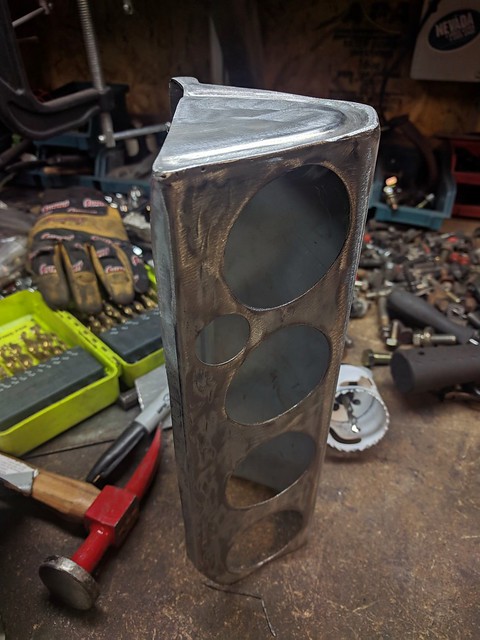 
__________________
'80 SRW C35 - 355/700R4/4:11/2.5-3/DD '77 Cheyenne K5 - Roller cam 355/NV4500/205/4:88's/35's/DD rust repair on the '77 http://67-72chevytrucks.com/vboard/s...d.php?t=740291 |
|
|
|
|
12-15-2017, 11:51 PM
|
#31 |
|
Registered User
Join Date: Mar 2010
Location: thomastown mississippi
Posts: 1,261
|
Re: rust repair on the '77...here goes nothin
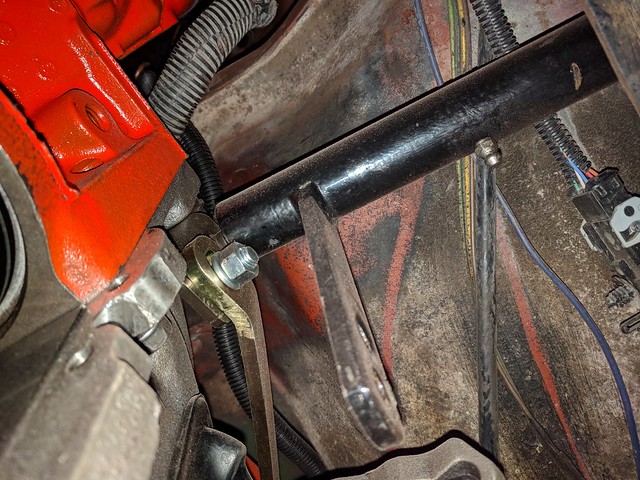
With that 4500 shifter in place do you think there is room for an underdash ac unit? Sure don't look like it.
|
|
|
|
|
12-17-2017, 11:11 AM
|
#32 | |
|
Registered User
Join Date: Mar 2009
Location: salt lake city, utah
Posts: 208
|
Re: rust repair on the '77...here goes nothin
Quote:
4500 shifter is actually further back than the old one. Couple pics here: http://67-72chevytrucks.com/vboard/s...d.php?t=749980
__________________
'80 SRW C35 - 355/700R4/4:11/2.5-3/DD '77 Cheyenne K5 - Roller cam 355/NV4500/205/4:88's/35's/DD rust repair on the '77 http://67-72chevytrucks.com/vboard/s...d.php?t=740291 |
|
|
|
|
|
01-06-2018, 11:23 PM
|
#33 |
|
Registered User
Join Date: Mar 2009
Location: salt lake city, utah
Posts: 208
|
Re: rust repair on the '77...here goes nothin
Passenger side requirement was almost identical to driver side.
     Stick stuff back together now. Outer rocker was still fine so I cleaned it up and got it ready. Like on the driver side the outer was replaced on a repair in the past. Inner rocker wasn't replaced so no debris could build up between the inner and outer. Kick panel first. 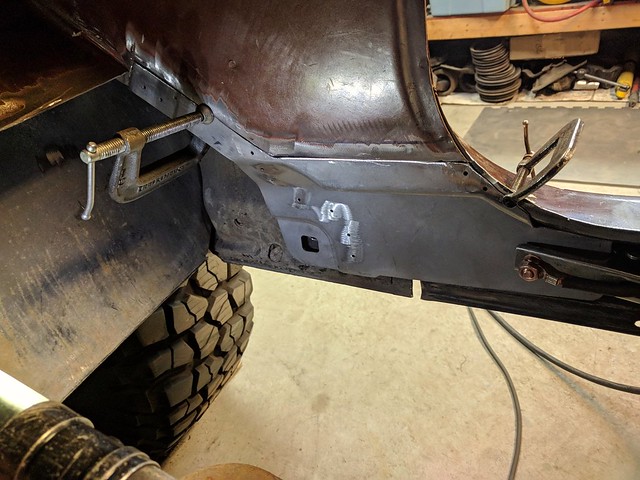 Inner Rocker 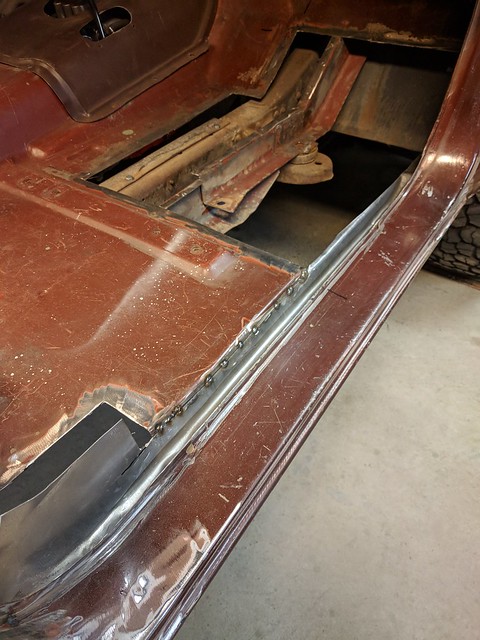 inner and kick with debris clean out holes that I added. 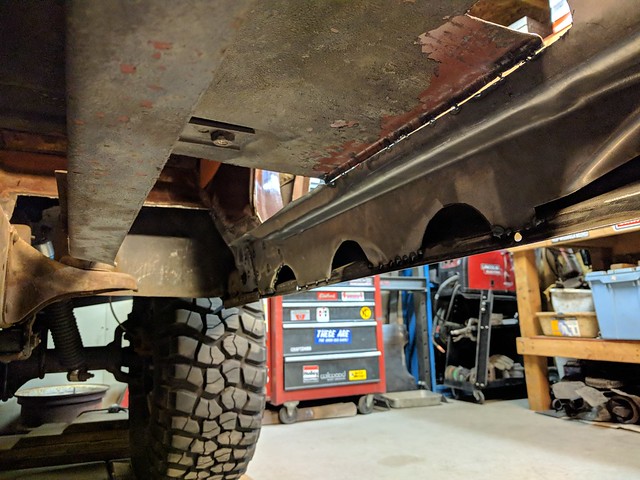 floor support    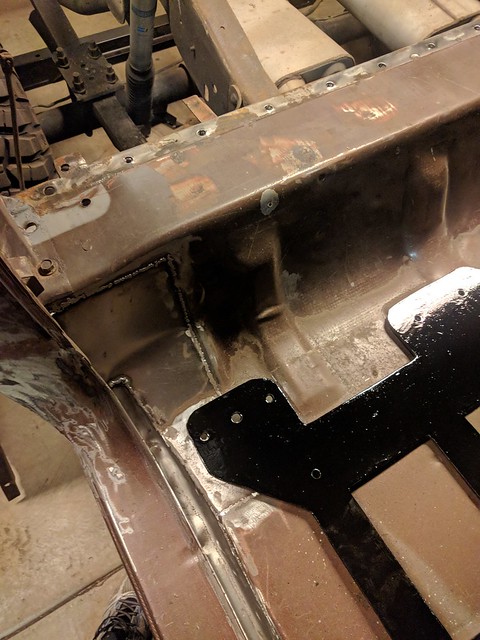 I got the replacement floor pan from Tabco who said it's for a blazer, but it's actually for a truck. Flat Blazer floor is much different than a truck so I had to cut the stamped part of the new floor out and use a piece of 18 gauge that I got at the steel supply. Such is life with these Taiwanese replacement panels, actually most of the panels I've used so far have been pretty good.
__________________
'80 SRW C35 - 355/700R4/4:11/2.5-3/DD '77 Cheyenne K5 - Roller cam 355/NV4500/205/4:88's/35's/DD rust repair on the '77 http://67-72chevytrucks.com/vboard/s...d.php?t=740291 |
|
|
|
|
01-06-2018, 11:30 PM
|
#34 |
|
Registered User
Join Date: Mar 2009
Location: salt lake city, utah
Posts: 208
|
Re: rust repair on the '77...here goes nothin
Finally got the floor rebuilt to the point of getting serious about how these seats are going to fit. I got the pair for $22 on sale day at the junkyard, but then dropped about $1300 to get them re-skinned in leather, which I didn't think was too bad of a deal. The low back seats had me freaking out about whiplash protection from getting hit in the ass by a texting driver. Anyway, here's what I did. Hope it's helpful to somebody.
Junkyard seats $22  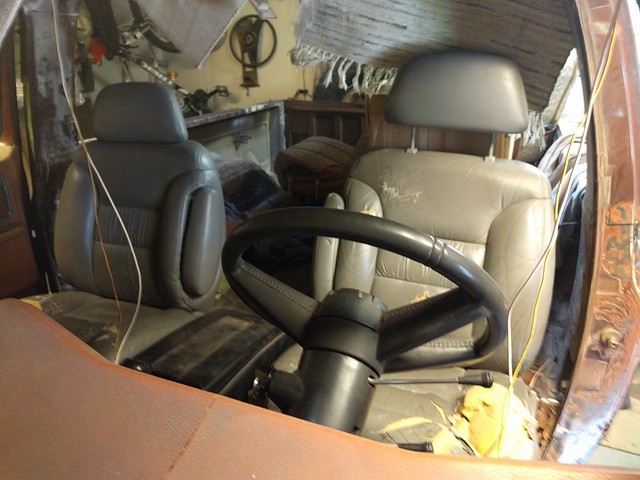 Old seats/New seats 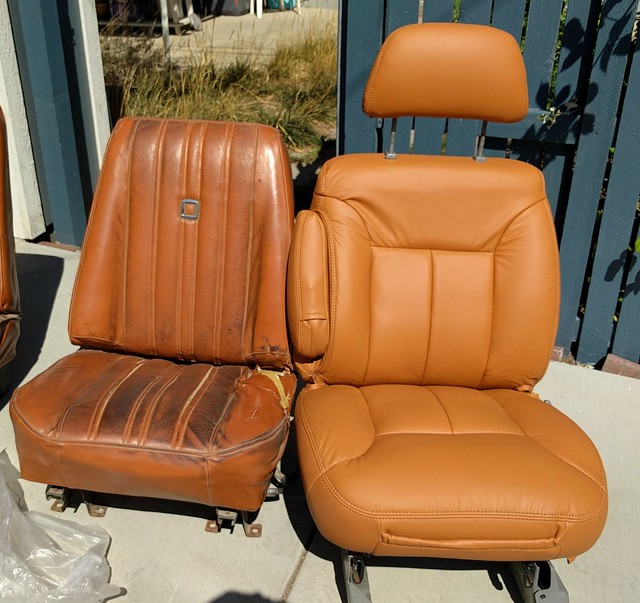 Now just to make them fit. Started with a piece of 2'x2' 3/16" steel plate. Man I wish I had a plasma cutter. 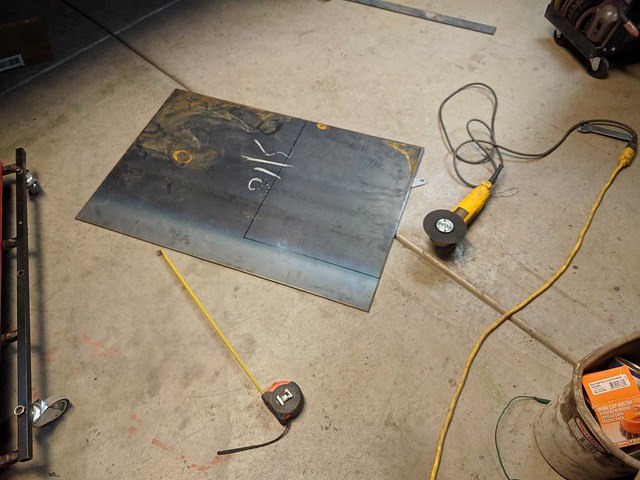 Driver side 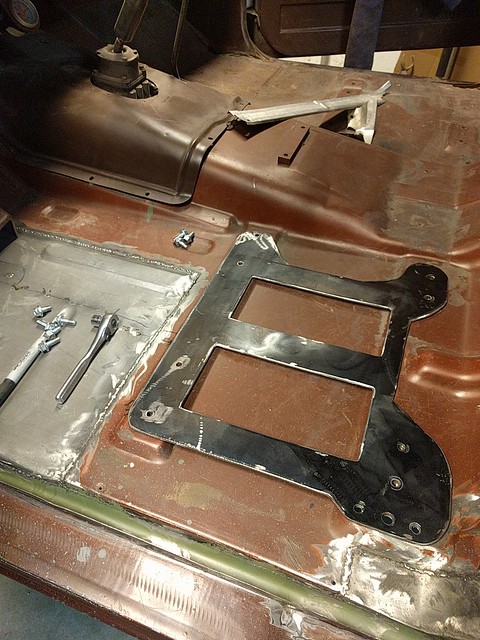 Passenger side 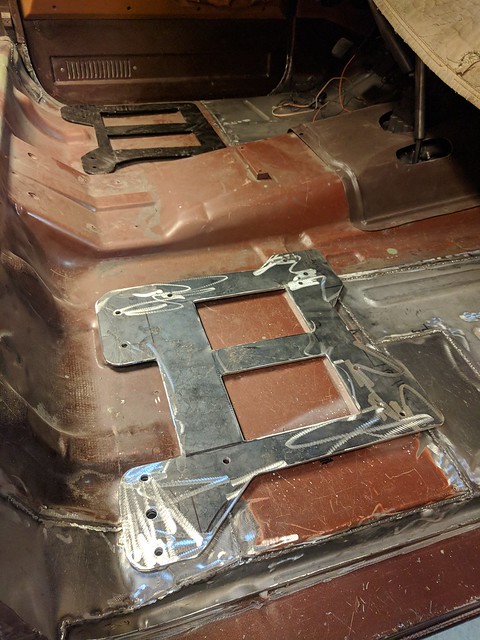 POR15'd 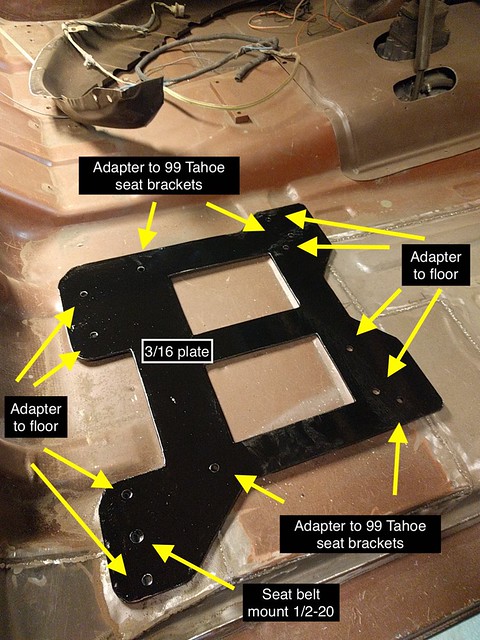 Brackets original to the 99 seats get bolted to the adapter. 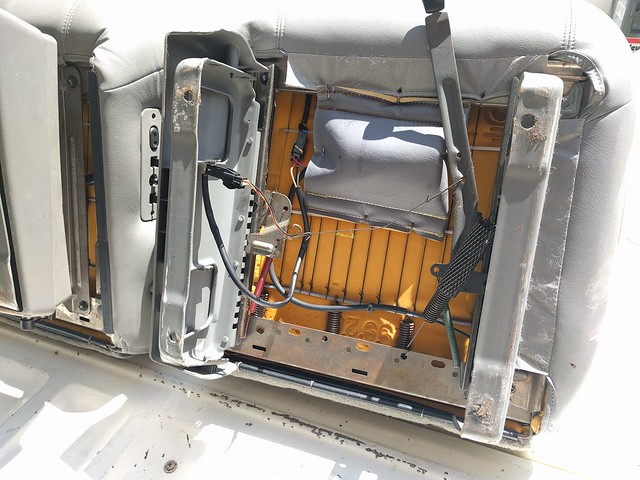 Seat belt gets bolted to this. Original floor is sandwiched between this and the 3/16" plate. 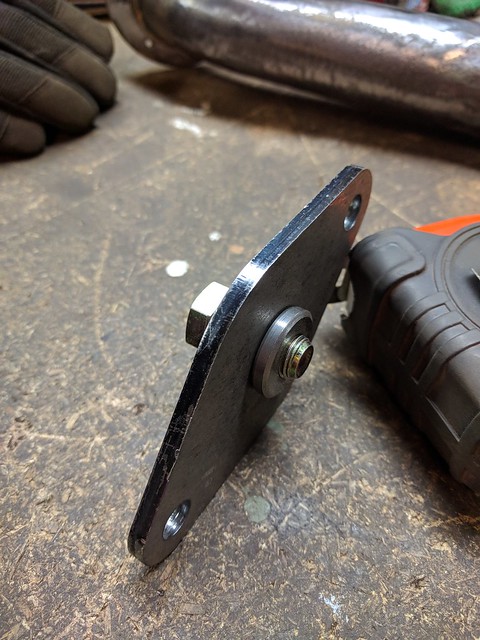 I decided not to make the new passenger seat tilt forward. After quite a few test fits it looks like when the new seat back is folded forward and the seat is slid all the way forward it provides almost as much room as the original gave when it was tilted forward.
__________________
'80 SRW C35 - 355/700R4/4:11/2.5-3/DD '77 Cheyenne K5 - Roller cam 355/NV4500/205/4:88's/35's/DD rust repair on the '77 http://67-72chevytrucks.com/vboard/s...d.php?t=740291 |
|
|
|
|
01-06-2018, 11:40 PM
|
#35 |
|
Registered User
Join Date: Mar 2009
Location: salt lake city, utah
Posts: 208
|
Re: rust repair on the '77...here goes nothin
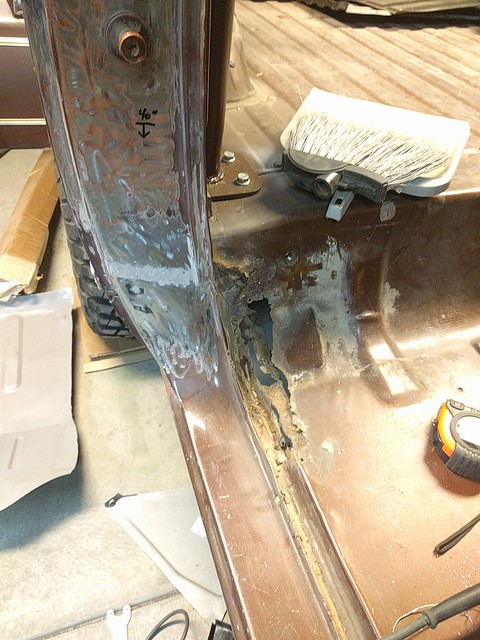
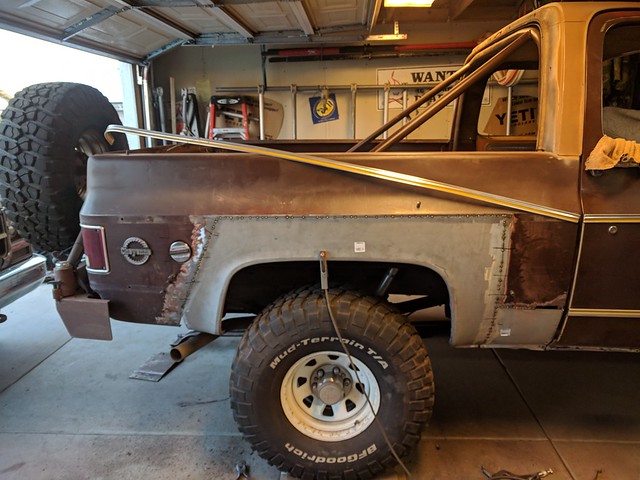
This bedside patch was an entire day! Whoever did this repair in the past didn't even bother to do any welding. Sheetmetal is screwed in place and covered with nearly a 1/2" of bondo in places. Glad to be getting this fixed!
   Next up to bat is the bed, stay tuned. 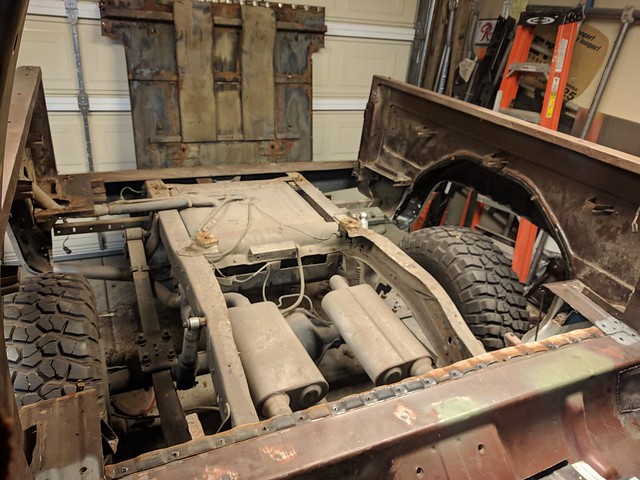
__________________
'80 SRW C35 - 355/700R4/4:11/2.5-3/DD '77 Cheyenne K5 - Roller cam 355/NV4500/205/4:88's/35's/DD rust repair on the '77 http://67-72chevytrucks.com/vboard/s...d.php?t=740291 |
|
|
|
|
01-07-2018, 06:16 AM
|
#36 |
|
Registered User
Join Date: Jun 2003
Location: ga
Posts: 630
|
Re: rust repair on the '77...here goes nothin
your 77 blazer looks like the 78 blazer I bought out of north Carolina that came out of ohio I brought it to ga. on a rollback got out one day and took off the top . when I took it off both sides of the blazer just fell to the ground it was repaired a one time and it was done poorly just bonded back together with rust and bondo was gona try to drive it but I was scared the rest of the body would fall off the first time I turned a corner

__________________
4x4k30 if trouble was money i would have plenty |
|
|
|
|
01-07-2018, 05:08 PM
|
#37 |
|
Registered User
Join Date: Jan 2014
Location: belleville ontario
Posts: 354
|
Re: rust repair on the '77...here goes nothin
now that you have the rockers all together I recommend spraying oil up in there everywhere. Seen many where the top of the rocker rots first. Nice work
|
|
|
|
|
01-07-2018, 08:46 PM
|
#38 | |
|
Registered User
Join Date: Mar 2009
Location: salt lake city, utah
Posts: 208
|
Re: rust repair on the '77...here goes nothin
Quote:
On this one, I've been using this stuff from Eastwood to get behind weld seams and such. No big deal. It's a driver and if it rusts I'll fix it again. http://www.eastwood.com/eastwood-int...z-aerosol.html
__________________
'80 SRW C35 - 355/700R4/4:11/2.5-3/DD '77 Cheyenne K5 - Roller cam 355/NV4500/205/4:88's/35's/DD rust repair on the '77 http://67-72chevytrucks.com/vboard/s...d.php?t=740291 |
|
|
|
|
|
01-13-2018, 10:13 AM
|
#39 |
|
Registered User
Join Date: Mar 2013
Location: SF
Posts: 345
|
Re: rust repair on the '77...here goes nothin
nice work on the roof repair. My 73 burb has rot in the roof and I've been having a hell of a time finding any info on repairing the roof. Been thinking of replacing the whole roof skin but not sure if it will save much in time comparing to replacing pieces like you did. Do you know if anyone makes a replacement roof?
|
|
|
|
|
01-13-2018, 11:27 AM
|
#40 | |
|
Registered User
Join Date: Mar 2009
Location: salt lake city, utah
Posts: 208
|
Re: rust repair on the '77...here goes nothin
Quote:
I don't know of anybody that sells a replacement roof skin. The more I dig into this thing the more surprised I am at how many parts are not available. If I were to do it again I'd find another donor roof, but I'd keep the outer skin intact and replace it as a whole, (like the kid in this video has done). Get the old outer skin off first so you can see what you have to deal with and go from there. With a donor roof you'll have what you need. That's what I would do, but a suburban roof will obviously ad a bit of complexity.
__________________
'80 SRW C35 - 355/700R4/4:11/2.5-3/DD '77 Cheyenne K5 - Roller cam 355/NV4500/205/4:88's/35's/DD rust repair on the '77 http://67-72chevytrucks.com/vboard/s...d.php?t=740291 |
|
|
|
|
|
01-13-2018, 12:56 PM
|
#41 |
|
Registered User
Join Date: Mar 2013
Location: SF
Posts: 345
|
Re: rust repair on the '77...here goes nothin
Thats kind of what I was thinking. I figured I would cut the roof off at the pillars. I was afraid of finding more rust like you.
|
|
|
|
|
02-01-2018, 01:29 PM
|
#42 |
|
Registered User
Join Date: Mar 2009
Location: salt lake city, utah
Posts: 208
|
Re: rust repair on the '77...here goes nothin
The bed floor:
I've watch other people do this and have dreaded the job myself, but it loomed over my head. I started this project thinking the bed was fine and I just needed to replace the tailpan and trailing edge of the bed. Once I started to poke around I found there was no other way than to remove the entire bed floor to fix it. I found hidden rust in all the mounting flanges and surface rust under the bed that couldn't be ignored. This was the final big piece of metal work required and it took almost a full month of working on it everyday. I ran into several problems with replacement panels that I'll try to mention here as clear as I can.Breaking it down... 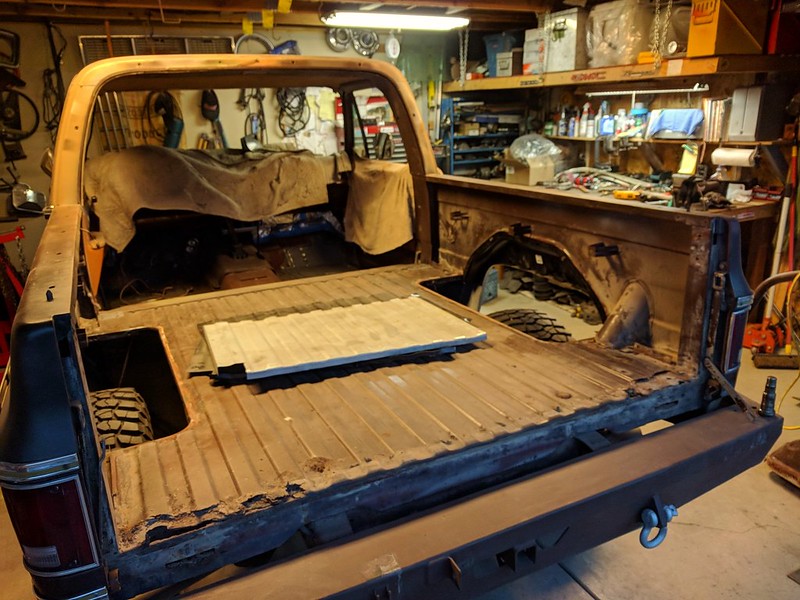 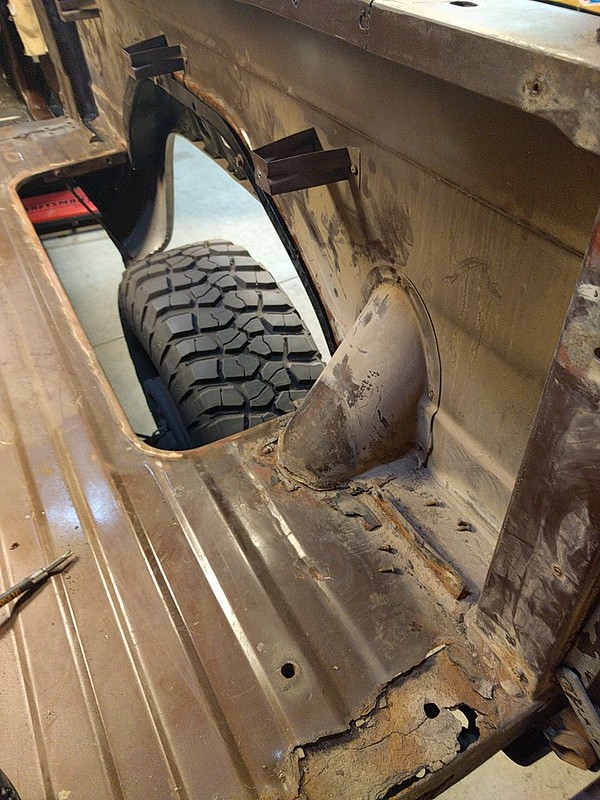  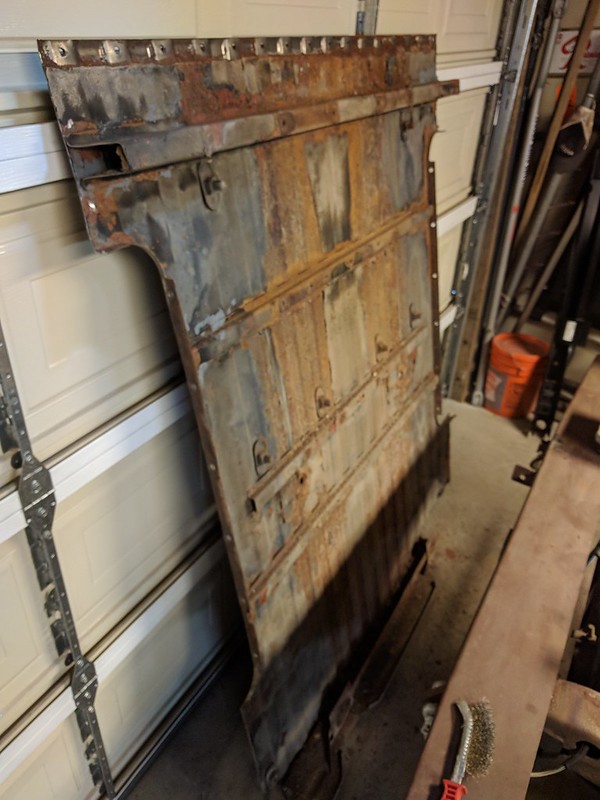 As you know, the front half of the bed floor changed in '78 to have the step down so rear seat passengers would have a better sitting area. It would be awesome if the aftermarket sheetmetal companies like LMC and Auto Metal Direct didn't advertise the front floor section as being the same from 73-91. Anyway, I couldn't find the replacement, so I needed to figure out a way to save the front half of the floor which required drilling out a million spot welds that attach the cross sill supports. The Blair spot weld cutter makes it a bit easier. 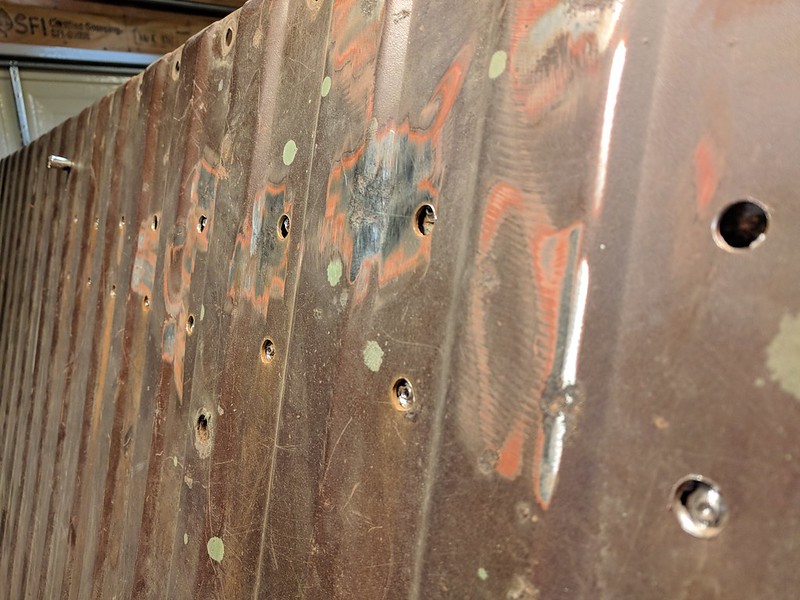 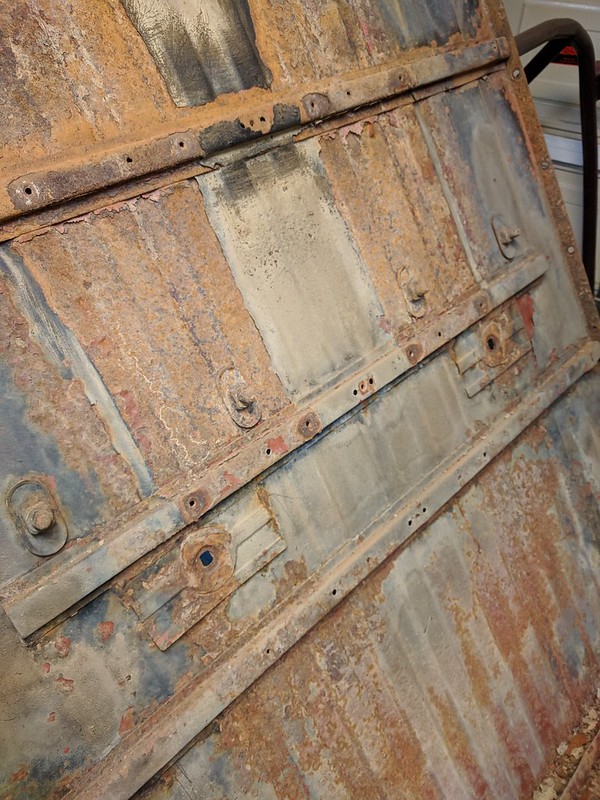 AMD 717-4073 to replace existing cross sills. 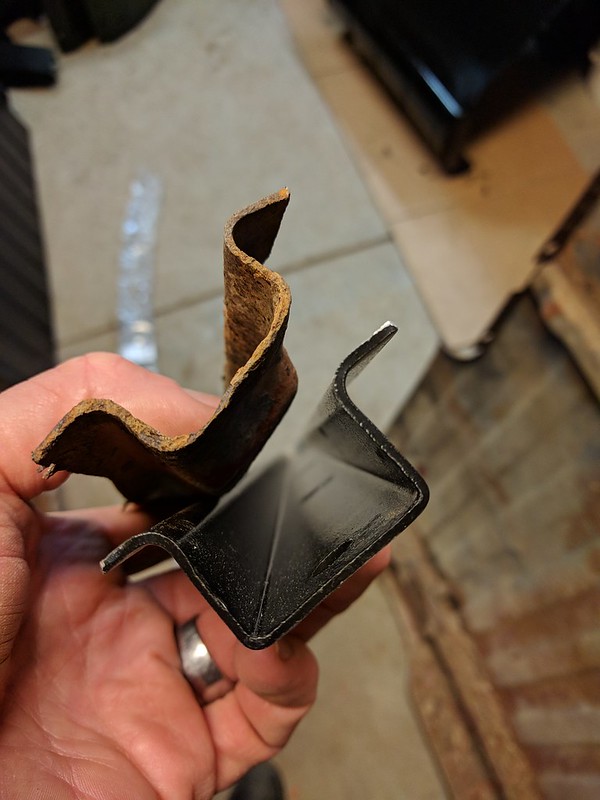 close enough...I guess 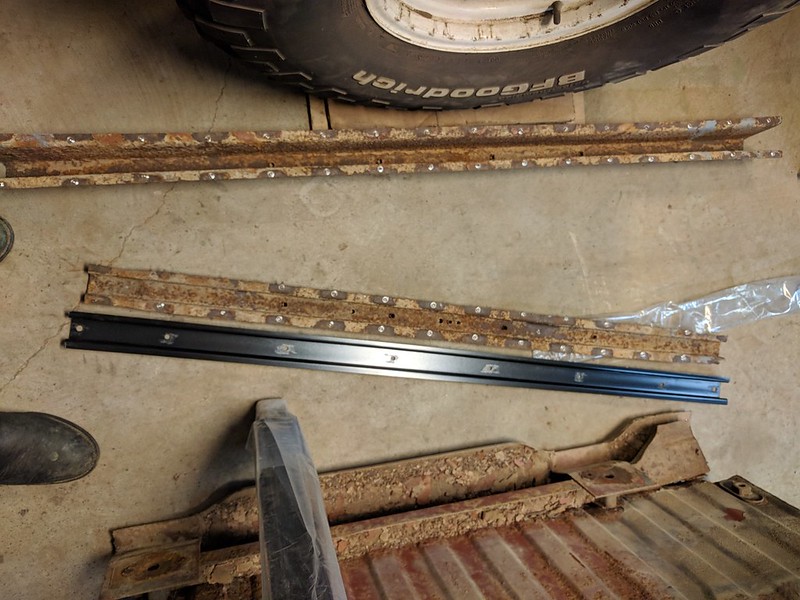 In order to determine how much of the bed floor I needed to save I needed the replacement rear floor. I ordered AMD 791-4373L and R through JEGS. Free shipping on such a big piece was remarkable! The fit and everything on these pieces were really good compared to most Taiwanese replacement panels. I had to do minimal beating to make these fit. I also can't say enough about how good my experience was with AMD packaging the shipment to avoid damage in transit. AMD 791-4373 left and right. 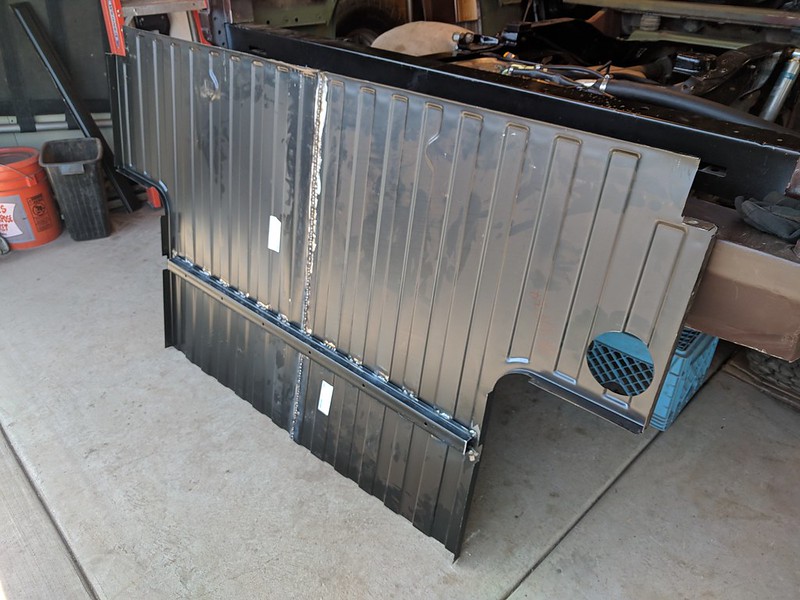 Comparing new rear floor gave me a place to cut front half of old floor out. Saving the old front half. 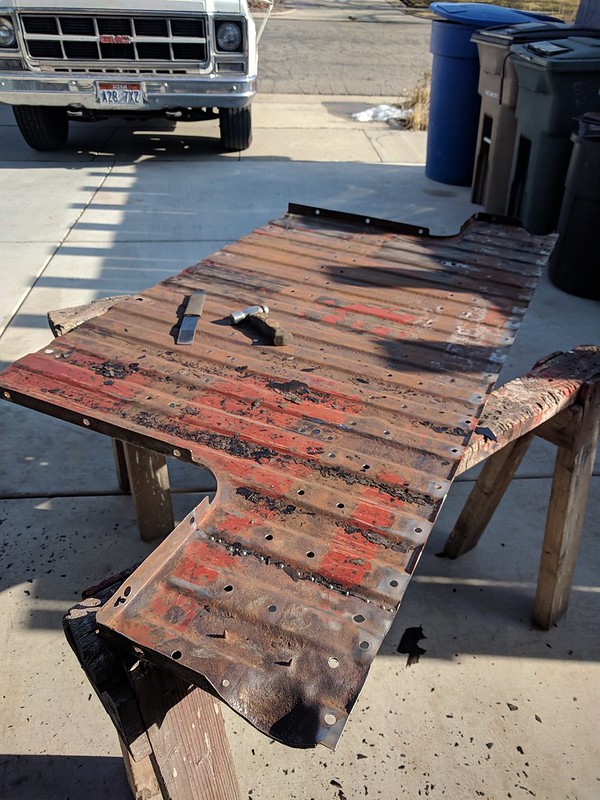 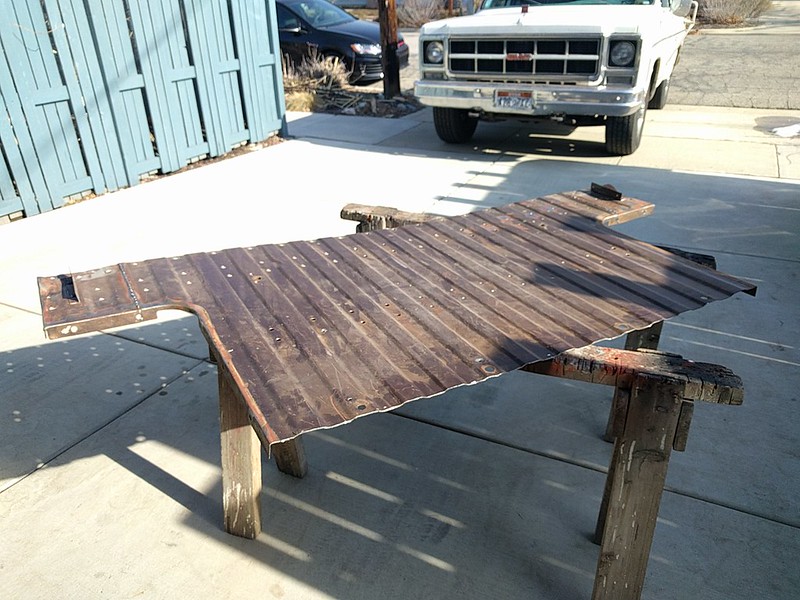 Eastwood PRE and rust encapsulator. 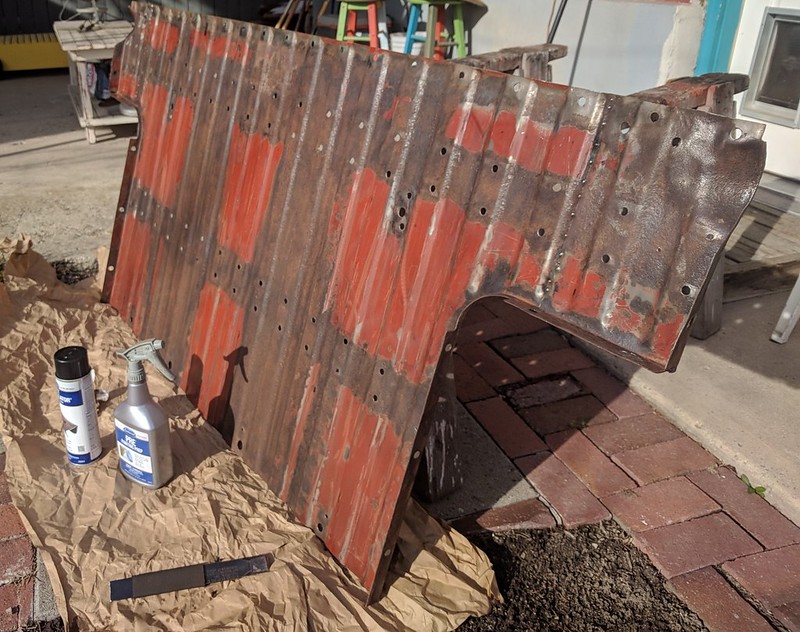 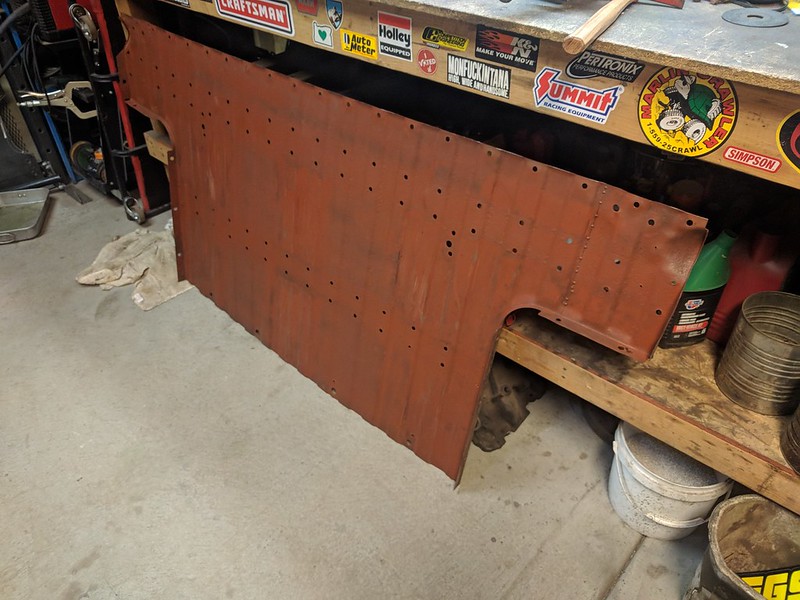 Eastwood rubberized undercoating.  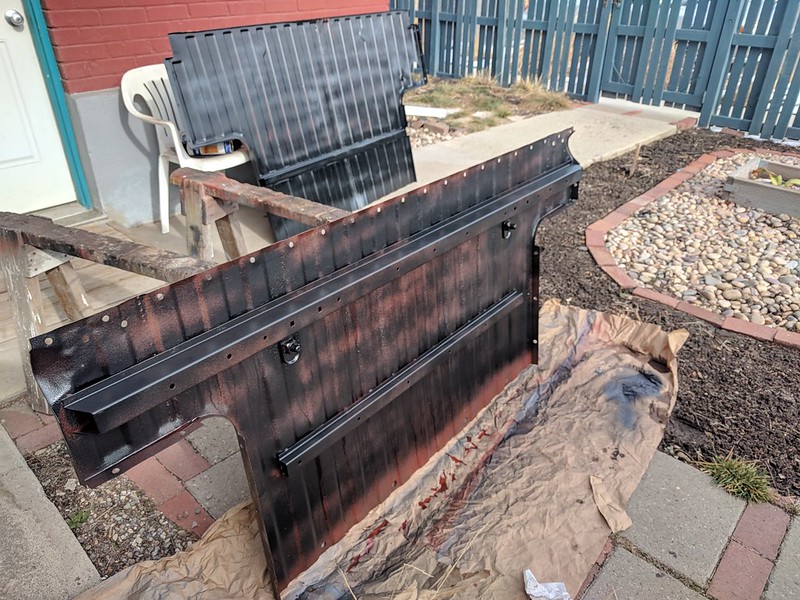 Bed rear pillar posts next... My existing pillars were mostly ok except for the very bottom. I ordered Goodmark GMK-4144-828-73 left and right. These sucked pretty bad and I had to return them to Summit. I ended up building my own replacement pieces from scratch. 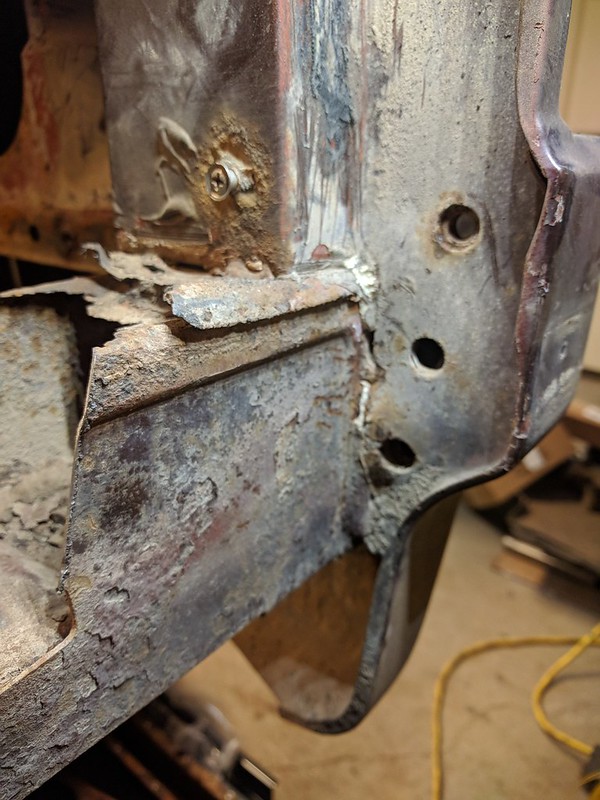 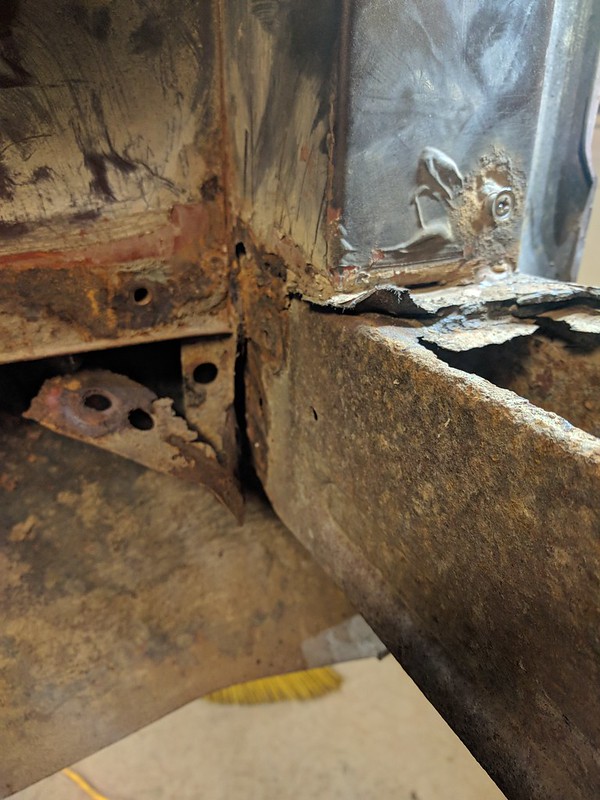 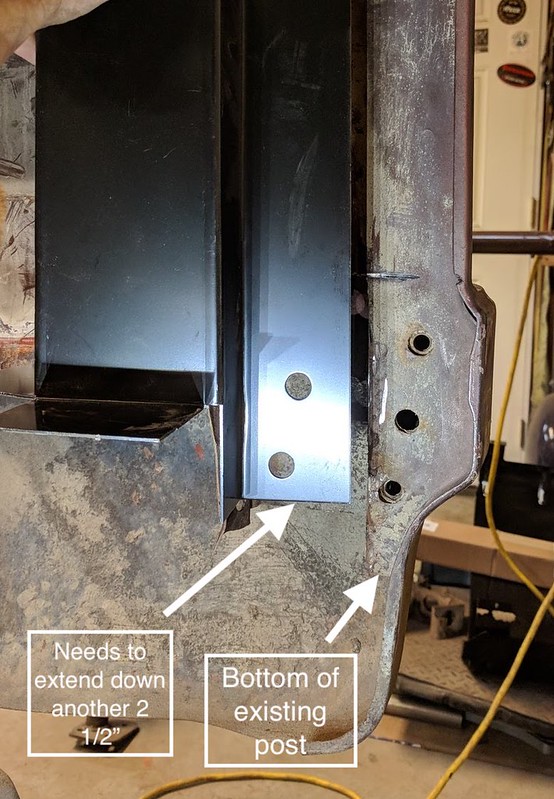 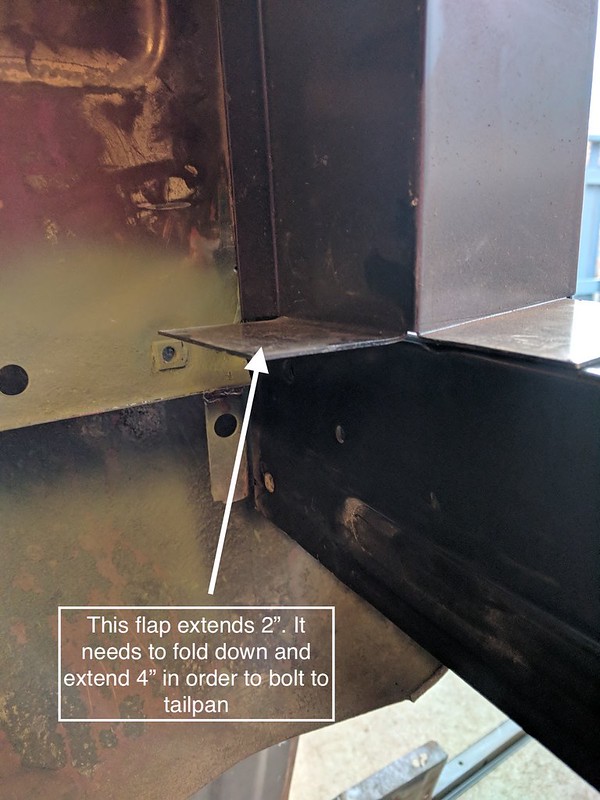 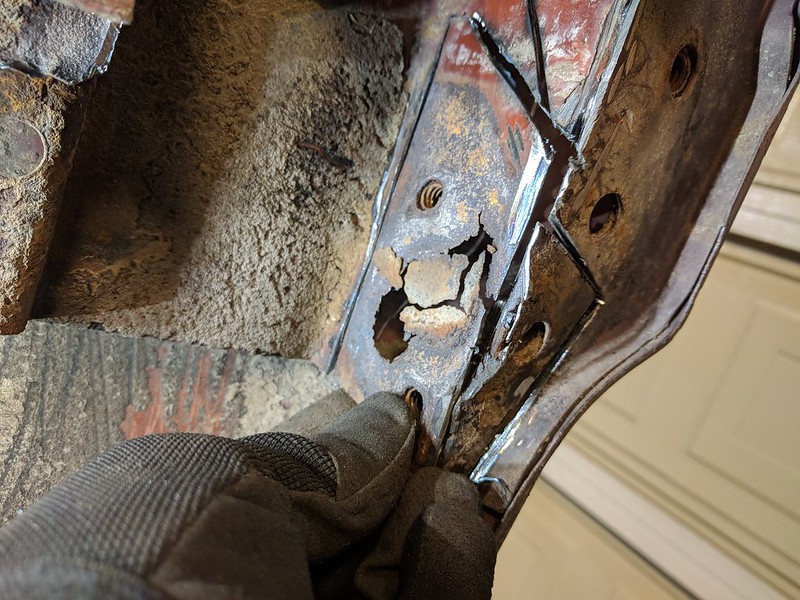 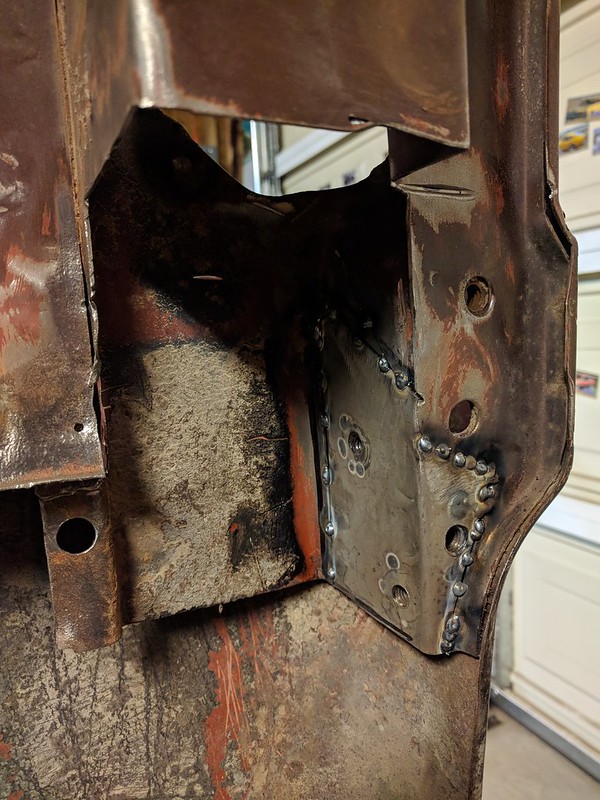  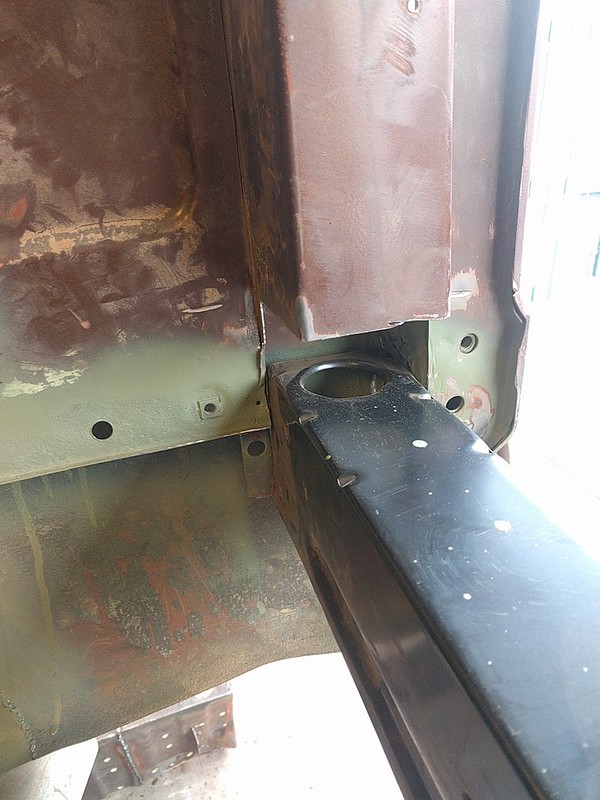 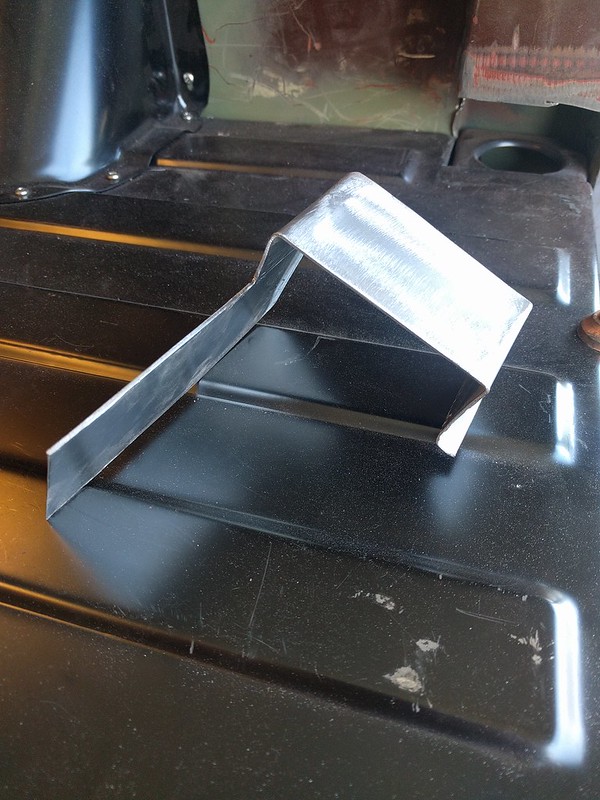 Left side  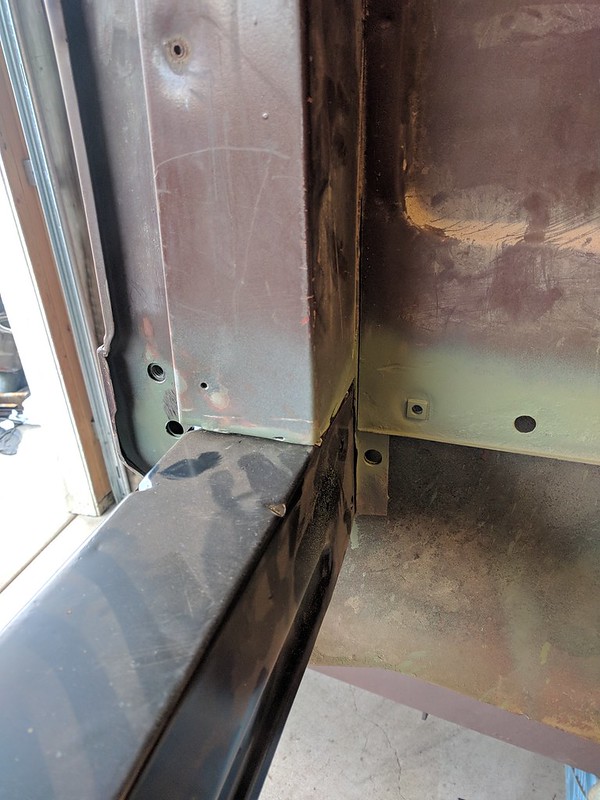 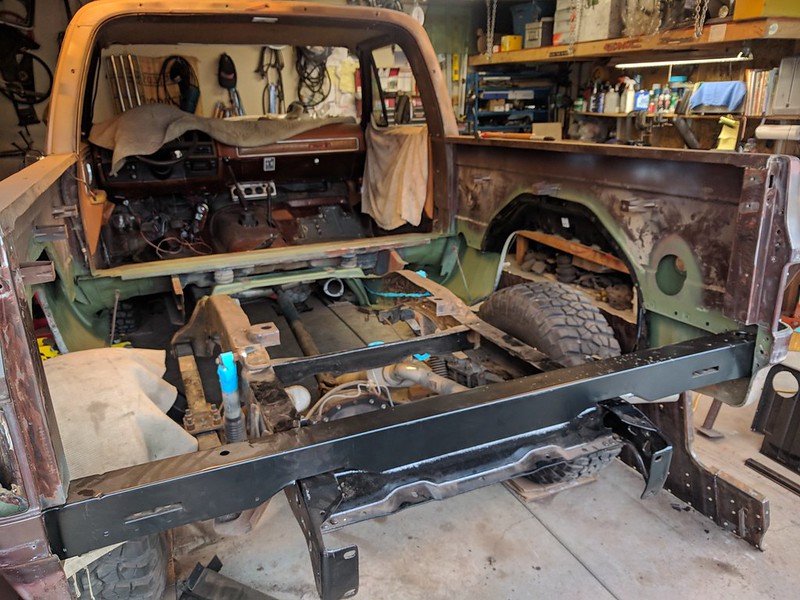 While the floor was out I decided it'd be a good time to replace the fuel tank, sending unit, tank straps, hard lines, soft lines, re-do the wiring harness, and POR15 the frame, and fuel tank skid plate. 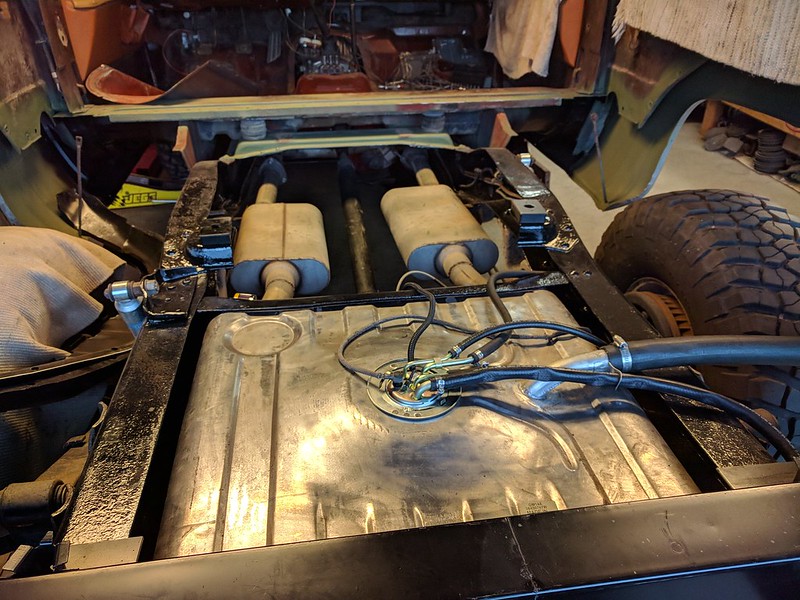 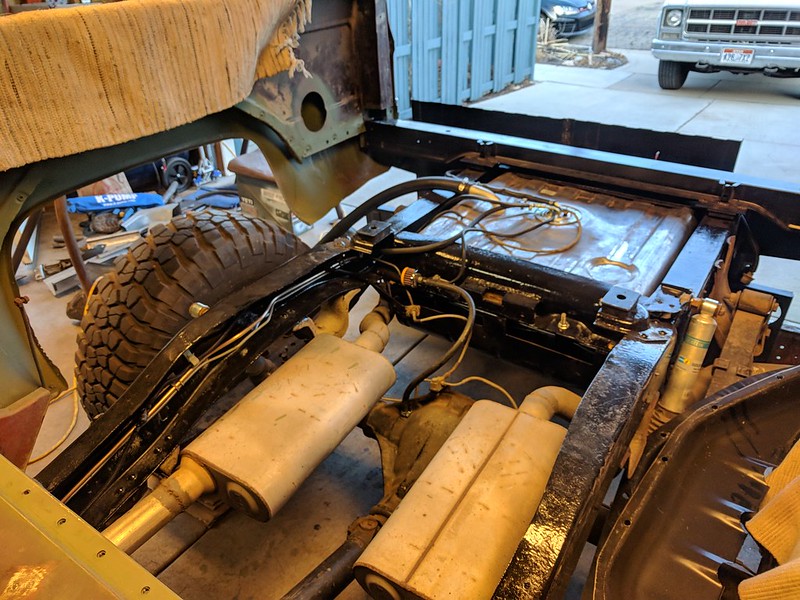  Got sick of doing what I was doing so I threw this away 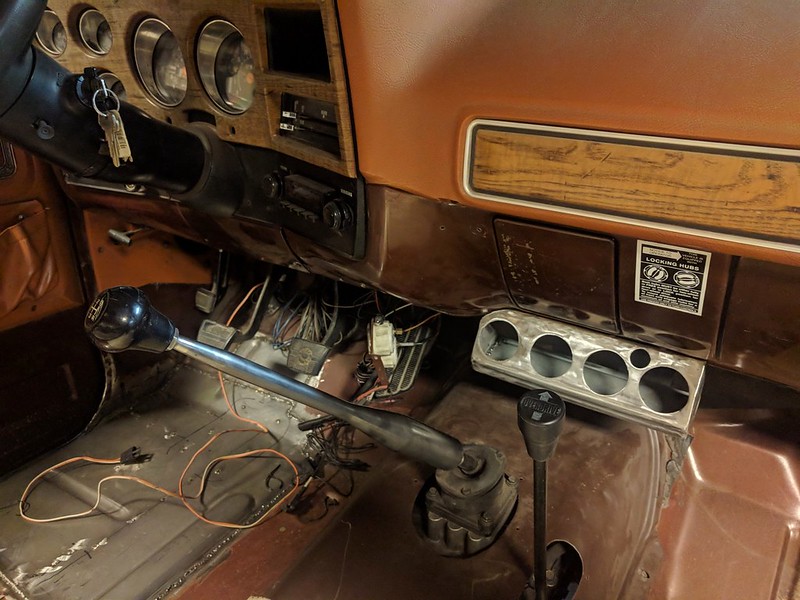 ...and built this  Floor sort of in... 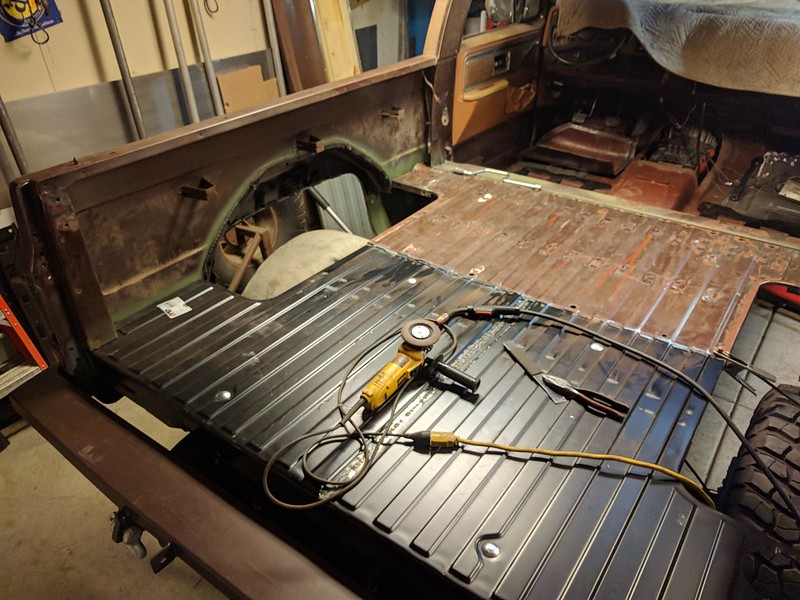 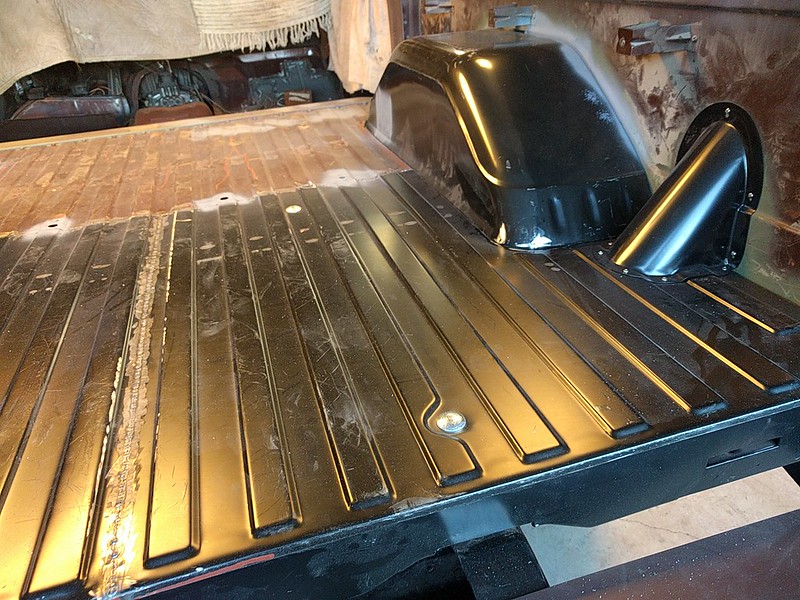  New rubber body mounts from LMC are looking like I'll get a bit of body lift. 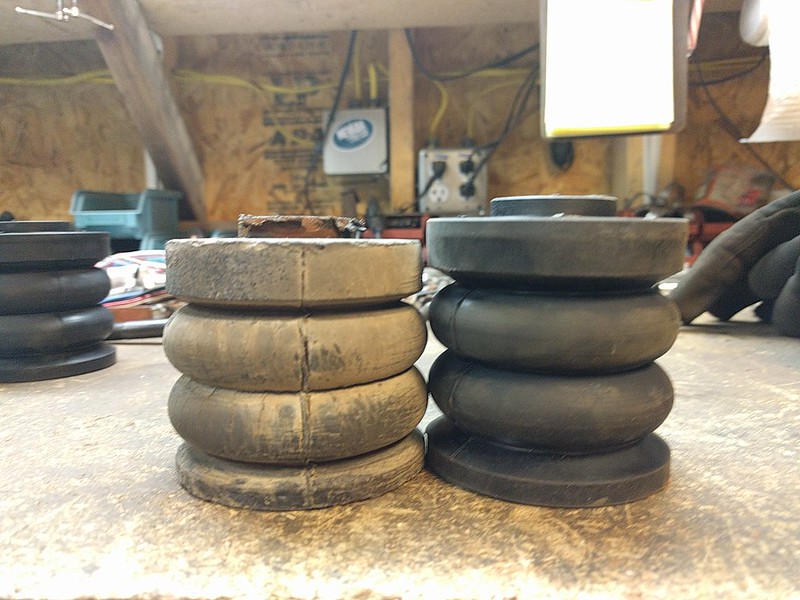 I'd also like to LMC source a better mounting bolt for this kit. I'd be glad to pay the extra $2. 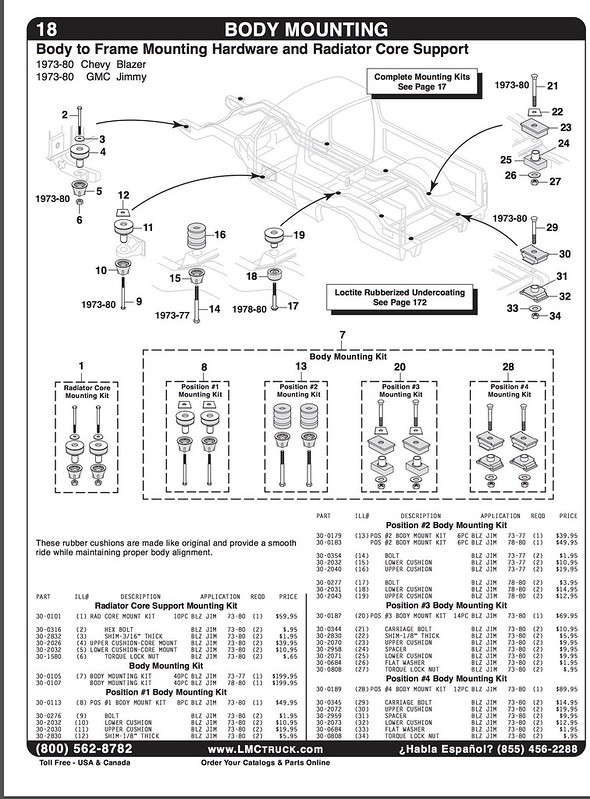 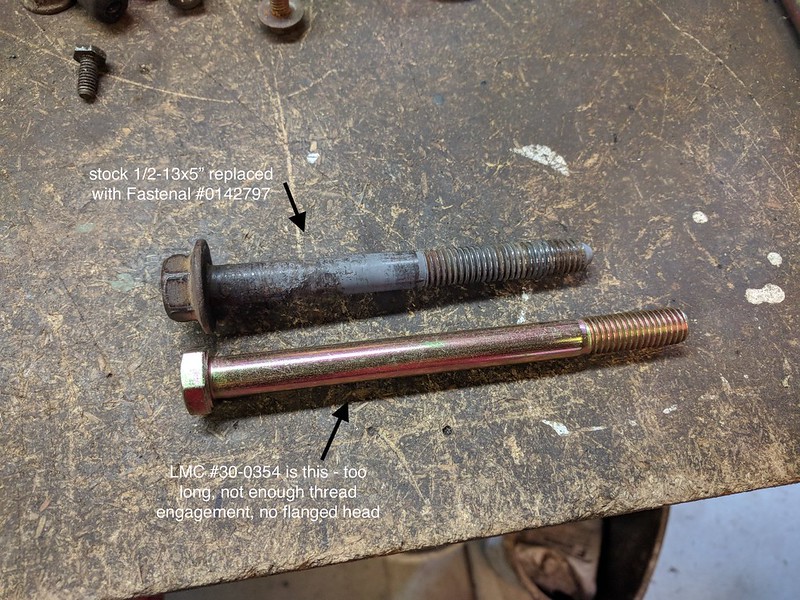 Kit also requires you to re-use these two pieces, which I thought was a bit lame. Luckily mine were ok, but if these are rusted out you'd be SOL. 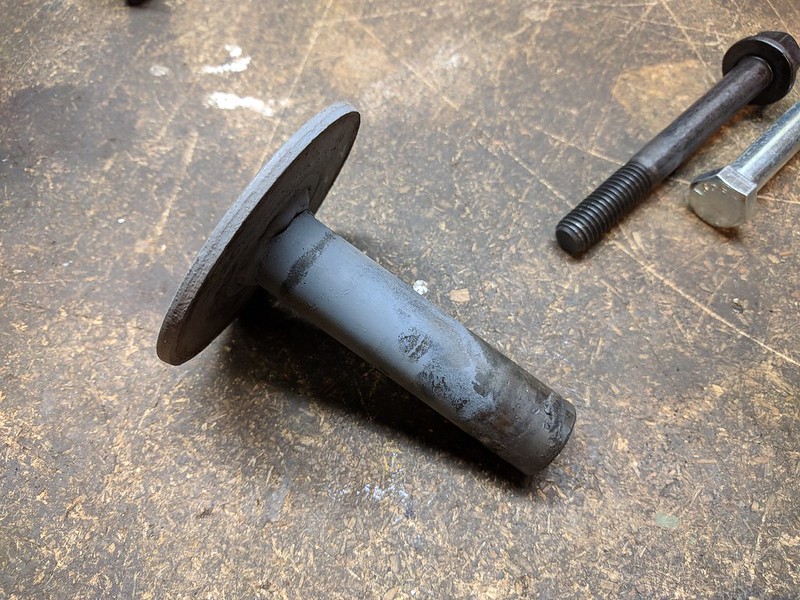 Floor looking a little better now 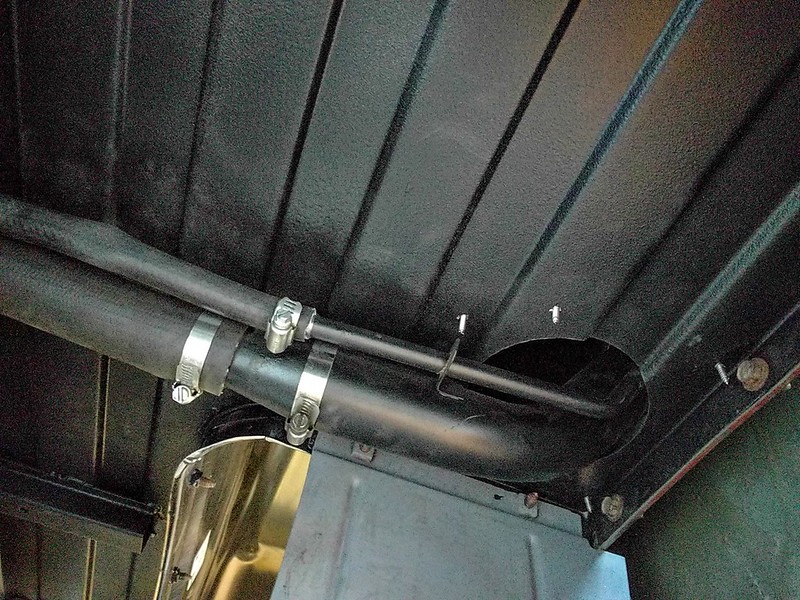   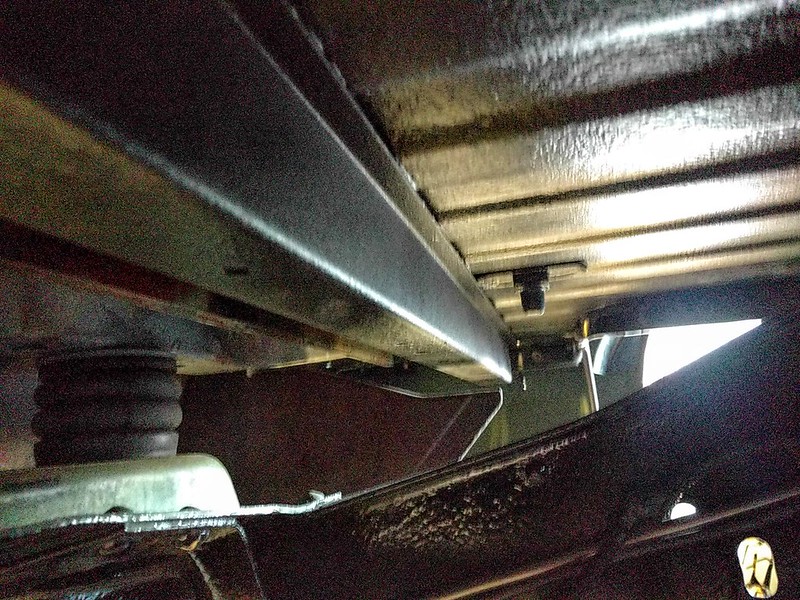 ...and a rad new order of made in USA hardware from Fastenal  I think that pretty much does it for rust repair and metal work. Body work and paint coming next.
__________________
'80 SRW C35 - 355/700R4/4:11/2.5-3/DD '77 Cheyenne K5 - Roller cam 355/NV4500/205/4:88's/35's/DD rust repair on the '77 http://67-72chevytrucks.com/vboard/s...d.php?t=740291 |
|
|
|
|
02-06-2018, 12:25 PM
|
#44 |
|
Registered User
Join Date: Mar 2009
Location: salt lake city, utah
Posts: 208
|
Re: rust repair on the '77...here goes nothin
Bodywork is the skill I suck most at and dread the most. Turned out ok, but it's a good thing I won't be going to any car shows.
Wish I was good enough to not need body filler. 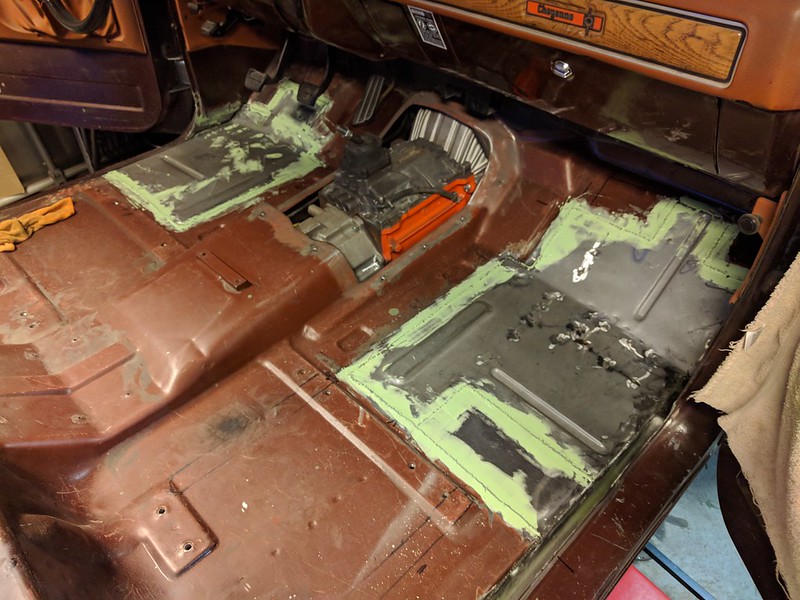 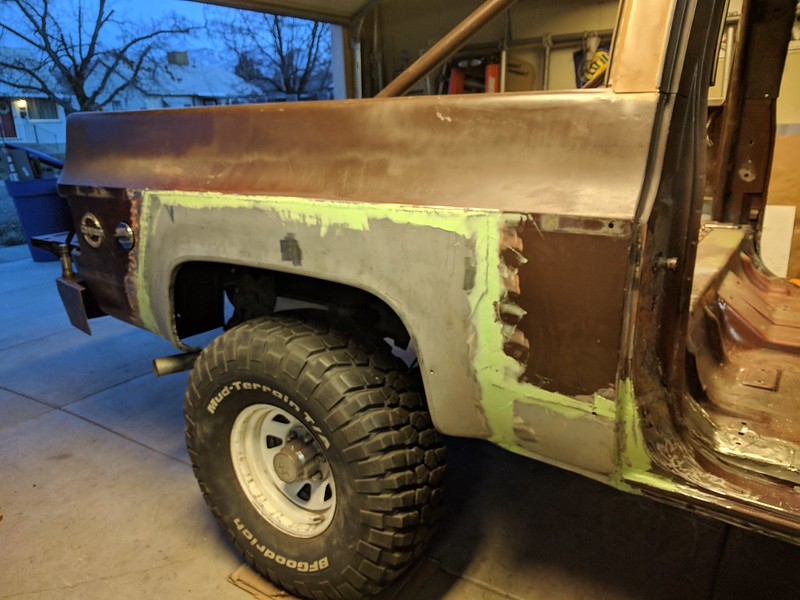  Epoxy primer 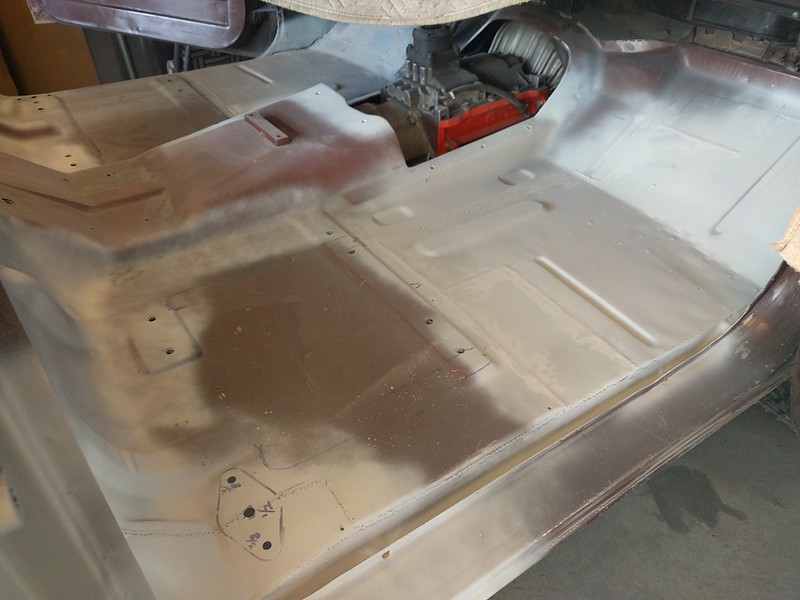 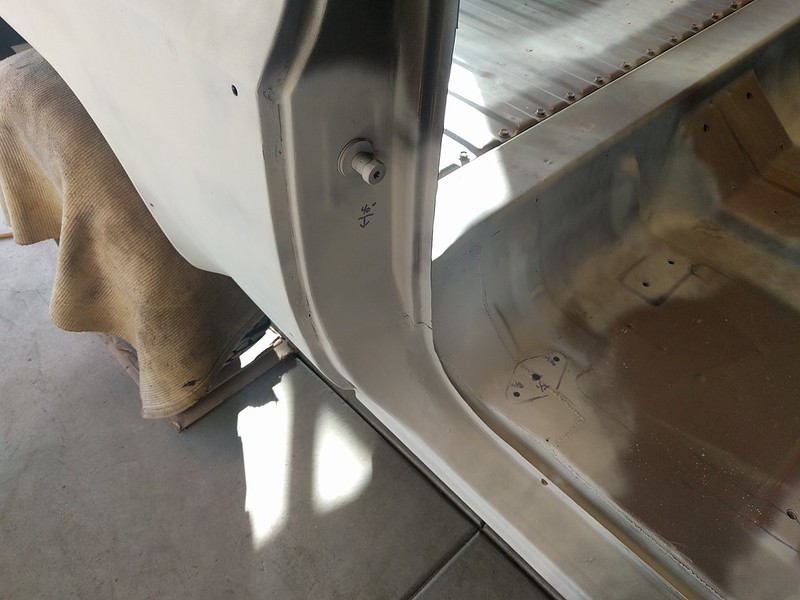 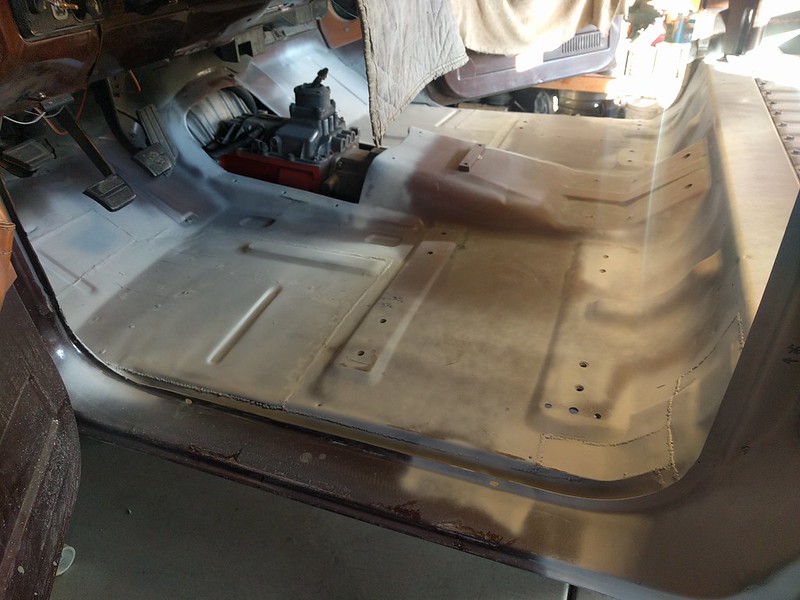 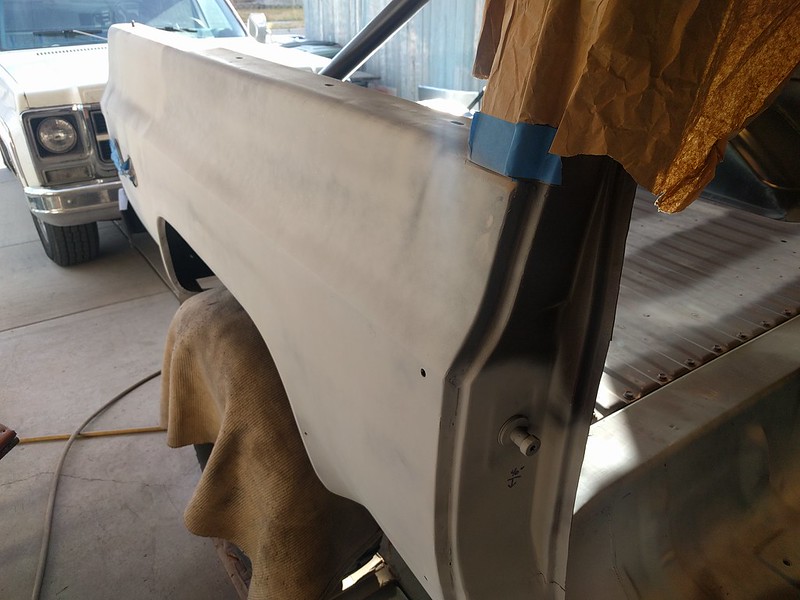 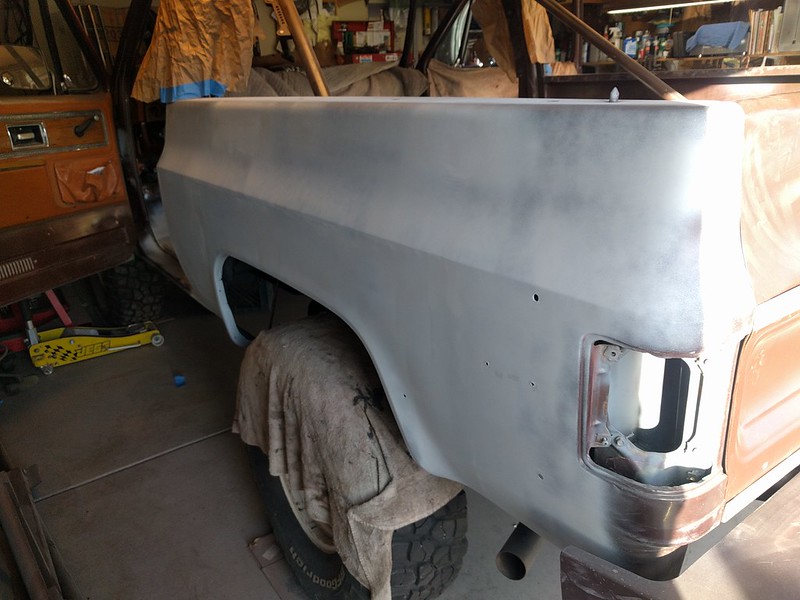 I took an old piece of body panel that had decent paint on it still to the local automotive paint supply and they mixed up a good match in rattle cans. I'll get serious about paint later...maybe.  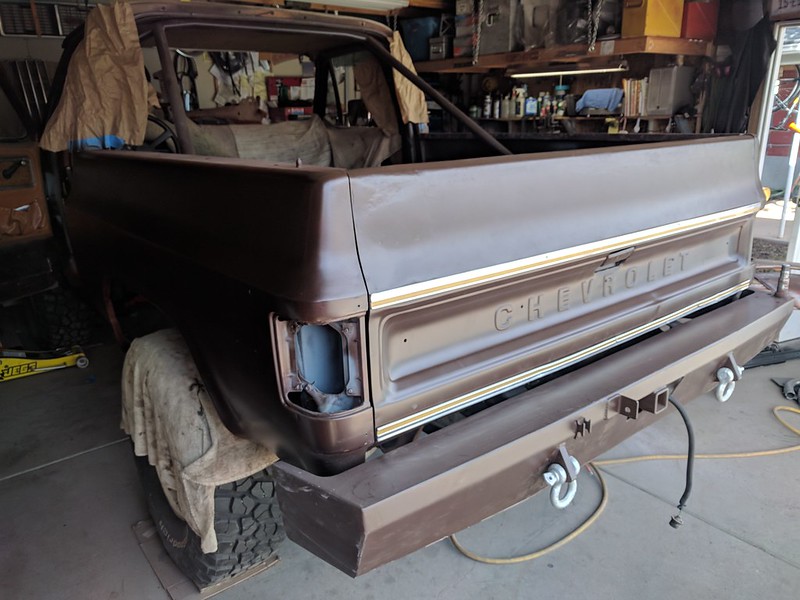 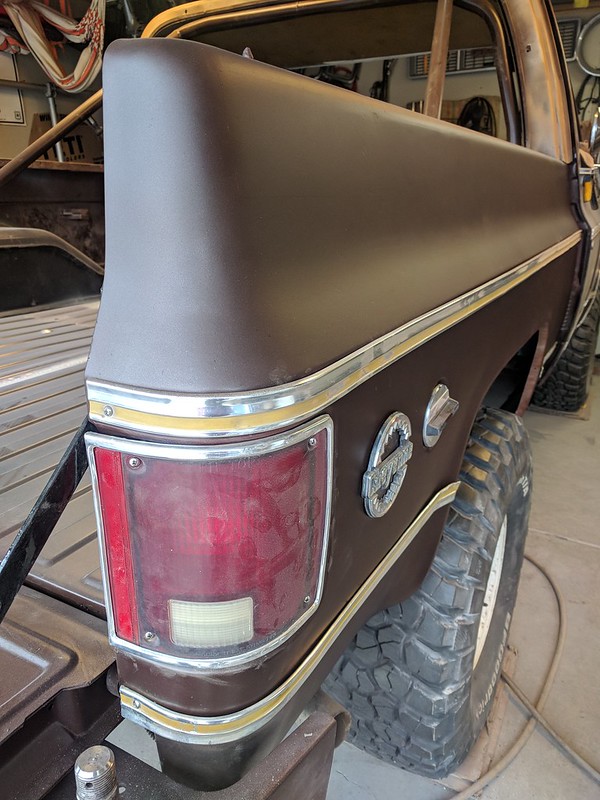 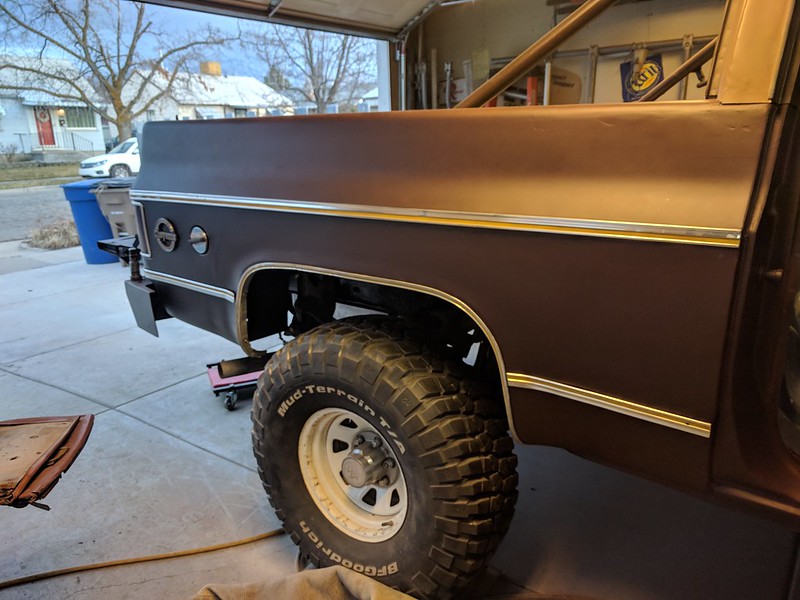 Next is slamming the interior together...
__________________
'80 SRW C35 - 355/700R4/4:11/2.5-3/DD '77 Cheyenne K5 - Roller cam 355/NV4500/205/4:88's/35's/DD rust repair on the '77 http://67-72chevytrucks.com/vboard/s...d.php?t=740291 |
|
|
|
|
02-06-2018, 12:50 PM
|
#45 |
|
Registered User
Join Date: Mar 2009
Location: salt lake city, utah
Posts: 208
|
Re: rust repair on the '77...here goes nothin
I thought I'd try using this stuff
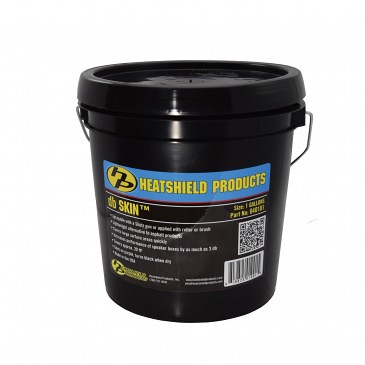 ...on the floor instead of the peel & stick product. Maybe I didn't do something right, but after it dried the floor still sounded like a drum when I knocked on it with my knuckle. 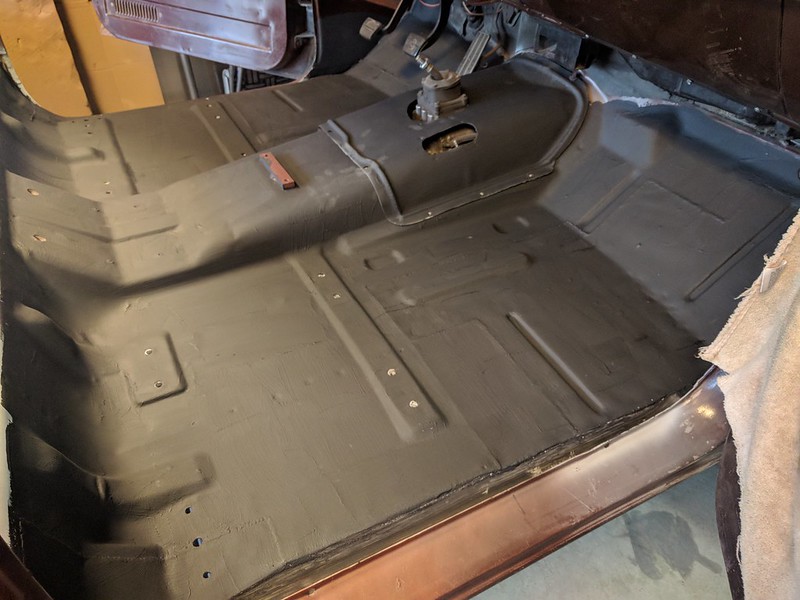 so I did this... 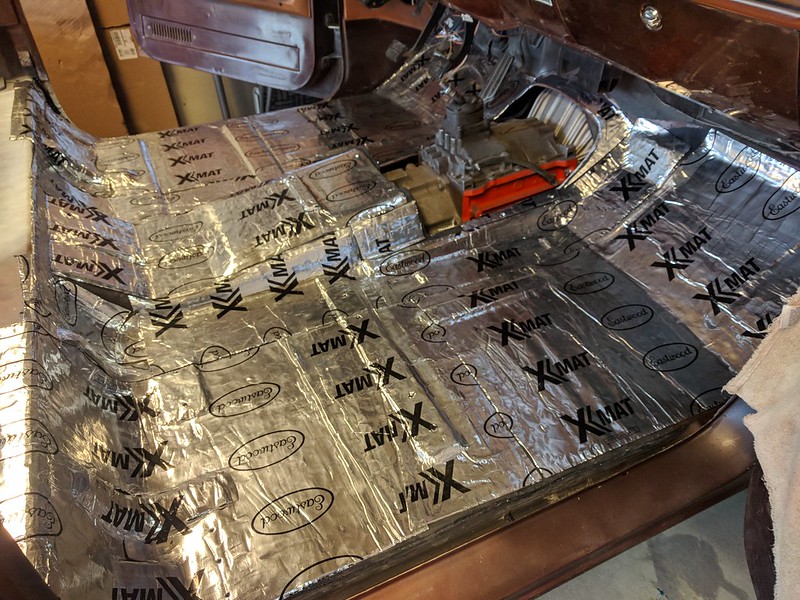 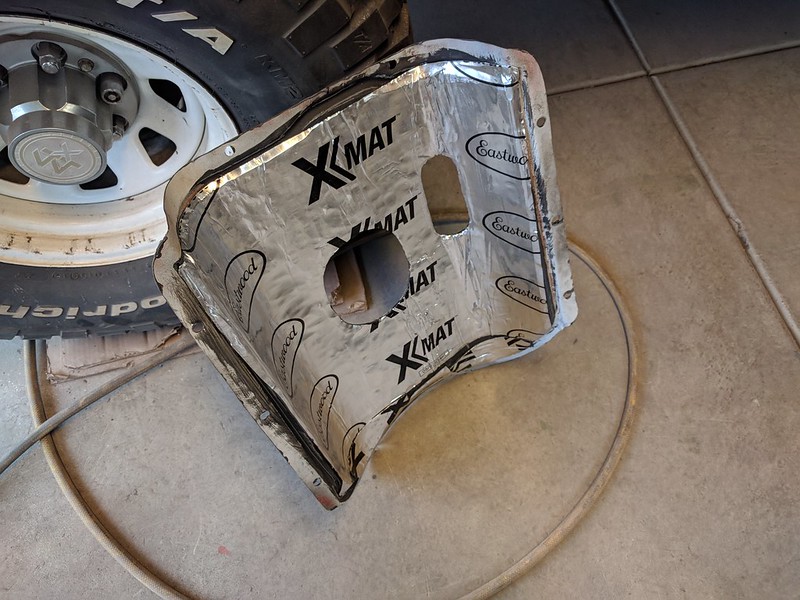 I used this Eastwood two part seam sealer which gave me acceptable results. A couple places that had larger gaps got the strip calk first then the 2K on top 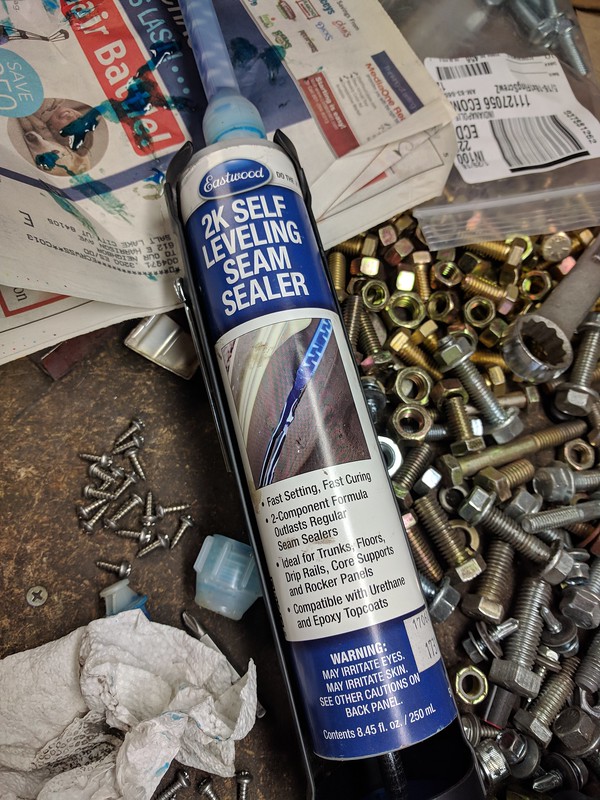 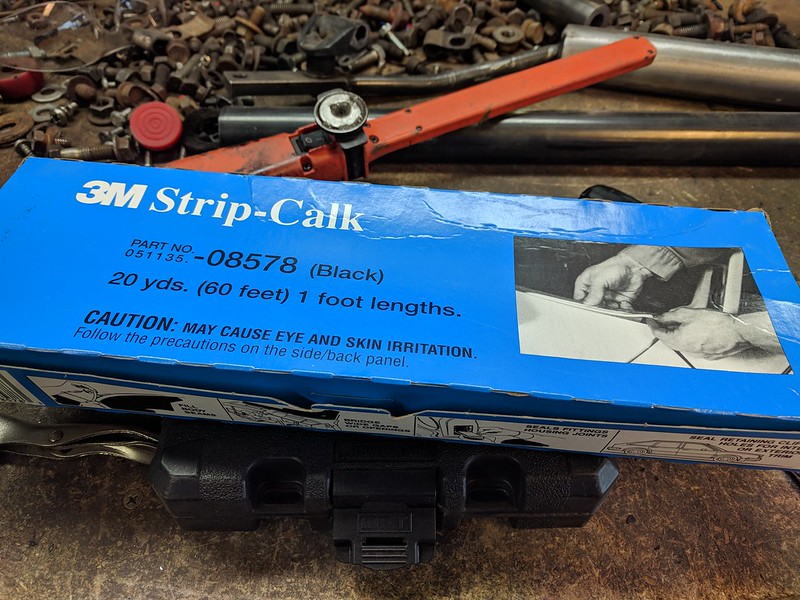 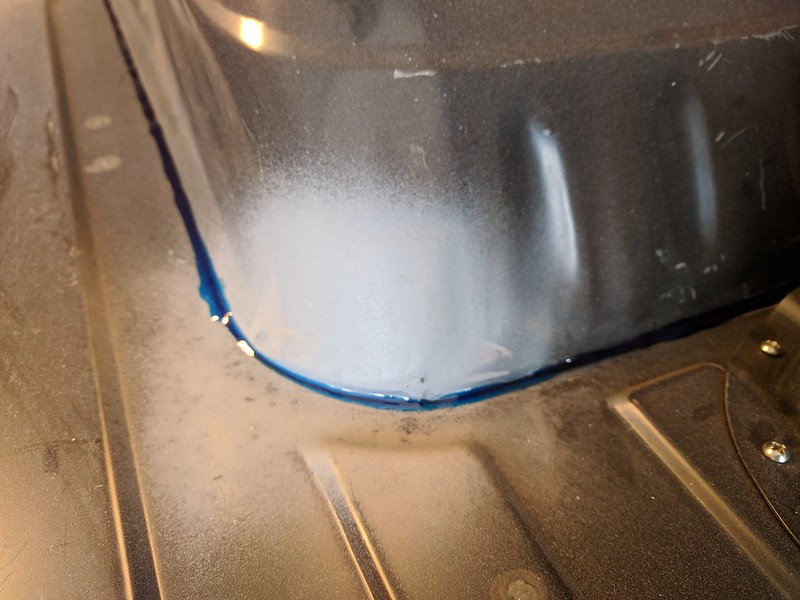 The Mandarin Orange interior has always been one of my favorite things about this blazer. I've never found anything that matches it though, not even spray paint. Somehow I needed to save the orange carpet. Since the NV4500 swap my trans tunnel carpet holes wouldn't line up that part would have to get cut. 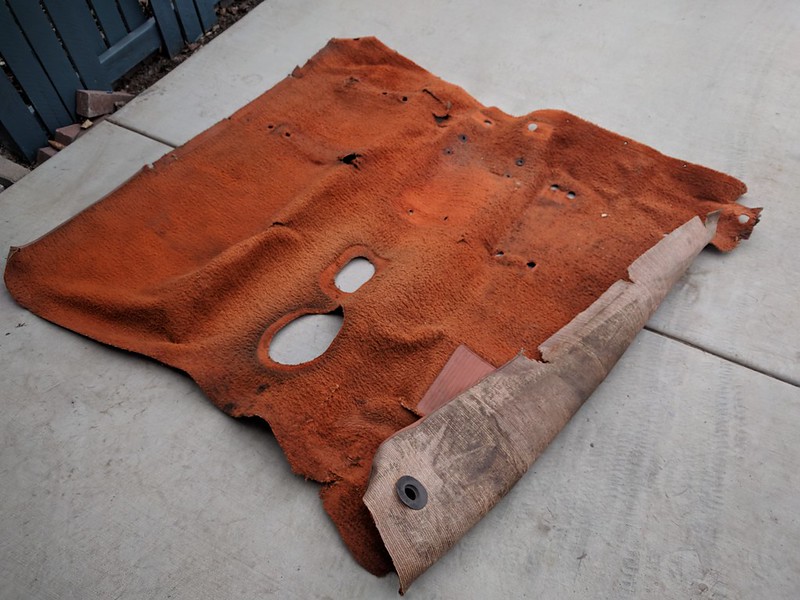 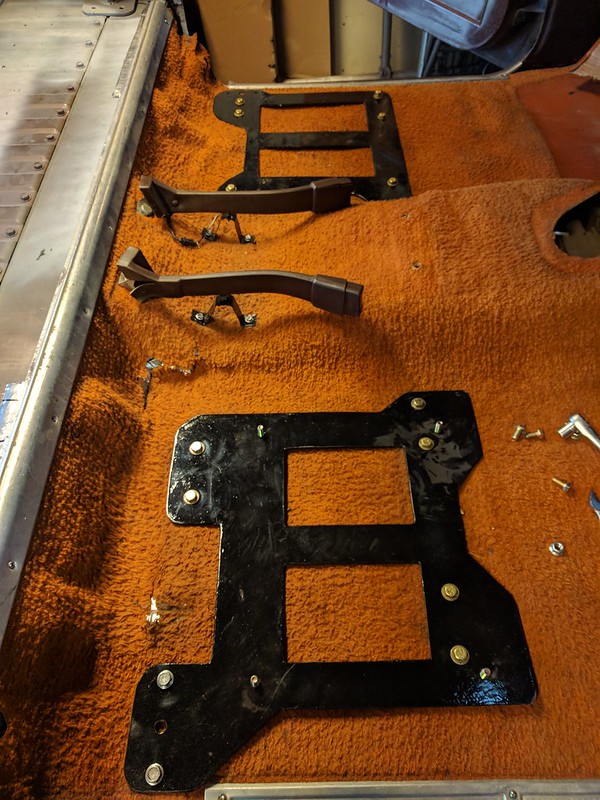 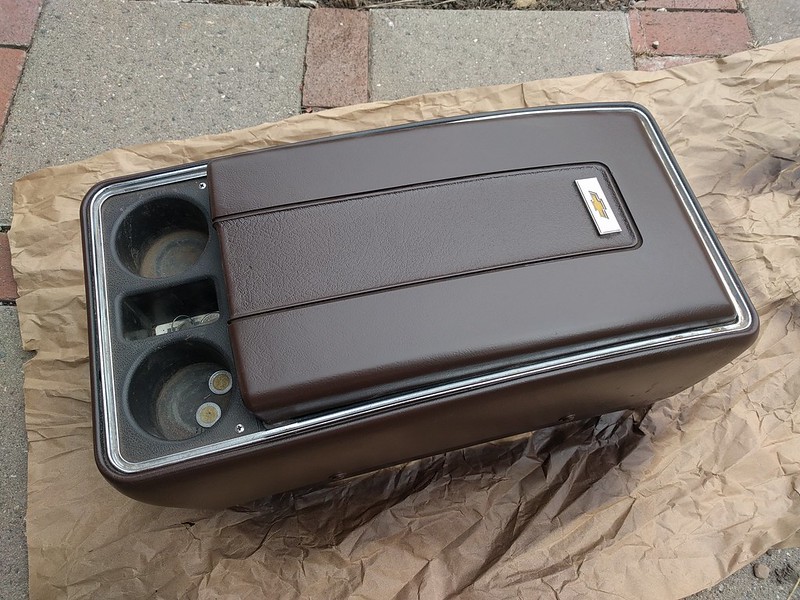 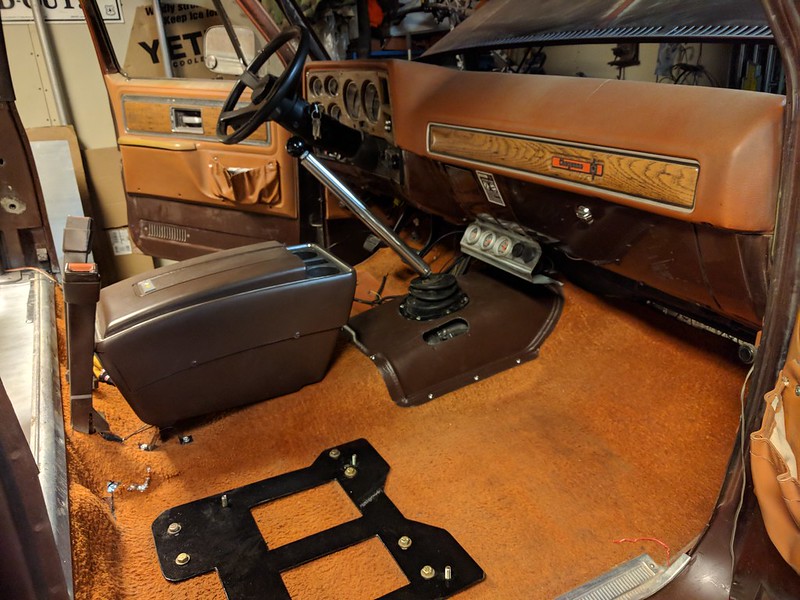 Got bored again so I built this shifter (on the left), which I'll probably not like in a couple weeks.  Next up continues the quest to save the orange interior... 
__________________
'80 SRW C35 - 355/700R4/4:11/2.5-3/DD '77 Cheyenne K5 - Roller cam 355/NV4500/205/4:88's/35's/DD rust repair on the '77 http://67-72chevytrucks.com/vboard/s...d.php?t=740291 |
|
|
|
|
02-06-2018, 01:49 PM
|
#46 |
|
Registered User
Join Date: May 2012
Location: Colo Springs, CO
Posts: 870
|
Re: rust repair on the '77...here goes nothin
Wow, ton of work and nice job! Did you know how to weld before taking this thing on? I've thought about it but have very little experience with welding. But I keep finding more and more rust spots in my truck...

__________________
- Jeff 89' K5 Blazer, 2.5" lift, 35" tires  04' GMC Yukon XL, 3/4 ton, 8.1L |
|
|
|
|
02-06-2018, 02:41 PM
|
#47 |
|
Registered User
Join Date: Nov 2016
Location: Mission BC
Posts: 117
|
Re: rust repair on the '77...here goes nothin
Might have to steal the gauge / phone charger idea for my wife's Jimmy, that looks pretty slick.
Nice job on the floor replacement, glad I didn't have to get into that on the Jimmy, just needed the sections behind the front seats & one tailgate post.
__________________
@badgaragebc |
|
|
|
|
02-06-2018, 03:26 PM
|
#48 |
|
Registered User
Join Date: Oct 2014
Location: Scottsdale, AZ
Posts: 465
|
Re: rust repair on the '77...here goes nothin
WOW!!! What a gang of work! Nice job.
|
|
|
|
|
02-06-2018, 03:31 PM
|
#49 |
|
I know the pieces fit
Join Date: Nov 2007
Location: MONTGOMERY, AL
Posts: 5,523
|
Re: rust repair on the '77...here goes nothin
Man that looks good! You'll be ready for Baja again soon.
|
|
|
|
|
02-07-2018, 10:58 AM
|
#50 | |
|
Registered User
Join Date: Mar 2009
Location: salt lake city, utah
Posts: 208
|
Re: rust repair on the '77...here goes nothin
Quote:
__________________
'80 SRW C35 - 355/700R4/4:11/2.5-3/DD '77 Cheyenne K5 - Roller cam 355/NV4500/205/4:88's/35's/DD rust repair on the '77 http://67-72chevytrucks.com/vboard/s...d.php?t=740291 |
|
|
|
|
|
| Bookmarks |
| Thread Tools | |
| Display Modes | |
|
|


 Linear Mode

