
|
Register or Log In To remove these advertisements. |
|
|
|
|||||||
 |
|
|
Thread Tools | Display Modes |
 02-16-2017, 10:40 AM
|
#76 |
|
Registered User
Join Date: Jan 2010
Location: Titusville, PA
Posts: 3,585
|
Re: Project Eugene: 1949 5 window
details are great. luv that bed wood
__________________
51' 99toLife finished 2011,355 sbc,5speed, patina, redoing whole truck, inter, bags, etc http://67-72chevytrucks.com/vboard/s...d.php?t=382481 49Hardtimes s/10 susp- bagged, vortec sbc, 5 speed, patina, sold http://67-72chevytrucks.com/vboard/s...d.php?t=594874 VIDEOS https://youtu.be/E8zHhjgS_lA https://youtu.be/E8zHhjgS_lA Geronimo 54' LS engine, static drop IFS, Client build, just about done http://67-72chevytrucks.com/vboard/s...62#post7399162 52' 3100 Slowly in progress, will be painted two toned, have 235 with a t-5, lowered OG frame Other projects, 49' farmuse 3100, killer Patina, will be slammed, LS engine, full done interior up next! www.coffeeandcustoms.com |

|

|
|
08-15-2017, 08:18 AM
|
#77 |
|
Registered User
Join Date: Jan 2015
Location: Prior Lake MN
Posts: 87
|
Re: Project Eugene: 1949 5 window
Well, progress has been slow this summer as I have been busy wakesurfing and building furniture/ knocking out side jobs to make money to buy more parts! The good news is that I'm back on track and getting stuff done.
Bought some engine covers. It's not a 6.0 so I need to shave that... 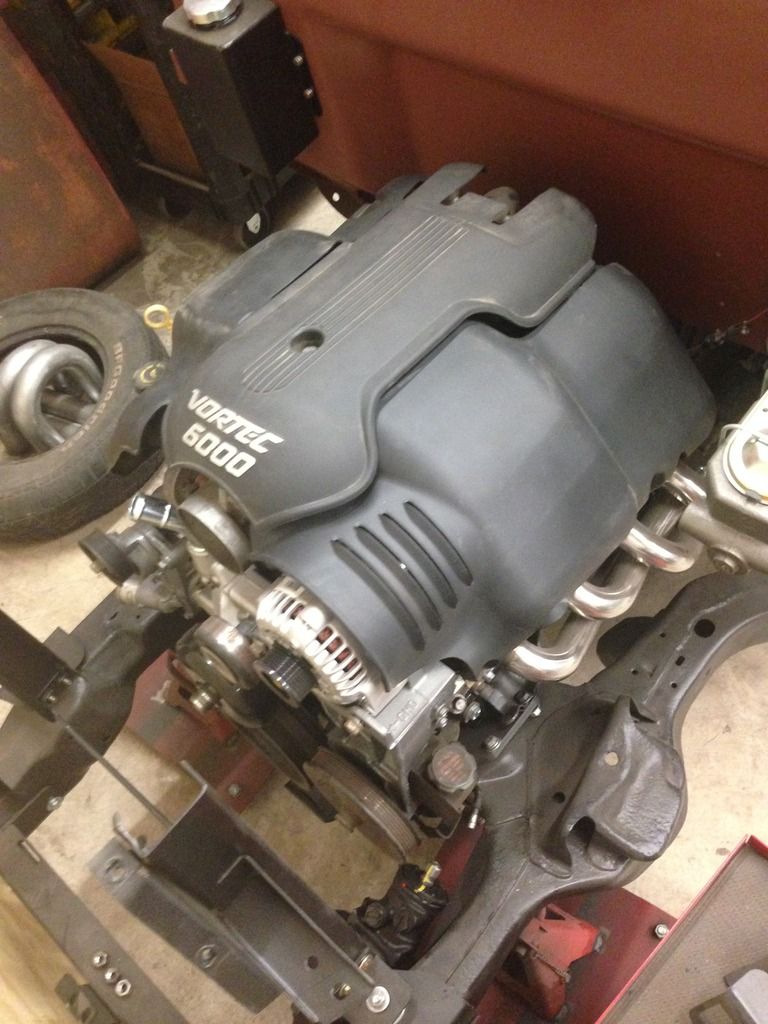 Steering parts finally arrived after a two month backorder. Borgeson joints and all new TRE's for safety. The connections fit like a glove! 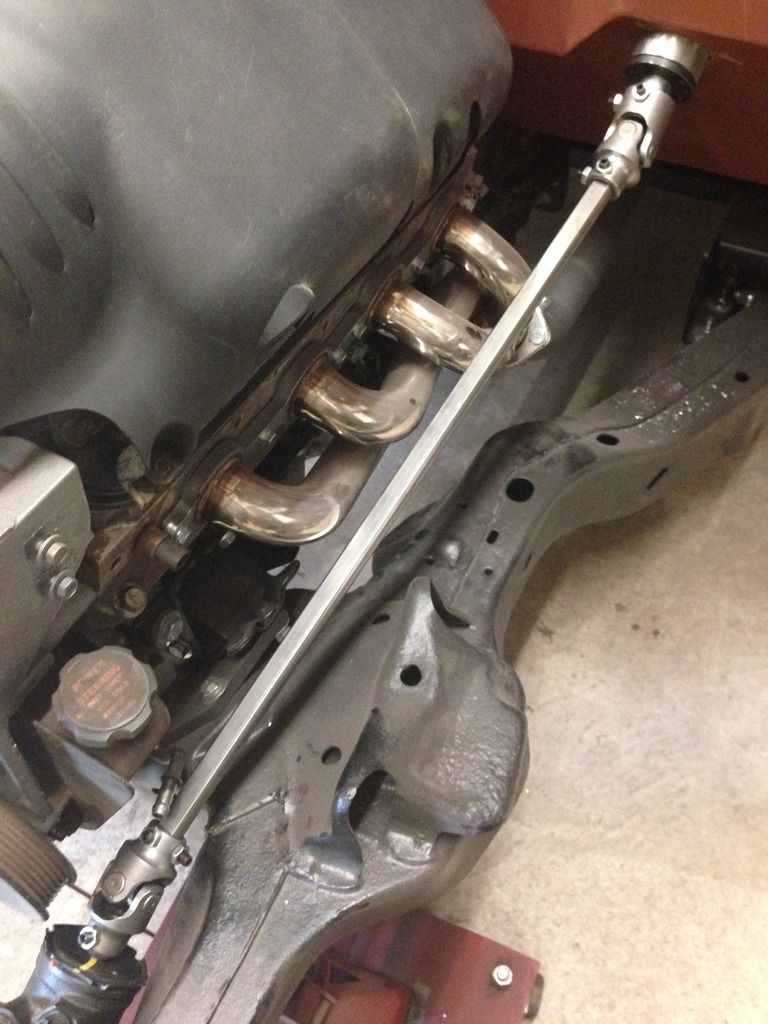 The next big step is paint. Tricky part for me is that I have some GREAT original patina that I want to preserve, but LOTS of new sheetmetal that I replaced- so I am trying to find a balance of new paint that looks old and leaving some of the old stuff showing through. I know fauxtina is a touchy subject, but it's my truck- so everybody that doesn't like it can kick rocks. Started by building up some layers on the brand new stuff, and you can see the original patina on the fenders in the back. 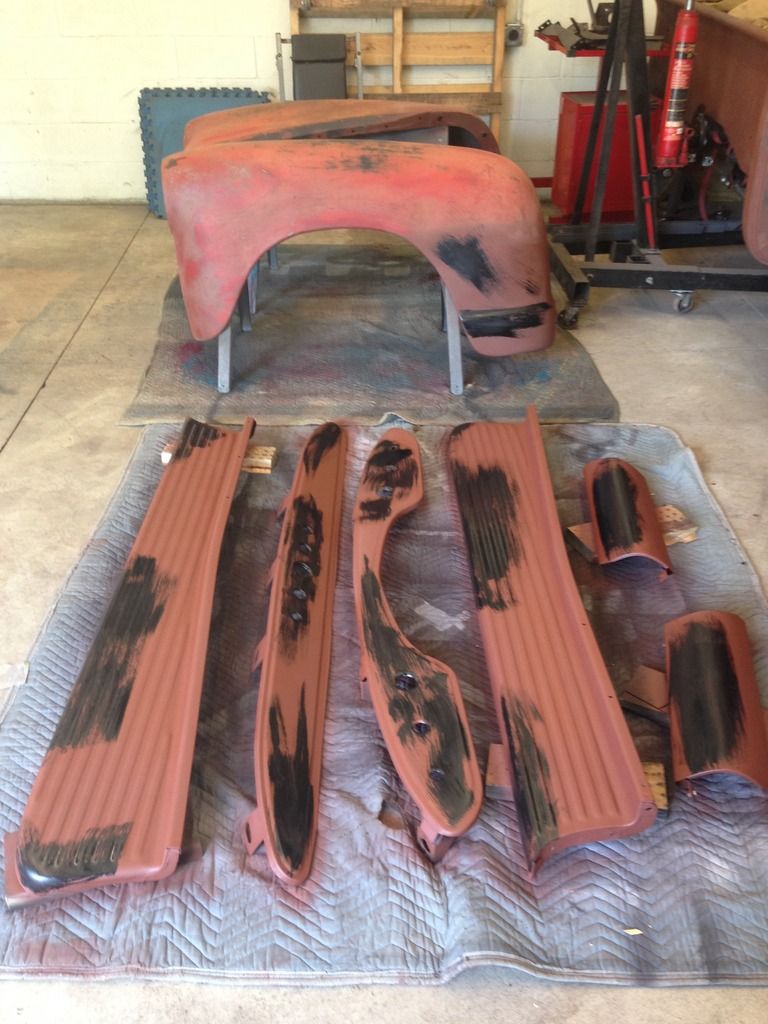  Then we spray on the blue/ green and wet sand a LOT until we feel like we have the right amount of old showing through, and spray on the matte clear. 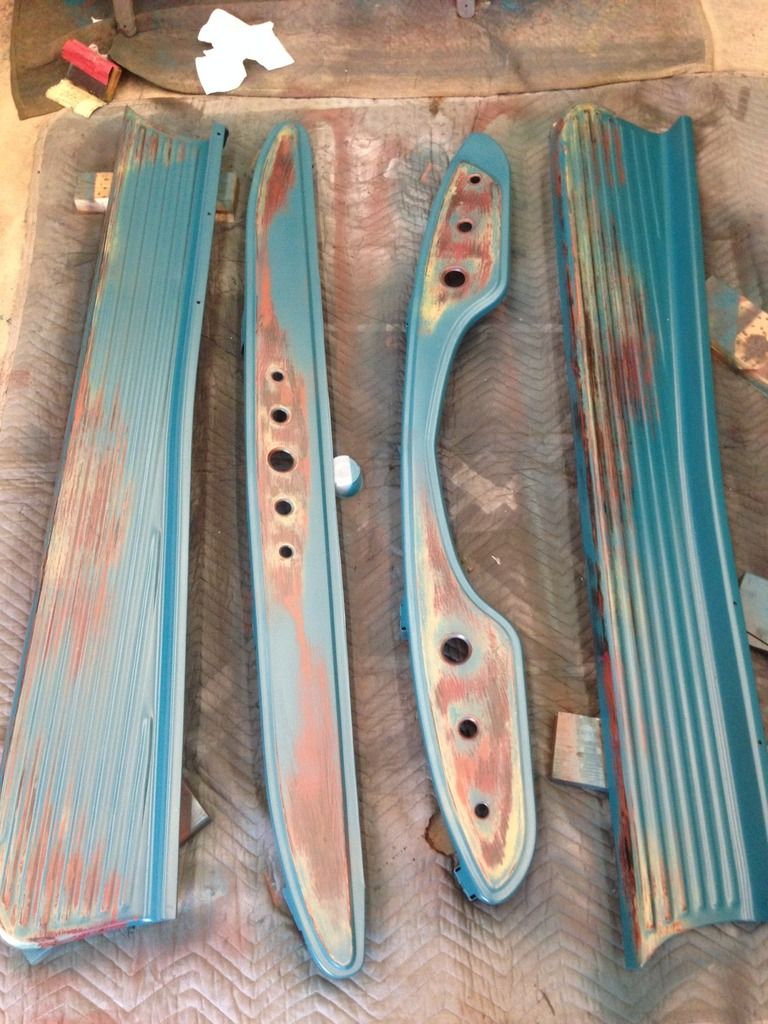 Rear Fenders: 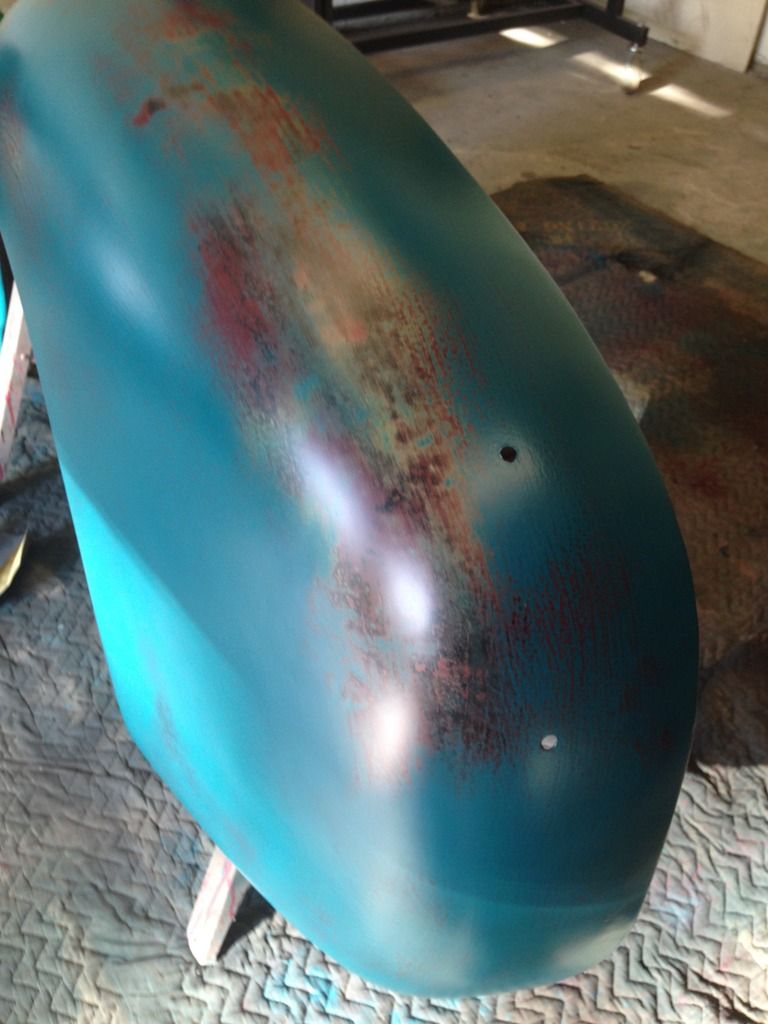 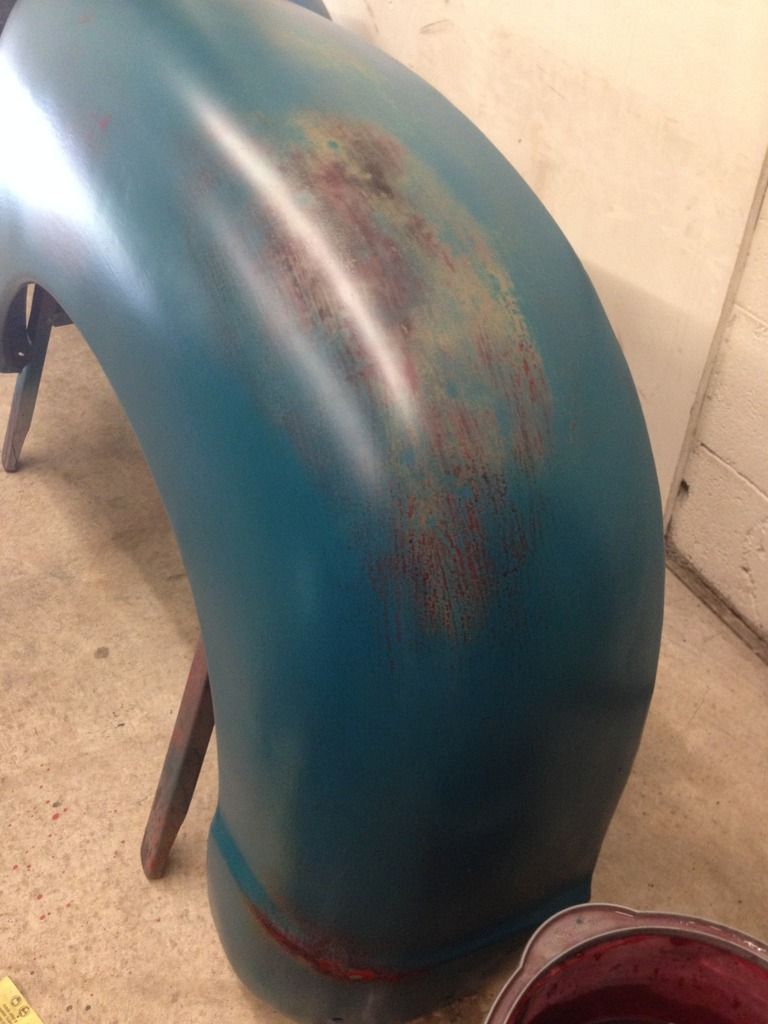 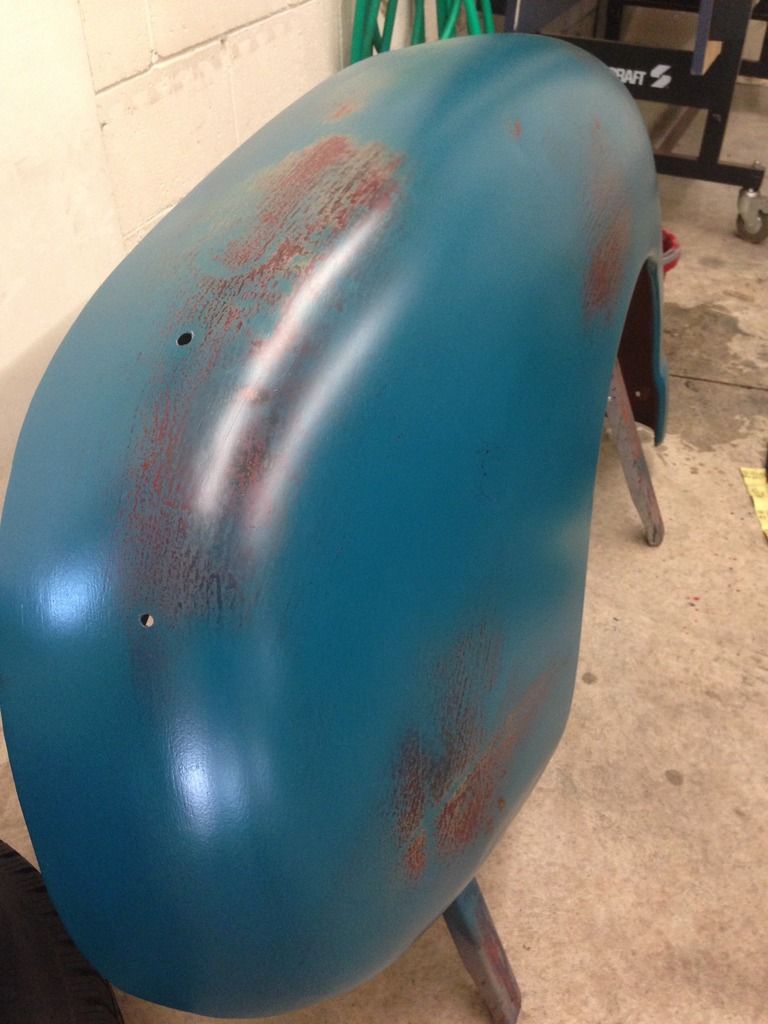 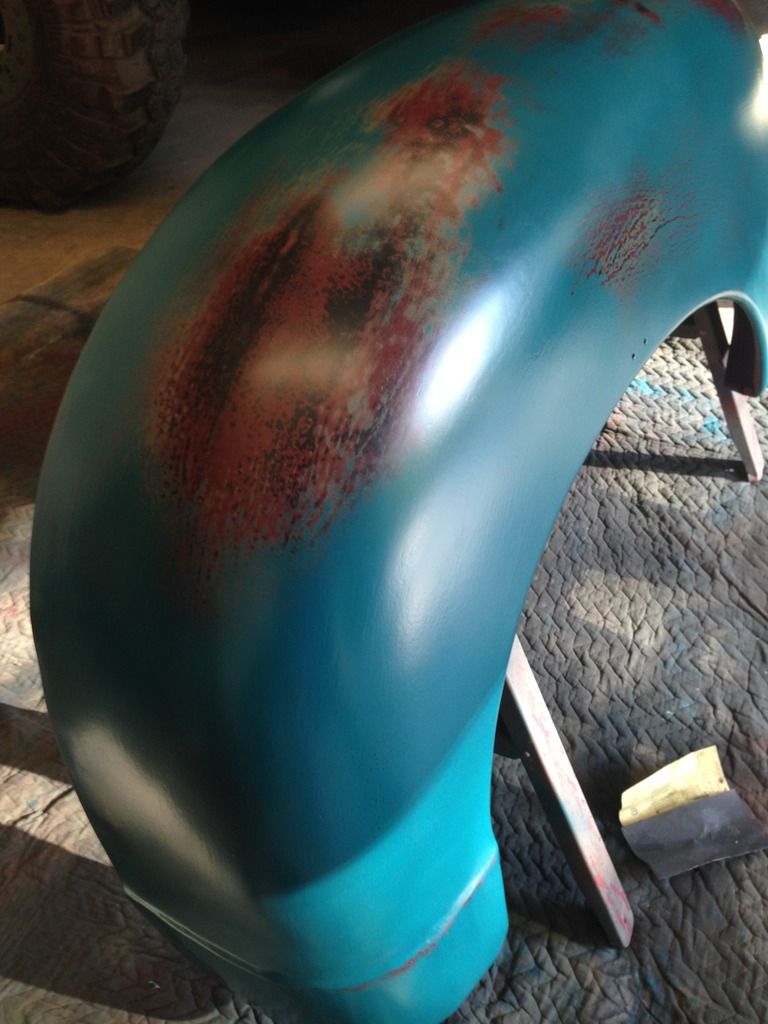 I knocked out the front fenders and hood this last weekend, and the cab/ doors are this weekend's project. 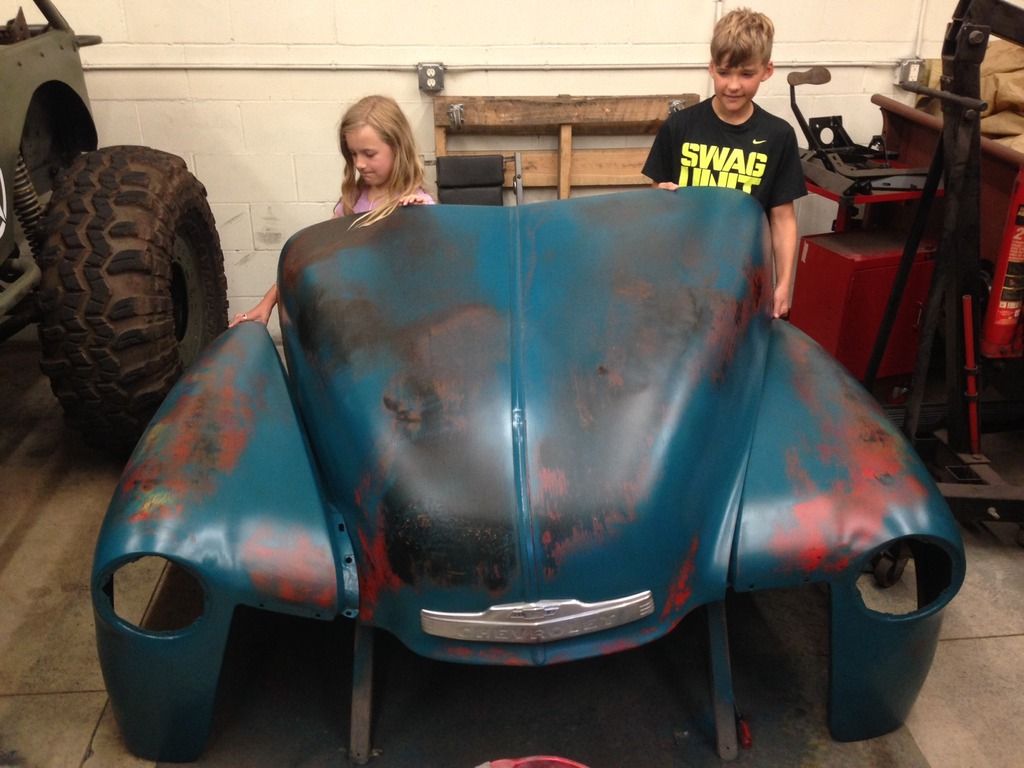 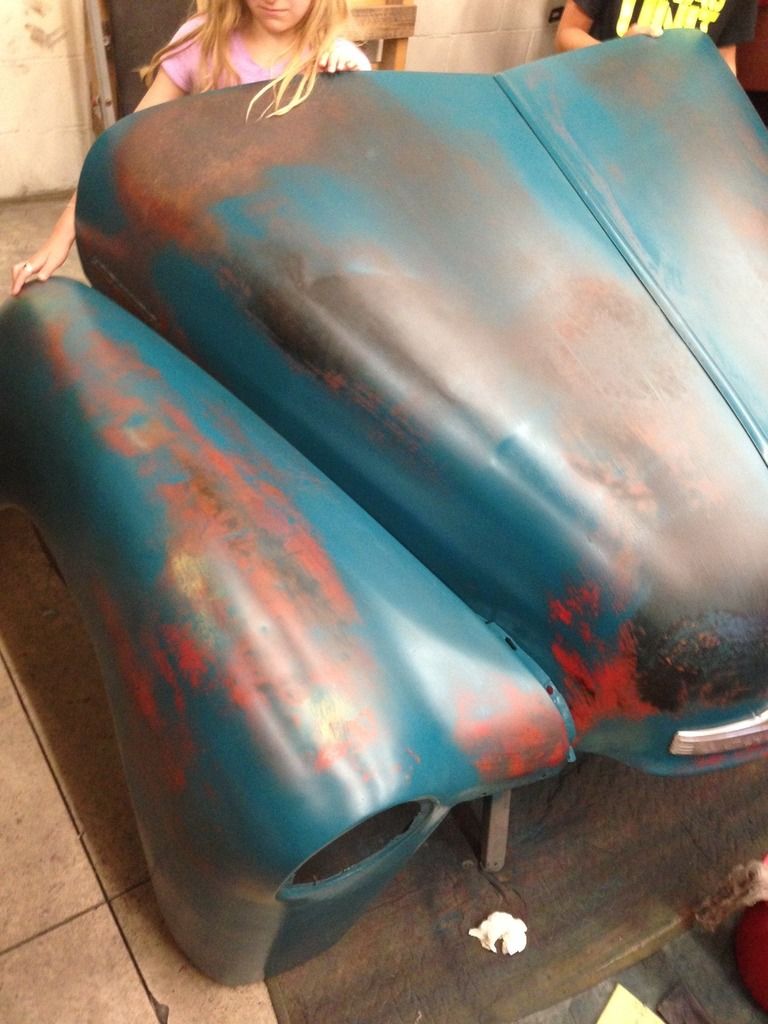 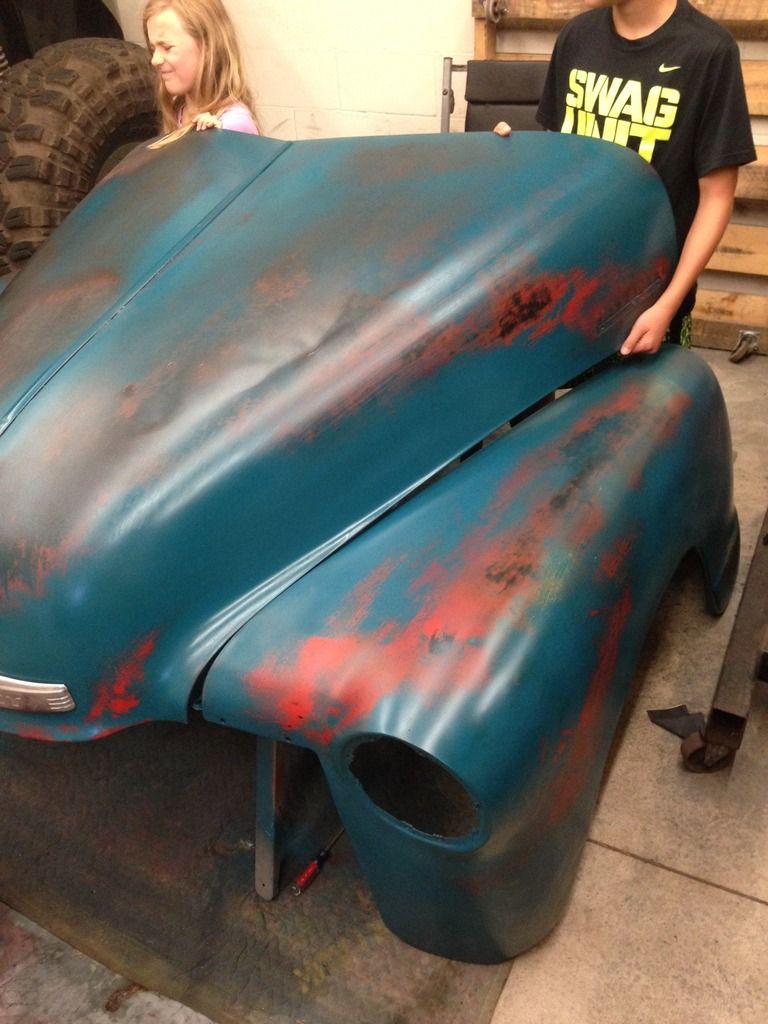 With Emblems: 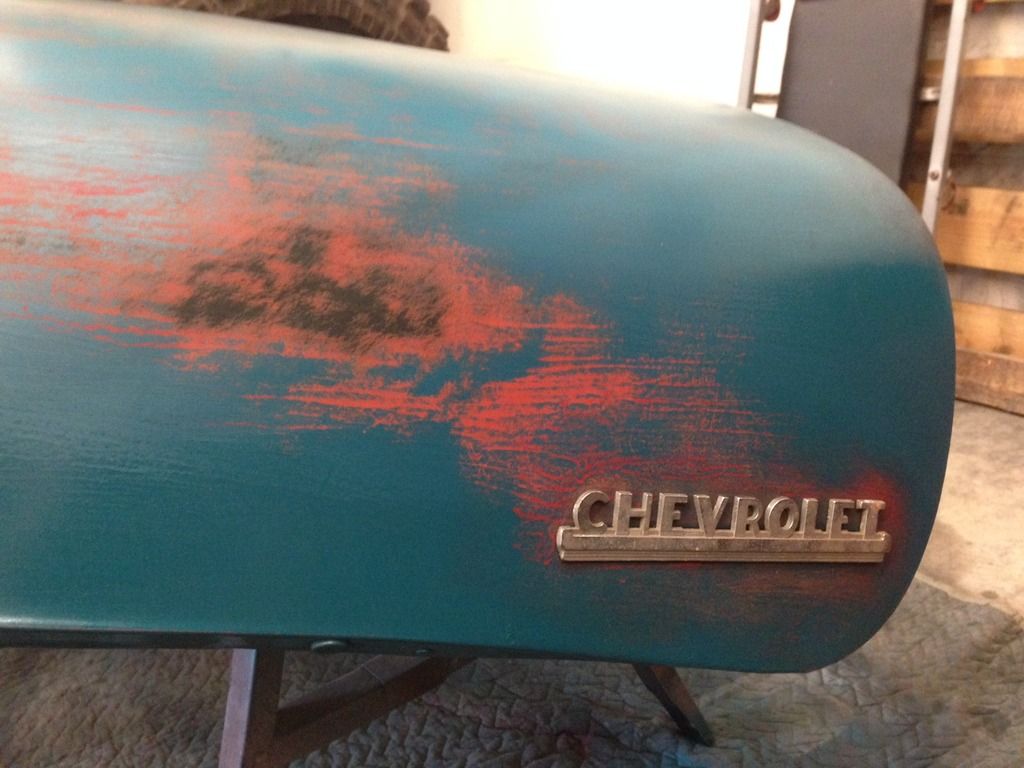 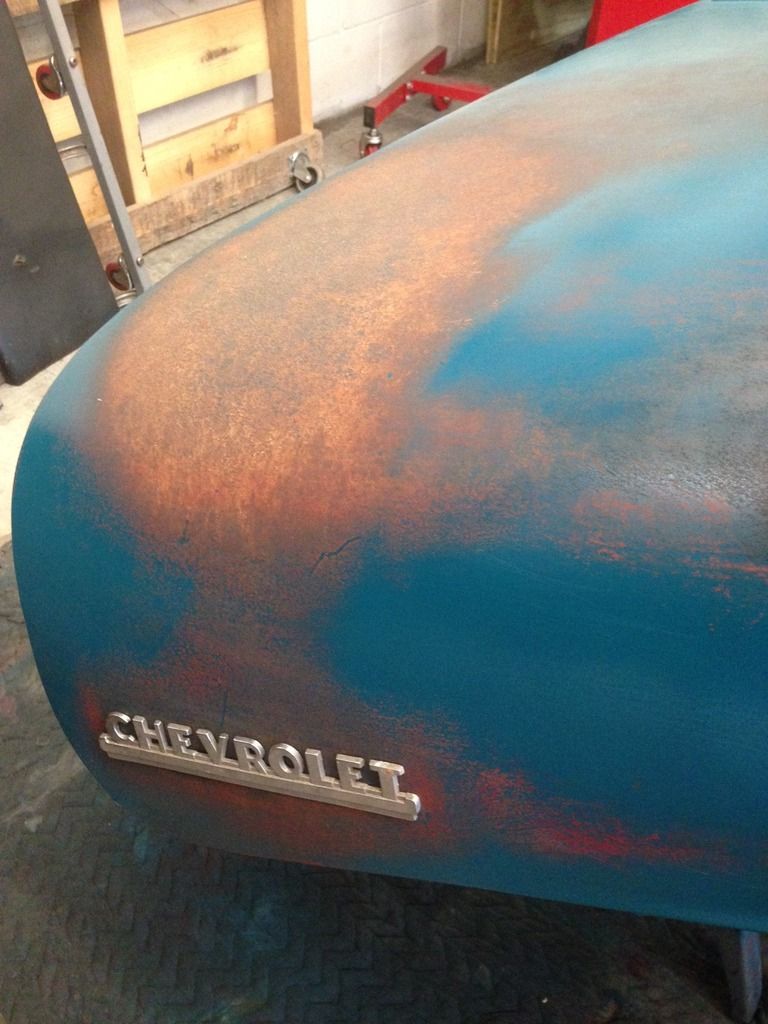 Air ride parts are trickling in- so once paint is done we will start picking at that. Still lots to do, but feels good to be moving forward again! |
|
|
|
|
08-15-2017, 09:10 AM
|
#78 |
|
Senior Member
 Join Date: Mar 2011
Location: West Plains, Missouri
Posts: 7,553
|
Re: Project Eugene: 1949 5 window
Turned out nice...Jim
__________________
my build thread: http://67-72chevytrucks.com/vboard/s...d.php?t=459839 Jimbo's long bed step build:http://67-72chevytrucks.com/vboard/s...t=464626<br /> |
|
|
|
|
08-15-2017, 10:23 AM
|
#79 | |
|
Senior Member
Join Date: Sep 2016
Location: Hershey, PA
Posts: 1,004
|
Re: Project Eugene: 1949 5 window
Quote:
I see a Hobart welder in the background of one of your pics. Which one is it? 190 or 140?
__________________
Current Build Thread 1930 Ford Model A Modern Twist: Ford Model A Rat Rod With a Modern Twist Build Thread Phase 1 "The Swap": 1949 3100 with S10 swap. Beginner build with ambition! Build Thread Phase 2 "The Drop": Beginner Build with Ambition gets Air Ride Last edited by gigamanx; 08-15-2017 at 10:40 AM. |
|
|
|
|
|
08-15-2017, 11:07 AM
|
#80 |
|
Registered User
Join Date: Nov 2009
Location: Gainesville Georgia
Posts: 458
|
Re: Project Eugene: 1949 5 window
I second that, really good job on the patina. Too many people want to get their patina "perfect" and patina is far from that. I have found getting flat paint either cans or spray works best. But, if you have glossy paint and want to flatten it mix some corn starch into it. My '53 I'm building now is named Eugene as well.
|
|
|
|
|
08-15-2017, 07:46 PM
|
#81 |
|
Registered User
Join Date: Jan 2015
Location: Prior Lake MN
Posts: 87
|
Re: Project Eugene: 1949 5 window
Thanks a lot guys- it has been a fun process to work through.
I started with a pretty well patina'd hood and fenders, and really tried to follow the cues that they gave me in where they were already worn. The rear fenders were an effort to just do the same. I've been starting at patina and fauxtina pics for over a year now so I had a pretty good idea of where I was headed. Never heard of the corn starch idea. I put on a layer of black auto paint with a roller, mixed up a red and brushed it on, and then sprayed on the blue/green. (It's rustoleum dark turquoise) Then it was wet sand with 400 til I like it and then a matte clear. I will probably end up scotch brite padding the clear to knock down more of the shine. The welder is a Hobart 190. I beat the hell outta that little bugger and it just keeps running. Someday I will buy a big kid welder but for now this thing takes everything I throw at it. |
|
|
|
|
08-15-2017, 11:18 PM
|
#82 |
|
A320 Pilot/USAF Retired
Join Date: Mar 2009
Location: Charleston, SC
Posts: 2,622
|
Re: Project Eugene: 1949 5 window
Patina work looks great!!

__________________
JJ My 1957 build: http://67-72chevytrucks.com/vboard/s...d.php?t=334552 http://www.trifive.com/forums/showthread.php?t=22037 Instagram - Chuckdriver57 |
|
|
|
|
08-16-2017, 12:24 AM
|
#83 |
|
Registered User
Join Date: Aug 2012
Location: West Side of the valley, CA
Posts: 878
|
Re: Project Eugene: 1949 5 window
I like the paint! Nice job on the steering, you got a straight stab at it and didn't need another joint.
|
|
|
|
|
08-16-2017, 07:20 AM
|
#84 | |
|
Registered User
Join Date: Jan 2015
Location: Prior Lake MN
Posts: 87
|
Re: Project Eugene: 1949 5 window
Thanks ChuckDriver!
Quote:
|
|
|
|
|
|
08-16-2017, 10:20 AM
|
#85 |
|
Registered User
Join Date: Jan 2010
Location: Titusville, PA
Posts: 3,585
|
Re: Project Eugene: 1949 5 window
its your truck, do what you want. I think it looks great. some pros to fauxtina and its almost impossible to find original trucks that need zero patches, so around here it is inevitable to not blend in a patch panel.
Did I miss your steering setup prior? Looks like you moved the steering over some, that is way too nice of an angle for an s10, LS. I moved my steering hole over on my current build, but its on the original frame with m2. are those ebay stainless shorty headers?
__________________
51' 99toLife finished 2011,355 sbc,5speed, patina, redoing whole truck, inter, bags, etc http://67-72chevytrucks.com/vboard/s...d.php?t=382481 49Hardtimes s/10 susp- bagged, vortec sbc, 5 speed, patina, sold http://67-72chevytrucks.com/vboard/s...d.php?t=594874 VIDEOS https://youtu.be/E8zHhjgS_lA https://youtu.be/E8zHhjgS_lA Geronimo 54' LS engine, static drop IFS, Client build, just about done http://67-72chevytrucks.com/vboard/s...62#post7399162 52' 3100 Slowly in progress, will be painted two toned, have 235 with a t-5, lowered OG frame Other projects, 49' farmuse 3100, killer Patina, will be slammed, LS engine, full done interior up next! www.coffeeandcustoms.com |
|
|
|
|
08-16-2017, 02:00 PM
|
#86 | |
|
Registered User
Join Date: Jan 2015
Location: Prior Lake MN
Posts: 87
|
Re: Project Eugene: 1949 5 window
Quote:
Yes, I moved the steering over on the dash towards the drivers door a few inches. Makes the steering wheel sit centered on the drivers seat indents for the bench seat I put in there. That, combined with moving the hole in the floor made it WAY easier to get the steering angles happy! Yup, ebay stainless headers. Very happy with them. |
|
|
|
|
|
08-16-2017, 03:10 PM
|
#87 |
|
Registered User
Join Date: Jan 2015
Location: Prior Lake MN
Posts: 87
|
Re: Project Eugene: 1949 5 window
Can anyone tell me what I need to do in order to get my pics to work? I dont want to spend $40 a month to be able to attach pics.
|
|
|
|
|
08-16-2017, 04:12 PM
|
#88 |
|
Senior Member
 Join Date: May 2007
Location: Doodah Kansas
Posts: 7,747
|
Re: Project Eugene: 1949 5 window
I switched to flickr
__________________
the mass of men live lives of quiet desperation if there is a problem, I can have it. new project WAYNE http://67-72chevytrucks.com/vboard/s...d.php?t=844393 |
|
|
|
|
08-16-2017, 04:34 PM
|
#89 |
|
Registered User
Join Date: Jan 2010
Location: Titusville, PA
Posts: 3,585
|
Re: Project Eugene: 1949 5 window
get free image editing program. open your picture up. resample aka resize it to 10" wide and 72dpi, save that picture to whatever folder you want. When you make a post here, go to advanced rather than quick reply, you'll see where you can upload the photos. I'v had 3 threads in past 7 years and all my photos are hosted here.
__________________
51' 99toLife finished 2011,355 sbc,5speed, patina, redoing whole truck, inter, bags, etc http://67-72chevytrucks.com/vboard/s...d.php?t=382481 49Hardtimes s/10 susp- bagged, vortec sbc, 5 speed, patina, sold http://67-72chevytrucks.com/vboard/s...d.php?t=594874 VIDEOS https://youtu.be/E8zHhjgS_lA https://youtu.be/E8zHhjgS_lA Geronimo 54' LS engine, static drop IFS, Client build, just about done http://67-72chevytrucks.com/vboard/s...62#post7399162 52' 3100 Slowly in progress, will be painted two toned, have 235 with a t-5, lowered OG frame Other projects, 49' farmuse 3100, killer Patina, will be slammed, LS engine, full done interior up next! www.coffeeandcustoms.com |
|
|
|
|
08-16-2017, 06:21 PM
|
#90 |
|
Registered User
Join Date: Jan 2015
Location: Prior Lake MN
Posts: 87
|
Re: Project Eugene: 1949 5 window
Oh man, so I have to reload every image to my thread?
This is heartbreaking... 
|
|
|
|
|
08-17-2017, 10:13 AM
|
#91 |
|
Registered User
Join Date: Aug 2015
Location: St-Hyacinthe, Quebec, Canada
Posts: 34
|
Re: Project Eugene: 1949 5 window
Been there, done that! I understand your pain. Had to re-upload a 15 pages tutorial I had elsewhere. At least you'll do it only once.
|
|
|
|
|
08-17-2017, 02:02 PM
|
#92 |
|
Post Whore
 Join Date: May 2015
Location: Alabama
Posts: 14,583
|
Re: Project Eugene: 1949 5 window
I could see your pics when you first posted them...next day it was nothing but goofy screen..
|
|
|
|
|
08-17-2017, 03:05 PM
|
#93 |
|
Registered User
Join Date: Aug 2015
Location: St-Hyacinthe, Quebec, Canada
Posts: 34
|
Re: Project Eugene: 1949 5 window
Some FREE alternatives to photobucket:
https://www.ghacks.net/2017/07/02/ph...r-third-party/ Hoping you'll find there one that suits you best. |
|
|
|
|
08-17-2017, 03:28 PM
|
#94 | |
|
Senior Member
Join Date: Sep 2016
Location: Hershey, PA
Posts: 1,004
|
Re: Project Eugene: 1949 5 window
Quote:
I asked about the welder because I have frame welding to do and I keep second guessing my Lincoln 140 (110v 0.30 wire/gas). I just don't know if I'm getting a quality weld. It's sort of important for cab mounts, but it will be really important for the core and rear 4 link suspension. I'm afraid I won't know if I did it right until something breaks off lol. Searching the Internet I get a host of opinions on 110v welds, but generally everyone says if I can run a 220 like the Hobart 190 then that is the way to go. As for image hosting, I'm using Flickr and it works great. Takes a little to get used to how to get the BB code link, but then you can paste it right in here.
__________________
Current Build Thread 1930 Ford Model A Modern Twist: Ford Model A Rat Rod With a Modern Twist Build Thread Phase 1 "The Swap": 1949 3100 with S10 swap. Beginner build with ambition! Build Thread Phase 2 "The Drop": Beginner Build with Ambition gets Air Ride |
|
|
|
|
|
| Bookmarks |
|
|


 Linear Mode

