
|
 10-14-2011, 08:45 PM
|
#1 |
|
Registered User
Join Date: Aug 2010
Location: ruston, la
Posts: 97
|
Vintage Air Install
Since I joined this site I have been doing a bunch of reading, but very little posting. I figured is what about time to contribute to this great site. I bought the Gen IV for my 1981 stepside C10 about two months ago and just started the install today. I didn't see a whole lot of pics of the install just the finished product so here is what I have so far:
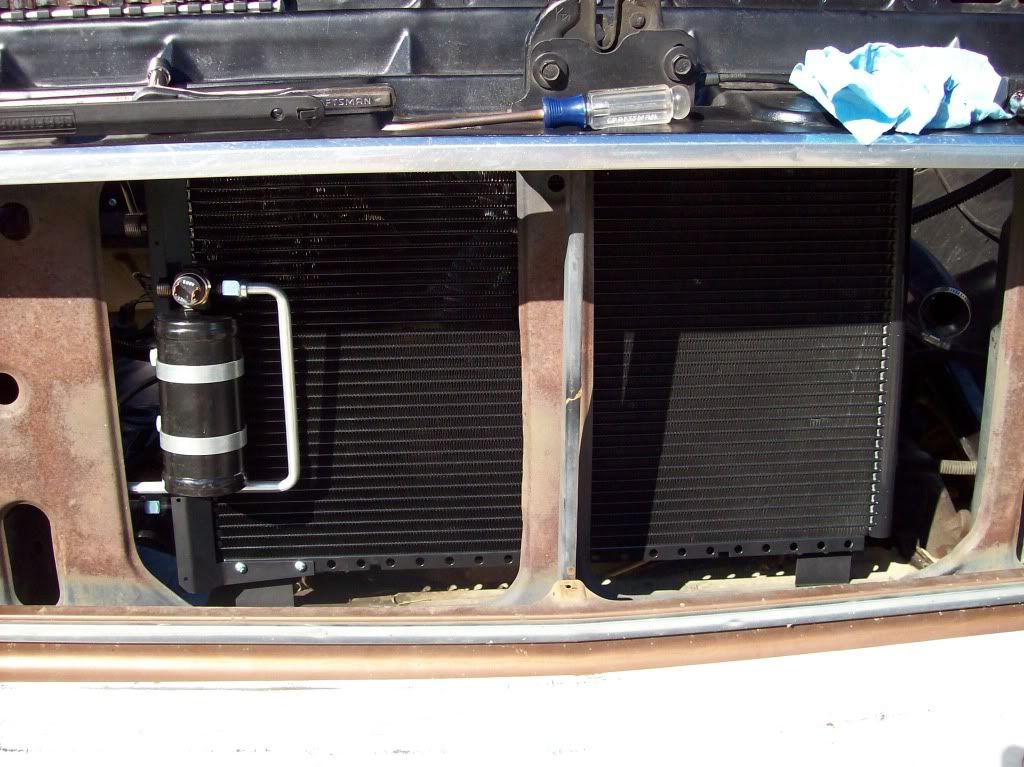
This is the interior and firewall completely gutted 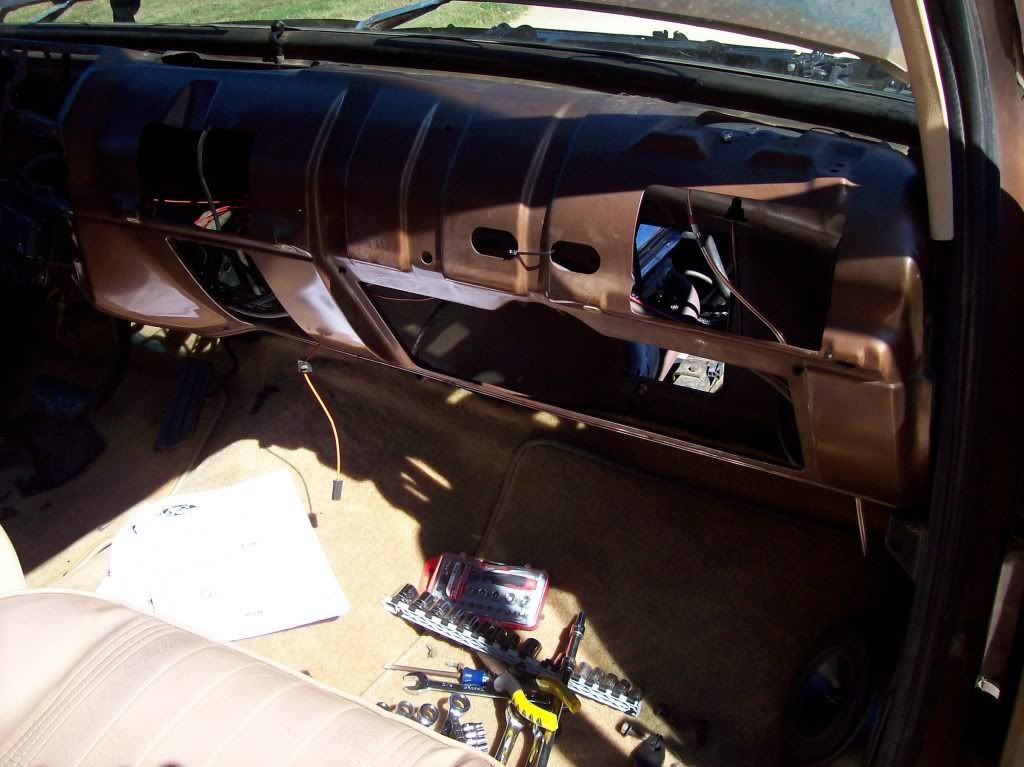 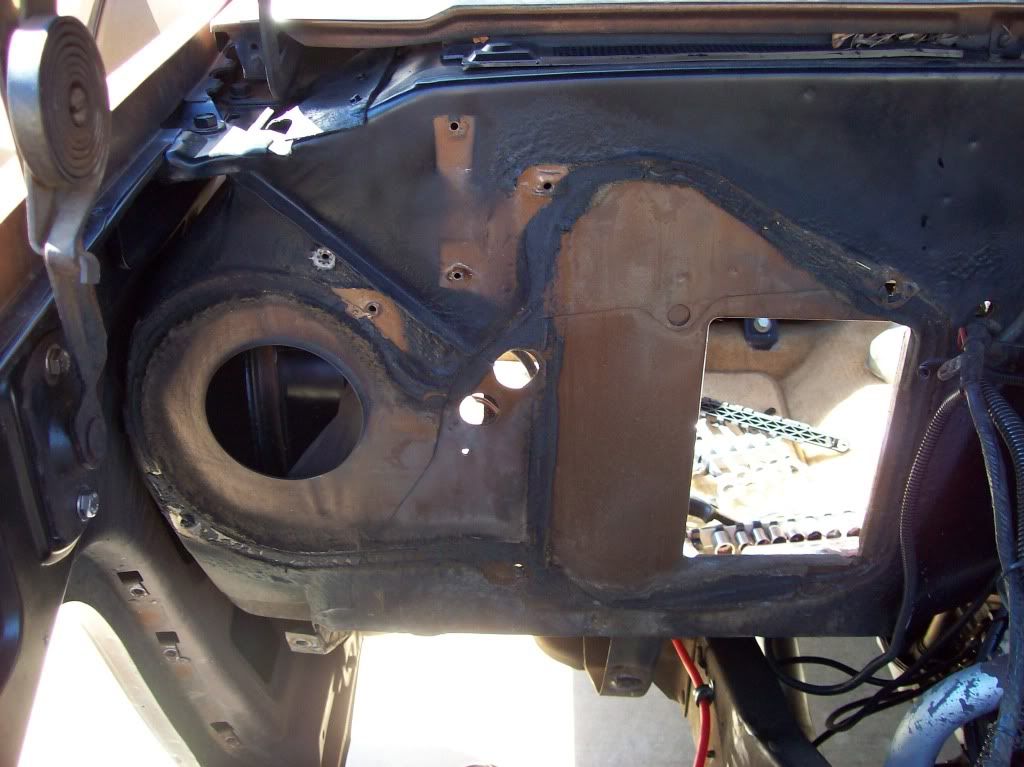 Here are two shots of the underdash unit and one of the firewall. I had problems drilling the top two holes for the top mounting bracket because my drill was too large; a right angle drill would probably work the best. I ended up using my dremel, but could only get one drilled for now. Also, when I installed the grommets on the panel that attaches to the firewall I installed the top one backwards. If you have installed this kit you may know what I'm talking about. If you haven't installed it yet the top grommet is recessed on one side, that side go toward the back of the truck. The manual doesn't state that, but after getting the evaporator installed and the lines through the firewall that makes the most sense. 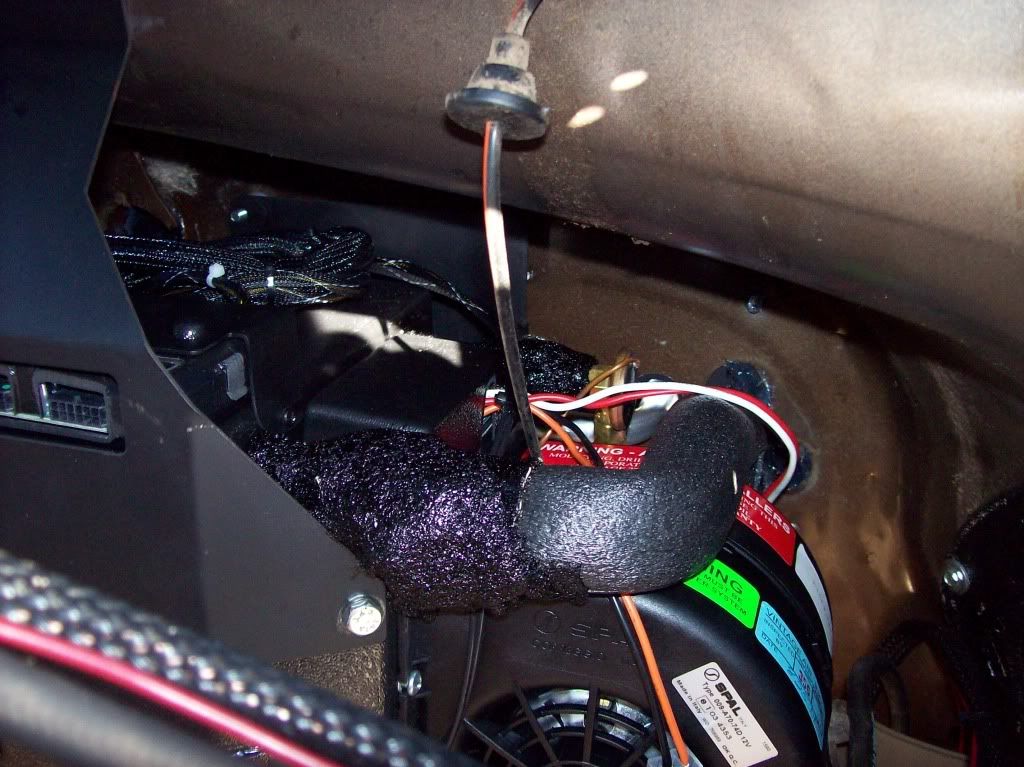 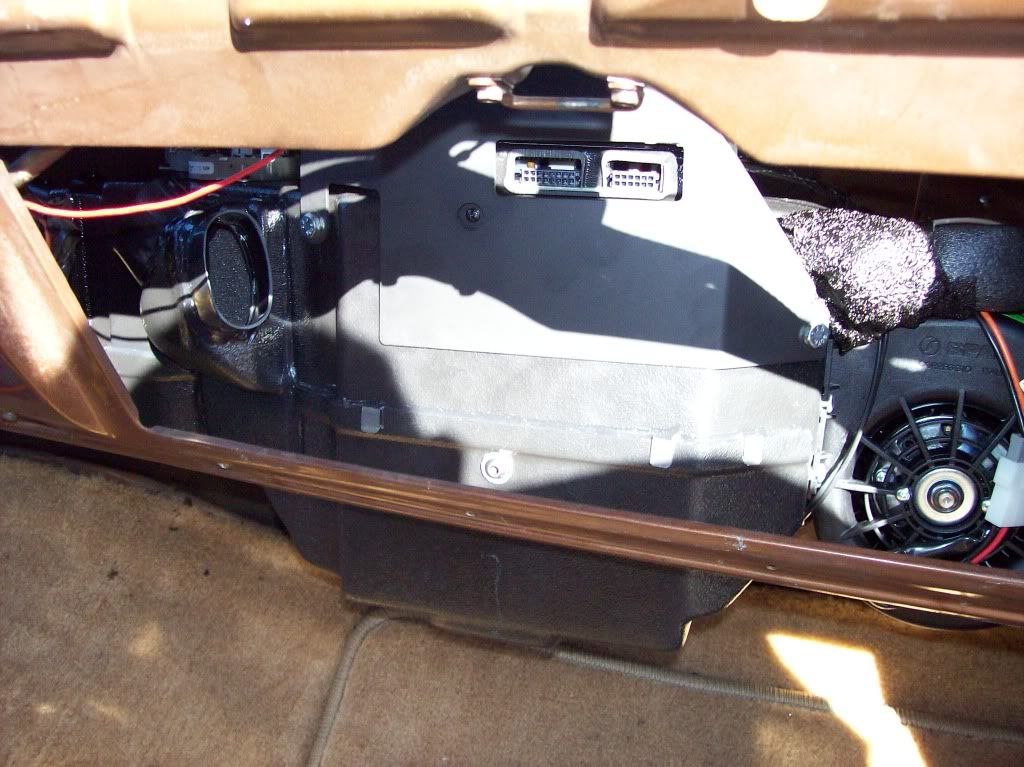 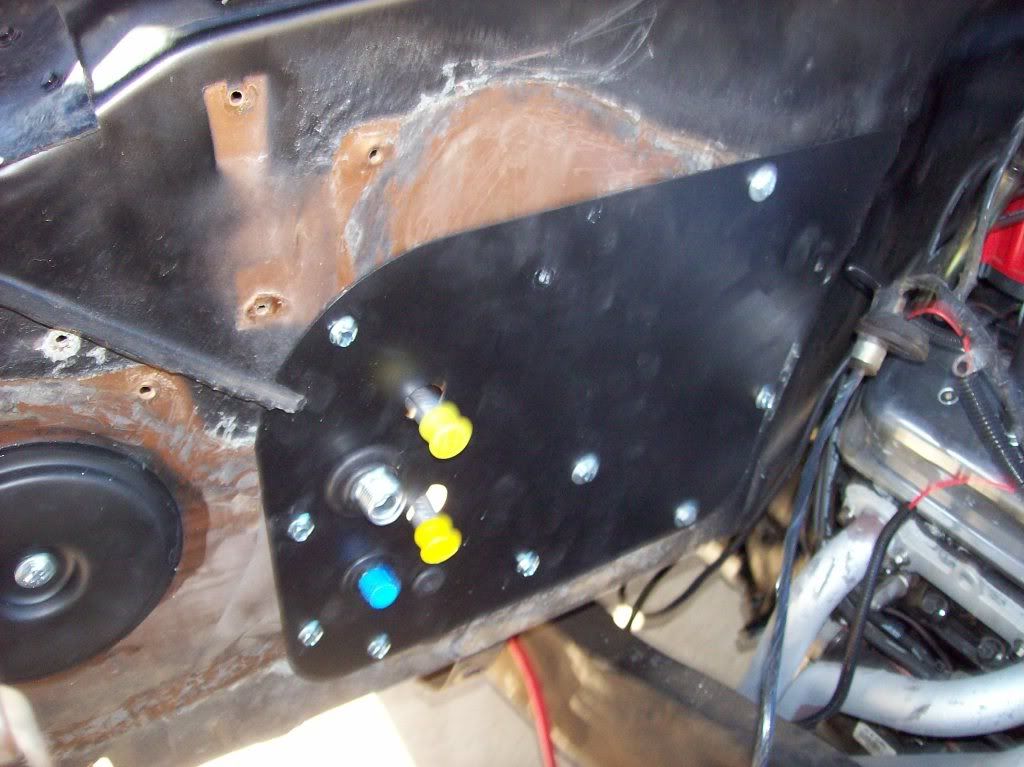 I do have one question so far if anyone can help me out. The instructions show to install the defrost vents with the #8 screws and j-nut; there was no way that I could see this working without taking a cutoff wheel to the dash. I had to modify the vents that Vintage Air sent to work with the stock mounting system, has anyone else ran into this? That is what I have done so far. Tomorrow I will pull the radiator and install the condenser, dryer and compressor. I was pretty intimidated when I started this, but it only took me 2 hours to remove the old and another 2 to install the box under the dash. I hope tomorrow goes as well. Here's a pic of the truck: 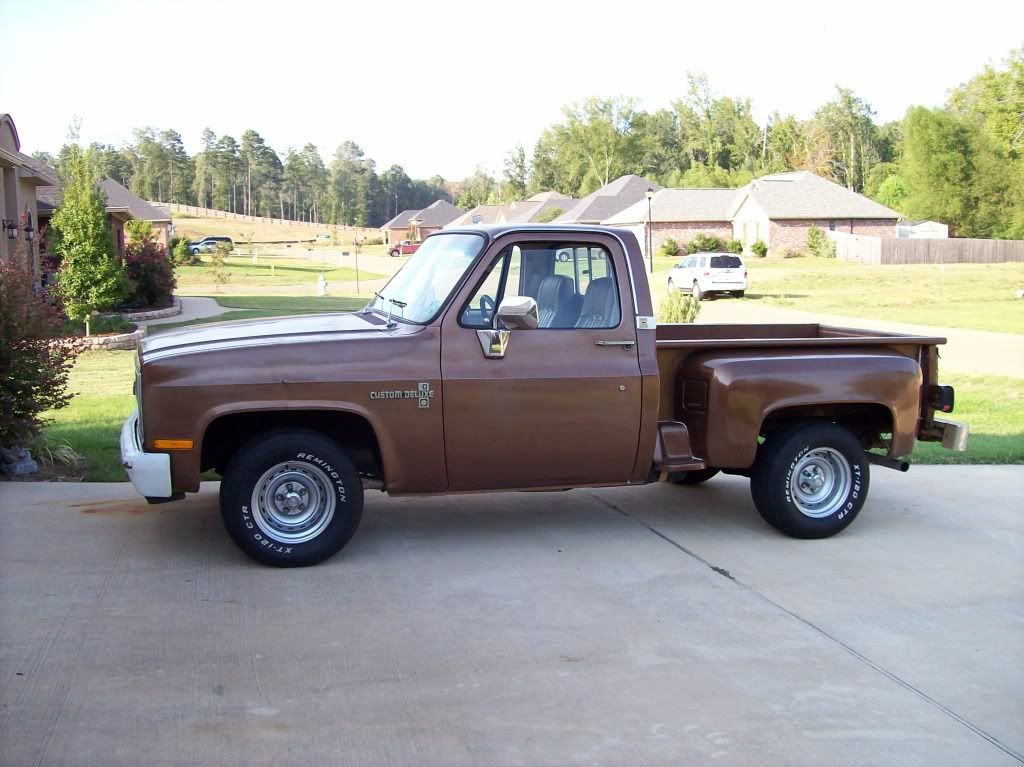 After this I can get to work lowering it 2.5/4 and installing new bumpers and grill. |

|

|
|
10-14-2011, 09:06 PM
|
#2 |
|
Registered User
Join Date: Oct 2005
Location: Jacksonville, NC
Posts: 224
|
Re: Vintage Air Install
Cool, I look forward to reading and seeing more.
__________________
stone sends... 78 GMC Stepside (http://67-72chevytrucks.com/vboard/s...d.php?t=243201) 06 Dodge Charger Daytona R/T 05 Suzuki GSX-R 1000 |
|
|
|
|
10-15-2011, 05:45 PM
|
#3 |
|
Registered User
Join Date: Aug 2010
Location: ruston, la
Posts: 97
|
Re: Vintage Air Install
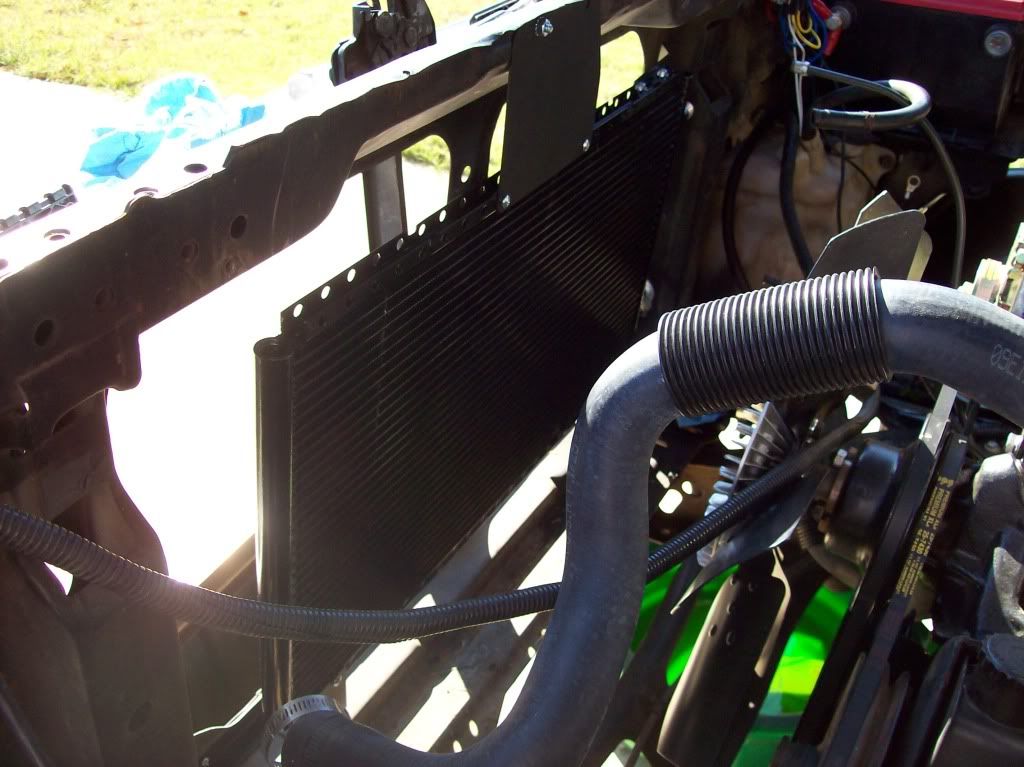
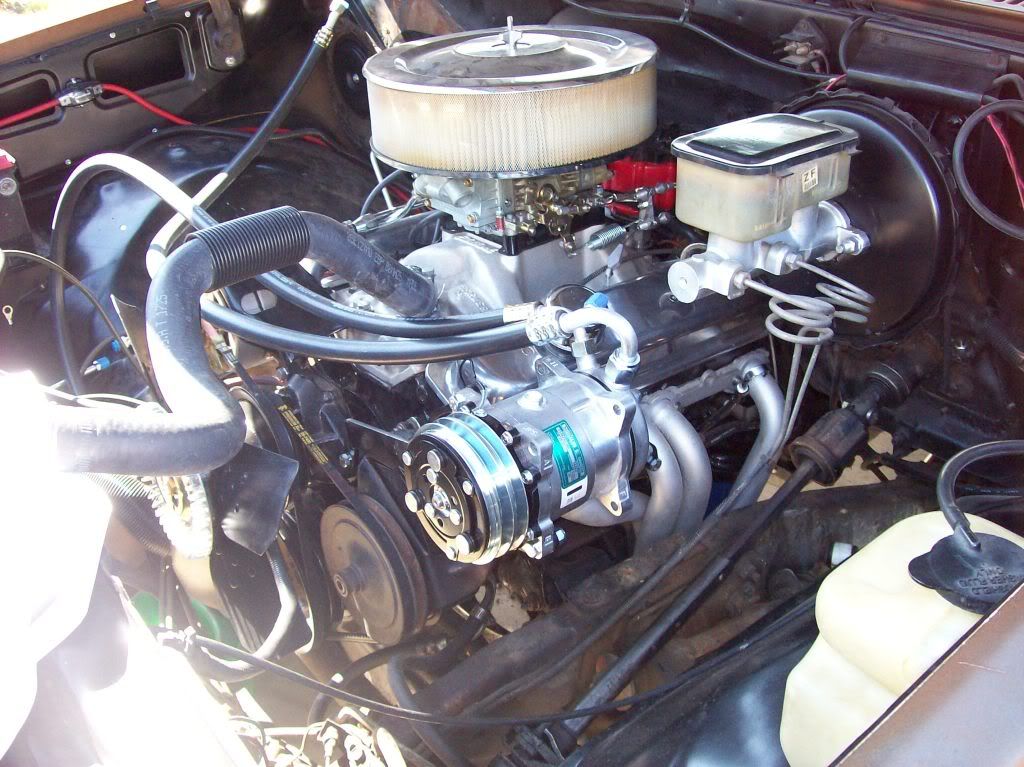
Today I installed the compressor, condenser, and I finished wiring it. Tomorrow all I have left to do is reinstall belts, fan shroud, coolant, and gauge cluster and I should be finished. Here are a few pics of today's work.
|
|
|
|
|
10-15-2011, 07:16 PM
|
#4 |
|
Registered User
Join Date: Jun 2011
Location: Baytown TX
Posts: 2,219
|
Re: Vintage Air Install
Great thread, I plan on getting V A in the spring and I am also running a small block soon to have headers. Could you post up some pics of the bracketry for the compressor.
Side note, I noticed you have what looks like factory bucket seats in your truck, did they come in that truck new or were they installed by you or PO?
__________________
John 82 Chevy Silverado 350ci/TH350 
|
|
|
|
|
10-15-2011, 08:27 PM
|
#5 |
|
Registered User
Join Date: Nov 2010
Location: Windsor Locks
Posts: 628
|
Re: Vintage Air Install
Looks like a nice setup, I started piecing together parts to put factory a/c in my truck but maybe this is a better way to go.
|
|
|
|
|
10-15-2011, 11:31 PM
|
#6 |
|
Registered User
Join Date: Nov 2009
Location: Sonora California
Posts: 860
|
Re: Vintage Air Install
I was just into a dealer add on air on my 1980 today. I was replacing the padded dash and was very disappointned to find they eliminated one of the padded dash clips to hang the unit from that location and bogus a hole in the metal for the fan motor. Such poor planning back then. I found where someone had added two resistors to slow the fan speed down and nearly burn down the truck due to a lack of fuses and too much resistance. All and all it still works well after 30 years.
Sure would like to see how your vent set up is. I'd like to replace my vents and bezel on the front of the dash but I have no examples to see. The vents and bezel were screwed to the padded dash with self tapping screws. The vents at the back of the bezel do fit nicely into the AC unit though. Take your time and fit it all carefully. I need my own advice there. Keep us posted. |
|
|
|
|
10-16-2011, 03:40 AM
|
#7 |
|
Registered User
Join Date: Jan 2011
Location: San Bruno, CA.
Posts: 348
|
Re: Vintage Air Install
Looks really nice man! Been thinking of picking up one of these kits for mine, but that's way too much money for an unemployed 17 year old, Hahaha.
Posted via Mobile Device
__________________
1975 Chevy Cheyenne w/ v8 350 and TH350 Siverado interior Fleetside bed aka "The Beast" aka "Cheyerado" |
|
|
|
|
10-16-2011, 01:10 PM
|
#8 |
|
Registered User
Join Date: Sep 2011
Location: longview, texas
Posts: 28
|
Re: Vintage Air Install
thanks for the thread, please keep posting pics etc.
thinking about doing this with mine, can't decide whether to do it myself or pay someone to do it in my 86 c10 swb can't decide whether to do a new engine first or not as well... :/ where did you order from? |
|
|
|
|
10-16-2011, 06:58 PM
|
#9 | |
|
Registered User
Join Date: Aug 2010
Location: ruston, la
Posts: 97
|
Re: Vintage Air Install
Quote:
It really wasn't that bad of an install. It probably took me a total of 13 or 14 hours total by myself. The hardest thing I ran into was the brackets for my power steering didn't look like what Vintage Air said I should have, so I had to make it work and I couldn't quite get the belt tight enough. Other than that and a few very minor things it went great and I believe that anyone with a little bit skills could do this in a weekend. |
|
|
|
|
|
03-21-2014, 11:27 PM
|
#10 | |
|
Registered User
Join Date: Mar 2012
Location: Houston, Tx
Posts: 85
|
Re: Vintage Air Install
Quote:
|
|
|
|
|
|
03-23-2014, 02:58 AM
|
#11 |
|
Registered User
Join Date: Mar 2012
Location: fullerton, ca
Posts: 26
|
Re: Vintage Air Install
I recently installed a Vintage air system in my 74 stepside. My truck was a non-air truck so the kit came with a/c vents and a dash insert. You also have to modify the glove box on the non air installations. I don't know if the non air defroster ducts are different but they just drop in from the top and the dash pad sandwiches them in place. I like the quality of the vintage air components (evaporator, condenser, compressor, and controls) but the aftermarket vents and dash insert they supplied are a joke. The black plastic and chrome reproduction dash insert would not fit into the recess in the dash and the chrome plating looked like hell. I ended up buying one of my own and I went to pick-a-part to get some factory a/c vent parts. I called Vintage Air on it and there attitude was "oh well". Other than that I like the system. It cools well and it has decent air flow at the vents on high.
|
|
|
|
|
03-23-2014, 04:32 PM
|
#12 |
|
Registered User
Join Date: Aug 2012
Location: Atlanta, GA
Posts: 124
|
Re: Vintage Air Install
My vintage air was a nightmare to install, but in the end I am happy with it. I too had a non-ac truck and ended up getting some factory pieces for the duct work.
I literally spent a month waiting on replacement parts from their kit (came with wrong ones), missing parts from their kit, having to source my own compressor brackets and then finding someone to crimp the ends on the compressor hoses....
__________________
'86 Chevy K10 SWB Custom Deluxe 4x4 '94 Chevy Corvette '07 Ford Mustang '08 Lexus LS 460 |
|
|
|
|
03-24-2014, 10:26 AM
|
#13 |
|
Registered User
Join Date: Jul 2009
Location: Maryville, TN
Posts: 132
|
Re: Vintage Air Install
I too did my VA install this past winter, but haven't tested it or gotten it charged yet (not sure where to go to get that done). Couple of things from my install that I can give advice on for anyone else taking this on:
1) When you make the holes in the firewall, pay attention to the size hole they recommend. I stupidly just made them the same size as the holes in the VA firewall plate, but the grommets are designed to fit only on the thickness of the plate. The holes you drill in the firewall have to be larger than the ones in the plate to accommodate the flanges of the grommets. 2) The compressor bracket is a bear and required a lot of fiddling. It also seems a little flimsy, but I haven't actually tested it yet, so that remains to be seen. 3) If you are wiring in electric fans (I put in some jetstreams from maradyne) you will need the optional trinary switch from VA. This also complicates the wiring a bit: it would be awesome if VA would offer a package that came with fans as I am sure a lot of other folks make both those upgrades at the same time. I feel the same as you guys do: it wasn't too bad of an install, but there were some parts that would have been greatly simplified by slightly better documentation. Don't get me wrong: the documentation they have is WAY better than what most companies provide. But just a couple of improvements would make a world of difference. |
|
|
|
|
03-24-2014, 11:43 AM
|
#14 | |
|
Registered User
Join Date: Apr 2009
Location: hazard, ky
Posts: 1,674
|
Re: Vintage Air Install
Quote:
__________________
2004 2500 hd dmax cc 4x4 2008 saturn aura xr 1966 buick gran sport 1984 k20 |
|
|
|
|
|
03-27-2014, 03:17 PM
|
#15 | |
|
Registered User
Join Date: Aug 2010
Location: ruston, la
Posts: 97
|
Re: Vintage Air Install
Quote:
|
|
|
|
|
|
03-27-2014, 04:29 PM
|
#16 |
|
Registered User
Join Date: Feb 2009
Location: Adkins Texas
Posts: 157
|
Re: Vintage Air Install
Nice job and great photos. Did you take any photos of the defrost duct that did not work correctly? The compressor brackets do include spacers for headers or manifolds, different brackets are used depending on the brand of headers and how the first tube is ran.
As for the aftermarket dash insert, it is not the best but the only one they have found on the market and are always looking for a better replacement so if you know of one let them know.
__________________
Never a failure, Always a lesson! 1968 Chevy SWB Fleetside ECE 4/6 327/350 1987 Chevy V20 Scottsdale 4X4 350/400 4.10 1987 Chevy Custom Deluxe SWB 305/7004R4 1991 Suburban Silverado V1500 4X4 350/700R4 2015 Chevy Crew Cab SWB (Daily Driver) 5.3 |
|
|
|
|
03-27-2014, 05:01 PM
|
#17 | |
|
Registered User
Join Date: Mar 2012
Location: Houston, Tx
Posts: 85
|
Re: Vintage Air Install
Quote:
|
|
|
|
|
|
03-27-2014, 05:11 PM
|
#18 |
|
Registered User
Join Date: Feb 2009
Location: Adkins Texas
Posts: 157
|
Re: Vintage Air Install
The side mount brackets use the first and third mounting holes for the header. If the first tube goes straight back and blocks access to the third bolt you will need to modify the bracket or use a top mount bracket. The top mount brackets mount off of the water pump and intake and sits up high, looks goofy on these trucks in my opinion but it does work.
__________________
Never a failure, Always a lesson! 1968 Chevy SWB Fleetside ECE 4/6 327/350 1987 Chevy V20 Scottsdale 4X4 350/400 4.10 1987 Chevy Custom Deluxe SWB 305/7004R4 1991 Suburban Silverado V1500 4X4 350/700R4 2015 Chevy Crew Cab SWB (Daily Driver) 5.3 |
|
|
|
|
03-27-2014, 06:58 PM
|
#19 | |
|
Registered User
Join Date: Mar 2012
Location: Houston, Tx
Posts: 85
|
Re: Vintage Air Install
Quote:
|
|
|
|
|
|
03-28-2014, 10:07 AM
|
#20 | |
|
Registered User
Join Date: Aug 2010
Location: ruston, la
Posts: 97
|
Re: Vintage Air Install
Quote:
|
|
|
|
|
|
03-28-2014, 01:46 PM
|
#21 |
|
Registered User
Join Date: Aug 2012
Location: Atlanta, GA
Posts: 124
|
Re: Vintage Air Install
The compressor brackets Vintage Air has will not work if you have the truck headers that don't hug the engine (Hedman in my case).
Vintage Air actually referred me to Alan Grove components who I was able to a bracket I could work with. http://www.alangrovecomponents.com/S..._Long_Pump.htm
__________________
'86 Chevy K10 SWB Custom Deluxe 4x4 '94 Chevy Corvette '07 Ford Mustang '08 Lexus LS 460 |
|
|
|
|
03-28-2014, 02:32 PM
|
#22 |
|
Registered User
Join Date: Aug 2010
Location: ruston, la
Posts: 97
|
Re: Vintage Air Install
I had long tube truck headers from Summit Racing, but my kit came with an Alan Grove bracket, part 119L. It wasn't the prettiest bracket, but did its job.
|
|
|
|
|
03-28-2014, 10:11 PM
|
#23 |
|
Registered User
Join Date: Aug 2012
Location: Atlanta, GA
Posts: 124
|
Re: Vintage Air Install
I ended up having to use the 119L bracket that only attached to the front of the engine. You do have to use the bracket for the PS pump to lower it slightly.
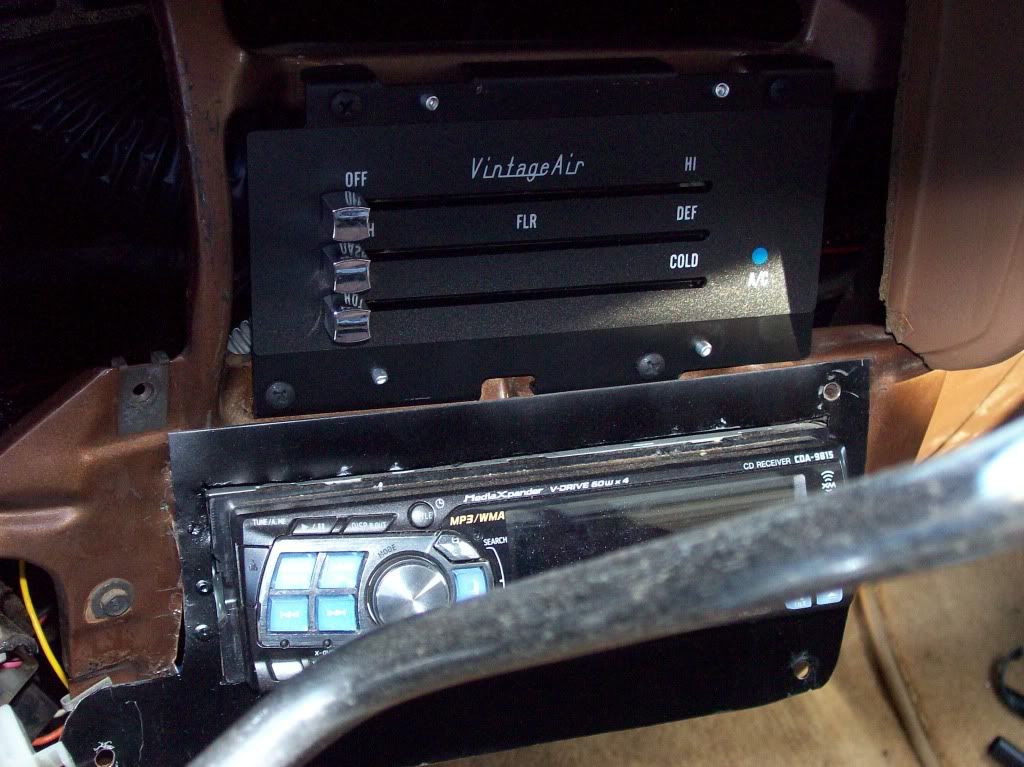
 This shows the Vintage air add on vent on the bottom left and the factory vent on the top right on the drivers side. The top right vent for Vintage Air looked too "add-on" for me.  For the passenger side the Vintage Air kit only comes with the black dash panel so I ended up taking the chrome vents out of it and they fit directly in the chrome panel LMC has.  And the firewall side on the engine compartment. 
__________________
'86 Chevy K10 SWB Custom Deluxe 4x4 '94 Chevy Corvette '07 Ford Mustang '08 Lexus LS 460 |
|
|
|
 |
| Bookmarks |
|
|


 Linear Mode

