The 1947 - Present Chevrolet & GMC Truck Message Board Network
LSx Swaps>Rubberbandit's 4L80E Build Thread.
clinebarger 09:54 PM 09-29-2016
Thought I would share some stuff on Rubberbandit's (Chad) 4L80E build, Most people never get to see what actually goes into building their transmission. This is going behind a stock LS3 but will handle A LOT more when I'm done!
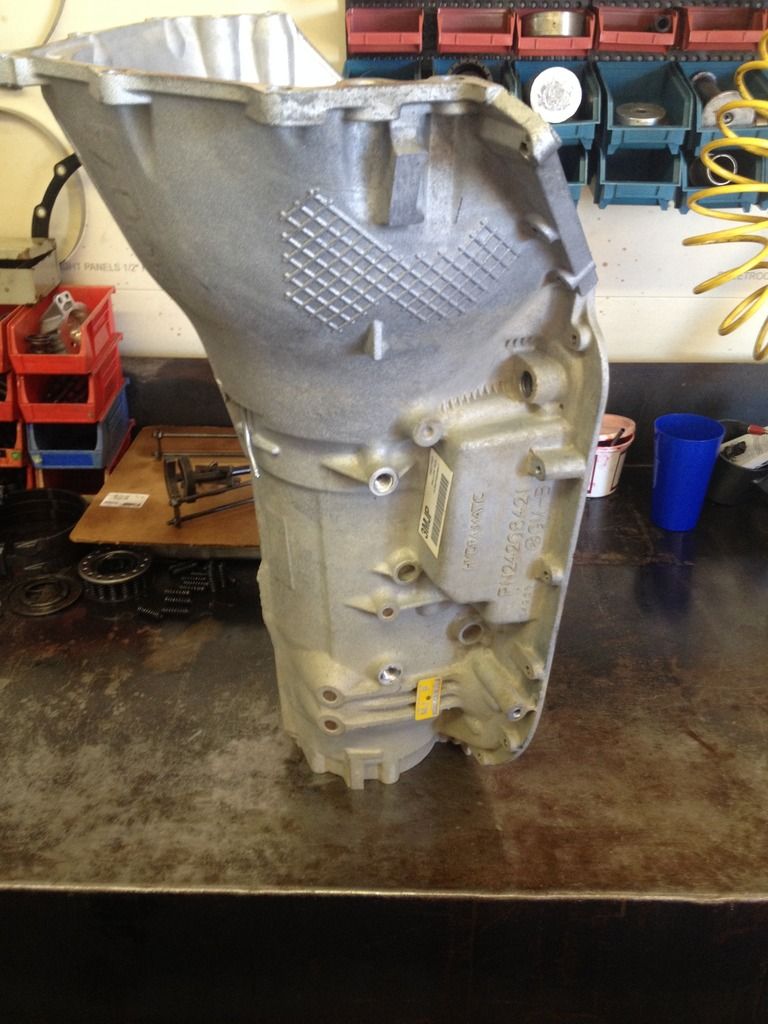
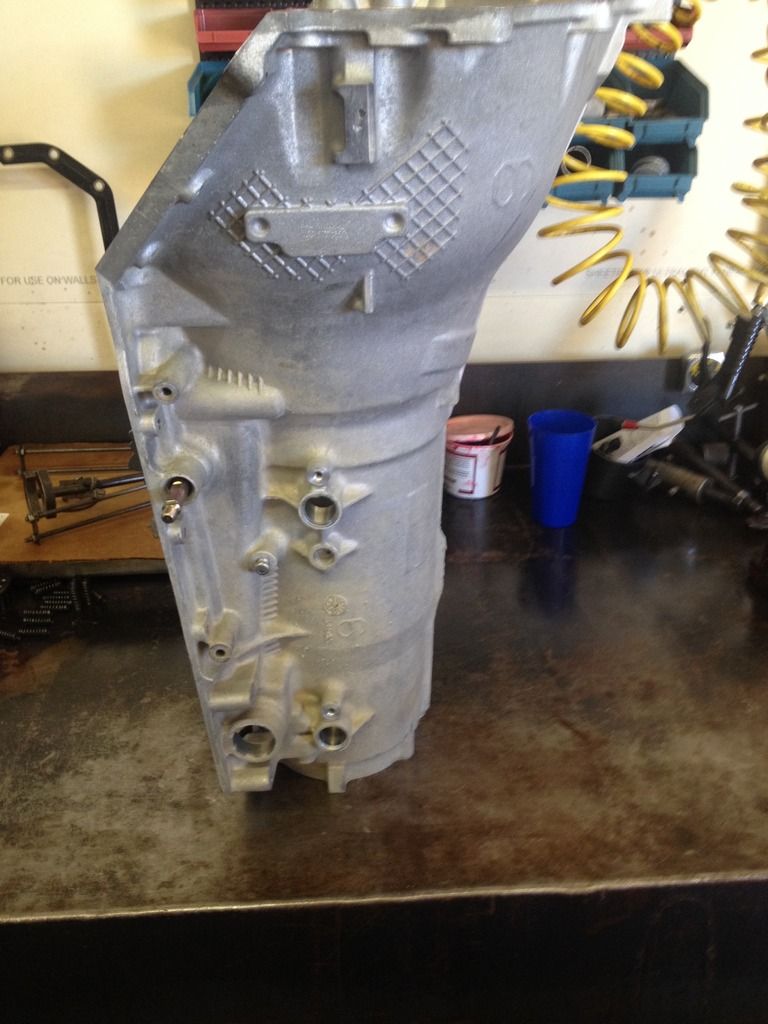
It's a 2003 4L80E out of a Express Van, REALLY nice core! It could have been put in just like it is & easily handle a LS3.....That's how good of shape it was in!
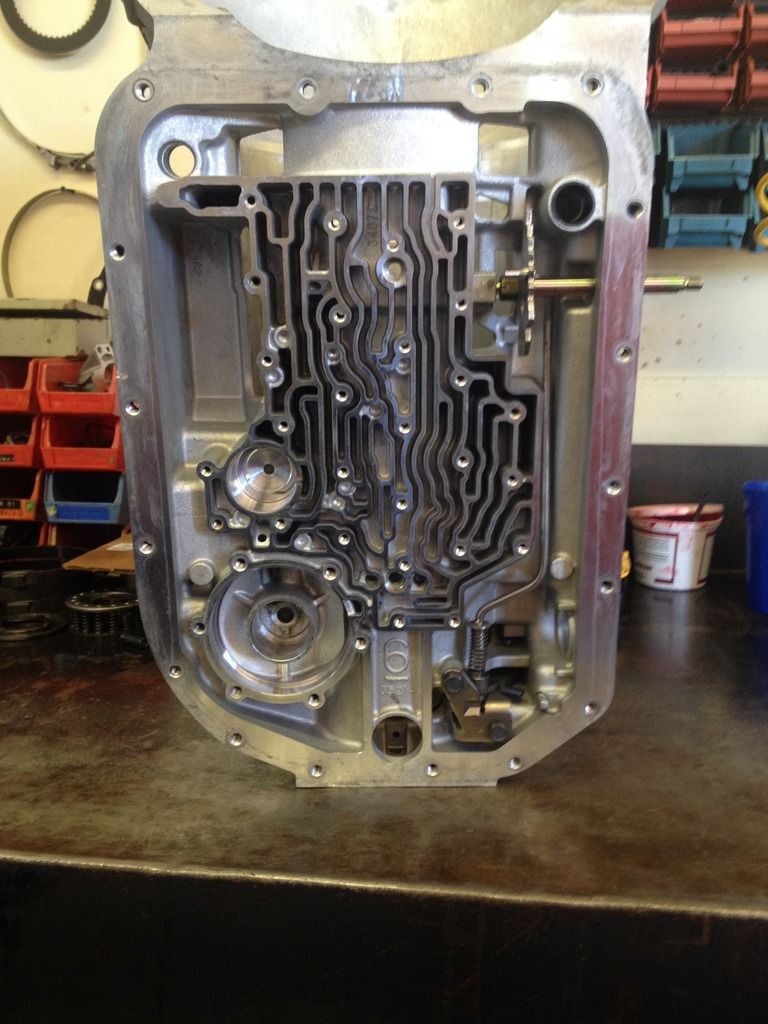
Got the Case cleaned up, Ran it through the Hot Water Vat twice, A little Iron staining on the lower half of the Case, I can paint this if you want Chad.....But I would leave it be, Your call??
It's a 2003 4L80E out of a Express Van, REALLY nice core! It could have been put in just like it is & easily handle a LS3.....That's how good of shape it was in!
Got the Case cleaned up, Ran it through the Hot Water Vat twice, A little Iron staining on the lower half of the Case, I can paint this if you want Chad.....But I would leave it be, Your call??


ls1nova71 10:00 PM 09-29-2016
This should be interesting! I'll be watching, but don't think I'll ever get up the nerve to try it myself! 
clinebarger 10:14 PM 09-29-2016
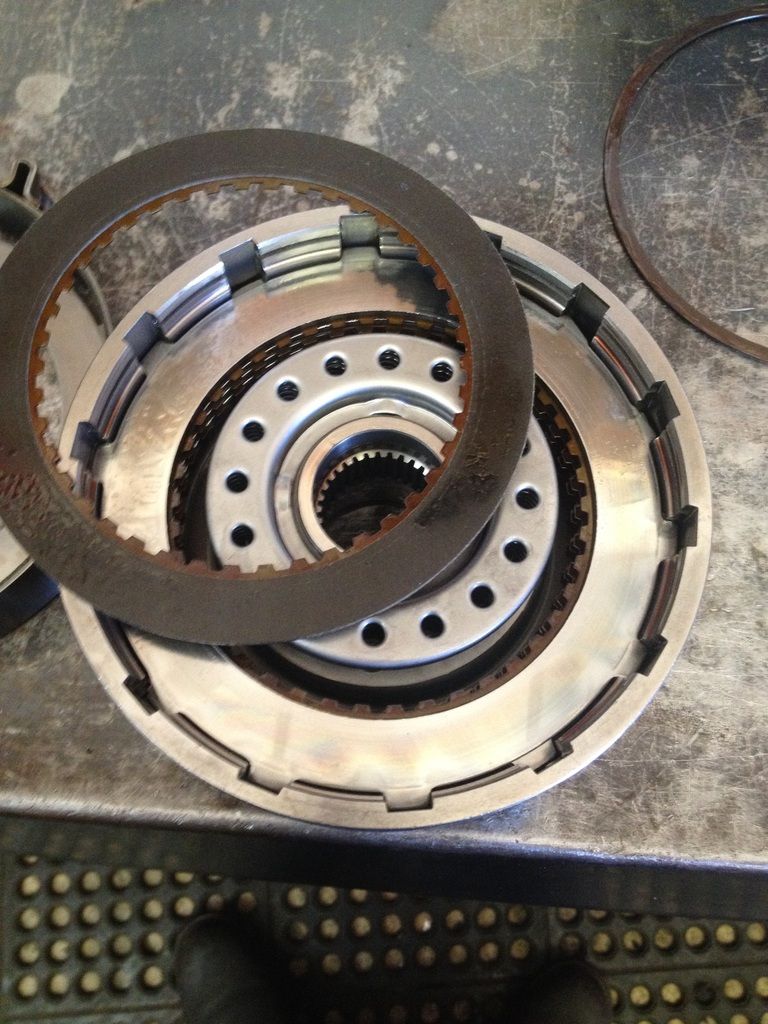
All Clutch packs looked PERFECT & Clearances were within spec.
Forward Clutch....
The Frictions are worn down to the numbers
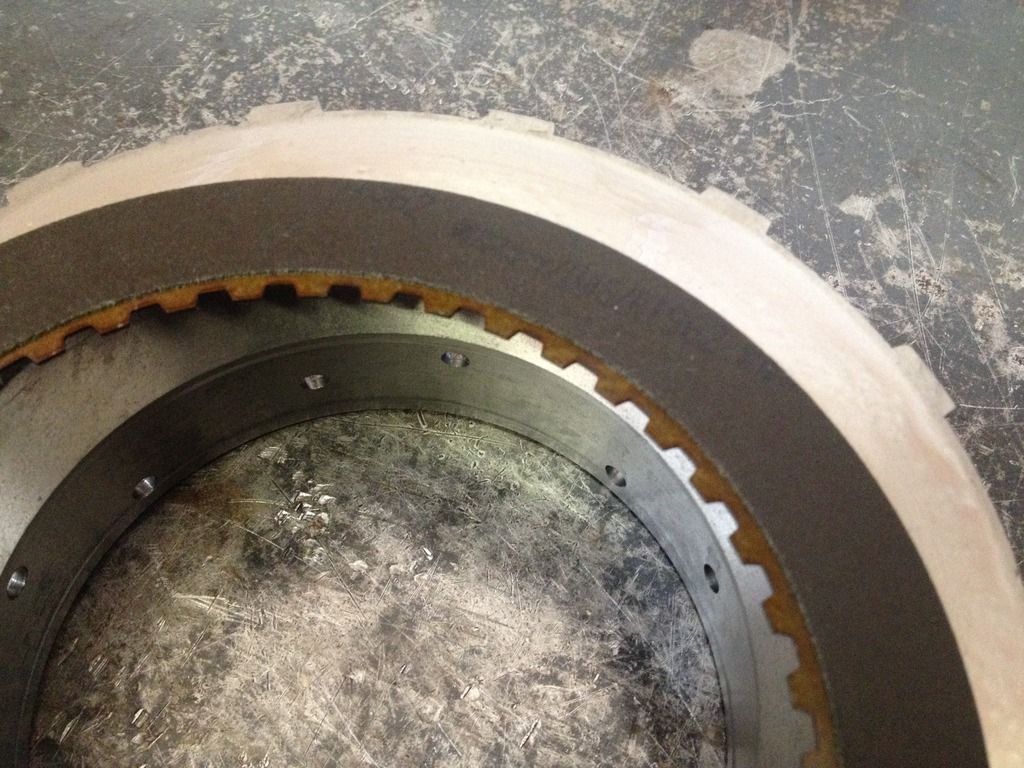
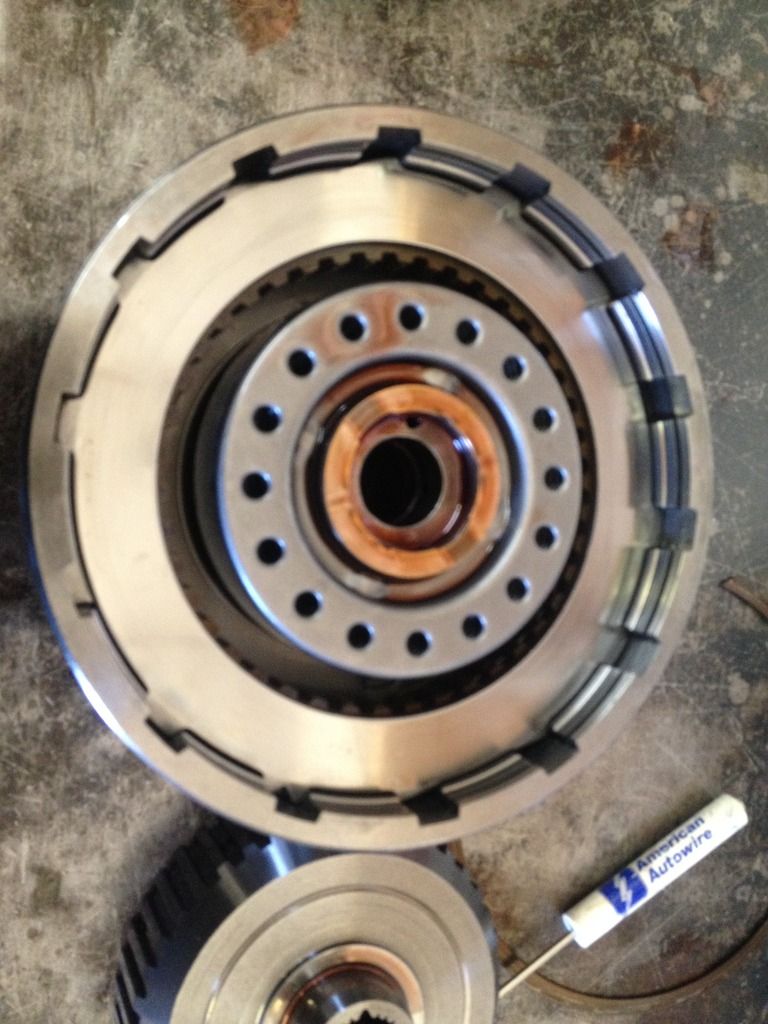
Directs.
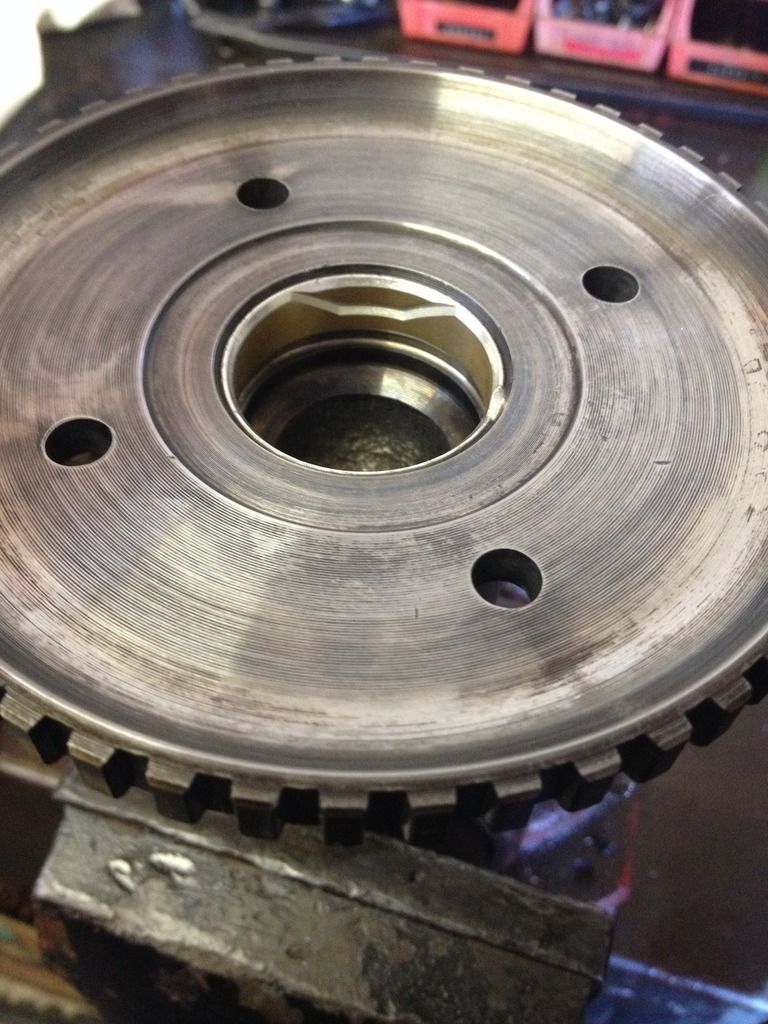
Direct Drum where the Intermediate Band rides, This trans has never been in Manual 2nd!
Forward Clutch....

The Frictions are worn down to the numbers

Directs.

Direct Drum where the Intermediate Band rides, This trans has never been in Manual 2nd!

clinebarger 10:54 PM 09-29-2016
The first modification is getting rid of the OE Steel Pistons in the Forward & Direct Drums & replace them with Aluminum Pistons out of a TH400.
Stock 4L80E pistons have a VERY poor "Work Surface Area" not even .030" wide all the way around (Red Arrow).
TH400 Aluminum Pistons have a HUGE reinforced Work Surface (between the red lines)
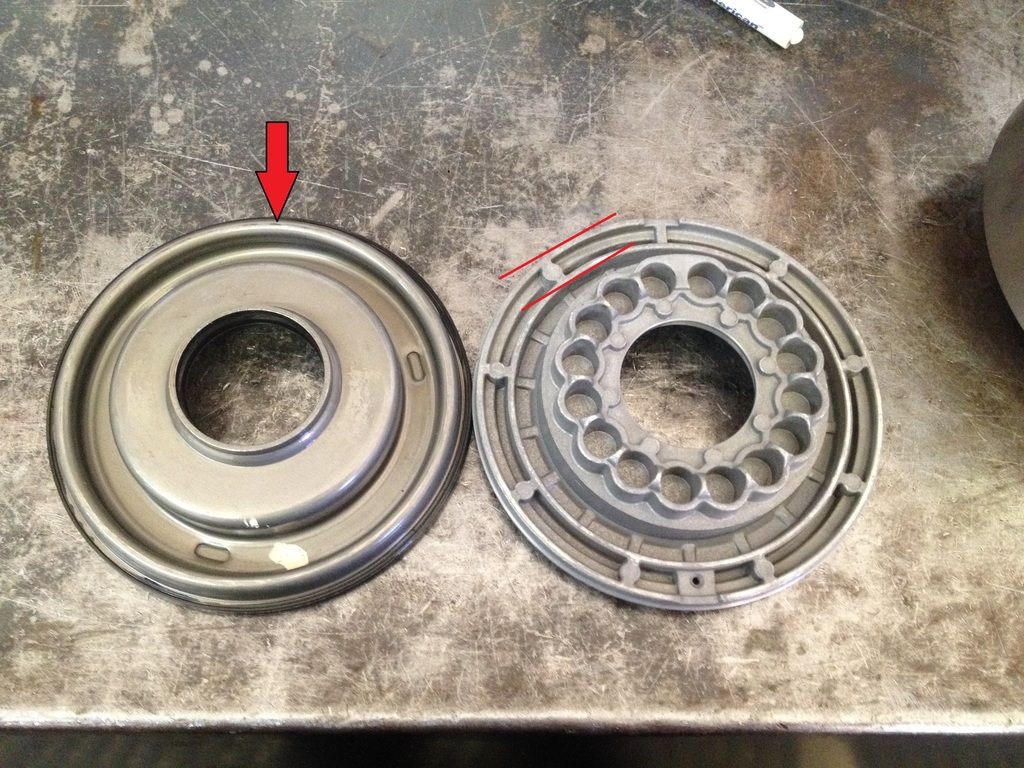
Stock 4L80E pistons have a VERY poor "Work Surface Area" not even .030" wide all the way around (Red Arrow).
TH400 Aluminum Pistons have a HUGE reinforced Work Surface (between the red lines)

clinebarger 11:55 PM 09-29-2016
When using stock steel 4L80E pistons, There is no way too truly blueprint clutch clearances , You have to machine stuff to get EXACT clearance & TH400 Pistons make it all that much easier, As a bonus.....The Work Surface gets cleaned & leveled.
Took .040" off the Direct piston too fit 6 .080" Frictions & 6 .077" Steels at .057" clearance.
Took .120" off the Forward Piston too fit 5 .080" frictions & 5 .077" Steels at .045" clearance.
Direct piston...
Forward piston...
Took .040" off the Direct piston too fit 6 .080" Frictions & 6 .077" Steels at .057" clearance.
Took .120" off the Forward Piston too fit 5 .080" frictions & 5 .077" Steels at .045" clearance.
Direct piston...

Forward piston...

clinebarger 12:25 AM 09-30-2016
Trans-Go High Rate Direct Return Springs installed along with a TH400 Spring Retainer.

clinebarger 09:39 PM 09-30-2016
Forward Drum with TH400 Piston & Spring Retainer.
I Omit the Wave plate in both drums, If it breaks (And they do!) the "Lugs" will slip under the ledge it the drum & prevent the piston from applying or only apply one side leading too clutch burn up!! This will make forward engagement a little more firm but nothing drastic if pressures are right. The arrow is highlighting the Lug & Ledge, A Flat .077" Steel CANNOT get under the ledge!
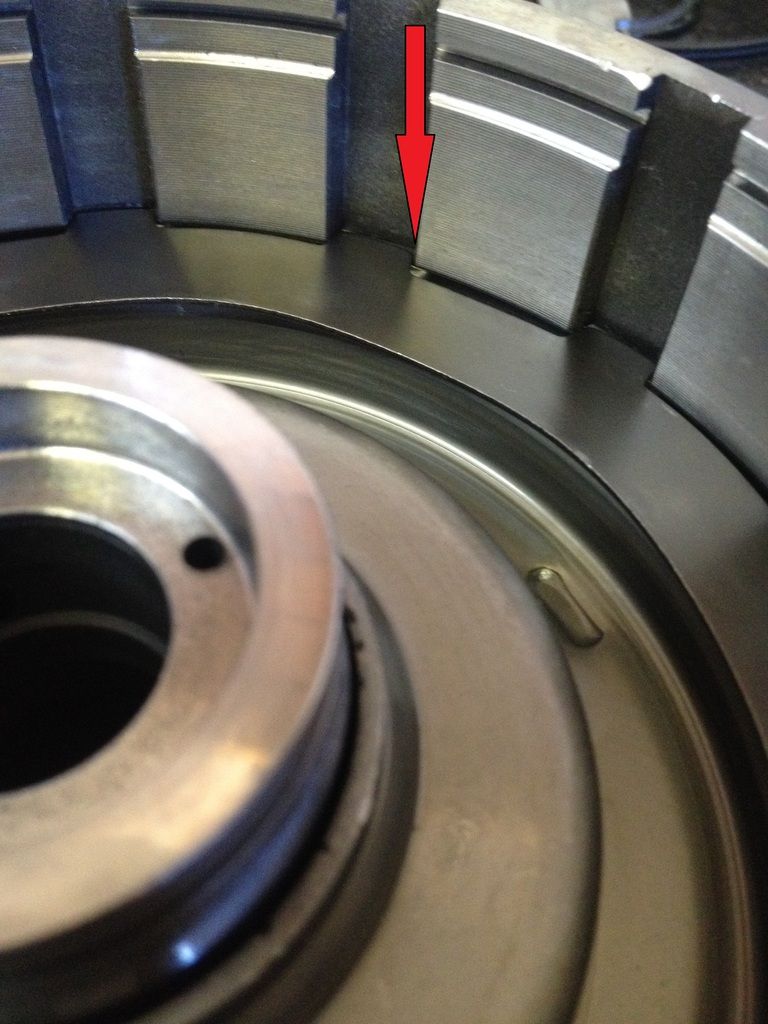
I Omit the Wave plate in both drums, If it breaks (And they do!) the "Lugs" will slip under the ledge it the drum & prevent the piston from applying or only apply one side leading too clutch burn up!! This will make forward engagement a little more firm but nothing drastic if pressures are right. The arrow is highlighting the Lug & Ledge, A Flat .077" Steel CANNOT get under the ledge!


clinebarger 09:51 PM 09-30-2016
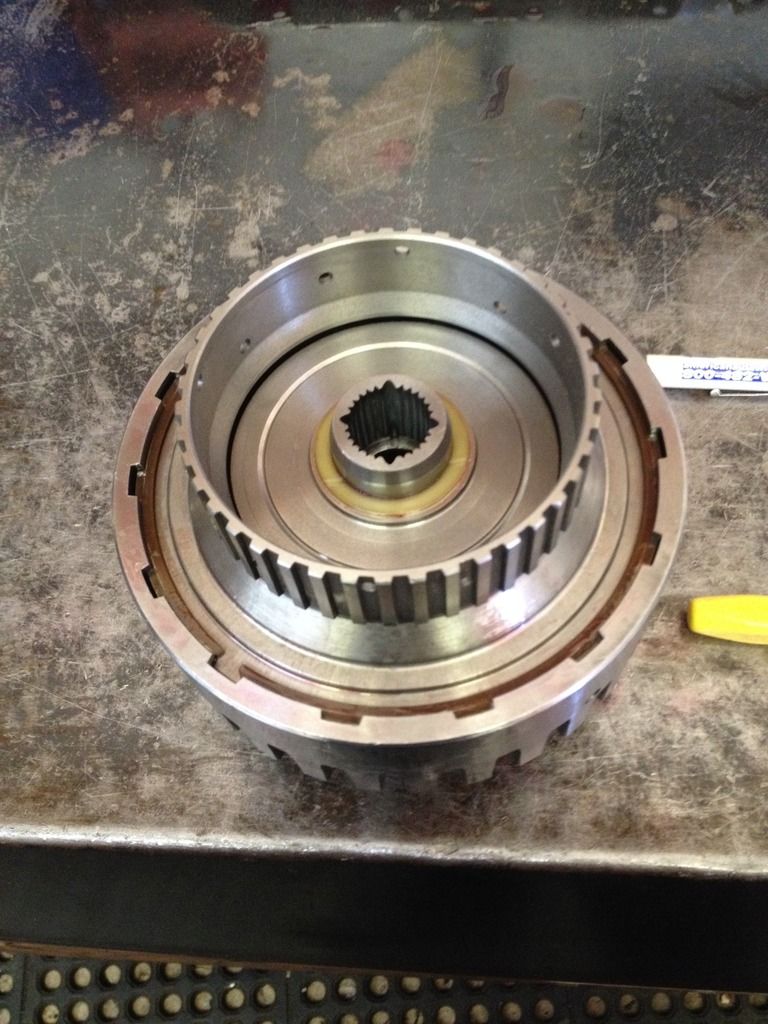
Forward & Direct drums stacked with new buffed Steels & new Borg Warner Frictions...


Dustytrix 09:56 PM 09-30-2016
Thanks for sharing info and pics.
clinebarger 10:00 PM 09-30-2016
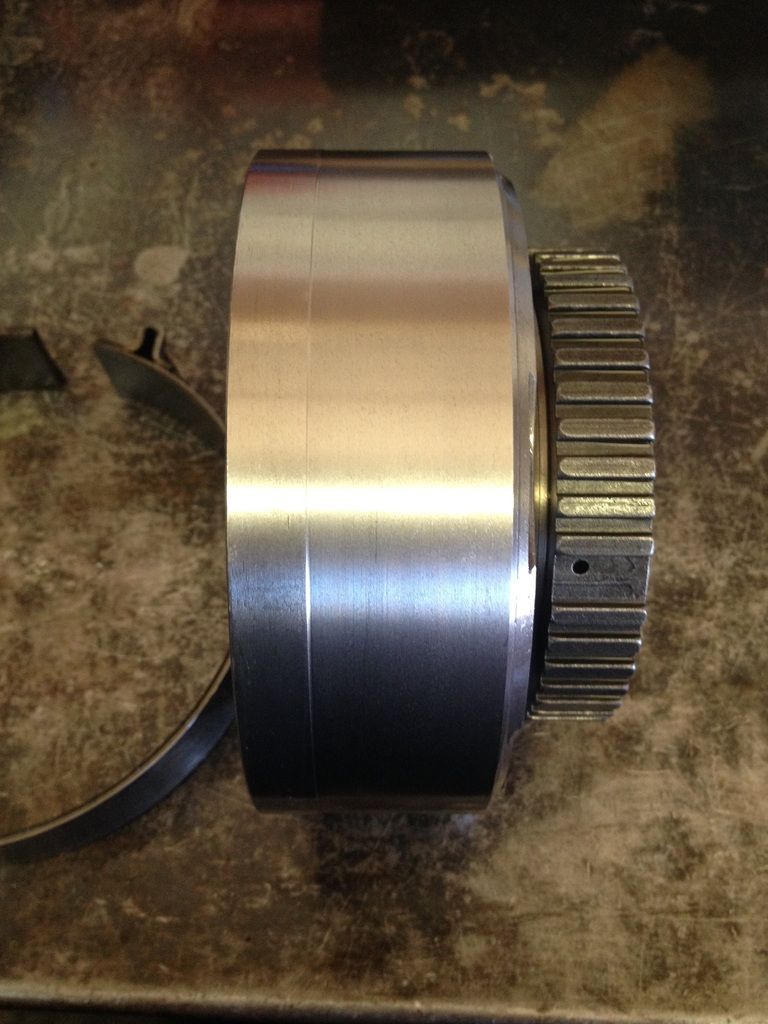
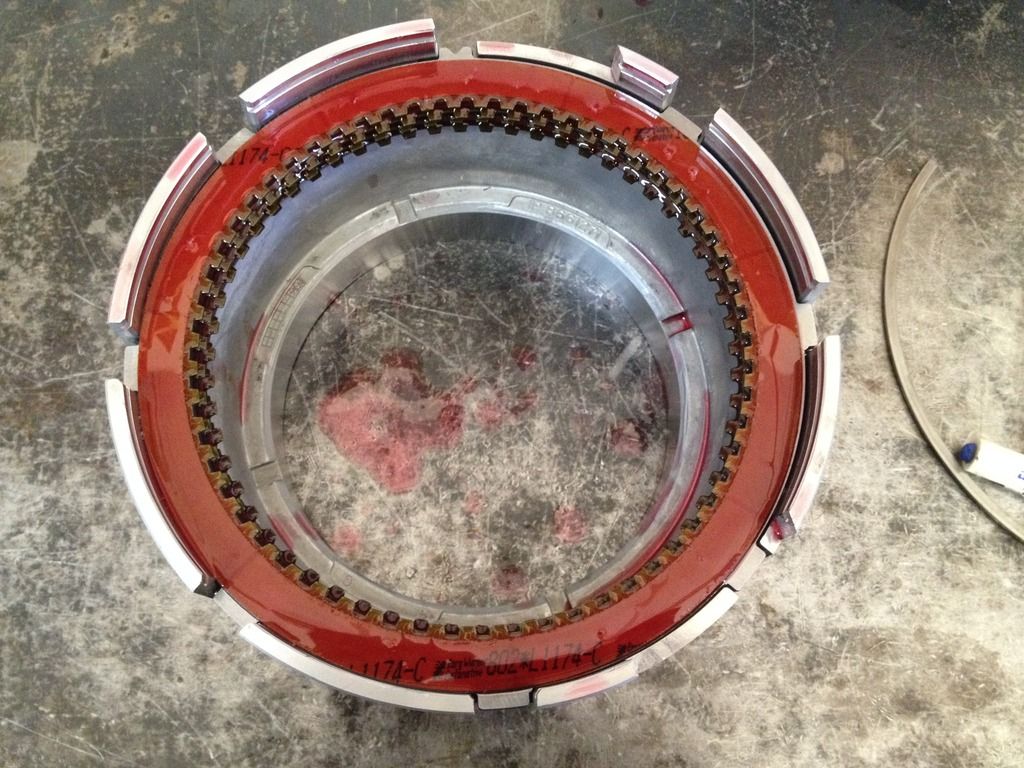
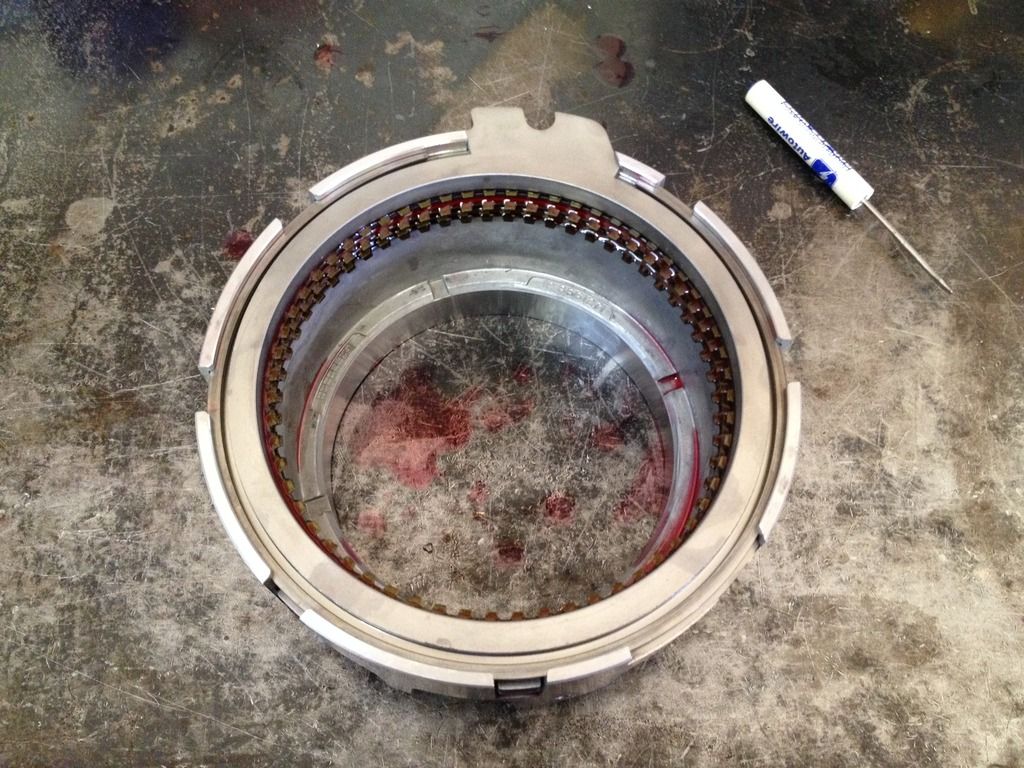
Overdrive Clutch Housing, Nothing special here, Just buffed steels & new Frictions, Note the diameter of the Clutch......It's massive!


clinebarger 10:57 PM 09-30-2016
Center Support mods.....
Machined off the Sealing Ring Lands between the 3rd & Reverse Circuits (Part of the Dual Fed Direct Clutch mod) Most builders just omit the Sealing Ring which is OK, But this helps with 3rd/Direct Clutch release times during Forced & Commanded Detent/Downshift.
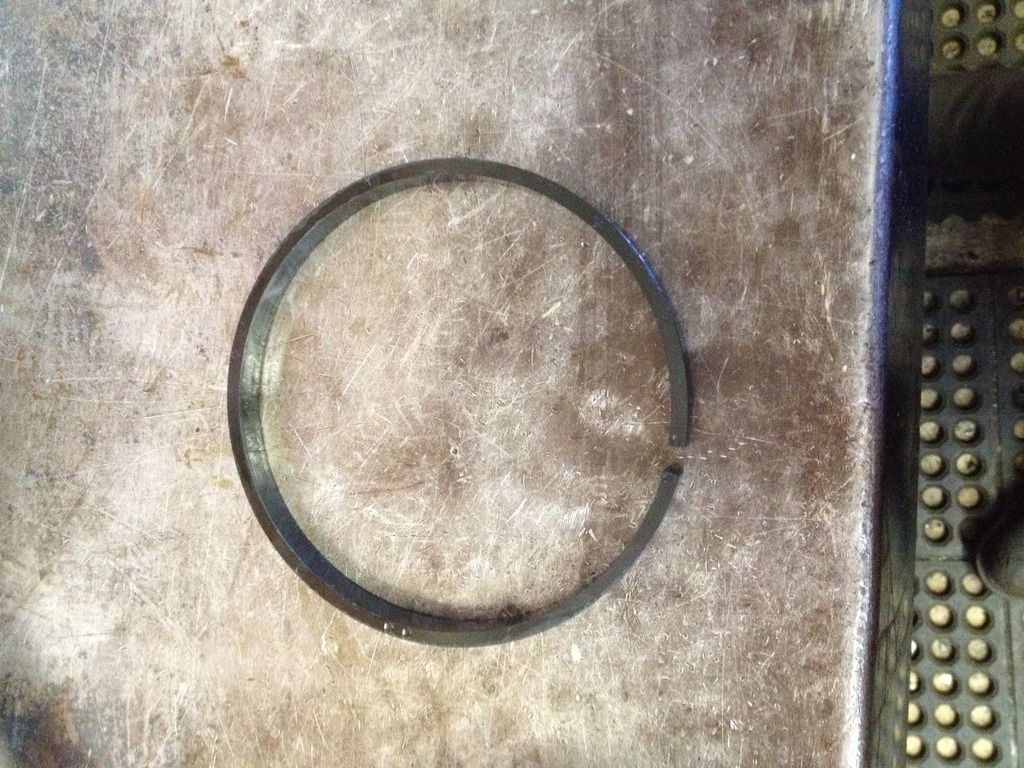
Replaced the Plastic "Step Cut" sealing rings with solid Teflon like found on earlier 4L80E's. They seal better, But it takes special tools to install them correctly.
Before & After....
Machined off the Sealing Ring Lands between the 3rd & Reverse Circuits (Part of the Dual Fed Direct Clutch mod) Most builders just omit the Sealing Ring which is OK, But this helps with 3rd/Direct Clutch release times during Forced & Commanded Detent/Downshift.
Replaced the Plastic "Step Cut" sealing rings with solid Teflon like found on earlier 4L80E's. They seal better, But it takes special tools to install them correctly.
Before & After....


mongocanfly 11:13 PM 09-30-2016
Cline ..you are da man when it comes to da trans..keep it up..this is interesting..
rubberbandit 01:35 AM 10-01-2016
Originally Posted by mongocanfly:
Cline ..you are da man when it comes to da trans..keep it up..this is interesting..
I definitely agree. Not many people can say they have a photo trail that documents their transmission build. Very cool!Cline ..you are da man when it comes to da trans..keep it up..this is interesting..
Custom 68 08:12 AM 10-01-2016
So much for buying and chucking parts at this let's turn them on our lathe. Very impressive nice job.
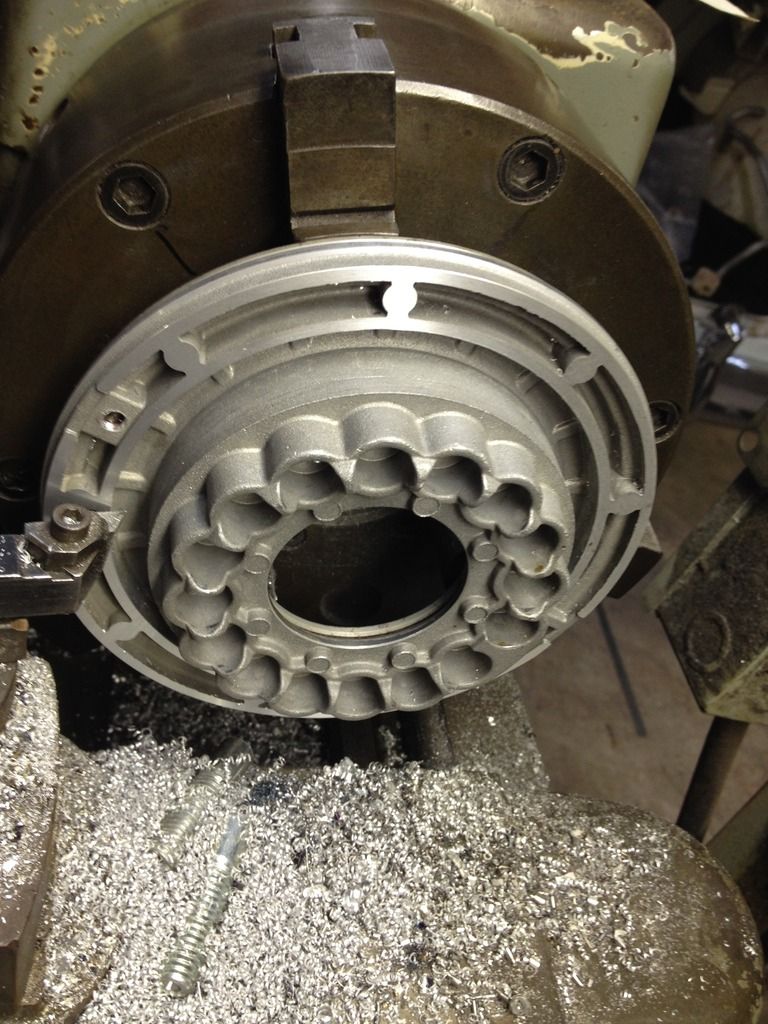
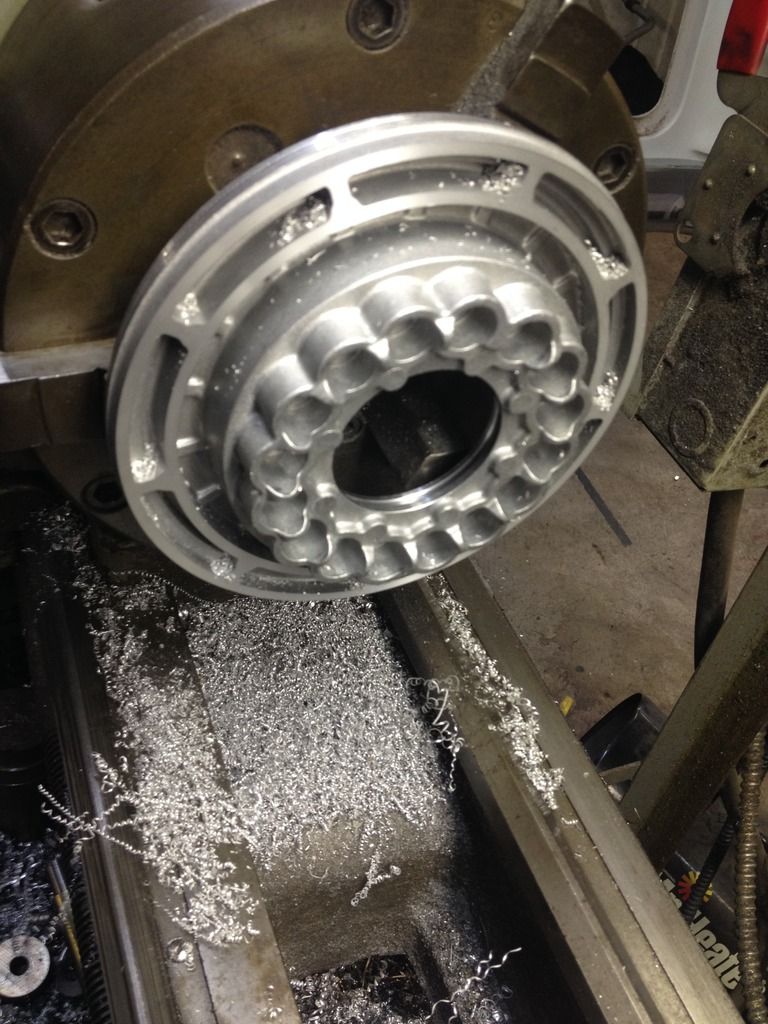
clinebarger 08:54 PM 10-01-2016
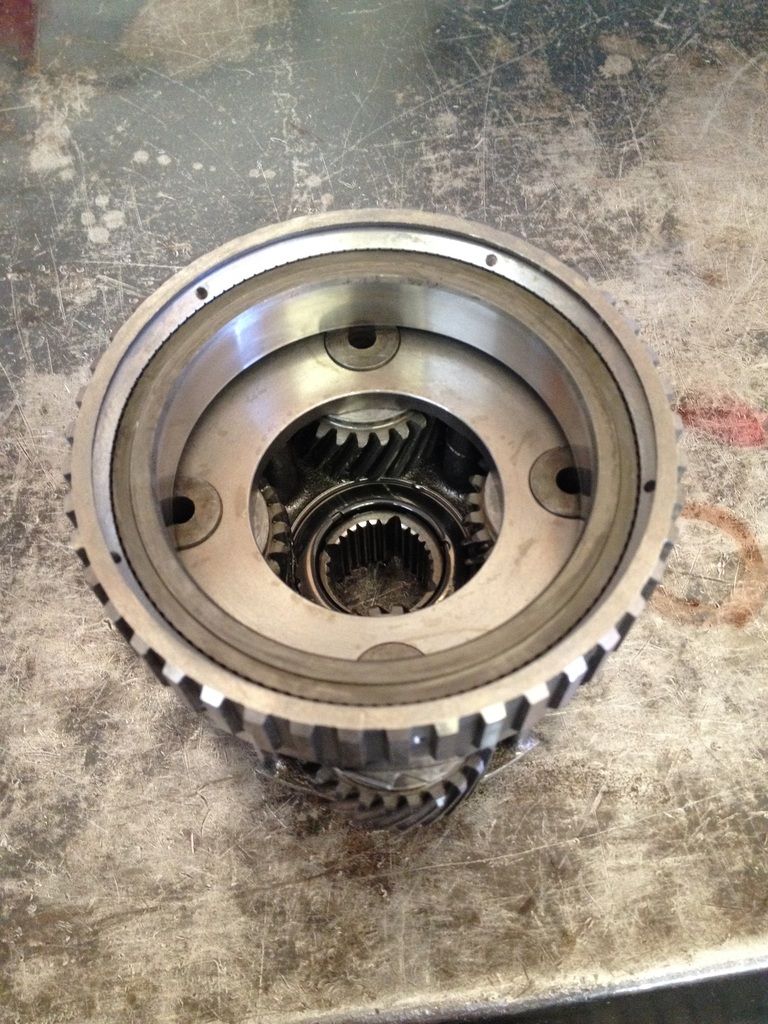
Build up of the Reaction & Output carriers, Everything was in perfect shape.
Replaced all the bushings with Clevite pieces & a new Low-Reverse Roller Clutch, The only mod too this area is a TH400 Silencer Ring which GM did away with in 1995 for cost cutting reasons, This is not only for noise reduction......It also acts as a Rear Support Thrust Washer for the Reaction Carrier.
First was the Bushing in the Output Shaft, This is one of those out of sight bushings that normally NEVER gets replaced though it see's a ton of load, Has a Lube Groove the original Federal Mogul Bushing didn't have.
Reaction Carrier Bushing....
Sun Gear Shaft Bushings(2)....
TH400 Silencer Ring....
New Center Support Bushing....
Geartrain assembly ready too install....
Replaced all the bushings with Clevite pieces & a new Low-Reverse Roller Clutch, The only mod too this area is a TH400 Silencer Ring which GM did away with in 1995 for cost cutting reasons, This is not only for noise reduction......It also acts as a Rear Support Thrust Washer for the Reaction Carrier.
First was the Bushing in the Output Shaft, This is one of those out of sight bushings that normally NEVER gets replaced though it see's a ton of load, Has a Lube Groove the original Federal Mogul Bushing didn't have.

Reaction Carrier Bushing....

Sun Gear Shaft Bushings(2)....

TH400 Silencer Ring....

New Center Support Bushing....

Geartrain assembly ready too install....

clinebarger 09:26 PM 10-01-2016
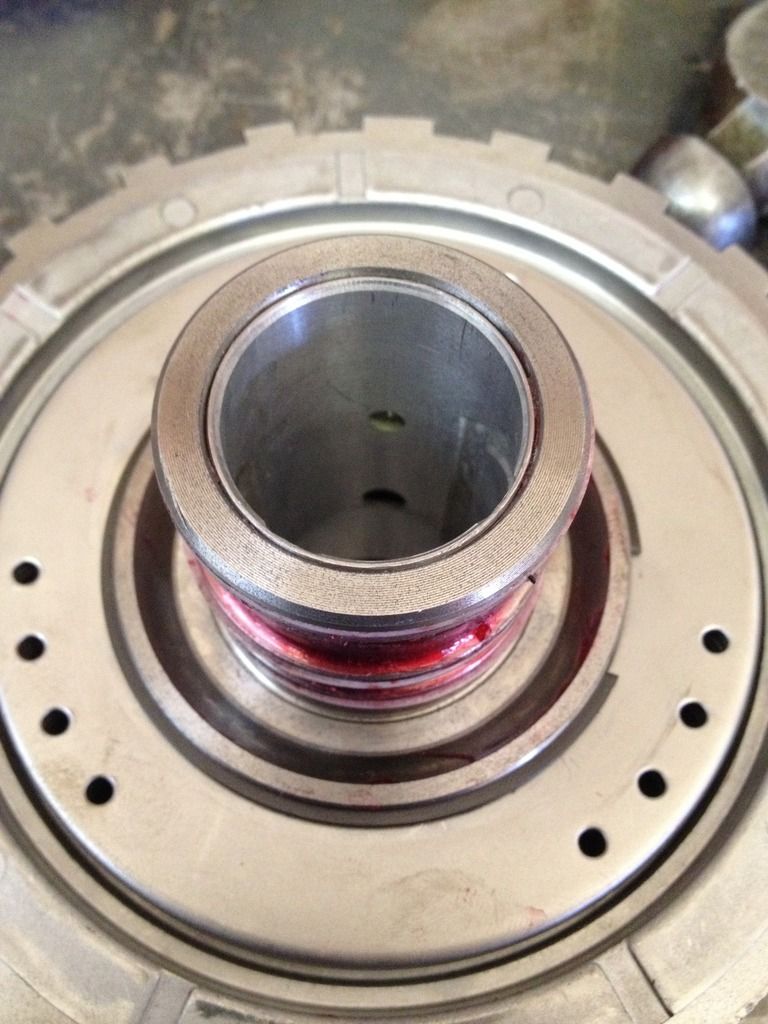
1997 & up 4L80E's have a smaller/weaker Overdrive Roller Clutch, Why GM did this is a mystery. I buy ALL the early 4L80E cores I can....Even European versions & harvest the OD Carrier, Roller Clutch, & Overrun Housing out of them.
This particular piece is from a 1996 4L80E from behind a 6.0L V12 Jaguar that had under 40,000 miles. All I did was replace the Bushing & the Overrun Frictions.
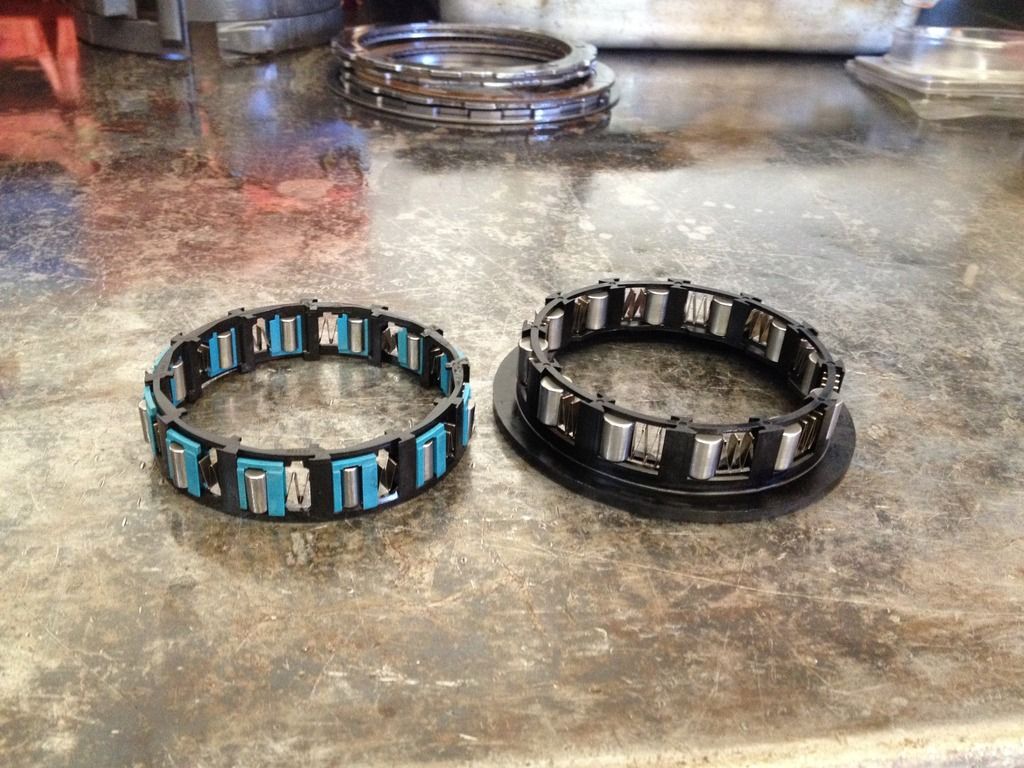
This pic highlights the difference between the OD Roller Clutch that was in this unit (Left) & the larger/more robust Roller Clutch found in the Jaguar OD assembly on the right.
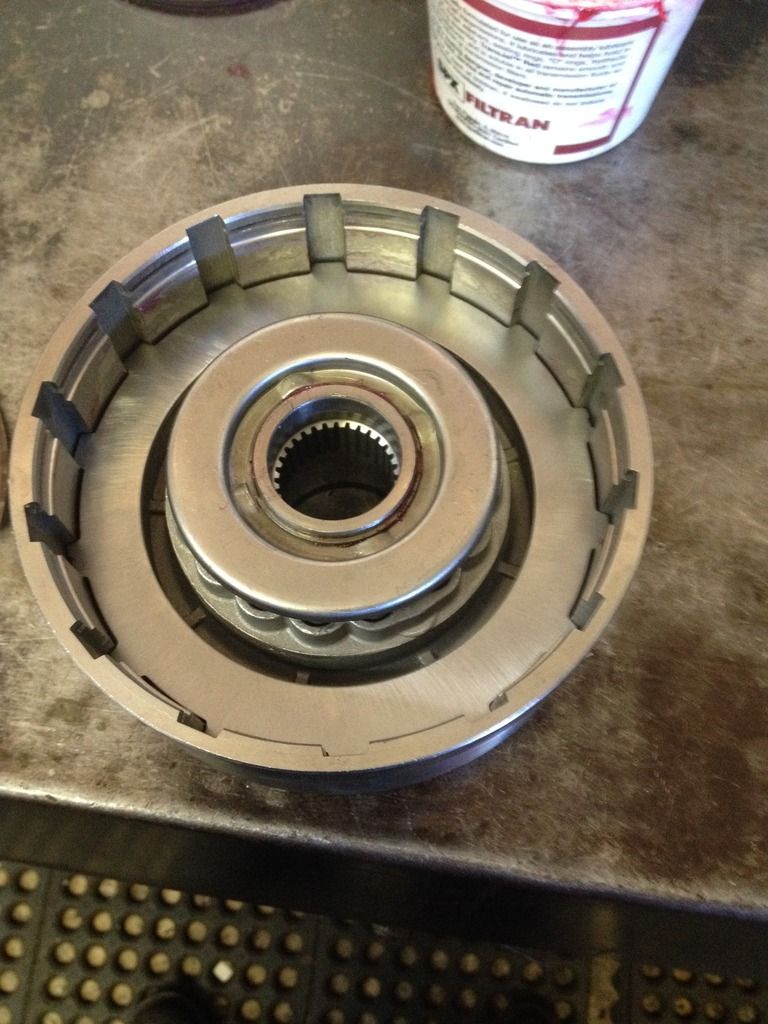
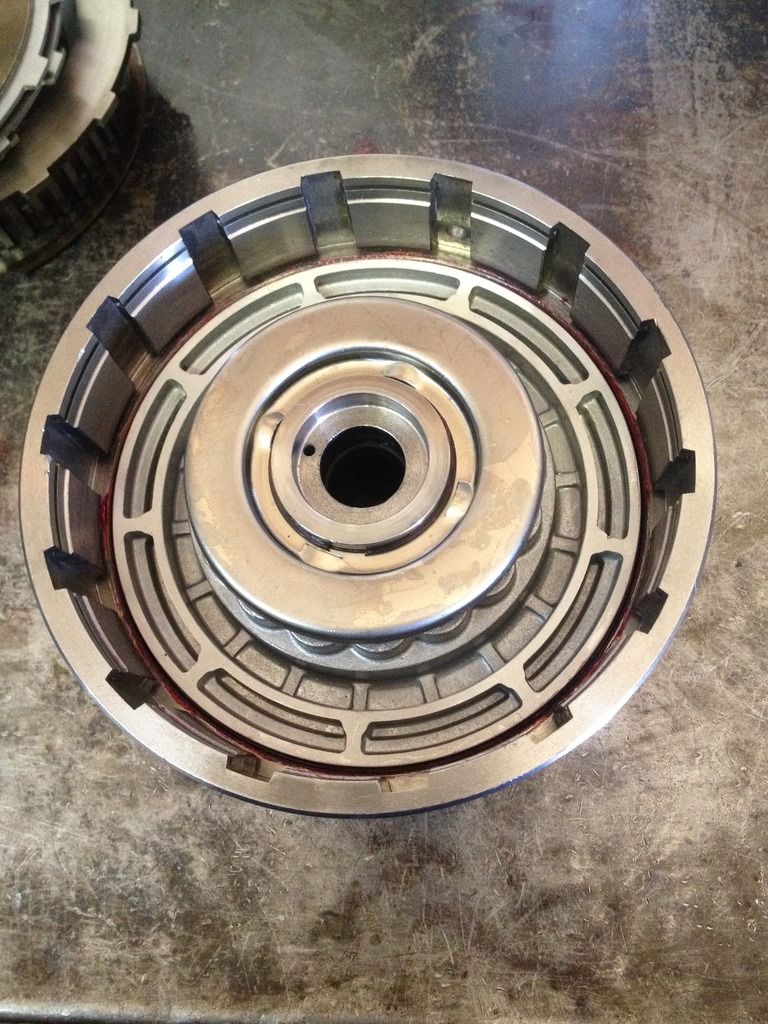
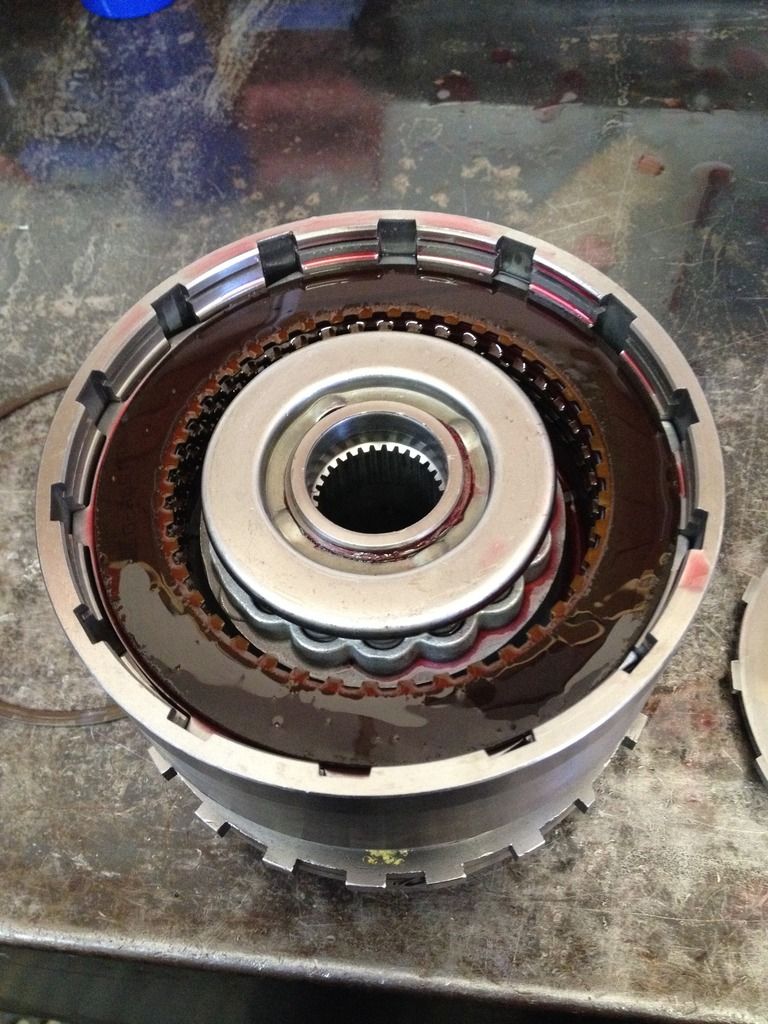
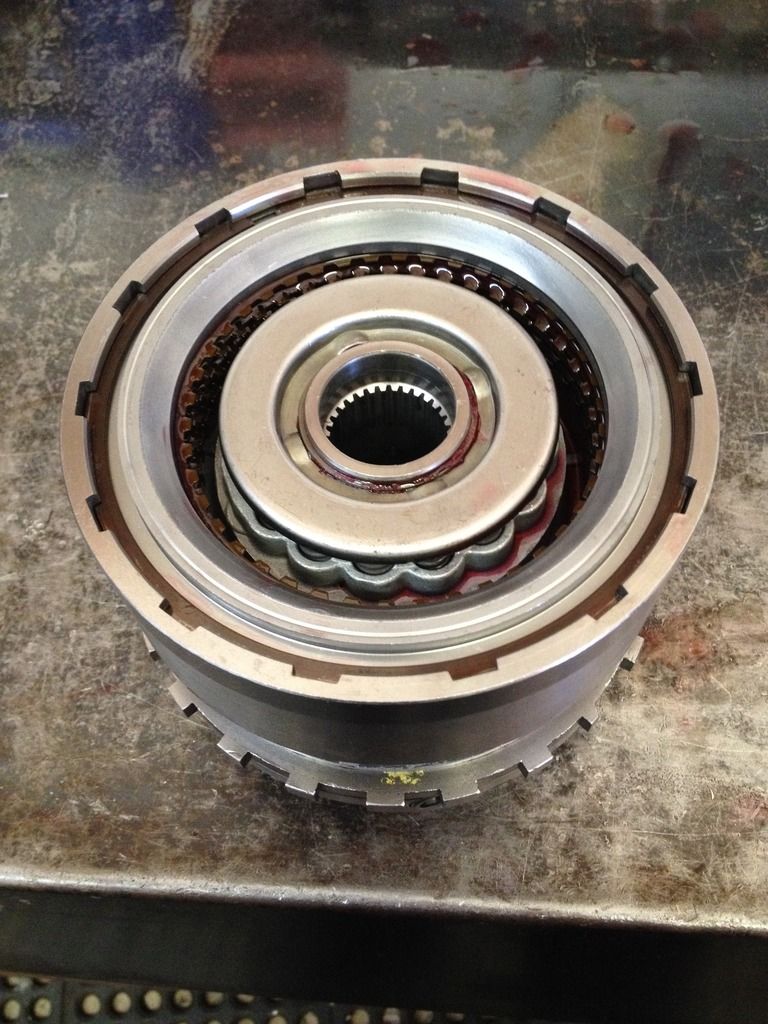
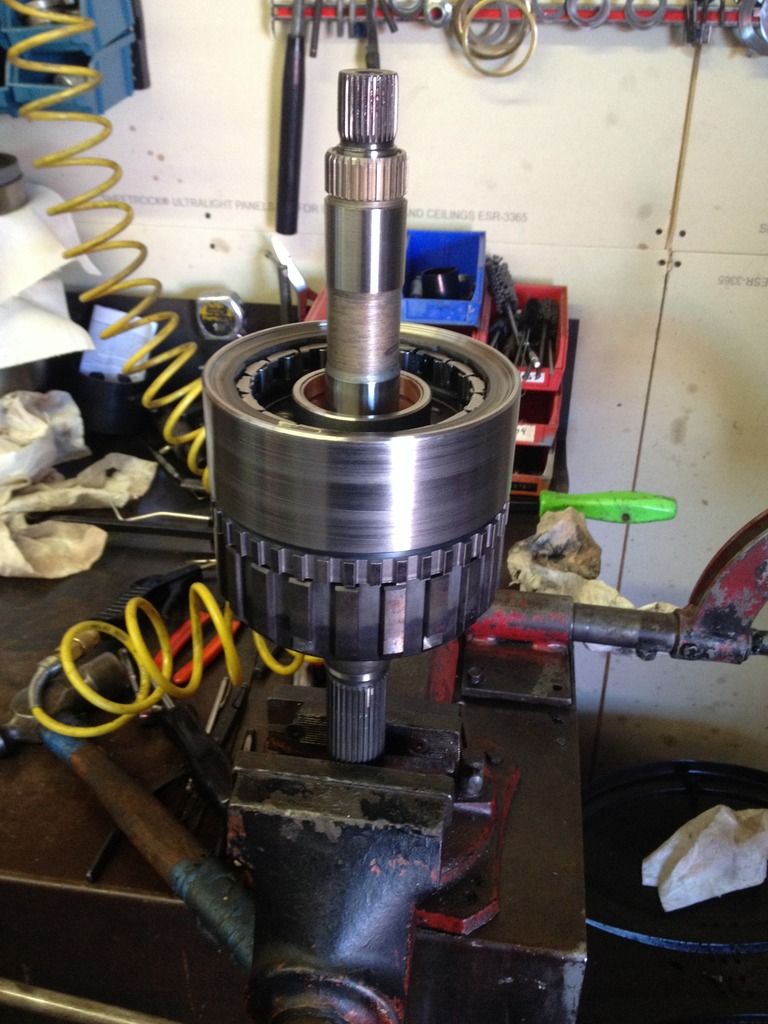
Overrun Clutch Housing with the Overrun Frictions & OD Roller Clutch installed...
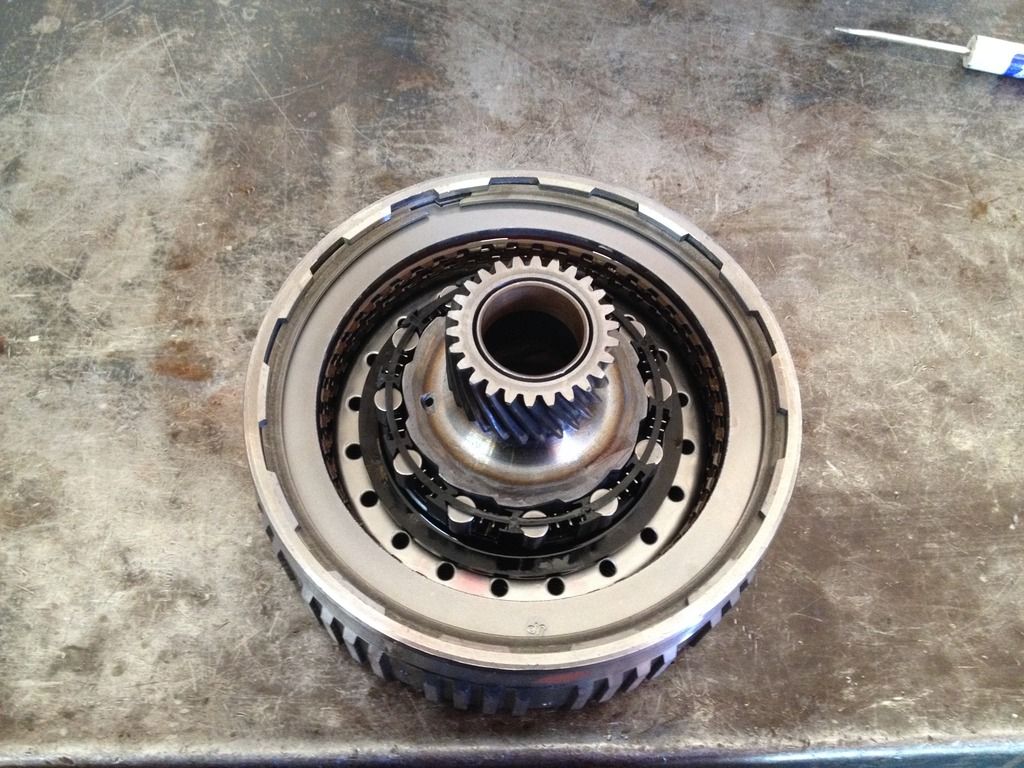
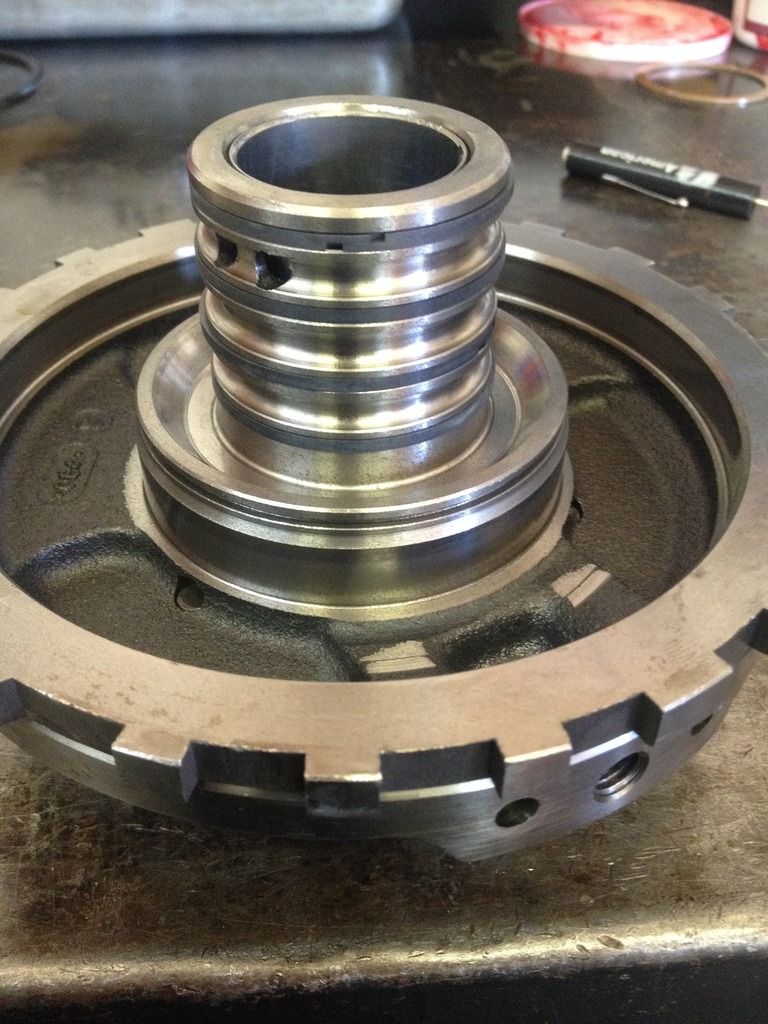
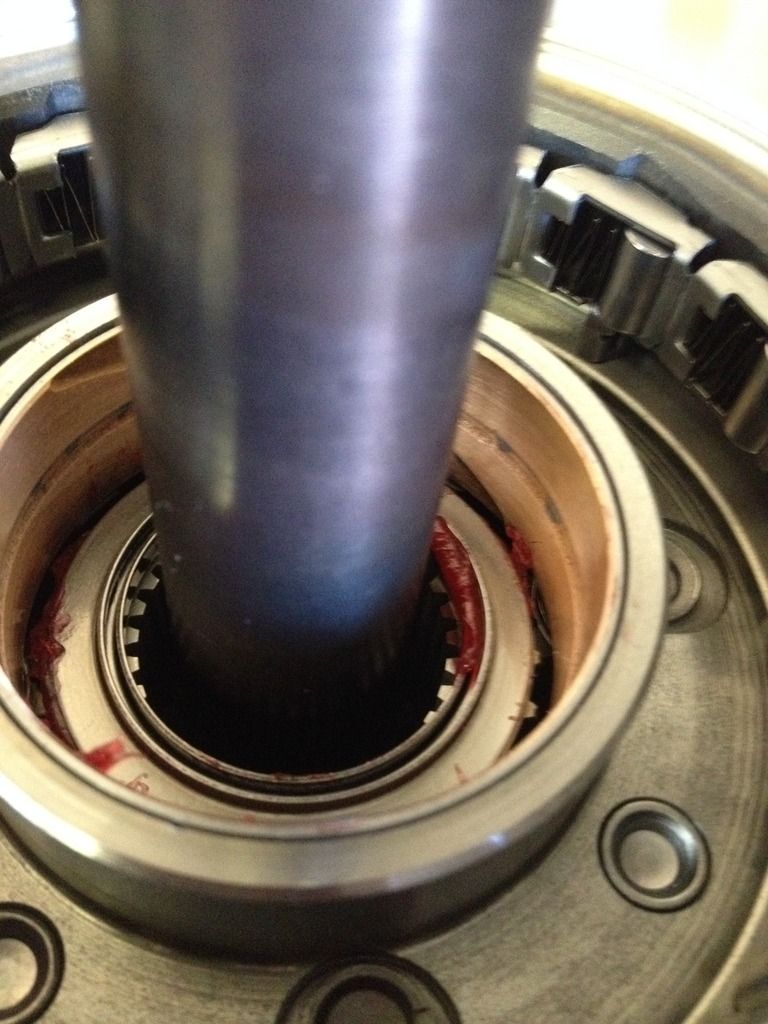
OD Carrier, Also houses the Roller Clutch outer Race & Overrun Clutch Hub.
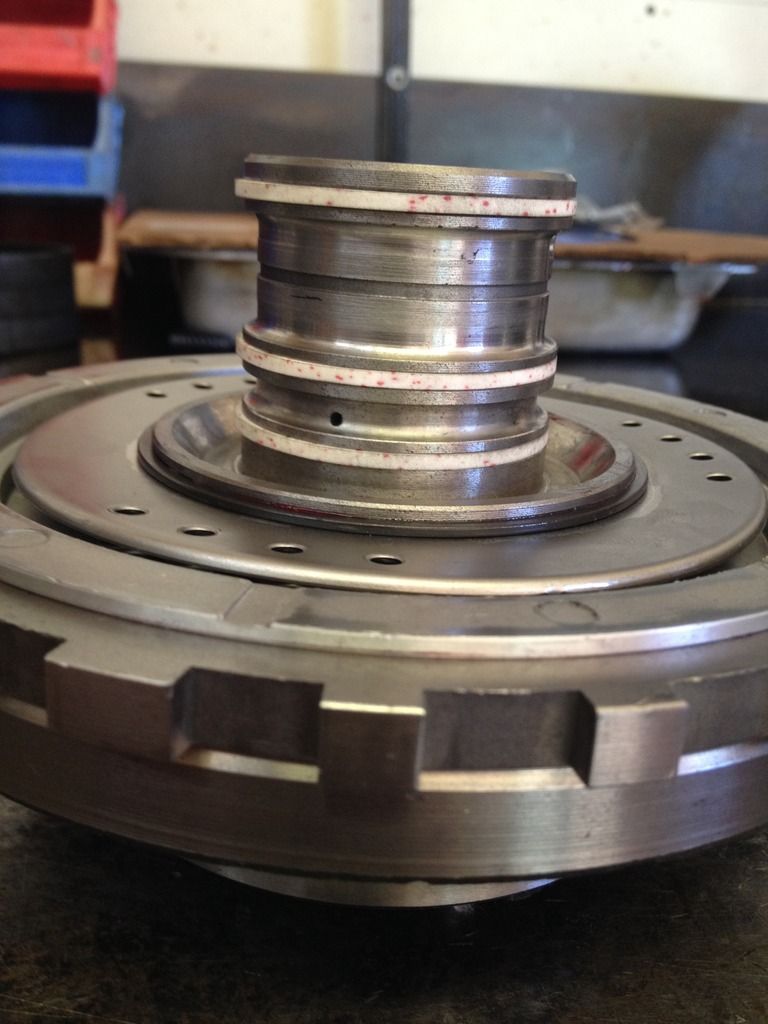
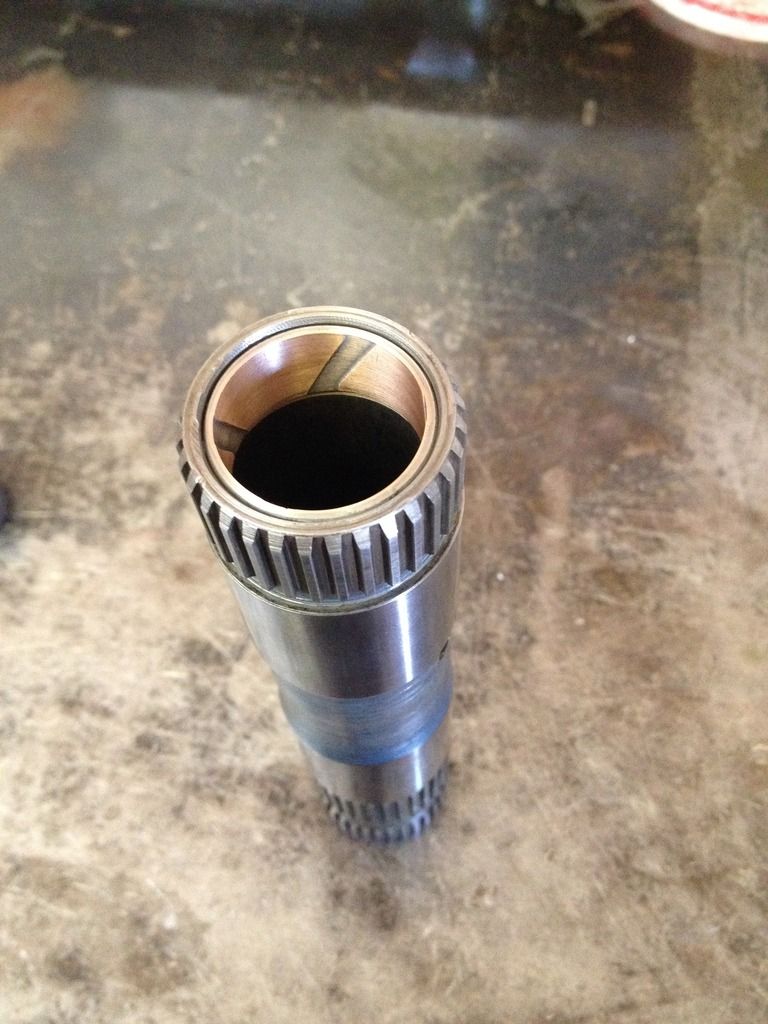
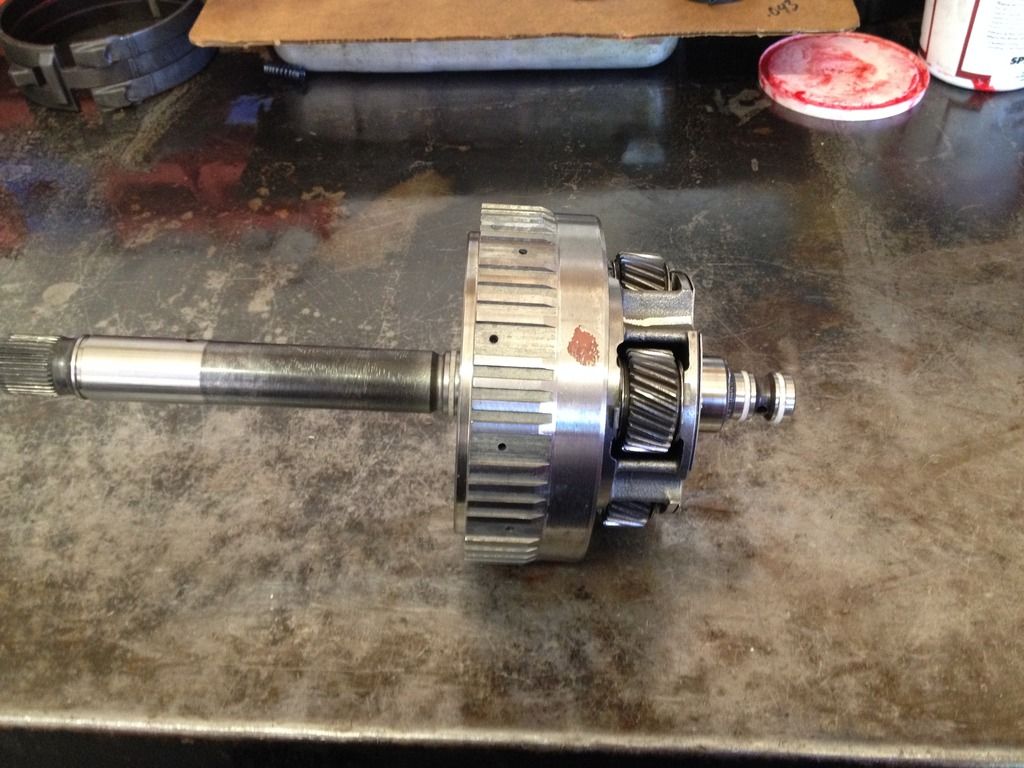
OD assembly & Input Shaft (With new Sealing Rings) ready for install.
This particular piece is from a 1996 4L80E from behind a 6.0L V12 Jaguar that had under 40,000 miles. All I did was replace the Bushing & the Overrun Frictions.
This pic highlights the difference between the OD Roller Clutch that was in this unit (Left) & the larger/more robust Roller Clutch found in the Jaguar OD assembly on the right.

Overrun Clutch Housing with the Overrun Frictions & OD Roller Clutch installed...

OD Carrier, Also houses the Roller Clutch outer Race & Overrun Clutch Hub.

OD assembly & Input Shaft (With new Sealing Rings) ready for install.

clinebarger 10:02 PM 10-01-2016
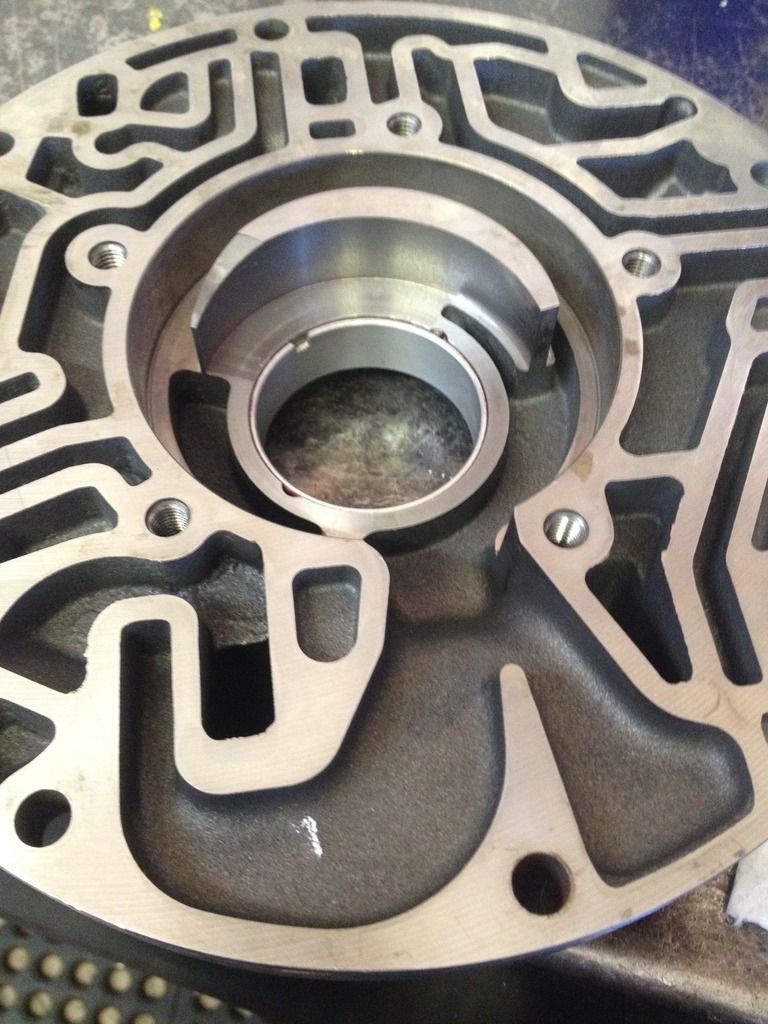
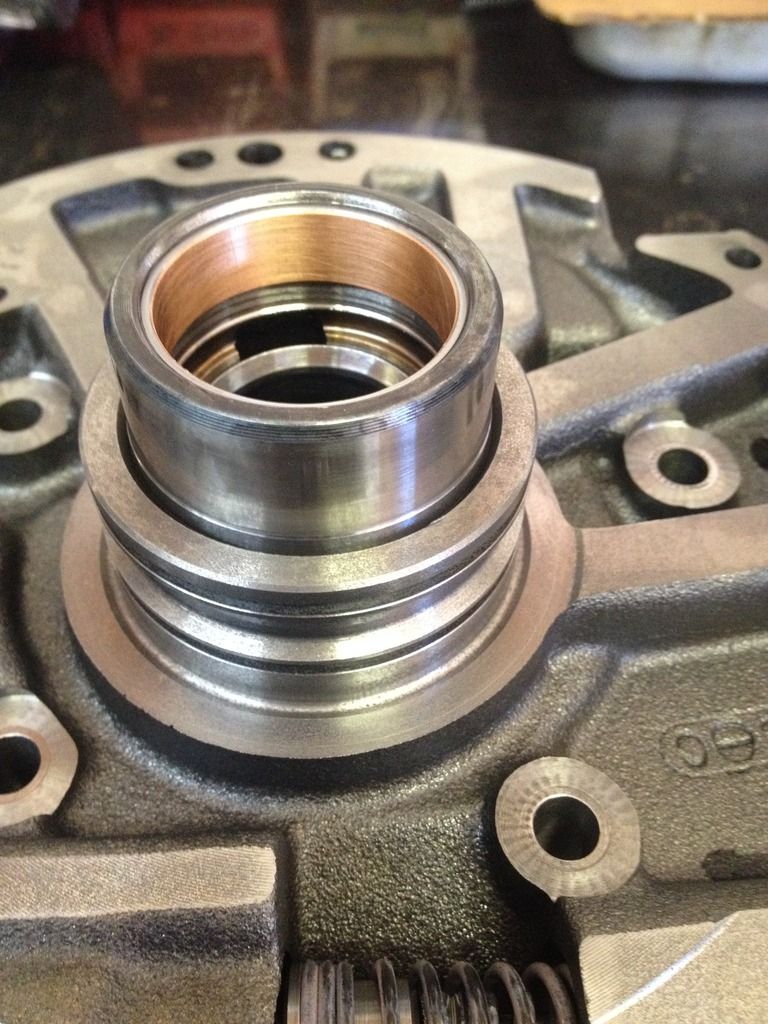
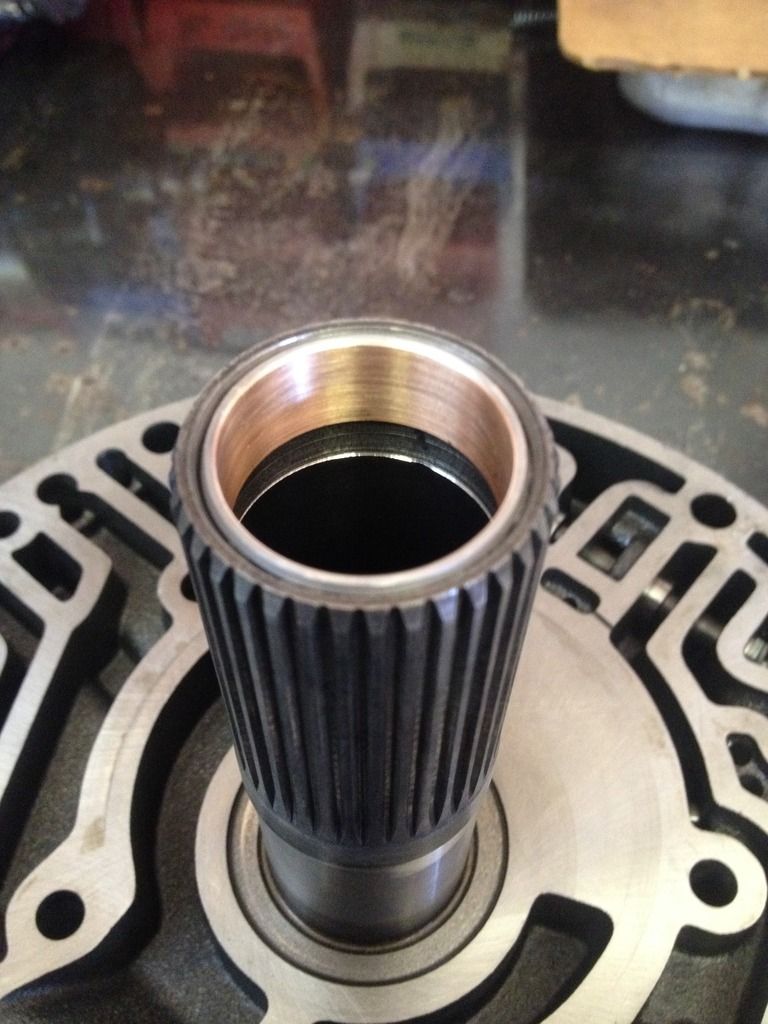
Pump....Again in excellent shape!, Replaced the Pump Gears, Pump Bushing, Both Stator Bushings & Overrun Clutch Sealing Rings.
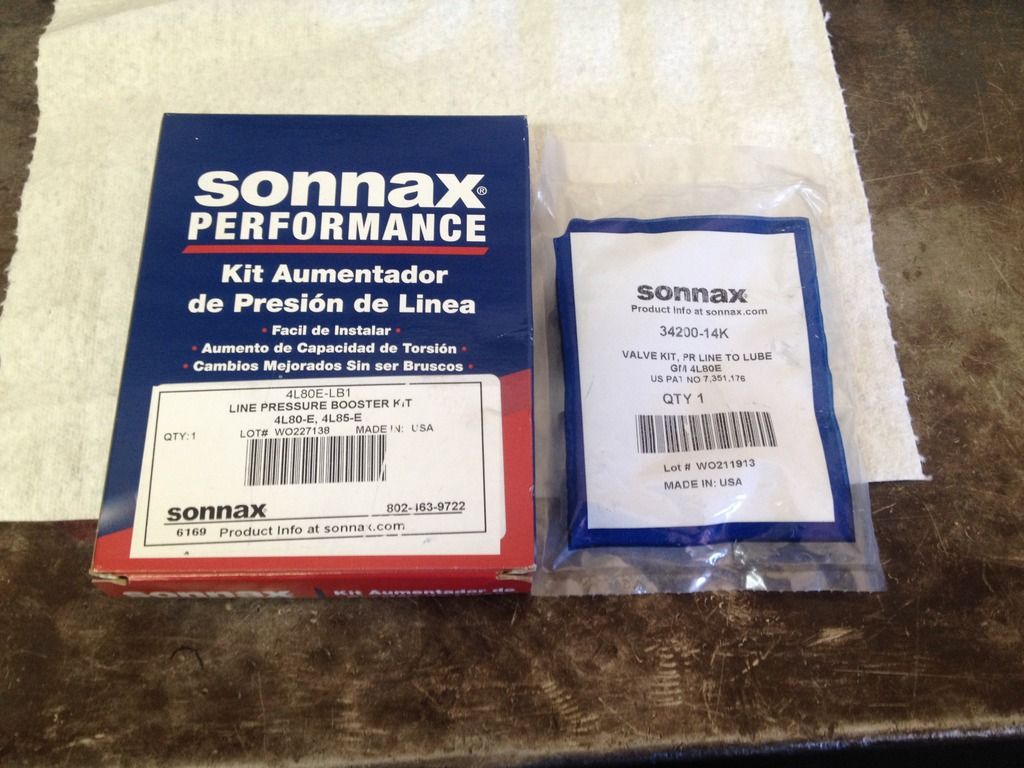
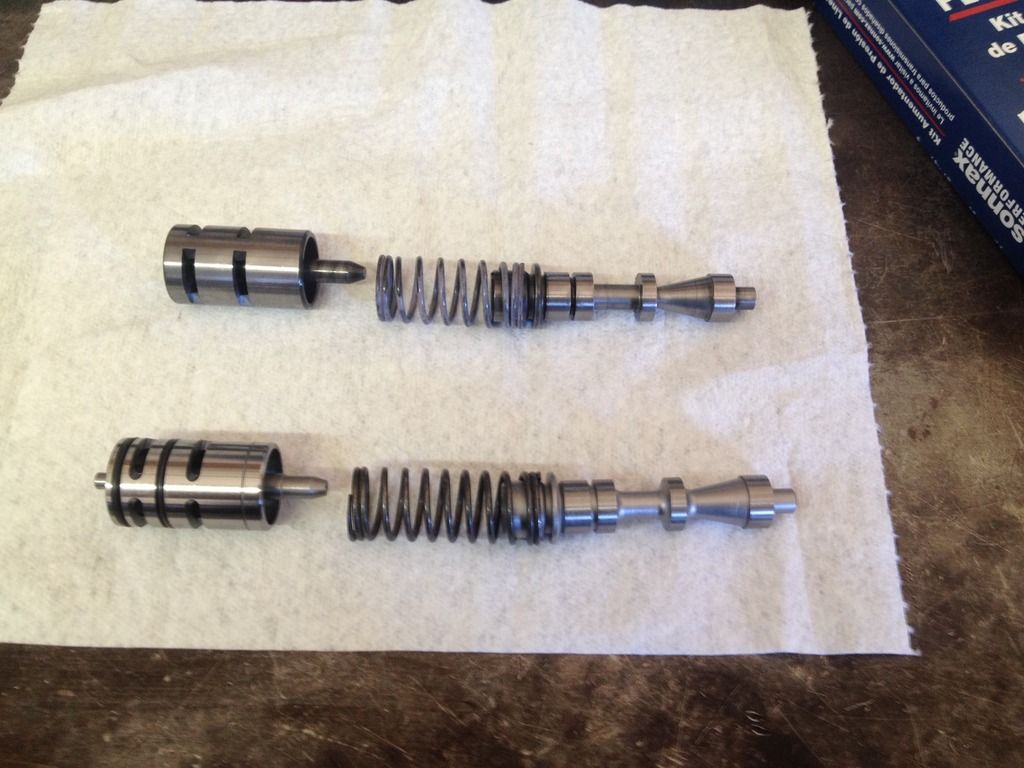
Installed a .770" Sonnax "O-ringed" Boost Valve, Stock is .740"
Sonnax 10% over Pressure Regulator Spring.
Sonnax "Lube to Line" Pressure Regulator Valve, Maintains Cooler Flow/Lubrication in high demand situations.
PR Bore Plug pressure tested good.
Pump Bushing installed...
Pump Gears...

Stator Bushings...
Boost Valve & PR components....
Installed a .770" Sonnax "O-ringed" Boost Valve, Stock is .740"
Sonnax 10% over Pressure Regulator Spring.
Sonnax "Lube to Line" Pressure Regulator Valve, Maintains Cooler Flow/Lubrication in high demand situations.
PR Bore Plug pressure tested good.
Pump Bushing installed...

Pump Gears...

Stator Bushings...


Boost Valve & PR components....


Advanced Design 10:02 PM 10-01-2016
Very interesting! Enjoying following along.
clinebarger 10:45 PM 10-01-2016
Originally Posted by ls1nova71:
This should be interesting! I'll be watching, but don't think I'll ever get up the nerve to try it myself!
As mechanically inclined as you are, It wouldn't be that bad for you! Besides....I would help you along!This should be interesting! I'll be watching, but don't think I'll ever get up the nerve to try it myself!
Originally Posted by Dustytrix:
Thanks for sharing info and pics.
Your welcome.Thanks for sharing info and pics.
Originally Posted by mongocanfly:
Cline ..you are da man when it comes to da trans..keep it up..this is interesting..
Thanks!Cline ..you are da man when it comes to da trans..keep it up..this is interesting..
Originally Posted by rubberbandit:
I definitely agree. Not many people can say they have a photo trail that documents their transmission build. Very cool!
I appreciate the business Chad! This trans will serve you for a long time!I definitely agree. Not many people can say they have a photo trail that documents their transmission build. Very cool!
Originally Posted by Custom 68:
So much for buying and chucking parts at this let's turn them on our lathe. Very impressive nice job.
That's what it takes to build the best product at a reasonable price point. So much for buying and chucking parts at this let's turn them on our lathe. Very impressive nice job.
I hope to buy a used CNC Mill pretty soon as indicating the pistons before turning them is very time consuming.
Originally Posted by Advanced Design:
Very interesting! Enjoying following
along.
Enjoy!Very interesting! Enjoying following
along.
Hart_Rod 12:13 PM 10-02-2016
Great info, thanks CB!
NorCalAnthony 11:41 PM 10-02-2016
Thanks for documenting the rebuild. It's cool seeing the inner workings and what all goes in to rebuilding and improving one with your level of attention to detail.
Clyde65 07:04 AM 10-03-2016
This type of write up gives incredible insight to a proper rebuild and why the parts and the changes you make, and why, are done. It really takes the mistery and confusion out of a large cost of our hobby. I appreciate you doing this Cline and all the other write ups and help that you do for this forum!
clinebarger 08:58 PM 10-03-2016
FINAL ASSEMBLY.
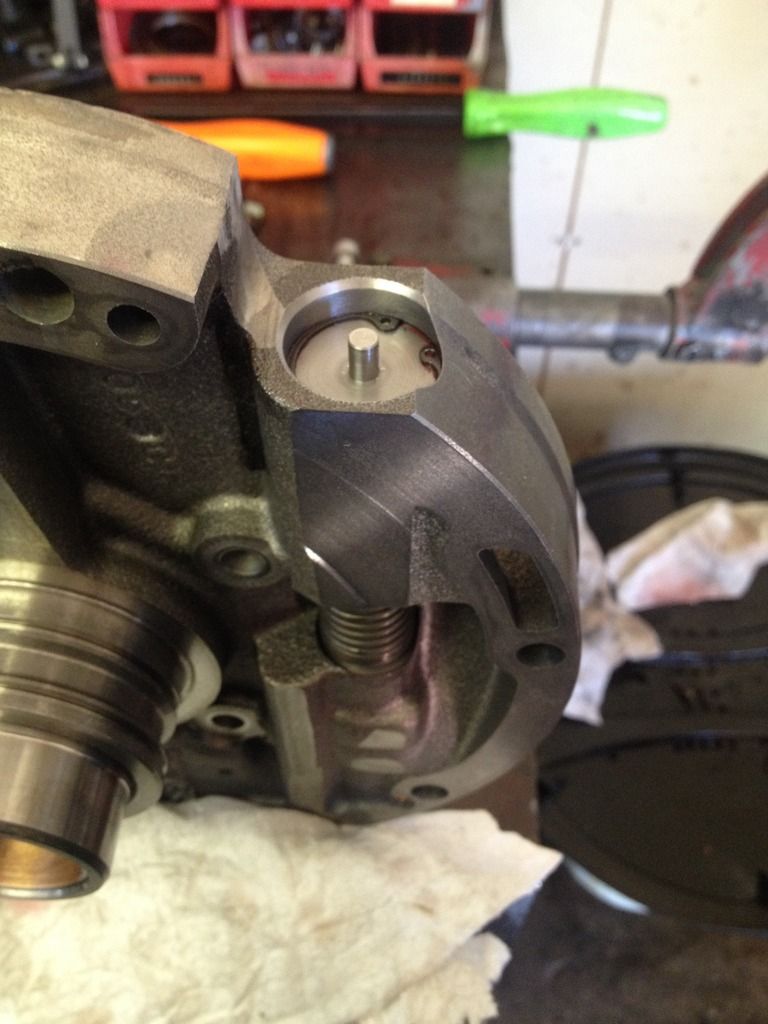
First thing on the list is to knock the Case Bushing in. I am Rollerizing the Output on this Unit, So this is not found in a service manual.
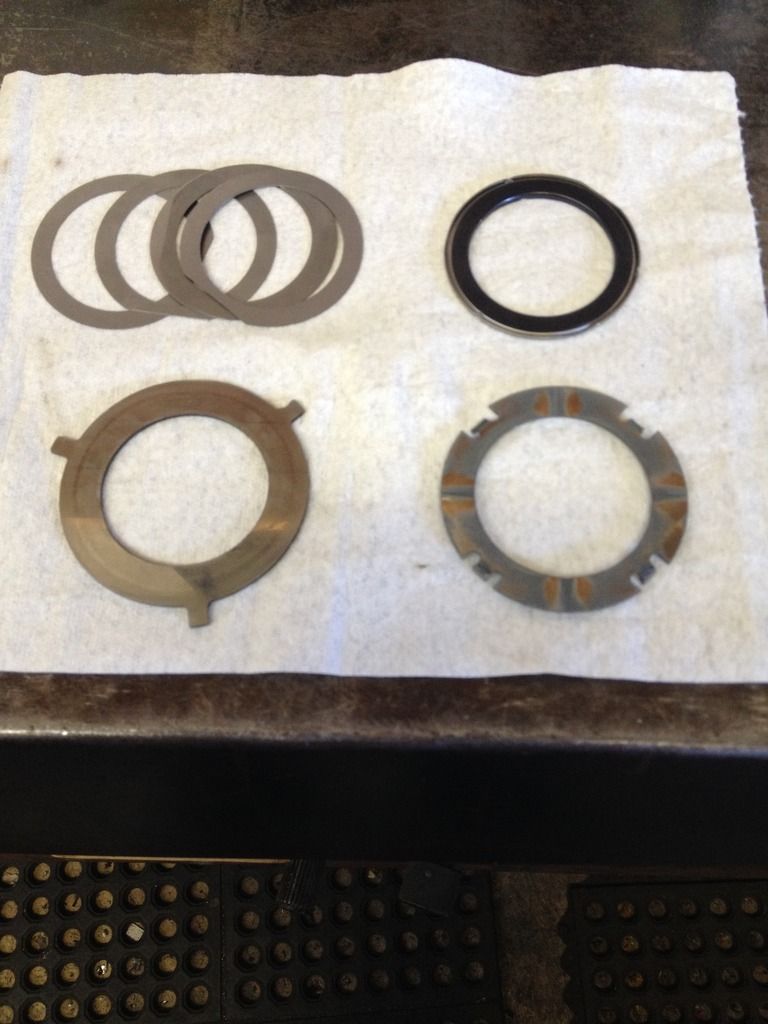
Use a TH350 Pump Bearing to replace the Thrust Washer & Selectable 3-Tang Washer.
The Case Bushing has to be left above flush to locate the Bearing, A stock Bushing is way too thin to leave above flush. The best Bushing too use here is a Early 4L80E Pump Bushing as it is the widest bushing that fits this location.
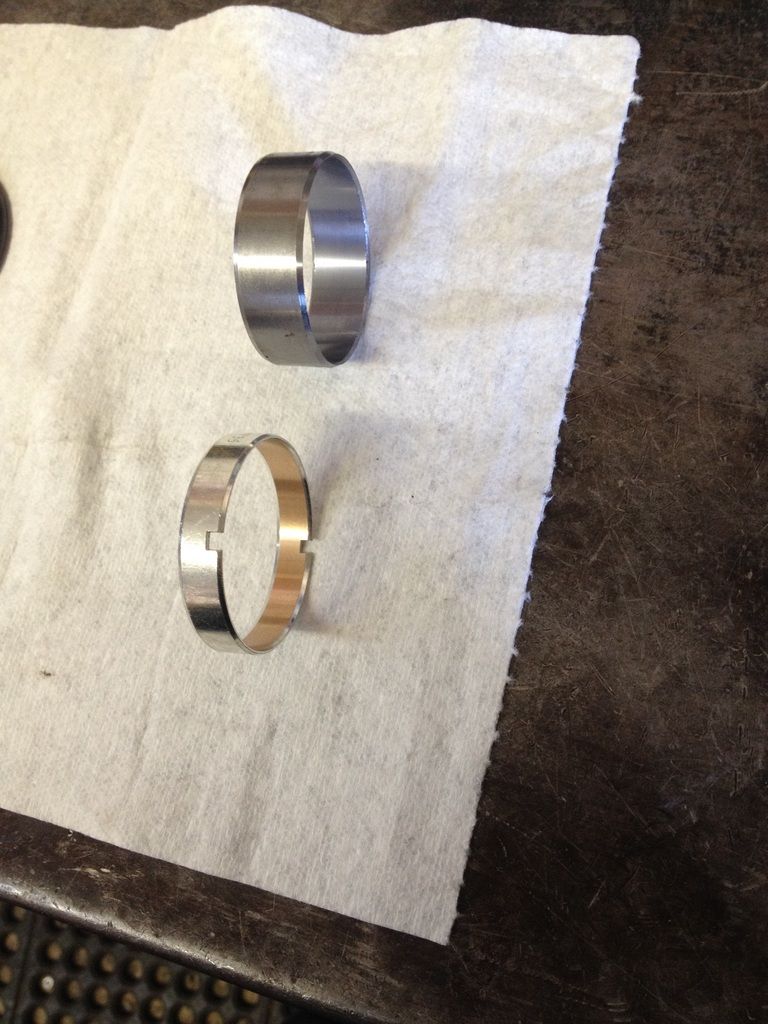
I like to use Seamless/1 Piece. Top is the wide Pump Bushing, Bottom is a stock Case Bushing.
The Bearing is .140" thick, So I leave .100" sticking up too locate the Bearing.
The Stock Thrust & Selectable is .147" thick, You generally start with the same thickness as came out, But there are no .007" Shims for the Bearing, But I do have a .010" shim. Making the total Bearing & shim thickness .150".
This unit was within spec already at .009" (.005"-.013") is the spec. So, .003" would put me around .006" Rear Unit Endplay. Ended up with .005".....
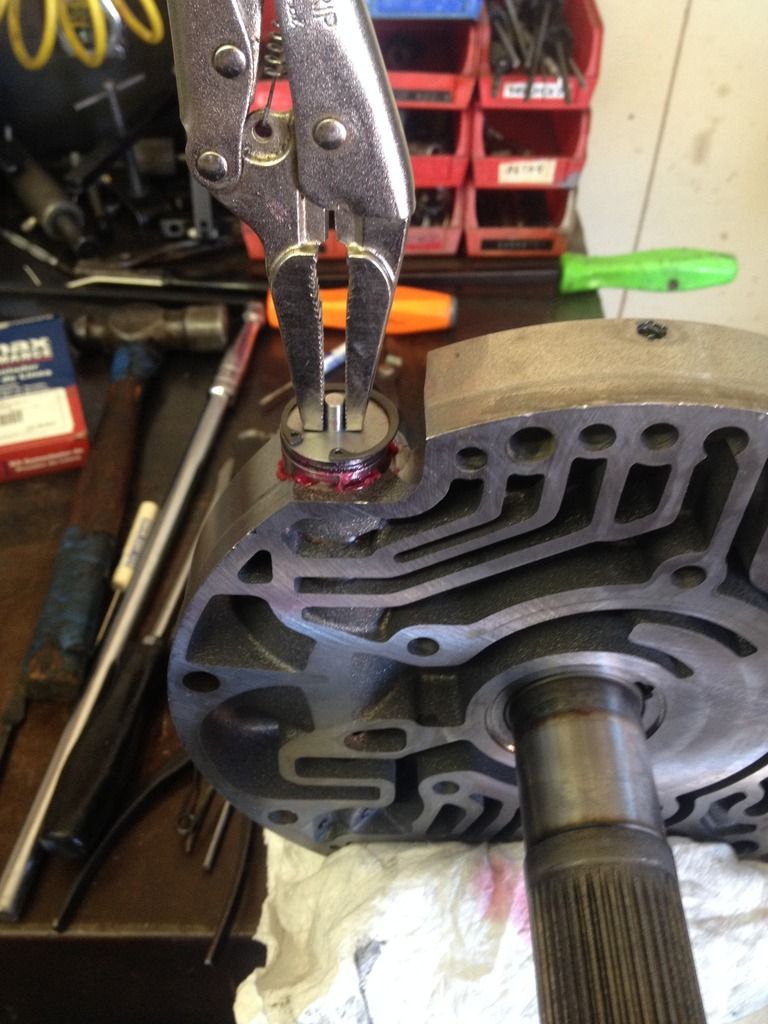
Knocked the Bushing in using my Bushing Installer with a .100" relief machined into it (I used Loctite Sleeve Retainer Compound on the Bushing).
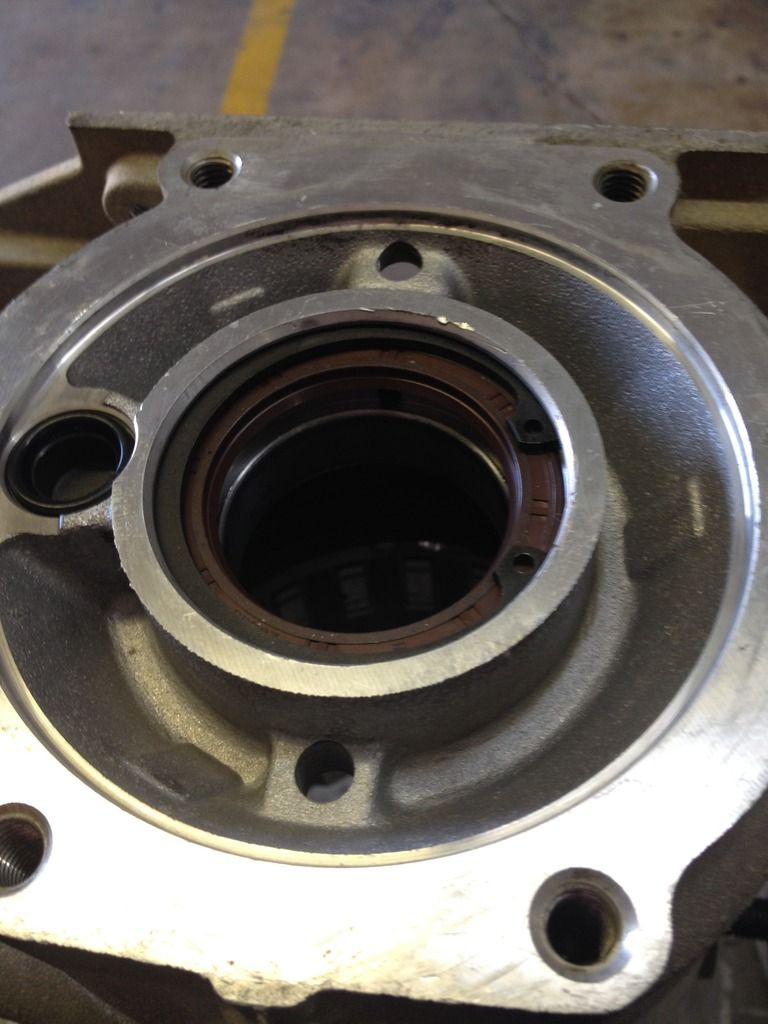
Installed the rear seal & Snap Ring.
Installed the Lo-Reverse Band & Fretting Snap Ring.
Place .010" Shim & Bearing over the Bushing.
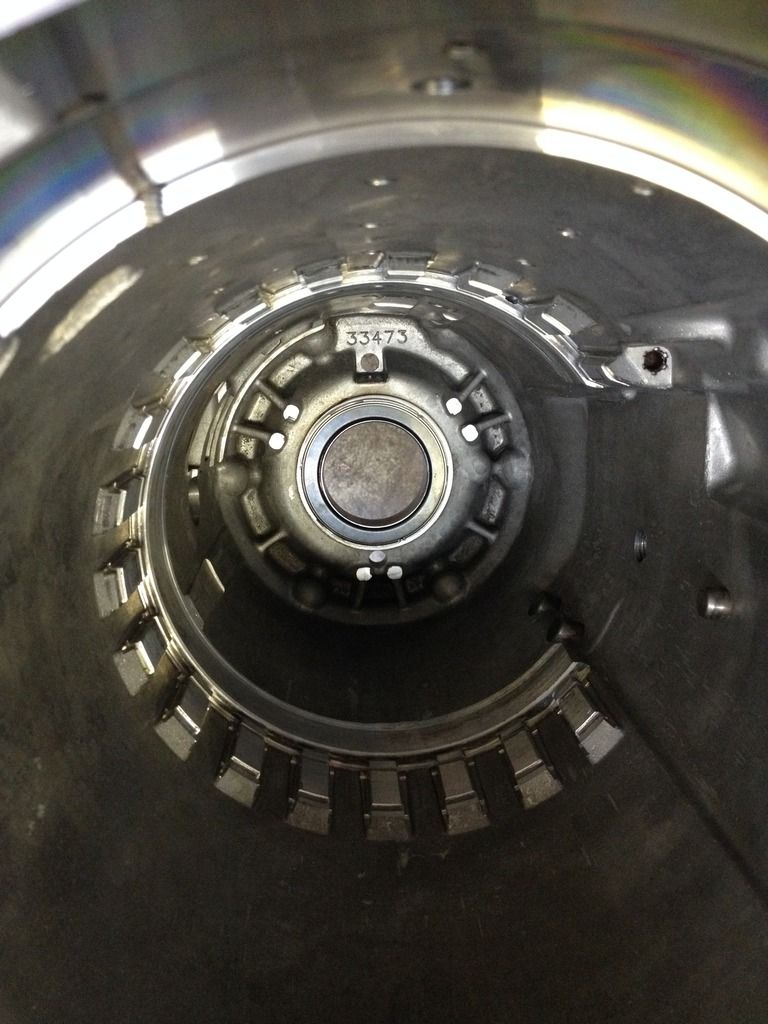
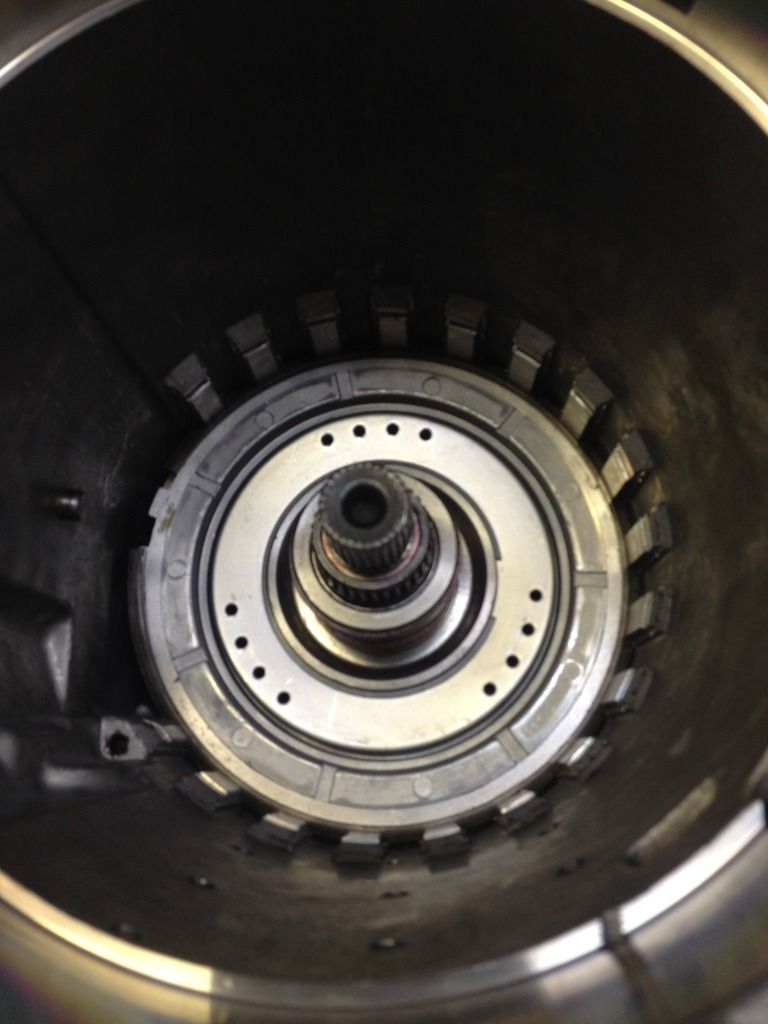
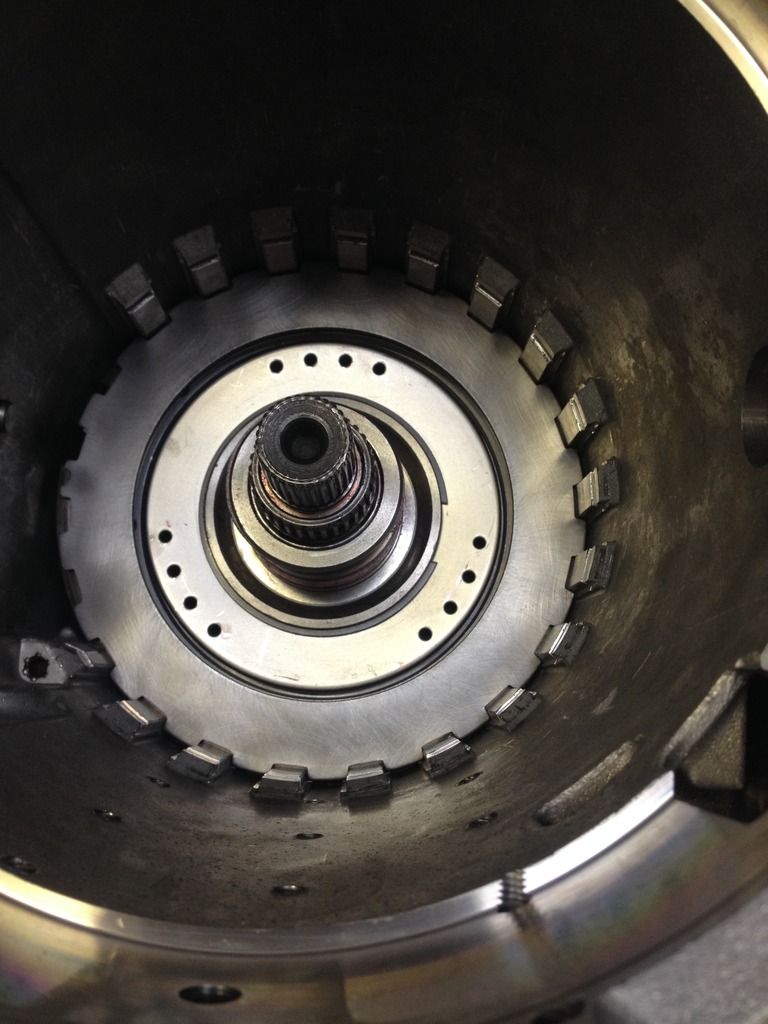
Lower the pre-assembled rear geartrain in place.
Installed the Center Support & Snap Ring.
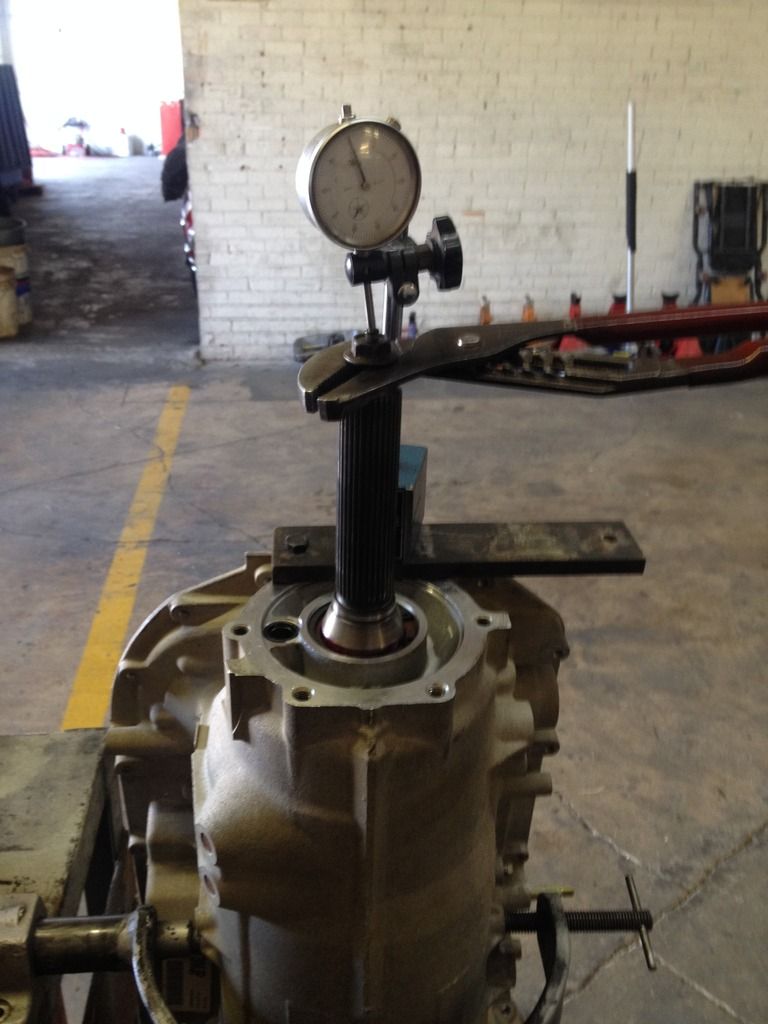
Measured rear unit Endplay.
Case Bushing...
Shim & Bearing that replace the Thrust & Selectable.
Bushing, Shim & Bearing installed...
Lube Seal & Snap Ring. Yes, The residual clutch material got removed!!
Geartrain, Center Support, & Snap Ring installed....
Checking final Rear Endplay...
First thing on the list is to knock the Case Bushing in. I am Rollerizing the Output on this Unit, So this is not found in a service manual.
Use a TH350 Pump Bearing to replace the Thrust Washer & Selectable 3-Tang Washer.
The Case Bushing has to be left above flush to locate the Bearing, A stock Bushing is way too thin to leave above flush. The best Bushing too use here is a Early 4L80E Pump Bushing as it is the widest bushing that fits this location.
I like to use Seamless/1 Piece. Top is the wide Pump Bushing, Bottom is a stock Case Bushing.
The Bearing is .140" thick, So I leave .100" sticking up too locate the Bearing.
The Stock Thrust & Selectable is .147" thick, You generally start with the same thickness as came out, But there are no .007" Shims for the Bearing, But I do have a .010" shim. Making the total Bearing & shim thickness .150".
This unit was within spec already at .009" (.005"-.013") is the spec. So, .003" would put me around .006" Rear Unit Endplay. Ended up with .005".....
Knocked the Bushing in using my Bushing Installer with a .100" relief machined into it (I used Loctite Sleeve Retainer Compound on the Bushing).
Installed the rear seal & Snap Ring.
Installed the Lo-Reverse Band & Fretting Snap Ring.
Place .010" Shim & Bearing over the Bushing.
Lower the pre-assembled rear geartrain in place.
Installed the Center Support & Snap Ring.
Measured rear unit Endplay.
Case Bushing...

Shim & Bearing that replace the Thrust & Selectable.

Bushing, Shim & Bearing installed...

Lube Seal & Snap Ring. Yes, The residual clutch material got removed!!

Geartrain, Center Support, & Snap Ring installed....

Checking final Rear Endplay...

truckdude239 09:22 PM 10-03-2016
Man nice work if you where closer id get you to build mine if it ever goes out
clinebarger 09:36 PM 10-03-2016
Intermediate/2nd Clutch.
Used 1 .100" TH400 Steel, & 3 .076" 4L80E Steels to get the correct clearance of .042". GM runs this clutch way loose for some reason, Too much clearance allows the Piston to pick-up too much speed & SLAM the Clutch Pack, Which doesn't do the Case Lugs, Intermediate Snap ring, Or the Intermediate Sprag any favors!
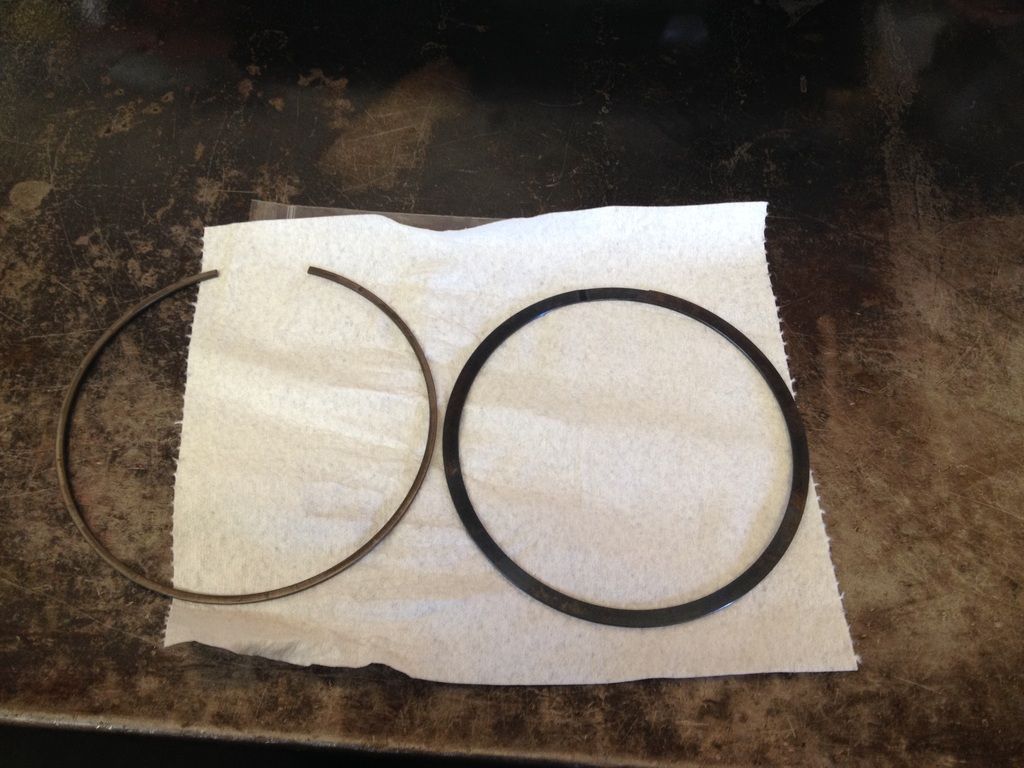
A CK Performance Spiro Lock Intermediate Snap Ring was utilized in this build, These have been used in 1500hp TH400's without failure! The stock Snap Ring can blow out &/or blow the Case Lugs out.
I cannot believe people take chances over a $13 part!!!
http://www.ckperformance.com/View/TH...UTCH-SNAP-RING
.100" TH400 Steel first, Gives more apply support vs a .076" Steel...
Intermediate Friction, 4 total on a 4L80E vs 3 on a TH400...
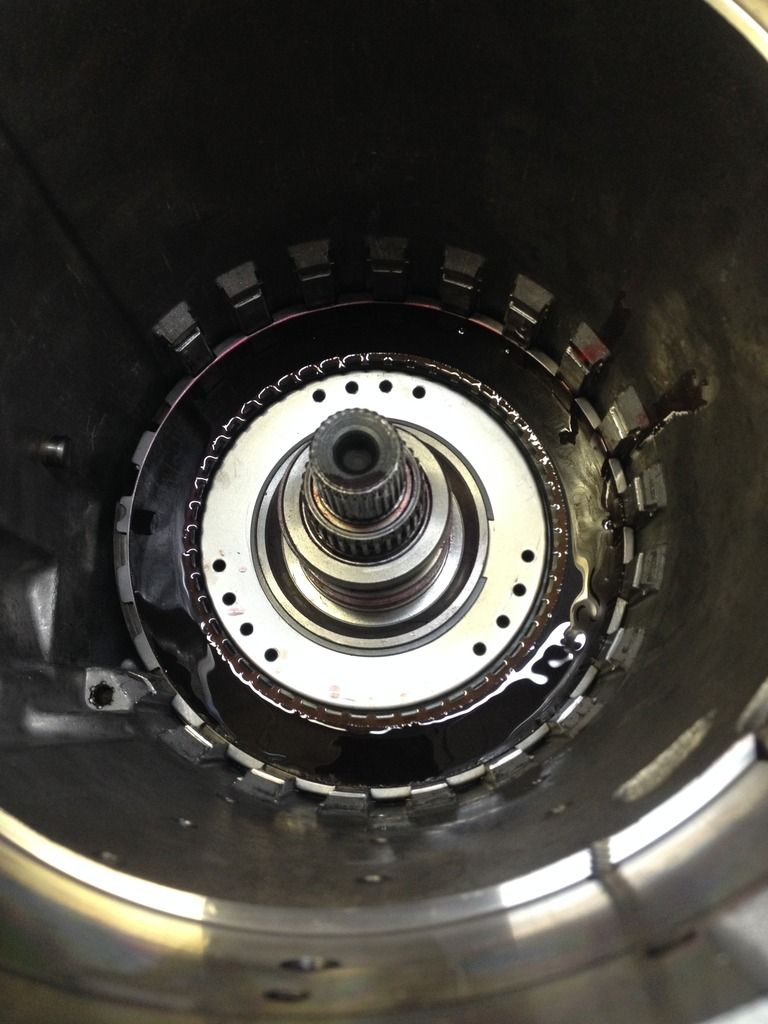
Stock Intermediate Snap Ring vs a CK Spiro Lock....Way more support!...
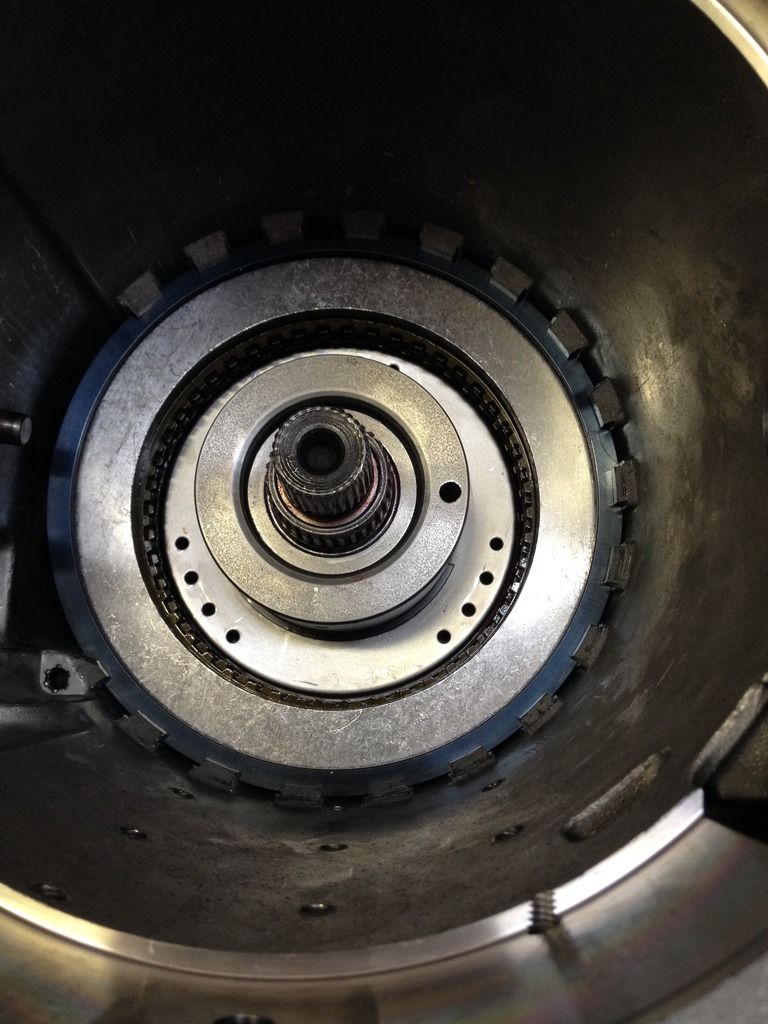
Snap Ring & Backing Plate installed...
1
2
Used 1 .100" TH400 Steel, & 3 .076" 4L80E Steels to get the correct clearance of .042". GM runs this clutch way loose for some reason, Too much clearance allows the Piston to pick-up too much speed & SLAM the Clutch Pack, Which doesn't do the Case Lugs, Intermediate Snap ring, Or the Intermediate Sprag any favors!
A CK Performance Spiro Lock Intermediate Snap Ring was utilized in this build, These have been used in 1500hp TH400's without failure! The stock Snap Ring can blow out &/or blow the Case Lugs out.
I cannot believe people take chances over a $13 part!!!
http://www.ckperformance.com/View/TH...UTCH-SNAP-RING
.100" TH400 Steel first, Gives more apply support vs a .076" Steel...

Intermediate Friction, 4 total on a 4L80E vs 3 on a TH400...

Stock Intermediate Snap Ring vs a CK Spiro Lock....Way more support!...

Snap Ring & Backing Plate installed...
