I thought it might be a good idea to review this thread and see what I may have forgotten, and realized a few things.
1. My photo host site dropped about a half dozen pictures, which I uploaded again and have reinserted where needed.
2. I duplicated some stuff so those entries have been consolidated.
3. Some of the text has been edited for better accuracy or clarity.
The last few projects were all completed late last year. I came to the realization that my heavy Simpson seat belt buckle was beating the crap out of my vintage Covico steering wheel (not that my delicate figure contributed in any way).

So two things were in order, new seat belts and attempted restoration of the wheel. I spent four and a half hours restoring the vinyl rim by hand. After nearly half a century of use it had plenty of nicks, scratches, and gouges.
All the defects were wet sanded out with 400, 600, 1000, and 1500 grit paper. This was followed by 3 polishing steps with Semi-Chrome, and the final finish was brought back to original with 3 additional applications of Mothers Mag Wheel polish. The end result was worth all the elbow grease. Its hard to photograph a shine, but Im amazed how nice it turned out.

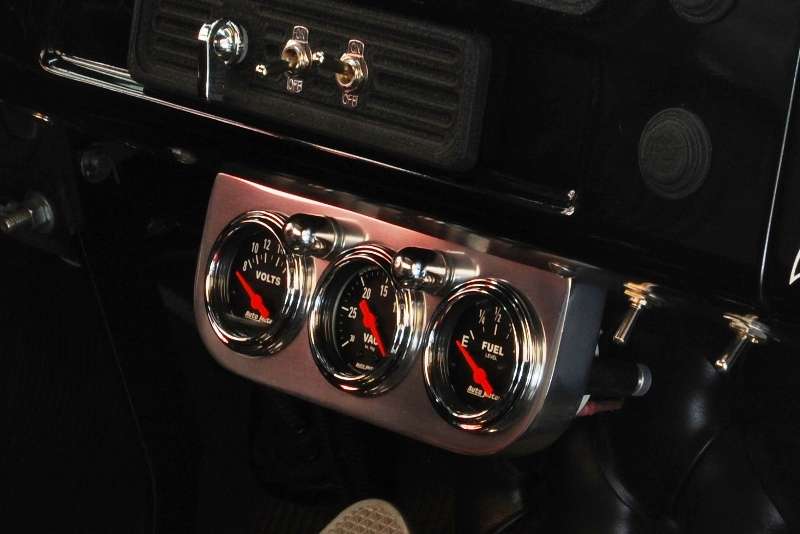
The accessory 3 gauge panel has been seen earlier, but it arrived during this period so Ill provide more details here. When pulled from the package, it wasnt anywhere near the tip top shape I had hoped for. Unfortunately my son recently borrowed his buffer back so all the finish work had to be done by hand. So starting with 100 grit on an air file, I started tearing it up in order to get remove the deep scratches and get it back to flat. Final polishing came 3 ½ hours later. Heres how it looked when first mounted with the VDO gauge in the center. The rims are so small they will fall through the hole if it's cut slightly oversize:

I never appreciated how puny and undersize the rims look on VDO gauges until I mounted the vacuum gauge in the same accessory panel with two Autometer gauges. The new Autometer vacuum gauge was installed a few minutes after it arrived. Both are 2 1/16" but comparing the two, the Autometer version is certainly more impressive (IMHO). The fun part being my wife inspired the upgrade. She insisted after all the work thats gone into the project the gauges all need to match, so a new 160 mph Autometer speedometer replaced the VDO model as well.
And this for comparison is the full Autometer set:
The modern design gauges in the panel do have internal lighting, but back when these external lighted panels were produced (around 1961-62?), many aftermarket gauges had no lights at all. The gauge housing was a simple solid metal can with two electrical posts sticking out the back, and nothing else. For a very brief period Moon, Dixco, and Eelco made panels for these unlighted gauges with the same dome shaped lights on the front which were suppose to illuminate the face of the gauge. In truth they mostly glared on the glass so you couldnt see the gauge reading anyway. In any event they aren't needed in my setup, I just always loved the way they looked and spent 10 years looking for this type panel at a price I could afford. The external lights are functional but not connected. I'm not sure if there's any advantage to hooking them up, so for now they remain unwired. Heres what the panel looks like with the internal lights illuminated:

These panels went obsolete very quickly because the next generation of gauges came with plastic lined "translucent windows around the perimeter of the gauge housing, just behind the rim. A sheet metal piece was attached to the back of the panel allowing a bulb to be plugged in, which sprayed light everywhere. Some of the light spilled into the gauge providing marginally improve illumination.
Soon after, the next generation of gauges had a conventional tube attached to the back allowing a conventional bulb and socket to plug in, providing good lighting for the first time.
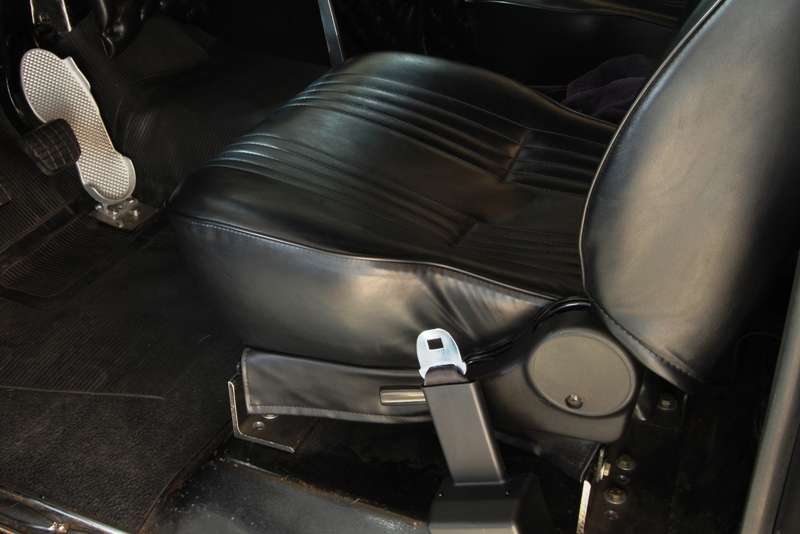
While the gauge panel was being buttoned up, the new retractable lap belts showed up. After pretty extensive research I finally found an outfit that still made authentic belts with vintage chrome lift latch buckles, and the correct GM style tapered tongue with the square latch hole.
http://www.cmwauto.com/MainMenu/Inte.../seatbelts.htm
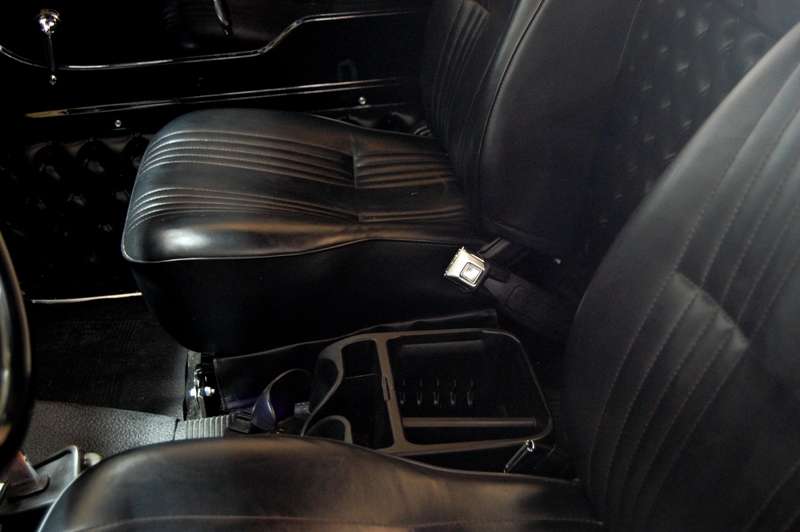
The problem being the buckle would still end up right in the middle, risking more damage to the steering wheel. So I went for the 70s style with the starburst metal buckles on the side instead. It sure is nice not having the big heavy buckles and belts laying all over the floor. Light was pouring in through the garage door and the back window so the 2nd shot is pretty bleached out, but it shows how they mounted.
The 1960 GMC has a cover plate on the driver side over the area where the taillight wiring enters the cab. This required moving the retractor forward to the angled area. The anchor brackets needed a correction to the mounting angle. To avoid bending a curve into the bracket like happens when using a large Crescent wrench, I clamped the bracket in the bench vise and pried it open slightly with a crowbar, just enough to clear the bolt head I used next. Then I attached a heavy steel plate along with a stack of washers and a bushing that just fit inside my cheater pipe. I kept nudging it until the bracket measured straight up as mounted on the truck floor. Heres the arrangement shown on one of the spare brackets that didnt need bending:


Rather than use the angle brackets on the inboard belts, I used the eye bolts that were in place for the Simpson belts. I just happened to have some serrated flange washers the same outside diameter as the eye bolts, making a simple and secure connection that didnt require crawling under the truck.
Finishing the belt installation the new Autometer speedometer was installed and calibrated using road markers. Accuracy was double checked against our Honda. Although both gauges are the same size, the face and numbers on the Autometer are much larger and easier to see.
Heres the last remaining VDO gauge, the old speedo. The only nice feature it offered was thru dial lighting, but it looked washed out and the numbers were too small:
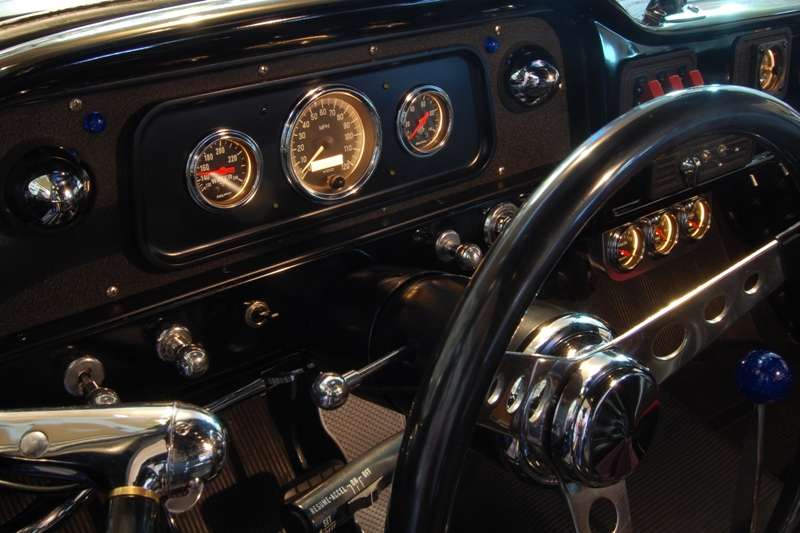
And heres the new Autometer:
