Some parts arrrived!

Front/Rear Disc Brakes, All Air Managment Stuff, Flip Kit, Shackles, and Steering Components.
Still waiting on all the front suspension stuff from PB Fab yet. Hopefully it will arrive soon, guess you could say, saving the best for last.
Got around to finally getting the Tinworks Fab C-Notch in. I found it much easier to remove the bolt for the body mount for installing/removing the C-notch. It probably would have been easier to cut the notch bigger instead of constantly shaving and test fitting.
The kit came with grade 8, 1/2 bolts and nylok nuts, I did notice other kits from the big names use a flat washer on both sides so I went and got extra flat washers since this kit only came with 1 washer per bolt. I figured a washer on each side might make for better clamping force. There were no directions, but I recall seeing some other people in the forum mention to drill a 1/4 hole in the corner where the cuts intresect to prevent the metal from tearing under stress so I followed that advice and over all i'm pleased with the C-notch. The metal in these frames just eats drill bits, by the end it was a full on battle to get the last few holes drilled since the metal dulled the bits so much. Gave it a quick wire wheel, and scuff with red scotchbrike, then wiped it down with degreaser and sprayed some rust converter on and then painted
with Krylon Colormaxx Satin Black.
Ended up getting a universal body mount kit from Energy Suspension since it had a metal sleeve in it, and washers for top and bottom mounts.
If I were to do it again, I would have found stock mounts and I would skip dealing with Energy Suspesnion. I reached out to them, and they were literally zero help. All they did was enter the details into their system, and looked at the result, which was "no hardware" for a 73-91 suburban for body mounts. I gave a few measurements of what I was after for the internal sleeve and washer size which I know they have, but I heard nothing back, and no effort was made by them to try and help a customer out, unfortunately I already ordered new leaf spring bushing from them otherwise I would have just got stockers put in by a leaf spring shop.


Now that the C-Notch is in, it's time to get the rear suspension in.
The plan is to put in a flip kit, lowering shackles and pull some leaves out of the leaf springs.
I messed around with the fuel filler neck and have enough clearance for 1 inch shackles to swing freely, but someone else mentioned a 2 inch will work with just zip tieing over the filler neck
since the range of travel for the shackles will never allow it to rotate all the way forward and down. I'm going to try the 2 inch shackles, and if it interfence or rubs, I alos have a 1 inch zero rate
spring from Offroad Design that I will use and swap back to the 1 inch shackles. In total i'm going to need a little over 9 inches of drop for the axle to hit the c-notch which is what I want. After I get the axle into the notch, I will use air bags to lift it a few inches to ride height. I'm hoping to avoid the zero rate springs just for the ease of installing the brackets for the air bags since they go on top of the leaf springs and woudl need to sandwich the bracket inbetween the top leaf and the zero rate if I have to use the zero rate spring. I suppose it would be best when testing fitting all of the suspension stuff to not torque the u-bolts down until i find the right combination to acheive the drop, everyone says to not reuse u-bolts and theroetically the threads would be stretched from the inital torque, so i think I will just make them snug enough to hold everthign in place while I add/remove leaf springs/leaf spring brackets etc.
To get started I pulled the leaf springs out, only one of the bolts would come out, so out came the zip-cut and all the bolts were removed.
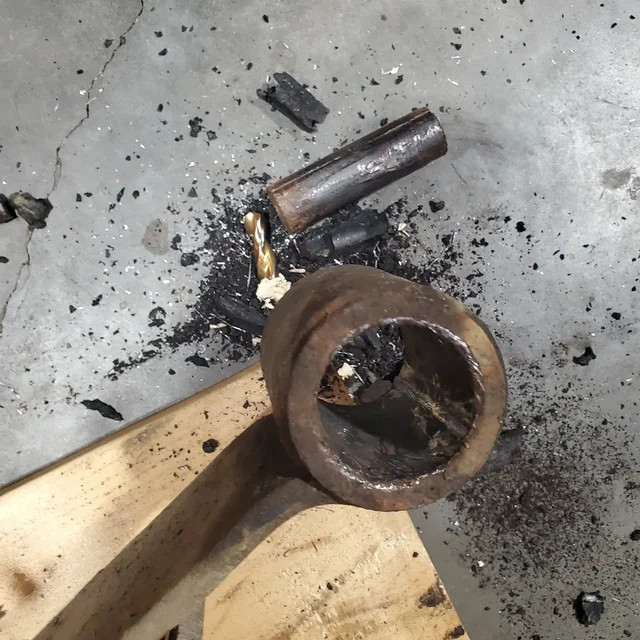
It's been about 15 years since I last pulled out factory bushings and installed poly eurethane ones. This will be the last time I ever touch a leaf spring bushing.
Broke 2 drill bits, almost broke my wrist and i'm still fighting with getting the outer sleeves cut out, i find that a sawzall doesnt work very well so switching to a hacksaw to cut the last 2 out.
Next time, i'm taking them to get pressed out and replaced... this is just all around prick of a job that i dont enjoy.

Overall, progress is a lot slower than I originally anticipated, but with 2 kids under 3, and 14 hr days by time i leave and get back home from work, i'm fairly happy with the balance i've found. Hopefully over the next week I can get the rear suspension in and go from there. I do know, i'm not looking forward to figuring out drive shaft angles afterwards. I've heard some guys say they move the tranny and carrier bearing both up, and shim up the pinion with some success, but ideally, the motor would be moved up too. When that time comes, I will grab a angle finder and read back up on drive shaft angles and phasing and get it figured out. I would be curious if a shop would build a 1 peice aluminum shaft or if it would be too long, this path would likely be a pain to since you would want a driveshaft hoop for safety as well which is just one more thing to do and im sure the cost would not be something to enjoy.