 |
|
|
|
|
#1 |
|
Senior Enthusiast
Join Date: Feb 2007
Location: Spokane Valley, WA
Posts: 8,356
|
No warp hole filling.
Hereís a tip on how to eliminate those unwanted holes in sheet metal without the risk of welding distortion. This method requires access to the back side of whatever is being repaired, preferably where the back side wonít be seen in the finished result. If you possess welding equipment and great metal working skills, this may not be of much interest, but for those of us that donít have welding equipment or skills, itís an inexpensive and permanent alternative.
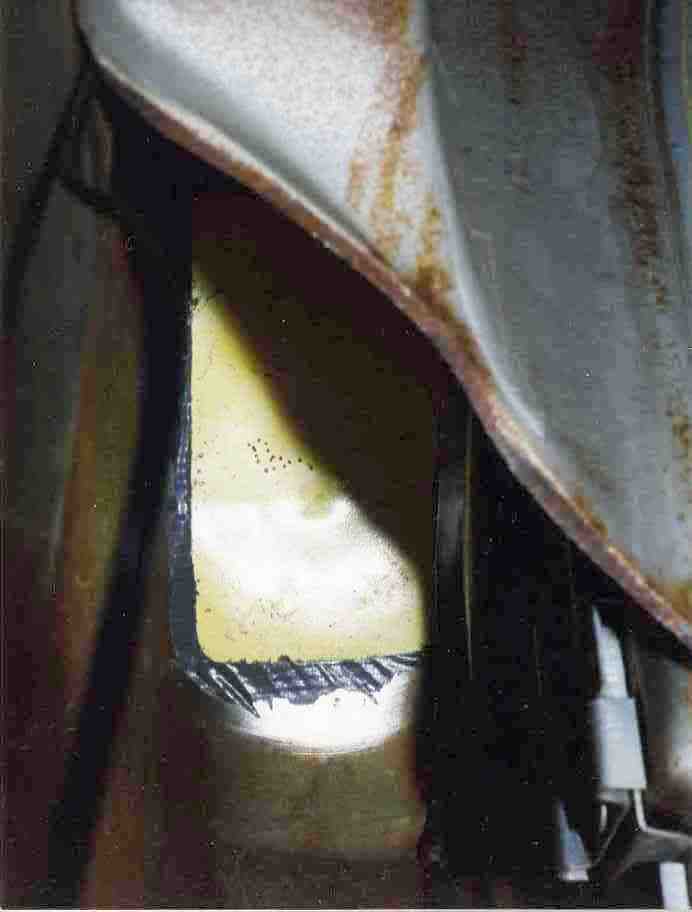
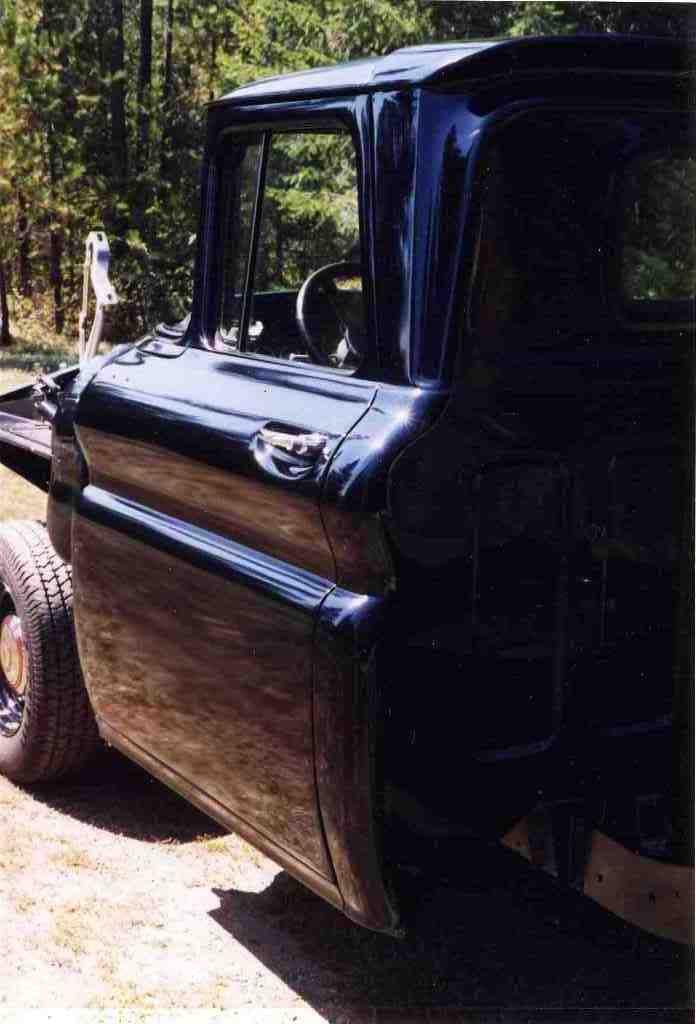
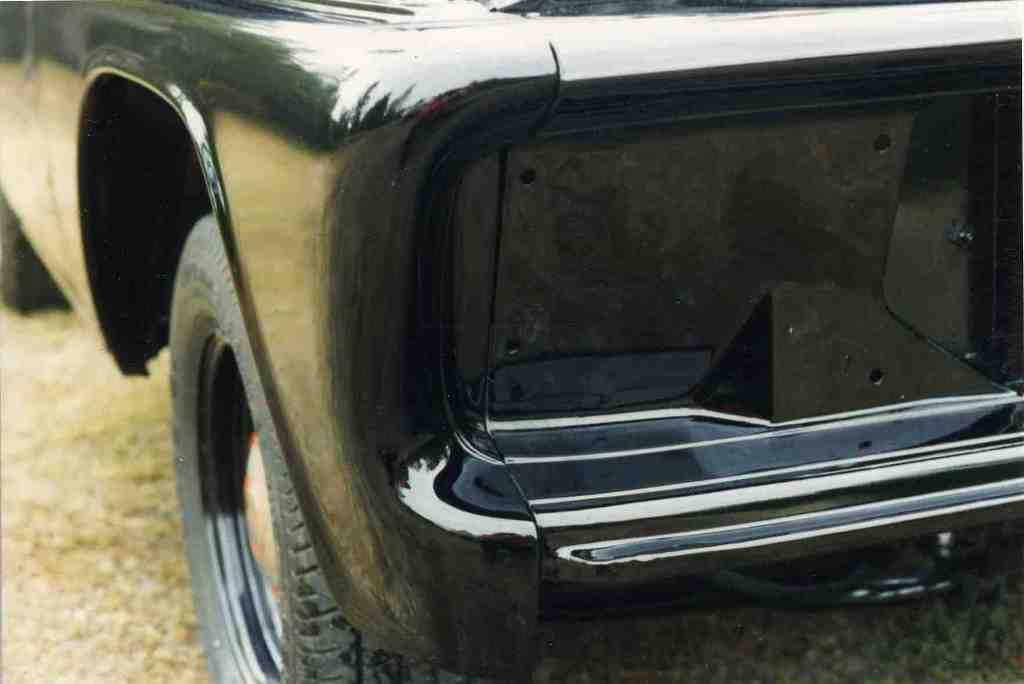
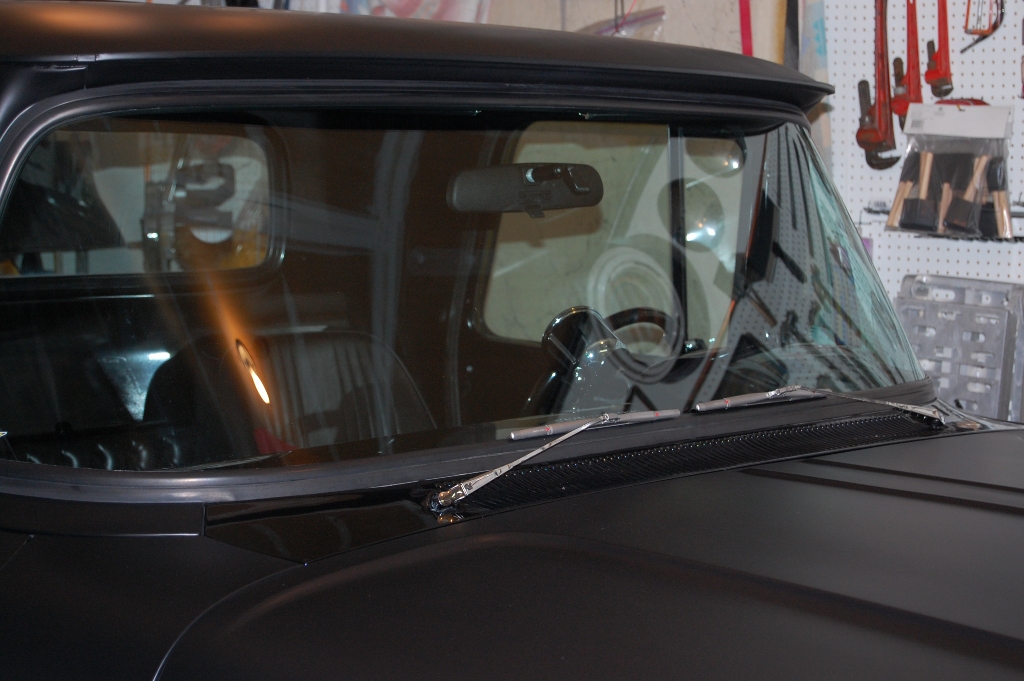
The short answer is JB Weld epoxy. Itís a metal heavy epoxy safe up to 500 degrees. It has similar expansion and contraction characteristics so cracks arenít a problem like when using fiberglass. My first encounter with this product was in the early 1980ís when I was sold a rebuilt cylinder head with a semi-circular damage slot in the gasket rail. Obviously it leaked like a sieve. When I complained to the machinist, he said ďno problem, Iíll have it fixed in a few minutesĒ - and introduced me to JB Weld epoxy. He explained he had filled a hole as big as 3Ē in an engine block with the stuff. I was skeptical at first, but he made a dam out of tape and filled the damaged area. After the JB Weld cured and was ground down, it worked perfectly for many years until I wore out the engine. With that in mind, I started using it to fill trim holes in car bodies. In the beginning I just did trim holes up to about 1/4 inch in size. Technique Ė best practice: 1. Thoroughly clean the front and back side of whatever youíre fixing with lacquer thinner or acetone (donít use alcohol). 2. Sand the front side, and slightly chamfer the hole if possible. 3. Sandblast the back side, or rough it up good with sand paper if blasting isnít practical. 4. Place duct tape over the front of the hole. 5. Select an appropriate size coin or disc that will cover well beyond the diameter of the hole. Iíve used lots of pennies and a few quarters over the years. 6. Rough up one side of the coin by sandblasting or sanding. Note Ė it isnít illegal to destroy coins. Early laws pertaining to defacing coins pertained to gold coins, where people would abrade them to collect gold dust, then sell the dust and spend the coin). If something cheaper than a penny is available, that would work as well. 7. Place an appropriate size piece of duct tape face up on the bench. 8. Lay the coin centered on the duct tape, roughened side up. 9. Mix up a suitable batch of JB Weld, and form a generous puddle on top of the coin. 10. Apply the coin to the back of the hole, sealing it in place with the duct tape. Press firmly until a slight bulge is showing in the tape on the front side. 11. Allow the patch to cure overnight. Remove the tape from both sides. 12. Paint the backside if any bare metal is showing from the sanding or blasting process. Block the bulge flat on the front side. The repair may require one simple coat of primer and the hole will become virtually invisible. The most vigorous test result Iíve seen was when my 67 Chevelle was destroyed by a guy running a red light. Along with the rest of the car, the quarter panels were demolished, but the JB Weld over the original emblem holes remained untouched. Iíve made a few exceptions to the preferred technique. For example, my truck originally had the west coast style truck mirrors installed. To fill the mounting holes in the top door flange, I sanded both sides, chamfered the holes on both sides, taped the front, filled the hole from the rear with JB Weld, and pressed duct tape in place on the back. Once cured, both sides were sanded flat and painted. That was almost 20 years ago and thereís no indication where the holes were. Chamfering the hole provides more surface area and grip to the plug. About 10 years ago I got much more ambitious with this process and started filling bigger holes. The following pics show the gas tank filler hole on my 1960. I used the same technique above, but substituted a patch made from part of the original front fender. I metal worked it on a sandbag to a shape matching the body before installing. Hereís a picture of the patch from the inside, and the finished result from the outside.   I made a bed of almost ľ inch of JB Weld, pressed in place from the inside. The outside was covered with wax paper, held in place with duct tape. When cured, there were a few low spots I filled with more JB Weld, before a final skim of Rage filler. Itís been in place for about a decade, and the door has been slammed against it about a zillion times (okay maybe not that many). Other than a recent repaint it looks exactly as it did when I patched it. Thereís never been any hint of a crack or defect. About the same time, I purchased new aftermarket front fenders. The seam at the front of each fender was so poorly formed the inner panel had square corners leaving gaps big enough to push a pencil into. I used the same repair, sandblasted the entire crack/gap, sealed the back with duct tape, stood the fenders on their rear edge, and filled the entire seam with JB Weld. Same result Ė the fenders showed years of chips before the recent repaint, but the JB Weld repairs are permanent and look as good as new.  Most recently I filled my cowl vent using the same process. I lined the back with thin sheet metal sealed with urethane windshield adhesive. I then used one and a half packages of Industro Weld (regular JB Weld in a bigger package) to fill the slots. This was followed by a thin finishing coat of Rage body filler and some block sanding.   JB Weld is available at Walmart, Amazon, and most auto supply stores so itís easy to find. Itís the only brand I use. Iíve tried other competitive products, and they just donít have the same characteristics. JB Kwik is a similar product from the JB Weld company that sets up and dries faster. I use it for modeling, but it isnít as strong or heat resistant as original JB Weld, so most of the time I stick with the original. One more note Ė donít use heavy magnets to hold pieces in place while JB Weld is curing. The metal content is so concentrated in the epoxy filler the magnetic field can cause the mixture to pool around the magnet during the curing cycle. Last edited by augie; 04-03-2011 at 10:48 PM. Reason: http://67-72chevytrucks.com/gallery/data/1093/medium/jbweld002.jpg |
|
|
| Bookmarks |
|
|