
|
 11-27-2011, 06:06 PM
|
#501 |
|
Registered User
Join Date: Jul 2011
Location: Des Moines, Iowa
Posts: 3,016
|
Re: Junkyard Jimmy Super Low Buck Build Thread
very cool

__________________
project: "my happy mess" |

|

|
|
11-27-2011, 11:47 PM
|
#502 |
|
GEARHEAD
Join Date: Aug 2003
Location: MN
Posts: 6,120
|
Re: Junkyard Jimmy Super Low Buck Build Thread
Todays progress report. Here's where I started...
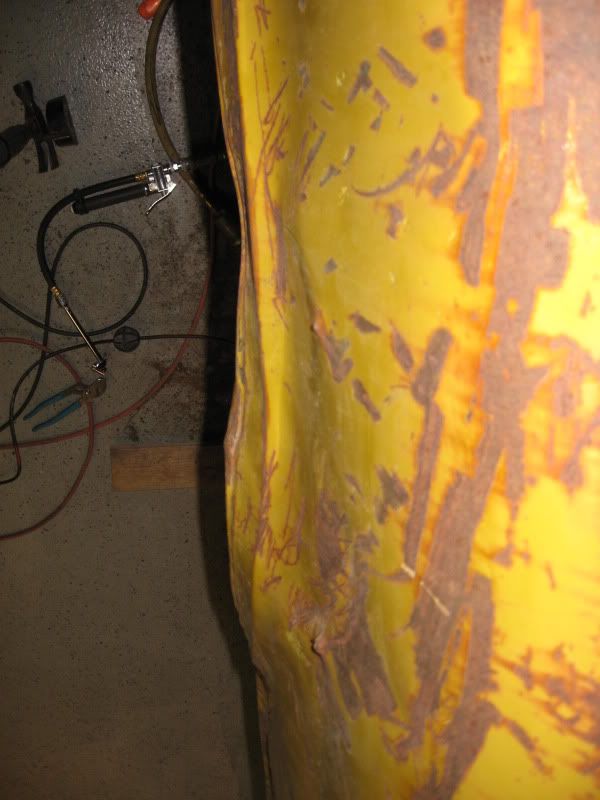 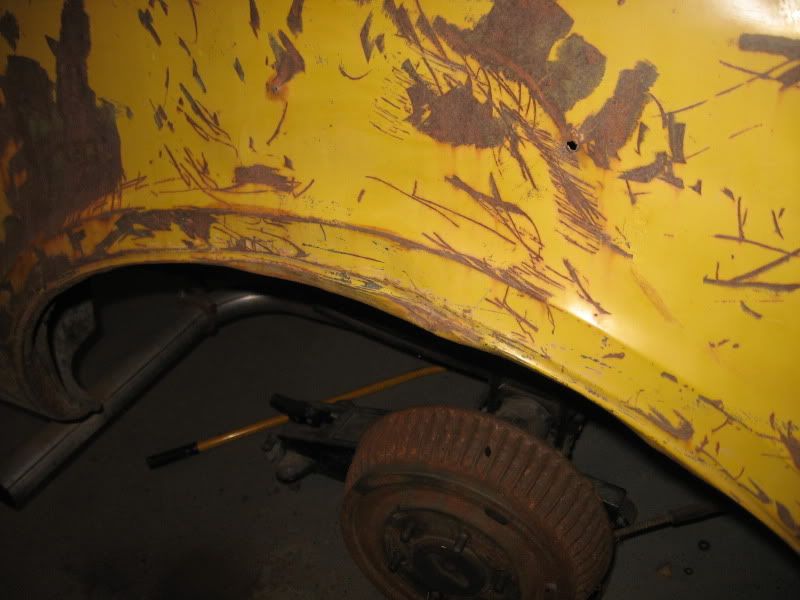 The inflated football got the basic shape of the bedside back, but the wheel well arch was a complete mess yet. For that I used a combination of hammers, dollies, blocks of wood, pliers, etc. I made enough improvement with that to bring me to the point where I could say to myself, ok, this should work out. Which would justify soldiering on, which meant stripping paint so the stud gun would be effective and make it easier to "see" my work without the rust and paint lines. Which got me here...  During the stripping my buddy from the body shop stopped by to check my progress. He was shocked and offered me a job. I told him he couldn't afford me. He said to just take my time and keep on and gave me some tips for working with the puller. A couple things I learned today, first the slide hammer can be used for more than just sliding the hammer for pulling. I figured out that if I just used my weight to jerk it back it was probably more affective. There is less shock on the stud because the force isn't just banged on and as for weight and force, I think I can generate more energy jerking my 245 lbs back than the couple pounds of the slide hammer. Second, you can put the slide hammer on the stud and give it steady pull and use a hammer around that spot to knock down some highs. Kind of similar to having a dolly on the back side. Anyway, here's where I ended the day... 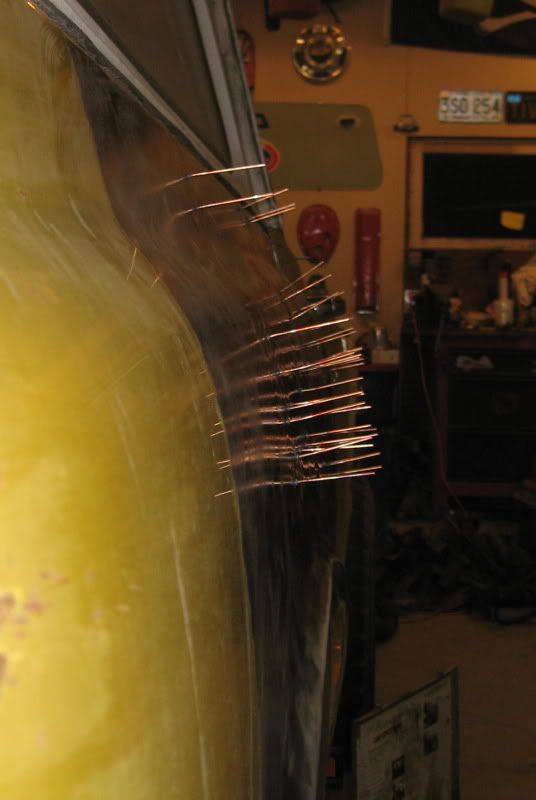 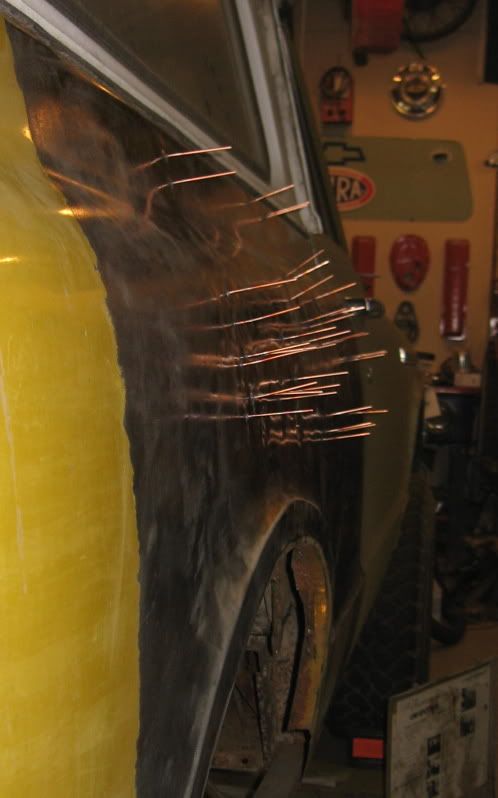 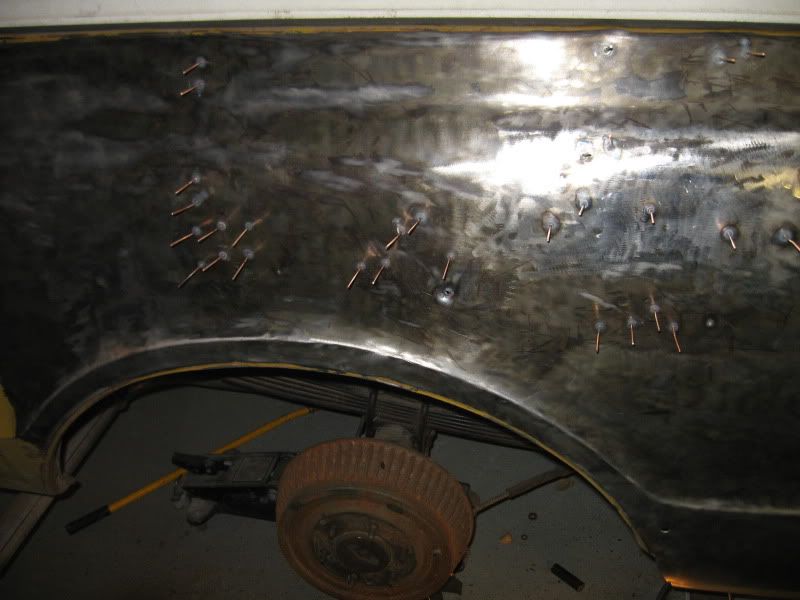 Not done yet, but it has come a long way and if I keep working it I won't even have to use a ton of mud on it to get it smooth.
__________________
If no one knows what you're doing, they can't tell you you're doing it wrong HG's Dream Car Build - Shelby Cobra Kit Build your own adjustable track bar 71  Long Fleet C/10 Long Fleet C/10 72  Jimmy 4x4 (Junkyard Jimmy) Jimmy 4x4 (Junkyard Jimmy)HG's Plow Truck '78  K35 Dually K35 DuallyBigass Farm Truck HG's thread of miscellaneous stuff |

|
|
|
11-28-2011, 02:05 AM
|
#503 |
|
VA72C10
 Join Date: Mar 2008
Location: Midlothian, VA
Posts: 25,269
|
Re: Junkyard Jimmy Super Low Buck Build Thread
That's a 1000% improvement. You must have a great sense of accomplishment!!!
__________________
Looking for a 67-72 swb or blazer project in or around VA. 
|
|
|
|
|
11-28-2011, 10:46 AM
|
#504 |
|
I miss this truck.
Join Date: Dec 2001
Location: Lexington, KY U.S.A.
Posts: 2,863
|
Re: Junkyard Jimmy Super Low Buck Build Thread
Whoa...
I'm absolutely blown away.
__________________
'07 GMC Acadia SLT. Sweet ride. '08 Crew Cab Z-71 short bed. Really like this truck A LOT. |
|
|
|
|
12-02-2011, 01:13 PM
|
#505 |
|
GEARHEAD
Join Date: Aug 2003
Location: MN
Posts: 6,120
|
Re: Junkyard Jimmy Super Low Buck Build Thread
Taking a day off today and got back to hammering on my bedside. Heres where I started the day...
  I just cut off the studs in the areas that I don't think will help it anymore, cleaned it up and sprayed some rattle can etch primer on it so I could see better where I was at. Borrowed the stud gun again but didn't use it yet today. I also borrowed a long handled dolly and a good body hammer and started banging away at it. It's much better than yesterday, but still has some issues to work out. The circled areas are high bulges (the ones above the wheel well will pop in and out). The lines are low areas. I think I'm within 1/8" on almost all of it. The top of the wheel arch is in and I need to figure out how to pull it out straight. Coming along better than I ever imagined though. 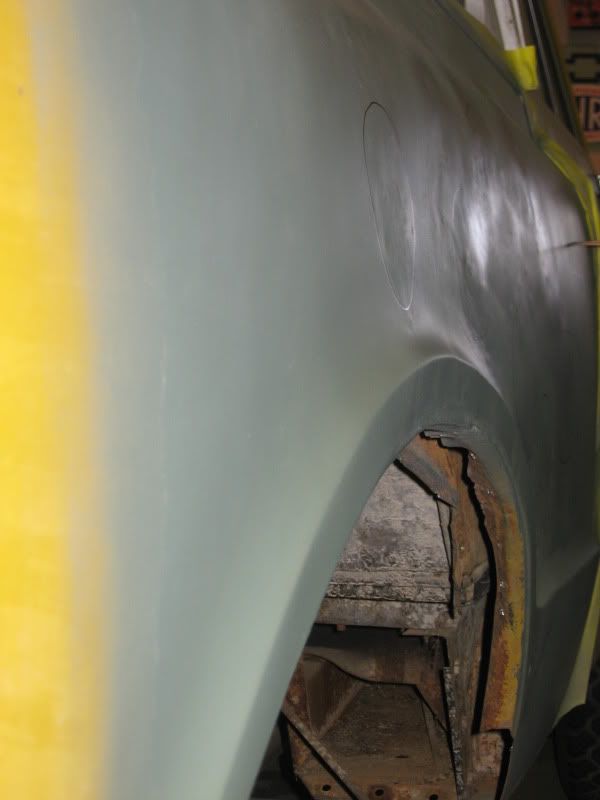 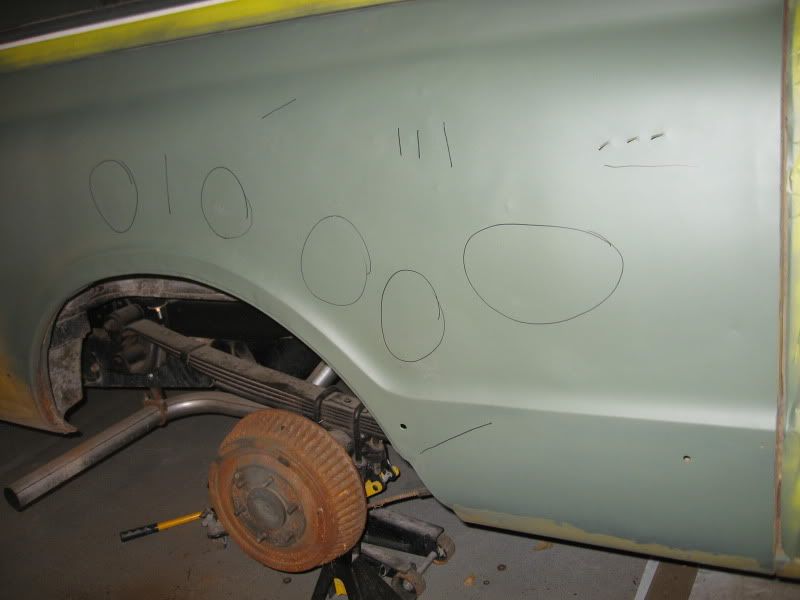
__________________
If no one knows what you're doing, they can't tell you you're doing it wrong HG's Dream Car Build - Shelby Cobra Kit Build your own adjustable track bar 71 Long Fleet C/10 72 Jimmy 4x4 (Junkyard Jimmy)HG's Plow Truck '78 K35 DuallyBigass Farm Truck HG's thread of miscellaneous stuff |
|
|
|
|
12-02-2011, 03:48 PM
|
#506 |
|
Registered User
Join Date: May 2010
Location: puyallup wa
Posts: 233
|
Re: Junkyard Jimmy Super Low Buck Build Thread
wow what a great job your doing !!!! keep it up !!!
|
|
|
|
|
12-03-2011, 12:36 AM
|
#507 |
|
Registered User
Join Date: Apr 2008
Location: Angleton, TX
Posts: 2,219
|
Re: Junkyard Jimmy Super Low Buck Build Thread
Nice work!
__________________
I don't always drive trucks; but when I do I prefer Chevy's. Stay driving my friends. '72 blazer 2wd build 67-72 Factory Big Block Registry |
|
|
|
|
12-03-2011, 01:11 AM
|
#508 | ||
|
GEARHEAD
Join Date: Aug 2003
Location: MN
Posts: 6,120
|
Re: Junkyard Jimmy Super Low Buck Build Thread
Quote:
Quote:
First I tried using the stud gun with a different tip that is like a button. Just rest it against the spot you want to heat, push the button and heat it up, pull the gun away and lay a wet rag on the spot to cool it and the steel will contract or shrink. I used it in 3 spots and it did help. It was most effective in the spot where the wheel tub bolt was pushed through the outer skin. Wanting to see if I could get the bulges to flatten out more I used my little propane torch to heat a bit larger area, layed a wet rag on it and I think it helped some. There are still high spots there, but they seem pretty stable. No longer popping in and out. With that done I decided to see what I could do with the back end of the panel. It was smacked in bad also and the worst of it was right at the top rear by the reverse light. Heres where it was when I started... 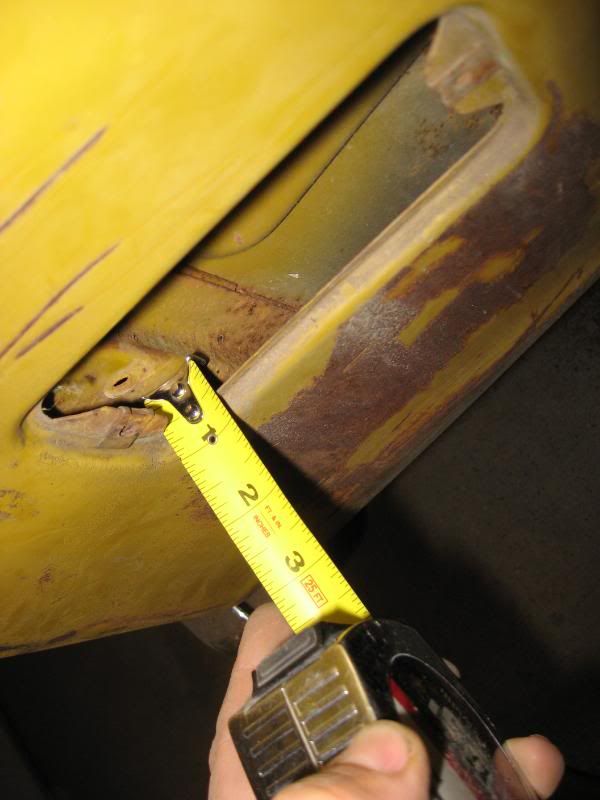 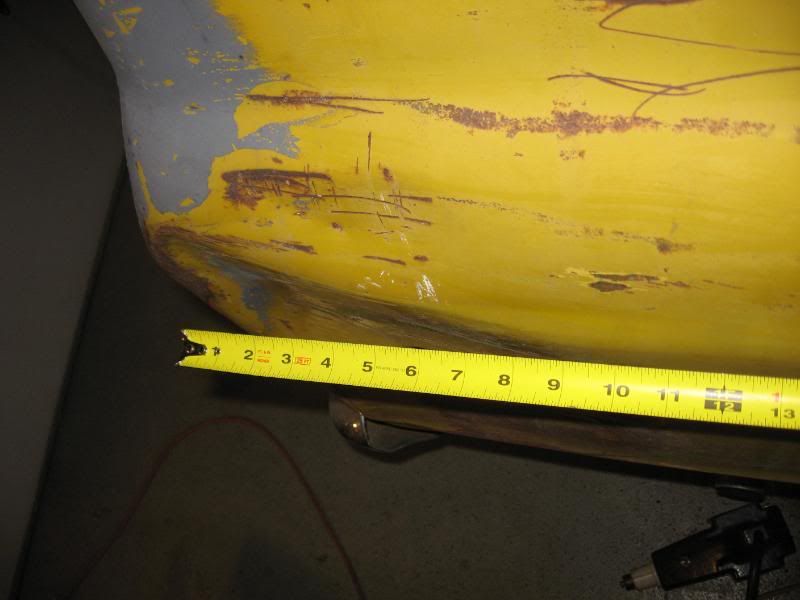 I took out the reverse light assembly, and used pry bars, dollies, hammers, punches, pliers and anything else I thought would help get in to the back side of those dents. I got the worst of it out. So now I'll strip off the paint there, clean it up and use the stud gun and puller to get it close enough to smooth out with a thin coat of filler. I'm pretty happy with how it turned out so far. 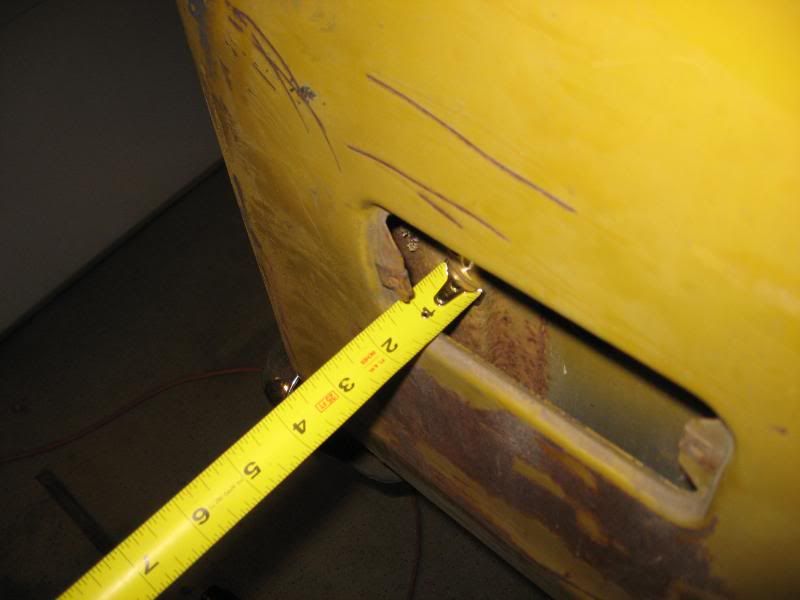 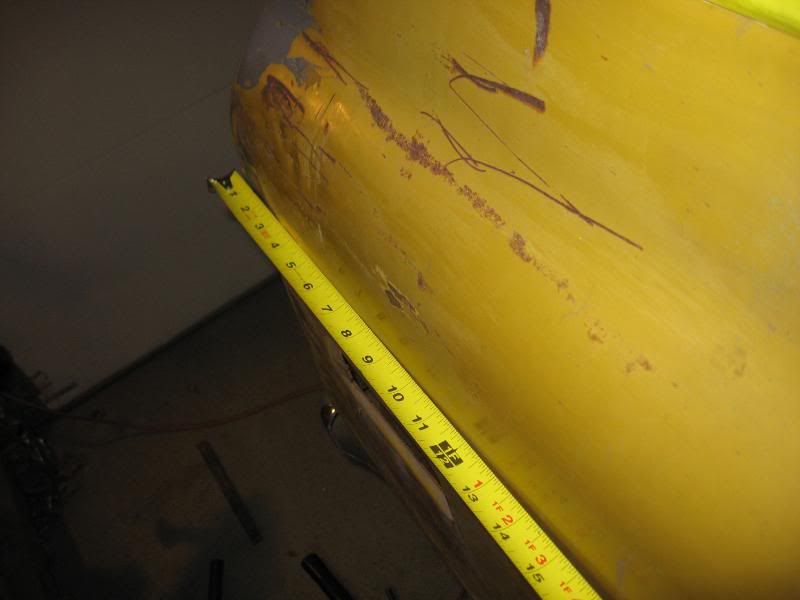 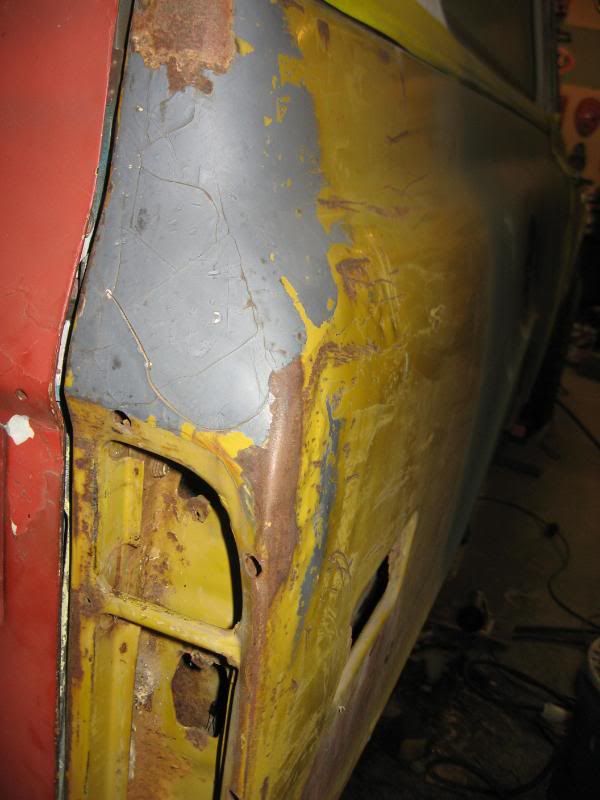
__________________
If no one knows what you're doing, they can't tell you you're doing it wrong HG's Dream Car Build - Shelby Cobra Kit Build your own adjustable track bar 71 Long Fleet C/10 72 Jimmy 4x4 (Junkyard Jimmy)HG's Plow Truck '78 K35 DuallyBigass Farm Truck HG's thread of miscellaneous stuff |
||
|
|
|
|
12-03-2011, 01:28 AM
|
#509 |
|
Registered User
Join Date: Mar 2010
Location: a t w a t e r cali 95301
Posts: 10,713
|
Re: Junkyard Jimmy Super Low Buck Build Thread
nice! come work on my bedside!
|
|
|
|
|
12-03-2011, 04:22 AM
|
#510 |
|
VA72C10
Join Date: Mar 2008
Location: Midlothian, VA
Posts: 25,269
|
Re: Junkyard Jimmy Super Low Buck Build Thread
You are turning into a regular body man!!! Great work!!!
__________________
Looking for a 67-72 swb or blazer project in or around VA.
|
|
|
|
|
12-03-2011, 12:15 PM
|
#511 |
|
Registered User
Join Date: Jul 2011
Location: Des Moines, Iowa
Posts: 3,016
|
Re: Junkyard Jimmy Super Low Buck Build Thread
Great progress for a few days.
__________________
project: "my happy mess" |
|
|
|
|
12-03-2011, 02:01 PM
|
#512 |
|
Registered User
 Join Date: Feb 2011
Location: A****er ca
Posts: 475
|
Re: Junkyard Jimmy Super Low Buck Build Thread
looks good i like this tread a lot and your jimmy
__________________
72 chevrolet 4wd 350/350 swb fleet green mean army machine 
|
|
|
|
|
12-03-2011, 10:01 PM
|
#513 |
|
Registered User
Join Date: Nov 2010
Location: Carlsbad, CA
Posts: 1,584
|
Re: Junkyard Jimmy Super Low Buck Build Thread
I've been watching your work in this thread for quite a while but haven't posted. I like your style. You're sort of like an alchemist; transforming junk into gold. Bravo.
__________________
- Jim - My Daily Driver is a 1969 Chevrolet Custom/20 Fleetside 350/TH400/Eaton H052 4.10 and its Project thread is here http://67-72chevytrucks.com/vboard/s...d.php?t=456911 |
|
|
|
|
12-04-2011, 05:17 PM
|
#514 |
|
Registered User
Join Date: Oct 2006
Location: Oakridge Oregon
Posts: 1,865
|
Re: Junkyard Jimmy Super Low Buck Build Thread
GREAT WORK, keep it up....
Looks like night and day.
__________________
68 CST SWB - Gold/White 50th anniversary /TH350/Buddy Buckets/3.73 Posi/dogdish caps. 68 K10 Burb - Gold/White 327/SM465/NP205/3.73 "Daa Burb" build thread |
|
|
|
|
12-04-2011, 10:06 PM
|
#515 | ||||||
|
GEARHEAD
Join Date: Aug 2003
Location: MN
Posts: 6,120
|
Re: Junkyard Jimmy Super Low Buck Build Thread
Quote:
Quote:
Quote:
Quote:
Quote:
Quote:
I'll probably get back to it tomorrow. Thanks for the kind words and encouragement everyone.
__________________
If no one knows what you're doing, they can't tell you you're doing it wrong HG's Dream Car Build - Shelby Cobra Kit Build your own adjustable track bar 71 Long Fleet C/10 72 Jimmy 4x4 (Junkyard Jimmy)HG's Plow Truck '78 K35 DuallyBigass Farm Truck HG's thread of miscellaneous stuff |
||||||
|
|
|
|
12-05-2011, 01:17 AM
|
#516 | |
|
Registered User
Join Date: Mar 2010
Location: a t w a t e r cali 95301
Posts: 10,713
|
Re: Junkyard Jimmy Super Low Buck Build Thread
Quote:
|
|
|
|
|
|
12-08-2011, 09:52 AM
|
#517 |
|
GEARHEAD
Join Date: Aug 2003
Location: MN
Posts: 6,120
|
Re: Junkyard Jimmy Super Low Buck Build Thread
Last night I took an hour to strip more paint and hammer more dents. The area above the taillight was a layer of old filler. Looks like someone beat it with a hammer. Borrowed the stud gun again and pulled most of it out. That area s hard to do because of te thickness of the steel and the sharp bends. The studs won't stick hard enough to pull it hard, but I got it much better. Also added studs to some of the other areas that were low and got it smoother. I'll postsome pics later when I finish getting the old paint off and have it all in primer.
__________________
If no one knows what you're doing, they can't tell you you're doing it wrong HG's Dream Car Build - Shelby Cobra Kit Build your own adjustable track bar 71 Long Fleet C/10 72 Jimmy 4x4 (Junkyard Jimmy)HG's Plow Truck '78 K35 DuallyBigass Farm Truck HG's thread of miscellaneous stuff |
|
|
|
|
12-10-2011, 09:16 PM
|
#518 |
|
GEARHEAD
Join Date: Aug 2003
Location: MN
Posts: 6,120
|
Re: Junkyard Jimmy Super Low Buck Build Thread
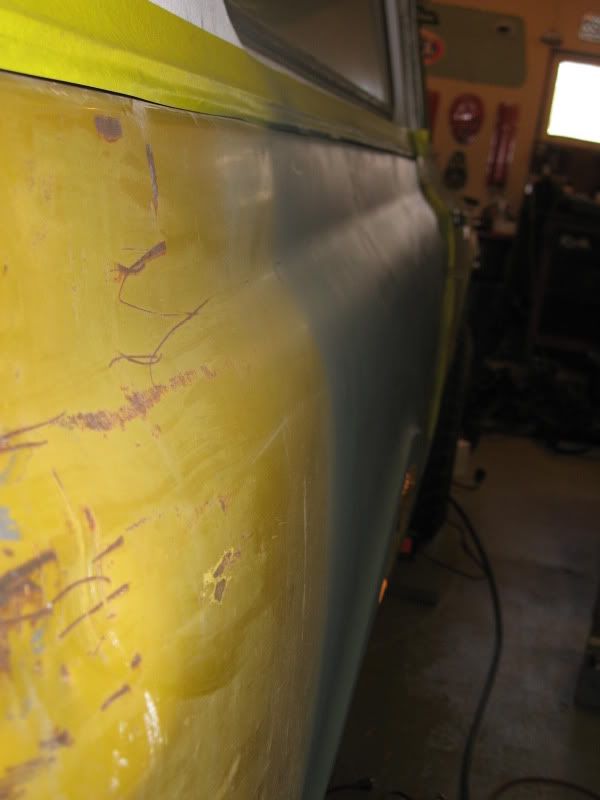
Got most of the old paint off the the bedside and cleaned off the studs for the puller work. Sprayed with the last of my rattle can etching primer. If you look close with a critical eye you will see lots of dings and it is no where near done. From here out though it will primarily be body filler work and some hammering on the high spots. I need to finish up the inner lip of the wheel arch and weld the inside panel back in place.
I also need to decide how to handle the front of the wheel arch. Both sides were cut for tire clearance. I could leave as is (not), or just put a flush patch in to close it up and maintain the tire clearance (maybe) or cut a patch from a truck bed and replace it back to original (maybe). 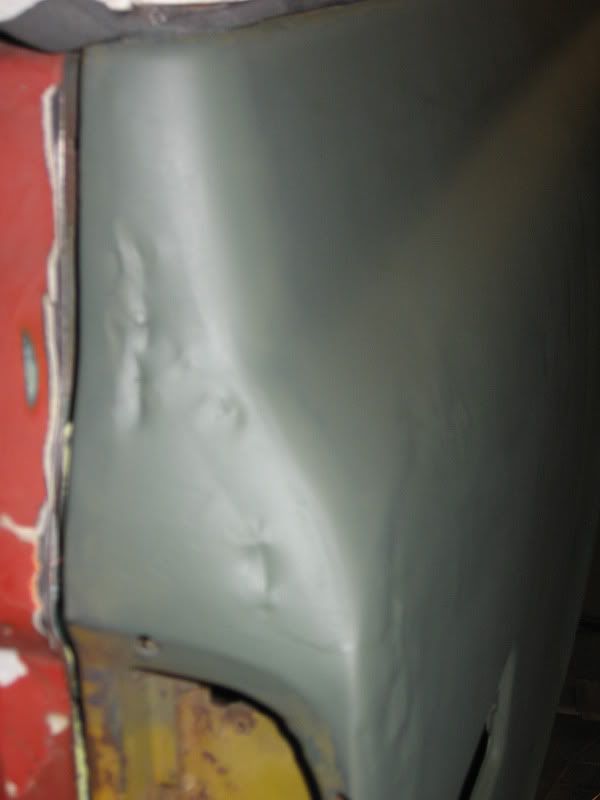 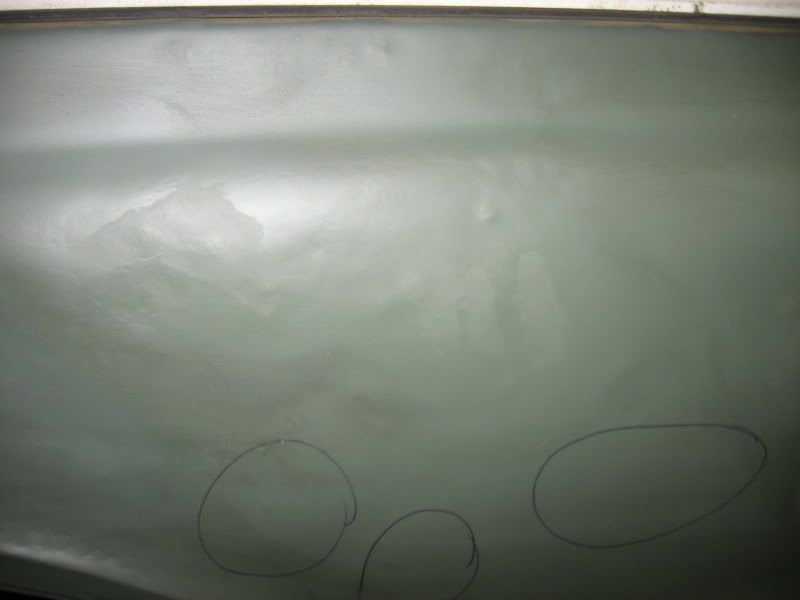 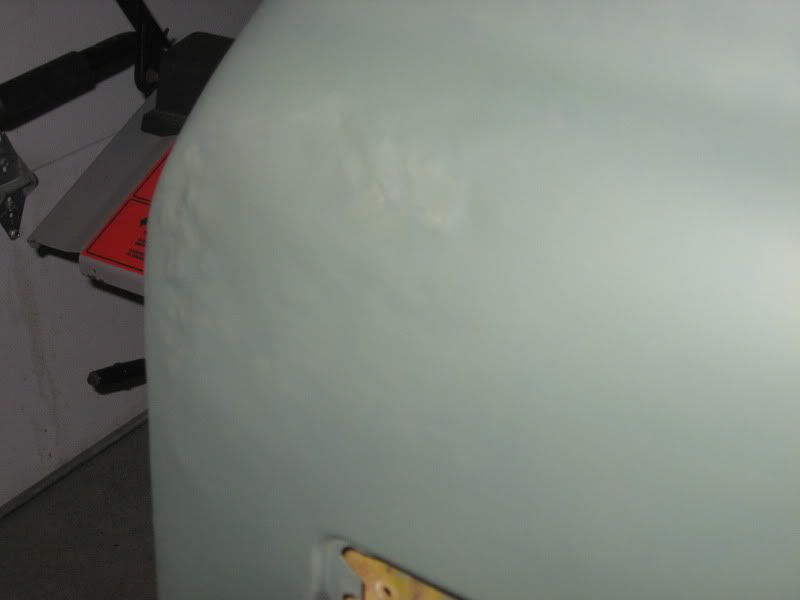  Where I started from... 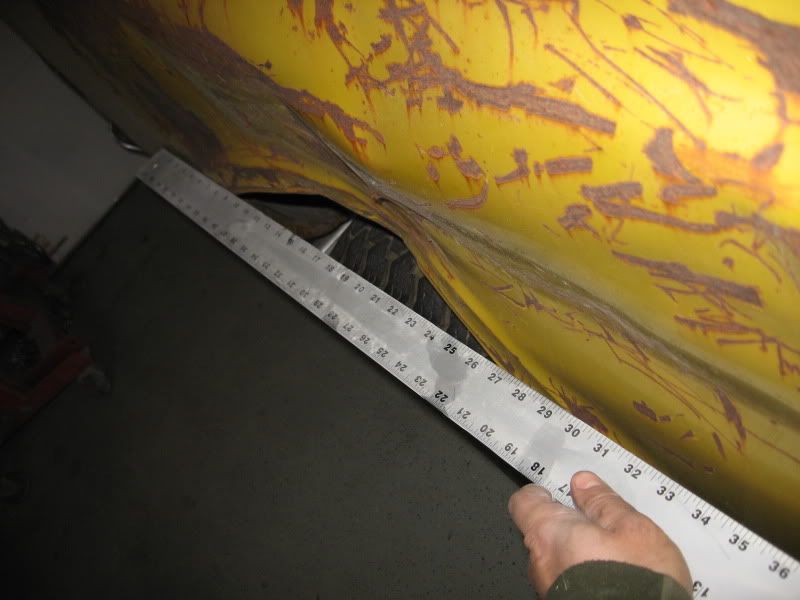
__________________
If no one knows what you're doing, they can't tell you you're doing it wrong HG's Dream Car Build - Shelby Cobra Kit Build your own adjustable track bar 71 Long Fleet C/10 72 Jimmy 4x4 (Junkyard Jimmy)HG's Plow Truck '78 K35 DuallyBigass Farm Truck HG's thread of miscellaneous stuff |
|
|
|
|
12-11-2011, 02:30 PM
|
#519 |
|
I miss this truck.
Join Date: Dec 2001
Location: Lexington, KY U.S.A.
Posts: 2,863
|
Re: Junkyard Jimmy Super Low Buck Build Thread
transformed
__________________
'07 GMC Acadia SLT. Sweet ride. '08 Crew Cab Z-71 short bed. Really like this truck A LOT. |
|
|
|
|
12-13-2011, 11:33 PM
|
#520 |
|
GEARHEAD
Join Date: Aug 2003
Location: MN
Posts: 6,120
|
Re: Junkyard Jimmy Super Low Buck Build Thread
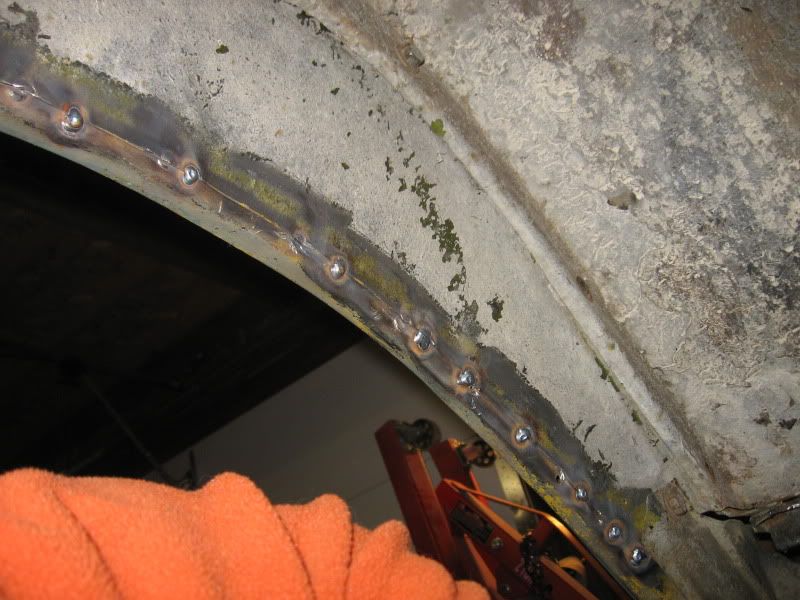
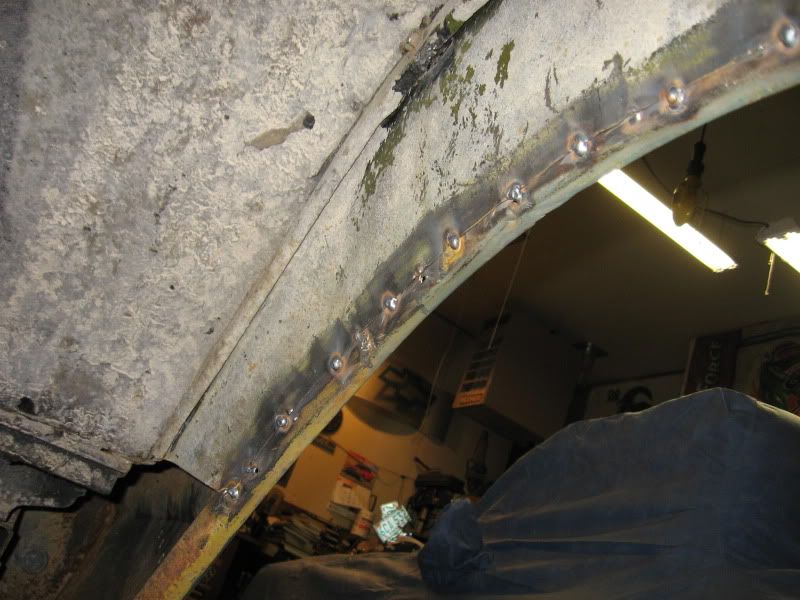
Got back under the wheel well to tack the inner and outer panels back together. No major problems, but I think I'll be cutting some of the tacks to get the arch pulled in more on the front and back. I think if I leave the top of the arch where it is, I can move the other areas in a bit to get a flatter opening all around. It's hard to see in any pictures and maybe I'm focusing too much on it, but I think it'll be worth the extra effort.
  With the panels welded together, it was easier to pound on it some more and try to get the high spots down some. I did more work around the tail light area also. It was pretty messed up. The damage on the side pulled on the corner, which was also smashed inward. It resulted in the edge by the tailgate getting pulled outward, the outside corner pushed in, the bottom corner of the light opening was in about 1/4". A lot of pry bar, hammer, pry bar, hammer to get it out where it's supposed to be. Started putting some filler on it too. More tomorrow and some sanding to see just where it all ended up. 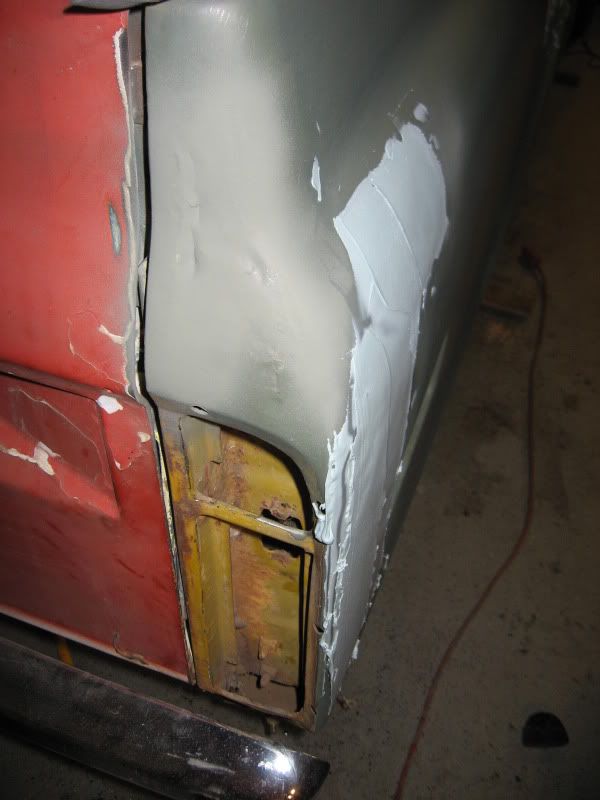 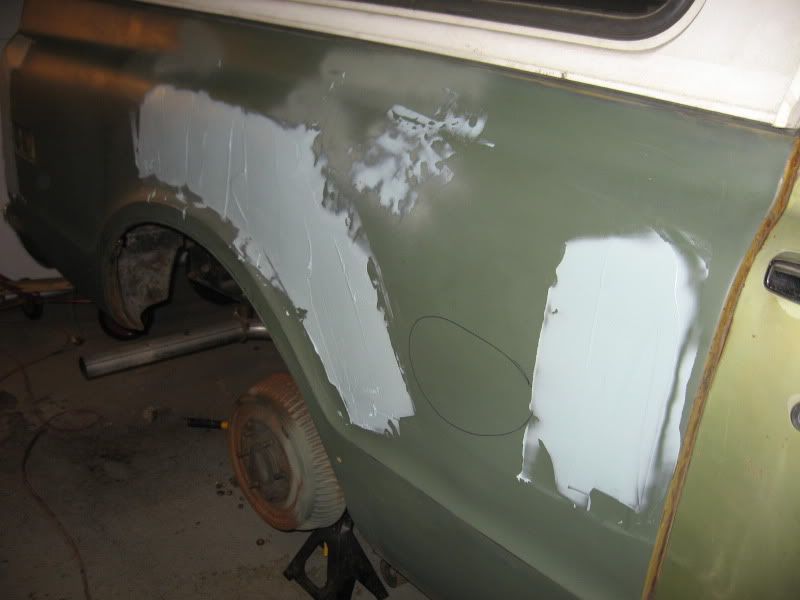
__________________
If no one knows what you're doing, they can't tell you you're doing it wrong HG's Dream Car Build - Shelby Cobra Kit Build your own adjustable track bar 71 Long Fleet C/10 72 Jimmy 4x4 (Junkyard Jimmy)HG's Plow Truck '78 K35 DuallyBigass Farm Truck HG's thread of miscellaneous stuff |
|
|
|
|
12-16-2011, 11:20 PM
|
#521 |
|
GEARHEAD
Join Date: Aug 2003
Location: MN
Posts: 6,120
|
Re: Junkyard Jimmy Super Low Buck Build Thread
Are you guys as tired of seeing pics of a banged up bed side as I am working on it? Took a day off today and did some mud work. Slowly building layers up and have most of it roughed in. Ran out of time with sanding my last layer, but it looks like I'll be able to finish it with just a bit more filler or maybe even a glaze coat and it'll be ready for primer. I decided not to worry too much about the wheel arch and the front where it was cut because I think I'm going to try and get a set of flares for it eventually. Future plans include coil over suspension with links and larger tires (waaaaay future).
First couple layers just to see where I was at, blocked with a 12" board.  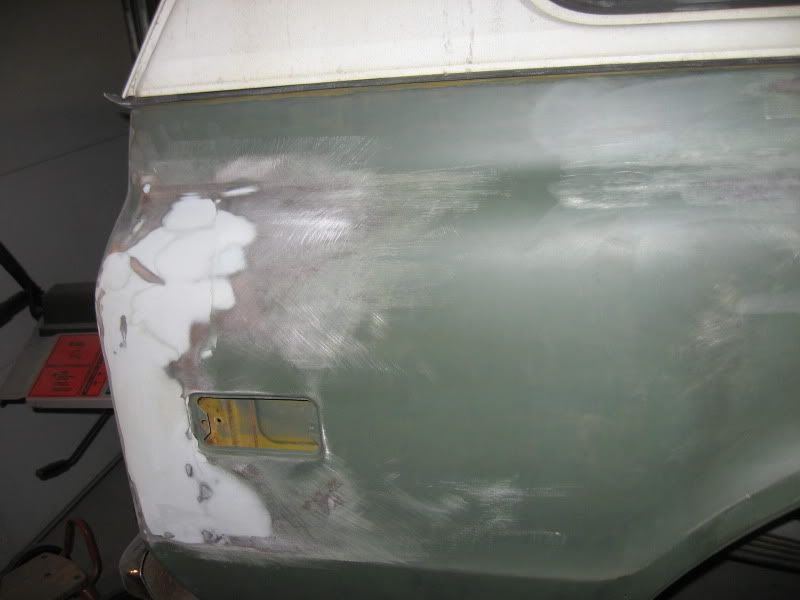 Then a skim coat over most of the damaged area, blocked out again and I have just a few little spots that need some fill. I don't think there is more than 1/8" of filler in any area. This next pic shows a magnet sticking to it in what should be the thickest layer of filler. 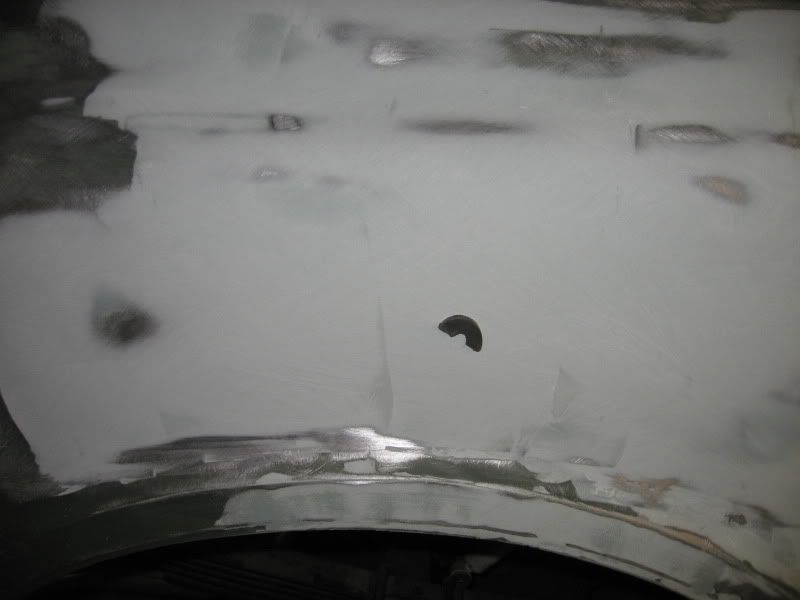 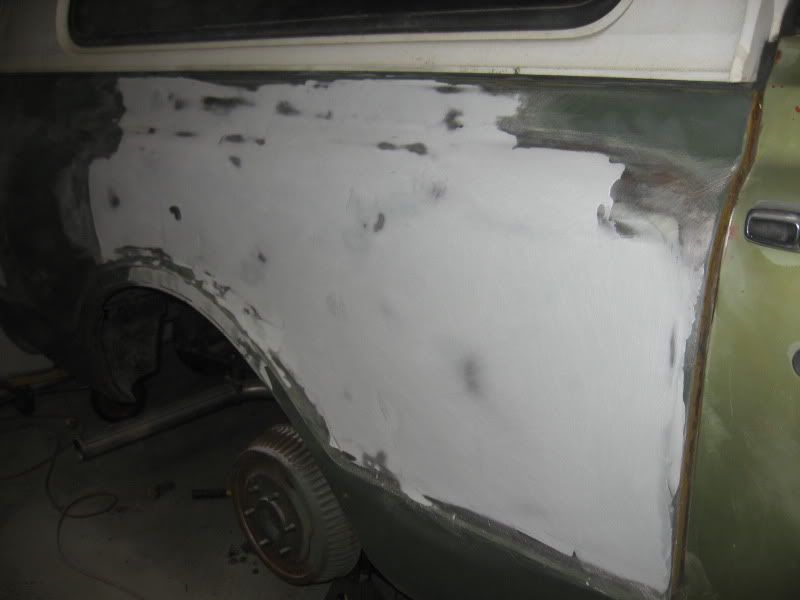 Still need to add some filler on the back corner, but it is very close now. I'm hoping to get it straight and in primer this weekend. Fingers crossed.
__________________
If no one knows what you're doing, they can't tell you you're doing it wrong HG's Dream Car Build - Shelby Cobra Kit Build your own adjustable track bar 71 Long Fleet C/10 72 Jimmy 4x4 (Junkyard Jimmy)HG's Plow Truck '78 K35 DuallyBigass Farm Truck HG's thread of miscellaneous stuff |
|
|
|
|
12-18-2011, 10:29 PM
|
#522 |
|
GEARHEAD
Join Date: Aug 2003
Location: MN
Posts: 6,120
|
Re: Junkyard Jimmy Super Low Buck Build Thread
After several attempts to fill all the lows and bang down all the highs, I finally got some high build primer over it. It's still very rough at this point, only used 100 grit so far with a 12" board, but I think it will be ok in the end. Definitely wont win any shows, good thing that isn't the plan.
The wife is really liking the copper colors, and I happened to catch a show this morning that had a 1939 ford with a 2 tone copper and silver paint job. The copper was PPG Copper Penny and she really liked that. Anyway, pics of the progress. Last of the regular filler work... 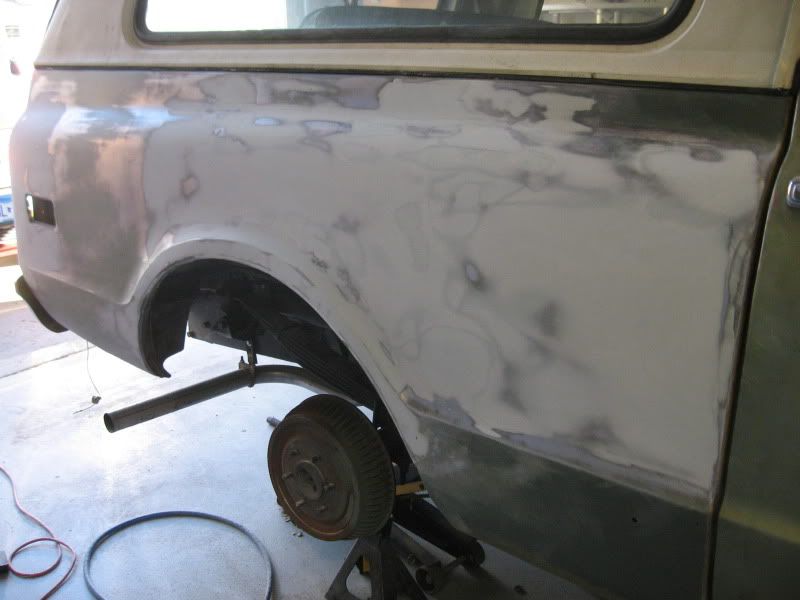 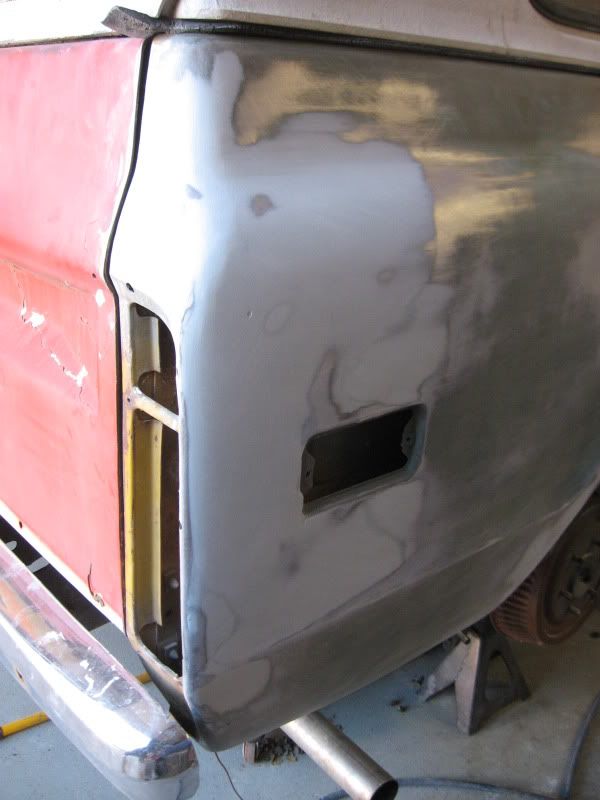 After a few coats of primer... (That line in front of the marker light is not a dent or wave, just where my spray pattern ended and the light catches it) 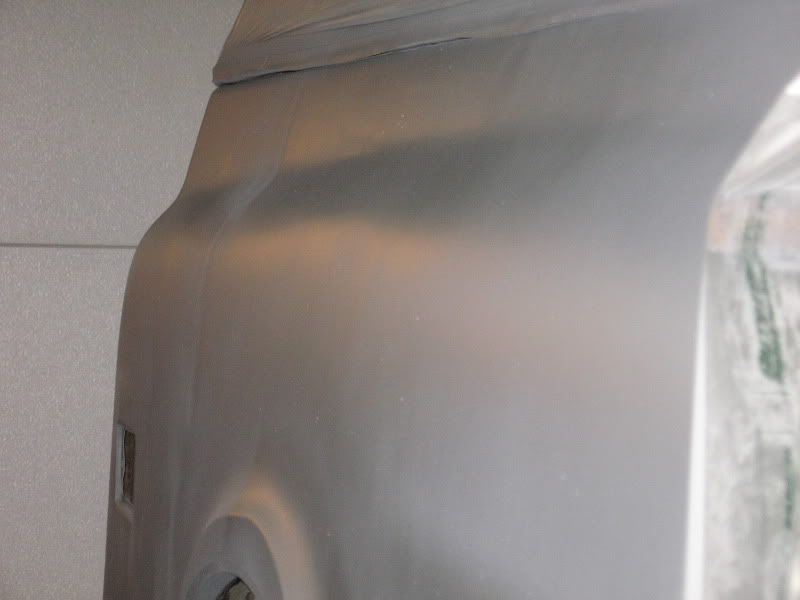 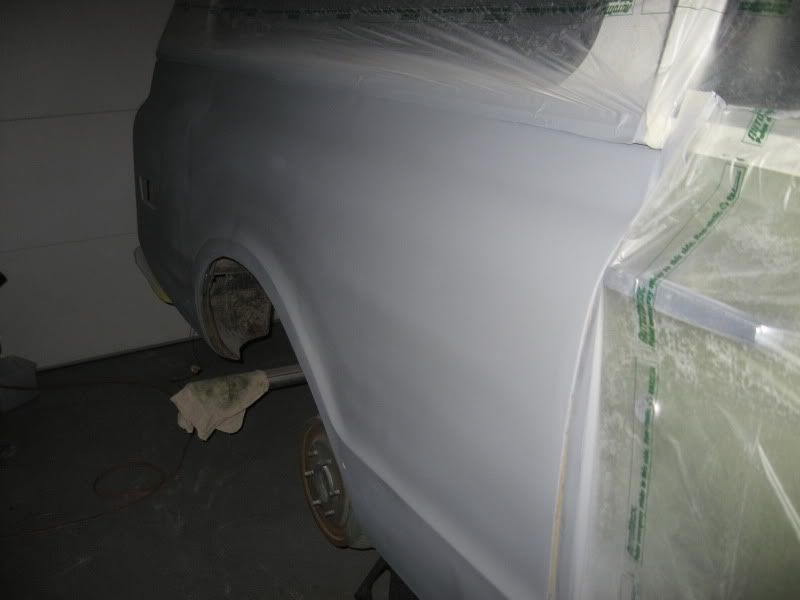 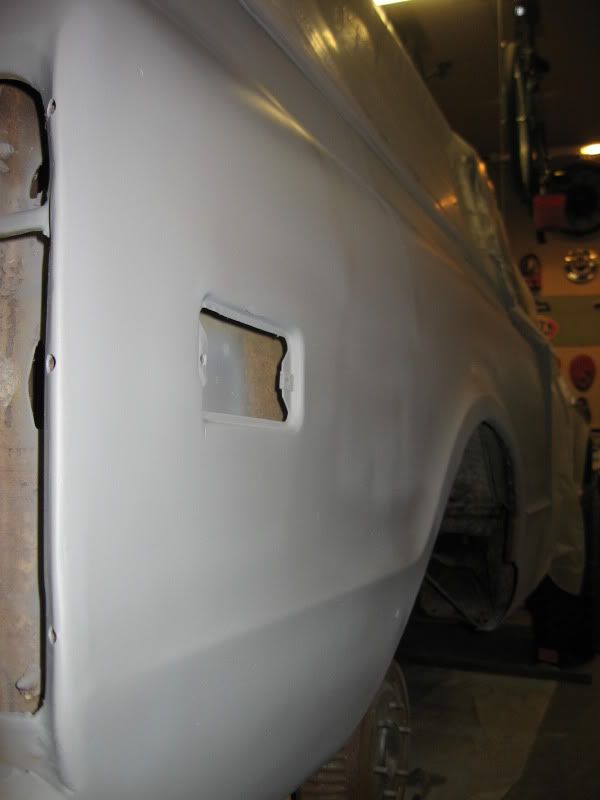 After that hammer fest the rest should be a piece of cake.
__________________
If no one knows what you're doing, they can't tell you you're doing it wrong HG's Dream Car Build - Shelby Cobra Kit Build your own adjustable track bar 71 Long Fleet C/10 72 Jimmy 4x4 (Junkyard Jimmy)HG's Plow Truck '78 K35 DuallyBigass Farm Truck HG's thread of miscellaneous stuff |
|
|
|
|
12-18-2011, 10:32 PM
|
#523 |
|
Registered User
Join Date: Mar 2010
Location: a t w a t e r cali 95301
Posts: 10,713
|
Re: Junkyard Jimmy Super Low Buck Build Thread
wow you saved that hole bedside! wish mine could be saved!

|
|
|
|
|
12-18-2011, 11:21 PM
|
#524 |
|
VA72C10
Join Date: Mar 2008
Location: Midlothian, VA
Posts: 25,269
|
Re: Junkyard Jimmy Super Low Buck Build Thread
Super work! Looks really good and keeps with the low buck theme nicely. You should be proud!
Copper sounds cool!
__________________
Looking for a 67-72 swb or blazer project in or around VA.
|
|
|
|
|
12-22-2011, 11:17 PM
|
#525 | ||
|
GEARHEAD
Join Date: Aug 2003
Location: MN
Posts: 6,120
|
Re: Junkyard Jimmy Super Low Buck Build Thread
Quote:
Quote:
Todays progress, took me about 15 minutes to pound out the next major dent. Not the easiest spot to work in, but you can reach it with a pry bar through the side marker hole. 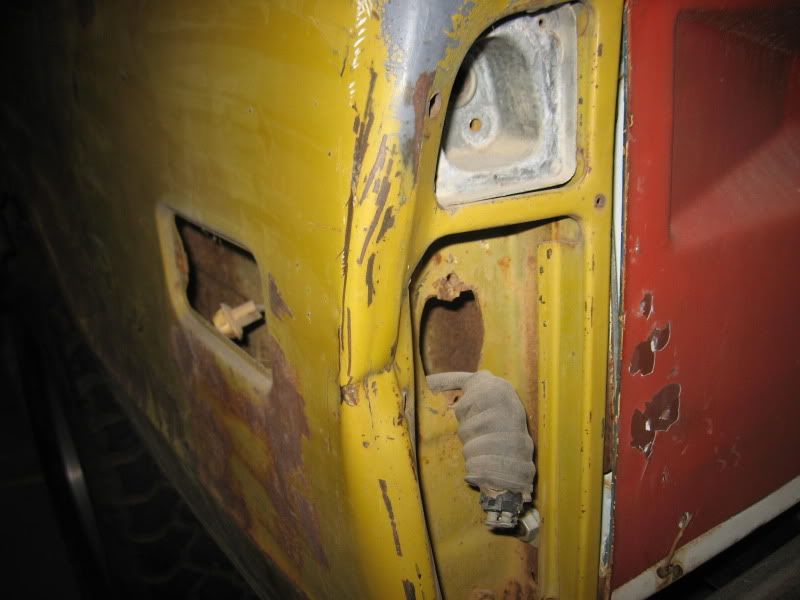 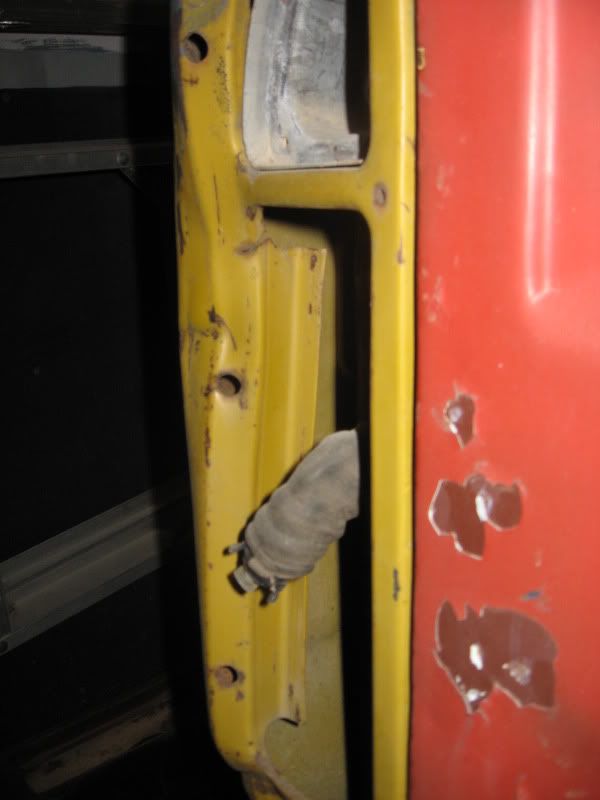 Just banged away from the back side until it came out, then had to beat the side in some, which pushed in the side some. I should have braced that inside with a piece of wood or something first. Always learning something. It'll pop out ok with the stud gun and puller. You can see in the straight on pic that the gap with the tailgate is not even. It spreads as you go down, and the outside edge of the brake light opening is bowed out yet. I'll weld the crack up at the top of the opening and keep working it. But definitely an improvement. Amazing what you can do with a hammer and pry bar. 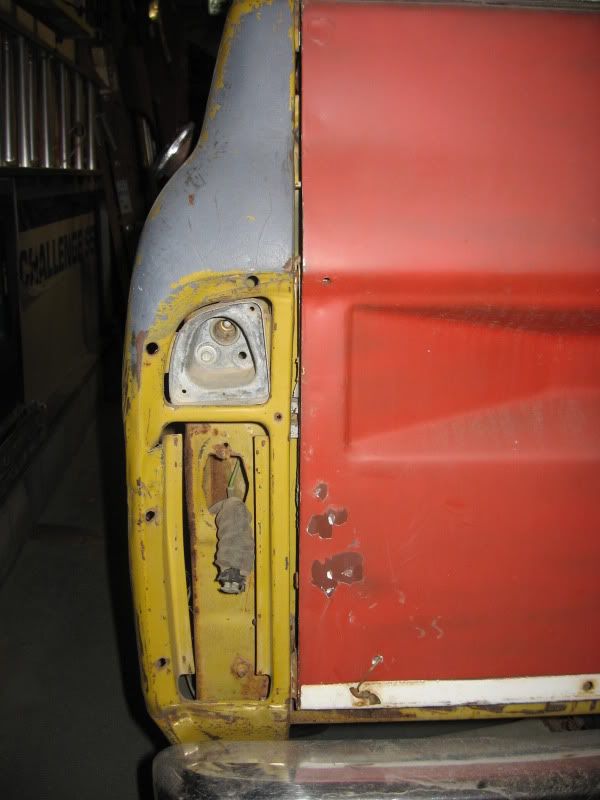 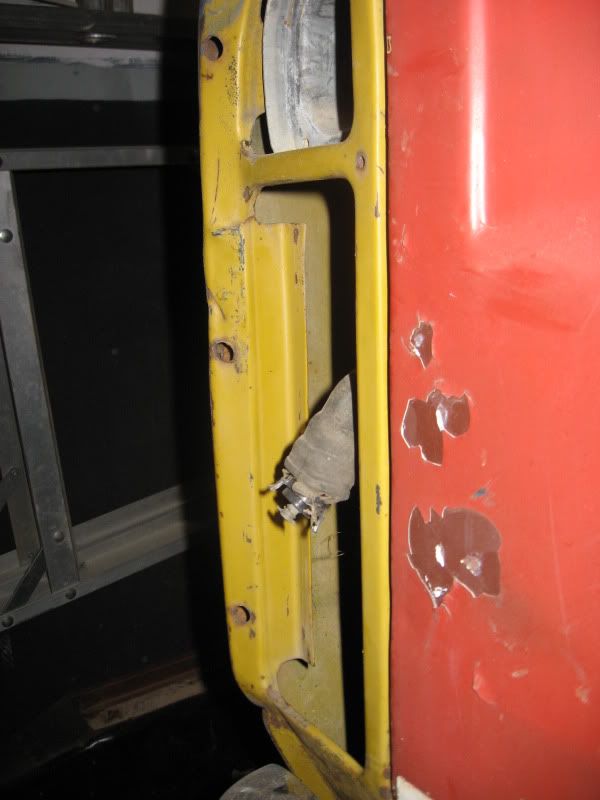 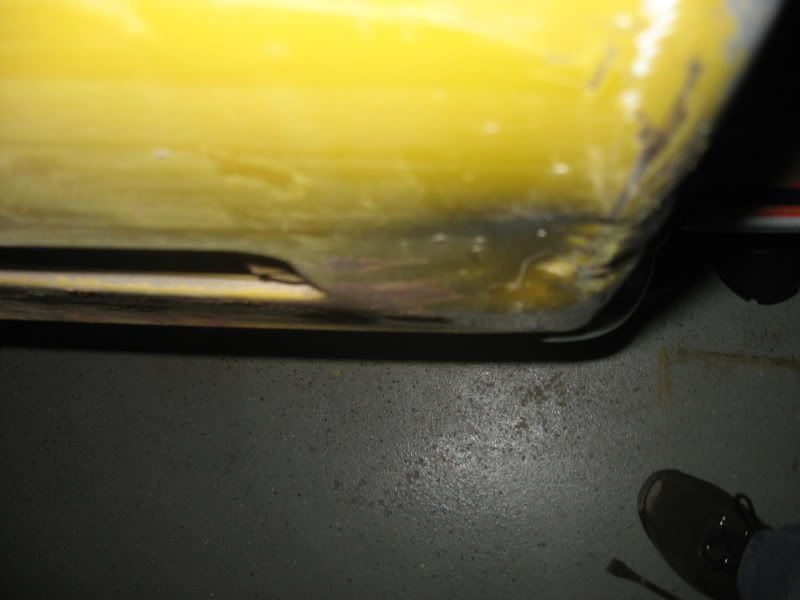
__________________
If no one knows what you're doing, they can't tell you you're doing it wrong HG's Dream Car Build - Shelby Cobra Kit Build your own adjustable track bar 71 Long Fleet C/10 72 Jimmy 4x4 (Junkyard Jimmy)HG's Plow Truck '78 K35 DuallyBigass Farm Truck HG's thread of miscellaneous stuff |
||
|
|
|
 |
| Bookmarks |
|
|


 Linear Mode

