
|
Register or Log In To remove these advertisements. |
|
|
|
|||||||
 |
|
|
Thread Tools | Display Modes |
 05-28-2013, 03:17 PM
|
#51 |
|
Registered User
Join Date: Sep 2012
Location: Unionville, MO
Posts: 185
|
Re: Project "Home Wrecker"
I hope that it all does not drown out! Looks like rain all week, so I am crossing my fingers it does not flood out and I get a few things completed around the shop. I am needing to pull the head on one of the big tractors this week and that will eat up a lot of my time (but should be able to sneak a few hours in on the truck when I have some help around and my father in law is on a parts run...he is all work no play!
 ) )Cheese "need a big sand blaster cabinet" Man
__________________
1969 Chevy C10 "Project Home Wrecker" "If you think you can't, you are probably right" |

|

|
|
05-29-2013, 03:16 PM
|
#52 |
|
Registered User
Join Date: Apr 2003
Location: Indep, MO
Posts: 5,893
|
Re: Project "Home Wrecker"
Posting from a canoe yet?
__________________
Boppa's Old Yeller Truck Build, Old Yeller's New Heart! Project Buzz Bomb Flyin' Low! |
|
|
|
|
05-30-2013, 08:22 AM
|
#53 |
|
Registered User
Join Date: Sep 2012
Location: Unionville, MO
Posts: 185
|
Re: Project "Home Wrecker"
just about haha!
I received a package from Classic Parts on Tuesday so I got around to opening it and actually had forgot some of the items I had ordered! I forgot I ordered the driveshaft u-bolt kit and the driveshaft carrier assembly. I was anxiously awaiting the rear shock relocation kit so I could get the rear u-bolts snugged up and have the rearend install completed. I got that all done last night and mounted the drive shaft carrier and called it a night b/c it was a hot and muggy SOB in the shop. That helped me make the decision to get the A/C installed and running!! If I get back home in time this evening I am going to try and see if we can get the motor installed. May be wishful thinking but in reality it should not take hardly anytime at all if everything lines up correctly...that is the big question!Cheese "more rain through the weekend" Man
__________________
1969 Chevy C10 "Project Home Wrecker" "If you think you can't, you are probably right" |
|
|
|
|
05-31-2013, 08:45 AM
|
#54 |
|
Registered User
Join Date: Sep 2012
Location: Unionville, MO
Posts: 185
|
Re: Project "Home Wrecker"
spent some time last night getting the adapter plates and mounts bolted to the motor and then measuring to the center of the tranny mount...I could never get the measurements to come out right with what the measurement on the perches to the tranny crossmember were. I spent hours researching this and came up with that when I made my adapeter plates the same measurements as the CPP ones, that gave me @ 3" of forward movement from the stock SB, and if I flipped the mounts to opposite sides it was about a 1" forward movement. What is bad is that either will likely work fine with what I am doing, but not having the cab on there make it difficult to see where my cab-motor placement will be in relation to each other. I have help coming over this evening to see if we can get everything to bolt in. It looks like I will have to use one of the tranny crossmember factory holes and drill the other.....no big deal, I assume I will have to get a custom driveshaft made when this is all said and done.
The body shop called with bad news last night, they said that the guys who put in my new cab corners did not sand the shipping primer off the metal and then put over 3/4" of filler over it and it was not even remotely adhering to the metal, it was flaking off as they were sanding it and it would not feather or blend due to this. They have to grind out all the filler, bring it all down to the bare metal and basically start over from what the last body shop did and charged me $1200 for...I am fuming mad over this, especially because it was a buddy who was needing the work. So my body work budget is now shot and I need to start selling off some of my extra/old parts to try and recoup some of this loss. I guess that is just the way it goes sometimes. Maybe tonight if we get the motor in and tranny mounted up correctly, that will make me feel a bit better about things. Cheese "will probably need a few cold beers too" Man
__________________
1969 Chevy C10 "Project Home Wrecker" "If you think you can't, you are probably right" |
|
|
|
|
06-01-2013, 01:08 AM
|
#55 |
|
Registered User
 Join Date: Apr 2013
Location: Torrance california
Posts: 14
|
Re: Project "Home Wrecker"
Sounds like my body guy, that is why i started to learn how to do all my own body work..i have my good eye on the short fleet bed of yours i just need the sides, so if you get rid of them keep me in mind, project looks awesome hope mine looks half as good..
|
|
|
|
|
06-01-2013, 11:41 AM
|
#56 |
|
Registered User
Join Date: Apr 2011
Location: .
Posts: 3,104
|
Re: Project "Home Wrecker"
You Sir have been added to "One of my Heroes" List.
Gigantico shops and more trucks added weekly.  Sorry to hear about the body shop downer news. That right there is why I tried, trying?,am trying!?!,., in process of doing some of my own body work/body modifications. Im not perfect but its mine. Looks like you have enough room to make your own paint booth/body shop area. Read the whole thread and liking what I see. Great job, keep it up. Subscribed. 
|
|
|
|
|
06-02-2013, 08:39 AM
|
#57 |
|
Registered User
Join Date: Sep 2012
Location: Unionville, MO
Posts: 185
|
Re: Project "Home Wrecker"
Thanks guys, things are coming along slow but sure. I had my buddy JR come over friday and we thought it should be a 30 minute install of the motor and then on to beer drinking...WRONG!!! When we went to put the motor in I thought the factory exhaust manifolds would easily clear, but I was wrong. Then when we took them off the oil pan was hitting the front suspension cross member. I was at the point of desperation where I was going to cut or notch a clearence in the cross member and just be done with it. Luckily JR takled me out of that and we pulled the motor out again and then measured for about the 873rd time and came up with moving the motor mounts back to the 6 cylinder mounting holes and we just had to drill one hole on each side for the lower bolt of the motor mount. Once that was done and we had scratched enough paint and chipped some powder coat off stuff I was hoping and praying this would be our fix...and it WAS! This remounting of the motor stands worked well with the LS conversion plates I had made and it also allowed for the mounting of the CPP tranny mount to the factory bolt holes in the frame. So gents.....here she sits as an official roller with the LS motor and 4L60E tranny installed! (and yes, we celebrated with a few cold beers afterwards!
)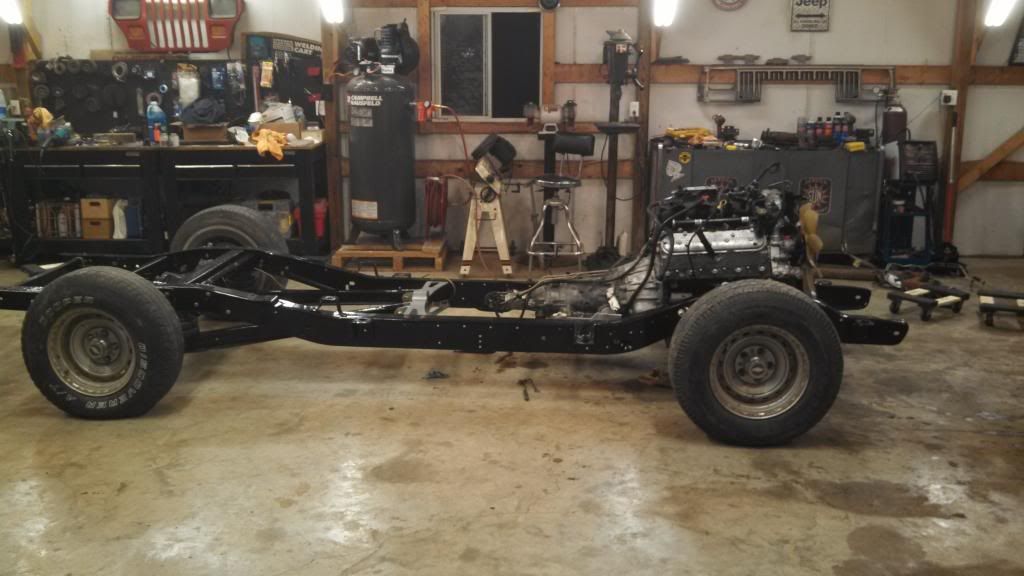 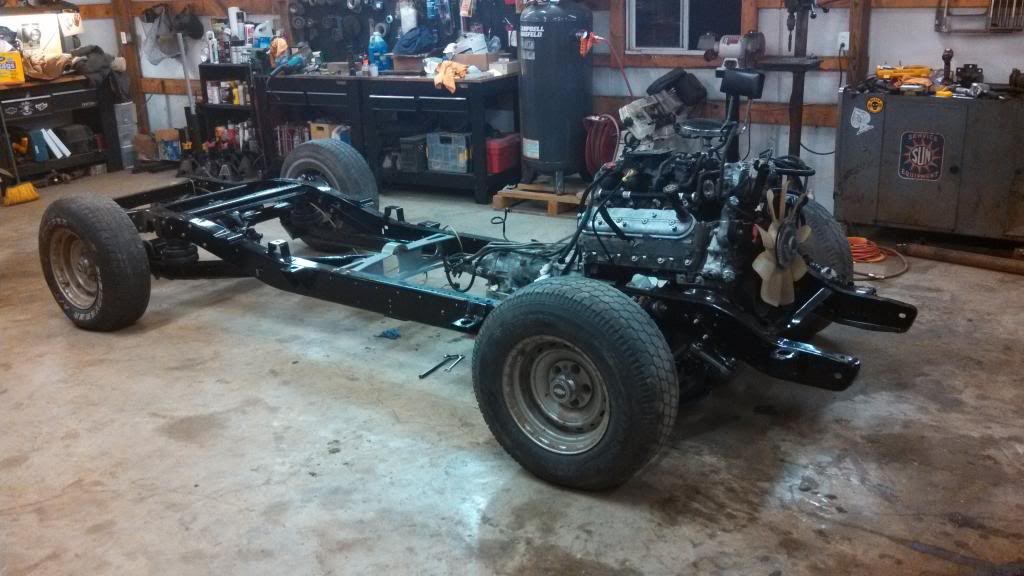  I am going to spend a few minutes in the shop this afternoon and going over and snugging up bolts and retorque what was done.... Cheese "one more thing marked off the list" Man
__________________
1969 Chevy C10 "Project Home Wrecker" "If you think you can't, you are probably right" |
|
|
|
|
06-02-2013, 03:55 PM
|
#58 |
|
Registered User
Join Date: Apr 2013
Location: Torrance california
Posts: 14
|
Re: Project "Home Wrecker"
look nice so the stock pan clears using 6cly mount points ? thanks i was going to go buy the camaro pan to get it to fit saved me 300$ you the man. figured it was no biggy as my friend gave me the 5.3 with all the wiring and trans, doing the same to mine Keep up the good job your taking all the hard work out of it for me LOL
|
|
|
|
|
06-02-2013, 03:56 PM
|
#59 |
|
Registered User
Join Date: Apr 2013
Location: Torrance california
Posts: 14
|
Re: Project "Home Wrecker"
also i believe the camaro manifolds or corvette might give you clearance if the flanges are hitting the frame
|
|
|
|
|
06-02-2013, 05:35 PM
|
#60 |
|
Registered User
Join Date: Jul 2011
Location: Farmville, Va
Posts: 3,027
|
Re: Project "Home Wrecker"
good job will keep lookin in.my bride says
i have 2 many toys also |
|
|
|
|
06-02-2013, 09:12 PM
|
#61 |
|
Registered User
Join Date: Sep 2012
Location: Unionville, MO
Posts: 185
|
Re: Project "Home Wrecker"
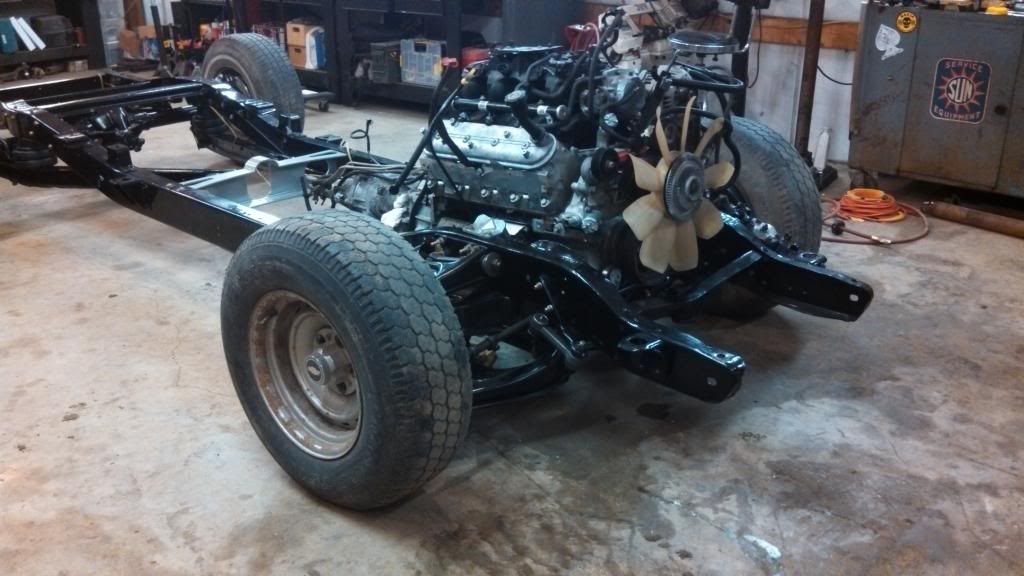
Thanks guys. One of the nice things about sliding back to the back set of holes (6 cyl holes) is that I was able to remain using the factory tranny cross member holes and that gave me a good idea od where the tranny and motor placement would be after the cab was sat on. I measured a parts truck that I have and looks like I have plenty of room. I was also able to slide the new A/C compressor in without any modifications. I am still in search of A/C parts but at least I have the compressor for the LS set up. I did have to drill an additional hole in the front cross member for the stud on the bottom of the CPP mounts but it was easy. Take into consideration that I made my own LS adapter plates that would mirror the holes of the ones that CPP sells but I also used the 4th hole on the block that they dont. After I had those made, they are supposed to be 3" forward mounts as per my reading and research (could be way wrong though, it is the internet!
) I then swapped sides of where I thought they were supposed be on and that gave me a 1" forward mount I believe, and gave me enough room to slide the compressor in from the front w/o any problems. Confusing enough?? haha!
__________________
1969 Chevy C10 "Project Home Wrecker" "If you think you can't, you are probably right" |
|
|
|
|
06-05-2013, 11:19 AM
|
#62 |
|
Registered User
Join Date: Sep 2012
Location: Unionville, MO
Posts: 185
|
Re: Project "Home Wrecker"
I took a few minutes last night to step out to the shop and was looking things over and saw that the plastic loom clip/sleeve that holds the positive cable to the starter, it runs right across the lower part of the motor and it was rubbing on my drag link, so after a minimal inspection I saw that it was going to be problematic with the additional drag. I am not sure if anyone else has encountered this or mentioned it, but I simply removed the loomed positive cable from the clip/sleeve and took out teh one 10mm bolt on the drivers side and the rest was just popped into place. It came off very easy and gave be back the needed room for the steering. The positive cable was still wrapped in the factory wire loom and I simply just remounted it back w/o the clip/sleeve and used zip ties to hold it securely out of the way. A cheap and easy fix and I now have no steering interference. I was also pleasently surprised that the PS pump and lines on the LS were a direct fit to the PS gear box from my 74 donor rig and no interference there either. I am hoping to have the radiator support worked over by the end of the weekend adn have it mocked into place and get the radiator, PS cooler and maybe even the AC condensor fitted. It is all to the very slow going part now and I am needing to get some more $$ socked back into the build budget for the next phase.
Cheese "may try for a trip to Classic Parts in the near future" Man
__________________
1969 Chevy C10 "Project Home Wrecker" "If you think you can't, you are probably right" |
|
|
|
|
06-25-2013, 05:25 PM
|
#63 |
|
Registered User
Join Date: Mar 2008
Location: kansas city mo
Posts: 898
|
Re: Project "Home Wrecker"
I am now subscribed Tyler... It is looking great! Keep it up and I hope to see the trailing arms all prettied up soon.
__________________
Project "Edna Marie"http://www.67-72chevytrucks.com/vboa...74#post5998074 Toys: 2014 Dodge Ram 1967 SHORTBED |
|
|
|
|
06-26-2013, 08:09 AM
|
#64 |
|
Registered User
Join Date: Apr 2003
Location: Indep, MO
Posts: 5,893
|
Re: Project "Home Wrecker"
Lookin great!
__________________
Boppa's Old Yeller Truck Build, Old Yeller's New Heart! Project Buzz Bomb Flyin' Low! |
|
|
|
|
07-10-2013, 09:01 AM
|
#65 |
|
Registered User
Join Date: Sep 2012
Location: Unionville, MO
Posts: 185
|
Re: Project "Home Wrecker"
Made a few trip to Classic Parts as of late. Now I have all the front clip parts and they are ready to head to the body shop. I picked up some bed crossmembers and a splash shield from bguild a few weeks back as well (Thanks Brian!). I just ordered a wrangler tank, blazer sending unit and ep381 pump/kit....all should be here by early next week. I am leaning towards using the nylon fuel line kit that I have seen a lot of chatter about. Appears to be easier to work with and considerably cheaper than AN fittings and lines that wont be seen under this thing. The cab and doors are STILL at the body shop and in polyester primer for the last time, they got behind due to a major hail storm hitting the area a few months back and they got swamped with insurance work. I am hoping that in the coming weeks I can get it home...it is hindering my progress at this point. Next up is to get the computer and harness sent off for thinning and tuning. I have set a goal to have thing thing fired up by the end of August. It woud be nice to hear it run before harvest starts and I am tied up for 2 months. No pics of anything exciting right now...just lots of boxes of parts in the shop...OK, that is kind of exciting I guess
Cheese "time to save some more $$$!" Man
__________________
1969 Chevy C10 "Project Home Wrecker" "If you think you can't, you are probably right" |
|
|
|
|
07-10-2013, 09:16 PM
|
#66 |
|
Registered User
Join Date: Mar 2011
Location: Alto,Mi
Posts: 164
|
Re: Project "Home Wrecker"
sounds like its going to be a fun ride, keep up the nice work I will b keeping an eye on this since I am also doing a LS swap (sort of)
__________________
2008 HD 2010 Camaro 2ss (The Wife's Ride) 2005 Suzuki GSX-R 1300 "Busa" 1969 C-10 (under Construction) 2013 Sonic LT "LIVE LIFE,TASTE DEATH" |
|
|
|
|
07-10-2013, 09:50 PM
|
#67 |
|
Formerly- 1972SuperCheyenne
Join Date: Oct 2008
Location: Wake Forest NC
Posts: 5,782
|
Re: Project "Home Wrecker"
Looking good man, keep it up!
__________________
--Josh My Build Thread:http://67-72chevytrucks.com/vboard/s...d.php?t=799218 A good crossthread is better than Loctite any day. Life is not about what you have, but who you have to share it with. |
|
|
|
|
07-11-2013, 04:09 AM
|
#68 |
|
Registered User
Join Date: Aug 2012
Location: Topeka Kansas
Posts: 2,655
|
Re: Project "Home Wrecker"
Cheeseman I went through a very similar thing with CPP's engine perches, poly motor mounts and 3" forward adapter plates.
CPP's 3" forward adapter plates set the engine way too far forward to the point you couldn't even get a radiator in between the core support and the fan, but I noticed I could come back an inch by designing and fabricating a custom adapter so that's what I did so now my motor mount is as close to the AC compressor bracket as it can go and still get my engine perch bolt in, so I ended up with 2" forward adapter plates which is correct for this application. I set my engine and transmission back in but I still don't have enough room for my radiator and electric fans so I'm going to pull the engine and transmission back out and move my engine perches back 2" which will do the trick. Now I have to ebay the 3" forward adapter plates because CPP won't take them back so I know how you feel. BTW you will need doug thorley headers that was custom designed for this application to clear the CPP perches, you can pick them up for $590 shipped directly from their website, you will also need the Lokar flexible dipstick that was custom designed for this application which will set you back another $69 from Summit. Check out page #14 and posts #347 and #349 of my build for the information on the headers and dipstick. I'm looking forward to the rest of your build. |
|
|
|
|
07-16-2013, 09:50 AM
|
#69 |
|
Registered User
Join Date: Sep 2012
Location: Unionville, MO
Posts: 185
|
Re: Project "Home Wrecker"
Came home last night to a stack of boxes on the porch..fuel tank, pump and sending unit arrived as well as a new container of body/alignment shims. We were busy stacking hay yesterday so I did not get a chance to get into the parts, but if things go as planned, I should have a chance to check it all out this evening and maybe start working on getting the tank mounted. Baby steps...baby steps...
Cheese "now I need the computer tune and fuel lines" Man
__________________
1969 Chevy C10 "Project Home Wrecker" "If you think you can't, you are probably right" |
|
|
|
|
07-16-2013, 01:01 PM
|
#70 |
|
Registered User
Join Date: Apr 2003
Location: Indep, MO
Posts: 5,893
|
Re: Project "Home Wrecker"
Christmas in July! Yippeee!
__________________
Boppa's Old Yeller Truck Build, Old Yeller's New Heart! Project Buzz Bomb Flyin' Low! |
|
|
|
|
07-16-2013, 11:35 PM
|
#71 |
|
Registered User
Join Date: Sep 2012
Location: Unionville, MO
Posts: 185
|
Re: Project "Home Wrecker"
I made a little time today to work on the fuel system. Started out with the tank for an 87-90 4 cyl Jeep Wrangler, a sending unit from an 87 Blazer and the EP381 fuel pump assembly.
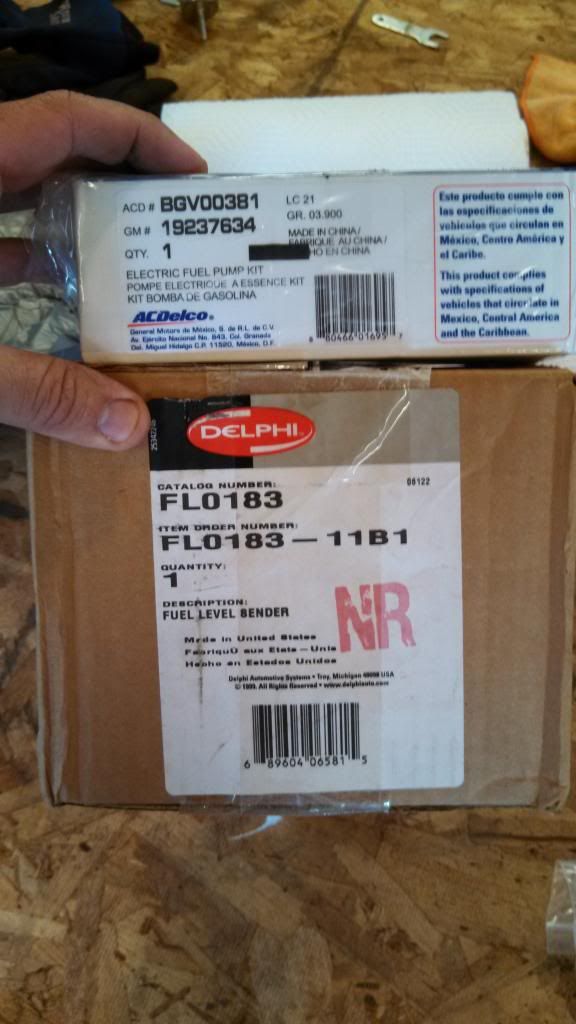 This is a pretty straight forward set up and install, one thing I had read about and experienced is that you have to form (bend) the rod that the float on the sending unit is attached to because it will hang up on the inner baffle in the tank as seen here. 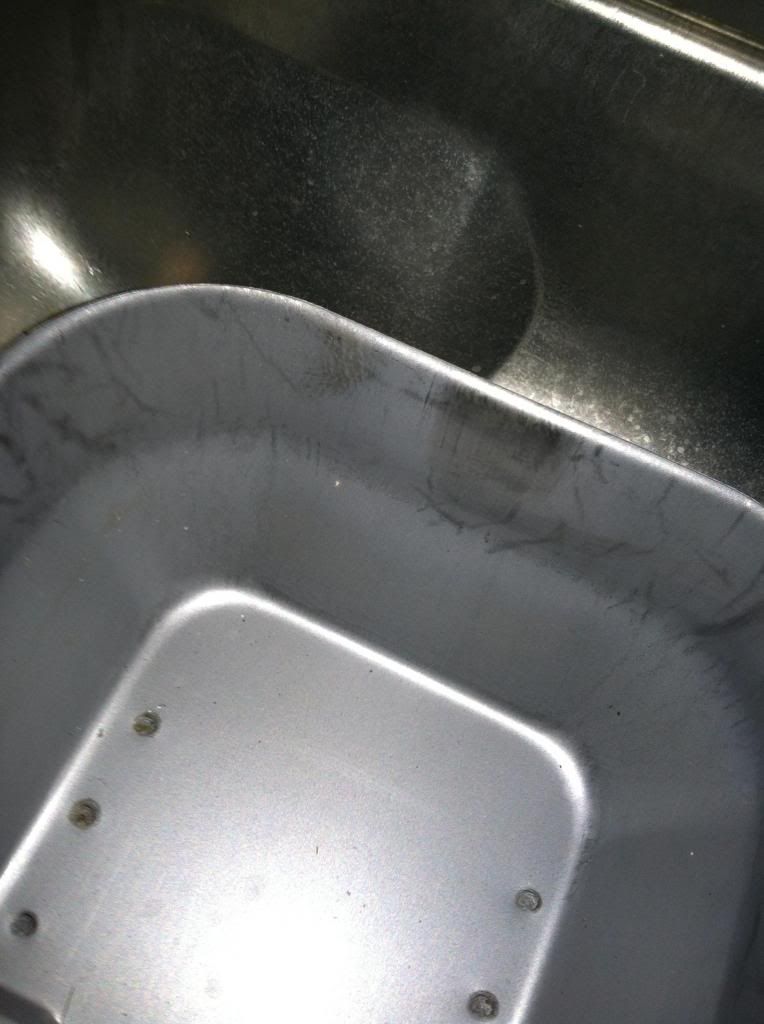 I just used 2 sets of vice grips to do a slow and easy bend until it cleared. First pic is the stock set up, second is the modified bend.  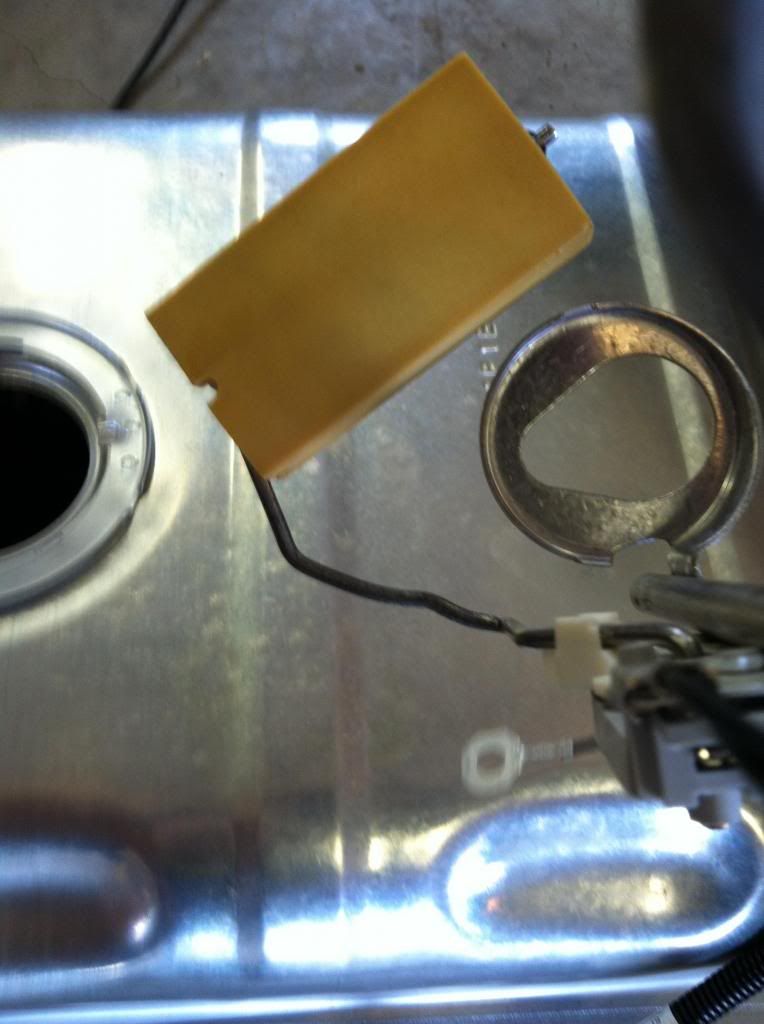 After the float was right, I installed the EP381 pump assembly and got ready to install the unit in the tank (yes I did install the strainer sock before installation into the tank) 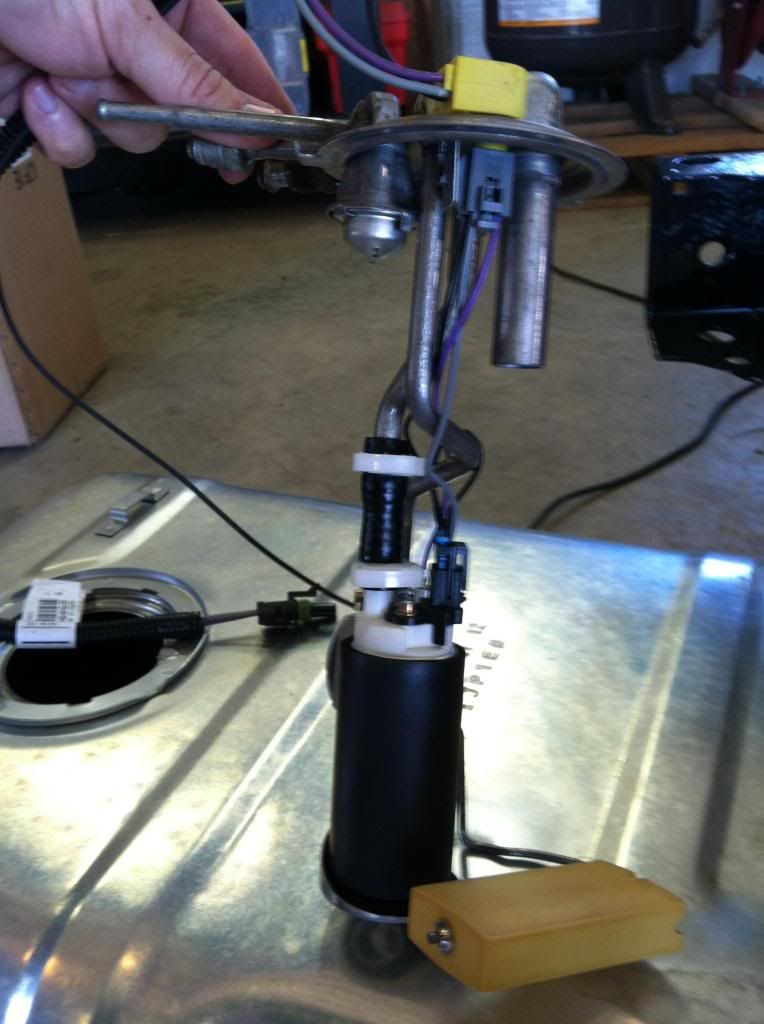 Once all together it looks like...well, you guessed it, an uneventful tank with a sending unit in it 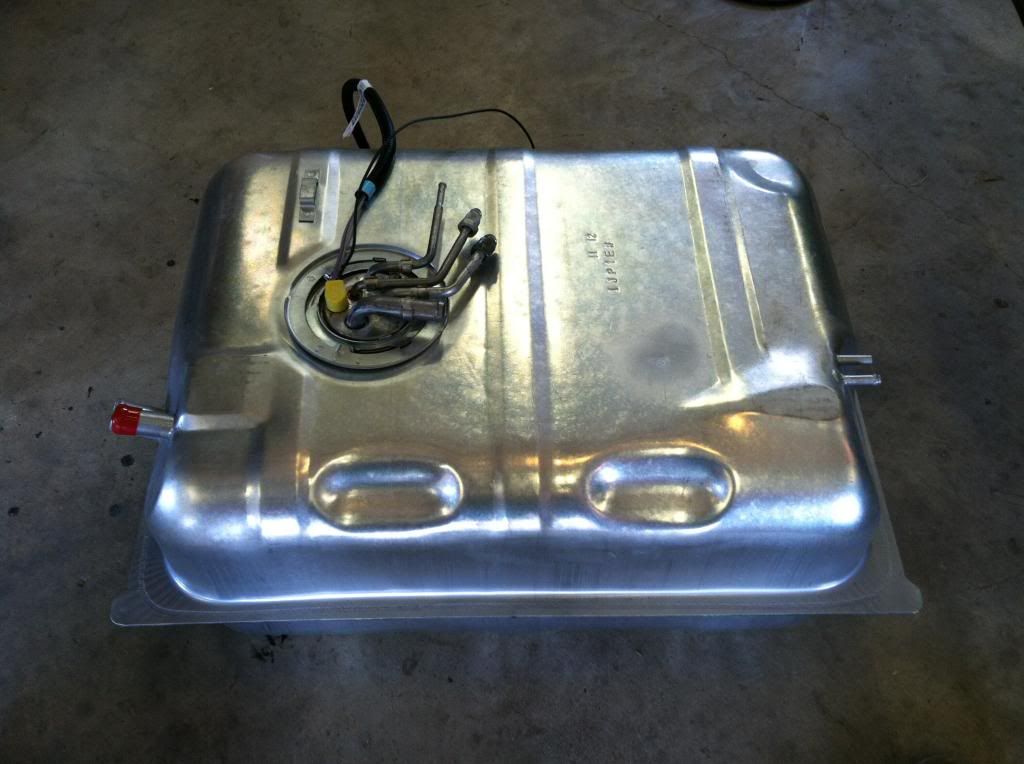 I need to pick up a few pieces of angel tomorrow to tie up the mounts I have dreamed up. Next up is getting the fuel lines straightened up and getting teh computer/tune done and then headers...... Cheese "stay tuned" Man
__________________
1969 Chevy C10 "Project Home Wrecker" "If you think you can't, you are probably right" |
|
|
|
|
07-16-2013, 11:40 PM
|
#72 |
|
Registered User
Join Date: Sep 2012
Location: Unionville, MO
Posts: 185
|
Re: Project "Home Wrecker"
One thing I will add is that I was able to pick up all the components shown in the pics for @ $190 delivered to my door. I bought the tank, pump and sending unit all brand new through eBay and every item was cheaper than the exact same thing through RockAuto etc. Also had each item shipped for free and to my door in about 3-5 days.
Cheese "pleased so far" Man
__________________
1969 Chevy C10 "Project Home Wrecker" "If you think you can't, you are probably right" |
|
|
|
|
08-19-2013, 08:45 AM
|
#73 |
|
Registered User
Join Date: Sep 2012
Location: Unionville, MO
Posts: 185
|
Re: Project "Home Wrecker"
Well the day has finally come that the cab and doors are done and in paint! They body shop is sending over a rollback truck and taking the rolling chasiss to their shop to install the cab. They also had the mobile glass company come out and install the new windshield. So if things go as planned I should have the cab and doors on by tomorrow and back to my shop to continue the fuel system. It has been a very slow process, but I feel that we are making headway.
Cheese "next up is the front clip" Man
__________________
1969 Chevy C10 "Project Home Wrecker" "If you think you can't, you are probably right" |
|
|
|
|
08-19-2013, 09:22 AM
|
#74 |
|
Registered User
Join Date: Sep 2006
Location: New Haven, MO
Posts: 1,243
|
Re: Project "Home Wrecker"
You are from my dad's family's neck of the woods. They are from Newtown-Harris area. I love any chance I get going down there.
__________________
-Lincoln 1987 GMC S15 (soon to be a chevy clone)  2.5l, 4 speed, no ps, no pb, no ac Silence is golden, but duct tape is silver.  Spoken by Cletus the hillbilly I like stickers... a whole bunch. |
|
|
|
|
08-19-2013, 10:09 AM
|
#75 |
|
Registered User
Join Date: Apr 2003
Location: Indep, MO
Posts: 5,893
|
Re: Project "Home Wrecker"
Woo hooo! Are you coming to the nats? Hope so, link in my sig. Great progress, I'm excited for ya!
__________________
Boppa's Old Yeller Truck Build, Old Yeller's New Heart! Project Buzz Bomb Flyin' Low! |
|
|
|
|
| Bookmarks |
| Tags |
| 1967, 1969, stepside |
| Thread Tools | |
| Display Modes | |
|
|


 Linear Mode

