
|
|
|
 06-18-2018, 10:55 AM
|
#1 |
|
Senior Member
 Join Date: Sep 2017
Location: Bryan, Texas
Posts: 2,287
|
Re: Wife's 48
Will those still fit if I use the S10 brake set up?
|

|

|
|
06-18-2018, 11:17 PM
|
#2 | |
|
Senior Member
Join Date: Mar 2011
Location: West Plains, Missouri
Posts: 7,555
|
Re: Wife's 48
Quote:
__________________
my build thread: http://67-72chevytrucks.com/vboard/s...d.php?t=459839 Jimbo's long bed step build:http://67-72chevytrucks.com/vboard/s...t=464626<br /> |
|
|
|
|
|
06-21-2018, 09:03 PM
|
#3 | |
|
Senior Member
Join Date: Sep 2016
Location: Hershey, PA
Posts: 1,004
|
Re: Wife's 48
Quote:
The easy way I found to mount the brake booster from an S10 is to cut out that section of the S10 firewall with the holes intact. I used that as a template. Some people on the forum actually cut the section from the AD firewall and weld in the S10 piece that way the holes are perfectly in place. 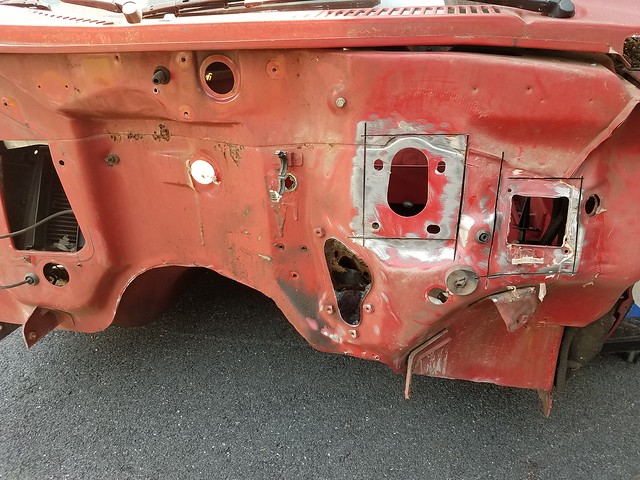
__________________
Current Build Thread 1930 Ford Model A Modern Twist: Ford Model A Rat Rod With a Modern Twist Build Thread Phase 1 "The Swap": 1949 3100 with S10 swap. Beginner build with ambition! Build Thread Phase 2 "The Drop": Beginner Build with Ambition gets Air Ride |
|
|
|
|
|
06-23-2018, 06:54 PM
|
#4 |
|
Senior Member
Join Date: Sep 2017
Location: Bryan, Texas
Posts: 2,287
|
Re: Wife's 48
9 hours in the shop today. It goes slow when you are learning. My welds are getting better, but they are still not good. I burned through 3 - 3" cutting discs reducing the weld. So I know there is room for improvement.
Thanks to you all, I fabricated several patches that actually fit very well. Some even had bends/rolls to them. So thank you all for that. I did not have the energy to go back one more time and make sure I got every little hole and that all the welds are good and the grinds are smooth, but I'm very happy with todays work. 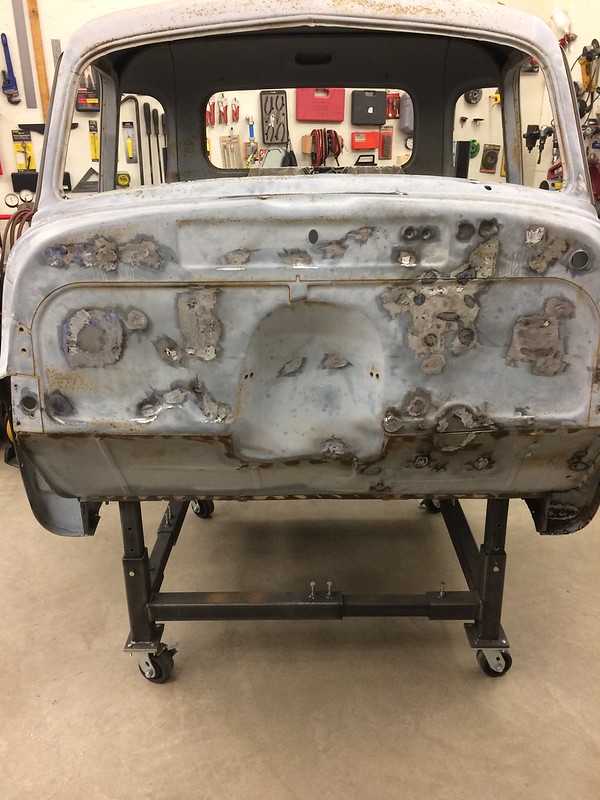 IMG_1950 by Robert Moorman, on Flickr IMG_1950 by Robert Moorman, on Flickr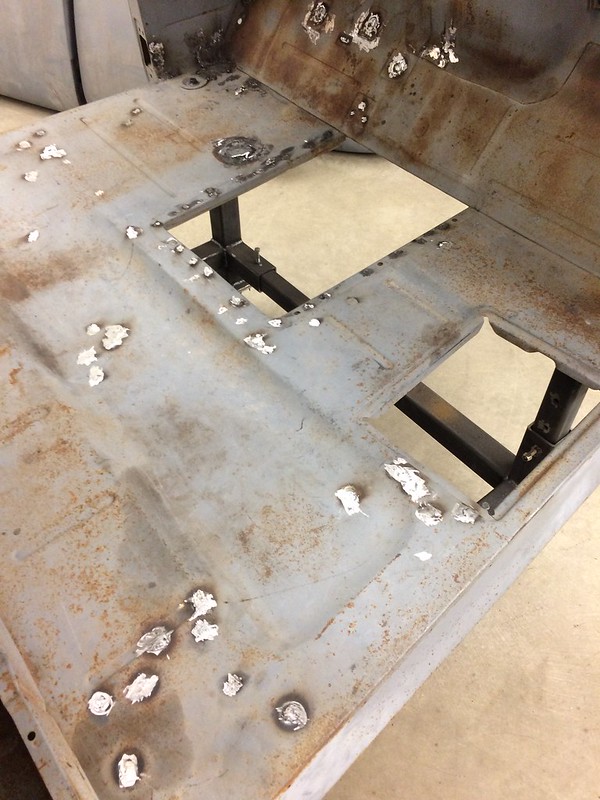 IMG_1951 by Robert Moorman, on Flickr IMG_1951 by Robert Moorman, on Flickr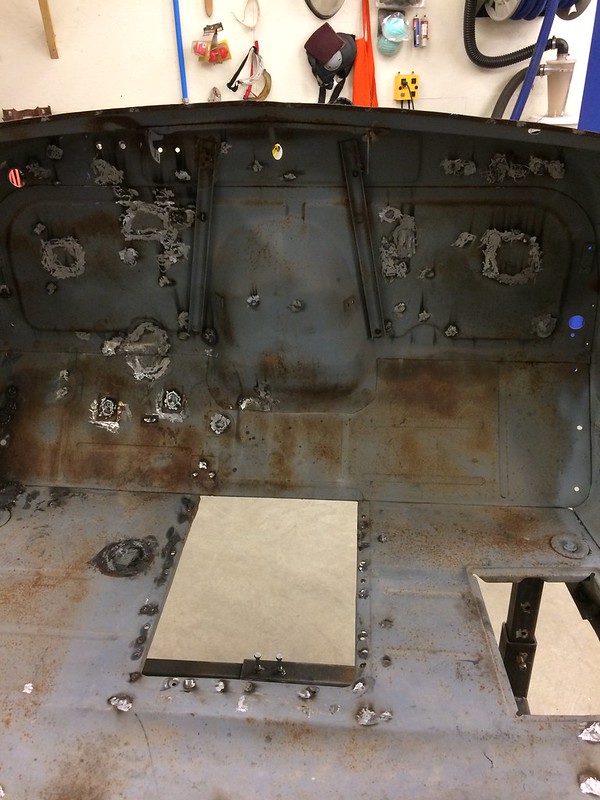 IMG_1952 by Robert Moorman, on Flickr IMG_1952 by Robert Moorman, on FlickrI even got most of the floor done, but I'm debating on the battery box hole. I have a good original cover that I can use just for fun. Or I can go ahead and fill the hole since the battery will not be in that hole. Last edited by 8man; 06-24-2018 at 09:05 AM. |
|
|
|
|
06-23-2018, 08:40 PM
|
#5 | |
|
Senior Member
Join Date: Sep 2016
Location: Hershey, PA
Posts: 1,004
|
Re: Wife's 48
Quote:
I kept my battery box hole so I could build something cool like a mini safe or a beer fridge haha. I figure I could find a use for a little compartment and on the surface, it still looks like a classic. Someone clued me into this site a while back. https://www.truckfridge.com/tb15/
__________________
Current Build Thread 1930 Ford Model A Modern Twist: Ford Model A Rat Rod With a Modern Twist Build Thread Phase 1 "The Swap": 1949 3100 with S10 swap. Beginner build with ambition! Build Thread Phase 2 "The Drop": Beginner Build with Ambition gets Air Ride |
|
|
|
|
|
06-23-2018, 09:07 PM
|
#6 |
|
Senior Member
Join Date: Sep 2017
Location: Bryan, Texas
Posts: 2,287
|
Re: Wife's 48
Those truck fridges are cool.
I started using .023 Easy Grind wire to help my welds. When I do it right, there is very little "excess" weld. It is all on me. I'm getting better, but it still takes practice. |
|
|
|
|
06-23-2018, 09:54 PM
|
#7 |
|
Registered User
Join Date: Nov 2010
Location: calgary alberta
Posts: 7,874
|
Re: Wife's 48
if you are using an actual grinding disc you may want to try a flap disc, just for giggles. it will surprise you. they also don't generate as much heat when using them as long as you are aware, like using a grinding disc and knowing that too much heat generated will produce more body work from warpage. they come in different grits so the finish can be done with a higher grit and be fairly smooth, actually.
I have several el cheapo deluxe mini grinders and they all have a different type of attachment. some are 4", a couple are 5". one has a wire wheel, one a cupped knotted wire wheel, one a flap disc with 40 grit, another 60, another 80 grit another an actual grinding disc, several with zip discs of different states of wear (sometimes you just need a small wheel to fit into a tight spot) and lastly a large and small shrinking disc. after that I also have several 1/4" die grinders with burrs of different shapes. the grinder with the extended shaft also is a handy one sometimes. harbor freight sells the stuff pretty cheap (especially compared to Canadian prices) |
|
|
|
|
06-23-2018, 09:57 PM
|
#8 |
|
Registered User
Join Date: Nov 2010
Location: calgary alberta
Posts: 7,874
|
Re: Wife's 48
one little trick I have found to work well for finding the pinholes is to use a light on the back side and then look for bright spots. then when that is all fixed and you can't find any more bright spots then soak the area liberally with some wax and grease remover and look on the back side for any wet/damp areas. the bonus to this is that you will also see the reflection of the surface, which is very close to the contours you will see when it is painted. if it looks ripply, and you want smooth, you have some body work to do before rechecking for pin holes.
|
|
|
|
 |
| Bookmarks |
|
|


 Hybrid Mode
