
|
 11-09-2007, 01:16 AM
|
#51 |
|
Senior Member
Join Date: Aug 2002
Location: Valley Center KS
Posts: 3,525
|
Re: Ackattack's Pro touring restoration thread
Oh, I came up with a name for my truck. Bruiser! Cause it's going to black blue and grey. I'm thinking I'm going to paint it a color called Blue Granite Metallic.
I "borrowed" a picture of a sweet looking truck to make a rendering! 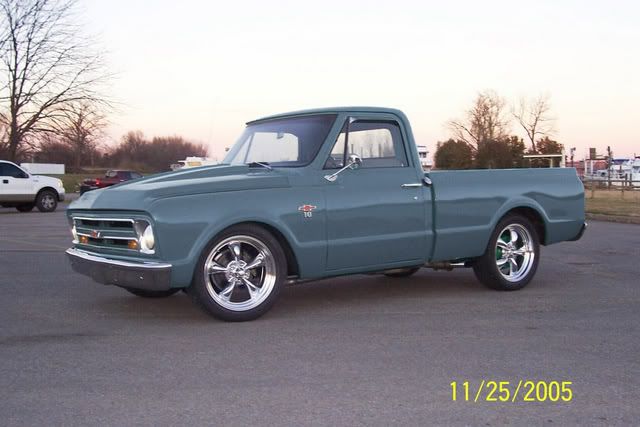
|

|

|
|
11-09-2007, 08:47 AM
|
#52 | |
|
Registered User
Join Date: Apr 2001
Location: DALLAS,TX
Posts: 21,907
|
Re: Ackattack's Pro touring restoration thread
Quote:
__________________
67SWB-B.B.RetroRod 64SWB-Recycle 89CCDually-Driver/Tow Truck 99CCSWB Driver All Fleetsides @rattlecankustoms in IG Building a small, high rpm engine with the perfect bore, stroke and rod ratio is very impressive. It's like a highly skilled Morrocan sword fighter with a Damascus Steel Scimitar..... Cubic inches is like Indiana Jones with a cheap pistol. |
|
|
|
|
|
11-15-2007, 01:03 AM
|
#53 |
|
Senior Member
Join Date: Aug 2002
Location: Valley Center KS
Posts: 3,525
|
Re: Ackattack's Pro touring restoration thread
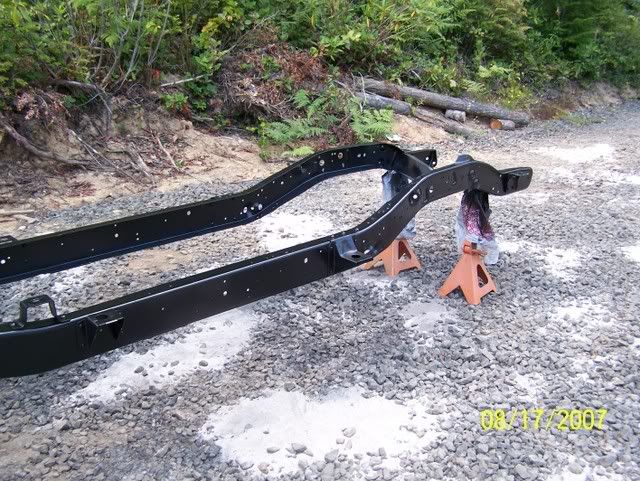
I had a 4 day weekend, so I finally able to make some good headway. My goal was to get the truck on 4 wheels. I didn't quite get there, but I'm close.
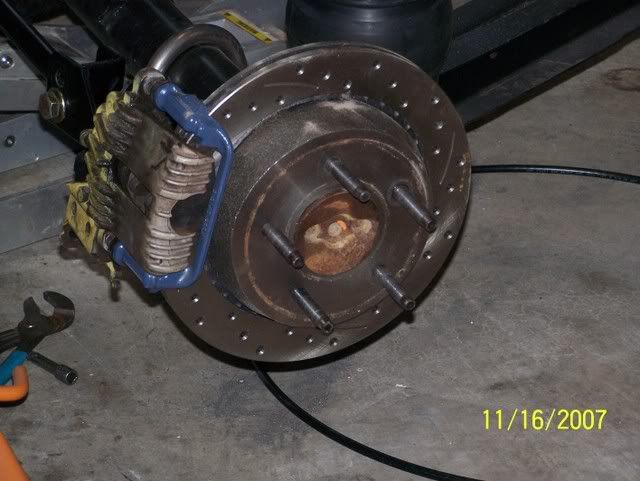
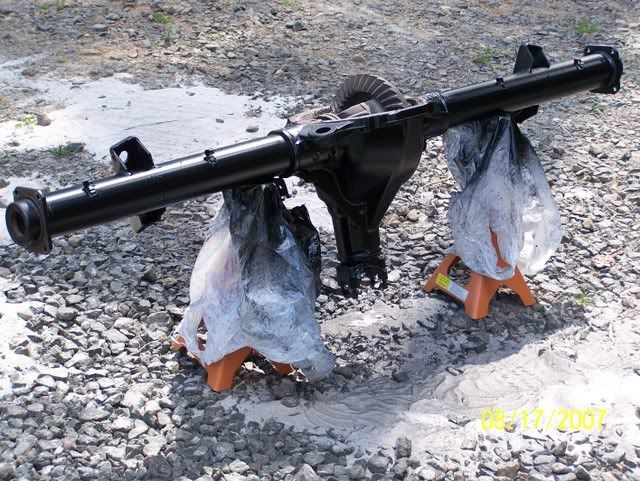
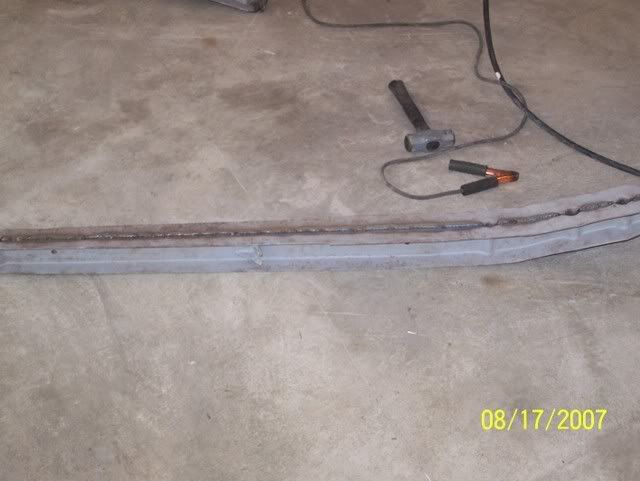
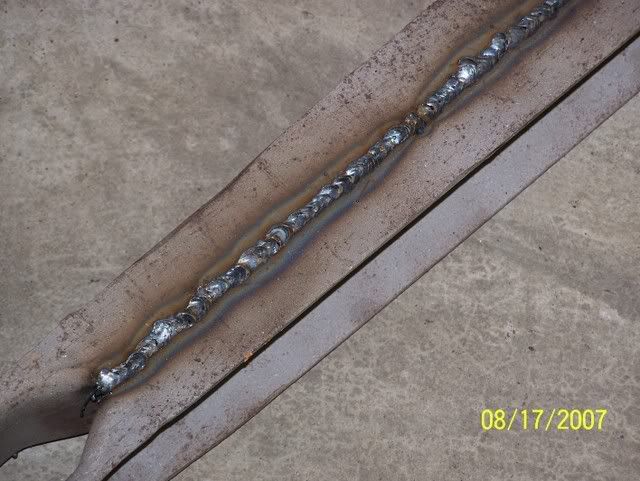
I realized that one of my hold ups was going to be powder coating some of the pieces, so I got that all ready to go, then I realized that my coating gun had broke some how (hadn't used it since I moved, and it somehow got broke in the move). Little modification, and I was back in business. Let's see: I got the ring and pinion installed into the rearend with the new posi unit. I reused the 4.11 gears that it originally housed, as well as the original pinion shims and carrier spacers (no shims in there). I installed all new bearings and seals. I'm using a 1350 series pinion yoke. This created a few problems. First the pinion nut that it came with was a 1 5/16" nut. So I got a new socket. Well the stupid socket wouldn't fit down into the yoke! The pinion nut that came with the bearings was basically too small. What to do? Well I went and got a big washer that fit over the pinion splines. Of course the OD was too big to fit into the yoke too.....but it was nothing a little bench grinder couldn't fix. So I then torqued the pinion nut down until I had 25in lbs of running torque (good thing I got a dial torque wrench from work  ). Then I put the ring gear and diff in. Back lash was right around .008" and the pattern looked good, so hopefully it will run well. We'll see in a few years! I'm going to see about getting a new cover that has preloads for the bearing caps. ). Then I put the ring gear and diff in. Back lash was right around .008" and the pattern looked good, so hopefully it will run well. We'll see in a few years! I'm going to see about getting a new cover that has preloads for the bearing caps.Why didn't I get the rearend all together? Well I'm putting in longer wheel studs. I got some moroso wheel studs from the local parts store. They're not an exact fit, so I'm drilling out the axles a little so they will fit. I have to use a 5/8" drill bit and my drill is acting up a little (I've used and abused it for 3 years...it's a craftsman 19.2V pretty good....but maybe it can't quite take all the abuse I throw at it). Anyways...I got one axle done and I'll finish the other axle up this week. I'll have to check on the parts number for the wheel studs if others are interested....I know it's been a topic of discussion on here.  I put the front suspension together. As I'm putting it together, I realize I installed the lower control arm shafts backwards, so I had to redo that. Then I assembled the air bags onto the plates and cups. I had to cut the lower control arm bumpstop mount off. I think I did a boo boo and cut the whole thing off, so now there isn't a steering stop. I'll ask in the suspension forum to see if I need to weld it back on...or if it's necessary. Then I put the upper a arms in. I got these cheaper ball joints from summit. I'm not impressed with them at all. I easily stripped out two of the nuts on the upper ball joint, and then when I went to tighten the castel nuts, the shafts just spun. Also, the lower one isn't the right size, since the spindle wouldn't fully seat. I had to get another lower ball joint, cause I messed up when I originally installed them, and I got a moog. Guess I'll be getting all moog now... much better quality...and I haven't even driven the thing. So the front suspension is temporarily done. 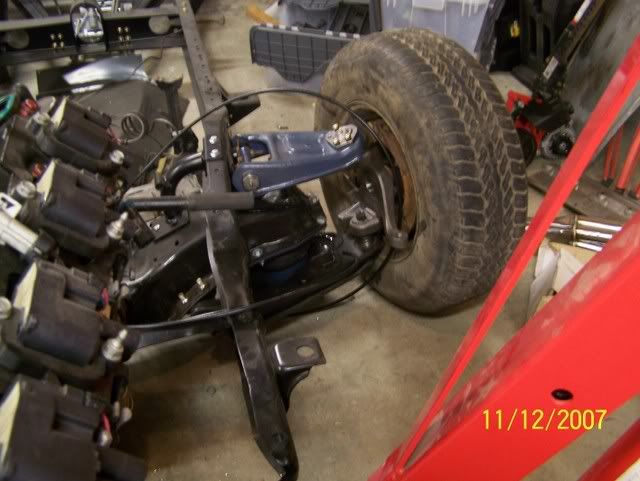 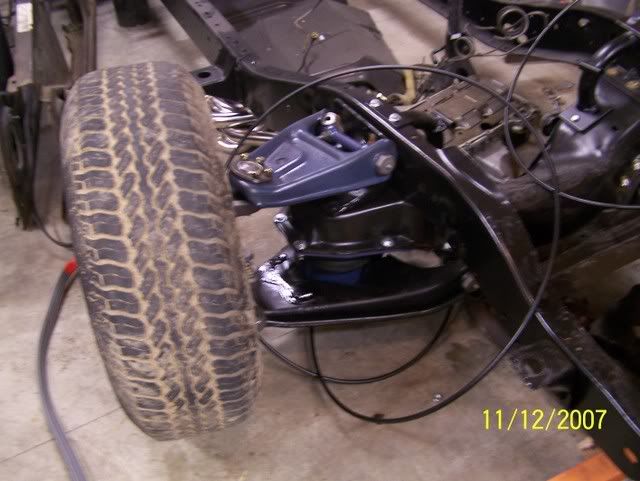 Oh yeah. For right now I used some old rotors that I had laying around. I didn't bother with the brakes either. These are temporary until I figure out what I'm doing with the front brakes. Back to the rear. I got the caliper hats and brackets powder coated. I'm going to get the actual caliper polished. Hope it will be a nice combo. 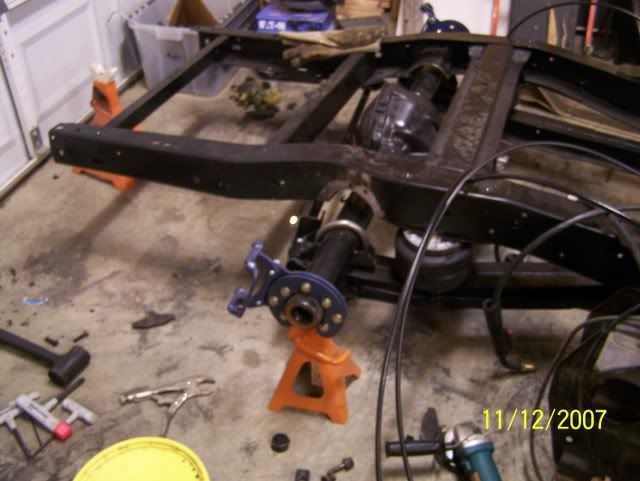 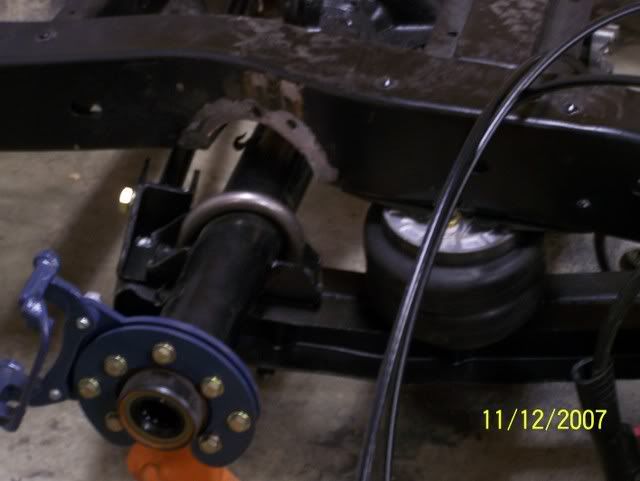 I finished up the welding on the other C-notch Then I put the airbags in. I need to get longer bolts to go through the trailing arms. Also, the top of the bags aren't bolted in. I notched out the crossmember a little for the air fitting clearance. I don't really like this cause it puts the center line of each end of the bag slightly offset. What are others doing here? 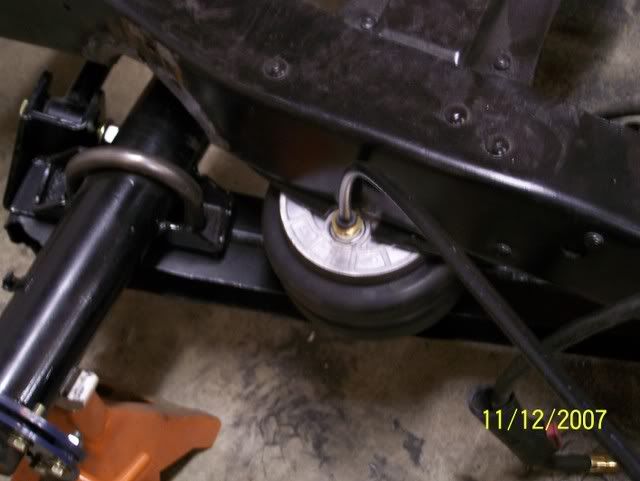 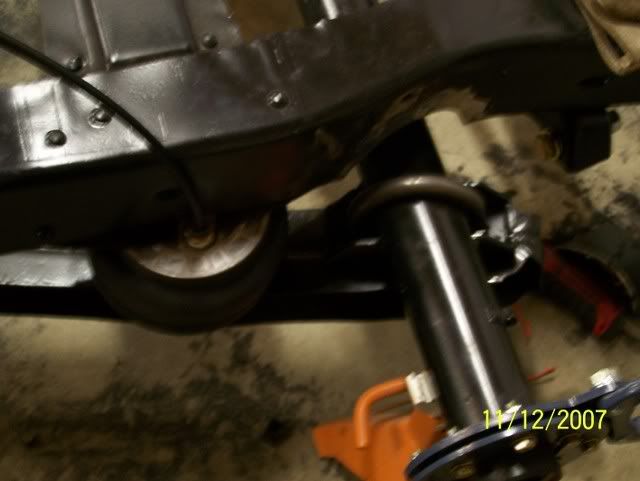 So this is what it looks like now...with no air in it. Frame is about 7" off the ground. 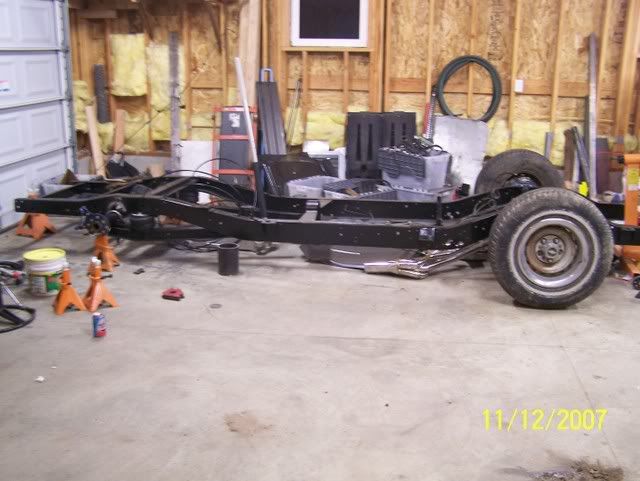
|
|
|
|
|
11-15-2007, 01:29 AM
|
#54 |
|
Registered User
Join Date: Jan 2007
Location: shoreline, wa
Posts: 1,565
|
Re: Ackattack's Pro touring restoration thread
why did you weld the control arms ??
__________________
68 swb fleet bagged on 20's 327 with 4 speed http://67-72chevytrucks.com/vboard/s...d.php?t=223308 2014 Chevy 2500hd duramax CCLB |
|
|
|
|
11-15-2007, 01:41 AM
|
#55 | |
|
Senior Member
Join Date: Aug 2002
Location: Valley Center KS
Posts: 3,525
|
Re: Ackattack's Pro touring restoration thread
Quote:
huh? |
|
|
|
|
|
11-15-2007, 01:49 AM
|
#56 | |
|
Registered User
Join Date: Jan 2007
Location: shoreline, wa
Posts: 1,565
|
Re: Ackattack's Pro touring restoration thread
Quote:
__________________
68 swb fleet bagged on 20's 327 with 4 speed http://67-72chevytrucks.com/vboard/s...d.php?t=223308 2014 Chevy 2500hd duramax CCLB |
|
|
|
|
|
11-15-2007, 10:25 AM
|
#57 |
|
Senior Member
Join Date: Aug 2002
Location: Valley Center KS
Posts: 3,525
|
Re: Ackattack's Pro touring restoration thread
oh....I thought you were talking about this week's progress
 I welded them in hopes of making them stronger....less flex. I'm not sure how much it helped, but figure it can't hurt. |
|
|
|
|
11-15-2007, 10:38 AM
|
#58 | |
|
PITbut
Join Date: Sep 2007
Location: monroe washington
Posts: 3,041
|
Re: Ackattack's Pro touring restoration thread
Quote:
At least thats my guess. |
|
|
|
|
|
11-15-2007, 12:11 PM
|
#59 |
|
Registered User
Join Date: Jan 2007
Location: shoreline, wa
Posts: 1,565
|
Re: Ackattack's Pro touring restoration thread
oh ok thanx
i thoght you were going all out and smoothing the suspention!!
__________________
68 swb fleet bagged on 20's 327 with 4 speed http://67-72chevytrucks.com/vboard/s...d.php?t=223308 2014 Chevy 2500hd duramax CCLB |
|
|
|
|
11-18-2007, 06:03 PM
|
#60 |
|
Senior Member
Join Date: Aug 2002
Location: Valley Center KS
Posts: 3,525
|
Re: Ackattack's Pro touring restoration thread
Well I got the axles installed with the brake rotors....I used the Summit drilled and slotted ones. I did not have to have them machined like I thought I was going to have to.
 Then I put the wheels on it to finally make it a roller! 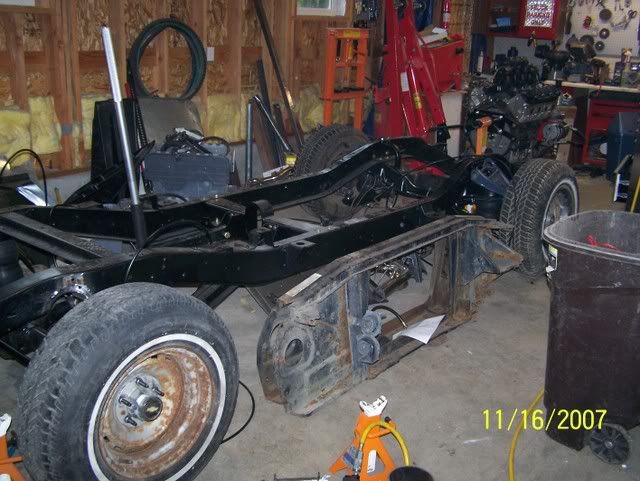 that lasted for about 10 min...no longer a roller I tore the front suspension back apart to replace the crappy ball joints. I went to put in the new moog ball joint and now the hole in the lower control arm is too big!!!! So now i don't know what I'm going to do. Probably pull a lower control arm off the parts truck...damn it...I had sand blasting! |
|
|
|
|
11-18-2007, 07:07 PM
|
#61 |
|
A guy with a truck
Join Date: Sep 2005
Location: Germany, for now
Posts: 5,920
|
Re: Ackattack's Pro touring restoration thread
Moog has 'Problem Solver' lower balljoints that are oversized for this exact scenario...
__________________
-Chris Instagram _elgringoloco_ '70 Short-Wide How to: Ruin a perfectly good C10 70 Blazer ConversionHow To: Ruin a Perfectly Good 4wd '72 Highlander How To: Ruin a Perfectly Good K/5 (SOLD) '72 Blazer 2WD How to: Ruin a perfectly good Blazer (SOLD) '05 Yukon Daily Driven (not so stock) Yukon (SOLD) 07 Yukon Denali (daily) Members met list: SCOTI, darkhorse970, 67cheby, 67cheby'sGirl, klmore, porterbuilt, n2billet, Fastrucken, classicchev, Col Clank, GSFMECH, HuggerCST, Spray-Bomb, BACKYARD88, 5150, fine69, fatbass, smbrouss70, 65StreetCruiser, GAc10boy |
|
|
|
|
11-18-2007, 08:20 PM
|
#62 |
|
Senior Member
Join Date: Aug 2005
Location: tulsa OK
Posts: 3,070
|
Re: Ackattack's Pro touring restoration thread
 common problem, moog has the fix tho.. |
|
|
|
|
11-19-2007, 08:08 PM
|
#63 |
|
Senior Member
Join Date: Aug 2002
Location: Valley Center KS
Posts: 3,525
|
Re: Ackattack's Pro touring restoration thread
No pics for today, but I got the new upper ball joints installed, and I began to get the holes drilled for the rear air bags. But again the drill is acting up. I actually think its the charger....I'll have to use my buddies, who has the same drill to see if its the battery, charger, or drill.
I also ordered a new oversized lower ball joint. Hopefully it will solve the problem. |
|
|
|
|
12-18-2007, 11:52 AM
|
#64 |
|
Registered User
Join Date: Feb 2005
Location: B.C.
Posts: 457
|
Re: Ackattack's Pro touring restoration thread
 Well......It's been almost a month now!.....Any new progress?? Well......It's been almost a month now!.....Any new progress??
|
|
|
|
|
12-21-2007, 03:49 PM
|
#65 | |
|
Registered User
Join Date: Aug 2007
Location: Hays, Kansas
Posts: 7
|
Re: Ackattack's Pro touring restoration thread
Quote:
|
|
|
|
|
|
12-21-2007, 04:04 PM
|
#66 |
|
Senior Member
Join Date: Aug 2002
Location: Valley Center KS
Posts: 3,525
|
Re: Ackattack's Pro touring restoration thread
It's been slow. I got the rear bags mounted, I also am getting a lower control arm shipped to me. I have the week off between christmas and new years and have a list of things I want to get done.
What's been slowing me down is we finished the "bonus room" above the garage....made it into a home theater: 96" screen and 7.1 surround sound
|
|
|
|
|
12-23-2007, 07:57 AM
|
#67 | |
|
Registered User
Join Date: Feb 2007
Location: Marana, Arizona
Posts: 3,416
|
Re: Ackattack's Pro touring restoration thread
Quote:
Oh well the guy who bought it is the guy who told me to weld them . He can't complain about the PO on that issue . 
__________________
"I feel the need for speed!"... as soon as I am done with my nap. |
|
|
|
|
|
12-31-2007, 04:31 PM
|
#68 |
|
Senior Member
Join Date: Aug 2002
Location: Valley Center KS
Posts: 3,525
|
Re: Ackattack's Pro touring restoration thread
Well over christmas break I've made a little progress. The main work has been on my 72 GMC, so I'll just show a quick before and after
Before: 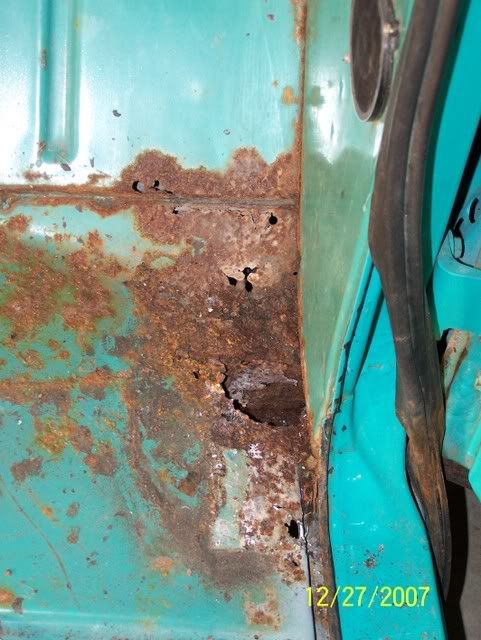 After: 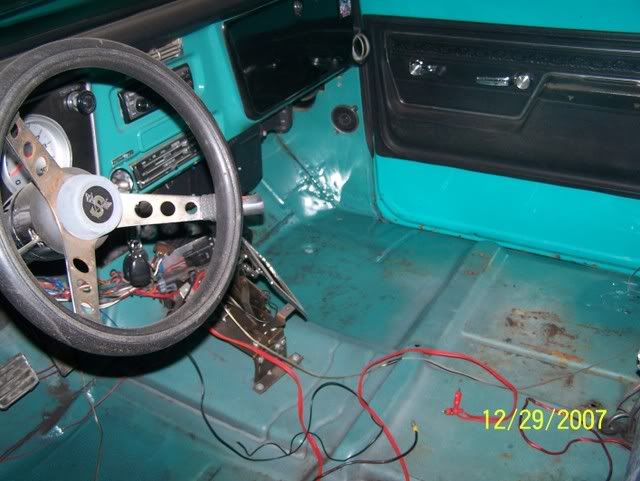 On the 68, I finally got a lower control arm. DHL only took an extra week to deliver it! (little ticked about that, but what can you do) I got it taken apart, and hopefully I'll sand blast and paint it tommorrow. I pulled the steering componenets off of my parts truck, so I need to get new tie rod ends ordered here ASAP. I moved the "new" cab into the garage with the help of some friends: 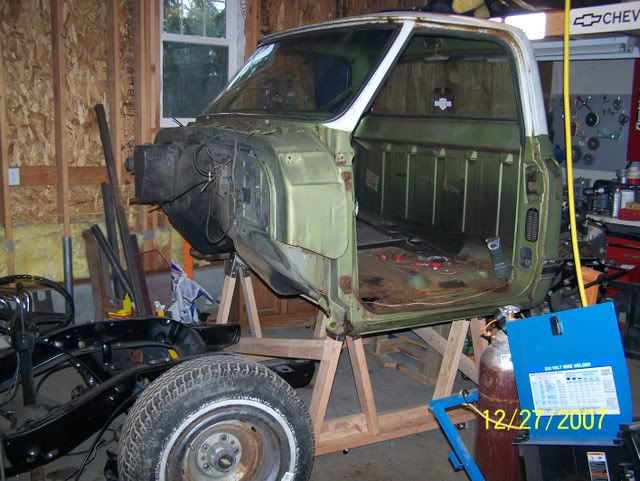 And then proceeded to remove the drivers side rocker panel. 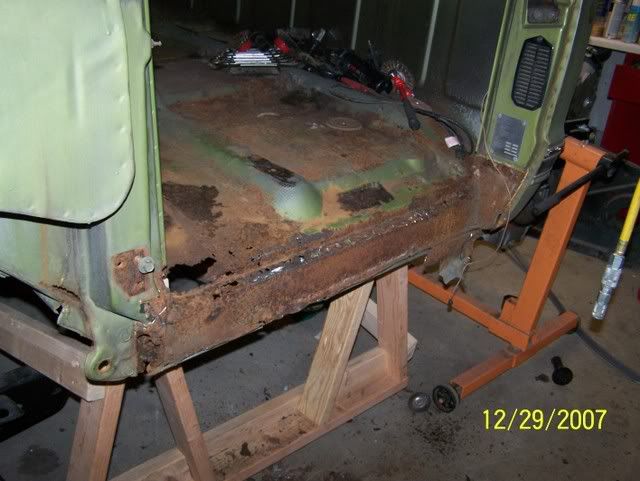 Looks like I'll be needing inner and outer rocker panels, cab corners, floor pan, kick panels, lower a-pillar, and cab supports (pretty much everything right??? At least on the drivers side. I assume the passenger side will be the same. I then removed all of the crap that won't be needed, like the heating componenets, radio, wiring, etc. 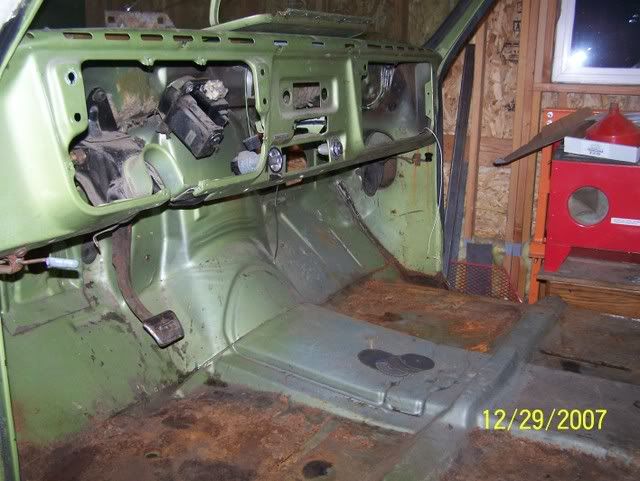 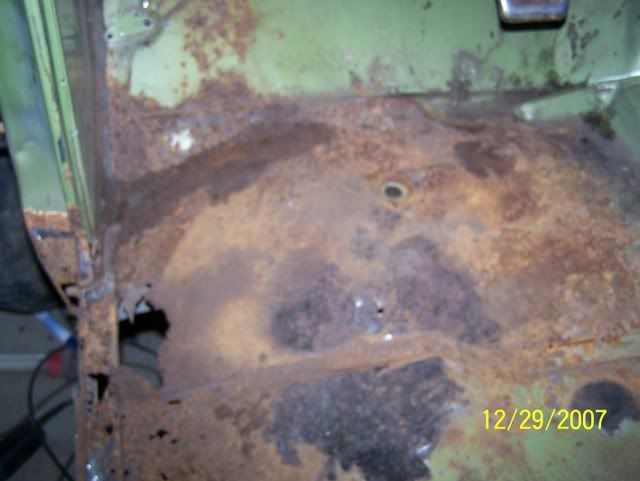 So I have some work to do
|
|
|
|
|
01-16-2008, 07:03 AM
|
#69 |
|
Senior Member
Join Date: Aug 2002
Location: Valley Center KS
Posts: 3,525
|
Re: Ackattack's Pro touring restoration thread
Back in business!
I finally got the control arm sand blasted, repainted, and assembled. So once again I have a rolling chasis. I also installed some of the steering linkage. I got new inner and outer tie rods, sleeves, and idler arm. I'm going to clean up and repaint the power steering gear box and see if that will work without leaking.....otherwise I'll replace it later. I also got the whole "cab repair kit" (floor pans, kick panel, cab corner, inner and outer rockers, A-pillar, and cab supports) so now I can start chopping and welding on the cab. |
|
|
|
|
02-03-2008, 02:39 PM
|
#70 |
|
Senior Member
Join Date: Aug 2002
Location: Valley Center KS
Posts: 3,525
|
Re: Ackattack's Pro touring restoration thread
I haven't posted much on here lately....been kinda slow going, though I have been working on the truck.
I shaved the drip rail along both sides of the doors, and have started along the top of the cab. It's a slow process of grinding and welding so that the sheets of metal don't seperate. I'll get some better pictures, but here is one of the progress.  I got a new pitman arm, but the pickle fork I borrowed from autozone is too small, so I guess I can't call my steering complete yet. I installed the rear parking brake cables. I used the cables from a camaro to match the calipers. I have the intermediate cable on its way. The brake lines are about ready to go on. I cleaned them up from the parts truck along with the little brackets that bolt them to the frame. I'll need to go get a tubing cutter and some additional tubing. I also need to figure out what I'm going to do to actually connect the lines to the rear calipers. I got the stainless steel brake lines from ECE awhile ago. Oh, I also opened up the hole on the rear rotors so they fully seat on the axle flange. Got the patch panels for the filler neck hole and the 3 for the heater holes welded in. I still have some clean up grinding to do on the firewall as well as fill in a lot more smaller holes. I forgot pictures of that progress though. Then yesterday I started cutting metal out of the floor. I started with the inner rocker/cab piece. This is a real nice piece that runs from the front seam all the way to the back of the cab. I also put in the kick panel patch. Now, I still have some more floor to replace, so that's why the front of this piece looks goofy. I'm not going to have to replace the bottom of the door pillar, so why it was apart I cleaned it up and put on a coate of POR15 to protect it. 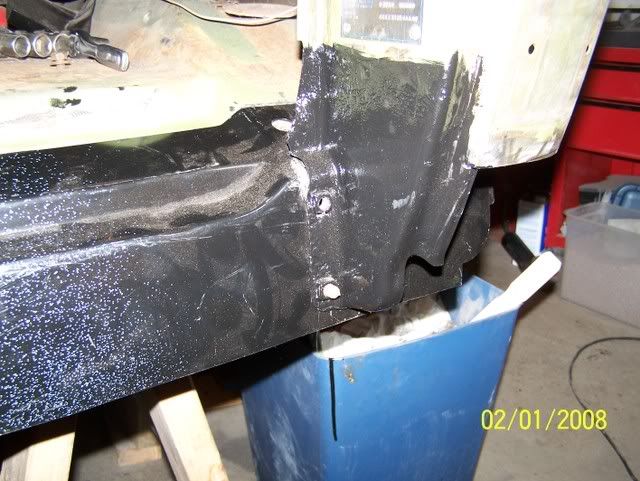 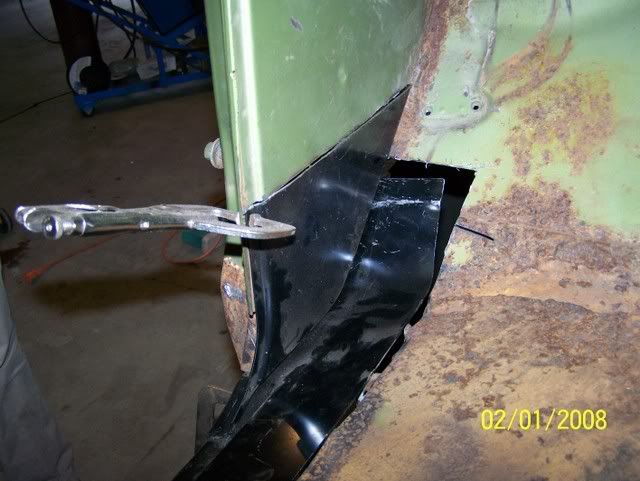 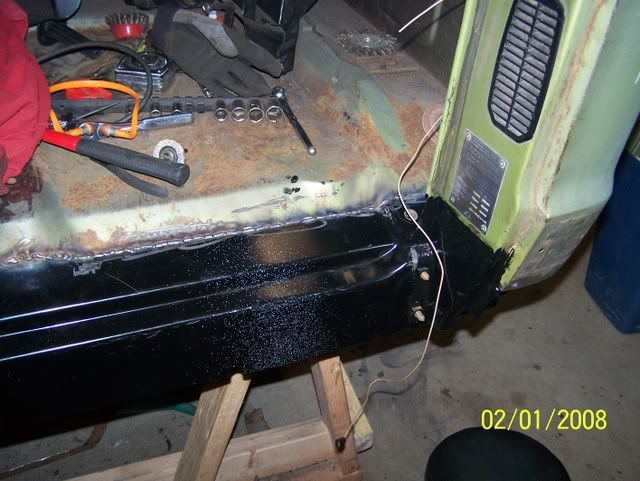
|
|
|
|
|
02-04-2008, 12:11 AM
|
#71 |
|
Senior Member
Join Date: Jul 2005
Location: Winters Ca. 95694
Posts: 4,843
|
Re: Ackattack's Pro touring restoration thread
Looks like good progress you have their! I just saw those inner rockers about 2months ago here on this site. They sure are nicer then the regular flat one that only comes to the top of the flor and stops! I tanked with Stan at ECE and he did some checking and found they call this piece the "outer floor extention" and not just the inner rocker for anyone needing them. From now on this is the only way I will be going, it just makes things that much easier. Keep the pics comming!
Kevin LFD Inc. |
|
|
|
|
02-04-2008, 03:43 AM
|
#72 | |
|
*************
 Join Date: Apr 2005
Location: Pensacola, FL
Posts: 17,827
|
Re: Ackattack's Pro touring restoration thread
Quote:
.
__________________
Rob - https://www.instagram.com/hart_rod_c10 As Iron Sharpens Iron, So One Man Sharpens Another. Proverbs 27:17 FOR SALE: DBW pedal bracket - http://67-72chevytrucks.com/vboard/s...d.php?t=651123 FOR SALE: Hood Brackets http://67-72chevytrucks.com/vboard/s...d.php?t=679945 1987 Silverado SWB - 34.5K original miles http://67-72chevytrucks.com/vboard/s...d.php?t=801834 1969 SuperBurb - http://67-72chevytrucks.com/vboard/s...d.php?t=200387 1968 Farm truck - http://67-72chevytrucks.com/vboard/s...d.php?t=358692 1968 SWB - http://67-72chevytrucks.com/vboard/s...d.php?t=551258 1948 Chevy - http://67-72chevytrucks.com/vboard/s...=122164&page=3 |
|

|
|
|
02-04-2008, 04:16 PM
|
#73 |
|
Senior Member
Join Date: Aug 2002
Location: Valley Center KS
Posts: 3,525
|
Re: Ackattack's Pro touring restoration thread
Well, I had every intention of getting a lot of work done today. I go out to the garage, do a little cutting to get the back edge of the piece refered to above to sit down nice and flush. Then I start welding, and the welds look like crap....check the guages on the gas bottle for the MIG....0...doh! So I make a phone call, and find that one of the welding places is open on Saturdays. Meanwhile my wife is on the phone with our friends and they want to meet up to talk about going on a vacation. So we go get the gas, then meet with them and end up eating dinner with them after discussing vacations. On our way home we make a pit stop at autozone to return the pickle fork and got the correct pitman arm puller.
When I got home I pulled off the pitman arm real quick (man it was easy with the right tool). Then I got on the internet to do some reading....I'm in the process of tuning my corvette with HPtuner...so I'm learning (will also apply the same knowledge to the 5.3L when I get it up and running...so it's a good education). So after figuring out what I was doing wrong, we made an ice cream run to test out the new tune. And now I"m back....and its 11pm......maybe tomorrow. Oh yeah, here very shortly progress on the truck is going to slow down even more (is that possible?) I'm taking the Professional Engineers Exam in April, so I'll be spending time studying for that. Oh, and when I'm not studying, I'll be working out cause we're going to Hawaii on our vacation (see above ) Can't go to Hawaii with the extra winter padding....don't need it for warmth over there.Hopefully I'll still be able to get a few hours of work on the truck in on the weekends as a study break.
__________________
Project Bruiser: 68 Pro-Touring C-10 5.3L / 4L60E Project Ironhide: 97 GMC Crew Cab 4x4 Cummins SOLD: '69 GMC 1/2T SWB TBI'd: Project No Buck Assembly Manual Index Sign up Thread!!! Factory Service Manual Index Last edited by Ackattack; 04-08-2008 at 04:38 AM. |
|
|
|
|
02-04-2008, 05:10 PM
|
#74 |
|
1972 Chevrolet SWB
Join Date: Jan 2008
Location: FT Smith AR
Posts: 512
|
Re: Ackattack's Pro touring restoration thread
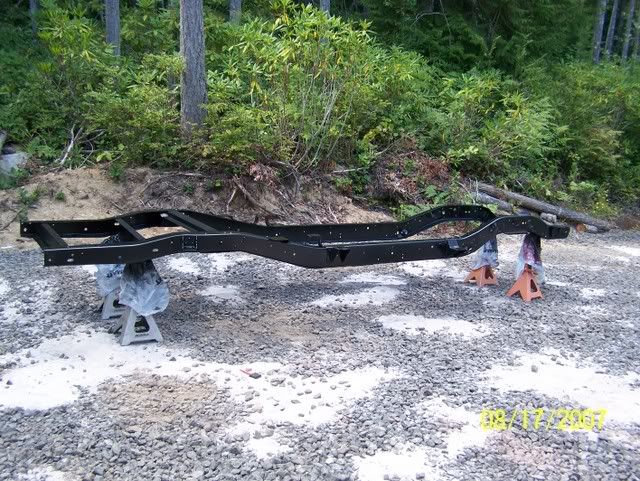
I really like your project and its progress so far. I am liking your home brew c-notch also and I built mine just like it except higher in the frame for more clearance and boxed the frame on the backside of the notch also.
After seeing all these builds and the air bagged trucks I may just have to convert my 5-8 static drop to air in due time. I will check progress.
__________________
My New thread with pics (not my build thread yet.)  http://67-72chevytrucks.com/vboard/s...46#post2573646 1972 Chevrolet 1/2 ton short wide bed,68 frt clip Project. 1980 Camaro Inherited when father passed,68K Miles 2003 Ford Mach1 FUN as Hell!! 2002 Dodge Ram 5-8 slam Rolling BillBoard (Gone not forgot) 2004 Dodge Ram HEMI 10" lifted on 37's and 2wd. |
|
|
|
|
02-07-2008, 04:08 AM
|
#75 |
|
Senior Member
Join Date: Aug 2002
Location: Valley Center KS
Posts: 3,525
|
Re: Ackattack's Pro touring restoration thread
Picked up a 4l60e last night for $300. Not too bad. It's out of a 98 T/A with 67k miles.
So now I can finally put the engine in, modify the frame rail for cleance for the power steering pully and modify the tranny crossmember for exhaust clearance if needed. First, I have to get me engine hoist back from a guy who I let borrow it
|
|
|
|
 |
| Bookmarks |
|
|


 Linear Mode

