
|
Register or Log In To remove these advertisements. |
|
|
|
|||||||
 |
|
|
Thread Tools | Display Modes |
 08-07-2010, 02:43 AM
|
#1 |
|
Registered User
Join Date: Mar 2009
Location: Derby Kansas
Posts: 564
|
Bartmans AD-S10 Chassis Swap
A new Beginning. A couple years ago I started a Build Thread on my 51 Chevy 3100.
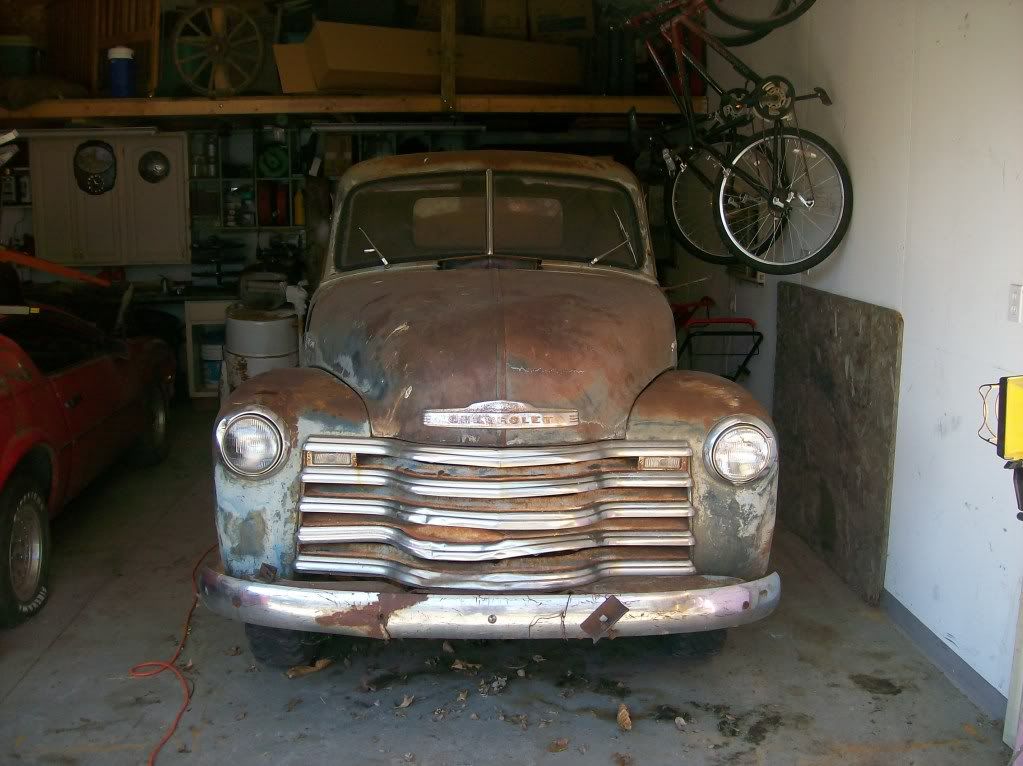 It was a low budget build and I opted to go with a narrowed 79 Chevy Scottsdale IFS. 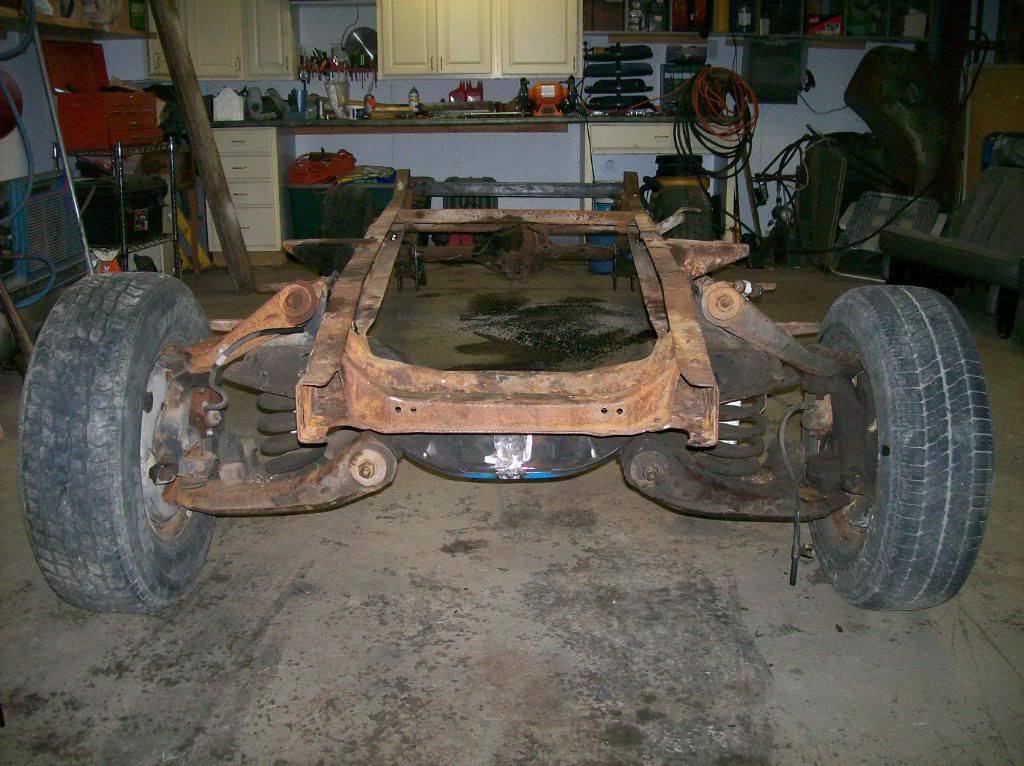 Long story short, I have scrapped that whole idea. You can see more pics of the work and the results at this link. http://s668.photobucket.com/albums/v...33337/?start=0 I have read pretty much every thread on this forum and others, on the S10 chassis swap. In the spirit of the "low budget" build that I originally had in mind, I recently bought an 94 extended cab chassis for $115.00. 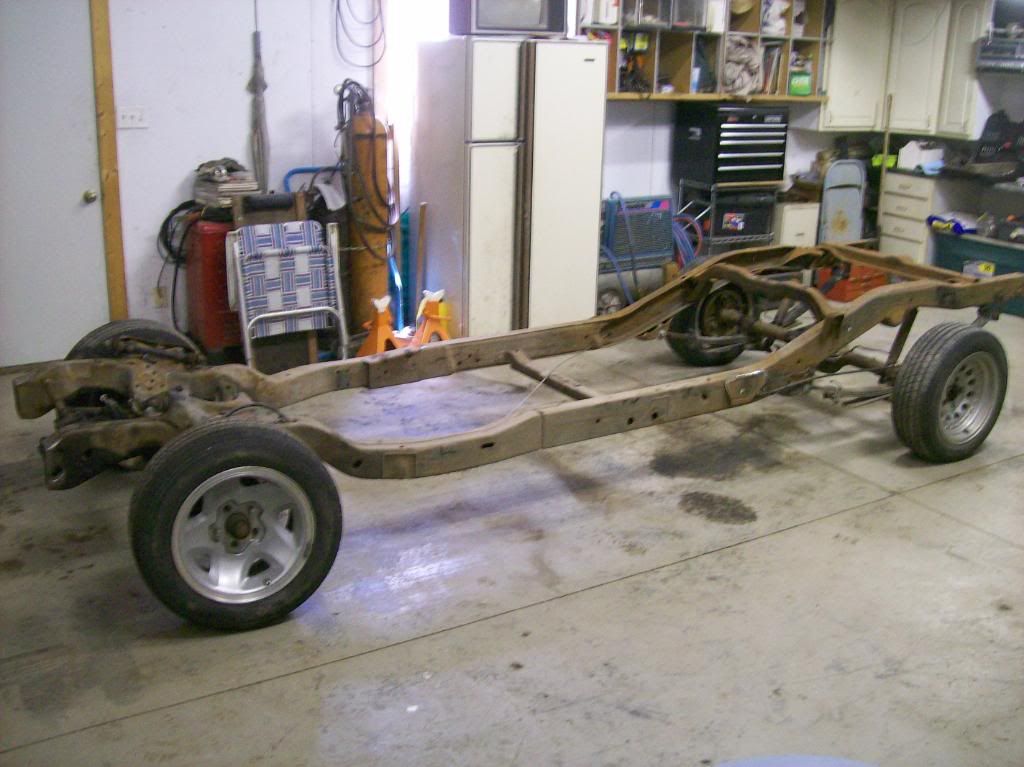 I will still be using the drive train of a donor Camaro. 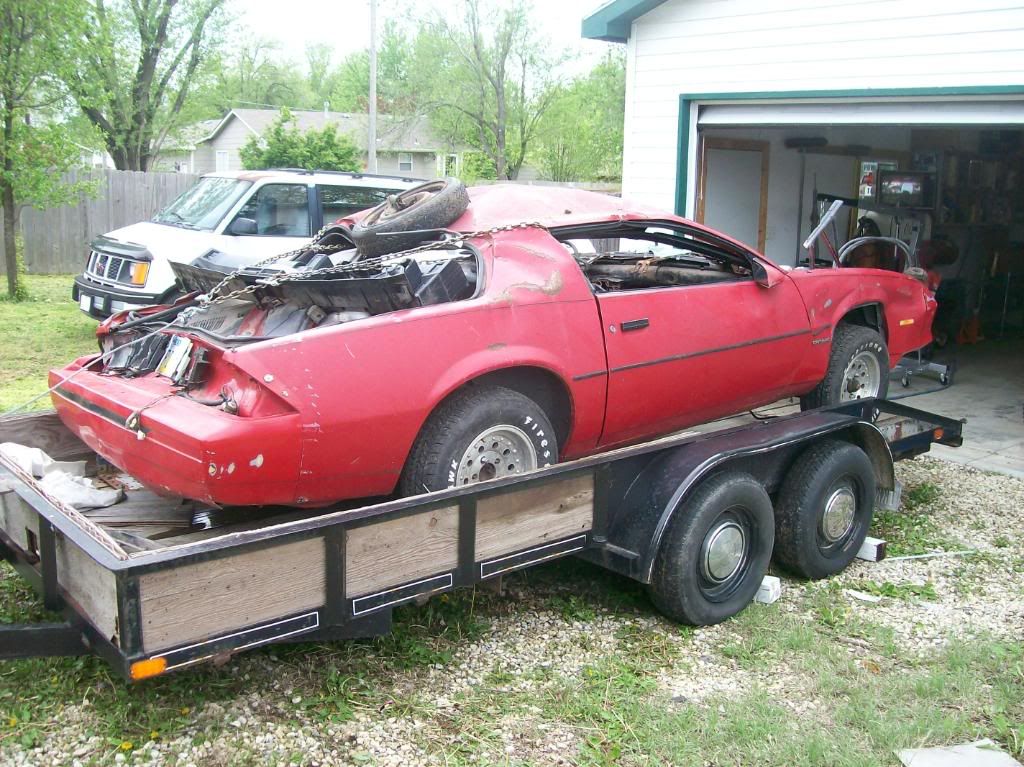
__________________
av8tr33337 AKA Bartman  Email av8tr33337@yahoo.com Email av8tr33337@yahoo.comBartman's Ad-S10 Chassis Swap http://67-72chevytrucks.com/vboard/s...d.php?t=415418 My First Youtube Video http://www.youtube.com/watch?v=B6hSt...eature=channel More Pics of the 51 Project http://s668.photobucket.com/albums/v...hassis%20Swap/ 1951 3100 Pickup Last edited by av8tr33337; 08-07-2010 at 02:44 AM. |

|

|
|
08-07-2010, 03:08 AM
|
#2 |
|
Registered User
Join Date: Mar 2009
Location: Derby Kansas
Posts: 564
|
Re: Bartmans AD-S10 Chassis Swap
Here it is with the Camaro rear end mocked up.
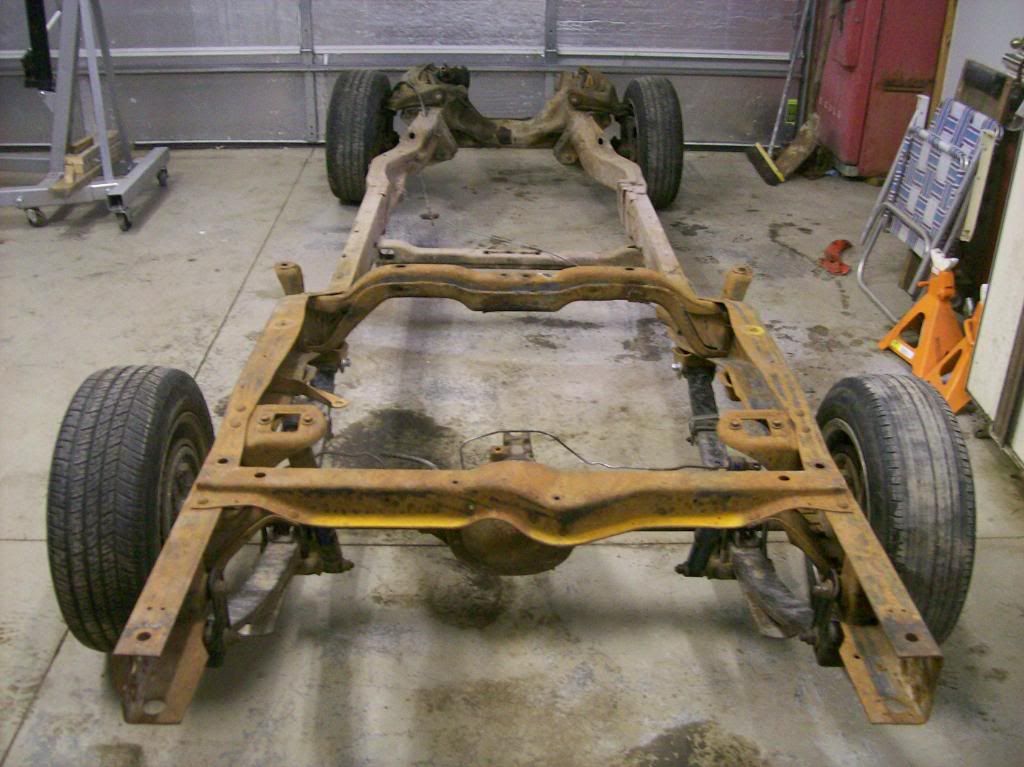 The first thing I did was cut the front frame horns off as well as all the cab mounts. I used a sawzall for all of these cuts. Following others builds for this process I marked the frame to be cut about 1/2 in aft of the forward end of the steering box. As it turns out this was exactly 5 inches from the back of the S10 fender mount. 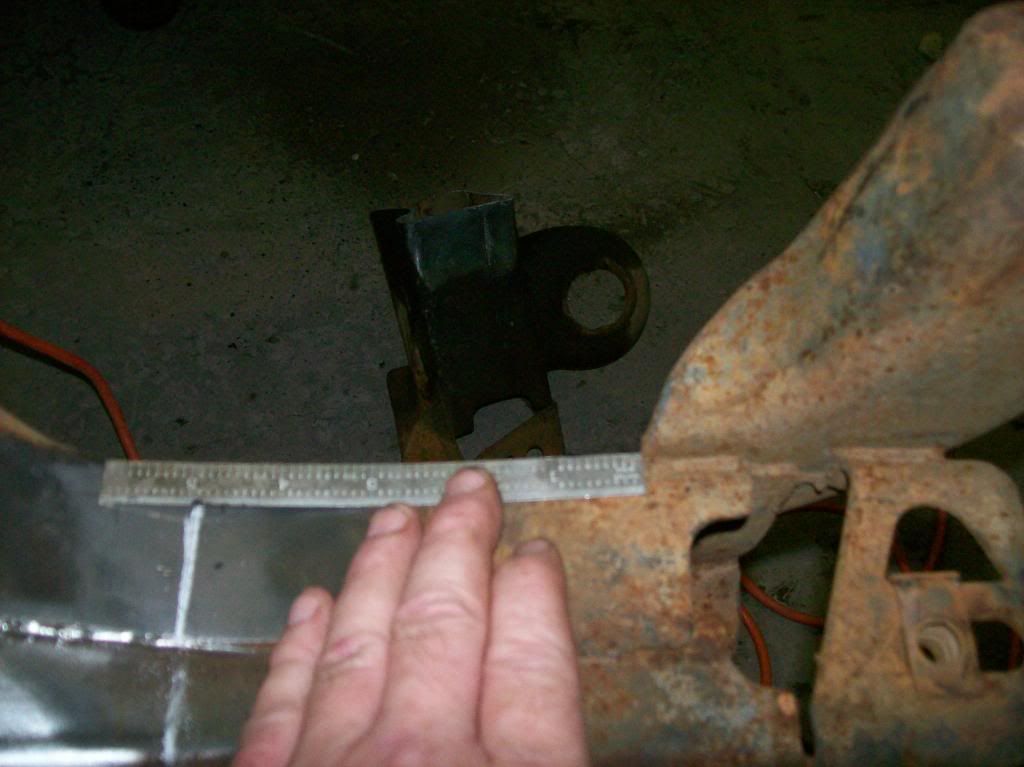 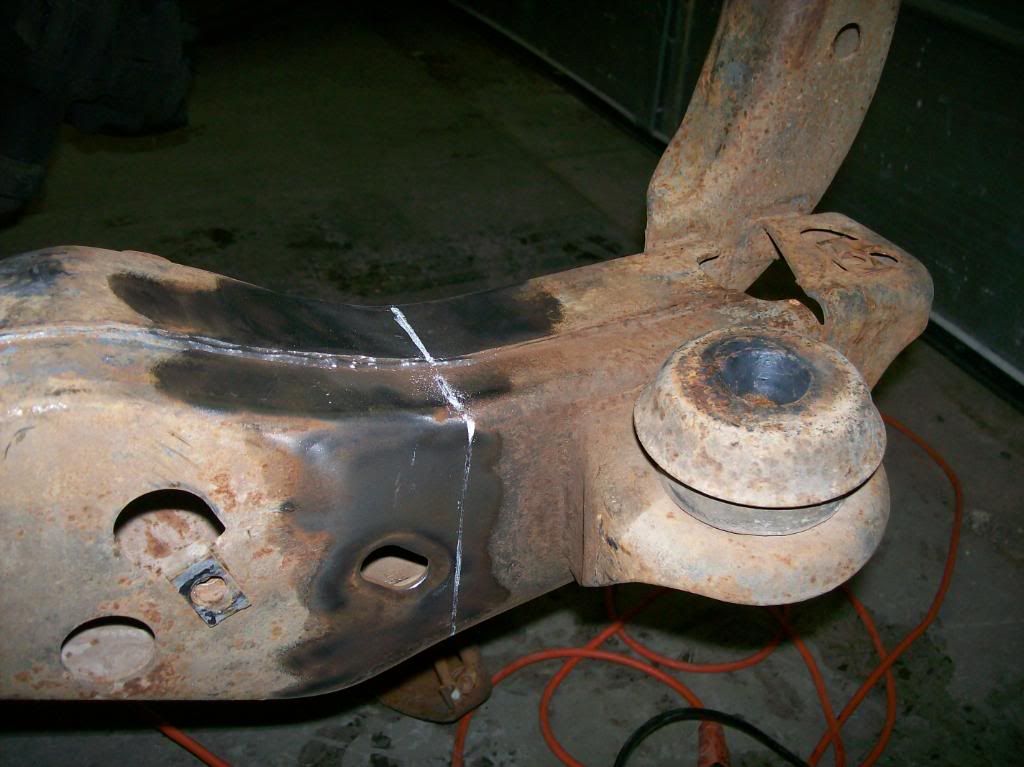 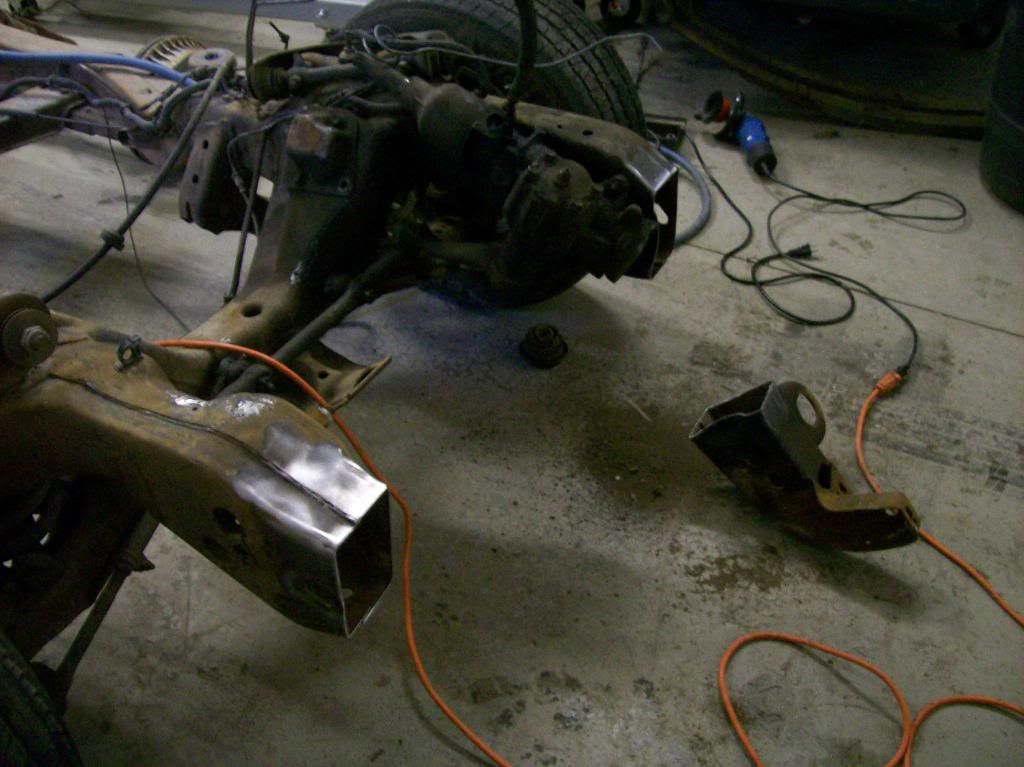 Steering box bolted back up 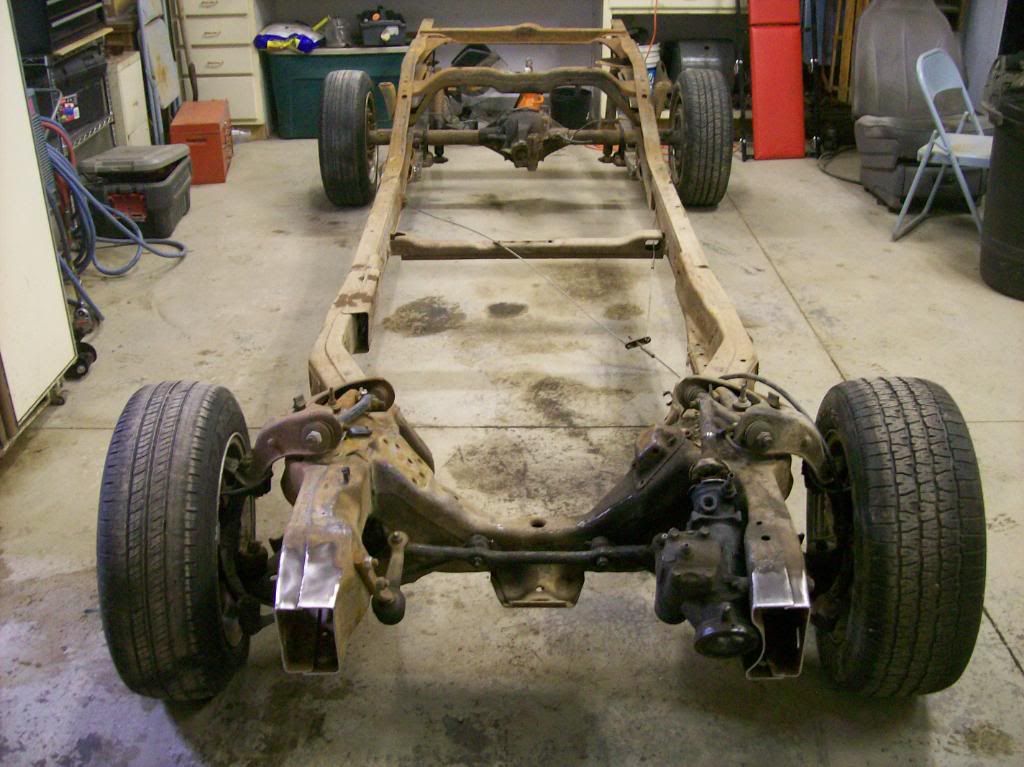 May need some tweeking but this should get me close.
__________________
av8tr33337 AKA Bartman Email av8tr33337@yahoo.comBartman's Ad-S10 Chassis Swap http://67-72chevytrucks.com/vboard/s...d.php?t=415418 My First Youtube Video http://www.youtube.com/watch?v=B6hSt...eature=channel More Pics of the 51 Project http://s668.photobucket.com/albums/v...hassis%20Swap/ 1951 3100 Pickup Last edited by av8tr33337; 08-07-2010 at 04:00 AM. |
|
|
|
|
08-07-2010, 03:52 AM
|
#3 |
|
Registered User
Join Date: Mar 2009
Location: Derby Kansas
Posts: 564
|
Re: Bartmans AD-S10 Chassis Swap
I spent the day mocking up the cab and front clip
 Just for s#%ts and grins. 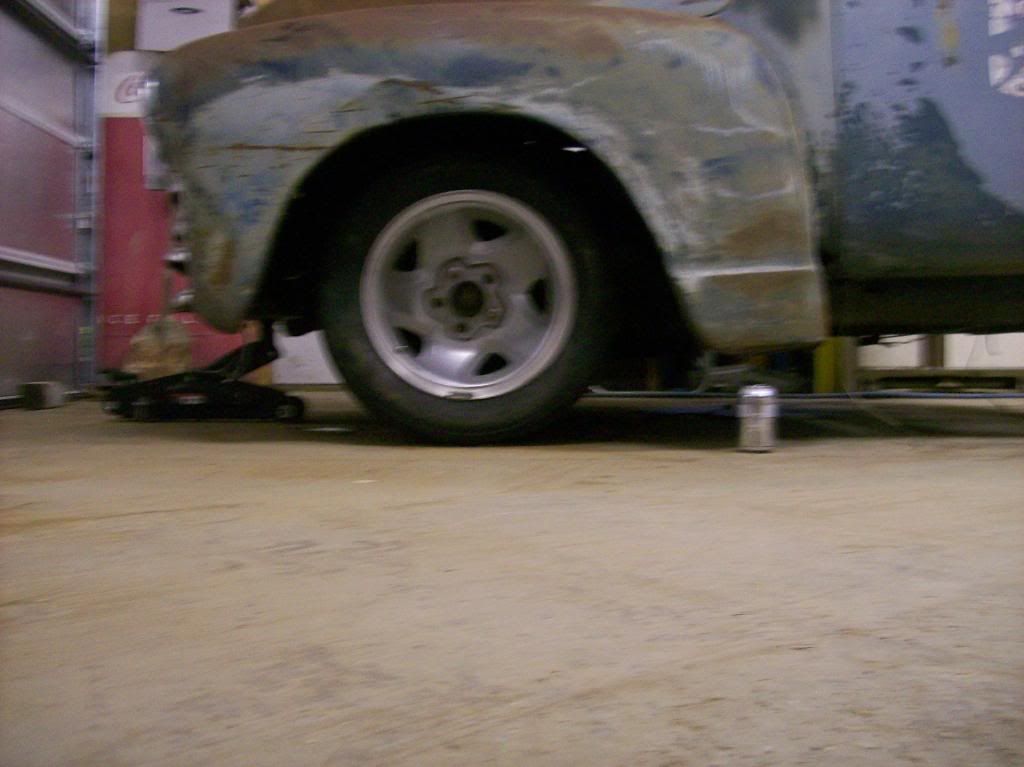 Looks pretty close 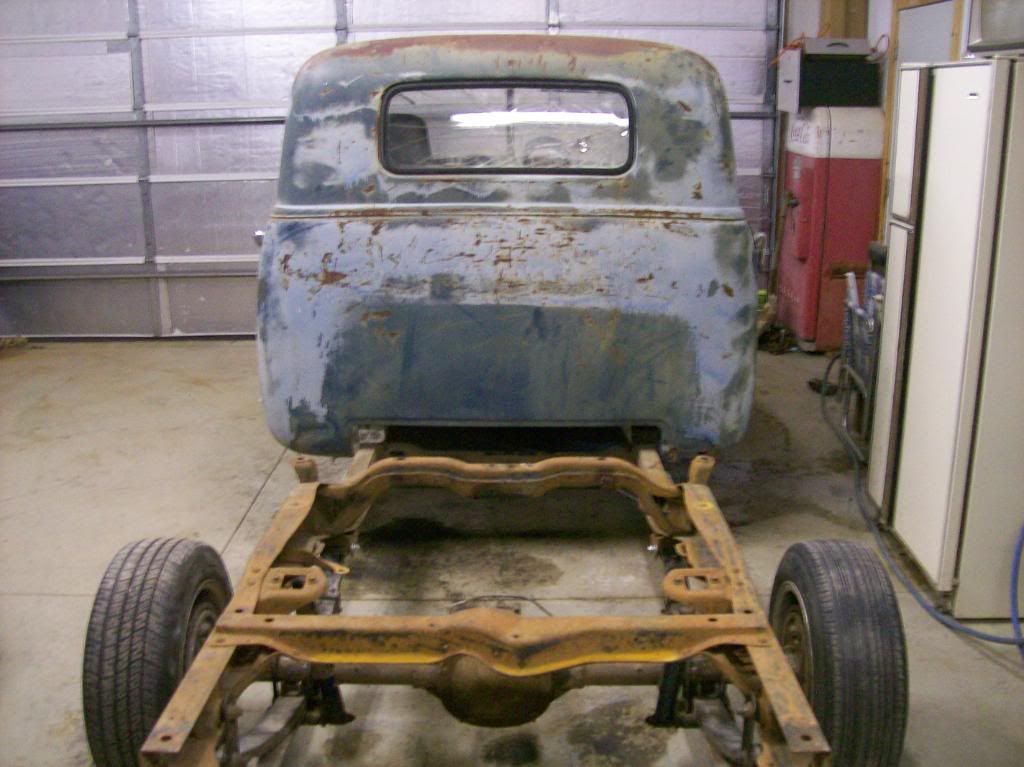 The cab it sitting on 4 inch wood blocks. I thought this would be about right to allow me to use the stock S10 gas tank and hopefully keep the bed at it's stock mounting height. Will see if I'm right about the bed on my next day off. I don't mind dropping the rear fenders an inch or two. If the bed sits way to high I can raise the cab and do some drop spindles and blocks to get it lower. I don't want the rear of the front fender any lower than 6 inches from the ground with the motor and tranny installed. It's sitting at 8 inches right now. 2 inches of settling under the weight of the engine and tranny sounds about right. 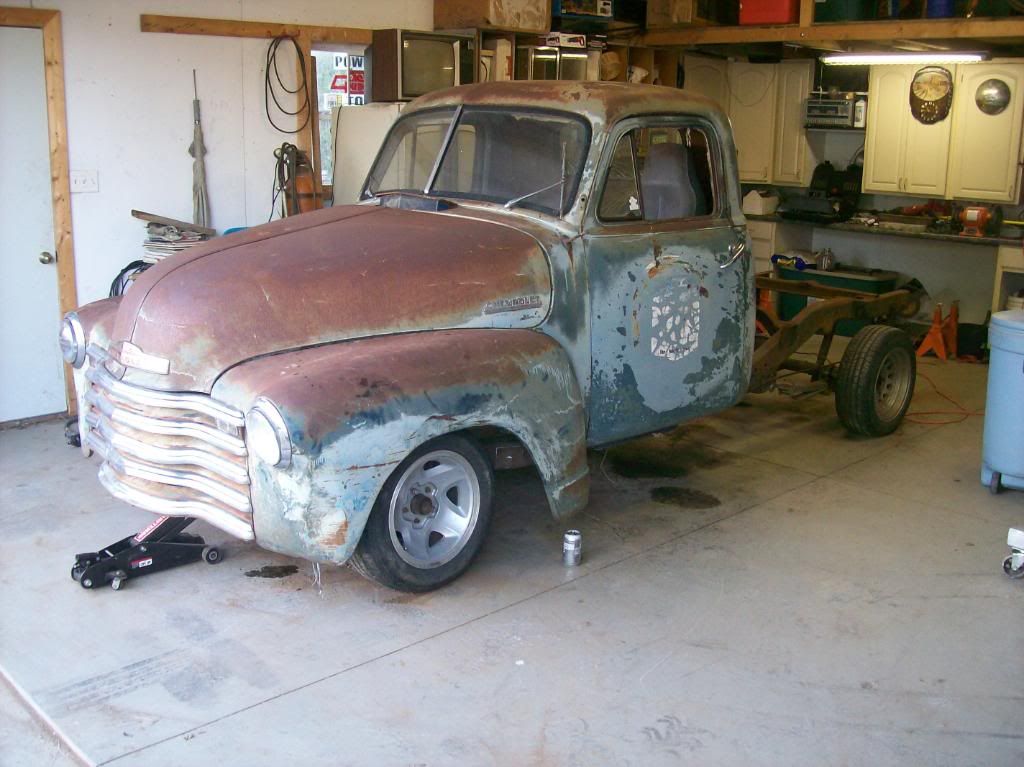 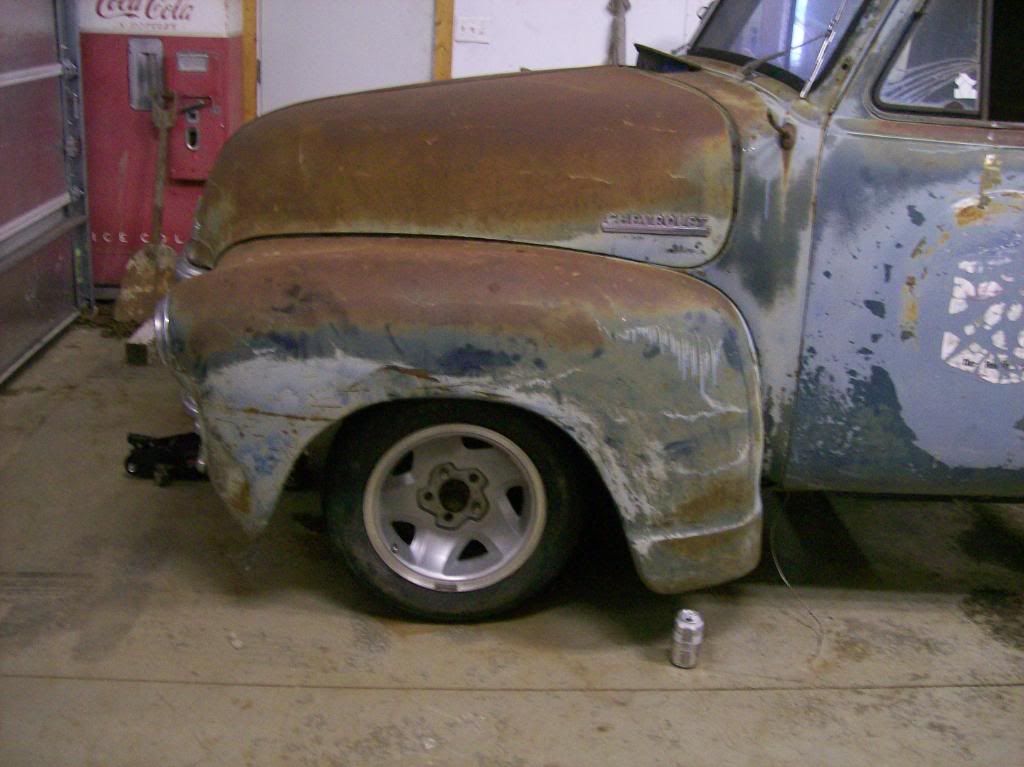 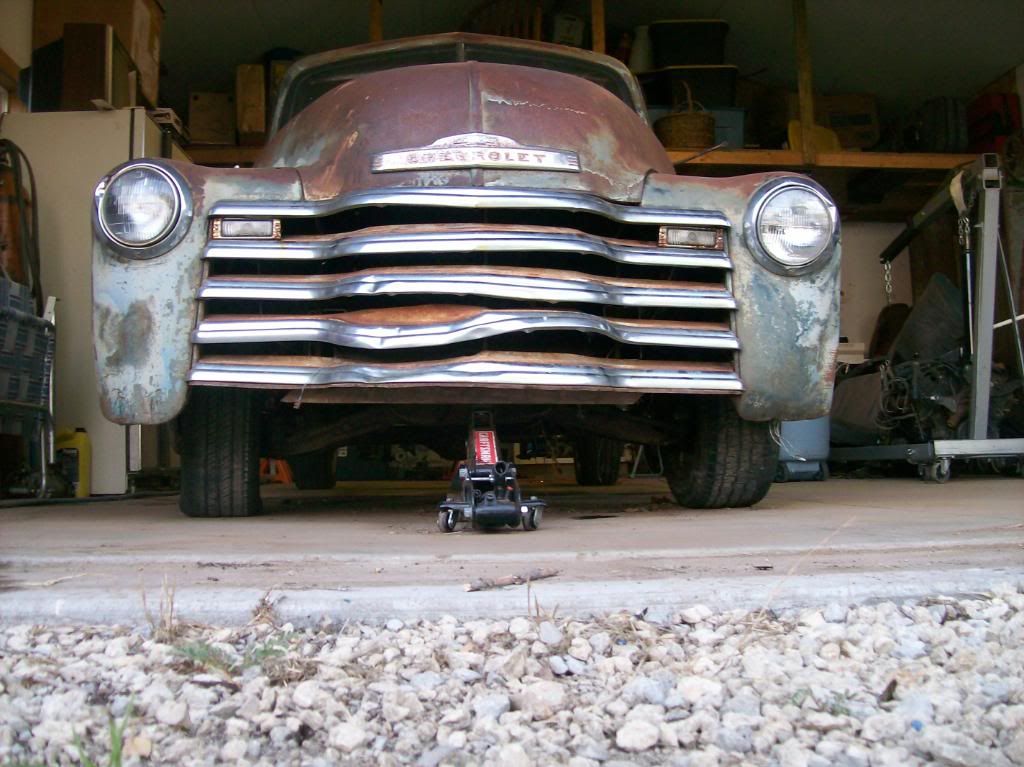 Going to need to do some fine tuning. Right fender sitting kinda high. I should name this truck "Sly" because the bent grill makes it look like Sylvester Stallone. (his droopy lip) hahaha 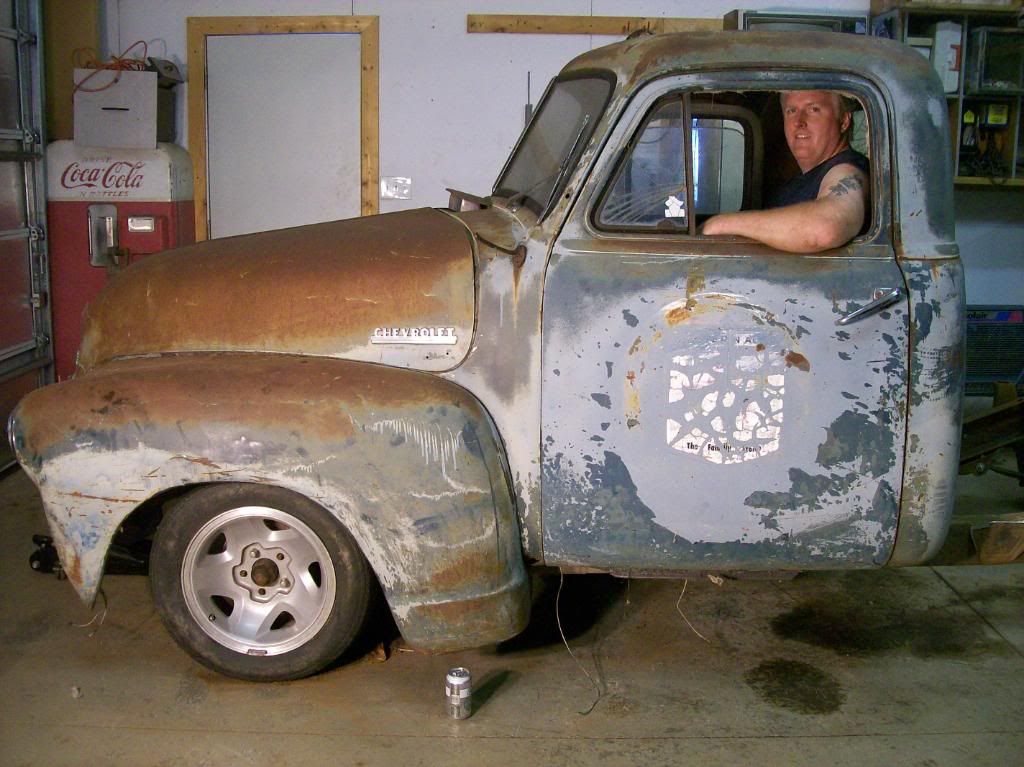 Just for s#%ts and grins I had my wife snap a pic of me in the old truck 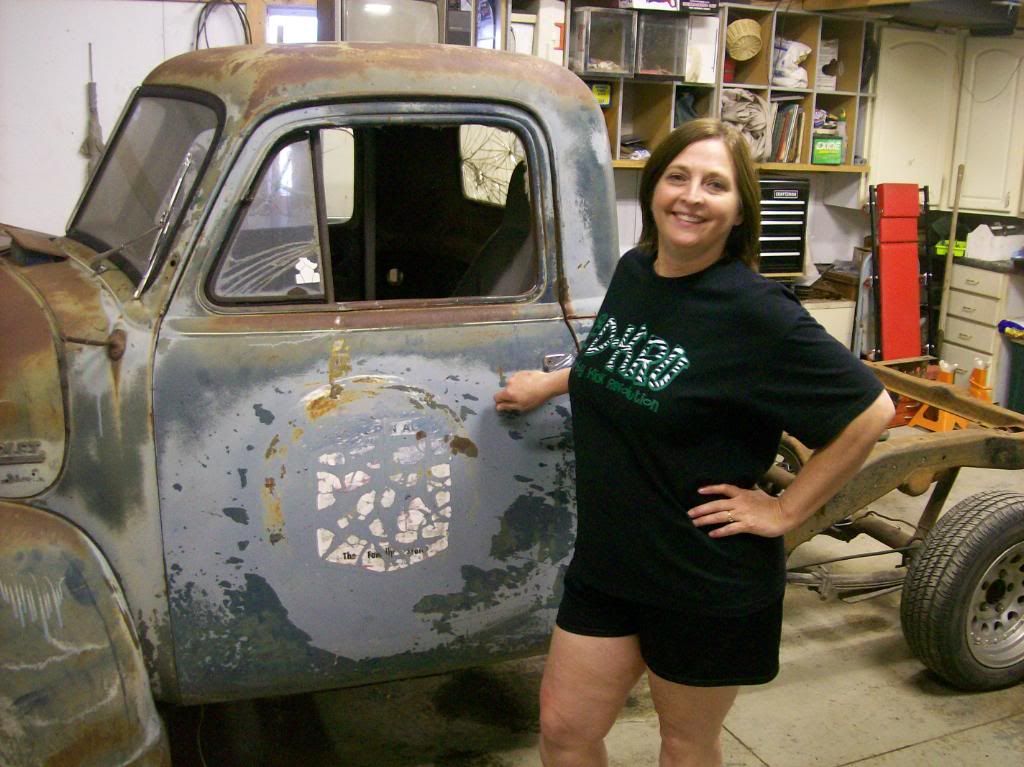 And here is the lady behind the build. My wife of 24 years (our anniversary was this week) We all need to thank the ladies once in a while for not giving us too much grief for the time and money we spend building our toys.
__________________
av8tr33337 AKA Bartman Email av8tr33337@yahoo.comBartman's Ad-S10 Chassis Swap http://67-72chevytrucks.com/vboard/s...d.php?t=415418 My First Youtube Video http://www.youtube.com/watch?v=B6hSt...eature=channel More Pics of the 51 Project http://s668.photobucket.com/albums/v...hassis%20Swap/ 1951 3100 Pickup |
|
|
|
|
08-07-2010, 07:34 AM
|
#4 |
|
and a few others
Join Date: Jun 2007
Location: Blue Ridge Mountains of VA
Posts: 5,638
|
Re: Bartmans AD-S10 Chassis Swap
Great write-up and great pics. Thanks for sharing.
I'm at the exact same place you are on progress. 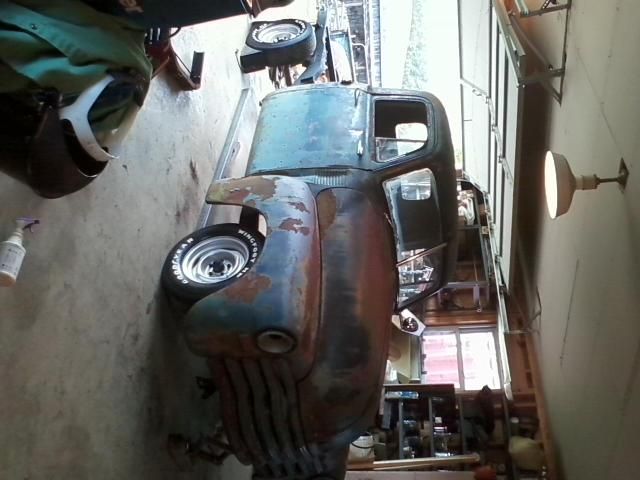 I haven't done much on mine since early spring because my brother and I are restoring a 70 shaker hood Mach 1. We wanted to get it done and have it on eBay by early summer, but that ain't gonna happen. But, it's pretty much taken all my spare time.
__________________
Bill  US Army Vet -193rd Infantry US Army Vet -193rd InfantryBlueRidgeMuscleCars.com The greatness of a nation and its moral progress can be judged by the way its animals are treated Gandhi |
|
|
|
|
08-07-2010, 08:17 AM
|
#5 |
|
Registered User
 Join Date: Jul 2010
Location: Anderson, SC
Posts: 84
|
Re: Bartmans AD-S10 Chassis Swap
Glad you started a new build thread! I was just about to post a question but I think it works here instead.
What if and cuts to the sheet metal are required to make the body fit on the S10 chassis? I pick my chassis up later today and am just trying to get all the work organized in my mind! Thanks, Ben |
|
|
|
|
08-07-2010, 10:40 AM
|
#6 |
|
Registered User
Join Date: Sep 2004
Location: Cheney, KS
Posts: 462
|
Re: Bartmans AD-S10 Chassis Swap
Looks good Bart! It's your old leading edge partner David. I'll have to come check it out sometime.
__________________
Where to start? |
|
|
|
|
08-07-2010, 11:26 AM
|
#7 |
|
Registered User
Join Date: Sep 2008
Location: Creston, BC Canada
Posts: 360
|
Re: Bartmans AD-S10 Chassis Swap
Welcome back to the new section and good to see you're making headway!
I dropped mine on 4x4 blocks to get it nice and low. The transmission will require a small hump, about 2" in height, so not too bad. if you decide to keep it that low, you will find the box a bit high and as so will require a few choice mods. You can either leave the box that high, drop your fenders (about 2") and will require taller filler panels between the box front and the running boards, or, you can drop the box back down those 2" and raise the bed floor up to accommodate. Personally, I like the look of mine with the box a little higher as it really helps to offset the look of the tall cab on a low box. I did have to fab the box to board filler panels though... not hard IMO. Then when you do a 4/2 suspension drop, everything comes right back down (I'm running 28" tires on mine). Cheers! Ted.
__________________
'51 Chevy Build - In the design stages Aut viam inveniam aut faciam - I will either find a way or make one. If you don't have time to do it right the first time, when will you... My new build - https://67-72chevytrucks.com/vboard/...70#post8958970 |
|
|
|
|
08-07-2010, 01:47 PM
|
#8 |
|
Registered User
Join Date: Mar 2009
Location: Derby Kansas
Posts: 564
|
Re: Bartmans AD-S10 Chassis Swap
Thanks everybody.
Dave, I got a few beers in the fridge with your name on them so come on over. Just call and let me know when. A5Ben, About the only mods to the cab are adding a transmission hump depending on how high or low you want your truck to sit. You have no doubt done a little searching on here and the H#@b. One guy named 62chevyII has a nice threat that gives you a lot of info. There are tons of guys here that have done or are doing the same thing. Don't be afraid to ask questions. This is my first build so I am a novice, but I'll help you anyway I can. Thad thanks, I was kinda wondering if you and other guys added another inch to your front wood blocks you use to mock up the front cab mounts as the S10 chassis has about an inch step down there. Also I have the rear mount "Channel" sitting on top of the wood block. Is that where you located your blocks or should I move mine forward to let the back of the cab drop down another inch??
__________________
av8tr33337 AKA Bartman Email av8tr33337@yahoo.comBartman's Ad-S10 Chassis Swap http://67-72chevytrucks.com/vboard/s...d.php?t=415418 My First Youtube Video http://www.youtube.com/watch?v=B6hSt...eature=channel More Pics of the 51 Project http://s668.photobucket.com/albums/v...hassis%20Swap/ 1951 3100 Pickup |
|
|
|
|
08-07-2010, 07:18 PM
|
#9 |
|
Registered User
Join Date: Sep 2008
Location: Creston, BC Canada
Posts: 360
|
Re: Bartmans AD-S10 Chassis Swap
I replaced my front cab mounts with 1"x2" tube stock with an 1/8" plate on the top and had a length of 1/8" flat stock folded into a "U" shape for my rear mounts. You can see them on my build with the cab on it's back. I placed the 4x4 blocks (3 1/2" in actual measurements) under the cab mount locations. I would highly recommend that you bolt up your front end and get all of that shimmed and located at the same time! One big point to note is that you will have to shim either the front or the back to get just the right rake on the cab for all the sheetmetal to line up.
Once you have the front end bolted up and aligned, put the hood on and check the gaps there... pay particular attention to the back edge of the hood where it meets the cowl... this is where you will notice very quickly if you have to shim the front or the rear of the cab up... If you don't, you will either have a larger gap at the bottom or the top edge. This is a sure sign that your cab has too much or too little 'rake'. With everything aligned, you're good to go, bolt up your cab mounts (don't forget the body bushings to go with) and tack weld them onto the frame... pop the cab off and finish the welds... done and aligned! Any questions, just holler! Cheers, Ted.
__________________
'51 Chevy Build - In the design stages Aut viam inveniam aut faciam - I will either find a way or make one. If you don't have time to do it right the first time, when will you... My new build - https://67-72chevytrucks.com/vboard/...70#post8958970 |
|
|
|
|
08-07-2010, 07:28 PM
|
#10 |
|
Registered User
Join Date: Mar 2009
Location: Derby Kansas
Posts: 564
|
Re: Bartmans AD-S10 Chassis Swap
Thanks Thad, I'm sure I've read your thread but I will refresh my memory. I appreciate the info.
__________________
av8tr33337 AKA Bartman Email av8tr33337@yahoo.comBartman's Ad-S10 Chassis Swap http://67-72chevytrucks.com/vboard/s...d.php?t=415418 My First Youtube Video http://www.youtube.com/watch?v=B6hSt...eature=channel More Pics of the 51 Project http://s668.photobucket.com/albums/v...hassis%20Swap/ 1951 3100 Pickup |
|
|
|
|
08-07-2010, 07:39 PM
|
#11 |
|
Registered User
Join Date: Sep 2008
Location: Creston, BC Canada
Posts: 360
|
Re: Bartmans AD-S10 Chassis Swap
Hey, no problem!
Anything to make another's mockup easier and avoid potential "issues" and heartaches... I know, I spent about 2 days getting mine aligned and straight before I welded them in! It was, by far, the biggest pain in the assets but once it's done, everything else is based off of it... so most critical to get right, the first time. Cheers, Ted.
__________________
'51 Chevy Build - In the design stages Aut viam inveniam aut faciam - I will either find a way or make one. If you don't have time to do it right the first time, when will you... My new build - https://67-72chevytrucks.com/vboard/...70#post8958970 |
|
|
|
|
08-18-2010, 09:41 PM
|
#12 |
|
Registered User
Join Date: Mar 2009
Location: Derby Kansas
Posts: 564
|
Re: Bartmans AD-S10 Chassis Swap
I finally got some time to work on my truck today.
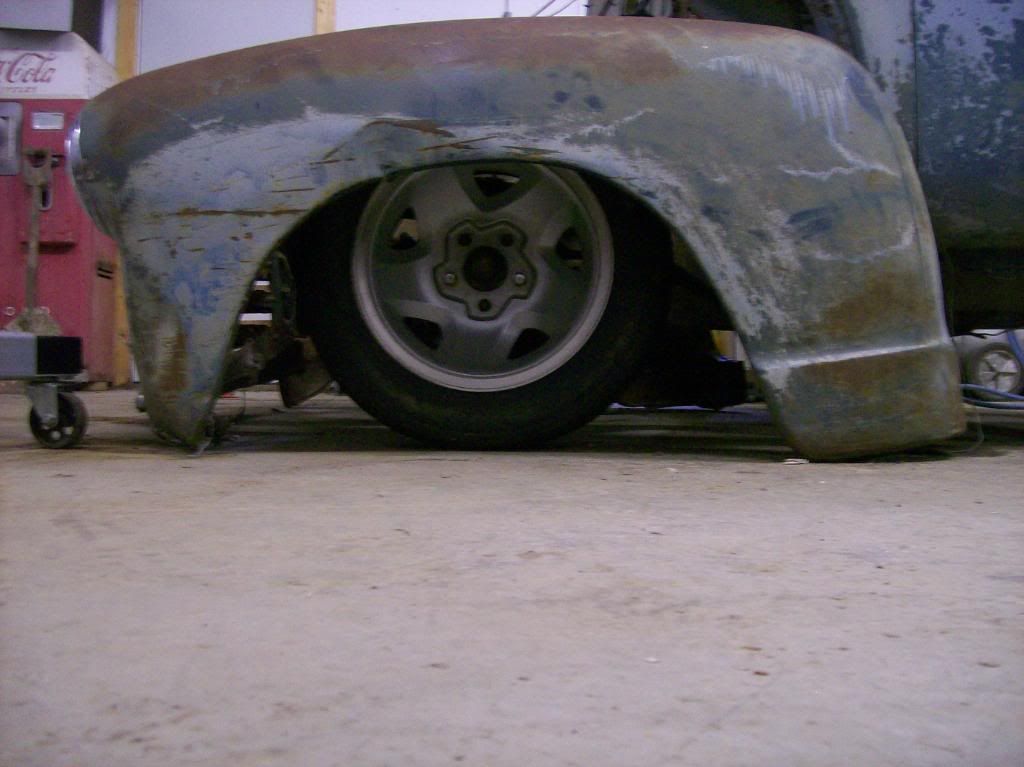
I was kind of waiting for this  Now I can get some stuff done Here are a couple pics of the fitment of the front sheet metal that I had yet to post. The inner fender wells were slow going because I didn't want to over do it. Can you guess how many tries it took me to get it just right?? [IMG] 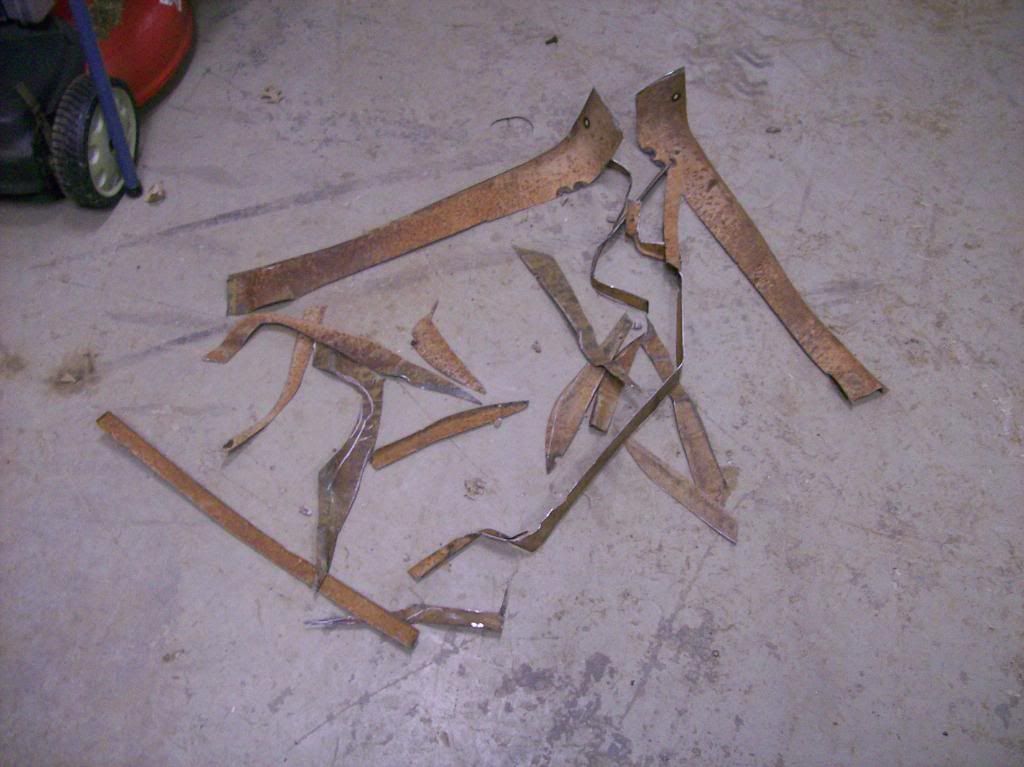 [/IMG] [/IMG]If I ever do that again I'll be able to eliminate the number of passes with the cutting tools. Here is what I did on the splash shield. [IMG] 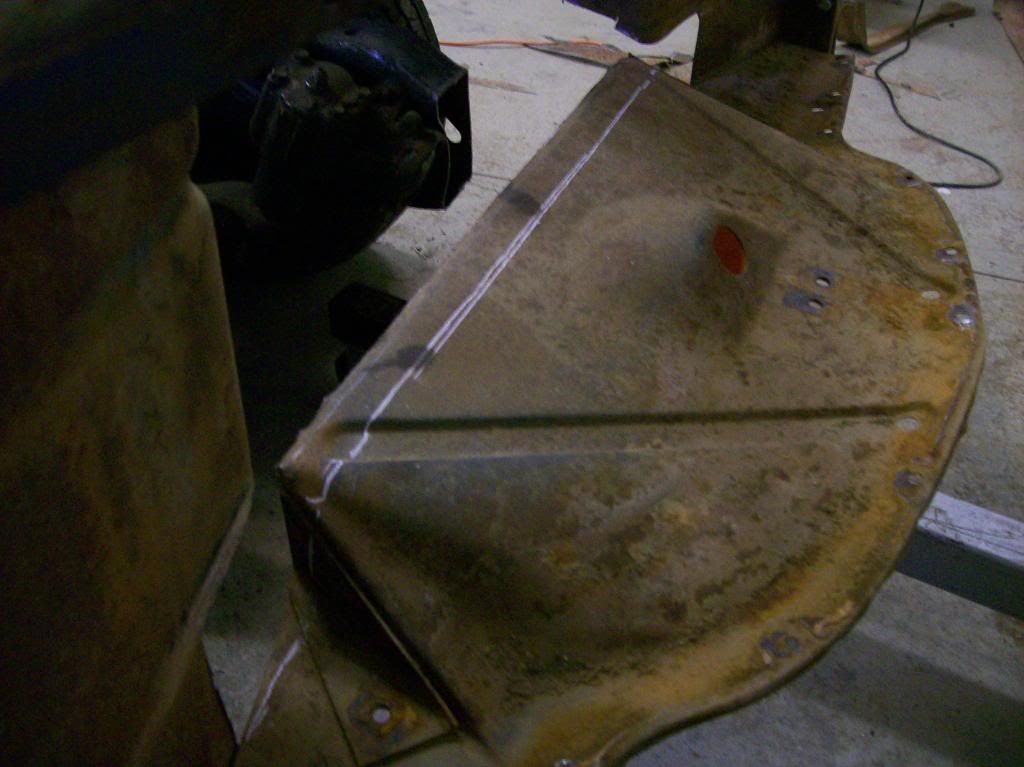 [/IMG] [/IMG]Sorry I didn't get an after shot but this might help somebody to trim theirs
__________________
av8tr33337 AKA Bartman Email av8tr33337@yahoo.comBartman's Ad-S10 Chassis Swap http://67-72chevytrucks.com/vboard/s...d.php?t=415418 My First Youtube Video http://www.youtube.com/watch?v=B6hSt...eature=channel More Pics of the 51 Project http://s668.photobucket.com/albums/v...hassis%20Swap/ 1951 3100 Pickup |
|
|
|
|
08-18-2010, 09:57 PM
|
#13 |
|
Registered User
Join Date: Mar 2009
Location: Derby Kansas
Posts: 564
|
Re: Bartmans AD-S10 Chassis Swap
Here is what I actually did today.
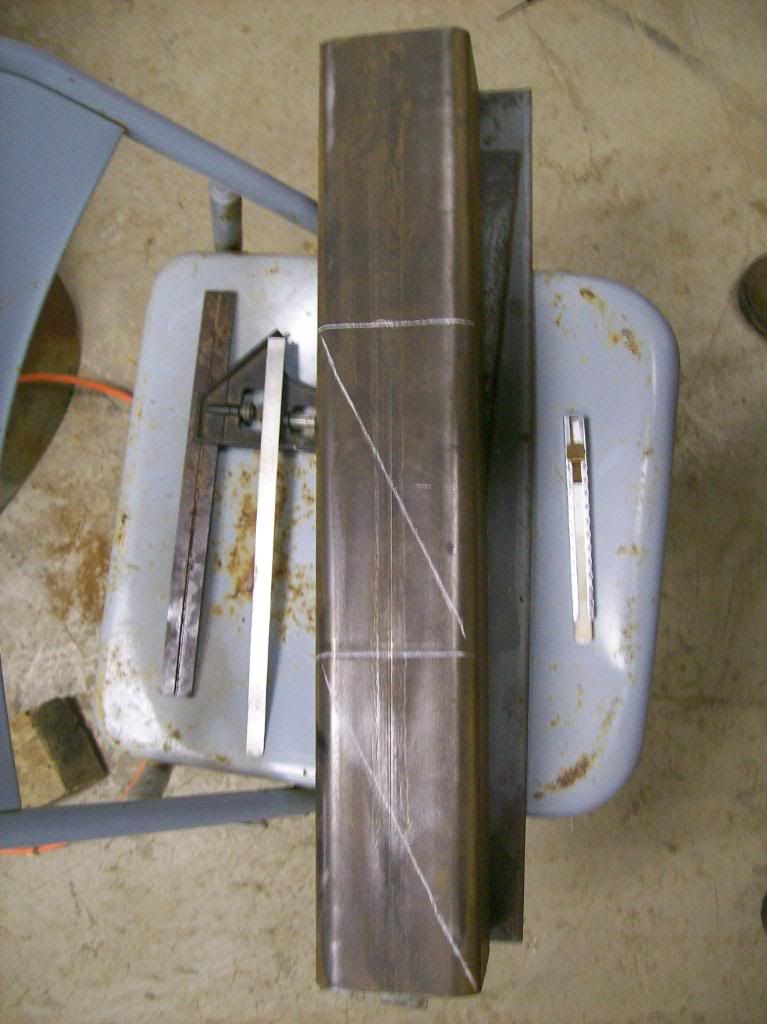 It was a lot of work, but instead of taking this stuff to a machine shop to have it cut with a band saw, I used my cut off saw and 4 1/2 inch grinder with a cut off wheel. Took about an hour to make all the cuts. 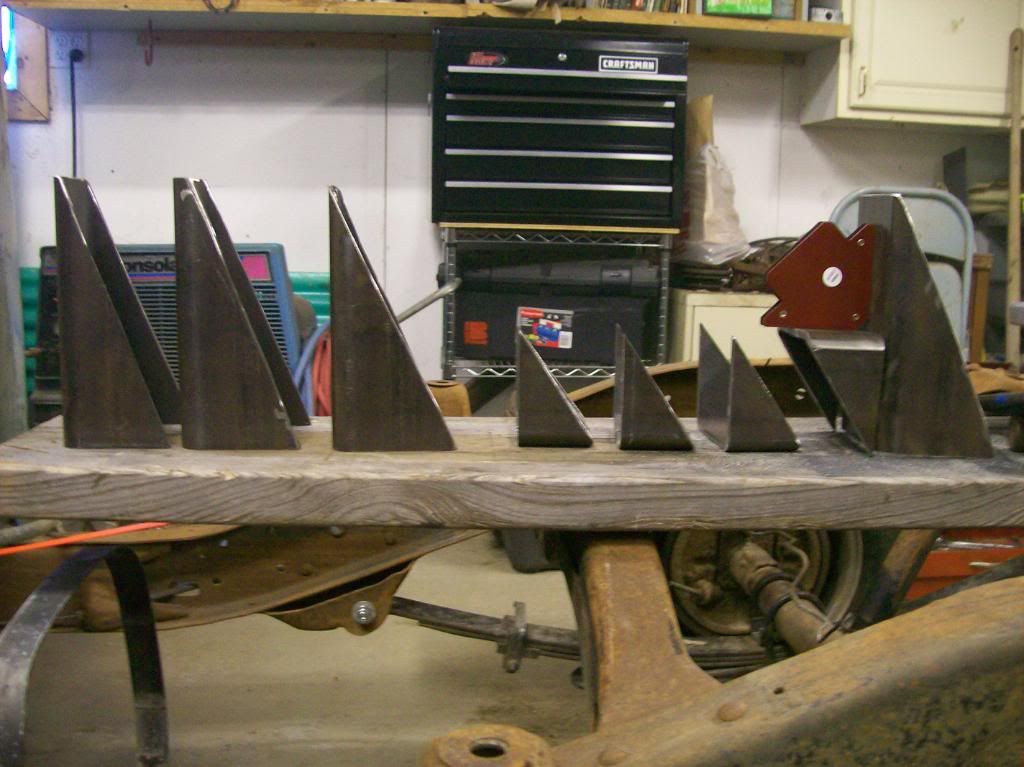 This is the last cab mount I welded up. 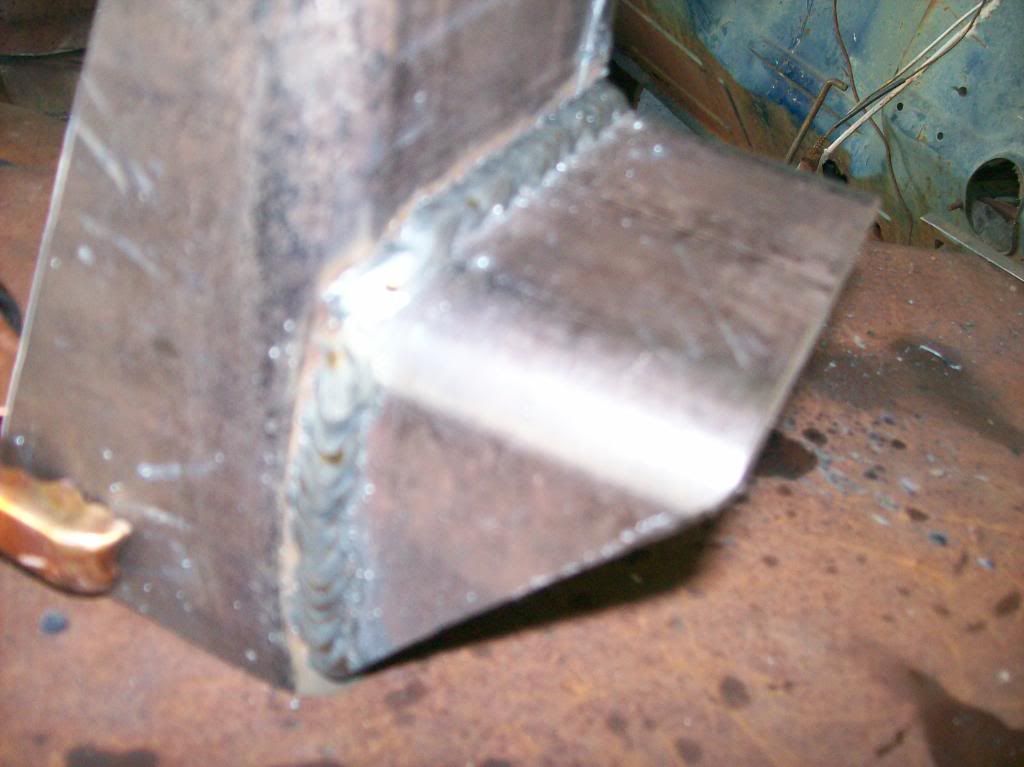 I finally got everything dialed in and got some descent looking welds. The other 3 got good penetration but were not as pretty. 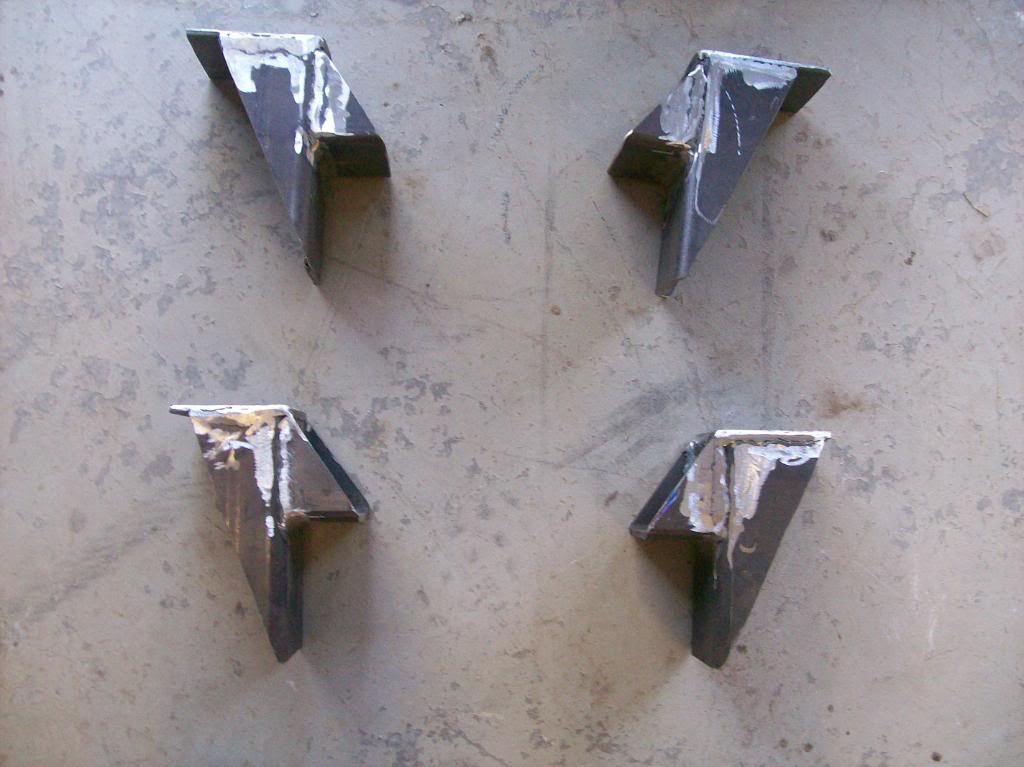 Just a quick shot of paint. 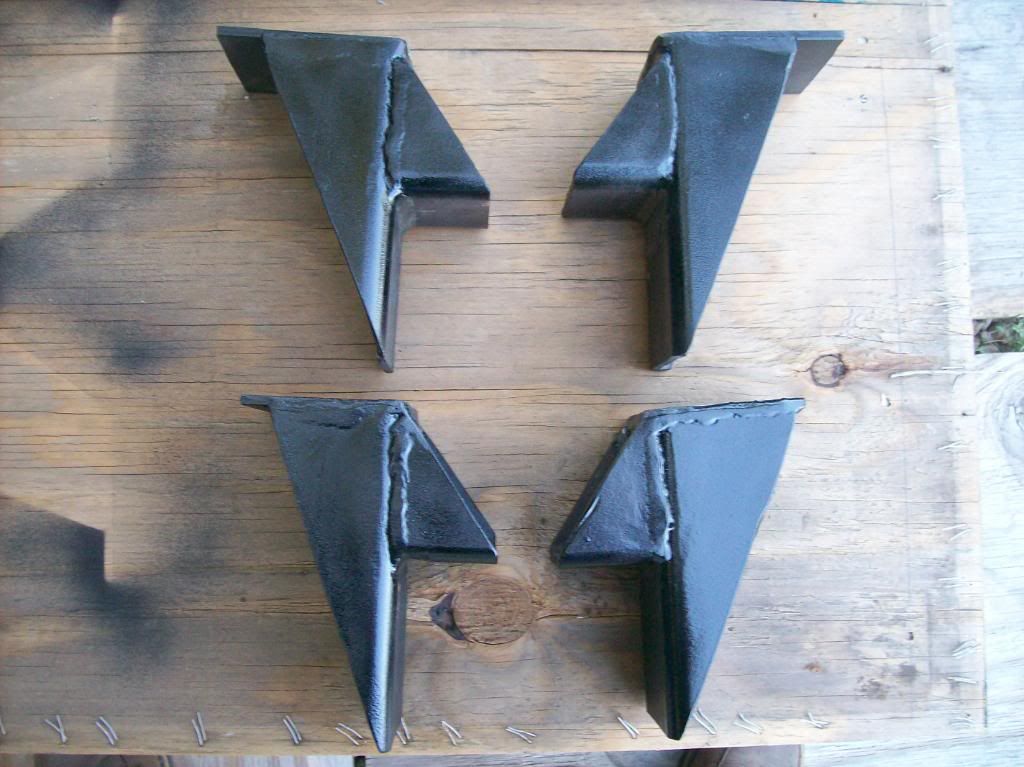 Tomorrow I will try to get them mounted and drilled for the stock S10 pads. Have to invest in a hole saw. Will try to get more pics up as I move forward.
__________________
av8tr33337 AKA Bartman Email av8tr33337@yahoo.comBartman's Ad-S10 Chassis Swap http://67-72chevytrucks.com/vboard/s...d.php?t=415418 My First Youtube Video http://www.youtube.com/watch?v=B6hSt...eature=channel More Pics of the 51 Project http://s668.photobucket.com/albums/v...hassis%20Swap/ 1951 3100 Pickup |
|
|
|
|
08-18-2010, 10:05 PM
|
#14 |
|
Registered User
Join Date: Mar 2009
Location: Derby Kansas
Posts: 564
|
Re: Bartmans AD-S10 Chassis Swap
Almost forgot. I took a couple pics of the original gas tank clearance the other day.
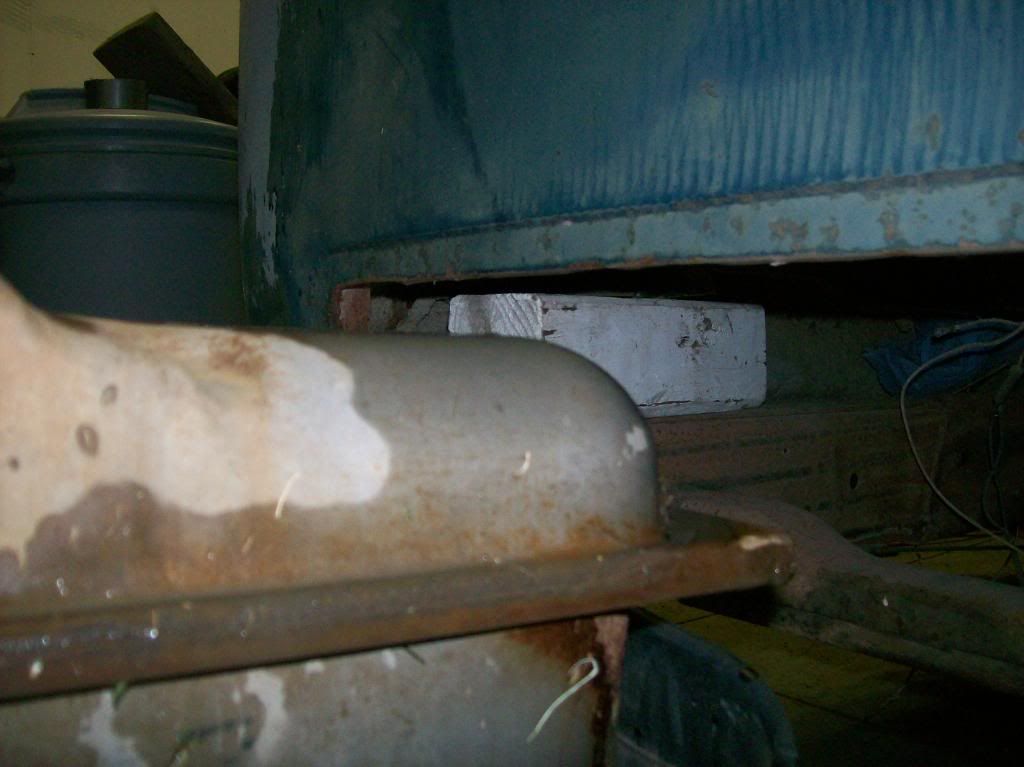 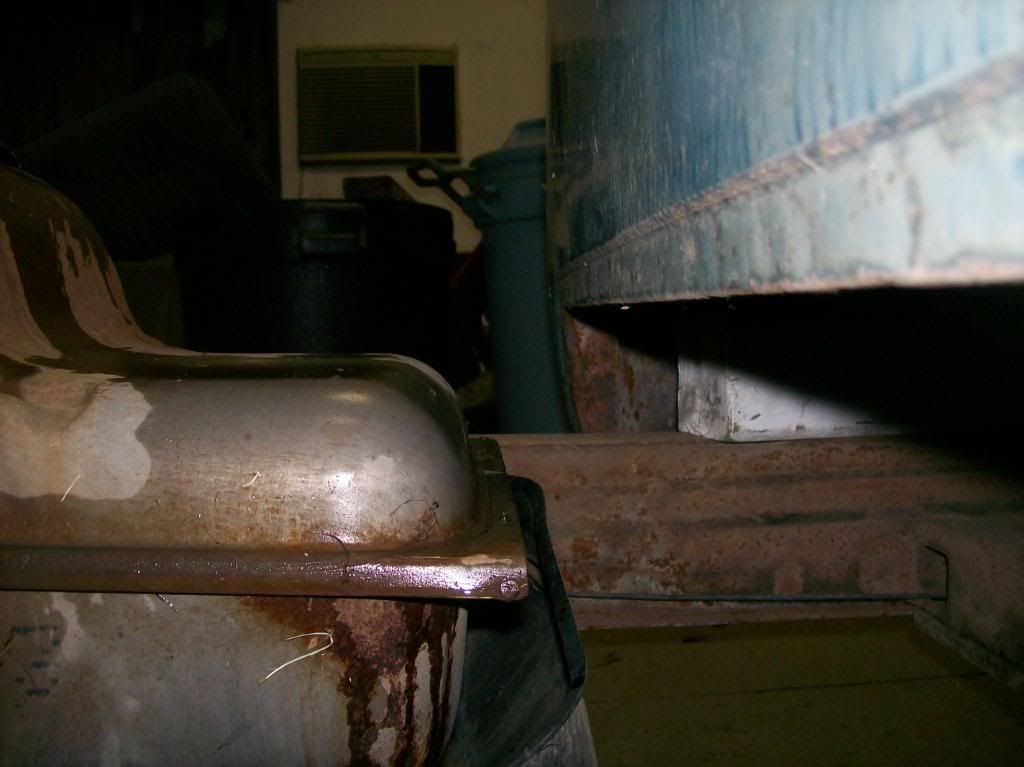 I still have Shorten the chassis (before I can attach the new rear cab mounts) but it looks like I will have about 1 to 2 inches of clearance between the bottom of the cab and the gas tank after the frame is shortened by 3.5 or 4 inches.
__________________
av8tr33337 AKA Bartman Email av8tr33337@yahoo.comBartman's Ad-S10 Chassis Swap http://67-72chevytrucks.com/vboard/s...d.php?t=415418 My First Youtube Video http://www.youtube.com/watch?v=B6hSt...eature=channel More Pics of the 51 Project http://s668.photobucket.com/albums/v...hassis%20Swap/ 1951 3100 Pickup |
|
|
|
|
08-19-2010, 02:01 AM
|
#15 |
|
Registered User
Join Date: Jul 2010
Location: Marietta, GA
Posts: 202
|
Re: Bartmans AD-S10 Chassis Swap
Make sure you get a quality hole saw. I have a set from Matco that have life time warrantee and cut holes in anything.
So I looked at all your pics on the for build you started with the narrowed crossmember but I didn't see where you stated why you dumped it and went to the S-10, I probably just missed it. Last edited by enick72; 08-19-2010 at 02:02 AM. |
|
|
|
|
08-19-2010, 08:53 PM
|
#16 |
|
Registered User
Join Date: Jul 2010
Location: Columbia Mo
Posts: 395
|
Re: Bartmans AD-S10 Chassis Swap
Cool! I would love to see some pictures of the cab mounts mounted to the rear of the cab not just the frame. t - one week till work begins on my 49, started shop safety today.
|
|
|
|
|
08-20-2010, 02:04 PM
|
#17 |
|
Registered User
Join Date: Mar 2009
Location: Derby Kansas
Posts: 564
|
Re: Bartmans AD-S10 Chassis Swap
RootBeer, Yeah there are not a whole lot of good pics showing how the mounts mate up to the bottom of the cab. I will snap a couple and post of them in a day or two.
__________________
av8tr33337 AKA Bartman Email av8tr33337@yahoo.comBartman's Ad-S10 Chassis Swap http://67-72chevytrucks.com/vboard/s...d.php?t=415418 My First Youtube Video http://www.youtube.com/watch?v=B6hSt...eature=channel More Pics of the 51 Project http://s668.photobucket.com/albums/v...hassis%20Swap/ 1951 3100 Pickup |
|
|
|
|
08-20-2010, 08:15 PM
|
#18 |
|
Registered User
Join Date: Jul 2010
Location: Anderson, SC
Posts: 84
|
Re: Bartmans AD-S10 Chassis Swap
Bartman, is that 1/4" thick"? I would like to see those extra pics myself when you get time to post them.
Thanks, Ben |
|
|
|
|
08-20-2010, 08:44 PM
|
#19 |
|
Registered User
Join Date: Mar 2009
Location: Derby Kansas
Posts: 564
|
Re: Bartmans AD-S10 Chassis Swap
Yes they are 1/4 inch. It was about all my welder could do and IMO they didn't need to be that heavy. We have a great supply yard here in Wichita called "The Yard". It seems like they only stock the most popular sizes of material though. 1/4 was all they carry in 4 inch square tubing. 4 inch flat stock also only comes in 1/4. I'm sure there are other places I could have gone, but I got all the materials to build the cab mounts and bed mounts for $49.00. It was convenient and I was in and out in 15 minutes.
__________________
av8tr33337 AKA Bartman Email av8tr33337@yahoo.comBartman's Ad-S10 Chassis Swap http://67-72chevytrucks.com/vboard/s...d.php?t=415418 My First Youtube Video http://www.youtube.com/watch?v=B6hSt...eature=channel More Pics of the 51 Project http://s668.photobucket.com/albums/v...hassis%20Swap/ 1951 3100 Pickup |
|
|
|
|
08-20-2010, 08:49 PM
|
#20 |
|
Registered User
Join Date: Jul 2010
Location: Anderson, SC
Posts: 84
|
Re: Bartmans AD-S10 Chassis Swap
Do you think 3/16th would work just as well? My welder is a 110volt mig so it would be much easier to weld.
|
|
|
|
|
08-20-2010, 08:57 PM
|
#21 |
|
Registered User
Join Date: Mar 2009
Location: Derby Kansas
Posts: 564
|
Re: Bartmans AD-S10 Chassis Swap
Yes I think it would work just fine but you might want to get other opinions. The factory mounts are more like 1/8 inch, but I suspect the older sheet metal is a little heavier than the s10 body. If not I would suspect since the AD cab etc sits higher it would put more strain on the mounts going around corners etc. Just a thought.
__________________
av8tr33337 AKA Bartman Email av8tr33337@yahoo.comBartman's Ad-S10 Chassis Swap http://67-72chevytrucks.com/vboard/s...d.php?t=415418 My First Youtube Video http://www.youtube.com/watch?v=B6hSt...eature=channel More Pics of the 51 Project http://s668.photobucket.com/albums/v...hassis%20Swap/ 1951 3100 Pickup |
|
|
|
|
09-16-2010, 12:48 AM
|
#22 |
|
Registered User
Join Date: Mar 2009
Location: Derby Kansas
Posts: 564
|
Re: Bartmans AD-S10 Chassis Swap
Just a quick update. Been working on the fab up and mock up of all the essential components. Cab mounts, bed mounts, running board mounts, motor mounts etc. Here are a few pics of how the truck looks now. Will post some pics of the whole process once its all final welded. Everything is just tacked in place right now except for the shortened frame. It's a done deal. Still need to do a 3 inch suspension drop but that will come when I blow this thing apart.
     Yes the top of the cab is caved in. I have another cab I'm going to use. More to come..........
__________________
av8tr33337 AKA Bartman Email av8tr33337@yahoo.comBartman's Ad-S10 Chassis Swap http://67-72chevytrucks.com/vboard/s...d.php?t=415418 My First Youtube Video http://www.youtube.com/watch?v=B6hSt...eature=channel More Pics of the 51 Project http://s668.photobucket.com/albums/v...hassis%20Swap/ 1951 3100 Pickup |
|
|
|
|
09-16-2010, 07:59 AM
|
#23 |
|
Registered User
Join Date: Jul 2010
Location: Anderson, SC
Posts: 84
|
Re: Bartmans AD-S10 Chassis Swap
Great progress Bartman. Wish I was this far along. Question though, did you have to do anything special to bolt up the camaro rear end? I have one thats from an older car that will need some mods to work like moving the spring mounts inward.
Ben |
|
|
|
|
09-16-2010, 12:01 PM
|
#24 | |
|
Registered User
Join Date: Mar 2009
Location: Derby Kansas
Posts: 564
|
Re: Bartmans AD-S10 Chassis Swap
Quote:
I cut and ground everything off the Camaro Rear end. I went to Atwoods (A farm supply store) and bought some cheap spring perches that are actually for building a trailer and are too narrow for my springs. I'm just using them for mock up, but the radius fit my rear end tube perfect. Nothing welded, just held in place by the U bolts. I will make my own spring perches later with some 2 1/2 inch square tubing. Just set small goals for yourself Ben you will get there.
__________________
av8tr33337 AKA Bartman Email av8tr33337@yahoo.comBartman's Ad-S10 Chassis Swap http://67-72chevytrucks.com/vboard/s...d.php?t=415418 My First Youtube Video http://www.youtube.com/watch?v=B6hSt...eature=channel More Pics of the 51 Project http://s668.photobucket.com/albums/v...hassis%20Swap/ 1951 3100 Pickup |
|
|
|
|
|
09-16-2010, 05:30 PM
|
#25 |
|
Registered User
Join Date: Aug 2009
Location: OKC, OK
Posts: 1,169
|
Re: Bartmans AD-S10 Chassis Swap
Did you get any of that big hail up there? I saw that you were near Wichita on a previous post.
__________________
My AD Truck Build Thread 52 GMC one day laying on the running boards 2004 Chevy Crewcab. 3/5 and notched |
|
|
|
|
| Bookmarks |
|
|


 Linear Mode

