
|
 02-17-2012, 02:28 PM
|
#26 |
|
Registered User
Join Date: Sep 2009
Location: South Texas
Posts: 171
|
Re: My 88 Silverado
LOL totally forgot to mention, had problems with my tail lights, so i bought new taillight housings with circuit board and bulbs for 55 bucks on ebay. heres the lights already installed on the truck.
 heres a pic of my engine bay. needs alot of tender loving care, but slowly its getting there  , anyone got suggestions on where to start with this enigma :p , anyone got suggestions on where to start with this enigma :p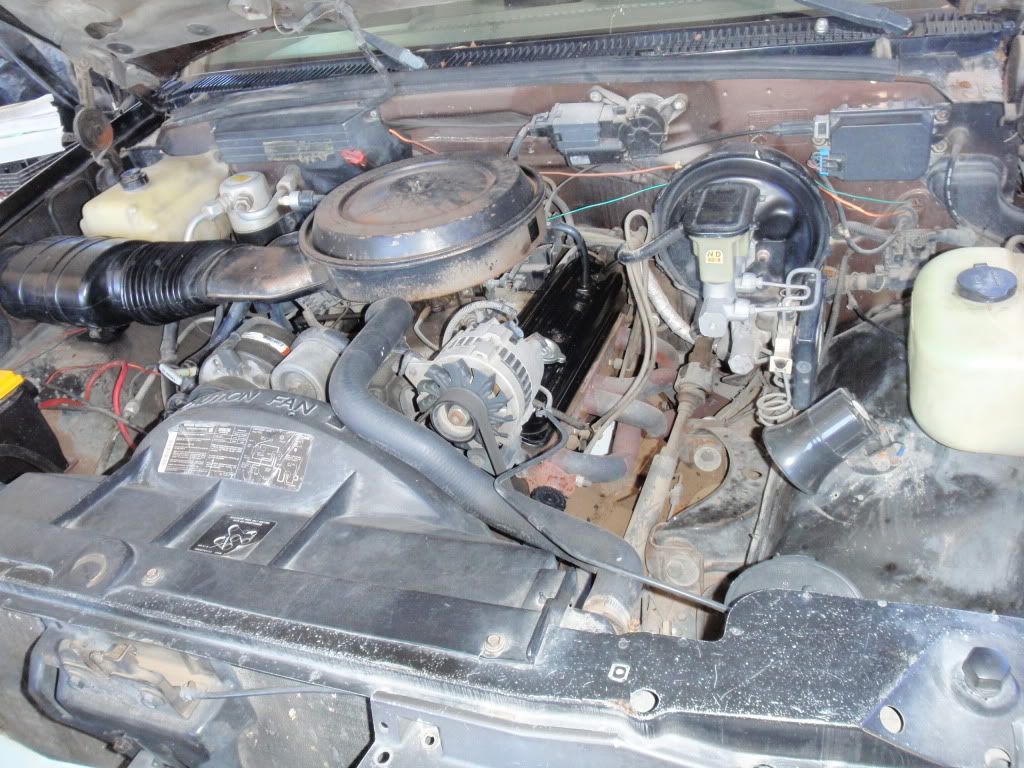
__________________
It takes 8,460 bolts to assemble an automobile, and one nut to scatter it all over the road...  1988 Chevrolet Silverado Single Cab, Short bed, 350, 5.7L: daily driver/on a budget restoration Last edited by Ricky78045; 02-17-2012 at 02:35 PM. Reason: added pic |

|

|
|
02-17-2012, 02:39 PM
|
#27 |
|
Registered User
Join Date: Sep 2009
Location: South Texas
Posts: 171
|
Re: My 88 Silverado
Heres one of the trucks taillights at night, i need to take better pics, but its what i had at the time

__________________
It takes 8,460 bolts to assemble an automobile, and one nut to scatter it all over the road... 1988 Chevrolet Silverado Single Cab, Short bed, 350, 5.7L: daily driver/on a budget restoration |
|
|
|
|
03-03-2012, 03:50 PM
|
#28 |
|
Registered User
Join Date: Sep 2009
Location: South Texas
Posts: 171
|
Re: My 88 Silverado
Recent Updates:
Feb 27 2012. My wife Liz and I parked the truck under the garage port and cleaned it out. She washed all the floor mats then swept the cabin carpet with a hand brush. I dusted the dash, doors, rear window with a fabric duster. We dusted and organized behind the bench. Feb 28 2012. Inflated all of our vehicles tires with a small compressor. Cleaned my trucks glove box, wiped it down and took some pictures of the parts sticker, lol I took the pics cause you never know when you're gonna need it . Removed A/C blower motor and cleaned it with a rag and wet towel, it looked pretty clean, just dusty. Cleaned out the core? lol there was some leaves and other stuff in there that needed clearing, haven't tried the a/c yet I hope it made a difference. With the air compressor i dusted the ac vents, dash, behind the dash, doors, bench, and a lot of nooks and crannies. I also emptied out my glove box from any old receipts and junk papers.Feb 29 2012. Removed the driver side door sill protector to clean it and to install the amp wire. I replaced the sound system wiring with 4 gauge(looks like 8 gauge) and fine tuned the head unit. I also installed a small black split loom that came with the amp kit. After fine tuning the radio, i took pictures of the settings and uploaded them to photobucket, cause it sounded awesome...... lol and usually the battery gets removed or something happens that I lose the settings  . I cleaned behind and under the sub box, and reorganized a lot of the stuff that was there. . I cleaned behind and under the sub box, and reorganized a lot of the stuff that was there.Mar 1 2012. There was a missing screw on the heater core cover (I think that's what its called lol) so I replaced it. I have a small center console that Liz bought me on the transmission hump, so I decided to remove it, empty it and washed it, and dried it. Took pics of the trucks interior. 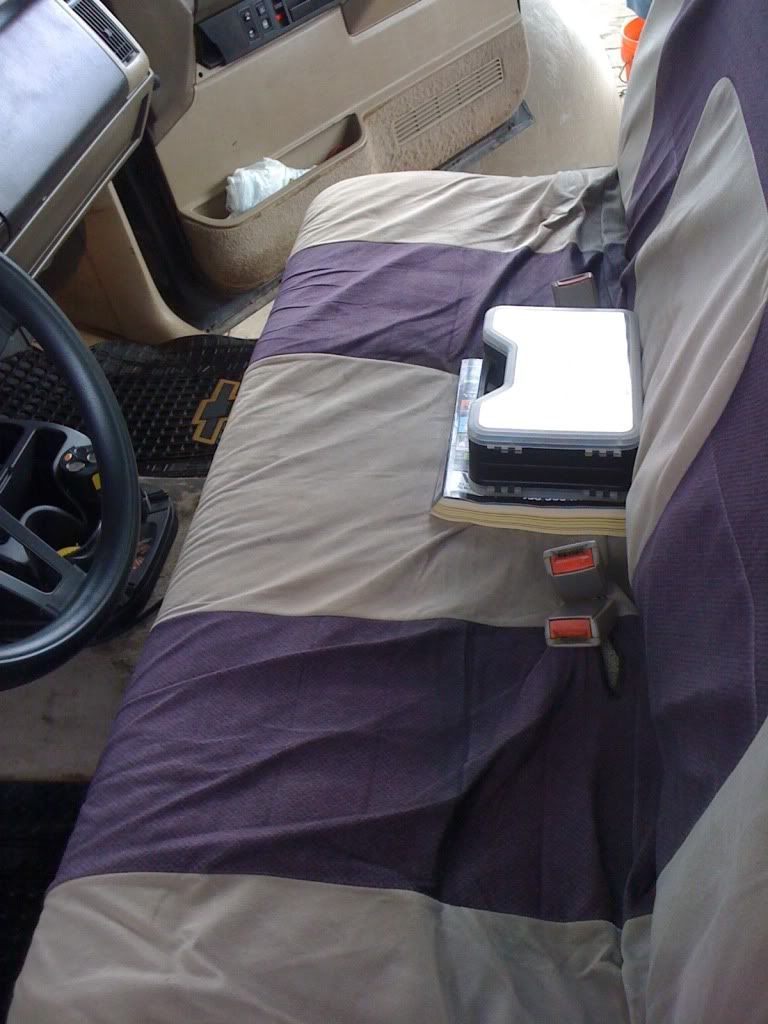  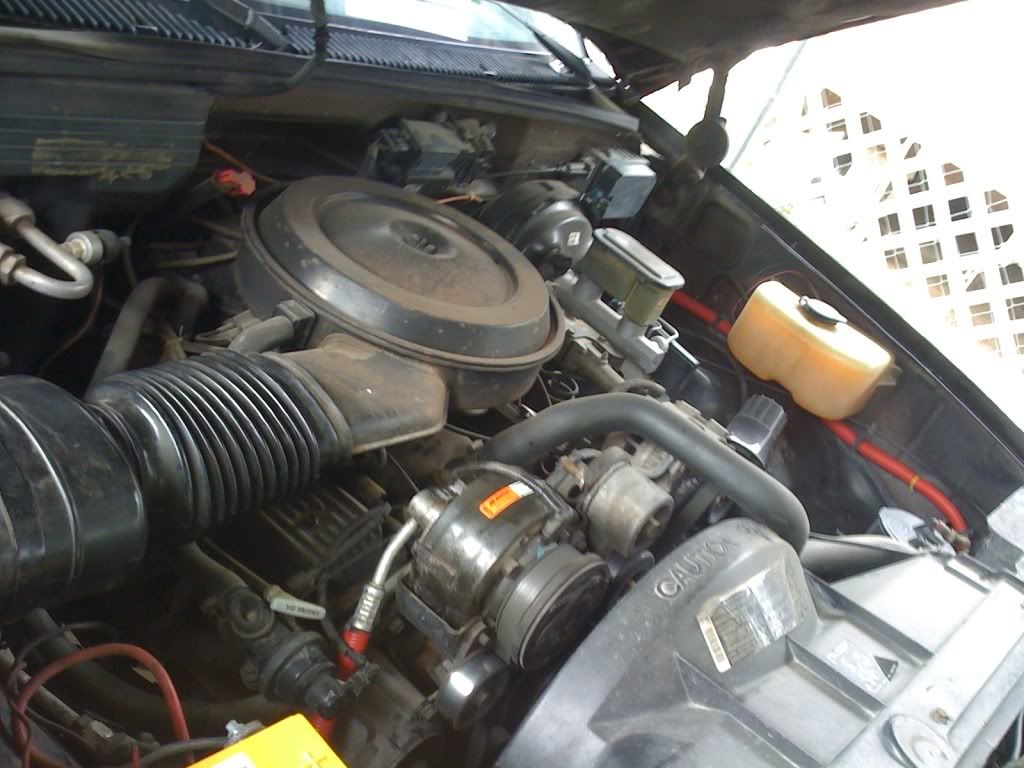 This isnt a recent picture of the engine bay, need to get them out of the camera. sorry for the blurry pics lol. well in the engine bay i put red loom on the electrical wires(the stock one was toasted and fell apart) and on the a/c hose :p just cause lol
__________________
It takes 8,460 bolts to assemble an automobile, and one nut to scatter it all over the road... 1988 Chevrolet Silverado Single Cab, Short bed, 350, 5.7L: daily driver/on a budget restoration Last edited by Ricky78045; 03-03-2012 at 04:07 PM. |
|
|
|
|
03-03-2012, 06:06 PM
|
#29 |
|
Registered User
Join Date: Sep 2009
Location: South Texas
Posts: 171
|
Re: My 88 Silverado
Pictures: here are some of the pics I was talking about.
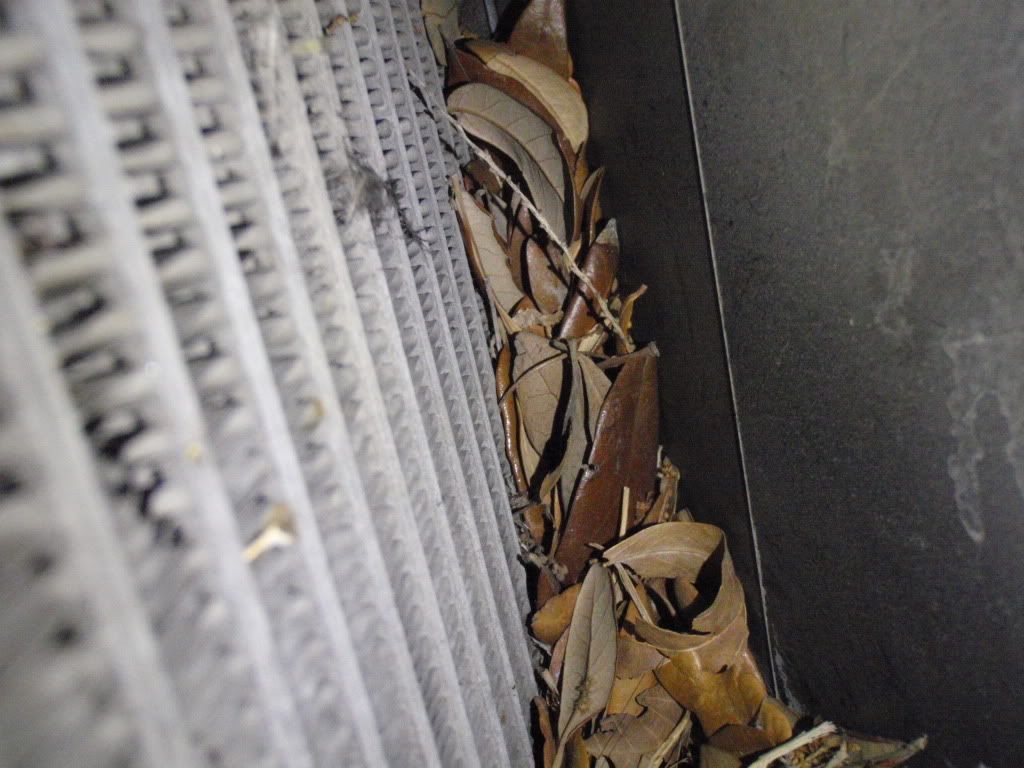 This ones the mess still in the back hiding from me lol 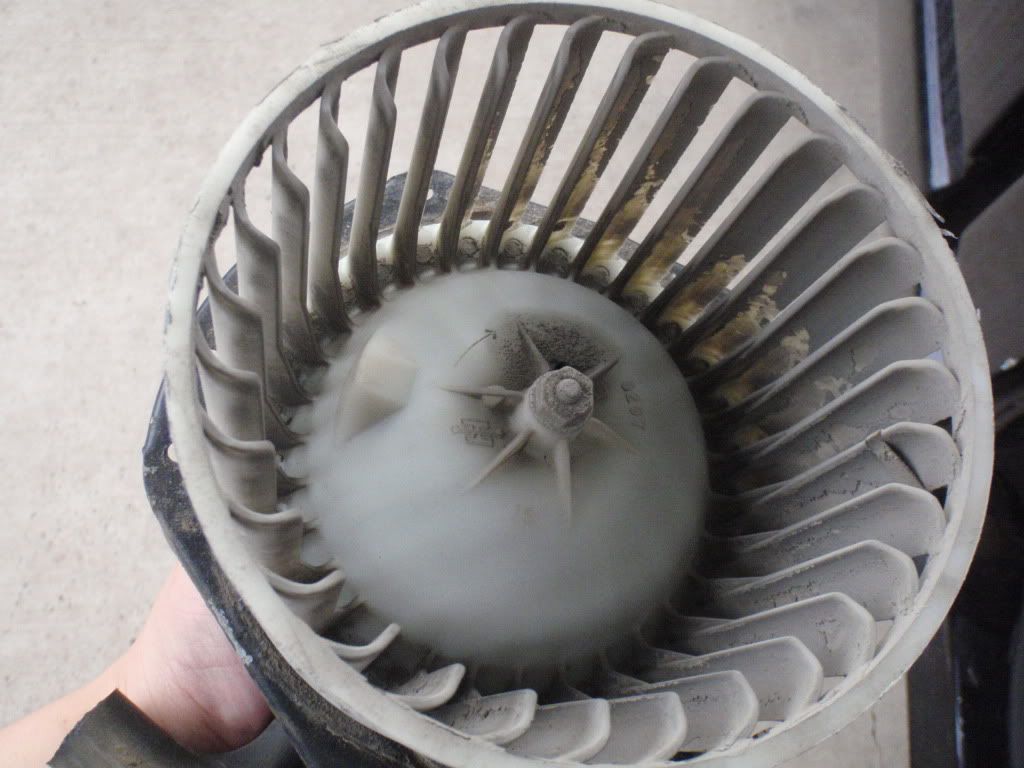 Super dirty kinda reminds me of clay lol 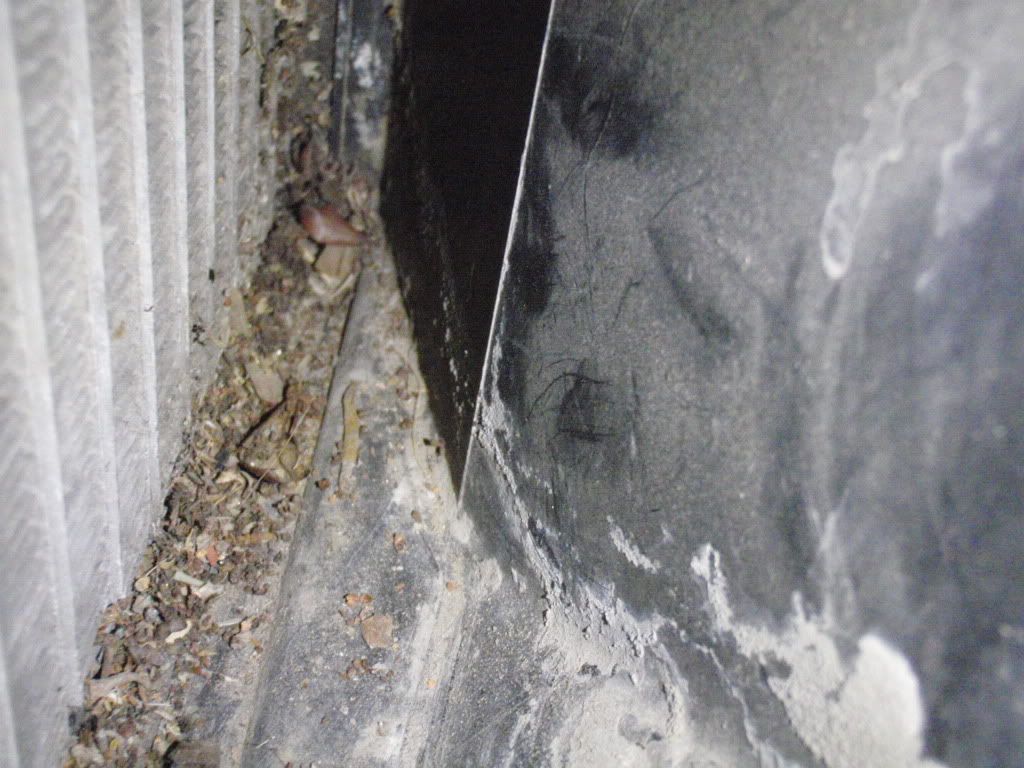 Cleaned out sorta... Still need to clean it out some more later, i know theres more leaves in there :p 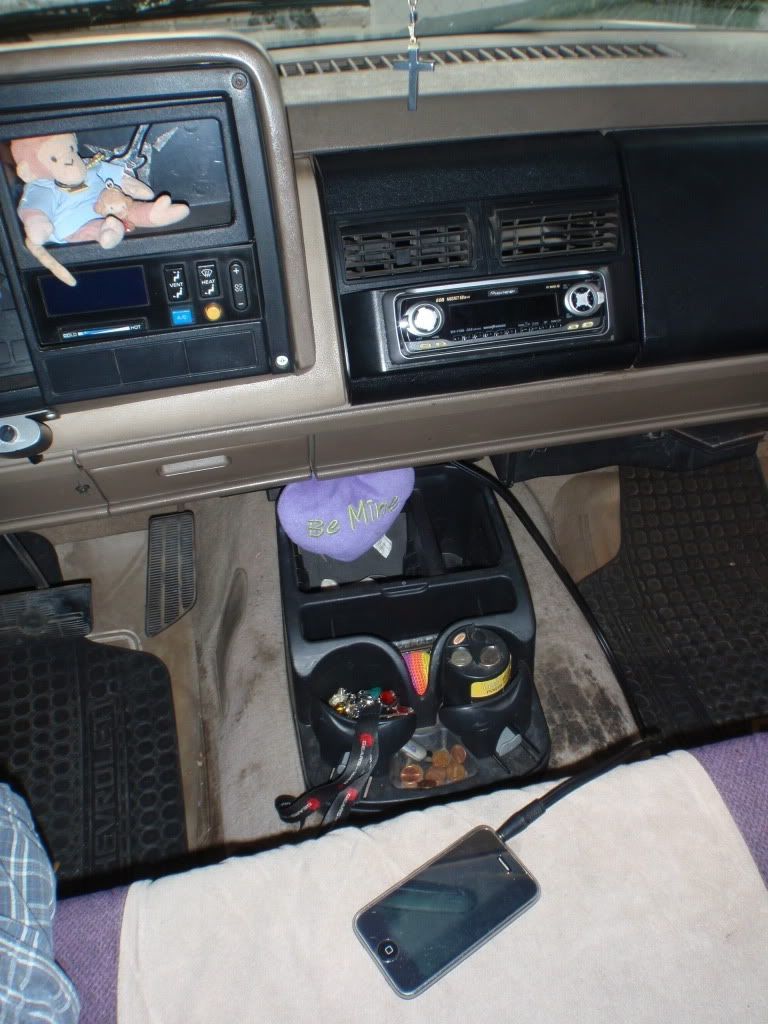 Here's a pic of the headunit(Pioneer DEH-p7300) and the aux connector for the iphone, and the center console.
__________________
It takes 8,460 bolts to assemble an automobile, and one nut to scatter it all over the road... 1988 Chevrolet Silverado Single Cab, Short bed, 350, 5.7L: daily driver/on a budget restoration Last edited by Ricky78045; 03-03-2012 at 06:11 PM. Reason: changed image link |
|
|
|
|
03-10-2012, 10:00 AM
|
#30 | |
|
GM Parts Guy
Join Date: Jan 2011
Location: Attleboro MA
Posts: 375
|
Re: My 88 Silverado
Quote:
__________________
1975 Chevrolet C-10 Custom Deluxe (DD/WIP) 1989 Chevrolet C1500 reg cab stepside (Winter Truck) 1977 Harley Davidson XLH 1000 (Summer Cruiser) |
|
|
|
|
|
03-10-2012, 03:02 PM
|
#31 | |
|
Registered User
Join Date: Sep 2009
Location: South Texas
Posts: 171
|
Re: My 88 Silverado
Quote:
Posted via Mobile Device
__________________
It takes 8,460 bolts to assemble an automobile, and one nut to scatter it all over the road... 1988 Chevrolet Silverado Single Cab, Short bed, 350, 5.7L: daily driver/on a budget restoration |
|
|
|
|
|
03-10-2012, 10:44 PM
|
#32 |
|
Chris
Join Date: Nov 2004
Location: Monaville, WV
Posts: 3,737
|
Re: My 88 Silverado
any paint would work, reg enamel or high heat/engine enamel.
I would sand it with say 400 grit wet, make it smooth and perfect all over, wipe down with grease and wax remover, then paint. Any bare metal you should hit with self etch primer first, let dry and wet sand it with 400 or 600 grit.
__________________
Chris GIT R DONE!!!!!! Check out all our rides, http://www.cardomain.com/id/benwa454 |
|
|
|
|
03-11-2012, 02:00 PM
|
#33 | |
|
Registered User
Join Date: Sep 2009
Location: South Texas
Posts: 171
|
Re: My 88 Silverado
Quote:
Quick update: I bought a fuse cover in charcoal for the truck, waiting for delivery Posted via Mobile Device
__________________
It takes 8,460 bolts to assemble an automobile, and one nut to scatter it all over the road... 1988 Chevrolet Silverado Single Cab, Short bed, 350, 5.7L: daily driver/on a budget restoration |
|
|
|
|
|
03-11-2012, 06:04 PM
|
#34 |
|
Chris
Join Date: Nov 2004
Location: Monaville, WV
Posts: 3,737
|
Re: My 88 Silverado
you can but you don't have to.
As for wetsanding after paint, only if you are going to buff it. As for paint, then wet sand then clear, yes. wetsand after it's had alot of time to dry, I saw a week or so in the 60's or higher, then wetsand and wipe down again, then clear it.
__________________
Chris GIT R DONE!!!!!! Check out all our rides, http://www.cardomain.com/id/benwa454 |
|
|
|
|
03-12-2012, 01:27 PM
|
#35 |
|
Registered User
Join Date: Sep 2009
Location: South Texas
Posts: 171
|
Re: My 88 Silverado
thanks chris, it will definitely be on one of the top things to do. I need to do a tune up and oil change, possibly a coolant flush
lol
__________________
It takes 8,460 bolts to assemble an automobile, and one nut to scatter it all over the road... 1988 Chevrolet Silverado Single Cab, Short bed, 350, 5.7L: daily driver/on a budget restoration |
|
|
|
|
03-14-2012, 07:04 PM
|
#36 |
|
Registered User
Join Date: Sep 2009
Location: South Texas
Posts: 171
|
Re: My 88 Silverado
Mini update:
Got the charcoal fuse cover in the mail today, installed it and looks better lol I'll post pics when I get on the computer also going to autozone tonight to buy stuff for a tune up. I hope that ts the fuel filter that's causing my rough idle and not the fuel pressure reg. I need to find out how much oil dip sticks cost and how hard are they to install. Also, is there a cable that goes from alternator to battery? My alternators cabl goes into the power block on the firewall, and a different cable from the power block to the battery, although its connected to that little 10 gauge wire that's part of the battery cable, should I connect it to the battery with it's own terminal as opposed to having it connected to the little hang on wire? I noticed my volt gauge would bounce with the blinker, maybe it's related. Anyone have any input?Posted via Mobile Device
__________________
It takes 8,460 bolts to assemble an automobile, and one nut to scatter it all over the road... 1988 Chevrolet Silverado Single Cab, Short bed, 350, 5.7L: daily driver/on a budget restoration Last edited by Ricky78045; 03-14-2012 at 07:18 PM. |
|
|
|
|
04-07-2012, 07:56 PM
|
#37 |
|
Registered User
Join Date: Sep 2009
Location: South Texas
Posts: 171
|
Re: My 88 Silverado
Hey guys I did some searching and put up another thread asking bout the electrical issues and have gotten quite a few hits. What I'm doing is adding additional grounds and relocating some others. I did do a tune up and oil change, along with new battery cables. Got a new battery as well from autozone to allow more power flow through the new terminals. Well once the cables were replaced I noticed a significant boost of energy when starting the truck. My previous cables were 6gauge and my new ones are 2gauge... and what a difference! This seemed to take care of the rough starting, and I also added a 10gauge lead from the negative terminal to the frame and a smaller one going to the fender at the headlight ground scew. cataclysm80 mentioned he moved his HL ground to the battery tray bolt on the wheel well, so I might give it a try. After I added that extra ground cable from battery to HL ground and frame I noticed that the battery gauge wouldn't dip as far... Obviously there's a grounding issue somewhere in the truck that makes the battery gauge jump around, so I'm sure adding some extra grounds to a 23 year old wiring system couldn't hurt.*
Posted via Mobile Device
__________________
It takes 8,460 bolts to assemble an automobile, and one nut to scatter it all over the road... 1988 Chevrolet Silverado Single Cab, Short bed, 350, 5.7L: daily driver/on a budget restoration |
|
|
|
|
05-03-2012, 06:18 PM
|
#38 |
|
Registered User
Join Date: Sep 2009
Location: South Texas
Posts: 171
|
Re: My 88 Silverado
Just received these 2 bolt extenders from rockauto for $8 shipped.
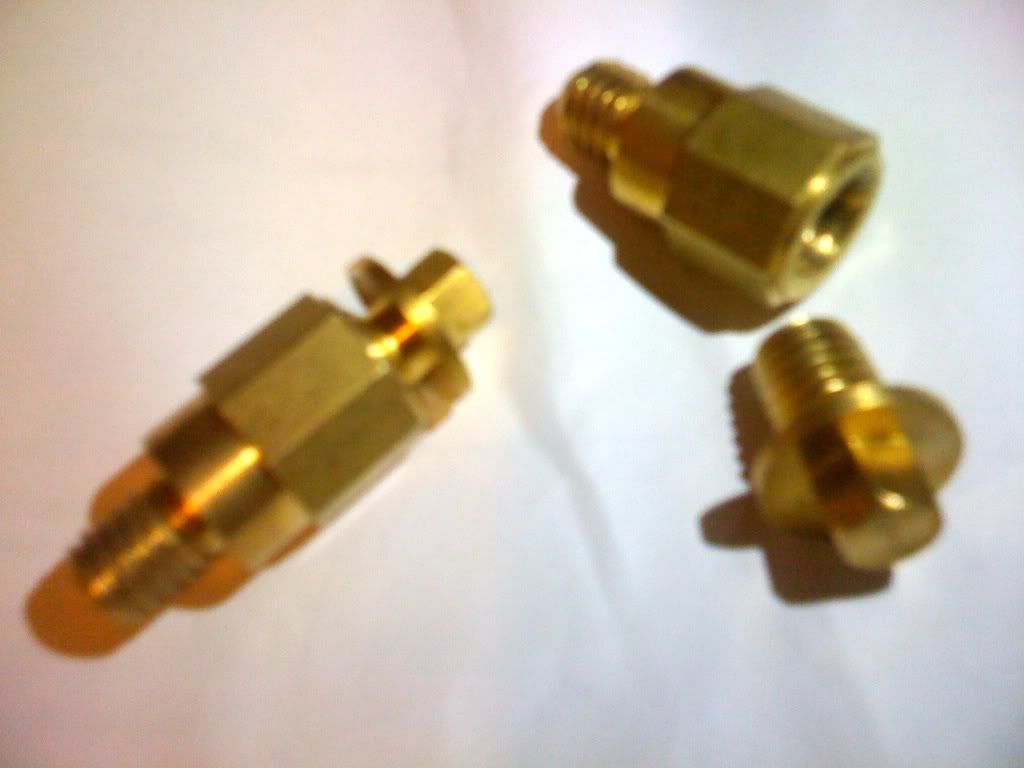 I need to buy a 2 or 4 gauge cable with two eyelets and bolt it as a frame to battery ground. The neg(-) lead 10 gauge I have, I will be running to the battery bolt tray along with my headlight ground to give it a better body ground. It's been hot and humid lately; when it gets cooler I'll be working on it and posting pics as I go along. Posted via Mobile Device Posted via Mobile Device
__________________
It takes 8,460 bolts to assemble an automobile, and one nut to scatter it all over the road... 1988 Chevrolet Silverado Single Cab, Short bed, 350, 5.7L: daily driver/on a budget restoration |
|
|
|
|
05-04-2012, 08:14 AM
|
#39 |
|
Chris
Join Date: Nov 2004
Location: Monaville, WV
Posts: 3,737
|
Re: My 88 Silverado
not a bad idea on them extenders, they have some at autozone and are like $6 a piece, where did you find them at rockautos site I may get some for as many accessories as I got wired into my truck.
You can do the big three upgrade, big cable from alt. to battery, big cable from battery to junction block if you have one or distribution block some call it. Big battery to frame, frame to body, engine to frame or body etc. I thought about doing this myself. I bought 2 gauge wire from advance for like $1.88 a foot and redid my battery wires. I got a crimp tool to crimp ends on as well. As for your wire with double ring ends, make it yourself. They have the big crimp tools on amazon cheap, you just use a hammer and beat them down. Or you can use a torch, and solder for them.
__________________
Chris GIT R DONE!!!!!! Check out all our rides, http://www.cardomain.com/id/benwa454 |
|
|
|
|
05-04-2012, 01:51 PM
|
#40 |
|
Registered User
Join Date: Sep 2009
Location: South Texas
Posts: 171
|
Re: My 88 Silverado
Hey chris, the big 3 is what I was trying to go for but lack of moneys slowin me down, so i gotta take it cable at a time lol. I got the bolt extenders by searching google and got part number (dorman 84399) to come up on rockauto. They were the last two in the clearance drop down option but they have some left for like 3-4 bucks. Here's the coupon code that worked for 5% off parts, 7EB3CCC67254. Type it without the . in the "how did you hear about us" and it'll discount the parts only.
I have a wire stripper that has a section "bat. terminal" I think... Maybe it'll work... I have 2gauge battery cables now, negative goes to front of the block, and ground strap from same block bolt to frame. The double end cable i would like to use as a battery to frame and have it be 2gauge like the battery cables. The 10gauge (-) lead I have right now is a temp batt. to frame. It'll be shortened and grounded with the stock headlight harness on the battery tray bolt. I want to buy the lead cable for my battery to junction and alternator to junction block but don't have funds for them yet. When I do I hope that all these electrical updates help the truck. The cables I have from the alternator/battery to junction block right now are probably 8gauge or so... Looks kinda puny, lol.
__________________
It takes 8,460 bolts to assemble an automobile, and one nut to scatter it all over the road... 1988 Chevrolet Silverado Single Cab, Short bed, 350, 5.7L: daily driver/on a budget restoration Last edited by Ricky78045; 05-04-2012 at 02:02 PM. Reason: Added some details |
|
|
|
|
05-04-2012, 02:28 PM
|
#41 |
|
Registered User
Join Date: Sep 2009
Location: South Texas
Posts: 171
|
Re: My 88 Silverado
Here's th pic of the charcoal fuse cover
 Not much but it looks pretty decent. Posted via Mobile Device Posted via Mobile Device
__________________
It takes 8,460 bolts to assemble an automobile, and one nut to scatter it all over the road... 1988 Chevrolet Silverado Single Cab, Short bed, 350, 5.7L: daily driver/on a budget restoration |
|
|
|
|
05-04-2012, 09:03 PM
|
#42 |
|
Registered User
Join Date: May 2012
Location: Kentucky
Posts: 7
|
Re: My 88 Silverado
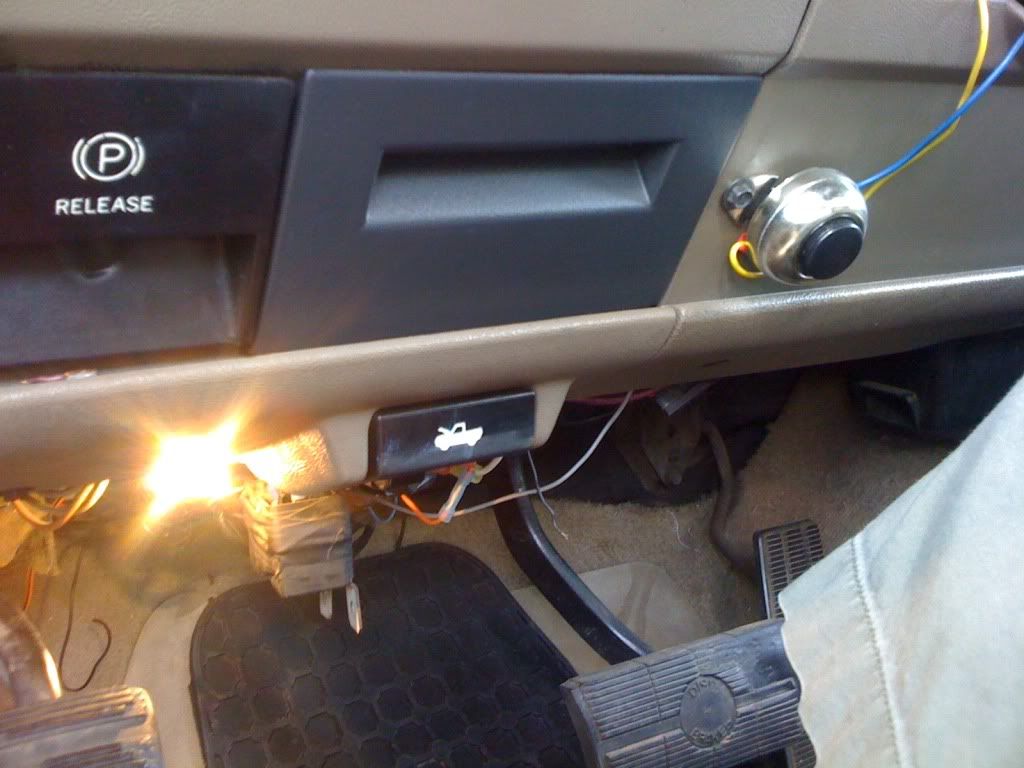
You have a push button to start the truck?
|
|
|
|
|
05-04-2012, 09:15 PM
|
#43 |
|
Registered User
Join Date: Sep 2009
Location: South Texas
Posts: 171
|
Re: My 88 Silverado
Nah I wish, it's my horn bypassed. I changed my steering wheel and everytime I'd turn the wheel the horn would blast.. It failed inspection until I added that thing, I'd love a remote start system with a push start button but that will come in time after I fix my electrical issues and restore the truck.
Posted via Mobile Device
__________________
It takes 8,460 bolts to assemble an automobile, and one nut to scatter it all over the road... 1988 Chevrolet Silverado Single Cab, Short bed, 350, 5.7L: daily driver/on a budget restoration |
|
|
|
|
05-06-2012, 12:05 AM
|
#44 |
|
Registered User
Join Date: Sep 2009
Location: South Texas
Posts: 171
|
Re: My 88 Silverado
Well upgraded my frame to battery with a 2 gauge cable I bought and made from advanced. Here's the battery bolt extender in action, only problem is that one broke... Gonna try to get it replaced so let's see how it goes. In the other pic you can see my 10gauge (-) lead that is now bolted together with the stock headlight harness ground and the battery tray. The battery meter doesn't drop as bad after turning on the headlights; adding the cable and moving them around helped but stepping on the brakes makes the bat meter dip a bit. I still need to add the grounds to my taillight harness. That's it for now, I'll post some more info on how it's going.
Pics: 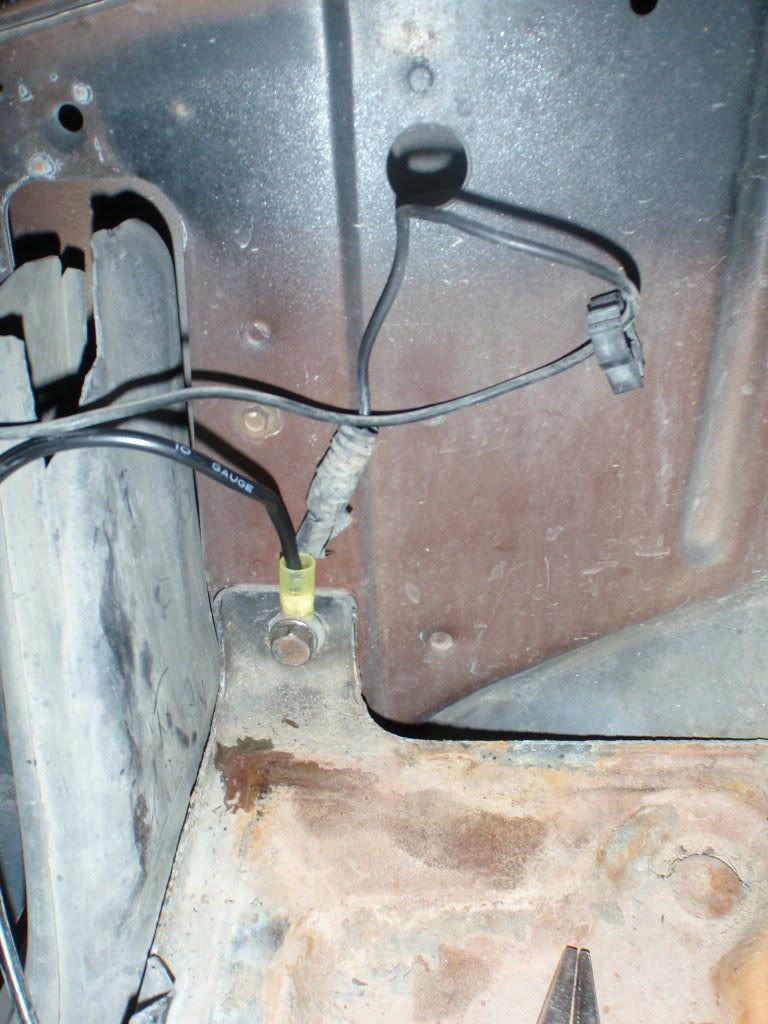 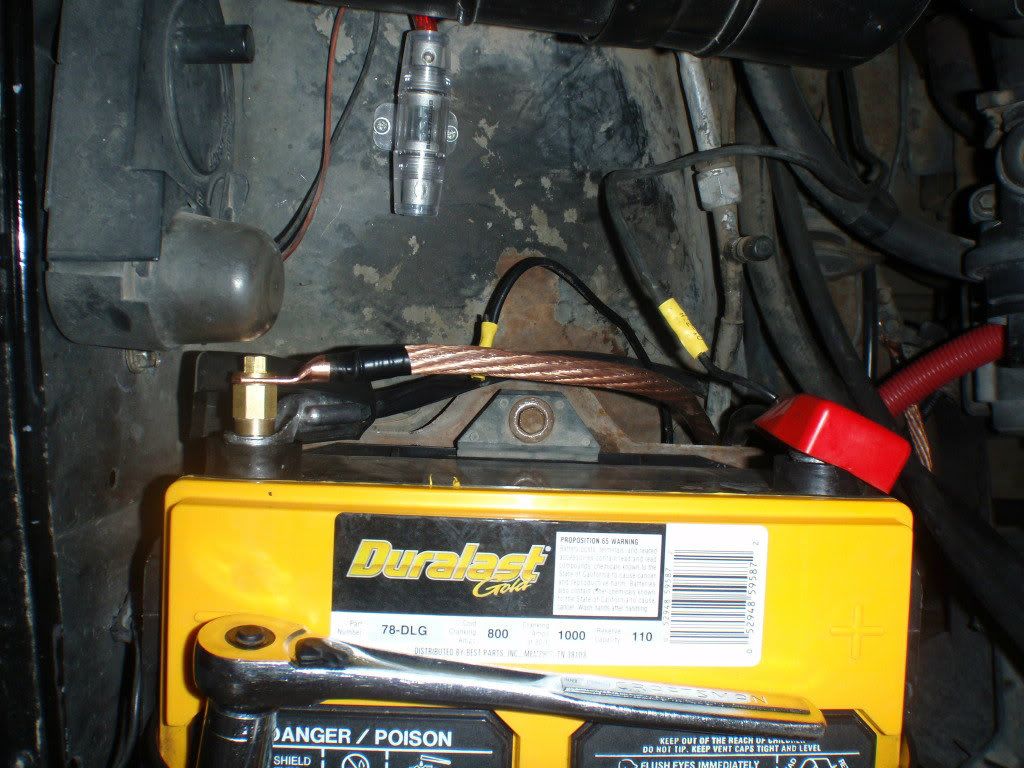 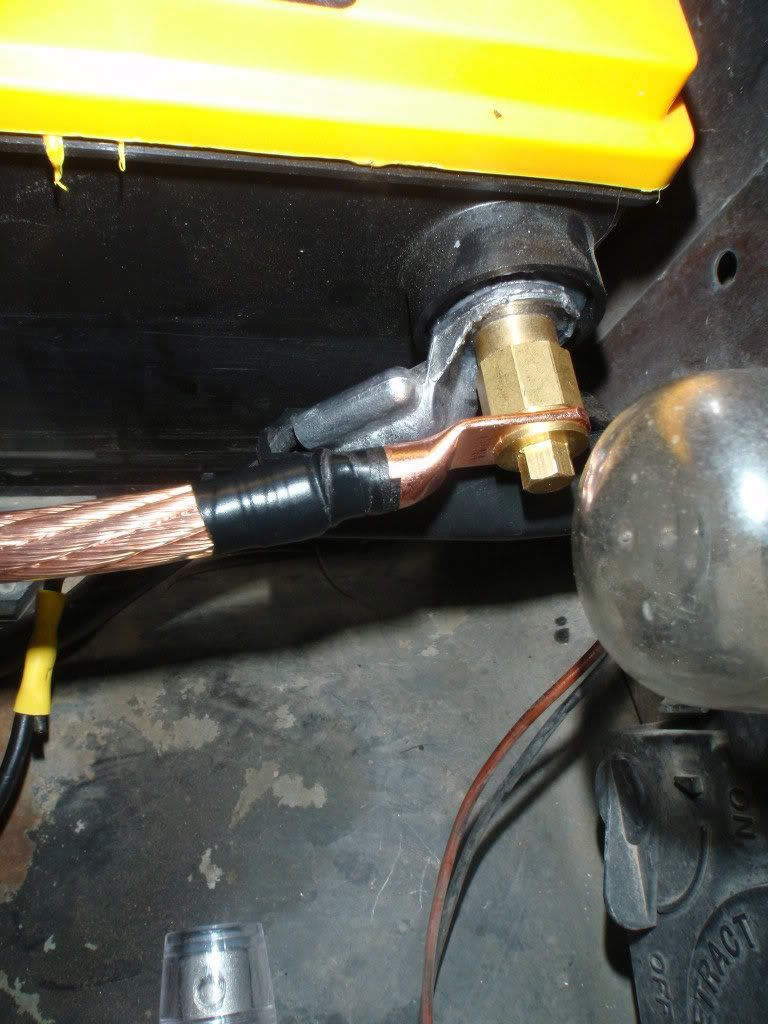 Posted via Mobile Device
__________________
It takes 8,460 bolts to assemble an automobile, and one nut to scatter it all over the road... 1988 Chevrolet Silverado Single Cab, Short bed, 350, 5.7L: daily driver/on a budget restoration |
|
|
|
|
05-06-2012, 11:37 AM
|
#45 |
|
Chris
Join Date: Nov 2004
Location: Monaville, WV
Posts: 3,737
|
Re: My 88 Silverado
that's the same 2 gauge wire I got, same crimp type terminal on it too LOL. I see you have an amp fuse mounted and not hooked up too. I got a fuse just like it.
What's the deal with moving the ground to the battery trey? does it help? I did mine a couple weeks ago just for cleaner looks, to hide the wires. On a side note the top of you rplastic snorkel is broken, the pic of the battery ground bolt you can see it. Now your cold ram air effect is throwing air out on top of the battery instead of down the tube into the air cleaner setup. I got that tube off mine and the entire inside box, since I finally got around to removing it.
__________________
Chris GIT R DONE!!!!!! Check out all our rides, http://www.cardomain.com/id/benwa454 |
|
|
|
|
05-06-2012, 03:56 PM
|
#46 | |
|
Registered User
Join Date: Sep 2009
Location: South Texas
Posts: 171
|
Re: My 88 Silverado
Quote:
Honestly another forum member(catalyst80) told me that he moved his to the tray along with a ground cable for a better ground, instead of just having a sheet metal screw. So I relocated it there and added a 10gauge lead. Personally I think it helped ALOT lol. Before I moved it, my battery would dip alot when my headlights were on. Now that I moved it, I cold start the truck and the battery meter goes above 14, with lights on it drops TO 14... Huge difference I believe. Now all I need for the cable upgrades are the alternator to junction and junction to battery. Also I read in another post that they added two wires and grounded their tail light harness to the bed. Now that I have a better frame ground I'll check my frame to bed strap to ensure I have a good ground to the tails. Hopefully that either calms or stops the battery meter from dipping drastically with the blinkers. I also wanna buy the hd harness with 4hi mod, but that will come after the 2 big upgrades and 2 tail harness grounds. The snorkel broke back in 01-02 that's why I threw away my original airbox.. I was a dumb kid, so I upgraded to headers.. I made a mess and now I'm cleaning it all up lmao. I was thinking about putting A/C reflective tape on iIt and try to salvage it lol. Was it difficult to remove the fender? I wanna look to see if theres anything broken that needs taping! Lololol Posted via Mobile Device
__________________
It takes 8,460 bolts to assemble an automobile, and one nut to scatter it all over the road... 1988 Chevrolet Silverado Single Cab, Short bed, 350, 5.7L: daily driver/on a budget restoration |
|
|
|
|
|
05-06-2012, 04:32 PM
|
#47 |
|
Chris
Join Date: Nov 2004
Location: Monaville, WV
Posts: 3,737
|
Re: My 88 Silverado
not hard at all buddy.
I think it's got one bolt behind the parklight a 7mm head on it, then a snap clip at the top area around the battery. One of those snap clips where you pull the center head out then the entire thing comes out easy. I need to update mine some, just like you. Mine does alot of the same you mentioned, flicks up and down sometimes with blinkers and what not. FYI I tried the 4 hi mod myself with 3 realys, one at a time not 3 at once, and none worked. Could be bad relays, but I never got it to work for me.
__________________
Chris GIT R DONE!!!!!! Check out all our rides, http://www.cardomain.com/id/benwa454 |
|
|
|
|
05-07-2012, 02:12 PM
|
#48 |
|
Registered User
Join Date: Sep 2009
Location: South Texas
Posts: 171
|
Re: My 88 Silverado
Hey ive been thinking about the heavy duty harness with 4hi mod that is sold in the forum for $95.99.*
Heres the link. http://67-72chevytrucks.com/vboard/s...d.php?t=491012 I want to get it to take a huge load off my stock harness and get my headlights to burn brighter. It's kinda expensive but at this point I'm thinking convenience. I have diagrams for the 4hi I can upload, maybe it'll help you figure out what's going on with your wiring? I still need to update those cables from alternator to junction block & Junction block to battery... Check all my grounds and then Ill be able to install the hd harness, and oh boy will I take pics lol. Posted via Mobile Device
__________________
It takes 8,460 bolts to assemble an automobile, and one nut to scatter it all over the road... 1988 Chevrolet Silverado Single Cab, Short bed, 350, 5.7L: daily driver/on a budget restoration |
|
|
|
|
05-07-2012, 02:51 PM
|
#49 |
|
Chris
Join Date: Nov 2004
Location: Monaville, WV
Posts: 3,737
|
Re: My 88 Silverado
IMO good guy, but way too much.
I'd buy a $6 relay from advance and wire it up. it's what I should have done. I had 2 old ones laying around, tried them then had a brand new one that had been around for awhile and it didnt work either. the new one the light actually came on without the switch being turned on. I saw pics and diagrams and followed them off the net, No luck. IF I go to do it again I'm going to buy a new relay and try it.
__________________
Chris GIT R DONE!!!!!! Check out all our rides, http://www.cardomain.com/id/benwa454 |
|
|
|
|
05-07-2012, 04:22 PM
|
#50 |
|
Registered User
Join Date: Sep 2009
Location: South Texas
Posts: 171
|
Re: My 88 Silverado
Here's a diagram that helped me lay it out clearly.
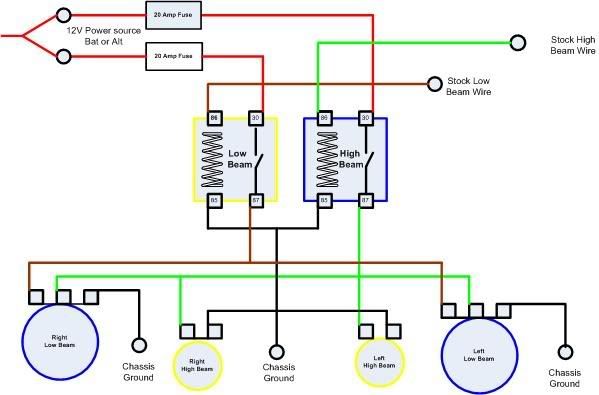 Do you think a 8 gauge cable would be decent for the alt to junction to battery cables? Posted via Mobile Device
__________________
It takes 8,460 bolts to assemble an automobile, and one nut to scatter it all over the road... 1988 Chevrolet Silverado Single Cab, Short bed, 350, 5.7L: daily driver/on a budget restoration |
|
|
|
 |
| Bookmarks |
| Tags |
| 1988, silverado |
|
|


 Linear Mode

