
|
Register or Log In To remove these advertisements. |
|
|
|
|||||||
 |
|
|
Thread Tools | Display Modes |
|
|
 12-21-2009, 03:52 PM
|
#1 |
|
PROJECT 7DEUCE
 Join Date: Dec 2002
Location: GRANTS PASS OR
Posts: 21,590
|
Re: New Member - 72 Jimmy: Project Knuckledragger mountain commuter
Nice build thread matt your doing a great job..
__________________
GO BIG GREEN  GO DUCKS GO DUCKSMEMBER #6377 72 k-5 daily driver 6'' lift 35'' 350-350-205 slowly getting rust free. Project "7DEUCE" check out my build http://67-72chevytrucks.com/vboard/s...d.php?t=267665 Tim Powell..R.I.P EastSideLowlife..... R.I.P.. |

|

|
|
01-06-2010, 03:43 PM
|
#2 |
|
Registered User
Join Date: May 2005
Location: New Brunswick, Canada
Posts: 585
|
Re: New Member - 72 Jimmy: Project Knuckledragger mountain commuter
Hey Matt,
Did you ever fix the problem of transmission fluid leaking into your transfer case? Mine's doing the same thing  Pete |
|
|
|
|
01-06-2010, 04:45 PM
|
#3 | |
|
Registered User
Join Date: Oct 2009
Location: SLC, Utah
Posts: 164
|
Re: New Member - 72 Jimmy: Project Knuckledragger mountain commuter
Quote:
 I topped it up and it leaked out the speedo for a while and then stopped leaking. I keep checking the fluid level and it's held steady just a little above the low mark on the dipstick. I'm not worried about the transfer running dex so I'll leave it alone unless the level drops. My power steering pump has stopped leaking also. I think that's due to dirt build up and freezing temperatures. Everything will start leaking again when the temps warm up. |
|
|
|
|
|
01-06-2010, 08:16 PM
|
#4 |
|
Registered User
Join Date: May 2005
Location: New Brunswick, Canada
Posts: 585
|
Re: New Member - 72 Jimmy: Project Knuckledragger mountain commuter
Yeah I did a search, and it appears to be a known/common problem. Seems like a tough thing to fix totally, so some suggest leaving it alone and checking tranny levels regularly, and do a yearly service or oil change on the transfer case. I dunno what I'm going to do yet
 My Blazer is parked for the winter, so I have a few months to think about it. My Blazer is parked for the winter, so I have a few months to think about it.Pete |
|
|
|
|
01-19-2010, 04:04 PM
|
#5 |
|
Registered User
Join Date: Oct 2009
Location: SLC, Utah
Posts: 164
|
Re: New Member - 72 Jimmy: Project Knuckledragger mountain commuter
It took a while to get the new dizzy and get it in but it's in now and the old beast is running again.
The problem turned out to be a broken wire inside the HEI distributor. My research indicates that this is a common failure point on these distributors. The replacement "Skip White" distributor is a nice unit with a slightly different top cap design and supposedly more power than the stock GM units. The new dizzy went in fairly easily but when I went to put the top cap on I realized that there was no way it was going to fit. It's just too tall and bangs into the firewall. This is a HUGE problem because the top cap is secured by 4 screws that also secure the coil and the coil ground. On the stock cap the coil is held down by 4 separate screws and then the top cap has it's own 2 screws so it can run without the top cap. Not so with the Skip White. I trimmed an inch or so off one side of the cap and got it to fit but it was still very hard to tighten the screws because of the curve of the firewall. In the end I just reused the stock coil mounting screws and top cap with the new distributor. All the screw holes and mounts in the aftermarket cap were the same as the GM unit. The old cap and rotor looked pretty rough and they had 20K+ on them so it was time for a change. The truck revs a lot smoother now but I'm getting a little bit of detonation at full throttle so I'll need to back the timing off a bit and then maybe this summer I'll play with some springs and plug gap. The point of failure:  Skip White rebuild kit:  Skip White top cap:  GM top cap:  Skip White complete distributor: 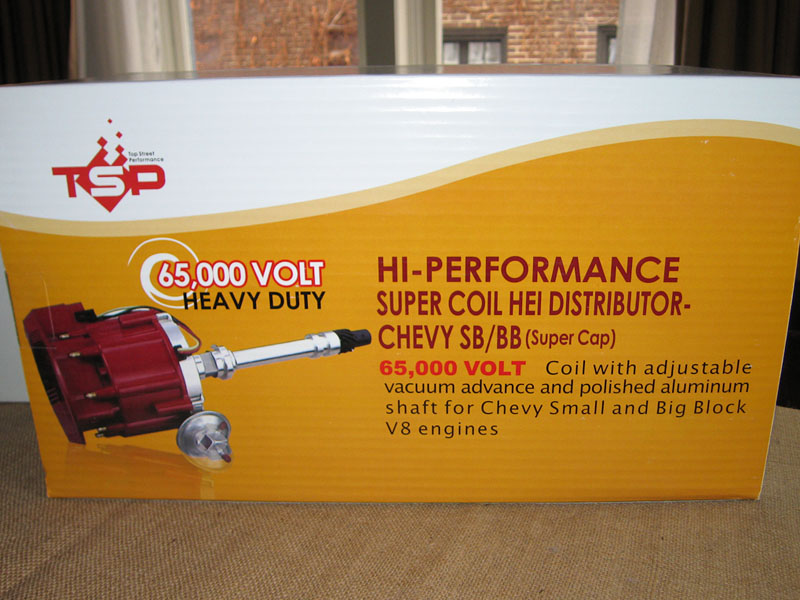
Last edited by snowblind; 01-19-2010 at 07:27 PM. |
|
|
|
|
02-12-2010, 02:48 PM
|
#6 |
|
Registered User
Join Date: Oct 2009
Location: SLC, Utah
Posts: 164
|
Re: New Member - 72 Jimmy: Project Knuckledragger mountain commuter
Been rolling along trying to not spend money for a bit. Trucks running well with the new distributor.
Here's a video that begins with shots from the driver's seat of my Jimmy! Last edited by snowblind; 02-12-2010 at 02:53 PM. |
|
|
|
|
02-12-2010, 05:16 PM
|
#7 |
|
Its lookin' like a Blazer!
Join Date: Aug 2003
Location: Gods Country, KY
Posts: 1,773
|
Re: New Member - 72 Jimmy: Project Knuckledragger mountain commuter
Awesome video, while I dig the people action footage, some of your ride throwin' snow would've been cool too
Looks like you had no problem navigating around in it. Last edited by Big J; 02-12-2010 at 05:17 PM. |
|
|
|
|
02-18-2010, 12:08 PM
|
#8 | |
|
Registered User
Join Date: Oct 2009
Location: SLC, Utah
Posts: 164
|
Re: New Member - 72 Jimmy: Project Knuckledragger mountain commuter
Quote:

|
|
|
|
|
|
06-29-2010, 05:11 PM
|
#9 |
|
2wd FTW!!!!
Join Date: Jan 2007
Location: SLC UTAH
Posts: 673
|
Re: New Member - 72 Jimmy: Project Knuckledragger mountain commuter
Seats look good did you get the power hooked up to them?
|
|
|
|
|
06-29-2010, 05:43 PM
|
#10 | |
|
Registered User
Join Date: Oct 2009
Location: SLC, Utah
Posts: 164
|
Re: New Member - 72 Jimmy: Project Knuckledragger mountain commuter
Quote:
You gotta have the power to move anything on these bad boys. Installation is a pain because you're always powering up to move it a little to access a bolt. For now it's just wire nuts and a fused wire from the battery that I switch back and forth when I need to move a seat. This weekend I plan to add a relay and make them ignition hot. I'm saving the heat/memory wiring for later when I have a center console.
Last edited by snowblind; 06-29-2010 at 05:44 PM. |
|
|
|
|
|
06-29-2010, 06:26 PM
|
#11 | |
|
2wd FTW!!!!
Join Date: Jan 2007
Location: SLC UTAH
Posts: 673
|
Re: New Member - 72 Jimmy: Project Knuckledragger mountain commuter
Quote:
|
|
|
|
|
|
06-29-2010, 06:46 PM
|
#12 | |
|
Registered User
Join Date: Oct 2009
Location: SLC, Utah
Posts: 164
|
Re: New Member - 72 Jimmy: Project Knuckledragger mountain commuter
Quote:
 I'm missing the torsion boxes on my truck and there is a bunch of rust in the rockers from the aux fuel tanks. I don't want to pull the top until after I replace all that stuff so it probably won't happen this summer. |
|
|
|
|
|
07-01-2010, 02:41 PM
|
#13 |
|
Registered User
Join Date: Apr 2009
Location: edmonton alberta canada
Posts: 496
|
Re: New Member - 72 Jimmy: Project Knuckledragger mountain commuter
here is what i did (see pic) and i reinforced the underside. used the same bolt holes that the blazer floor has.
|
|
|
|
|
07-01-2010, 04:10 PM
|
#14 | |
|
Registered User
Join Date: Oct 2003
Location: Lake Stevens, WA
Posts: 75
|
Re: New Member - 72 Jimmy: Project Knuckledragger mountain commuter
Nice build! I'm on the hunt for some seats for my blazer. I'm hoping to go the same route and reinforce things from underneath.
Truck looks like a lot of fun man! Quote:
__________________
71 K5 In progress! |
|
|
|
|
|
07-01-2010, 05:10 PM
|
#15 | |
|
Registered User
Join Date: Apr 2009
Location: edmonton alberta canada
Posts: 496
|
Re: New Member - 72 Jimmy: Project Knuckledragger mountain commuter
Quote:
|
|
|
|
|
|
07-06-2010, 11:50 AM
|
#16 |
|
Registered User
Join Date: Oct 2009
Location: SLC, Utah
Posts: 164
|
Re: New Member - 72 Jimmy: Project Knuckledragger mountain commuter
I found these the other day. The edges are beveled to disperse the pulling force so that the plate doesn't cut/tear through the floor. I'm going to take some measurements tomorrow and see if I can fit them in.
 http://www.mooneyesusa.com/safety-be...es-p-2224.html Last edited by snowblind; 07-06-2010 at 11:50 AM. |
|
|
|
|
07-06-2010, 12:29 PM
|
#17 |
|
Registered User
Join Date: Oct 2009
Location: SLC, Utah
Posts: 164
|
Re: New Member - 72 Jimmy: Project Knuckledragger mountain commuter
I did a bit of engine compartment and wiring cleanup this weekend.
My PO equipped the truck with a remote starter solenoid. Thank you sir! However, I wasn't really happy with it's location and mounting (lot's of exposed wires and zip ties) and I was adding to the mess with my own wiring "upgrades". I decided it was time to get everything cleaned up and protected before it got any worse. Anyways... On to the photos. Here you can see the starter solenoid mounted back on the firewall. The starter wire, one-wire alternator connection and "turn-on" wire are coming in from the right. The battery positive and a couple of accessory power wires are on the left. The black box in the left foreground contains six 20amp breakers and draws it's power directly from the + side of the remote solenoid.   And here are similar shots but with the cover on the breaker box. I also painted the inner fenders with some "semi-flat" Krylon, installed a washer bottle/pump from a 90's 2500HD and cleaned up the wiring on most of the driver's side and firewall. I'll get some photos of all that stuff later.  The breaker box is pretty slick. Bottom left of this photo you can see that it has a rubber grommet at the top entrance and a sealed rubber blank on the bottom. These grommets/blanks are easily switched around depending on where the wiring comes from. I bought the box at NAPA. They had it in stock in the back. 
Last edited by snowblind; 07-06-2010 at 12:35 PM. |
|
|
|
|
07-08-2010, 11:36 AM
|
#18 |
|
Registered User
Join Date: Oct 2009
Location: SLC, Utah
Posts: 164
|
Re: New Member - 72 Jimmy: Project Knuckledragger mountain commuter
I found a 72 C10 at a local junkyard complete with door panels.
 They were dirty and the arm rests were toast but 20 minutes of scrubbing and new arm rests cleaned them up. They were dirty and the arm rests were toast but 20 minutes of scrubbing and new arm rests cleaned them up. The photos make the leather look a lot darker but it's closer in real life.    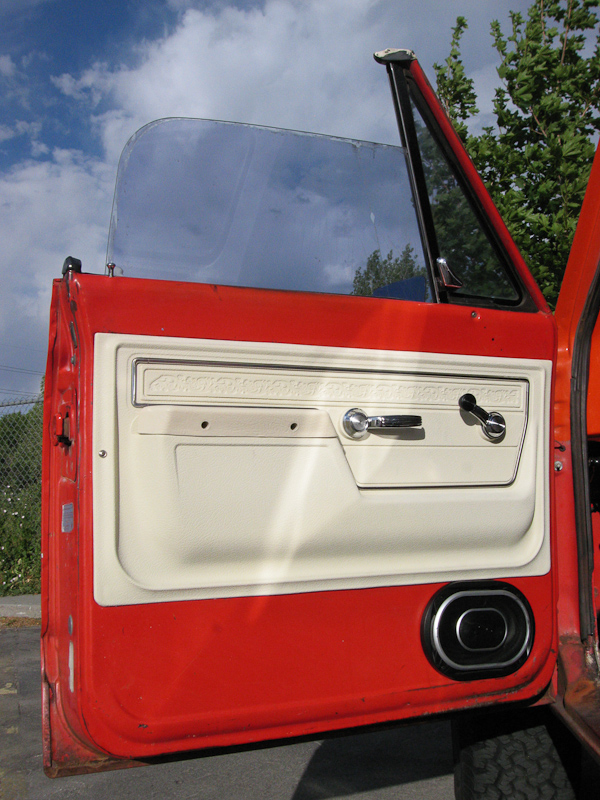 I wish my PO hadn't cut the doors for speakers... 
|
|
|
|
|
07-01-2010, 06:26 PM
|
#19 | |
|
Registered User
Join Date: Oct 2009
Location: SLC, Utah
Posts: 164
|
Re: New Member - 72 Jimmy: Project Knuckledragger mountain commuter
Quote:
My temporary set up is similar but I want the rear mounts to have a more secure mount than just the floor. It's the same deal as mounting a roll bar. Some people are OK just bolting it to the floor. |
|
|
|
|
|
07-08-2010, 02:20 PM
|
#20 |
|
Registered User
Join Date: May 2005
Location: New Brunswick, Canada
Posts: 585
|
Re: New Member - 72 Jimmy: Project Knuckledragger mountain commuter
Panels turned out great! Cleans up the doors nicely
|
|
|
|
|
07-08-2010, 03:35 PM
|
#21 |
|
2wd FTW!!!!
Join Date: Jan 2007
Location: SLC UTAH
Posts: 673
|
Re: New Member - 72 Jimmy: Project Knuckledragger mountain commuter
A little elbow grease does wonders. They look great.
|
|
|
|
|
07-08-2010, 05:11 PM
|
#22 |
|
Registered User
Join Date: Jul 2009
Location: Orange, CT
Posts: 72
|
I really enjoy this thread, you're making a ton of progress and you're doing it on the cheap where you can but spending the money where you need to. Great job!
|
|
|
|
|
07-09-2010, 11:33 AM
|
#23 | |
|
Registered User
Join Date: Oct 2009
Location: SLC, Utah
Posts: 164
|
Re: New Member - 72 Jimmy: Project Knuckledragger mountain commuter
Quote:
I have a bunch MORE stuff on the to do list including a new steering box, new leaf springs/bushings, power windows, finishing off the wiring for the seats, new carb, etc, etc, etc. It sure is a lot of work.
|
|
|
|
|
|
07-09-2010, 01:17 PM
|
#24 |
|
Registered User
Join Date: Oct 2009
Location: SLC, Utah
Posts: 164
|
Re: New Member - 72 Jimmy: Project Knuckledragger mountain commuter
I got a few more things done on the Jimmy.
Windshield washer/wiper upgrade: These are a big deal for me. My winter driving involves a lot of salt and spray and some really heavy snow and ice. Last winter I ran the stock reservoir with an aftermarket pump and the stock squirters and it was not a lot of fun. I have a plan for upgrading the system that I'll go into later but step one was installing a bigger reservoir and stronger pump. I pulled a reservoir with built in pump from a Chevy 2500 at the junkyard. The built in pump really simplifies the mounting and makes for a pretty clean install. I also checked out the dual pump reservoir from a S10 Blazer but the pumps mounted on the outside of the tank and didn't look as clean. Reservoir and pump. I made sure to clip the GM "weatherpack" connector so I could wire it in cleanly.   Here are a few shots of the engine bay after cleaning up the wiring. It's still pretty dirty and the duct tape on the firewall is a nice touch but it's better than it was.   I also installed a new upper radiator hose. It took a few tries at Pep Boys to get the right hose but I ended up with a hose from a 79 Blazer that fits well with my set up. I don't know how it would fit with the stock shroud and fan but it works well for me. The fans have worked flawlessly BTW. Idling in 95º the temp barely comes over the the first hash on the stock temp gauge. That's where it normally runs in the winter!  
|
|
|
|
|
07-22-2010, 01:59 PM
|
#25 |
|
Registered User
Join Date: Oct 2009
Location: SLC, Utah
Posts: 164
|
Re: New Member - 72 Jimmy: Project Knuckledragger mountain commuter
My steering box has been leaking from the top seal since I bought the truck. In the winter it wasn't too bad but now that it's hot it's leaking more and getting fluid all over the leaf spring and tie rods.
Here's a few shots of the offender after a good scrub down and degreasing.   And now the new Red Head re-manufactured box from Wes @ Classic Heartbeat. I chose the quick ratio model.  Installation was fairly straight forward. I kept the box mounted very loosely until I got everything else hooked back up and then I tightened it down. I did break the PS Return hard line though as it was too corroded to spin. I recommend ordering a new set of hoses for when you do the box. To fill the box I filled the pump and then turned the steering wheel a few turns and it sucked the fluid into the box. Repeated 5-6 times and then did it with the engine running to bleed out the last of the bubbles. The new box is nice with a much, much smaller dead spot in the center. Steering effort feels a little higher and that makes sense because if it's moving more distance with less steering wheel input it's going to take more effort. |
|
|
|
|
| Bookmarks |
|
|


 Hybrid Mode
