
|
 08-05-2012, 01:46 AM
|
#151 | |
|
But Found Her 25yrs Later!
 Join Date: Oct 2010
Location: Oregon City, Oregon
Posts: 10,468
|
Re: Project '64 Cheapskate
Quote:
What a great simple solution.
__________________
I lost my 65 - Found it 25 years later: http://67-72chevytrucks.com/vboard/s...d.php?t=426650 66 C20 Service Truck: http://67-72chevytrucks.com/vboard/s...d.php?t=428035 |
|

|

|
|
08-05-2012, 11:08 AM
|
#152 |
|
Registered User
Join Date: Apr 2003
Location: Indep, MO
Posts: 5,893
|
Re: Project '64 Cheapskate
Those wheels are TIGHT! Lookin' good! A question, when you narrow a 12 bolt, do you have to get new axles? I heard you can't respline due to the taper, and the cclips are a problem. Never done it myself, just wondering. Gonna be a cool ol truck!
Posted via Mobile Device
__________________
Boppa's Old Yeller Truck Build, Old Yeller's New Heart! Project Buzz Bomb Flyin' Low! |
|
|
|
|
08-05-2012, 09:04 PM
|
#153 | |
|
Registered User
Join Date: Mar 2005
Location: apple valley, ca
Posts: 2,670
|
Re: Project '64 Cheapskate
Quote:
__________________
Check out my latest endeavor: https://roundsixpod.com My build threads: '55 Chevy: http://67-72chevytrucks.com/vboard/s...d.php?t=247512 '64 C-20: http://67-72chevytrucks.com/vboard/s...d.php?t=446527 |
|
|
|
|
|
08-05-2012, 11:03 PM
|
#154 |
|
Registered User
Join Date: Apr 2003
Location: Indep, MO
Posts: 5,893
|
Re: Project '64 Cheapskate
At least I was right about something today! Dang, so much for budget. That probably doubled your investment in the whole truck, didn't it? Those rearend guys are proud! It'll be killer in the end, though.
Posted via Mobile Device
__________________
Boppa's Old Yeller Truck Build, Old Yeller's New Heart! Project Buzz Bomb Flyin' Low! |
|
|
|
|
08-06-2012, 12:29 AM
|
#155 |
|
Registered User
Join Date: Sep 2008
Location: Willow Grove, PA
Posts: 299
|
Re: Project '64 Cheapskate
Just read all seven pages...great project...will definitely be following along!!
|
|
|
|
|
08-06-2012, 03:03 PM
|
#156 |
|
Registered User
Join Date: Nov 2011
Location: mid ga
Posts: 552
|
Re: Project '64 Cheapskate
very nice on the wheels,looks good.
__________________
check out SANFORD build thread http://67-72chevytrucks.com/vboard/s...d.php?t=522019 |
|
|
|
|
08-13-2012, 08:44 AM
|
#157 |
|
Registered User
Join Date: Mar 2005
Location: apple valley, ca
Posts: 2,670
|
Re: Project '64 Cheapskate
I was able to get a lot done this weekend even though it was over 105 with some humidity thrown in. Brad picked up the rear end from Rob's shop and another buddy who's a certified welder took care of welding up the perches. I made two of the brake clips that weld to the axle tube and welded them on. For some reason, both of the clips were missing on the driver's side axle tube. I cleaned and blasted the rear inspection cover, primered the housing, and shot it all in chassis black. It turned out good.
A few months ago, I was able to make a deal (more parts trading!) on a complete exhaust system from a friend who was going from small block to big block on his '65 longbed. The exhaust was relatively new, with Sanderson shorty headers, aluminized pipe (2.5") and stainless Magnaflows. He removed it from the truck but cutting it out in sections, and although it might sound like it would be easy to reassemble it into my truck, it wasn't as simple as it sounds. The hardest part was trying to get it back under the truck and supported with jackstands, and with tailpipes that go all the way to the rear corners of the bed, that was fun. I also changed the style of pipe hangers from the ones with the pipe clamps and rubber straps to the better ones with the L-brackets and sandwiched biscuit mounts. I don't care for the look of exhaust tips, so we were able to adjust the tailpipes where they dump in the back corners but are 100% hidden. After the system was tacked back together, it came back out to be fully welded and sprayed with VHT exhaust paint. It turned out nice, especially for what I have into it ($200). And a big thanks to Brad, who helped tackle this beast! I was moving at such a fast pace trying to get as much done as possible that I forgot to take pictures. I'll get some as soon as I can. Next step: Mount the rear axle, install the Super Track Bar kit, install the shocks, install the axles and backing plates, rebuild the rear brakes, and make rear brake lines. I really want to get the rear suspension completed so I can move to the front and finish it up the last few items.
__________________
Check out my latest endeavor: https://roundsixpod.com My build threads: '55 Chevy: http://67-72chevytrucks.com/vboard/s...d.php?t=247512 '64 C-20: http://67-72chevytrucks.com/vboard/s...d.php?t=446527 |
|
|
|
|
08-13-2012, 10:06 AM
|
#158 |
|
Registered User
Join Date: Apr 2003
Location: Indep, MO
Posts: 5,893
|
Re: Project '64 Cheapskate
Progress! X2 on the too busy for pictures. Had to remind myself this weekend!
Posted via Mobile Device
__________________
Boppa's Old Yeller Truck Build, Old Yeller's New Heart! Project Buzz Bomb Flyin' Low! |
|
|
|
|
08-18-2012, 11:24 PM
|
#159 |
|
Registered User
Join Date: Mar 2005
Location: apple valley, ca
Posts: 2,670
|
Re: Project '64 Cheapskate
Had another good day today. Got a lot done on the '64!
First, I did a final clean-up of the inside of the 12 bolt and torqued the main caps to 60ft/lbs and installed the cover for the last time. Did a little touch-up on the housing, and while it was drying, I replaced the upper and lower coil spring attach fittings because my originals had some hairline cracks. After that, the rear axle was set into place and the Super Track Bar brackets were installed. The rear shocks were some Rancho adjustables that Brad had that were left over from an old project, so I cleaned and painted them chassis black and installed new Energy Suspension eyelet bushings. I think that the adjustable feature of those shocks are really going to come in handy down the road. I finally remembered to take some pictures, but I waited until I was done. 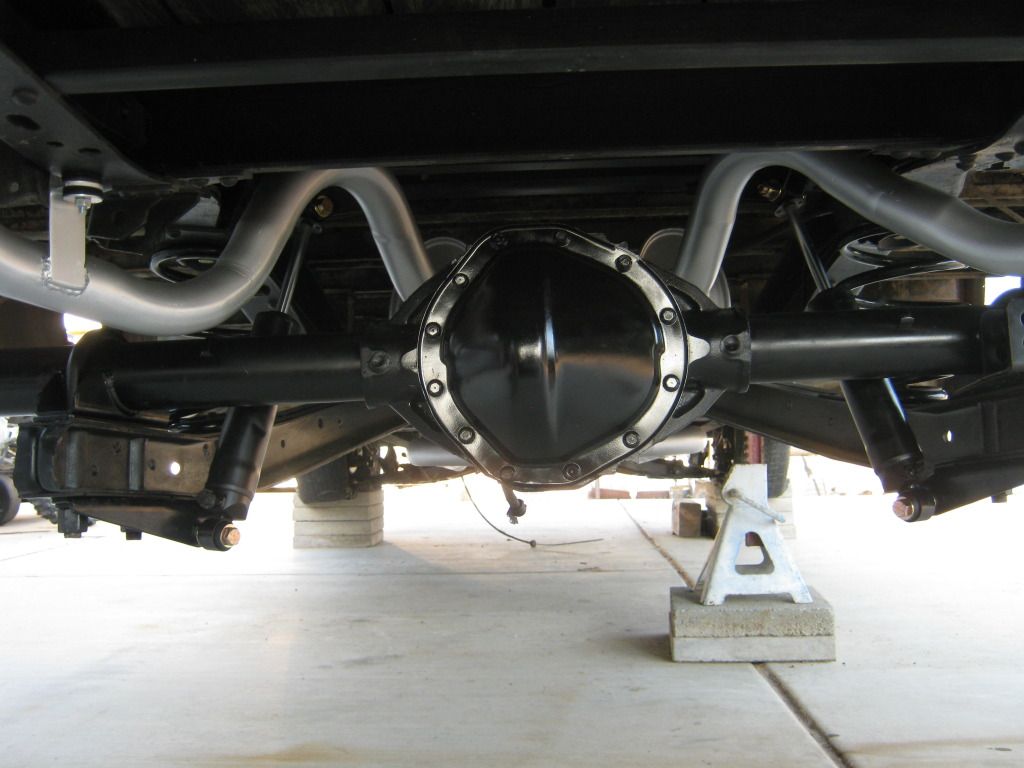 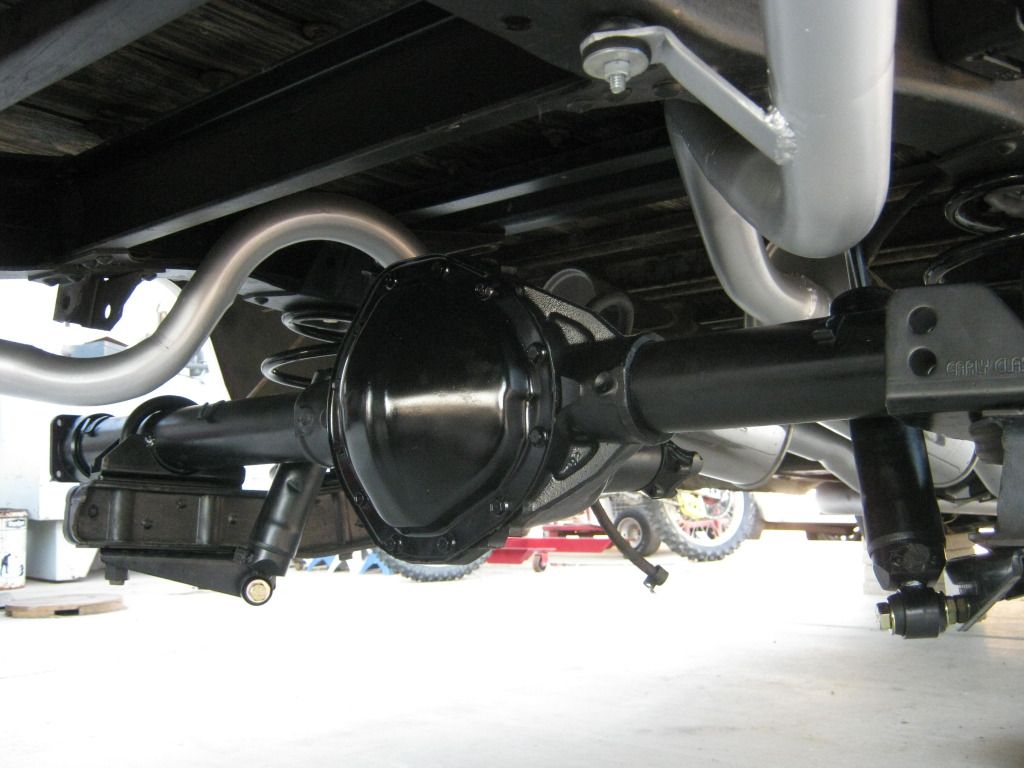 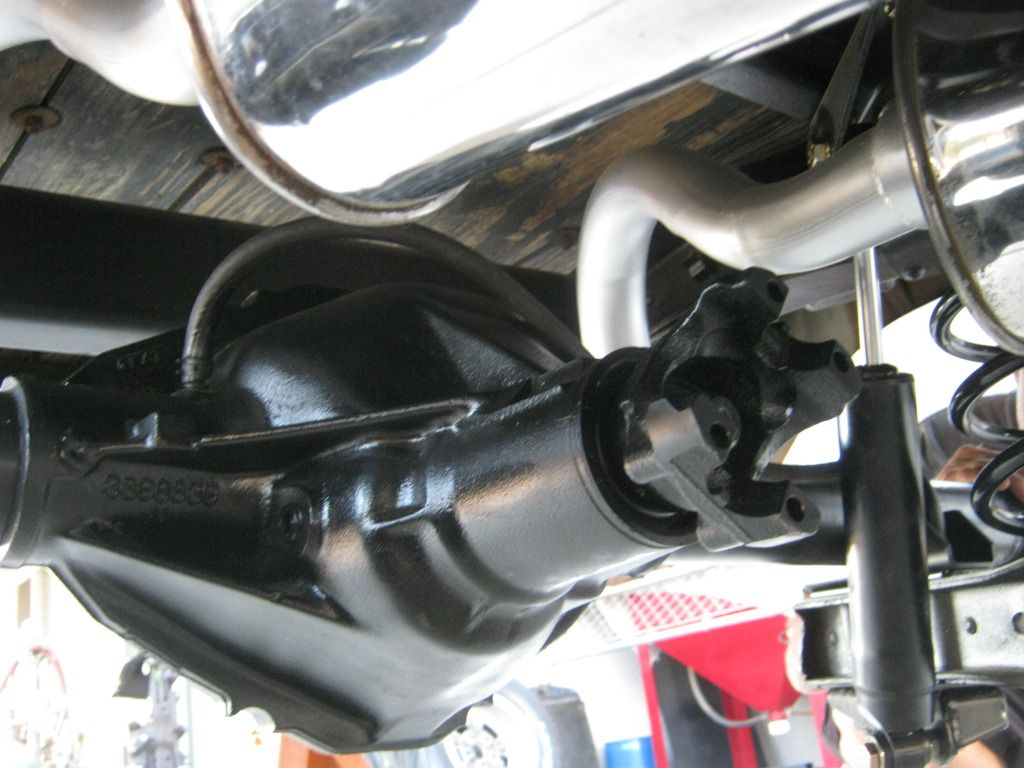 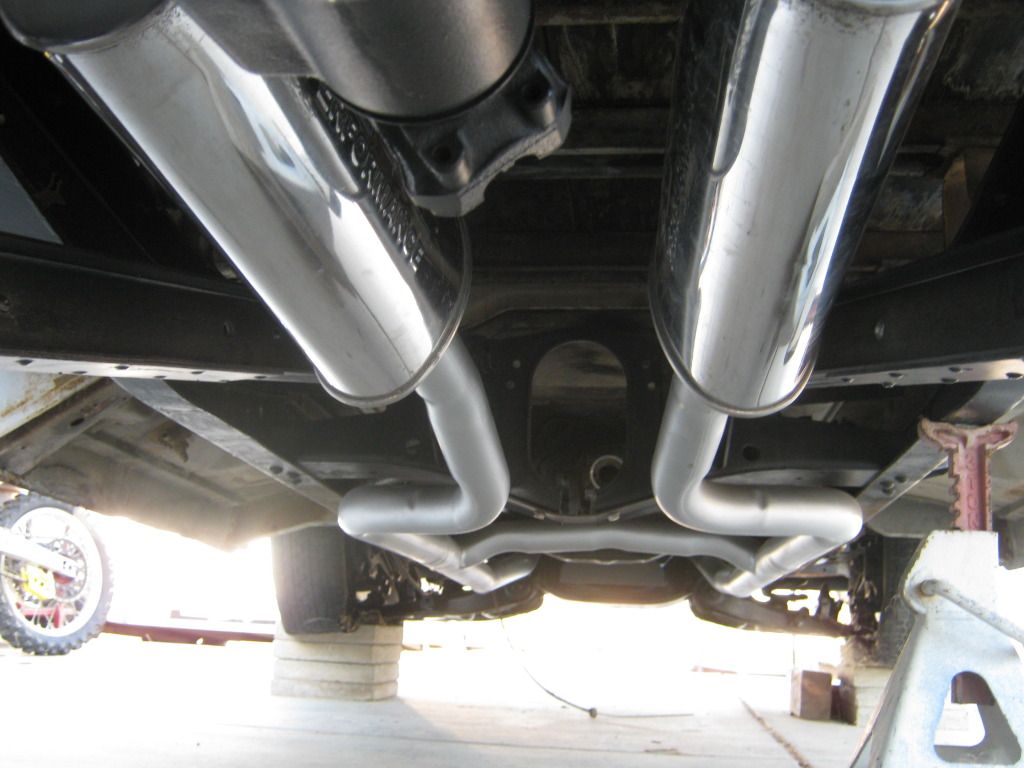 I you remember, I did some trading with a buddy for the exhaust. I did a lot of cleaning and painting and it turned out really nice. The ONLY problem that I have is that the system was designed around my buddy's truck which has a factory panhard rod. Right now, the panhard bar for the Super Track Bar kit I have will not work until the passenger side tailpipe is modified. A bummer, but it won't be difficult to fix. Tomorrow: Mock up the column and the shift linkage, and start to sort out the intermediate shaft and all of the steering linkage. I want this thing to be a roller soon!
__________________
Check out my latest endeavor: https://roundsixpod.com My build threads: '55 Chevy: http://67-72chevytrucks.com/vboard/s...d.php?t=247512 '64 C-20: http://67-72chevytrucks.com/vboard/s...d.php?t=446527 |
|
|
|
|
08-19-2012, 12:35 AM
|
#160 |
|
Registered User
Join Date: Apr 2003
Location: Indep, MO
Posts: 5,893
|
Re: Project '64 Cheapskate
Looks terrific! I painted our exhaust with rust bullet and a brush. Looks better and might slow down the crust, what the heck. I can't wait to see it be a roller, are you gonna put the later PS in?
Posted via Mobile Device
__________________
Boppa's Old Yeller Truck Build, Old Yeller's New Heart! Project Buzz Bomb Flyin' Low! |
|
|
|
|
08-19-2012, 12:45 AM
|
#161 |
|
Registered User
Join Date: Apr 2012
Location: Cambridge, Ontario, Canada
Posts: 1,771
|
Re: Project '64 Cheapskate
Not sure how I missed this thread before... great looking truck, and great progress
love your innovative low cost, highly effective, methods
__________________
Craigerrr My build thread, CRGRS 66 Winter Build: http://67-72chevytrucks.com/vboard/s...09#post5638709 |
|
|
|
|
08-19-2012, 09:52 AM
|
#162 | ||
|
Registered User
Join Date: Mar 2005
Location: apple valley, ca
Posts: 2,670
|
Re: Project '64 Cheapskate
Quote:
Quote:
__________________
Check out my latest endeavor: https://roundsixpod.com My build threads: '55 Chevy: http://67-72chevytrucks.com/vboard/s...d.php?t=247512 '64 C-20: http://67-72chevytrucks.com/vboard/s...d.php?t=446527 |
||
|
|
|
|
08-21-2012, 05:49 PM
|
#163 |
|
Registered User
Join Date: Apr 2012
Location: Beaver, Pa.
Posts: 197
|
Re: Project '64 Cheapskate
Just came across this build, love the way you're building using a lot of what you find on hand. Can't wait to see what comes next.
|
|
|
|
|
08-21-2012, 09:39 PM
|
#164 |
|
Rollin' Old Skool
Join Date: Jun 2007
Location: Hattiesburg, MS
Posts: 5,371
|
Re: Project '64 Cheapskate
great work, looking nice & clean! what paint did you use for the exhaust?
__________________
_____________________________________________ Phillip My Build threads: 1966 Chevy C-10 "Black Betty" shortbed, fleetside, BBW, 327 V8/ Powerglide (under construction) http://67-72chevytrucks.com/vboard/s...ighlight=betty 1997 Chevy Tahoe, 2dr/2wd, mild custom (Daily driver) http://67-72chevytrucks.com/vboard/s...d.php?t=601142 Pics: '66 C-10 https://flic.kr/s/aHsjHWD4h9 '97 Tahoe https://flic.kr/s/aHsjGZ7wKP '93 C-1500 https://flic.kr/s/aHskxdpdnQ '88 S-10 Blazer https://flic.kr/s/aHsjYGx4Md Previous Rides: 1993 Chevy S-10 ext. cab, 4.3L, 4/5 drop (Sold) 1993 Chevy C-1500 short/step Retro-Rod (Sold) 1988 S-10 Blazer 2dr/2wd mild custom (Sold) |
|
|
|
|
08-21-2012, 11:47 PM
|
#165 |
|
Registered User
Join Date: Apr 2012
Location: Cambridge, Ontario, Canada
Posts: 1,771
|
Re: Project '64 Cheapskate
The Rancho adjustable shocks, can you describe to me what the adjustability is? Is it ride height, or smoothness/stiffness of ride, and how are they adjusted?
__________________
Craigerrr My build thread, CRGRS 66 Winter Build: http://67-72chevytrucks.com/vboard/s...09#post5638709 |
|
|
|
|
08-22-2012, 08:08 AM
|
#166 | |||
|
Registered User
Join Date: Mar 2005
Location: apple valley, ca
Posts: 2,670
|
Re: Project '64 Cheapskate
Quote:
Quote:
Quote:
__________________
Check out my latest endeavor: https://roundsixpod.com My build threads: '55 Chevy: http://67-72chevytrucks.com/vboard/s...d.php?t=247512 '64 C-20: http://67-72chevytrucks.com/vboard/s...d.php?t=446527 |
|||
|
|
|
|
08-22-2012, 09:53 AM
|
#167 | |
|
Registered User
Join Date: Apr 2012
Location: Cambridge, Ontario, Canada
Posts: 1,771
|
Re: Project '64 Cheapskate
Quote:
__________________
Craigerrr My build thread, CRGRS 66 Winter Build: http://67-72chevytrucks.com/vboard/s...09#post5638709 |
|
|
|
|
|
09-02-2012, 09:27 PM
|
#168 |
|
Registered User
Join Date: Mar 2005
Location: apple valley, ca
Posts: 2,670
|
Re: Project '64 Cheapskate
The axles finally came from Strange on Tuesday, so I had to wait until today to install them. The axles fit perfectly, but we had to do a little grinding on the axle retainers that Rob had made to get them to fit the way I wanted. His measurements were a little "tight", so they had to be opened up just a little.
The drum fit the axle ends perfectly. I like the Strange Engineering logo on the axle end, but unfortunately, it won't be seen when the wheels and center caps are on. 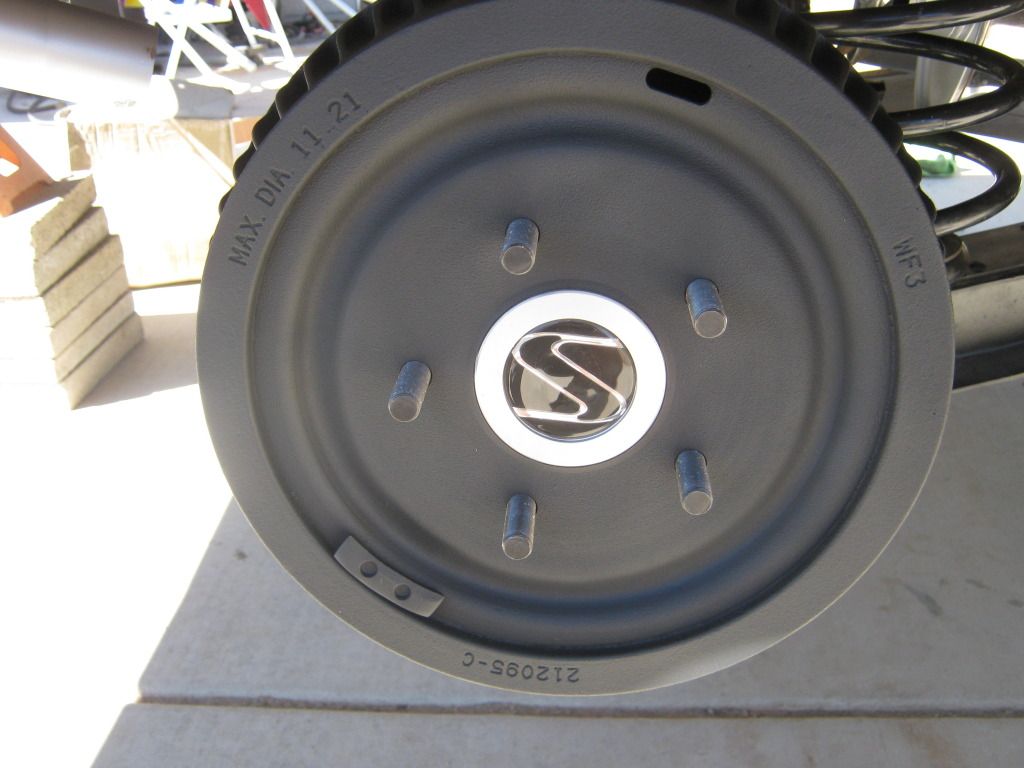 Got the wheels bolted up, and had to made some adjustments to the track bar and also to the bed, which was way out of alignment. Once everything got aligned just right, the truck was lowered to the ground on it's wheels for the first time in a LONG time. Needless to say, I was very happy with the results. I was going to take some more shots of the rear wheels, but the batteries in the camera died. 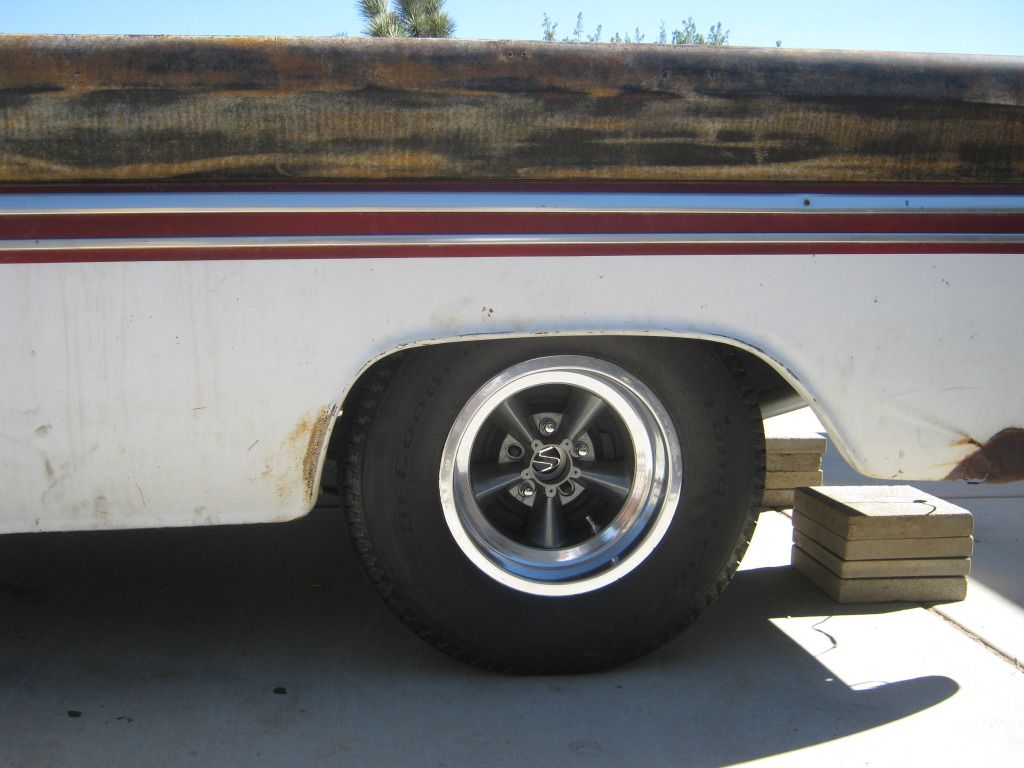 Tomorrow, I am going to finalize the rear brakes, and work on the front suspension. I would really like to have the front and rear wheels bolted on and the front end mocked up at ride height.
__________________
Check out my latest endeavor: https://roundsixpod.com My build threads: '55 Chevy: http://67-72chevytrucks.com/vboard/s...d.php?t=247512 '64 C-20: http://67-72chevytrucks.com/vboard/s...d.php?t=446527 |
|
|
|
|
09-02-2012, 09:41 PM
|
#169 |
|
1 thing at a time is progress.
Join Date: Jun 2007
Location: Ball Ground GA
Posts: 5,511
|
Re: Project '64 Cheapskate
Very nice!!
__________________
Alan
Philippians 2:14-16 |
|
|
|
|
09-02-2012, 09:48 PM
|
#170 |
|
Registered User
Join Date: Dec 2011
Location: Alaska
Posts: 405
|
Re: Project '64 Cheapskate
Looks great! Thanks for updating us on how good it looks. Keep up the work!
__________________
C@rnut001 (Owen) Alaskan Members Check In http://67-72chevytrucks.com/vboard/s...22#post5094422 http://67-72chevytrucks.com/vboard/s...18#post6778618 |
|
|
|
|
09-03-2012, 05:38 PM
|
#171 |
|
Registered User
Join Date: Mar 2005
Location: apple valley, ca
Posts: 2,670
|
Re: Project '64 Cheapskate
As promised, I got the brakes situated and bolted up the front wheels and tires. We wound up pulling out the coils because there's no weight in the front. There is a bare aluminum block and a gutted 700r4 case sitting in the engine compartment, which is essentially no weight at all. The front tires are mock-ups, and after looking at the stance, I might go up one size to a 225/60-15 tire. I also bolted on the funky ET oval center caps. I'm really happy with the way it looks!
 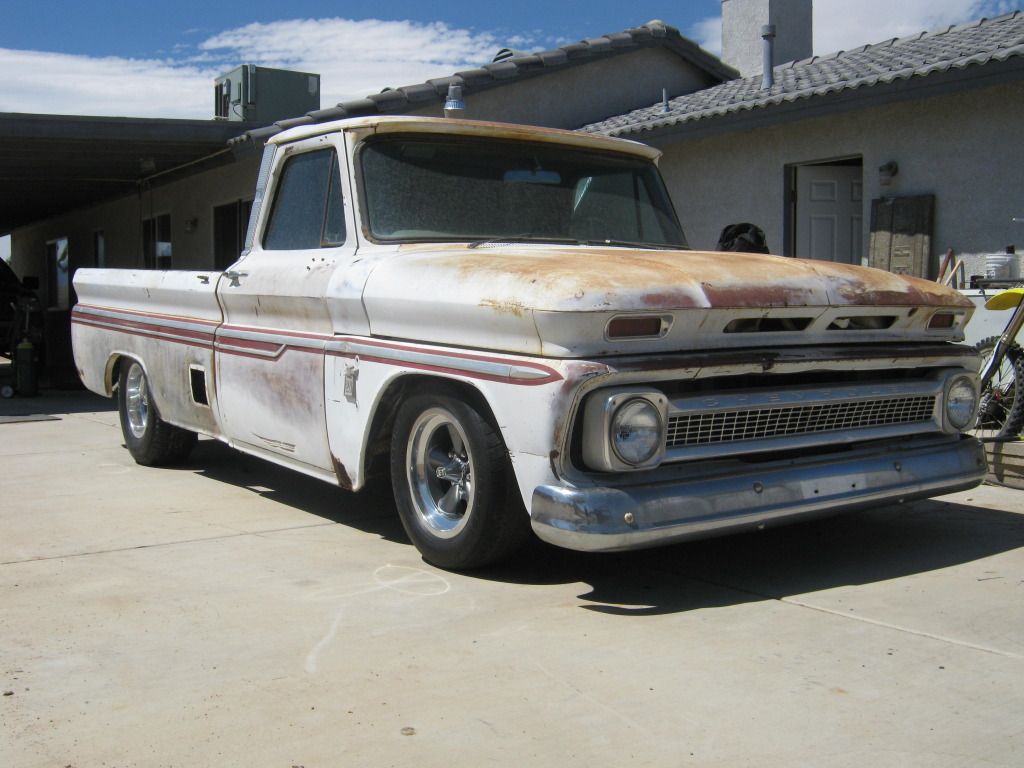  The next step is to get the front steering linkage situated, get the column finished, and build the shift linkage.
__________________
Check out my latest endeavor: https://roundsixpod.com My build threads: '55 Chevy: http://67-72chevytrucks.com/vboard/s...d.php?t=247512 '64 C-20: http://67-72chevytrucks.com/vboard/s...d.php?t=446527 |
|
|
|
|
09-03-2012, 06:03 PM
|
#172 | |
|
Registered User
Join Date: Apr 2012
Location: Cambridge, Ontario, Canada
Posts: 1,771
|
Re: Project '64 Cheapskate
Quote:
__________________
Craigerrr My build thread, CRGRS 66 Winter Build: http://67-72chevytrucks.com/vboard/s...09#post5638709 |
|
|
|
|
|
09-03-2012, 06:17 PM
|
#173 |
|
Registered User
Join Date: Mar 2005
Location: apple valley, ca
Posts: 2,670
|
Re: Project '64 Cheapskate
Right now, the tire is a 205/60-15. They were on a buddy's '71 El Camino, and I needed some tires for mock-up. I knew that they were going to be too short, but you never know until you bolt them up and get a good look from every angle.
__________________
Check out my latest endeavor: https://roundsixpod.com My build threads: '55 Chevy: http://67-72chevytrucks.com/vboard/s...d.php?t=247512 '64 C-20: http://67-72chevytrucks.com/vboard/s...d.php?t=446527 |
|
|
|
|
09-03-2012, 08:40 PM
|
#174 | |
|
Needs a Big Block
Join Date: Oct 2003
Location: Red Deer , Alberta
Posts: 1,198
|
Re: Project '64 Cheapskate
Quote:
Well. You got the stance nailed !! Love this truck, will you be putting bumper guards on this one? Posted via Mobile Device
__________________
1964 Short box On dropmembers and billets 1962 Suburban family cruiser 1972 K10 |
|
|
|
|
|
09-03-2012, 09:04 PM
|
#175 | |
|
But Found Her 25yrs Later!
Join Date: Oct 2010
Location: Oregon City, Oregon
Posts: 10,468
|
Re: Project '64 Cheapskate
That is a great shot.
 Quote:
__________________
I lost my 65 - Found it 25 years later: http://67-72chevytrucks.com/vboard/s...d.php?t=426650 66 C20 Service Truck: http://67-72chevytrucks.com/vboard/s...d.php?t=428035 |
|
|
|
|
 |
| Bookmarks |
|
|


 Linear Mode

