
|
Register or Log In To remove these advertisements. |
|
|
|
|||||||
 |
|
|
Thread Tools | Display Modes |
 11-16-2011, 02:09 PM
|
#1 |
|
Registered User
Join Date: May 2011
Location: Anderson SC
Posts: 3,868
|
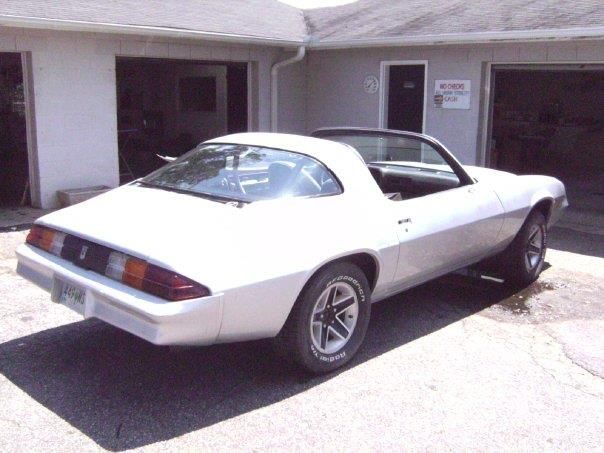
Retrospective 1978 Camaro Targa Top Project
A few years ago we had a guy come by our shop wanting a lift-off roof section for his '78 Camaro. Years ago he had cut a section out and had a canvas cover for it but decided that he wanted a metal insert. He had another shop put a roof skin on it but they did a horrible job and we had to redo that. It already had subframe connectors and a main hoop with front and rear down bars to stiffen the body. Our job was to make a one peice removable roof section, much like T-tops, out of steel. Once I got into the job I found that it had been hit and the quarter panel replaced and we had to rework some of the B pillar areas.
Here's a picture of a factory Porsche Targa top to give you an idea of what we were doing. 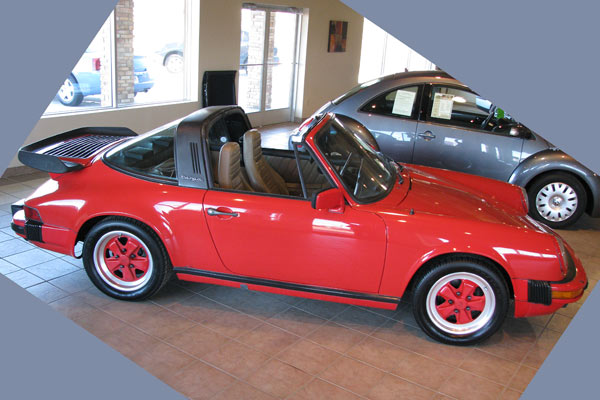  And here's what we started with. A very poorly done roof clip installation. Not only was it welded incorrectly, the alignment was way off and the glass would have never fit in the pinchweld. They didn't even get all of the lead out of the seam before they started welding!! 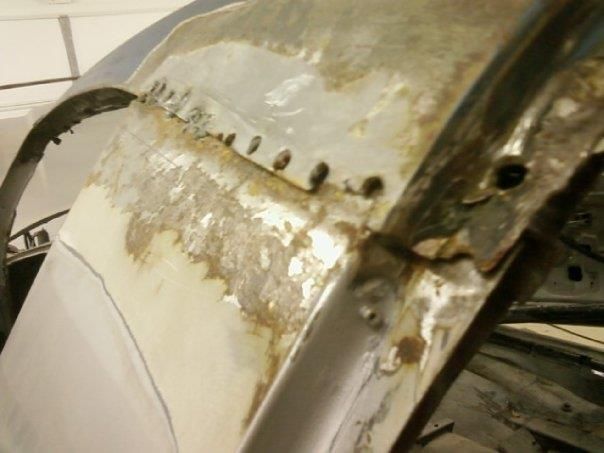  To fix that mess, I completly cut away the whole factory leaded/offset seam and made an new panel. I also replicated the factory inner brace, seen where the plug welds are. 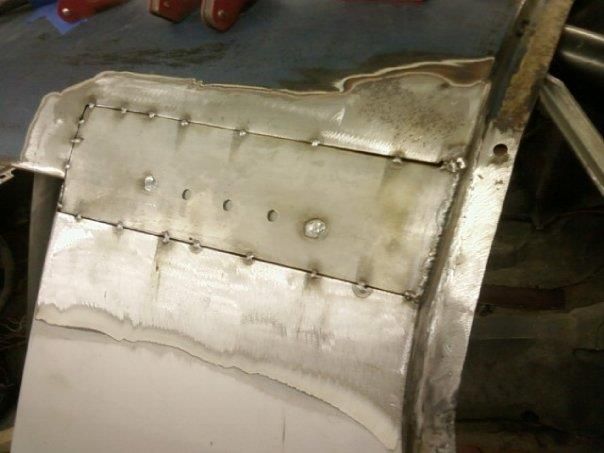 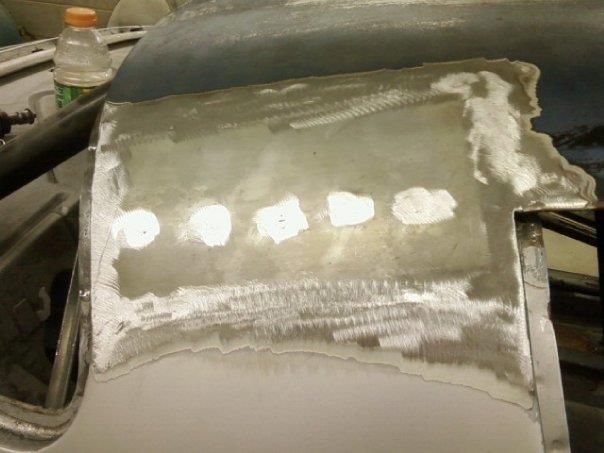 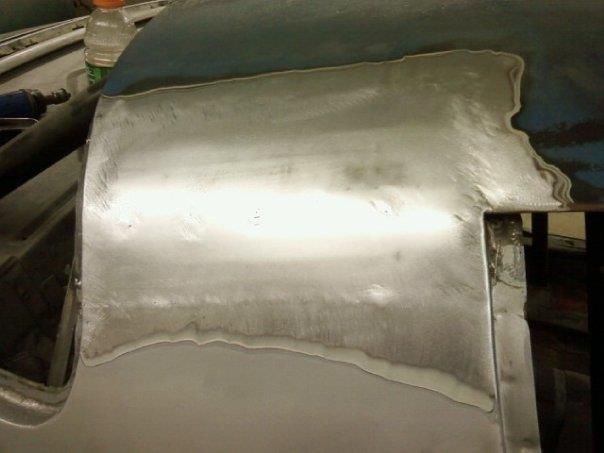 The front windshield opening was misaligned so we cut it to repostion it. The rear cut was where the owner originaly wanted the opening to begin. We later talked him into letting the opening start farther forward, much like a convertible windshield frame. 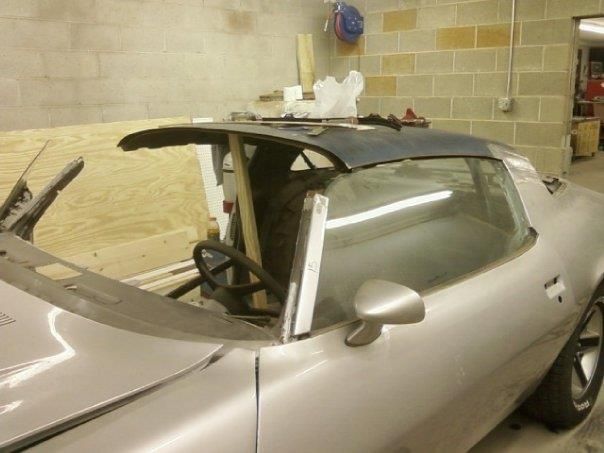 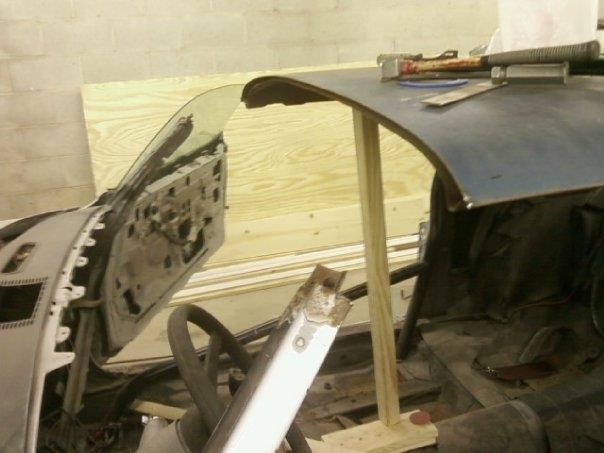 The windshield frame blasted, primed, and repositioned. 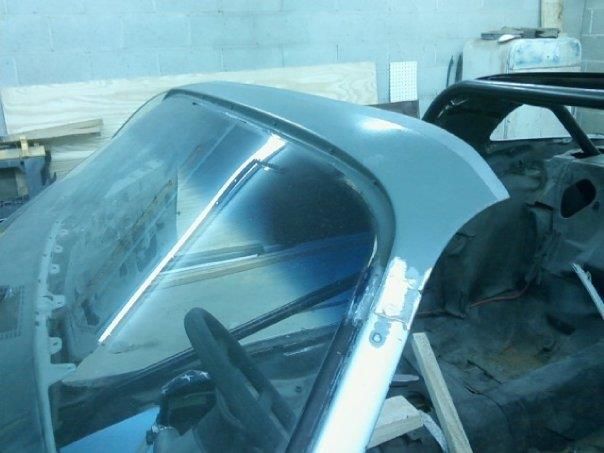 The rear opening trimmed. 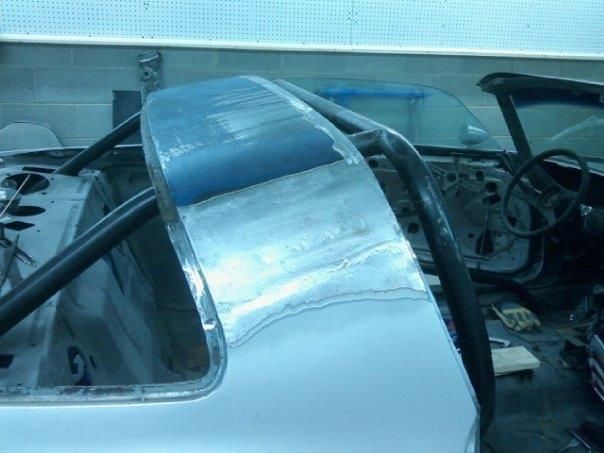 Trimming the front edge to the final opening size. The owner wanted the thicker windshield frame to start with but we realized that the corners would make getting in and out of the car alot harder without hitting his head. It also looks much better with the thinner windshield frame; like a factory convertable may have looked. 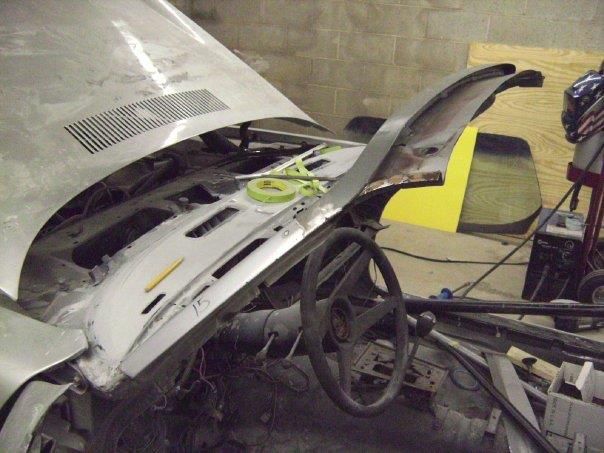 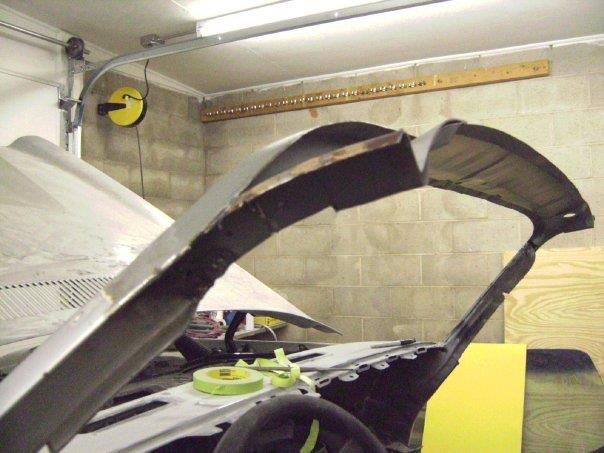 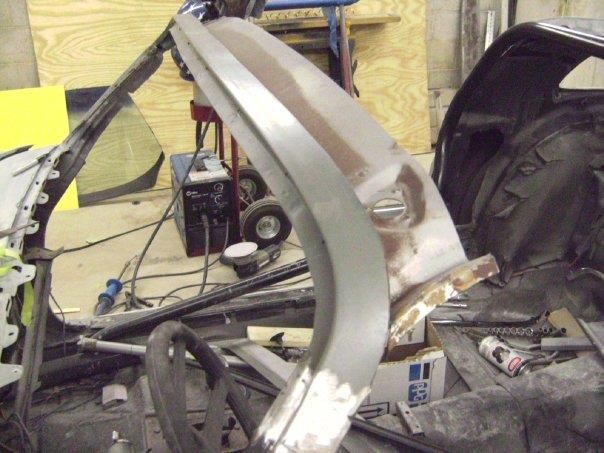 I'll work on posting some more pics later on. When we first got the car in the shop we really thought this would be a hack job and a something that would really kill the look and value of the car. We were wrong and it turned out to be a really neat project that looked like the factory could have made it. And with the top on, most people would never even notice that it had a lift off top.
__________________
Project Goldilocks '66 C10 Short Fleet BBW Build '65 C10 Highly Detailed Stock Restoration Thread '78 Camaro Targa Roof Build '55 International Metal/Body/Paint Work '66 F100 Full Rotisserie Restoration '40 Packard 120 Convertible Coupe Restoration How To Restore and Detail an Original Gauge Cluster How To Detail Sand Body Panels, Edges, Corners, Etc Last edited by theastronaut; 12-08-2012 at 05:29 PM. |

|

|
|
11-17-2011, 01:53 PM
|
#2 | |
|
Registered User
Join Date: Feb 2007
Location: Marana, Arizona
Posts: 3,416
|
Re: Retrospective 1978 Camaro Targa Top Project
Quote:
Anxiously awaiting more pics!
__________________
"I feel the need for speed!"... as soon as I am done with my nap. |
|
|
|
|
|
11-17-2011, 04:09 PM
|
#3 | |
|
Registered User
Join Date: May 2011
Location: Anderson SC
Posts: 3,868
|
Re: Retrospective 1978 Camaro Targa Top Project
Quote:
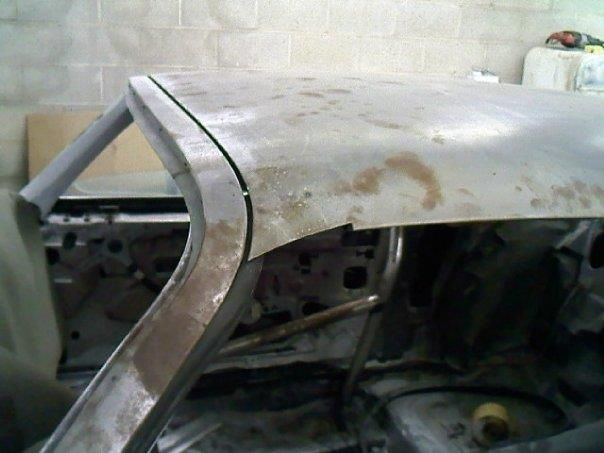
Here's some more pics of it. W/S frame fully trimmed and ready to start boxing it. Used 18g bent 90* and shaped with a shrinker/stretcher from Eastwood. I left some of the inner brace metal on the bottom side of the w/s frame for the filler panels to weld to. 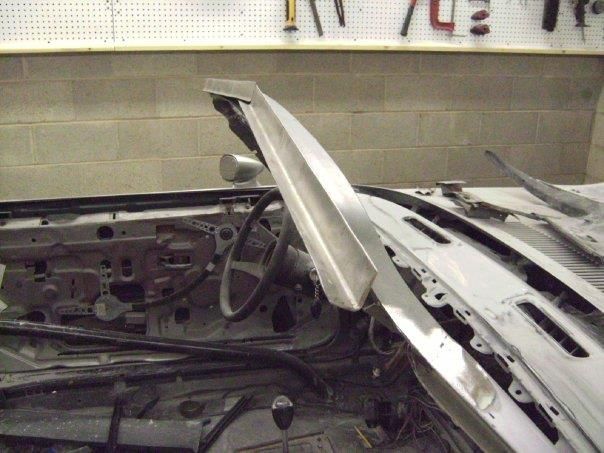 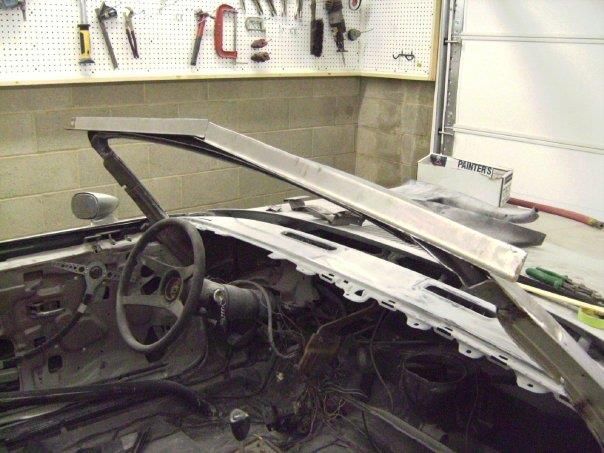 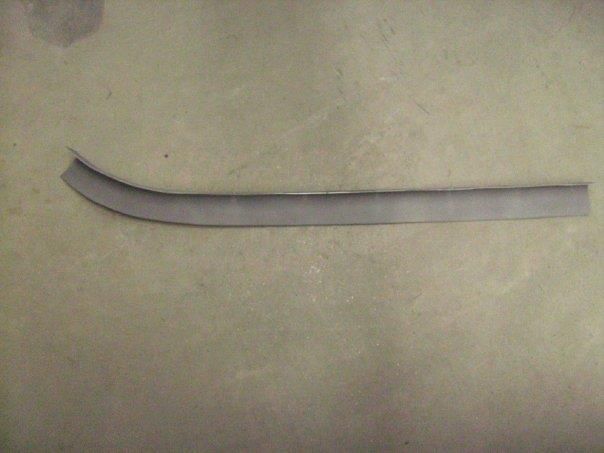  Drilled some holes to plug weld the filler panels to the existing inner brace panel. 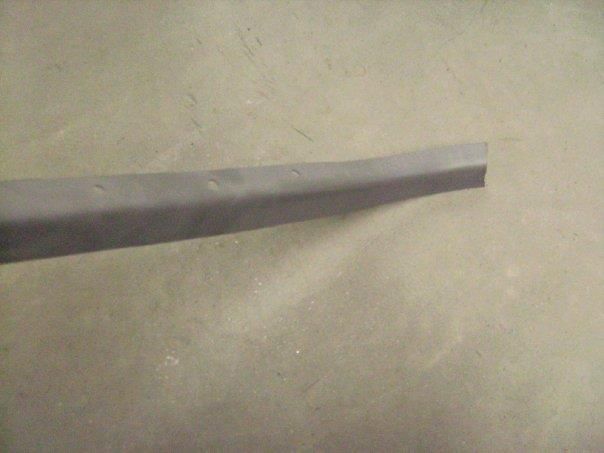 Test fitting the filler panels. 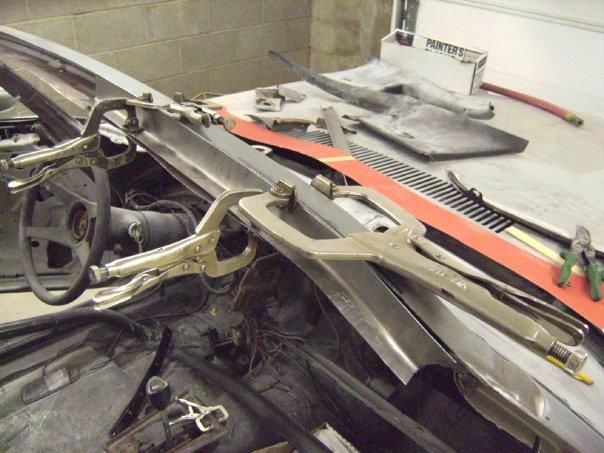 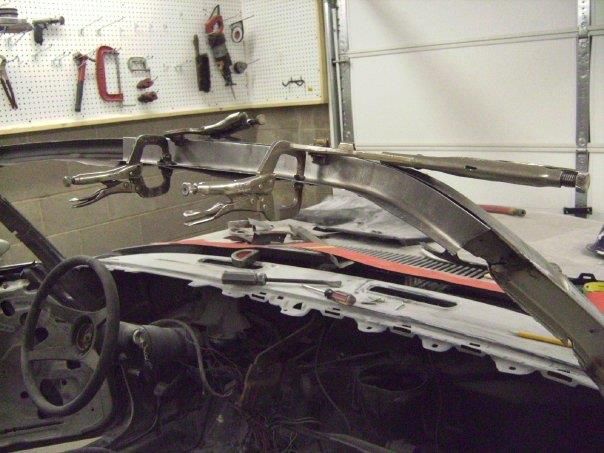 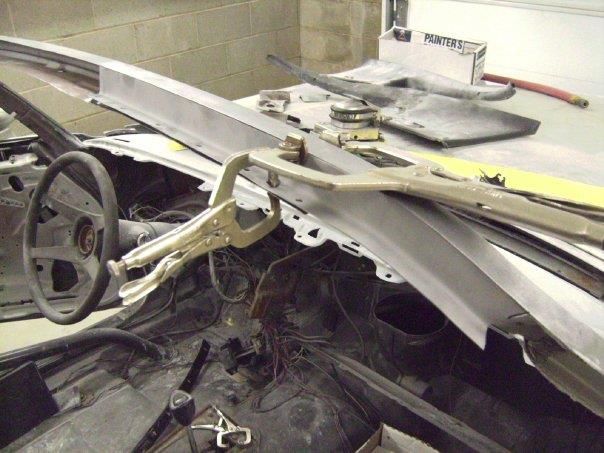 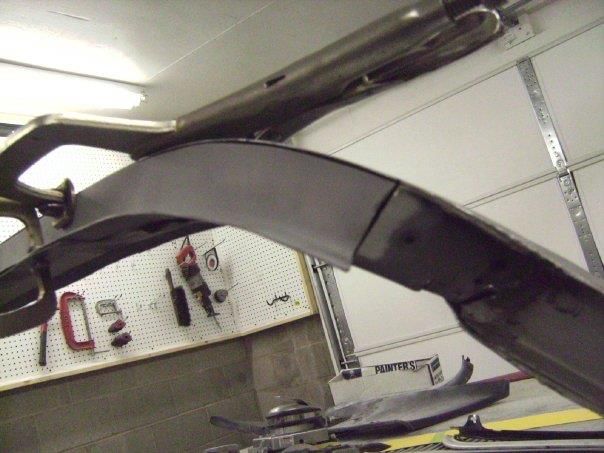 Welding the filler panels in place. 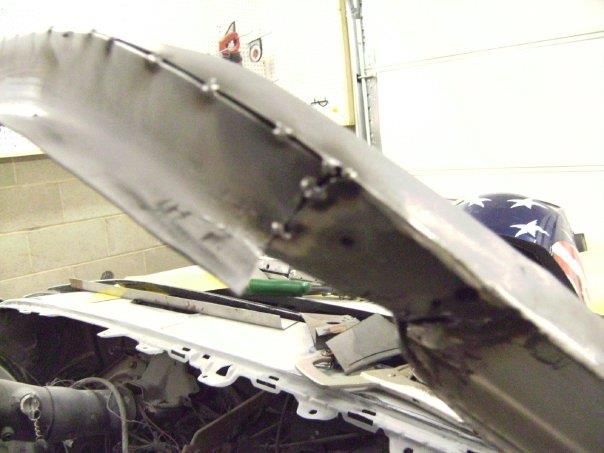 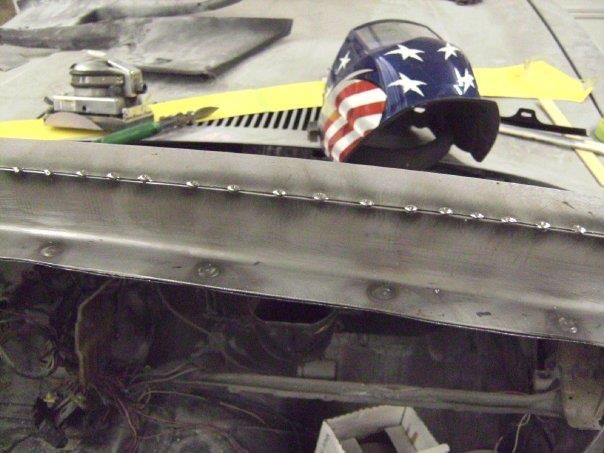 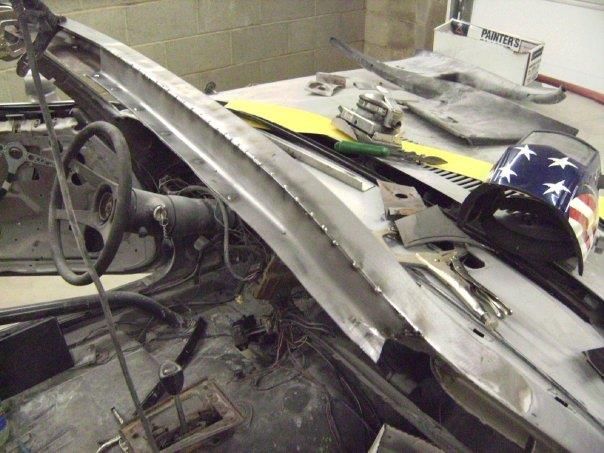 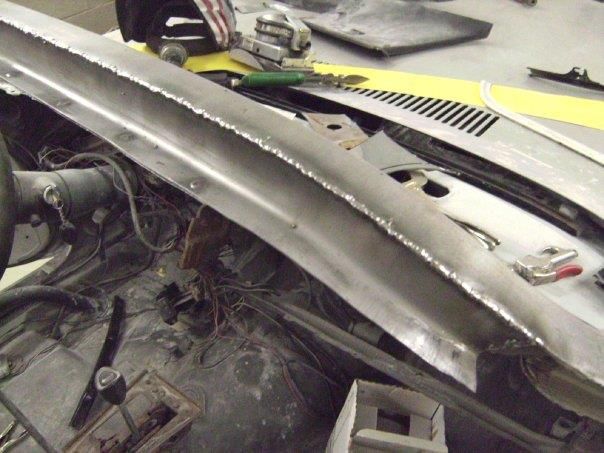 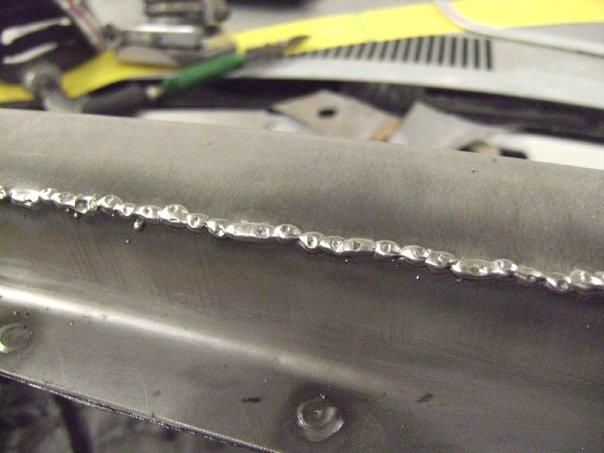 Welds ground down and sanded with a DA. The lip will be used to hold a rubber seal for the roof. 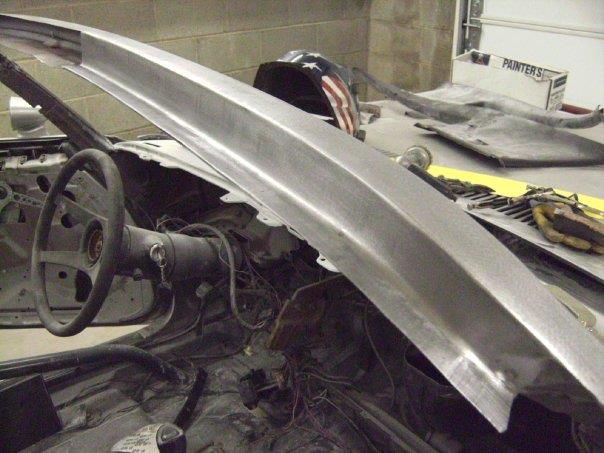 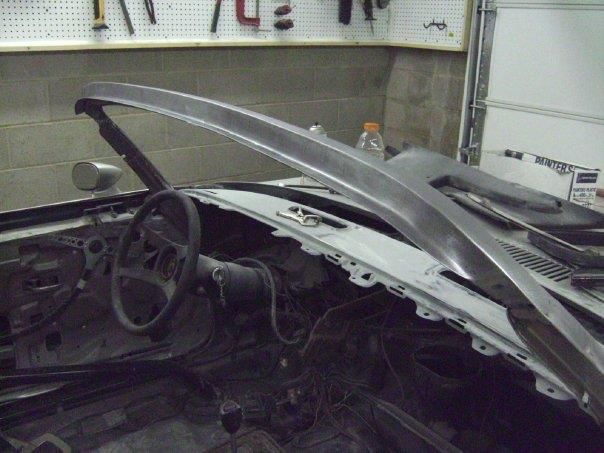 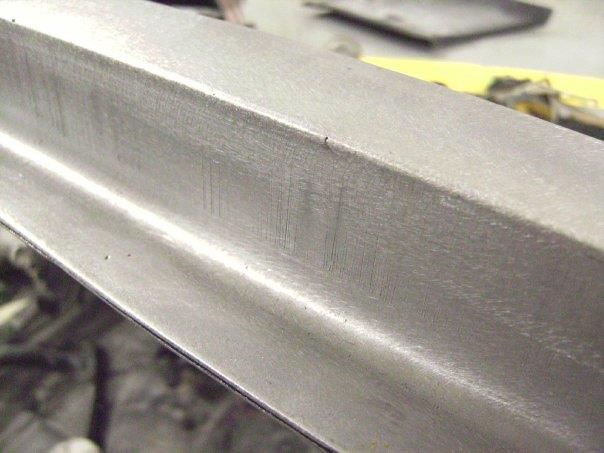 Edges trimmed. 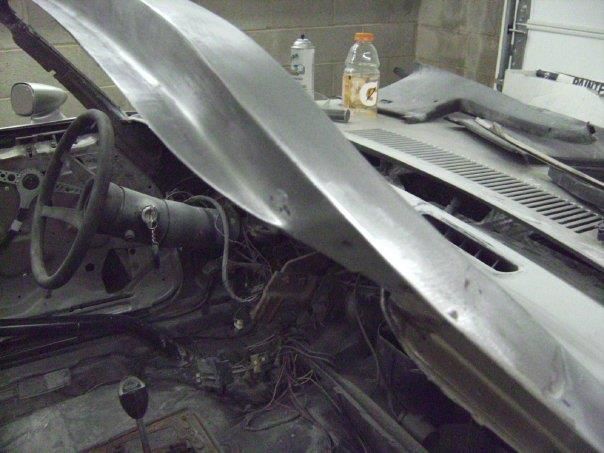 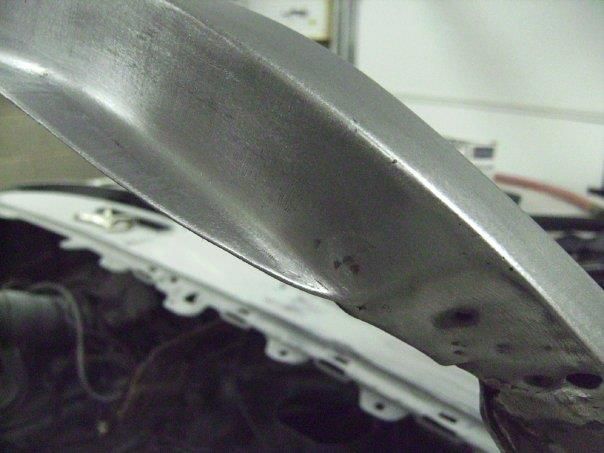 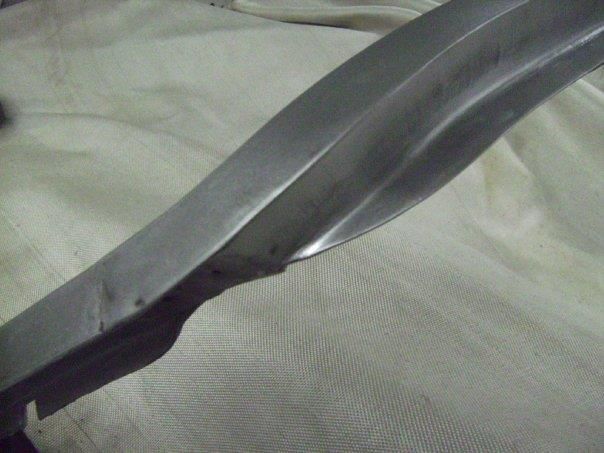
__________________
Project Goldilocks '66 C10 Short Fleet BBW Build '65 C10 Highly Detailed Stock Restoration Thread '78 Camaro Targa Roof Build '55 International Metal/Body/Paint Work '66 F100 Full Rotisserie Restoration '40 Packard 120 Convertible Coupe Restoration How To Restore and Detail an Original Gauge Cluster How To Detail Sand Body Panels, Edges, Corners, Etc Last edited by theastronaut; 12-08-2012 at 05:35 PM. Reason: Fix dead pic links |
|
|
|
|
|
11-17-2011, 04:26 PM
|
#4 |
|
Registered User
Join Date: May 2011
Location: Anderson SC
Posts: 3,868
|
Re: Retrospective 1978 Camaro Targa Top Project
The rear filler panels were a little bit simpler to build. I did have to notch them to clear the rear down tubes. Made a template of the shape of the roof and used the shrinker/stretcher again to shape them.
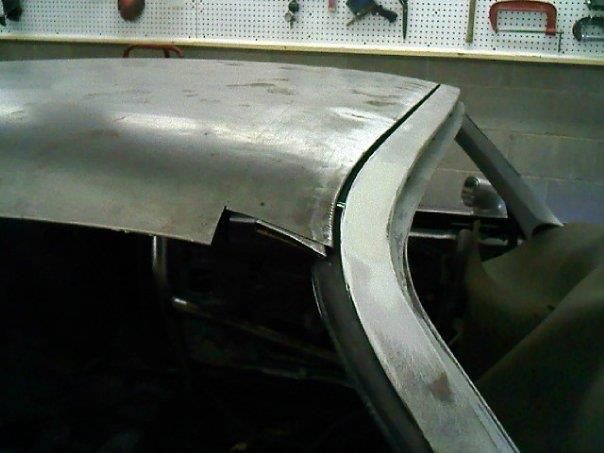
  Section cut out to clear the down tubes, then used the S/S to make contoured notches. 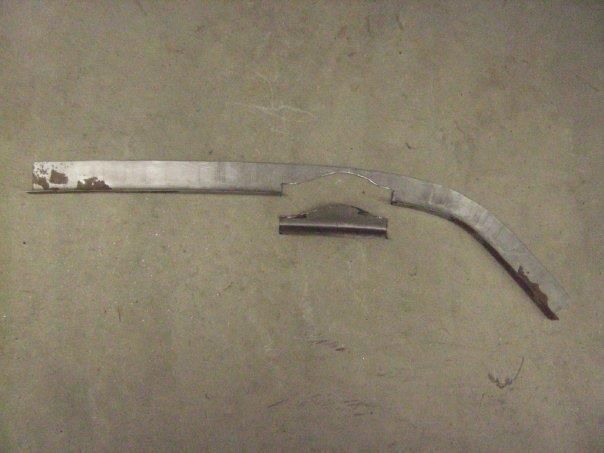 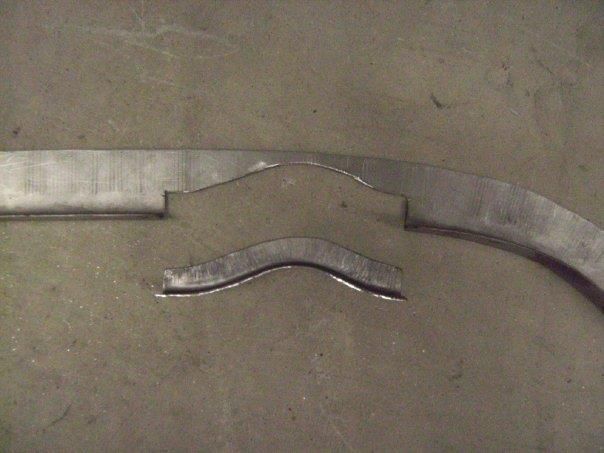 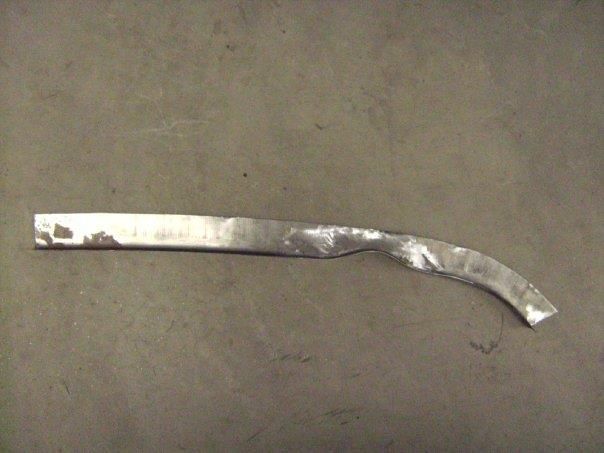 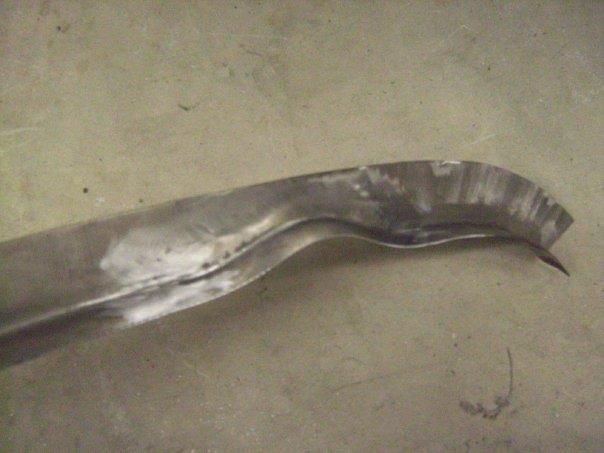 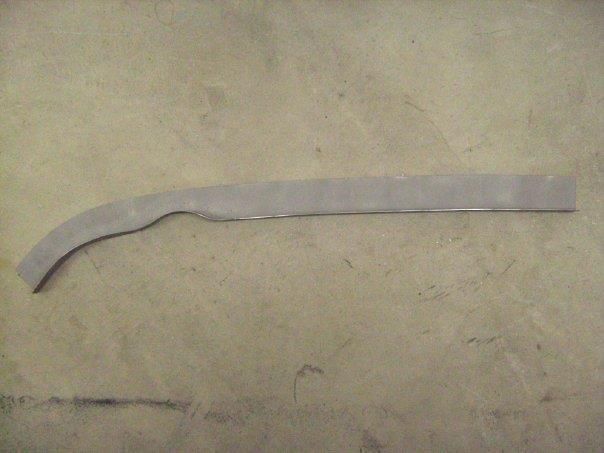 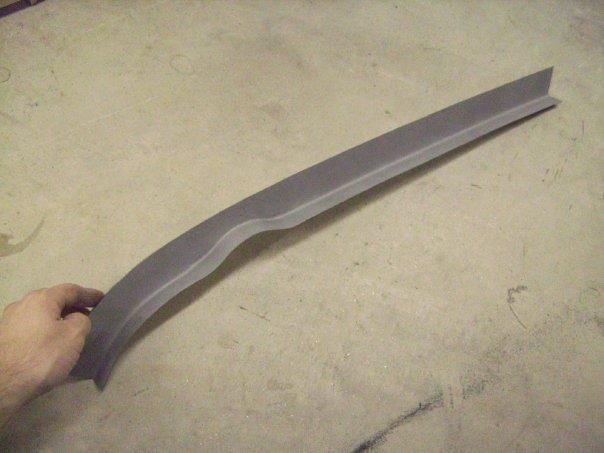 Welding the rear filler panels in.  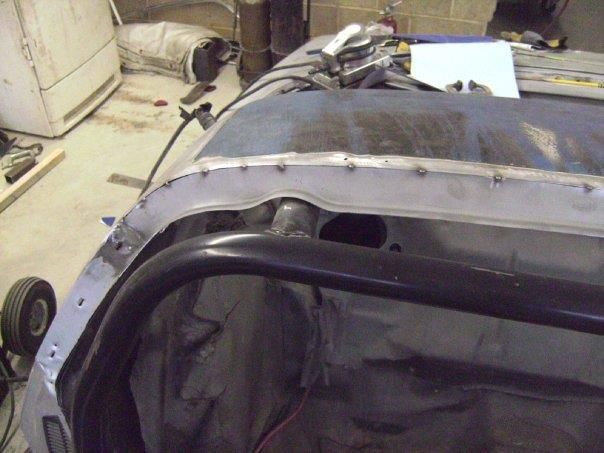 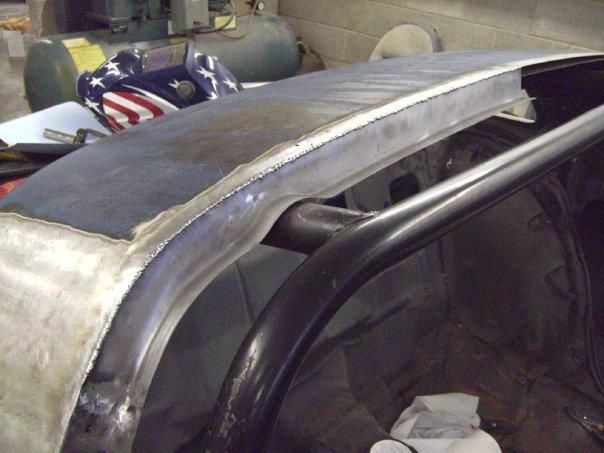 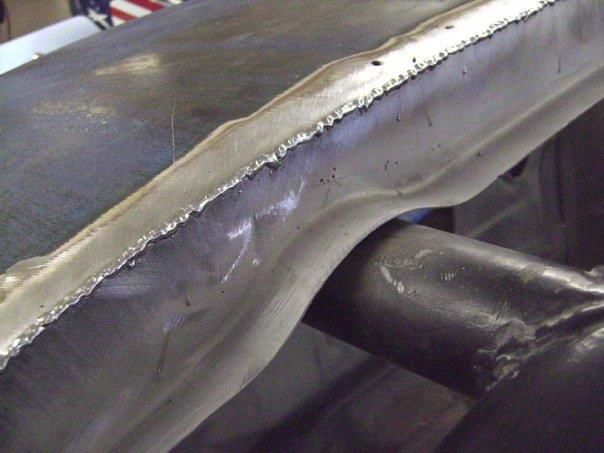 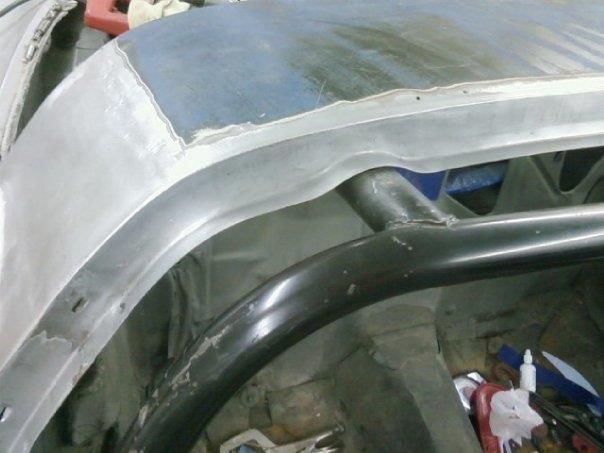 Both sides done and the welds ground down and smoothed. 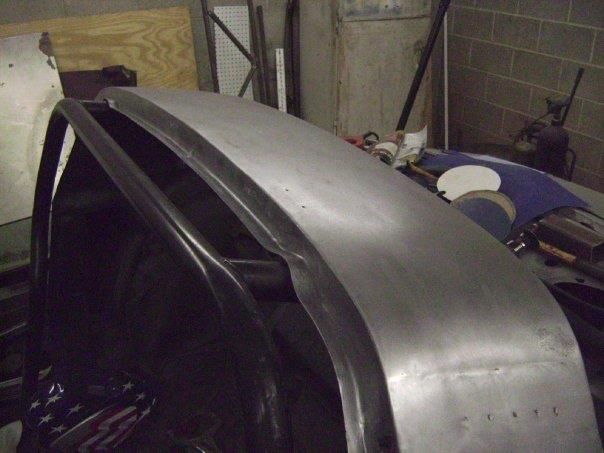 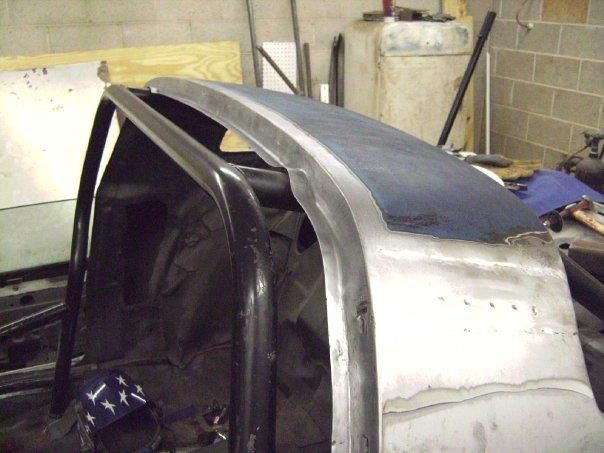 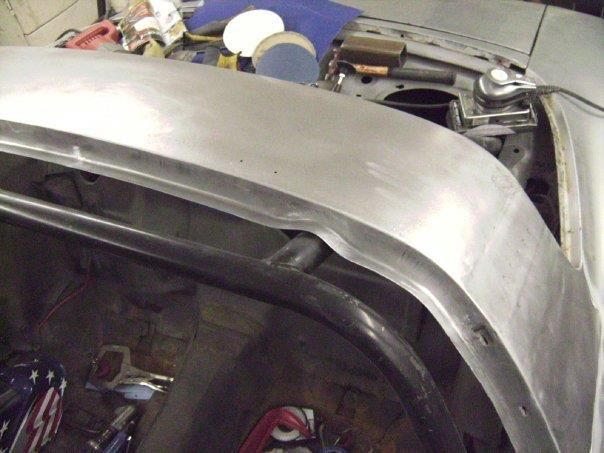 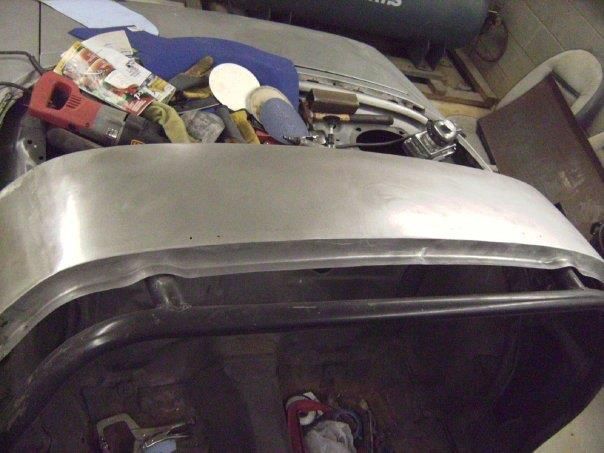 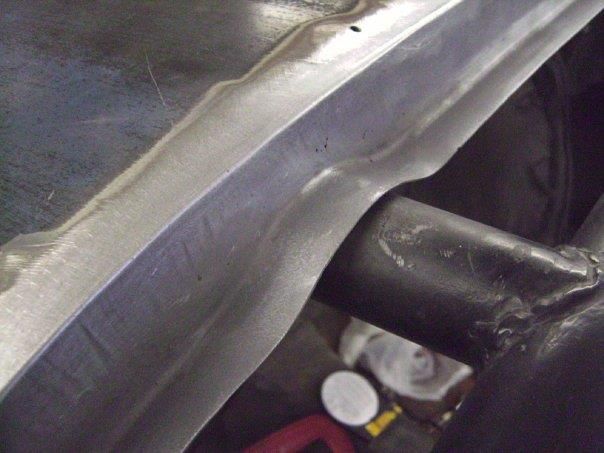 Test fitting the rubber seal. 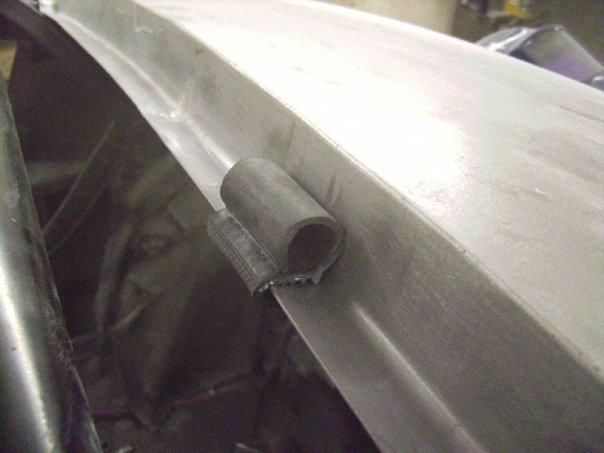 This was the original plan for the front and rear roof braces. Planned on making a hat channel and using the edge of the roof skin to create a hemmed edge to hold the hat channel in place. This would strengthen the roof panel and create an edge for the rubber to seal on. We later found some 16g rectangle tubing to make the braces with that turned out much better. 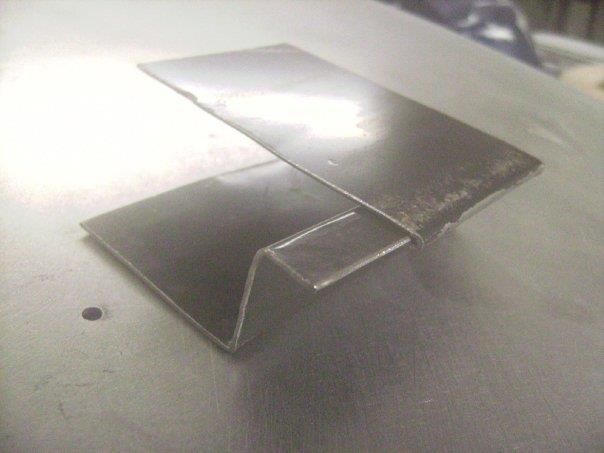 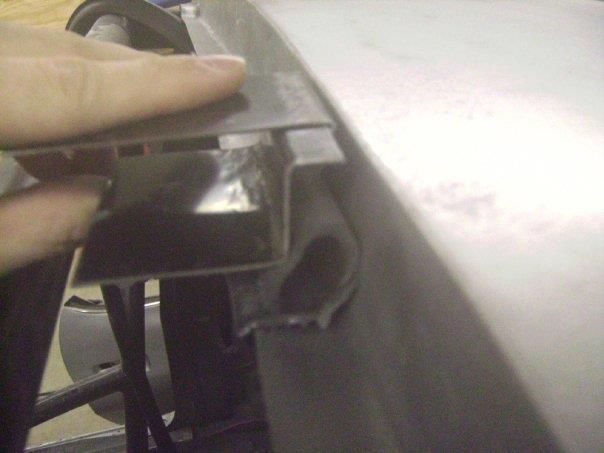
__________________
Project Goldilocks '66 C10 Short Fleet BBW Build '65 C10 Highly Detailed Stock Restoration Thread '78 Camaro Targa Roof Build '55 International Metal/Body/Paint Work '66 F100 Full Rotisserie Restoration '40 Packard 120 Convertible Coupe Restoration How To Restore and Detail an Original Gauge Cluster How To Detail Sand Body Panels, Edges, Corners, Etc Last edited by theastronaut; 12-08-2012 at 05:39 PM. Reason: Fix dead pic links |
|
|
|
|
11-17-2011, 04:59 PM
|
#5 |
|
Registered User
 Join Date: Jul 2010
Location: memphis
Posts: 2,537
|
Re: Retrospective 1978 Camaro Targa Top Project
nice metal fab
__________________
1981 C-10 (Pop's) 1978 Camaro 2006 Lacrosse |
|
|
|
|
11-17-2011, 05:25 PM
|
#6 | |
|
Registered User
Join Date: May 2011
Location: Anderson SC
Posts: 3,868
|
Re: Retrospective 1978 Camaro Targa Top Project
Quote:
Posted via Mobile Device
__________________
Project Goldilocks '66 C10 Short Fleet BBW Build '65 C10 Highly Detailed Stock Restoration Thread '78 Camaro Targa Roof Build '55 International Metal/Body/Paint Work '66 F100 Full Rotisserie Restoration '40 Packard 120 Convertible Coupe Restoration How To Restore and Detail an Original Gauge Cluster How To Detail Sand Body Panels, Edges, Corners, Etc |
|
|
|
|
|
11-18-2011, 02:27 PM
|
#7 |
|
Registered User
Join Date: May 2011
Location: Anderson SC
Posts: 3,868
|
Re: Retrospective 1978 Camaro Targa Top Project
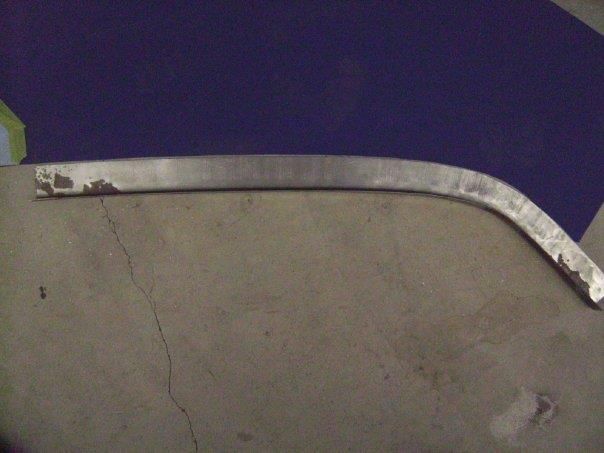
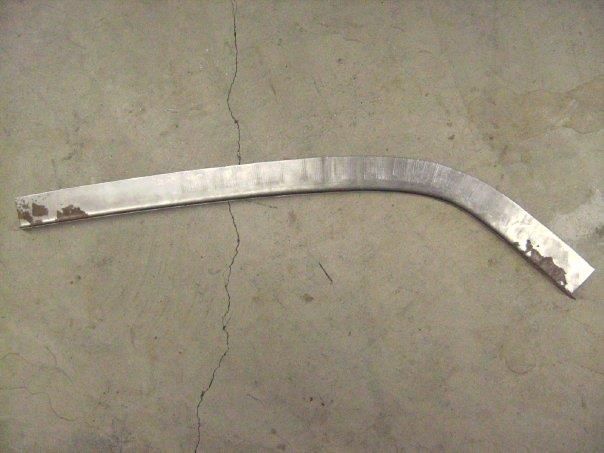
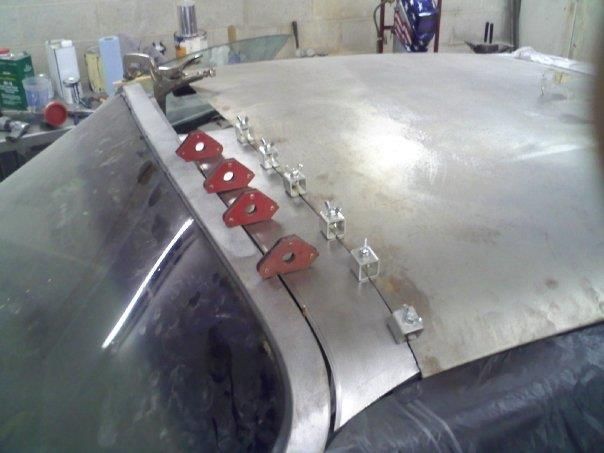
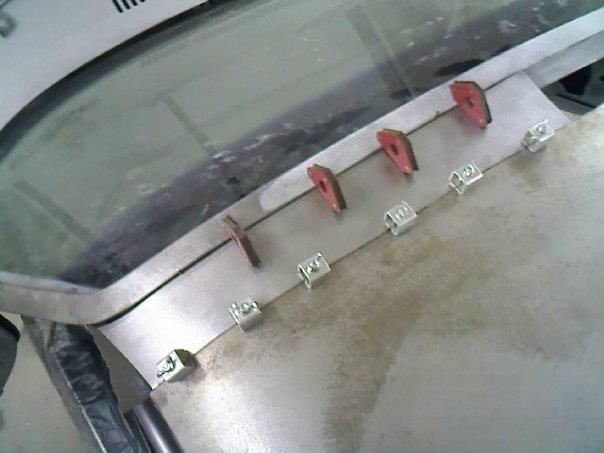
Instead of using the hat channel for the roof skin braces, I was able to find 18g 1.5"x.5" rectangle tubing for the front and 1.5"x5/8" tubing for the rear. The rear filler panels I made had a deeper recess than the front, so the roof skin brace needed to be taller for a proper fit against the rubber seal. I built a tubing roller to shape the tubing to the shape of the roof skin.
 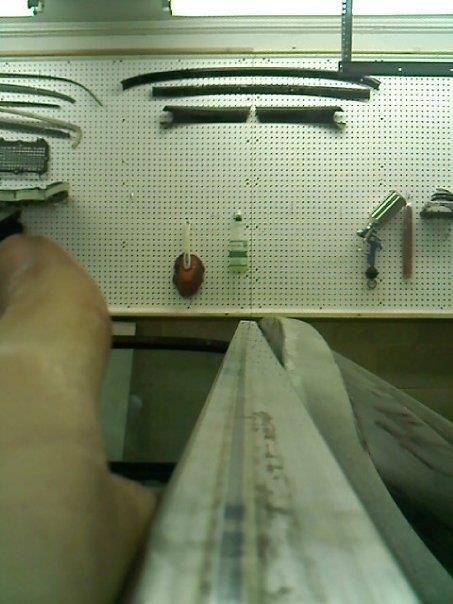 I built a tubing roller to shape the tubing. 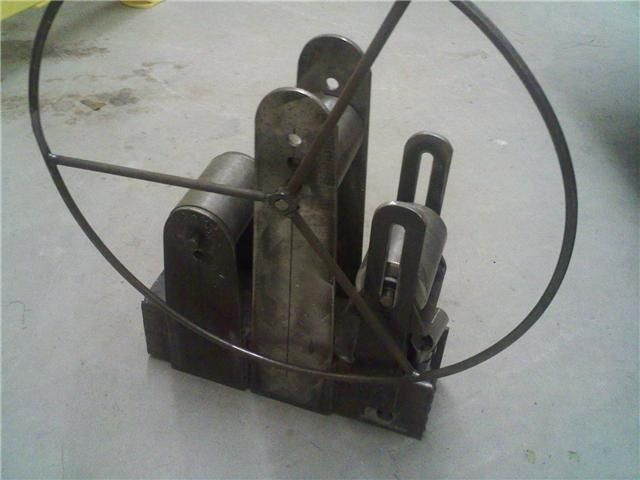 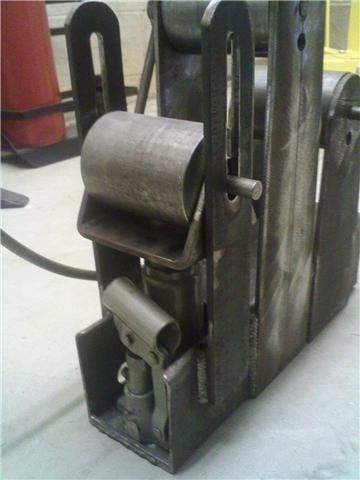 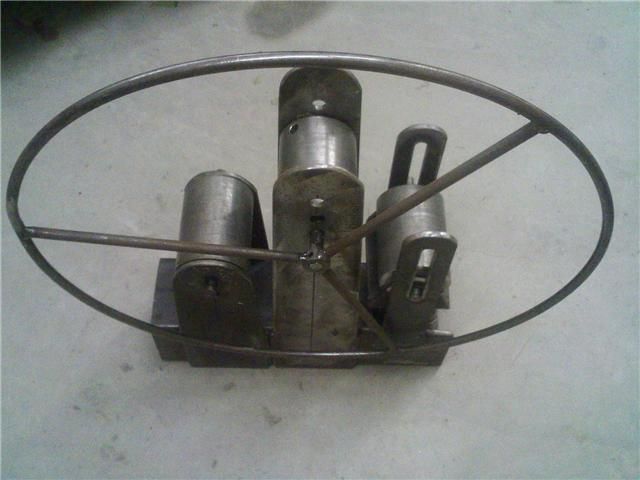 Tubing shaped with the roller. It's curved both ways to match the shape of the windshield frame. 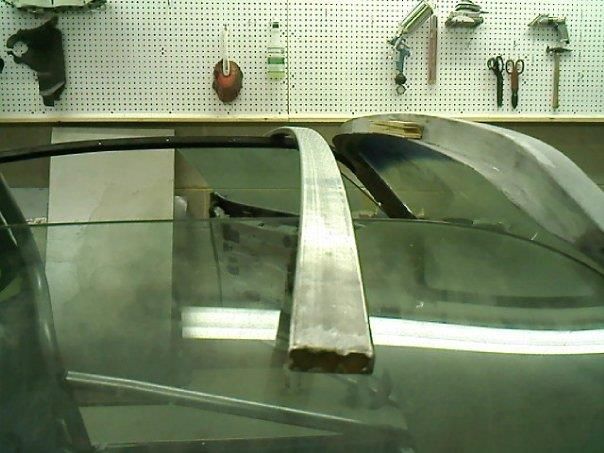  Bending the rear brace. 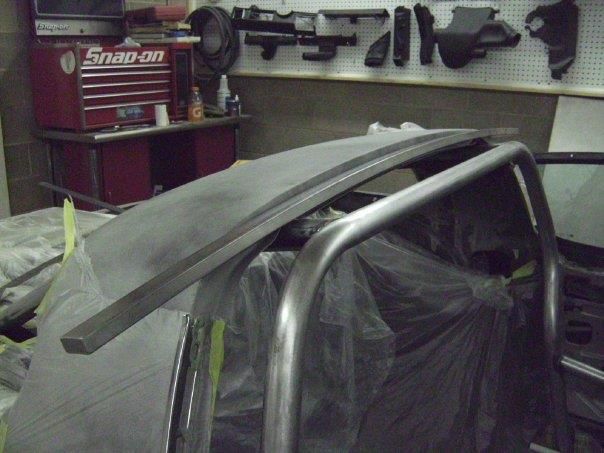 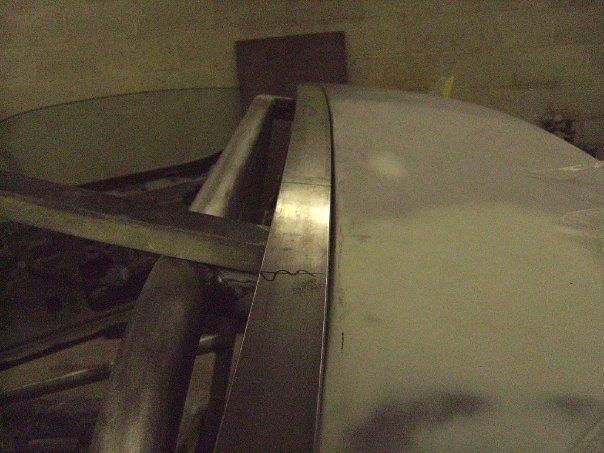 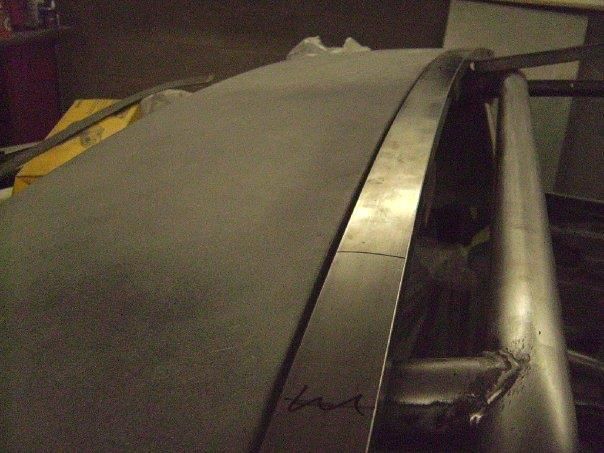 Once it was bent I cut the sides off of the ends and shaped the tighter part of the curve by hand, then welded new sides into the tubing. The roller wheels were spaces to far apart to make that tight of a bend. 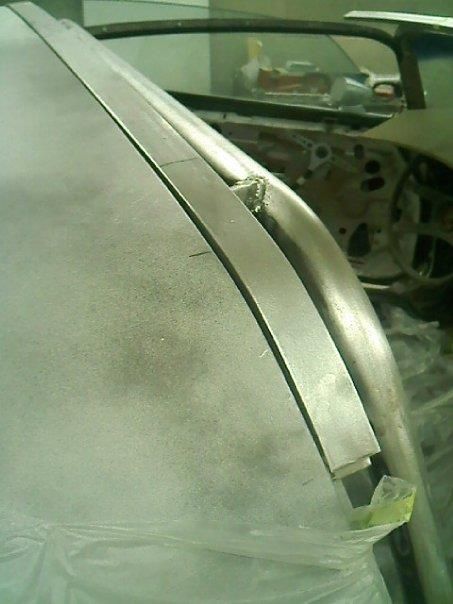 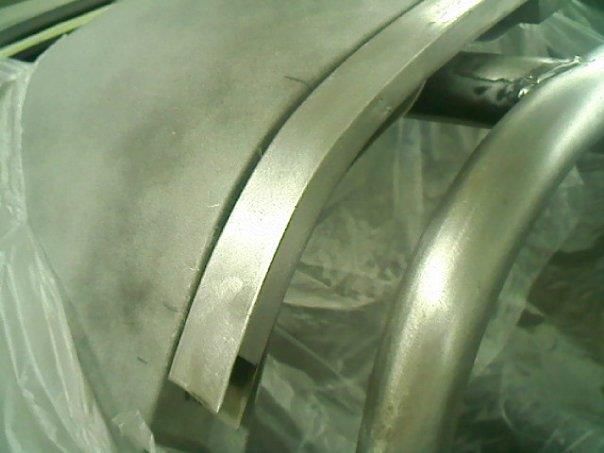 I welded a strip across the rear edge of the roof panel to strengthen it, much like a hemmed edge would be.  Welds ground down and smoothed. Once I was able to mount the roof panel, I welded 1/8" welding rods to the edge to fine to the panel gaps front and rear. 
__________________
Project Goldilocks '66 C10 Short Fleet BBW Build '65 C10 Highly Detailed Stock Restoration Thread '78 Camaro Targa Roof Build '55 International Metal/Body/Paint Work '66 F100 Full Rotisserie Restoration '40 Packard 120 Convertible Coupe Restoration How To Restore and Detail an Original Gauge Cluster How To Detail Sand Body Panels, Edges, Corners, Etc Last edited by theastronaut; 12-08-2012 at 05:43 PM. Reason: Fix dead pic links |
|
|
|
|
11-18-2011, 02:32 PM
|
#8 |
|
Registered User
Join Date: May 2011
Location: Anderson SC
Posts: 3,868
|
Re: Retrospective 1978 Camaro Targa Top Project
At this point the front of the roof panel was too short since the owner originally wanted a smaller opening. I had to fab panels to lenthen the roof before I could add the front brace. I rolled a hemmed edge with a friends bead roller on the front and sides of the panels. I messed up the sides when I rolled them so I had to cut them off and weld new peices on later.
  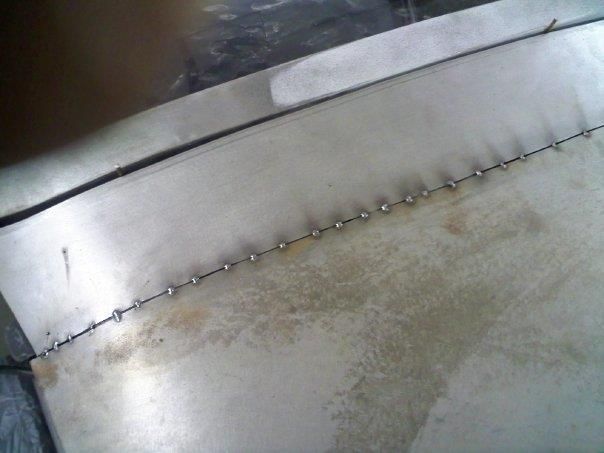 Fully welded and ground down. 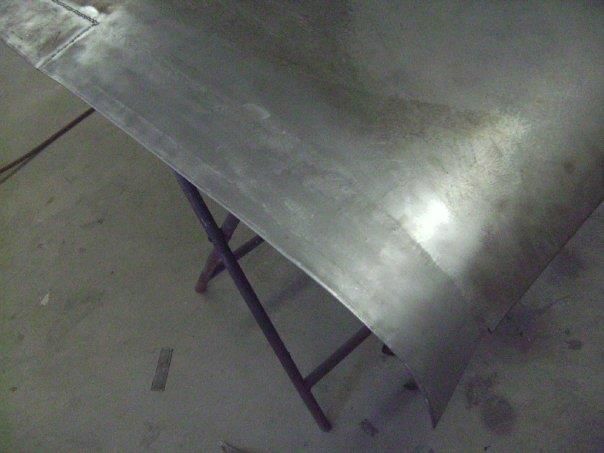 I tack welded the rear brace in place to check the placement. Once it was in the right spot, I drilled the roof skin and plug welded the skin to the brace all the way across. The spot welds were ground down and the seam was filled with SEM epoxy seam sealer. 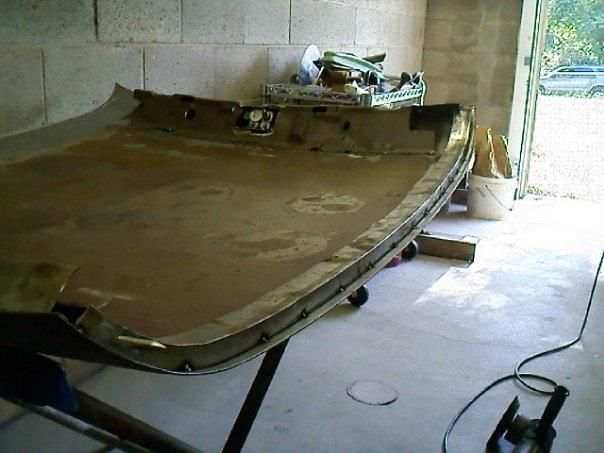 Also had to make reliefs to clear the humps in the filler panels for the down tubes. With the rubber seal in place, the humps wouldn't allow the roof panel to seat all the way down. I cut the brace and filled in the hole with sheetmetal, welded it, and ground it down smooth. 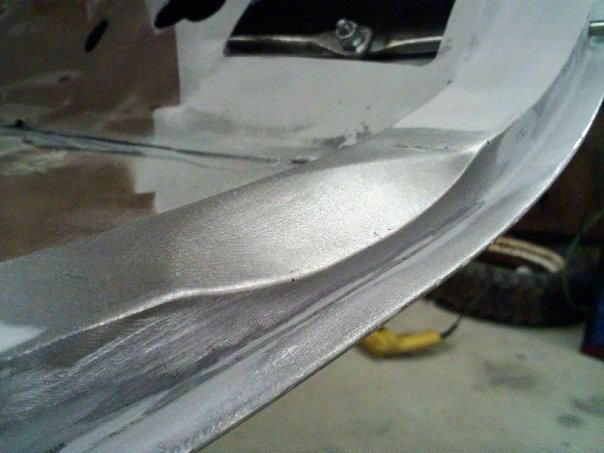 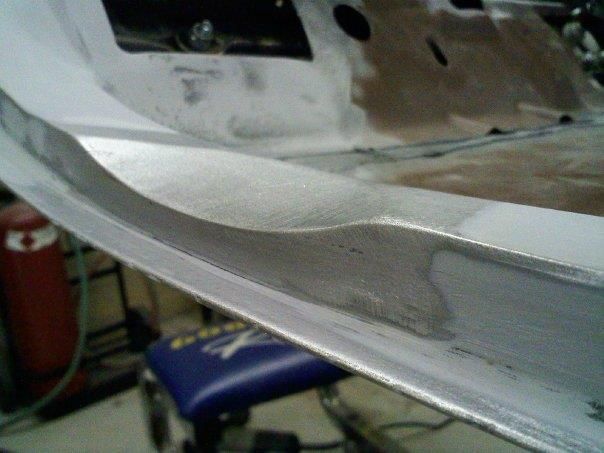  In this pic you can see what we did about the inner roof panel. To keep the overall weight down we removed the center section of the inner roof skin, left about an inch wide flange, and bonded the flange to the outer roof skin with SEM panel bond. This stiffened up the roof considerably and cut the weight almost in half. Once the front and rear braces were tied into the existing inner roof skin, the roof panel was extremely solid with no twisting or flexing. 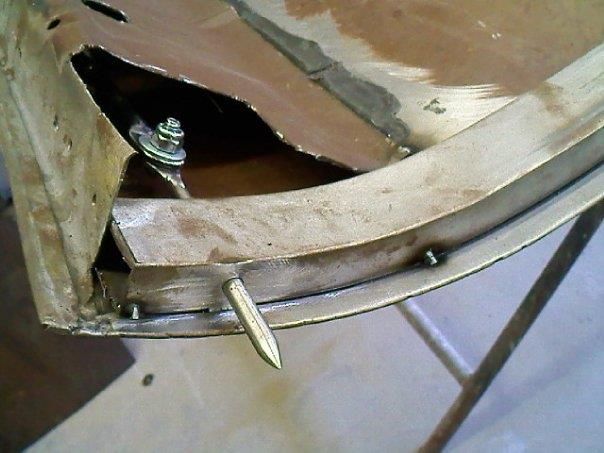
__________________
Project Goldilocks '66 C10 Short Fleet BBW Build '65 C10 Highly Detailed Stock Restoration Thread '78 Camaro Targa Roof Build '55 International Metal/Body/Paint Work '66 F100 Full Rotisserie Restoration '40 Packard 120 Convertible Coupe Restoration How To Restore and Detail an Original Gauge Cluster How To Detail Sand Body Panels, Edges, Corners, Etc Last edited by theastronaut; 12-08-2012 at 05:50 PM. |
|
|
|
|
11-18-2011, 05:18 PM
|
#9 |
|
Registered User
Join Date: May 2011
Location: Anderson SC
Posts: 3,868
|
Re: Retrospective 1978 Camaro Targa Top Project
For the latches, we had a pair of junk 80's Camaro T-tops that we took the mechanisms from. I built a bucket for the mechanisms to weld to, then welded the bucket inside the existing inner skin brace. I also had to cut the original rods and stems off and weld studs on so we could have removable rods.
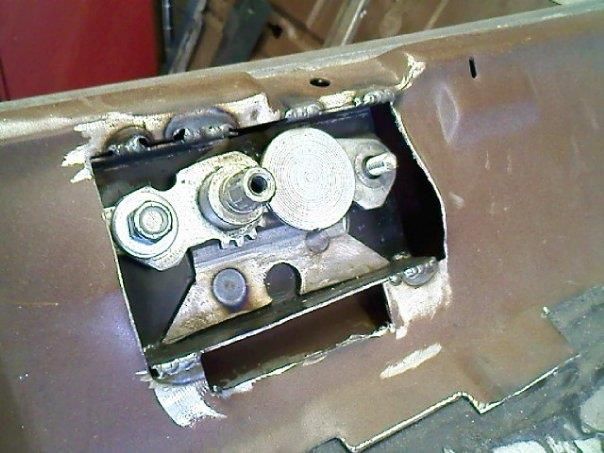 I used 1/4" stainless rod for the pins and tapered the ends. The pins slide in 2" long, 1/2" outside diameter stainless spacers welded into the roof braces. Four more spacers were welded into the body of the car for the pins to lock into. The backside of the spacers in the body were capped off and the length of the pins in the roof were trimmed so that the end of the pins would bottom out on the pins in the body. That made the whole roof self-locate front to back, keeping the gaps even everytime the roof is installed. One of the completed rods. For the final assembly, we used nyloc nuts and nylon washers to keep the linkage smooth and free from rattles. 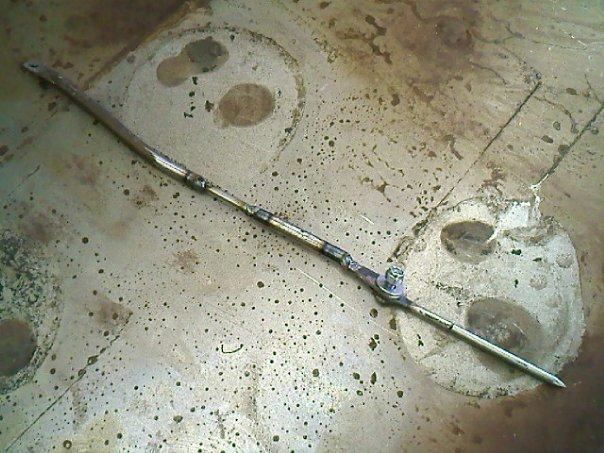 Final shaping of the front brace. The ends needed some metal added on to cover the seal completely.  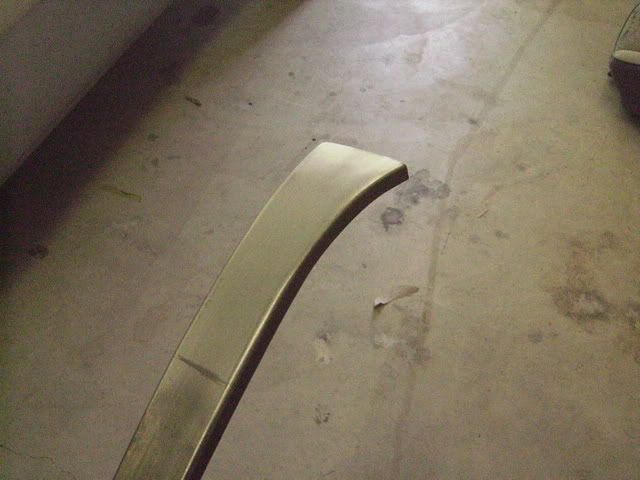 These shots show the front brace welded in. I also boxed in the existing side braces. I didn't get any pics of it but I later fully welded the bracing and boxing before doing the bodywork. The rectangle openings are access holes to be able to install/remove the latch pins and linkage. 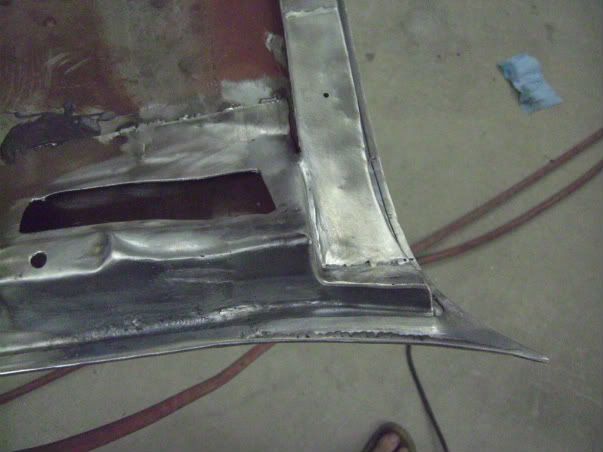 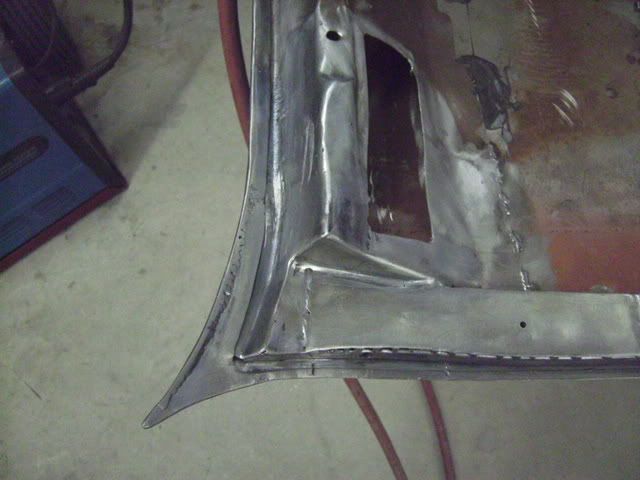 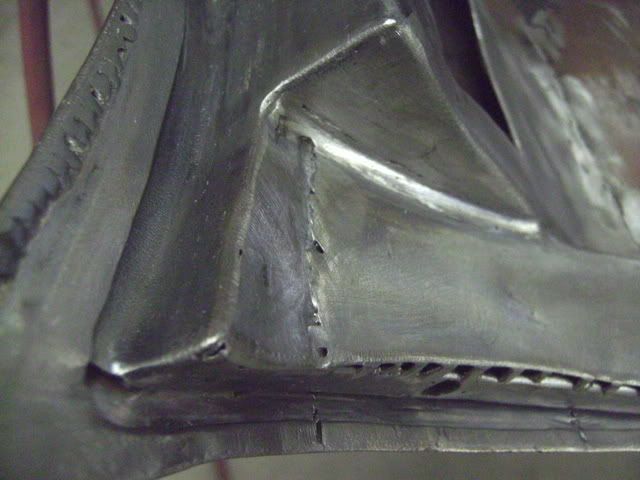
__________________
Project Goldilocks '66 C10 Short Fleet BBW Build '65 C10 Highly Detailed Stock Restoration Thread '78 Camaro Targa Roof Build '55 International Metal/Body/Paint Work '66 F100 Full Rotisserie Restoration '40 Packard 120 Convertible Coupe Restoration How To Restore and Detail an Original Gauge Cluster How To Detail Sand Body Panels, Edges, Corners, Etc Last edited by theastronaut; 12-08-2012 at 05:55 PM. Reason: Fix dead pic links |
|
|
|
|
11-18-2011, 05:46 PM
|
#10 |
|
Registered User
Join Date: May 2011
Location: Anderson SC
Posts: 3,868
|
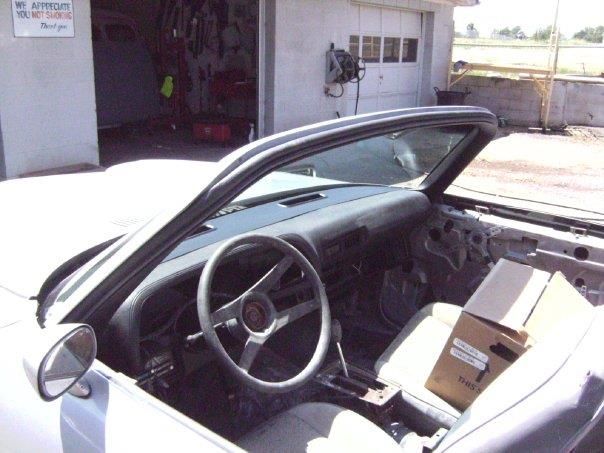
Re: Retrospective 1978 Camaro Targa Top Project
After doing the bodywork I masked it out and primed the front and rear roof pillars with Slicksand. I also primed the dash top so we could paint it.
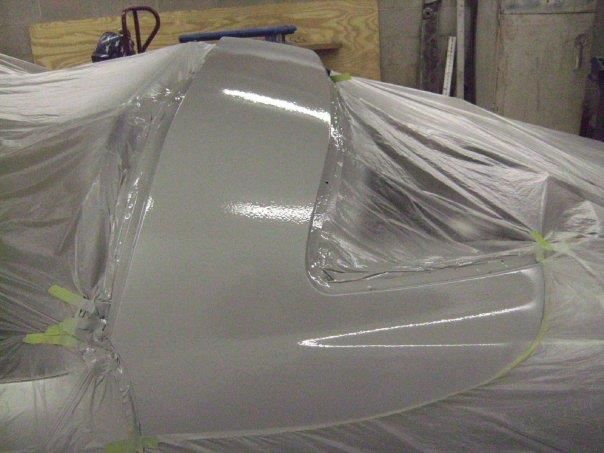  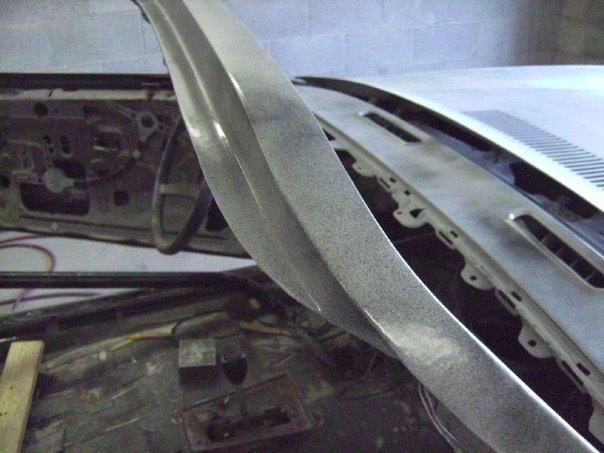 After blocking and painting the dash top. I had to weld up a hole that was cut through the original speaker hole; the owner wanted it shaved instead of adding the speaker grill back in. 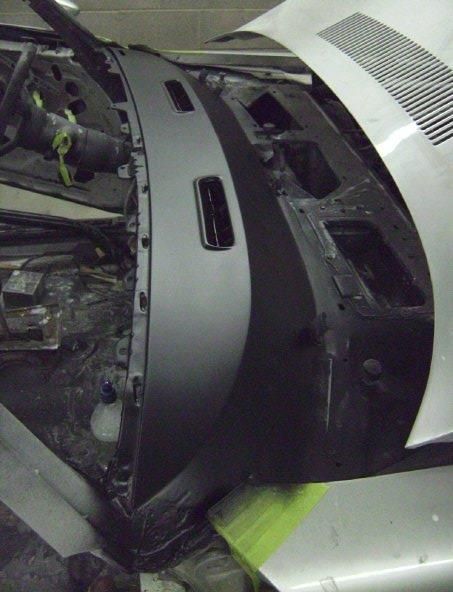 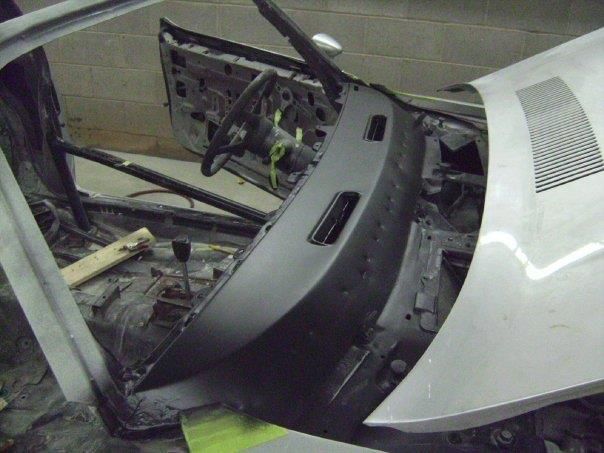 Primer blocked and ready for another round of priming and blocking. 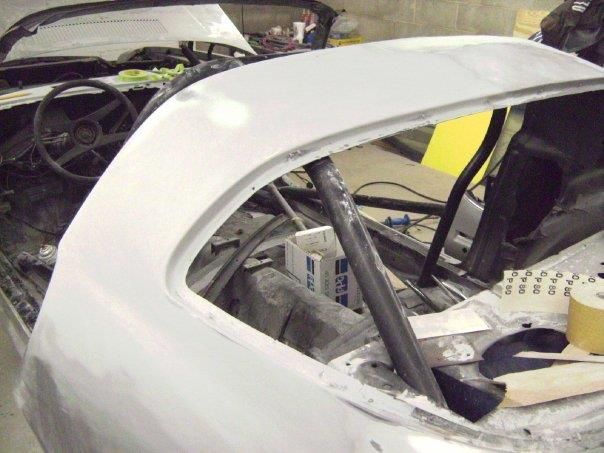  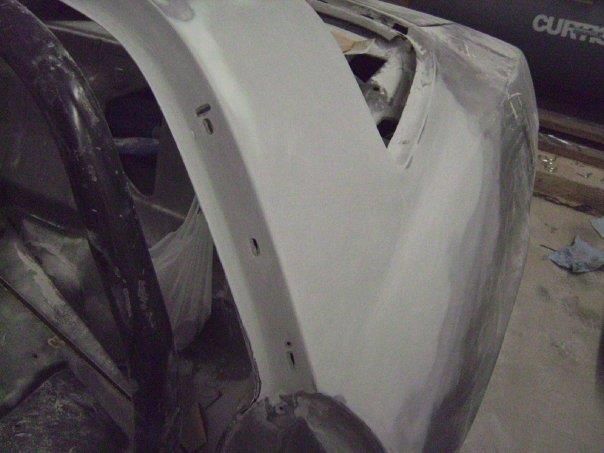 I also made a pair of windshield garnish moldings using the original post covers and two upper moldings welded together to cover the width of the w/s frame. I split the upper moldings in half, made corner peices to fill in the missing spot between the upper and post covers, and welded it all together. They got bodyworked and painted to match the dash top. Shown here mocked up with the rubber seal. 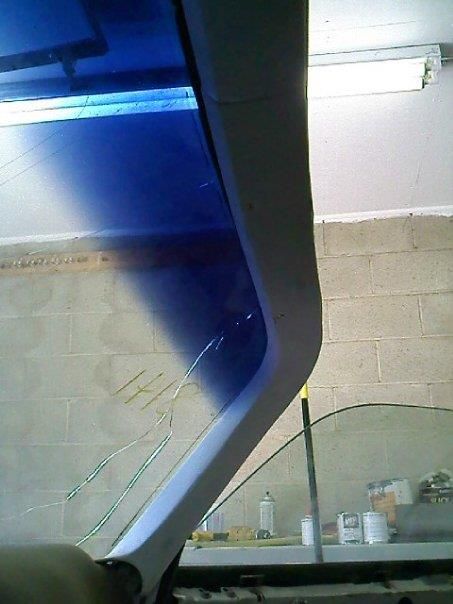 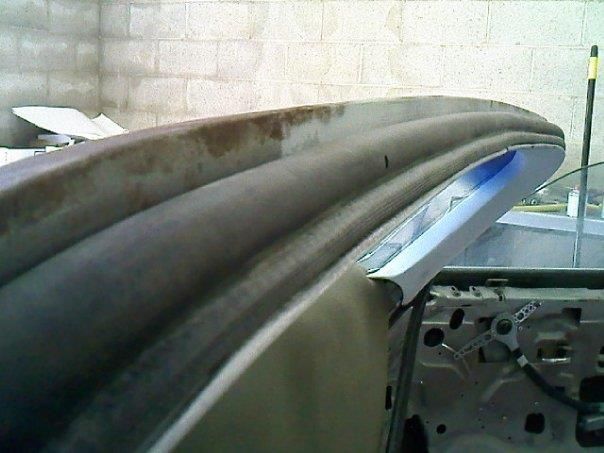 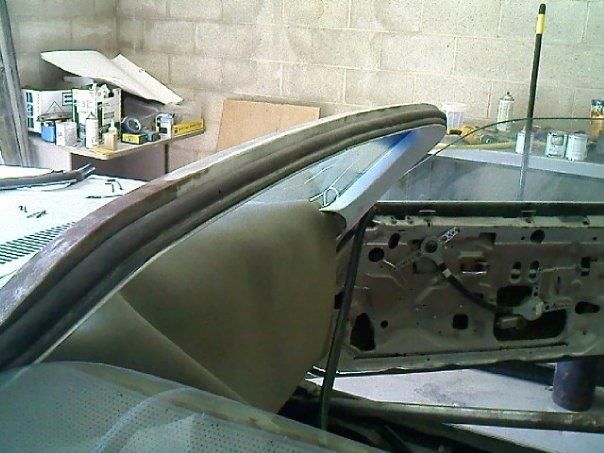
__________________
Project Goldilocks '66 C10 Short Fleet BBW Build '65 C10 Highly Detailed Stock Restoration Thread '78 Camaro Targa Roof Build '55 International Metal/Body/Paint Work '66 F100 Full Rotisserie Restoration '40 Packard 120 Convertible Coupe Restoration How To Restore and Detail an Original Gauge Cluster How To Detail Sand Body Panels, Edges, Corners, Etc Last edited by theastronaut; 12-08-2012 at 06:00 PM. Reason: Fix dead pic links |
|
|
|
|
11-18-2011, 07:39 PM
|
#11 |
|
Registered User
Join Date: Sep 2009
Location: Monroe,Iowa
Posts: 4,370
|
Re: Retrospective 1978 Camaro Targa Top Project
Wow!! I'm impressed with the work you have done,I think it's going to be a 1 of a kind and very nice.
|
|
|
|
|
11-18-2011, 08:53 PM
|
#12 |
|
Yellow truck club
Join Date: Apr 2006
Location: Barrie Ontario
Posts: 2,080
|
Re: Retrospective 1978 Camaro Targa Top Project
Wow very impressed!
__________________
................................................................ Brian ......  My hub garage address http://www.hubgarage.com/mygarage/59apache I gue$$ everything has it'$ price ALL GONE NOW   59 Chev Apache 59 Chev Apache PRAISE THE LOWERED 350 700r lokar shifter power MII front end, shockwaves tilt, 4 wheel discs 4-link and bags 10 bolt limited |
|
|
|
|
11-18-2011, 09:01 PM
|
#13 |
|
Registered User
Join Date: Jul 2010
Location: Ontario CA
Posts: 317
|
Re: Retrospective 1978 Camaro Targa Top Project
that is some seriously b!tchen metal work.....very nice craftmanship sir! Only one thing that sticks out to me would be re-fabbing a better/custom roll bar top hoop and hide it (as in rearward what maybe 4-5") behind your excellent work. Tuck it in nice so it almost disappears....
Wish i had your skillz on the metal work. Tim
__________________
Ontario CA70 Chevy Shortbed Fleetside C-10 71 Chevy Longbed Fleetside C-20 (sold  ) )63 Chevy II Nova SS 02 Ford F-150 Harley-Davidson supercharged 5.4 2000 Harley Roadking Hot Bike Baggers Mag Shoot http://s263.photobucket.com/albums/i...oot/?start=all some truck lettering & flame jobs http://www.flickr.com/photos/4950319...7602894916215/ |
|
|
|
|
11-18-2011, 09:38 PM
|
#14 |
|
Senior Member
Join Date: Jun 2005
Location: Clovis Ca.
Posts: 3,311
|
Re: Retrospective 1978 Camaro Targa Top Project
Very nice work man! I think GM should have done a targa top on the new Camaro myself.
__________________
Classic Trucks Link http://www.classictrucks.com/feature...uck/index.html 1958 GMC.Project Build http://67-72chevytrucks.com/vboard/s...d.php?t=162816 1966 Chevelle Build http://67-72chevytrucks.com/vboard/s...d.php?t=443576 Video http://www.youtube.com/watch?v=prrNKo8F7Zw#GU5U2spHI_4 |
|
|
|
|
11-18-2011, 10:21 PM
|
#15 |
|
Registered User
Join Date: May 2011
Location: Anderson SC
Posts: 3,868
|
Re: Retrospective 1978 Camaro Targa Top Project
Thanks dudes!! 70-Shorty, I definitly agree about the main hoop being moved back so it would be hidden. It was already in the car when the owner brought it so we had to live with it.
I'll post some more pics for you guys once I get back to my computer. Posted via Mobile Device
__________________
Project Goldilocks '66 C10 Short Fleet BBW Build '65 C10 Highly Detailed Stock Restoration Thread '78 Camaro Targa Roof Build '55 International Metal/Body/Paint Work '66 F100 Full Rotisserie Restoration '40 Packard 120 Convertible Coupe Restoration How To Restore and Detail an Original Gauge Cluster How To Detail Sand Body Panels, Edges, Corners, Etc |
|
|
|
|
11-19-2011, 06:17 PM
|
#16 |
|
Registered User
Join Date: May 2011
Location: Anderson SC
Posts: 3,868
|
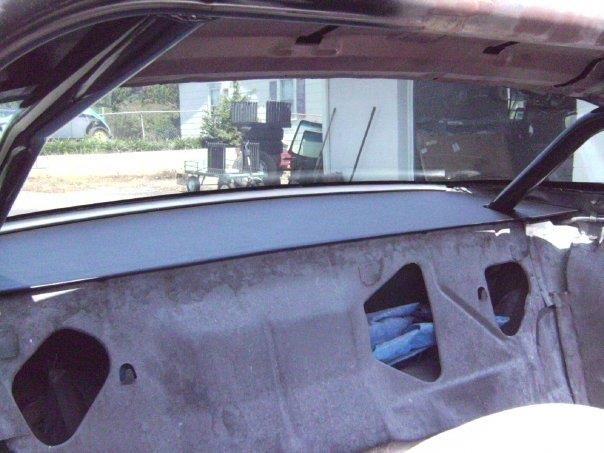
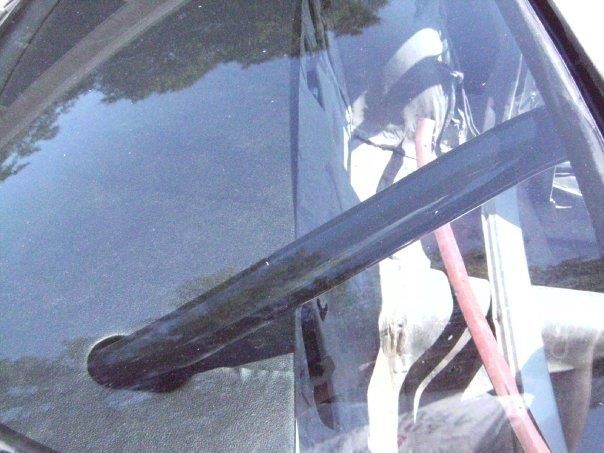
Re: Retrospective 1978 Camaro Targa Top Project
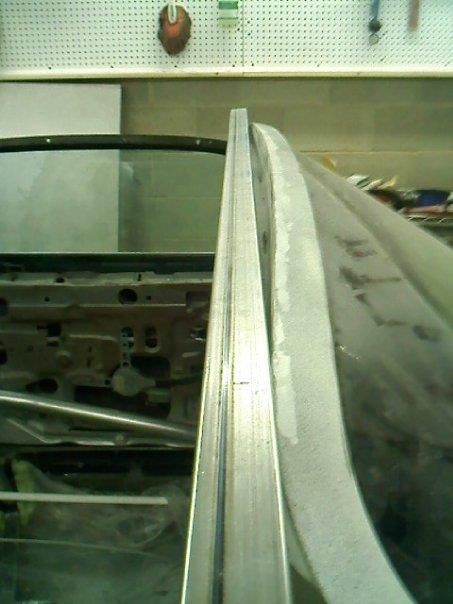
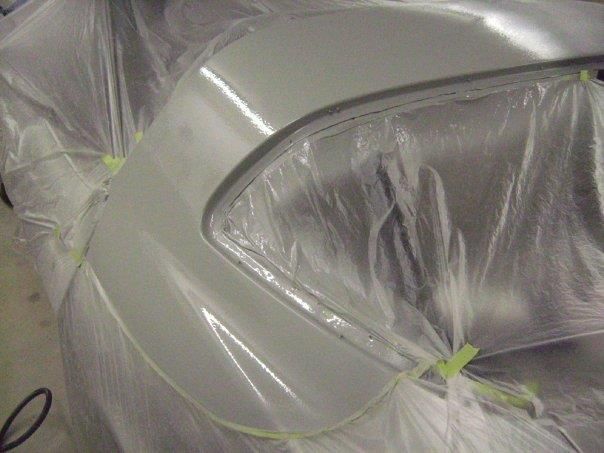
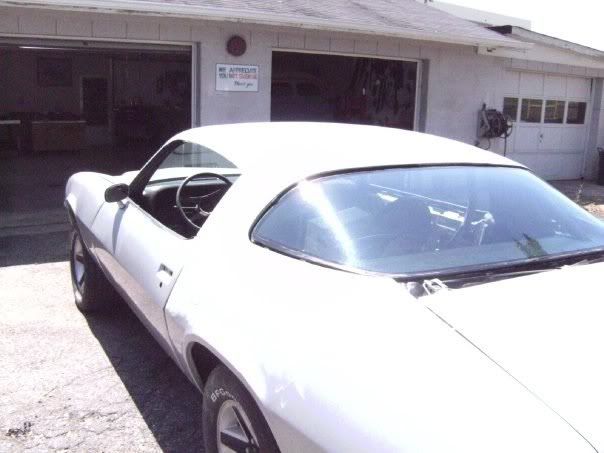
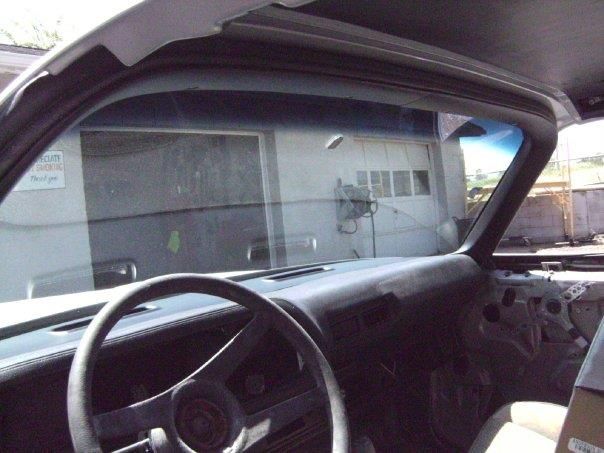
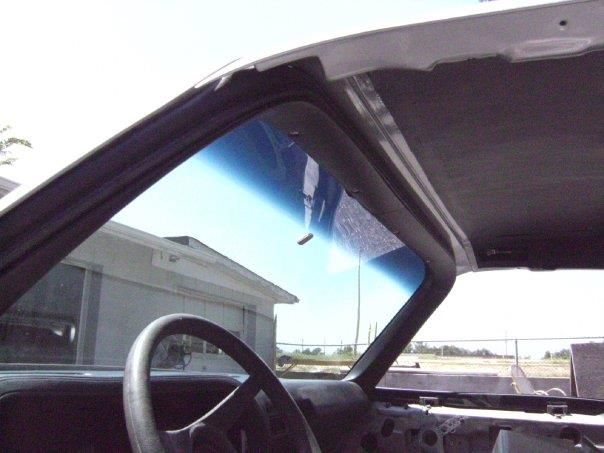
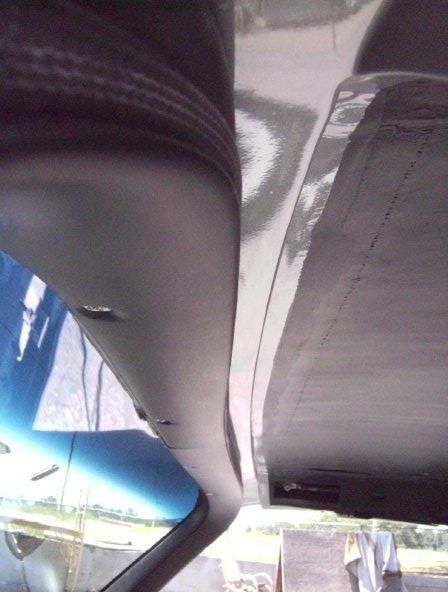
With the front and rear braces in place, I was able to test fit the roof and fine tune the front and rear gaps with 1/8" welding rods welded to the edges and ground down to even out the gap.
  With the roof off you can see holes of the stainless spacers that I welded into the w/s frame and rear roof pillar for the latches to lock into. The back of these spacers were welded up solid so that the latch rods would bottom out in the spacers. The rods were trimmed to just the right length so when they are bottomed out, the roof would be centered in the opening front to rear, keeping the gaps even. 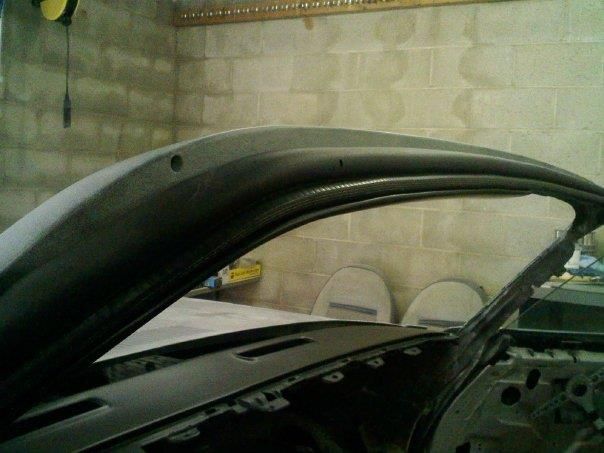 The inside garnish moldings painted. 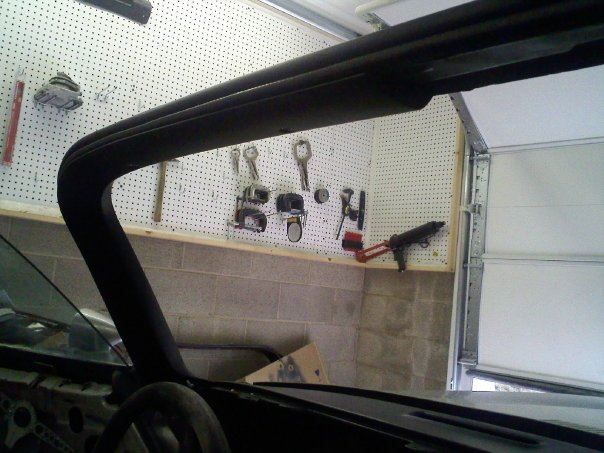 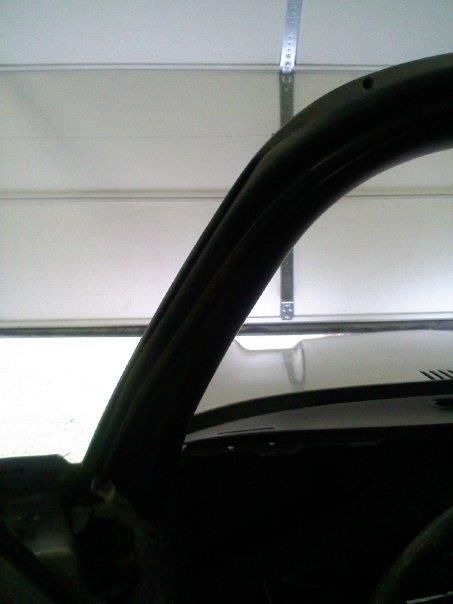 With all of the metal work done, the roof was bodyworked and primed. I blocked and primed it a couple times to get it straight. The owner had a paint shop already lined up to paint the whole car but wanted us to go ahead and paint the inside of the lift off roof so it could leave fully assembled and working. I finish welded the inside braces and original side channels, then bodyworked and primed the underside. It got blocked and primed again, then painted to match the color code provided by the owner. Not shown in the photos, but we also reworked the roof rail seal/channel and shaved the factory window opening molding. Here's the pics of top in primer. We still had to install the front and rear glass, the complete dash, and the roof rail channels and seals. 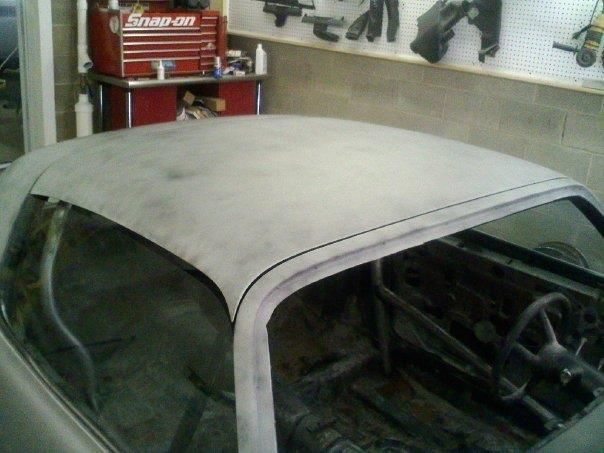 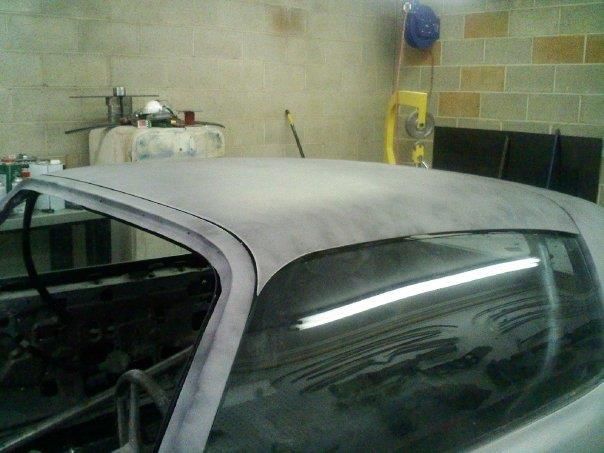 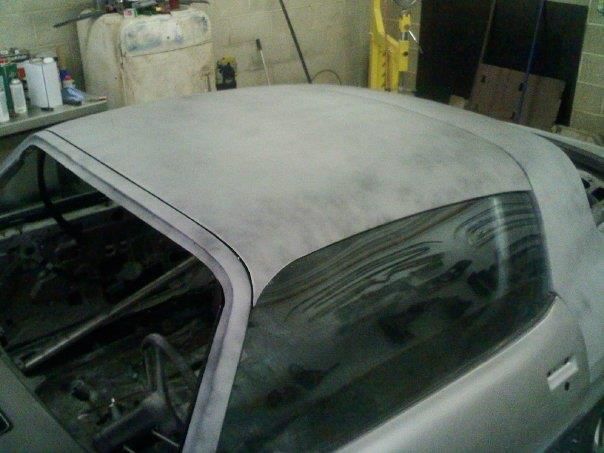 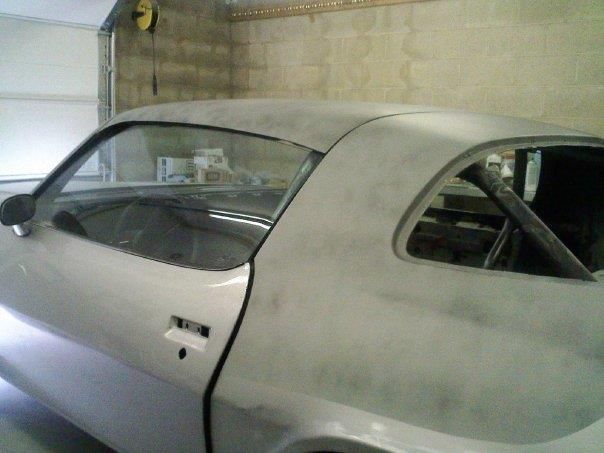 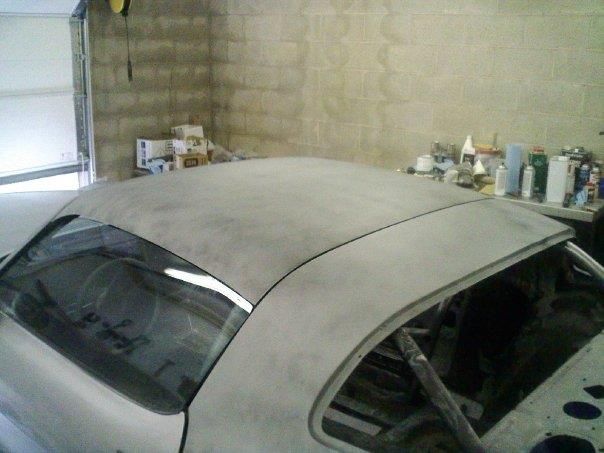 Dead even gaps front and rear. 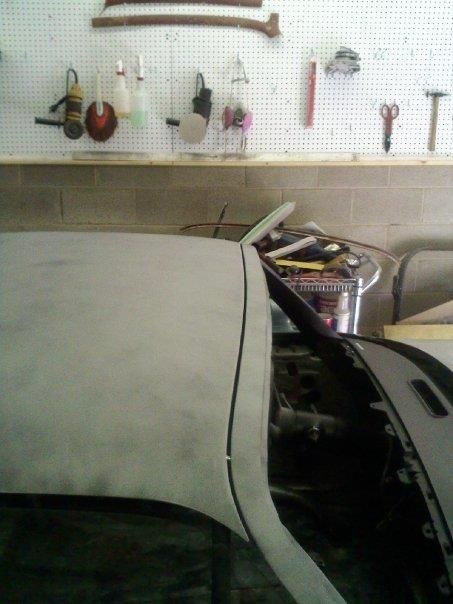 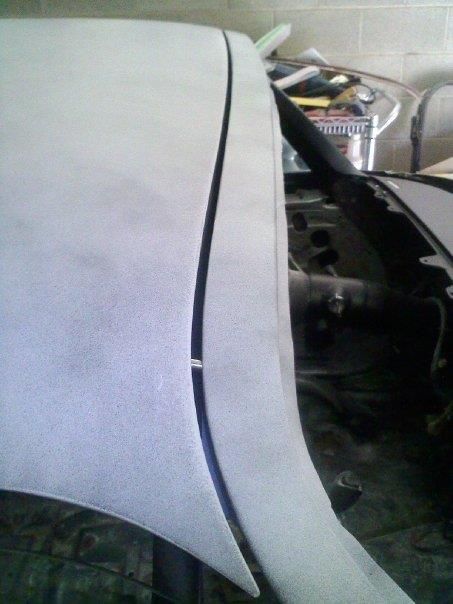 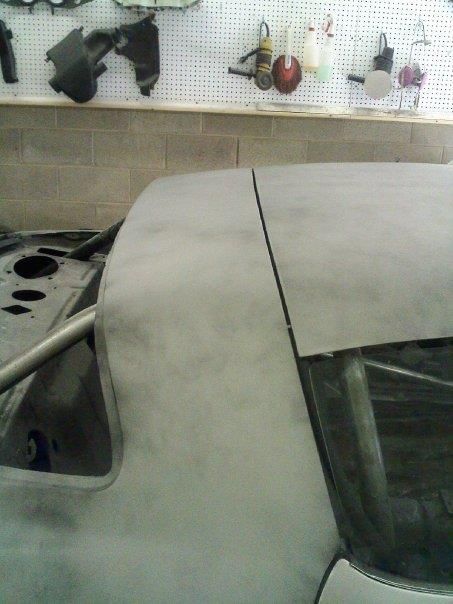 For the underside of the roof, I sprayed the center section semigloss black, then masked the center out and painted the edges silver. 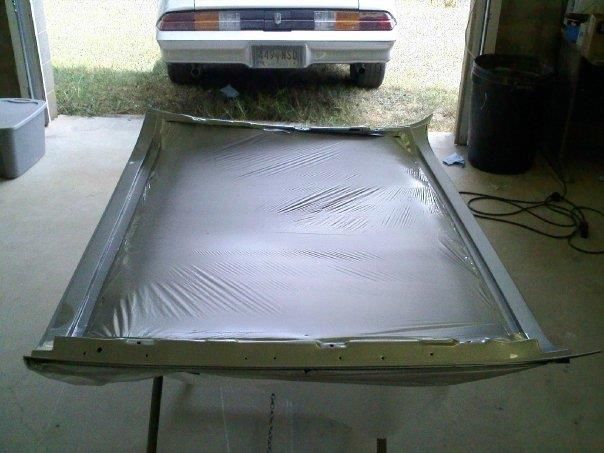 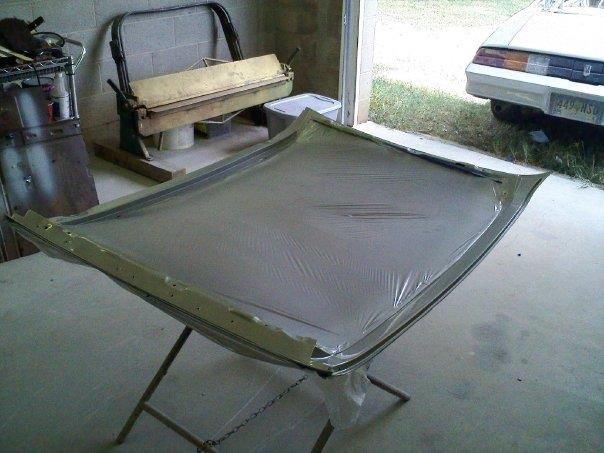 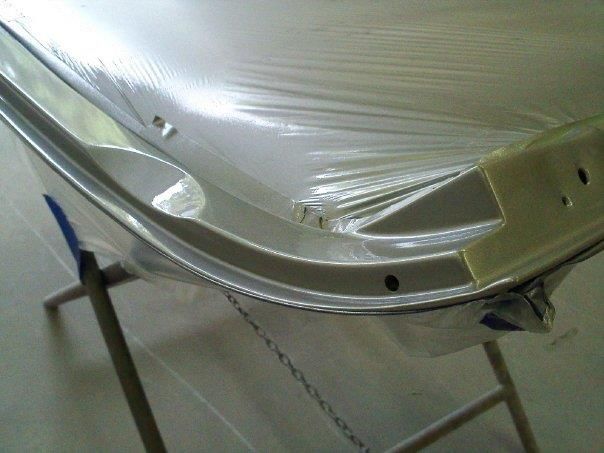 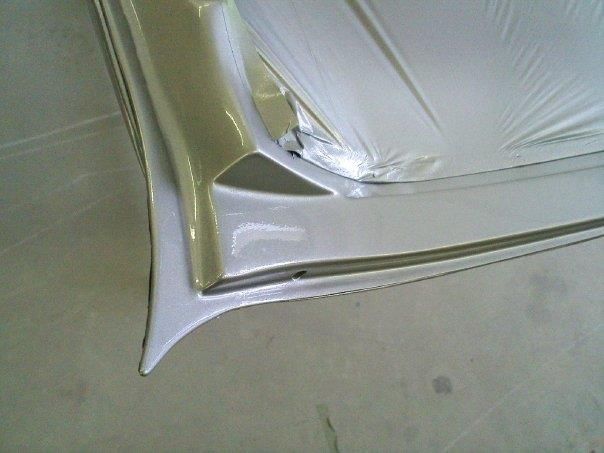 Unmasked with one of the windshield garnish moldings. 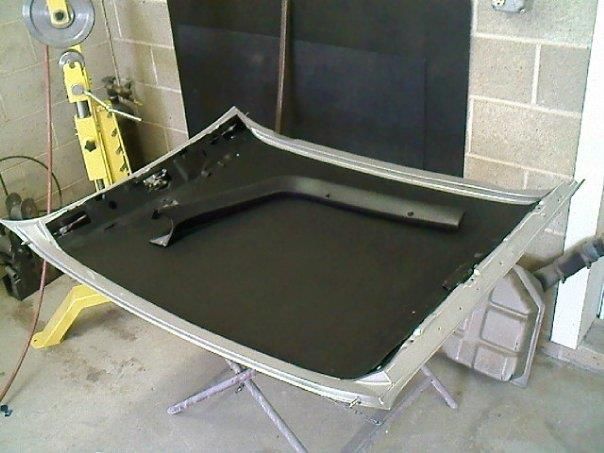 Reassembled with polished latch pins. 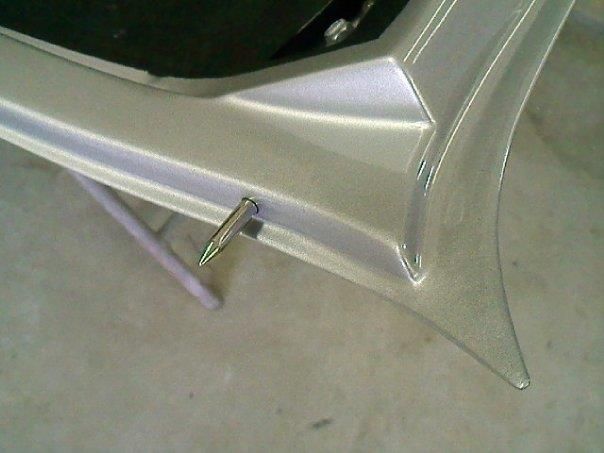  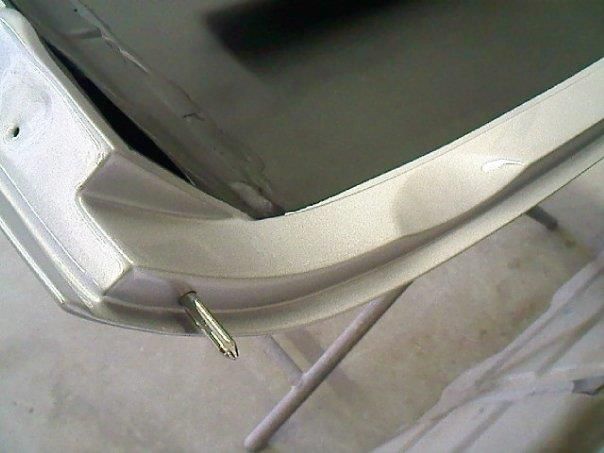 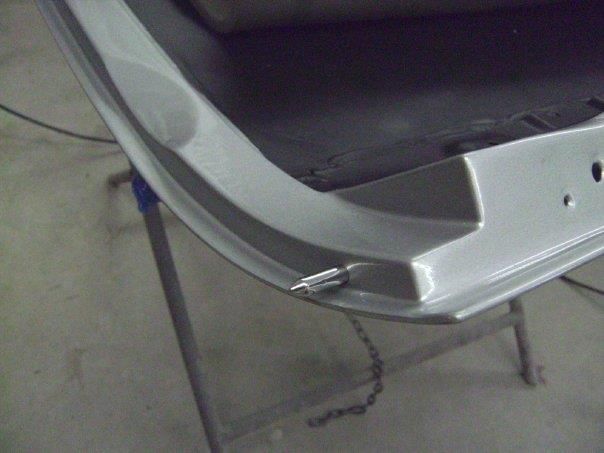 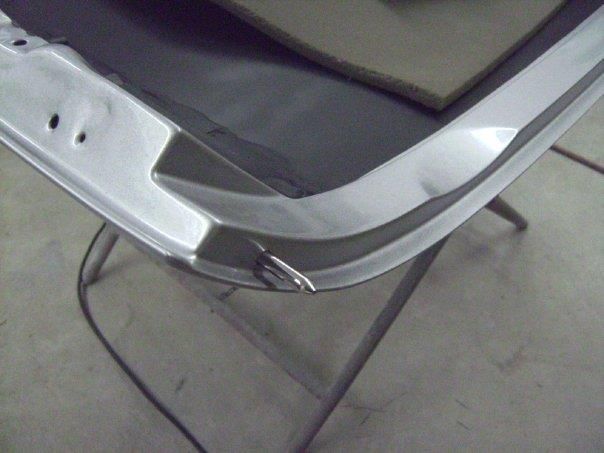 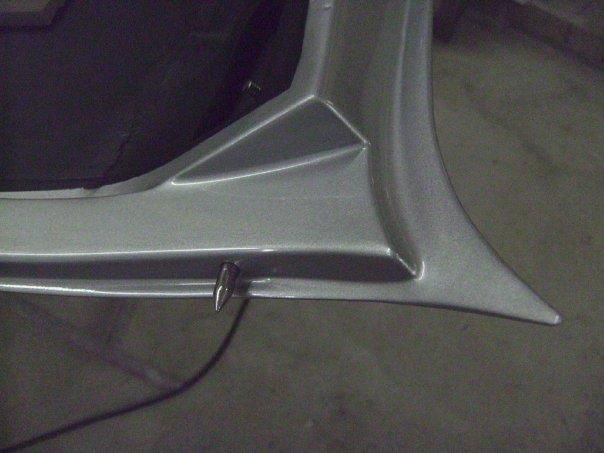 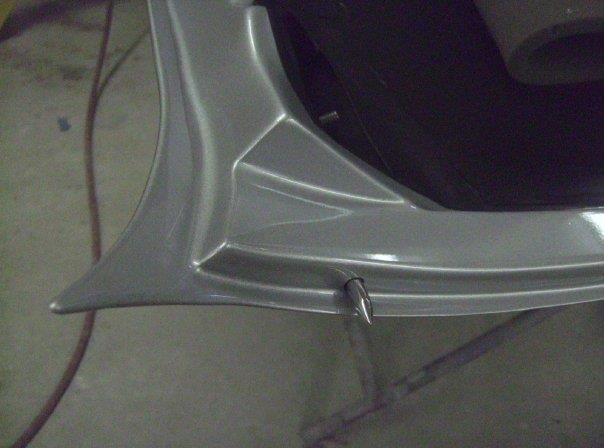
__________________
Project Goldilocks '66 C10 Short Fleet BBW Build '65 C10 Highly Detailed Stock Restoration Thread '78 Camaro Targa Roof Build '55 International Metal/Body/Paint Work '66 F100 Full Rotisserie Restoration '40 Packard 120 Convertible Coupe Restoration How To Restore and Detail an Original Gauge Cluster How To Detail Sand Body Panels, Edges, Corners, Etc Last edited by theastronaut; 12-08-2012 at 06:12 PM. Reason: Fix dead pic links |
|
|
|
|
11-19-2011, 06:24 PM
|
#17 |
|
Account Suspended
Join Date: Mar 2007
Location: san bernardino ca. everywhere
Posts: 3,938
|
Re: Retrospective 1978 Camaro Targa Top Project
sweet

|
|
|
|
|
11-19-2011, 06:25 PM
|
#18 |
|
Registered User
Join Date: May 2011
Location: Anderson SC
Posts: 3,868
|
Re: Retrospective 1978 Camaro Targa Top Project
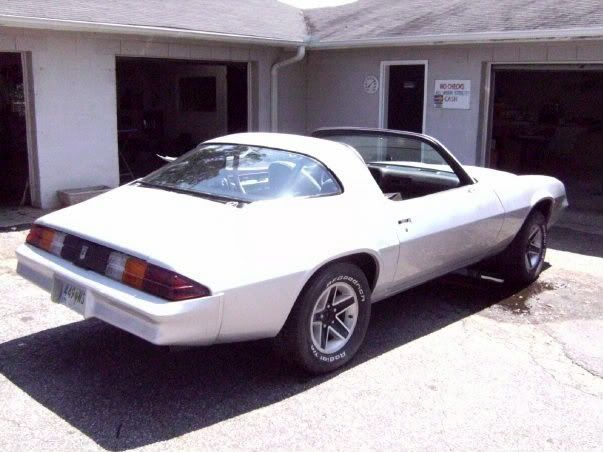
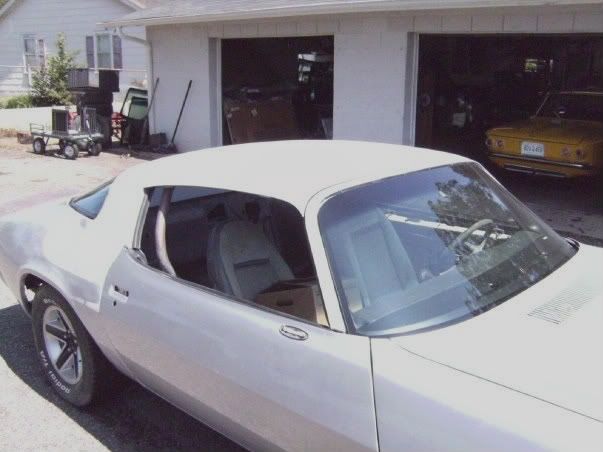
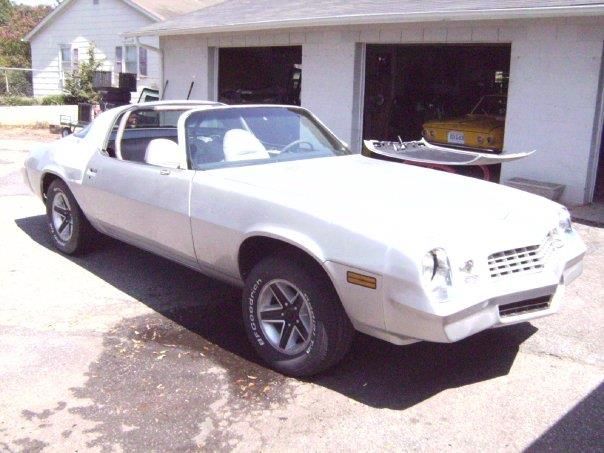
And a few pics right before the owner picked it up.
__________________
Project Goldilocks '66 C10 Short Fleet BBW Build '65 C10 Highly Detailed Stock Restoration Thread '78 Camaro Targa Roof Build '55 International Metal/Body/Paint Work '66 F100 Full Rotisserie Restoration '40 Packard 120 Convertible Coupe Restoration How To Restore and Detail an Original Gauge Cluster How To Detail Sand Body Panels, Edges, Corners, Etc Last edited by theastronaut; 12-08-2012 at 06:11 PM. |
|
|
|
|
11-19-2011, 06:41 PM
|
#19 | |
|
Registered User
Join Date: May 2011
Location: Anderson SC
Posts: 3,868
|
Re: Retrospective 1978 Camaro Targa Top Project
Quote:
__________________
Project Goldilocks '66 C10 Short Fleet BBW Build '65 C10 Highly Detailed Stock Restoration Thread '78 Camaro Targa Roof Build '55 International Metal/Body/Paint Work '66 F100 Full Rotisserie Restoration '40 Packard 120 Convertible Coupe Restoration How To Restore and Detail an Original Gauge Cluster How To Detail Sand Body Panels, Edges, Corners, Etc |
|
|
|
|
|
11-19-2011, 06:45 PM
|
#20 |
|
Account Suspended
Join Date: Mar 2007
Location: san bernardino ca. everywhere
Posts: 3,938
|
Re: Retrospective 1978 Camaro Targa Top Project
no problem, you deserve the compliments for the great work you did, and fixing the previous work as well

|
|
|
|
|
11-19-2011, 09:07 PM
|
#21 |
|
Registered User
Join Date: Nov 2011
Location: kinderhook, NY
Posts: 15
|
very nice work!
I am a long time Camaro guy and this is one of the best custom jobs I seen done to a second gen Camaro. Kudos to you.
|
|
|
|
|
11-19-2011, 09:44 PM
|
#22 |
|
Registered User
Join Date: Jul 2010
Location: memphis
Posts: 2,537
|
Re: Retrospective 1978 Camaro Targa Top Project
That looks killer
__________________
1981 C-10 (Pop's) 1978 Camaro 2006 Lacrosse |
|
|
|
|
11-19-2011, 10:55 PM
|
#23 |
|
Truck and auto performance nut
Join Date: Feb 2007
Location: McKinney,Texas
Posts: 3,848
|
Re: Retrospective 1978 Camaro Targa Top Project
Very nice. I wanted to do that to my '78 too! I've seen one other on the road many years ago, in Houston.
__________________
Kurt - '68 GMC short step - NIB '09 LY6 6.0L crate motor w/mods, NIB '12 crate 4L85e w/billet 3k stall Circle D, 3.73 posi 12 bolt, DynaTech f-swap headers, 3/4 drop, handling mods, etc. - my toy '72 Chevy LWB C-10 Highlander - 350/350 ps/pb/tilt/ac - not original but close '06 Chevy TrailBlazerSS - LS2/4L70e - little black hot rod SUV - my DD '18 Kia Sorento - wife's econo-driver '95 Chevy S10 - reg cab shortbed, LS, 4.3, auto... my '68's powertrain and chassis build -links broken A surprise phase - carb to efi -links broken |
|
|
|
|
11-20-2011, 04:18 AM
|
#24 |
|
the pollock
Join Date: May 2008
Location: abilene, texas
Posts: 4,423
|
Re: Retrospective 1978 Camaro Targa Top Project
dude.. i was linked this from www.nastyz28.com.. those guys have a thread going about your thread here.
http://www.nastyz28.com/forum/showthread.php?t=228205 nice work man. can you tell us what you charged for this?
__________________
Jack of ALL trades, Master of none.. (but one... procrastination) Army vet 02-08 RIP El Jay! Miss you brother! http://67-72chevytrucks.com/vboard/s...d.php?t=343538 http://67-72chevytrucks.com/vboard/s...d.php?t=386042 |
|
|
|
|
11-20-2011, 10:28 AM
|
#25 | |
|
Registered User
Join Date: May 2011
Location: Anderson SC
Posts: 3,868
|
Re: Retrospective 1978 Camaro Targa Top Project
Quote:
Thanks for that link! I'm glad the camaro guys like it!! IIRC, we charged around 10 g's. That included fixing the bad roof skin seams (inner and outer), cutting and repositioning the front and rear w/s openings to fit the glass, all the fab work on the roof, the bodywork and paint, new front w/s installed, used rear glass that we buffed to look like new, bodyworking and painting the dash, installing new door hinge pins and adjusting the doors and side windows, modifying the roof rail moldings and seals, shaving the side window roof trim, and reworking the quarter panel/door jamb area due to poor previous repair. I'm probably missing something but that's the things I can think of off the top of my head. Starting with a clean roof would make the job much easier/quicker and less expensive if we built another one. Posted via Mobile Device
__________________
Project Goldilocks '66 C10 Short Fleet BBW Build '65 C10 Highly Detailed Stock Restoration Thread '78 Camaro Targa Roof Build '55 International Metal/Body/Paint Work '66 F100 Full Rotisserie Restoration '40 Packard 120 Convertible Coupe Restoration How To Restore and Detail an Original Gauge Cluster How To Detail Sand Body Panels, Edges, Corners, Etc |
|
|
|
|
|
| Bookmarks |
| Thread Tools | |
| Display Modes | |
|
|


 Linear Mode

