
|
Register or Log In To remove these advertisements. |
|
|
|
|||||||
 |
|
|
Thread Tools | Display Modes |
 02-25-2008, 03:11 AM
|
#1 |
|
Eat My Rust
Join Date: Jan 2007
Location: Cypress, Texas
Posts: 3,362
|
Direct fit clock, parts #'s included. (Cadillac Escalade, tut)
Got another freebie from my dad's work. It's a clock out of an Escalade, replaced because it had a broken lense. Basically, when a part is removed from a car, unless Cadillac wants it back, once it clears warrenty, it's 1st come, 1st serve for employees/
 It comes in this whole assembly like this: 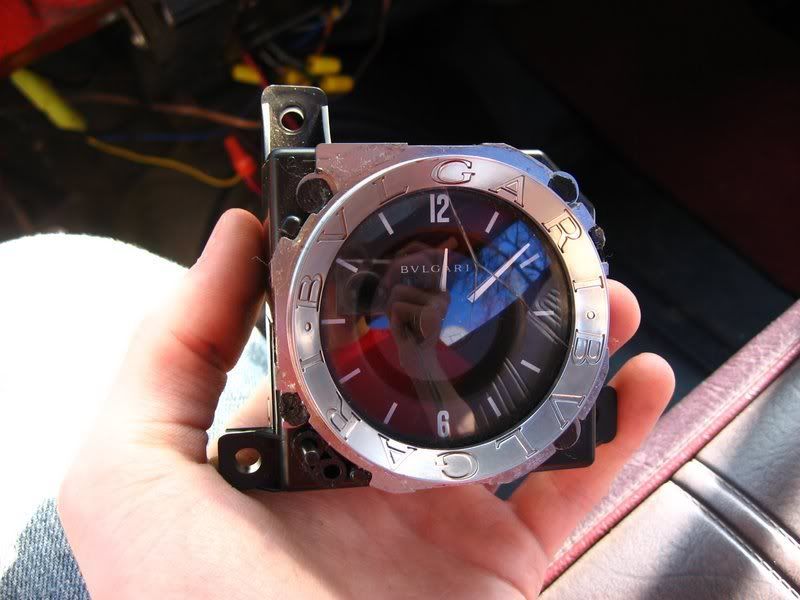 But, with two easy to pop tabs, take out the clock mechanism. 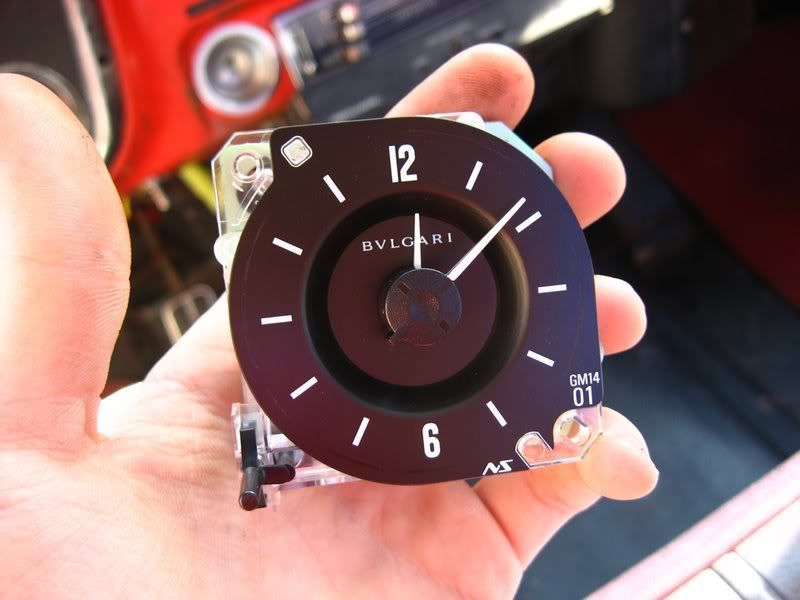 Fits right in any of the bottom 4 guage holes in the higher-optioned clusters: 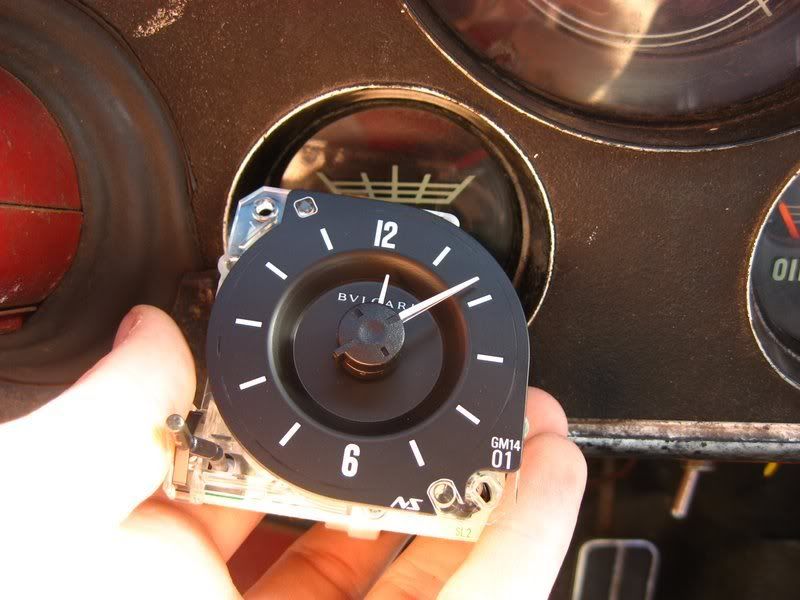 The size of the face that shows through the gauge cluster is exactly the same as what shows through the assembly it came it. Besides mounting, the only mod needed is to either drill a hole in the cluster for the time setting button, or just wire another push-button switch in a different location. It's a 3 pin connector on the back. One for power, one for ground, and one from the headlight switch IIRC so that it lights up with the head lights.  Also, another rectangle one I've got, same story as before with a cracked lense. Fits pretty good into the ash tray slot. With some sheet metal to fill in the space, I'm sure it would look sweet.  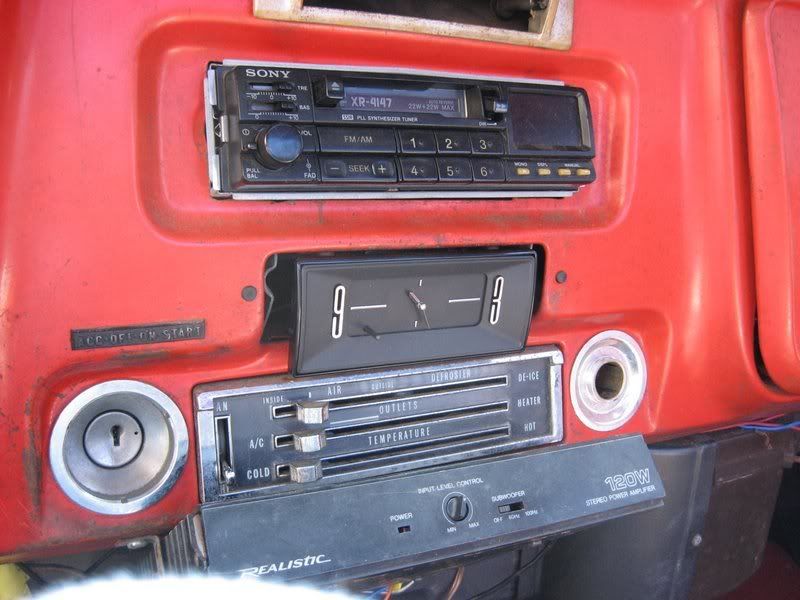 
Last edited by texanidiot25; 02-25-2008 at 09:23 AM. |

|

|
|
02-25-2008, 03:20 AM
|
#2 |
|
State of Confusion!
  Join Date: Jul 2002
Location: Gulfport, MS USA
Posts: 46,644
|
Re: Direct fit clock, parts #'s included.
Good information
Thanks You'll have to show us the final product in the vacuum gauge spot!
__________________
Bill 1970 Chevy Custom/10 LWB Fleetside 2010 Toyota Tacoma PreRunner SR5 Double Cab - DD Member of Louisiana Classic Truck Club (LCTC) Bill's Gallery Life isn't tied with a bow, but it's still a gift. Live simply. Love generously. Care deeply. Speak kindly. Leave the rest to God! |
|
|
|
|
02-25-2008, 03:28 AM
|
#3 |
|
Eat My Rust
Join Date: Jan 2007
Location: Cypress, Texas
Posts: 3,362
|
Re: Direct fit clock, parts #'s included.
I'll see about pulling out the cluster this weekend. Dunno when I'll get around to doing it... Got to get my truck driving before I worry about the time
 Is the dashes and lines on the stock gauge printed on the lens, or on the black piece behind it? Last edited by texanidiot25; 02-25-2008 at 03:29 AM. |
|
|
|
|
02-25-2008, 05:42 AM
|
#4 |
|
its all about the +6 inches
Join Date: Jan 2001
Location: Hilliard Ohio
Posts: 2,693
|
Re: Direct fit clock, parts #'s included.
on the lens, you can use a razor blade to remove the lines, or some automotive polish.
|
|
|
|
|
02-25-2008, 05:46 AM
|
#5 |
|
Registered User
Join Date: Feb 2007
Location: Cali Central Coast
Posts: 5,191
|
Re: Direct fit clock, parts #'s included.
I'm not lovin' that clock in the ashtray slot -
__________________
'67 SWB Fleetside ZZ4/350/Tremec 5-speed/4link/Scott's IFS - and fun as heck! SOLD  Click here to support the board Philippians 4: 6-7 Last edited by dan42; 02-25-2008 at 05:48 AM. |
|
|
|
|
02-25-2008, 08:11 AM
|
#6 | ||
|
Eat My Rust
Join Date: Jan 2007
Location: Cypress, Texas
Posts: 3,362
|
Re: Direct fit clock, parts #'s included.
Quote:
Quote:
Curiosity killed the Vacuum gauge, I went ahead and did it.  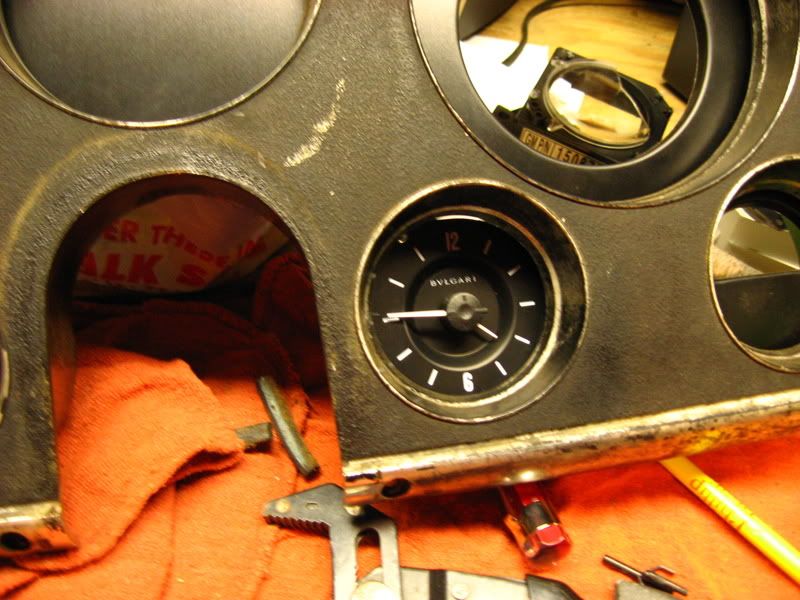 I'll write a tut for it. |
||
|
|
|
|
02-25-2008, 08:39 AM
|
#7 |
|
Eat My Rust
Join Date: Jan 2007
Location: Cypress, Texas
Posts: 3,362
|
Re: Direct fit clock, parts #'s included.
How to add a Cadillac Escalade (2nd gen) round clock to the optional gauge holes (vacuum gauge in my case)
We start off with the round analoge clock from a 2nd gen Escalade.  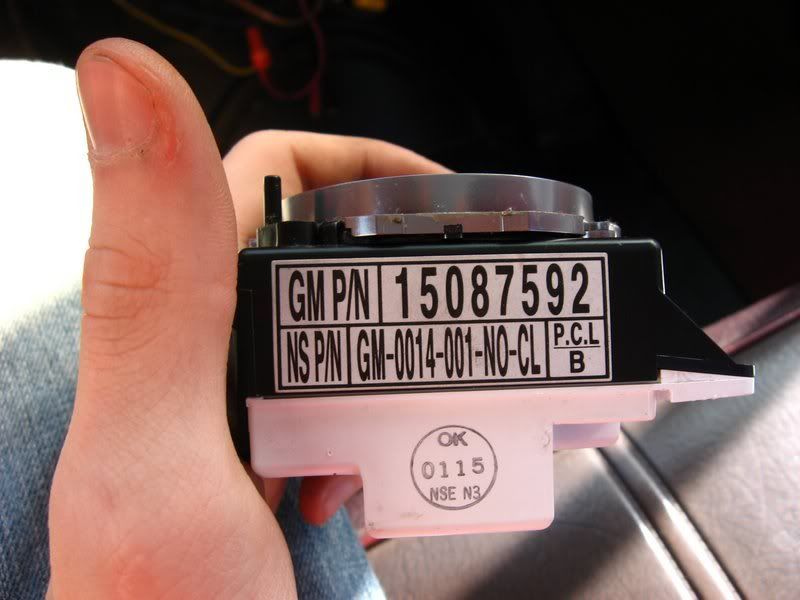 Parts # ^ Pop it out of the case: 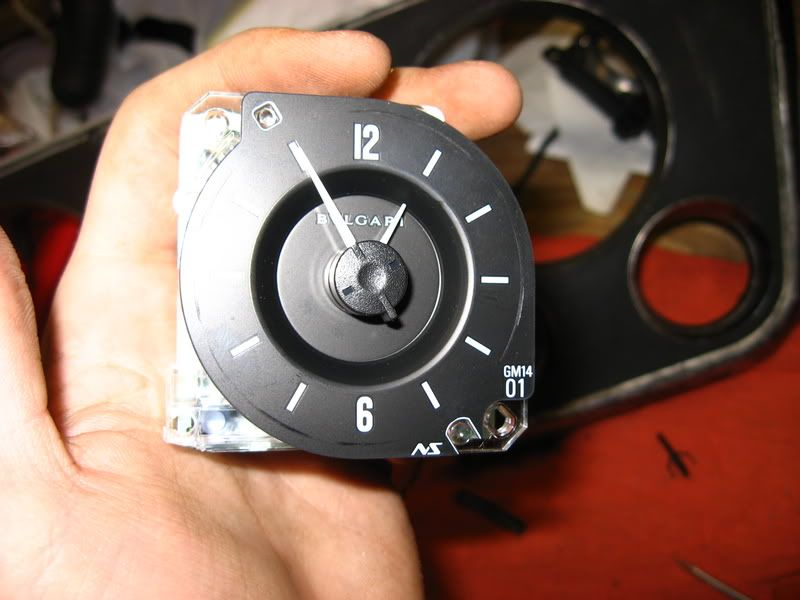 Like this, it won't fit into the cluster, due to the lower left corner, the reset button. Pop out the little push pin, it won't be used. Then, carefully pry up the face of the clock, and rotate it 180 degrees around. Eh, yeh, smart idear eh?  (ignore the the minute hand position, to be fixed later) (ignore the the minute hand position, to be fixed later)The locating tab at the top left is too large for the hole in the face of the clock:  Use a 5/32 drill bit to widen the hole. The plastic is so thin, you can do this by hand. 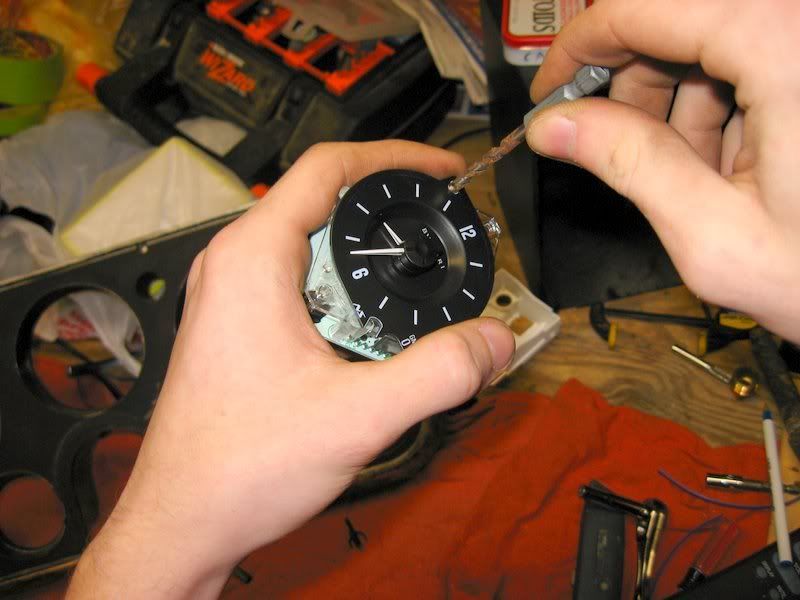 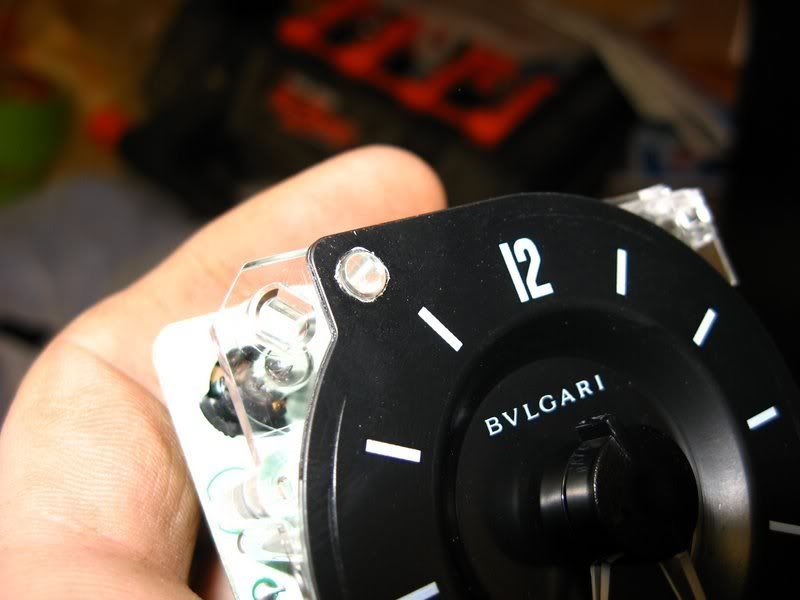 Then, use an x-acto knife to cut down the plastic rib that is next to the lower right mounting hole. 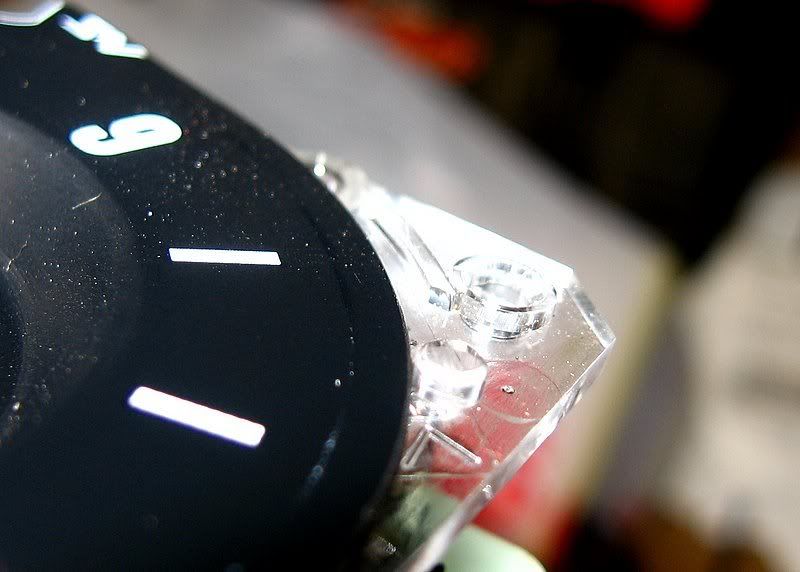 Place a drop of super glue on the lower right corner, and on the top left, and you should end up with the face of the clock oriented like this: 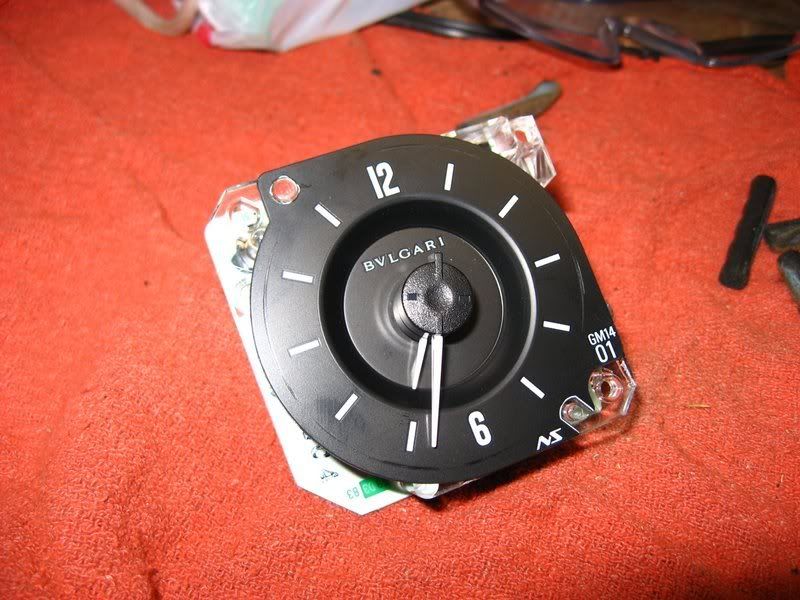
Last edited by texanidiot25; 02-25-2008 at 08:48 AM. |
|
|
|
|
02-25-2008, 08:46 AM
|
#8 |
|
Eat My Rust
Join Date: Jan 2007
Location: Cypress, Texas
Posts: 3,362
|
Re: Direct fit clock, parts #'s included.
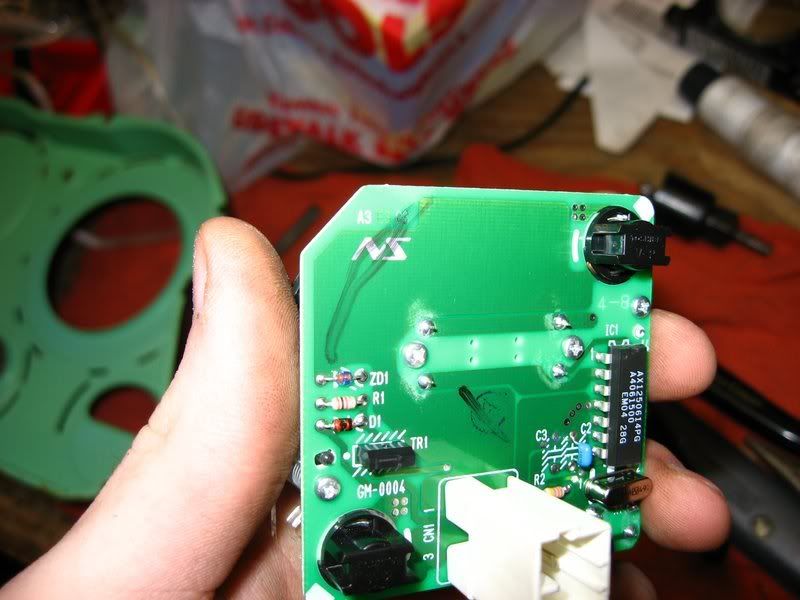
Next up is to trim down the PCB of the clock. Trace it out, and cut it out. I used a dremel cut off wheel. Though, do it near a fan, the fine fiberglass dust kicked up is none-to-good for your lungs.
 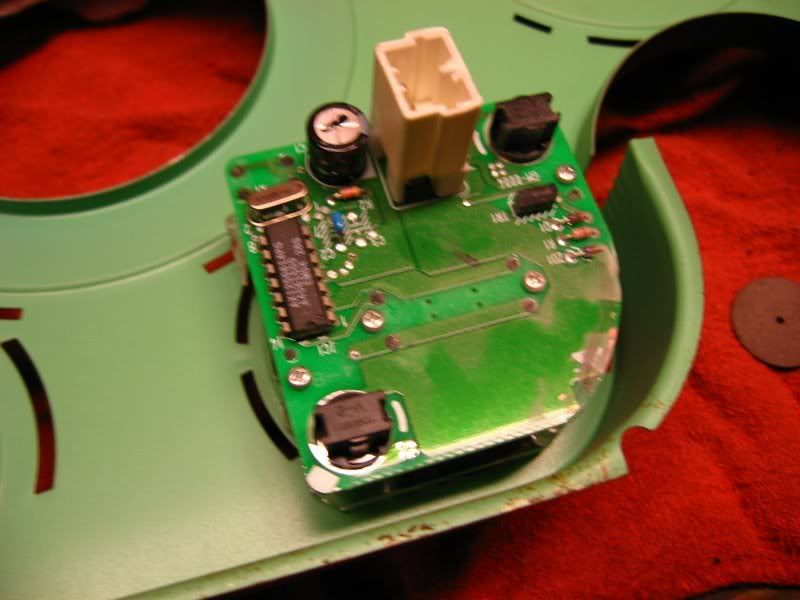 Using a hole saw to cut out the hole in the metal layer of the cluster, I just cut it to the width of the indention in the cluster. Then, layed the clock in there, and moved it around til I was happy with the placement, and marked it with a pencil. It really helps to pop out the two light bulbs (same as you would a bulb in the print circuit) and stick the pencil through that. Then I just drilled it, and used a screw and nut to fix it in place. Also drilled the mounting holes in the clock larger (for the screws), and the top left corner a bit larger to allow for some adjustment. Now, you may notice the minute and hour hand won't line up right (try doing 12:00). Again, it's easy. Use a small flat head screw driver to CAREFULLY pry the minute hand off. Rotate the hour hand to 12, and press the minute hand back on at the 12 position too. This gets it all aligned back up. 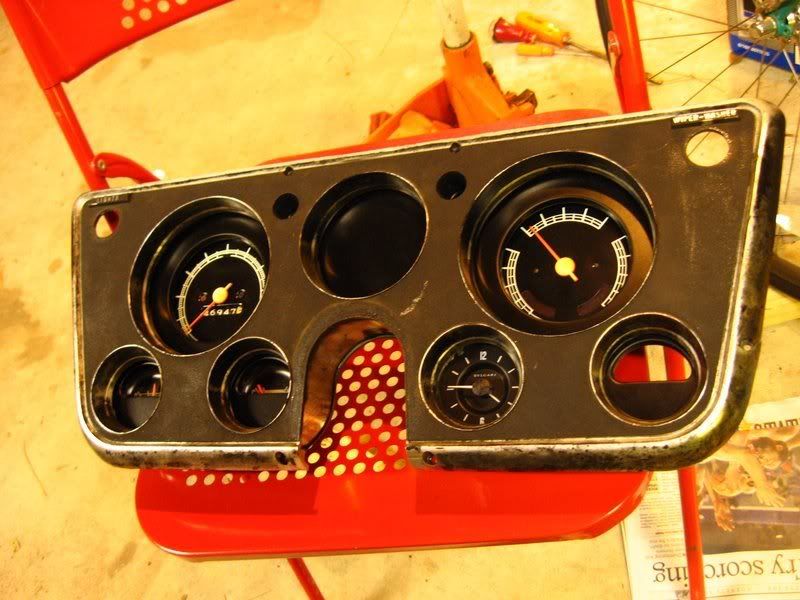  It even will light up close to the OE gauges (the clock is not hooked up in this pic, just getting light from the stock cluster lights) 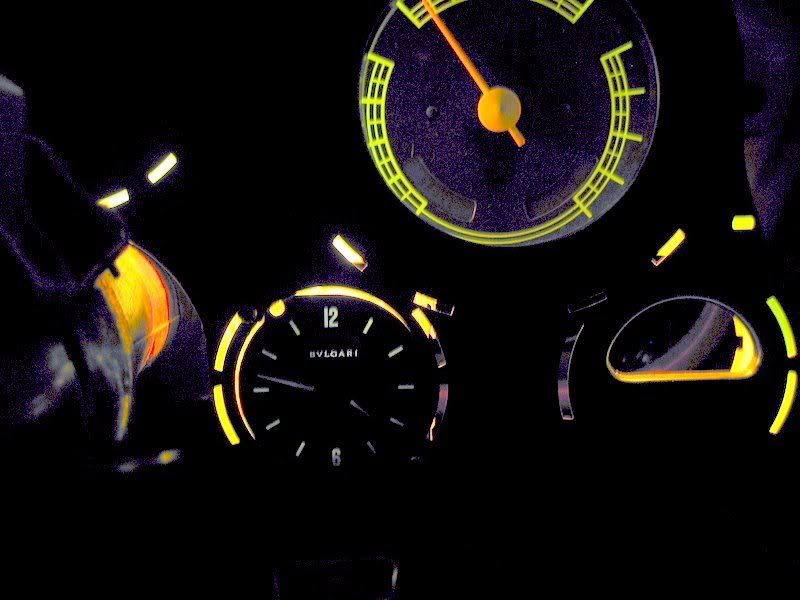 The back cover will need to be cut to clear the 3-pin connector. 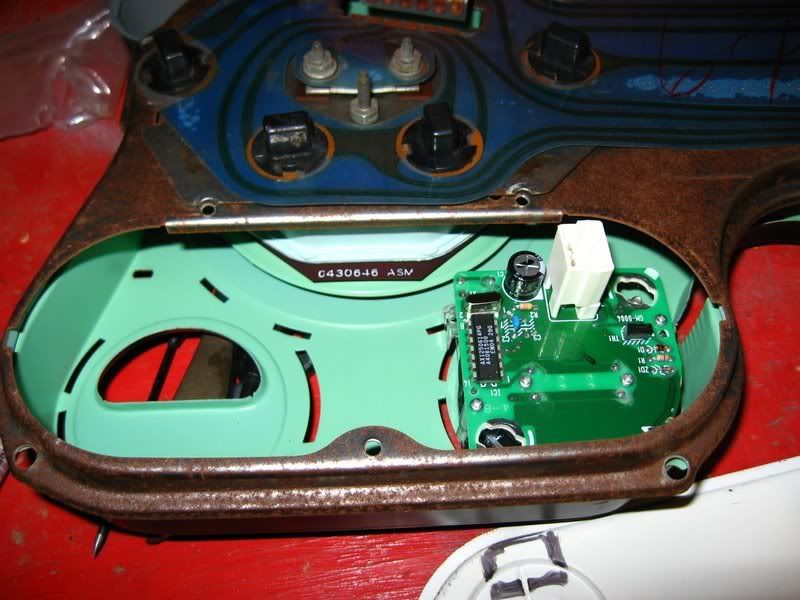 Coming soon, will be wiring up the clock to work off the truck, and light up with the cluster. My dad is gonna try and grab the right 3-pin connecter monday, so I'll update when I finish it up.
Last edited by texanidiot25; 02-25-2008 at 08:52 AM. |
|
|
|
|
02-25-2008, 08:51 AM
|
#9 |
|
Registered User
Join Date: Feb 2007
Location: (Cloverdale) Surrey BC Canada
Posts: 1,566
|
Re: Direct fit clock, parts #'s included.
thats a nice clock
__________________
Travis
travis_moffatt@hotmail.com  1969 Chevrolet C-10 LWB, 350c.i., TH350, In Pieces. 1991 GMC Sonoma, IROCS s10 grill 1963 Ford Galaxie 351/C4 |
|
|
|
|
02-25-2008, 08:58 AM
|
#10 |
|
Registered User
Join Date: Jan 2007
Location: Orland, CA
Posts: 721
|
Re: Direct fit clock, parts #'s included.
Very nice and pretty cool looking! Almost looks factory!
|
|
|
|
|
02-25-2008, 09:01 AM
|
#11 |
|
Eat My Rust
Join Date: Jan 2007
Location: Cypress, Texas
Posts: 3,362
|
Re: Direct fit clock, parts #'s included.
Thanks! I may paint the top of the needls orange, so they match the stock gauges. But, still be able to light up.
|
|
|
|
|
12-30-2008, 08:59 PM
|
#12 |
|
Eat My Rust
Join Date: Jan 2007
Location: Cypress, Texas
Posts: 3,362
|
Re: Direct fit clock, parts #'s included.
It's been forever, but I finally wired this up into the cluster and got it working.
Figured out how to wire it in place using the stock connector: 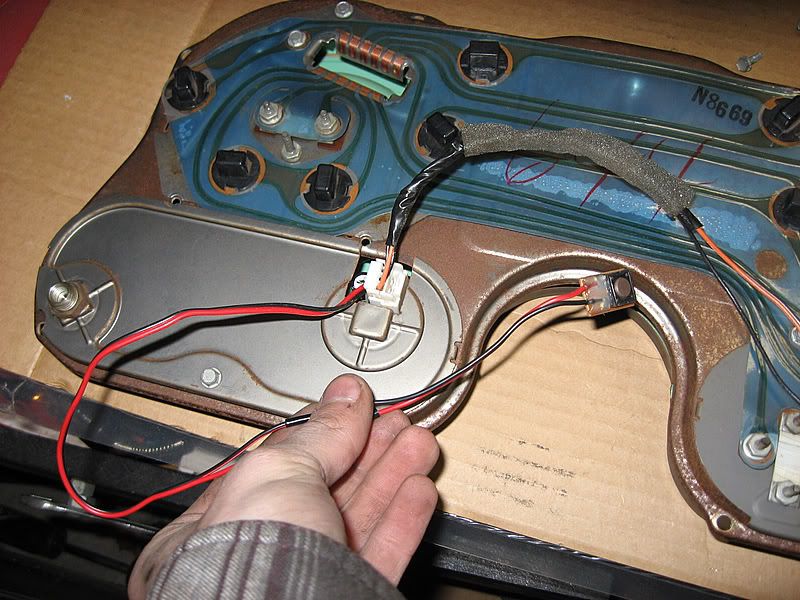  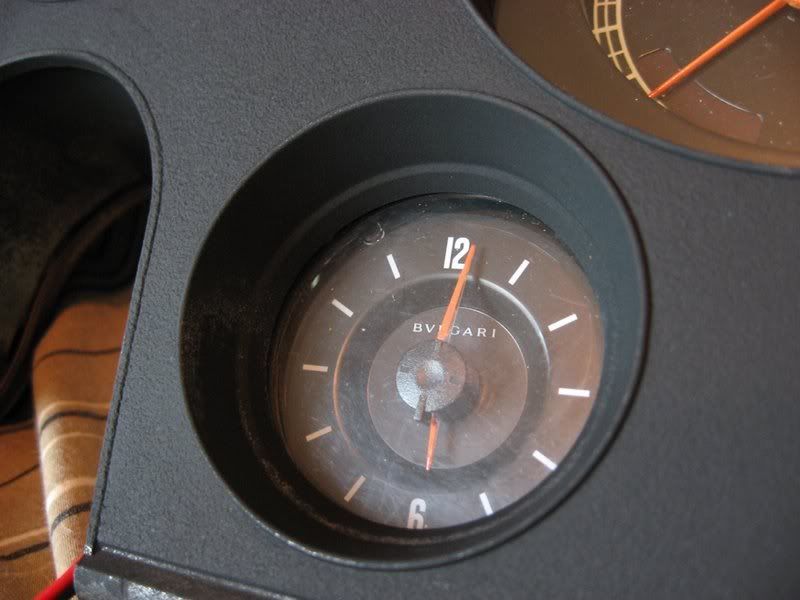 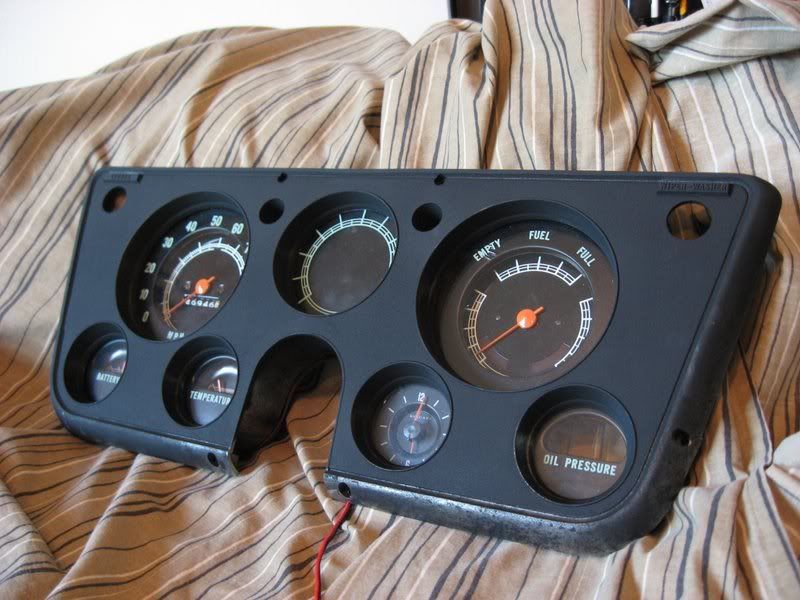 Done and in the truck! I used some play-doh like stuff (Dunno what it was, my dad gave it to me to use) to seal the clock's face to the metal layer of the cluster. Besure to assemble it and hold the set button to make sure the hands clear the stock lense. I had put it all together and tossed it in the truck only to realize the minute hand got stuck on the lense and wouldn't count time. Just use some small washers on the mount screws and you should be good to go
|
|
|
|
|
12-30-2008, 09:24 PM
|
#13 |
|
Registered User
Join Date: Feb 2005
Location: Carl Junction, Missouri
Posts: 2,061
|
Re: Direct fit clock, parts #'s included.
nice job man, looks good in there!
|
|
|
|
|
12-30-2008, 10:14 PM
|
#14 |
|
Old Skool Club
Join Date: Jun 2001
Location: Benton, AR "The Heart of Arkansas"
Posts: 10,880
|
Re: Direct fit clock, parts #'s included.
When done, it looks nice. The style of the numbers seems to coordinate very well with the original numbers of the factory speedometer.
Bad thing about having 2 clocks.....you don't know what time it is, anymore, if they don't have the same time.
__________________
Member Nr. 2770 '96 GMC Sportside; 4.3/SLT - Daily driven....constantly needs washed. '69 C-10 SWB; 350/TH400 - in limbo The older I get, the better I was. |
|
|
|
|
12-30-2008, 11:45 PM
|
#15 |
|
Registered User
Join Date: Feb 2004
Location: Idaho
Posts: 4,034
|
Re: Direct fit clock, parts #'s included.
That is a pretty cool little build info, love the labeling on the cluster wiring.
__________________
"Remember, They can Kill You, but they can't eat You, That's against the law!!!!!!!!!" |
|
|
|
|
12-31-2008, 12:08 AM
|
#16 | |
|
Eat My Rust
Join Date: Jan 2007
Location: Cypress, Texas
Posts: 3,362
|
Re: Direct fit clock, parts #'s included.
Thanks guys!
Quote:
Only other clock would be one on the head unit if I upgrade it from my high teck Sony Tape deck.
|
|
|
|
|
|
| Bookmarks |
|
|


 Linear Mode

