
|
 08-14-2011, 03:25 AM
|
#101 |
|
Registered User
 Join Date: Feb 2011
Location: Langwarrin South, Victoria, Australia
Posts: 121
|
Re: Rebuild on a shoestring.....continued
Thanks for checking out the build. It's a 67-68 wheel and it is a 16 1/2" diameter wheel. Hope that helps.[/QUOTE]
Thanks for the info. You've Been a great help! Thinking of running a old pearl wheel from a kenworth. Cheers Posted via Mobile Device |

|

|
|
08-14-2011, 02:04 PM
|
#102 | |
|
VA72C10
 Join Date: Mar 2008
Location: Midlothian, VA
Posts: 25,269
|
Re: Rebuild on a shoestring.....continued
Quote:

__________________
Looking for a 67-72 swb or blazer project in or around VA.
|
|
|
|
|
|
08-14-2011, 09:40 PM
|
#103 |
|
VA72C10
Join Date: Mar 2008
Location: Midlothian, VA
Posts: 25,269
|
Re: Rebuild on a shoestring.....continued
Sold a bunch of parts locally as well as on here so I've got funds now....just gotta be smart with them
 Looking forward to tomorrow evening when I go back over to work on it again at the body shop 
__________________
Looking for a 67-72 swb or blazer project in or around VA.
|
|
|
|
|
08-15-2011, 06:21 AM
|
#104 | |
|
Registered User
Join Date: Sep 2008
Location: Cornelius Oregon
Posts: 1,073
|
Re: Rebuild on a shoestring.....continued
Quote:
I have this huge shop and cant find anything. I need shelving and some kind of storage where the overspray doesn't get all over everything. I Still cant believe what a mess the bodywork and paint jobs cause. I need to gut my shop and start over completely. JRBECK64 |
|
|
|
|
|
08-15-2011, 10:43 PM
|
#105 | |
|
VA72C10
Join Date: Mar 2008
Location: Midlothian, VA
Posts: 25,269
|
Re: Rebuild on a shoestring.....continued
Quote:
Just got back from there tonight. Glenn (body guy) got the rocker finished (made a custom piece for the front and welded it in). I got the four cab mounts trimmed and ready for him to weld in. And we made a patch for the driver's floor pan and got that welded in. I got my first experience welding tonight......and I need A LOT of practice  It wasn't too bad but I had a hard time seeing even w/ a nice auto dimming helmet...and ended up going off line a couple times and blowing through the metal around it....but in the end I got it done and other than looking like a bunch of buggers it is in.... It wasn't too bad but I had a hard time seeing even w/ a nice auto dimming helmet...and ended up going off line a couple times and blowing through the metal around it....but in the end I got it done and other than looking like a bunch of buggers it is in....Gene went behind me and cleaned up the welds...so it's nice and solid now... pics to follow in a bit....
__________________
Looking for a 67-72 swb or blazer project in or around VA.
|
|
|
|
|
|
08-16-2011, 07:01 AM
|
#106 | |
|
Registered User
Join Date: Sep 2008
Location: Cornelius Oregon
Posts: 1,073
|
Re: Rebuild on a shoestring.....continued
Quote:
When I first started welding I found the same thing with how my welds looked except I thought they looked more like Chicken Crap!!!LOL The trick is to take some metal and just practice till you get it. The problem is with 40 some odd year old metal your dealing with rust and inpurities and its way harder to weld on that. My Son Ian is a really good welder (Which Works out good for Me) and he makes welding look easy. Problem is he tends to do most of the welding so I dont practice near as much as I should. We are getting ready to weld the floor pan complete from the fire wall to the trunk on my 67 GTO Convertible and that has both of us a little nervous just from the size of the sheet metal we are welding in. Glad to hear your not having to mess up your shop with the bodywork, I forsee a two day deep cleaning for my shop in the near future before I start putting my current project together. Im really enjoying watching your build and look forward to some more pictures. JRBECK64 |
|
|
|
|
|
08-16-2011, 06:26 PM
|
#107 |
|
VA72C10
Join Date: Mar 2008
Location: Midlothian, VA
Posts: 25,269
|
Re: Rebuild on a shoestring.....continued
I found out when I was almost done that I was holding the tip too far away...my fear was ruining his welder so I wasn't getting enough heat. Plus, I wasn't holding down the trigger long enough for fear of burning holes through the old metal. The only time I burned through was when I got off track and welded on un-sanded rusty metal. I just had an issue seeing anything when I was welding....
__________________
Looking for a 67-72 swb or blazer project in or around VA.
|
|
|
|
|
08-16-2011, 06:59 PM
|
#108 |
|
Man of Mini-Talents
Join Date: Sep 2009
Location: Oklahoma City, OK
Posts: 4,295
|
Re: Rebuild on a shoestring.....continued
This is the perfect platform to learn on - if it were the BBSuperSWB you would turn the welder on yourself!

__________________
Steve Project - Ruth 66 Skylark Project - Lola 60 Biscayne Project - Iron Ox 54 GMC 100 Project - Darth 69 Camaro |
|
|
|
|
08-16-2011, 08:24 PM
|
#109 | |
|
VA72C10
Join Date: Mar 2008
Location: Midlothian, VA
Posts: 25,269
|
Re: Rebuild on a shoestring.....continued
Quote:
 true, true true, true
__________________
Looking for a 67-72 swb or blazer project in or around VA.
|
|
|
|
|
|
08-17-2011, 02:27 AM
|
#110 |
|
VA72C10
Join Date: Mar 2008
Location: Midlothian, VA
Posts: 25,269
|
Re: Rebuild on a shoestring.....continued
Well, here are the pics.....finally...
This is the worst spot on the truck....passenger floor/cab mount 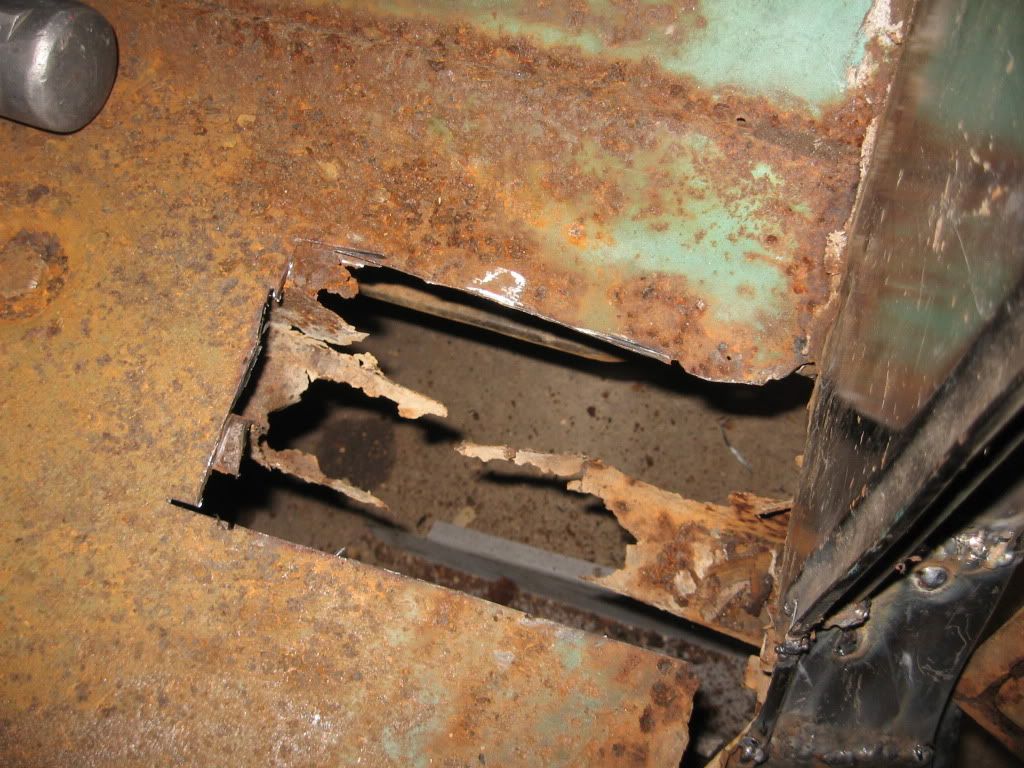 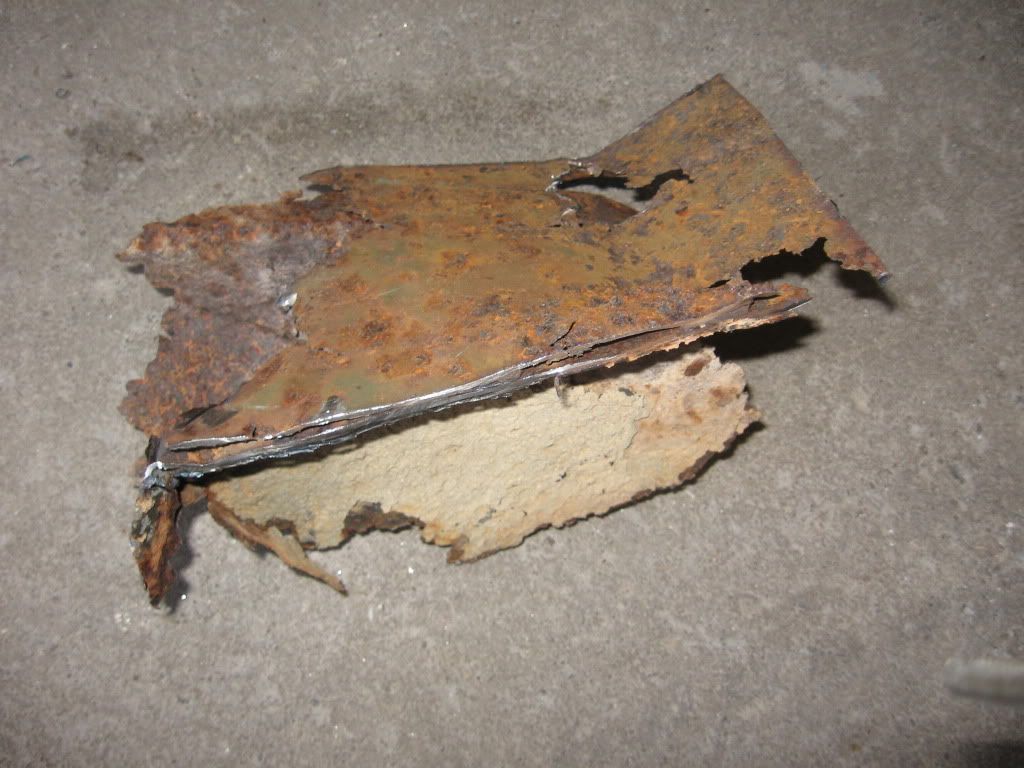 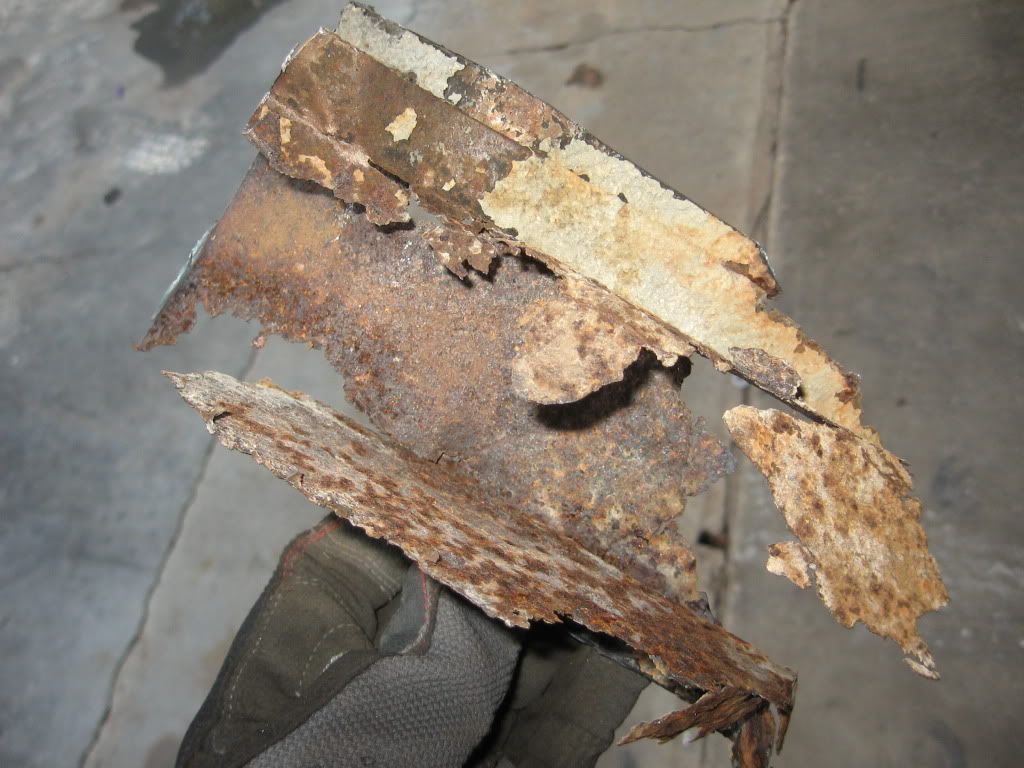
__________________
Looking for a 67-72 swb or blazer project in or around VA.
|
|
|
|
|
08-17-2011, 02:31 AM
|
#111 |
|
VA72C10
Join Date: Mar 2008
Location: Midlothian, VA
Posts: 25,269
|
Re: Rebuild on a shoestring.....continued
So....I needed to make a patch panel. Gene laid it out for me and we finally found a way to use my tri-plus inner door patch....(it's the only tri-plus panel I've ever used that didn't fit--it was WAAAY off
)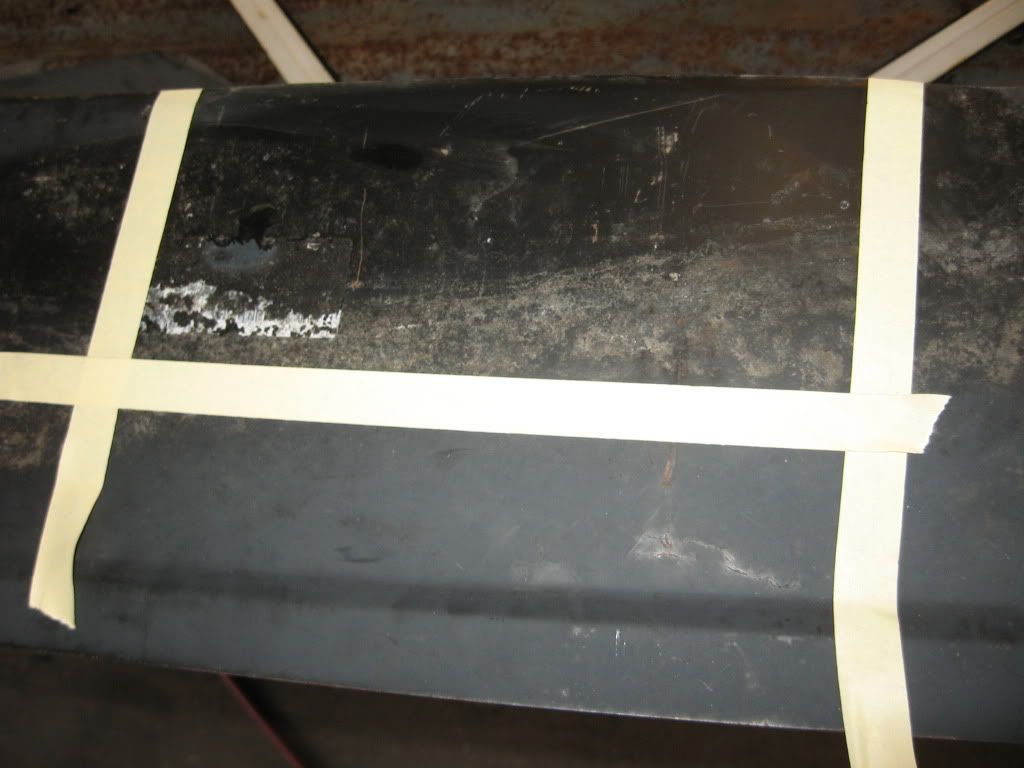 So...I get it cut out. 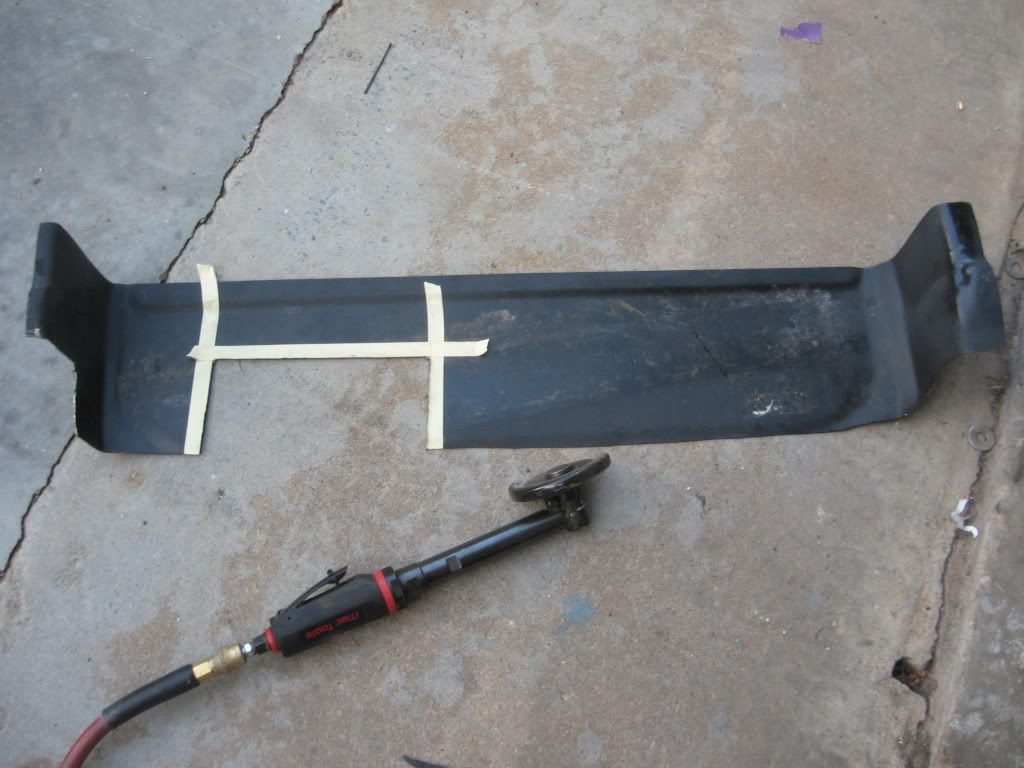 As I'm grinding my hand feels warm as the sparks hit the inside curve of the patch..... I look down and ooops.... melted my mechanix gloves 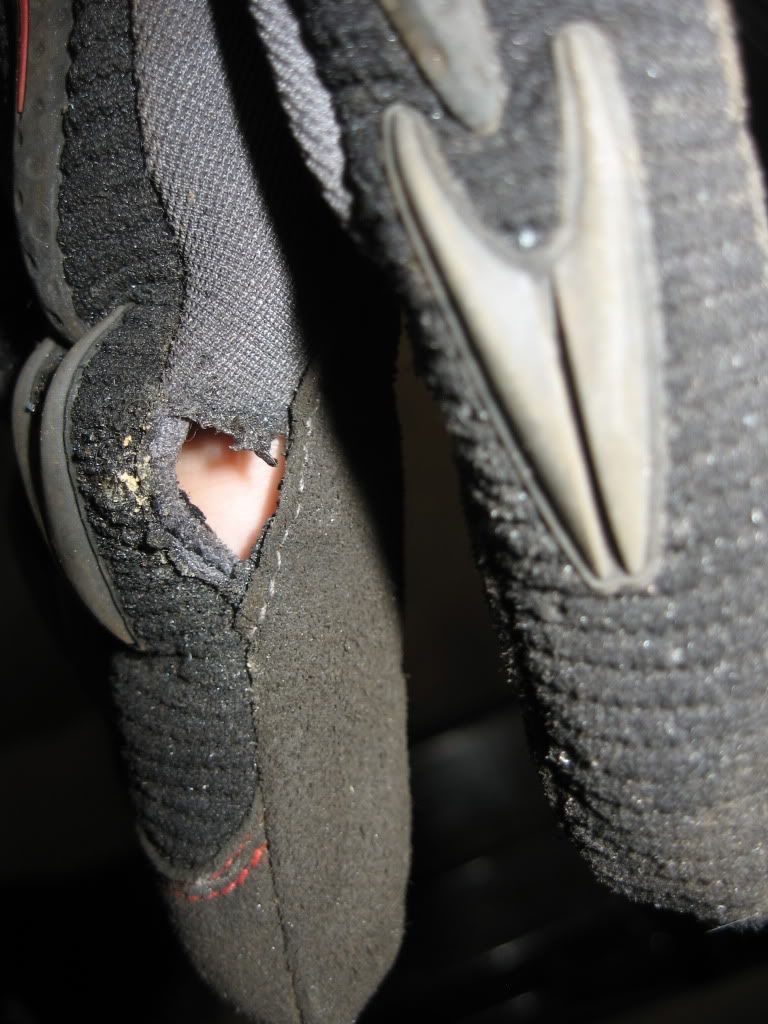 At least I was wearing the gloves so I saved the inside of my fingers.....although I also burned my forearms....looked like tiny dots all over my arm and itched like crazy last night but feels fine today.
__________________
Looking for a 67-72 swb or blazer project in or around VA.
|
|
|
|
|
08-17-2011, 02:34 AM
|
#112 |
|
VA72C10
Join Date: Mar 2008
Location: Midlothian, VA
Posts: 25,269
|
Re: Rebuild on a shoestring.....continued
Here you can see Glenn welding over my welds to make sure the patch is good....it'll be okay once it's ground down...
You can also see the custom patch he made from a non-tri plus rocker (the one we tried and ended up going with the partial tri-plus piece because it fit so bad...) Even on this small patch he had to pie cut it and tac, hammer and tac, hammer and tac...to get it in place. Will take the door off to weld the front edge and grind it down. 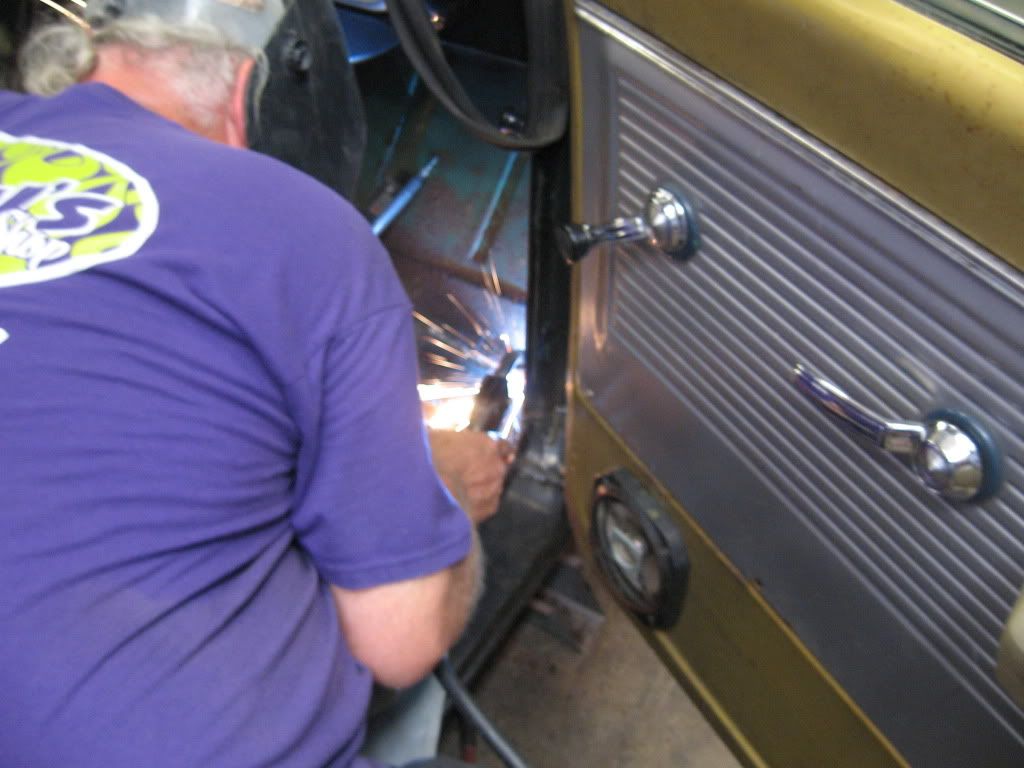 And here's the patch in...again...he had to weld over my poor welds.... 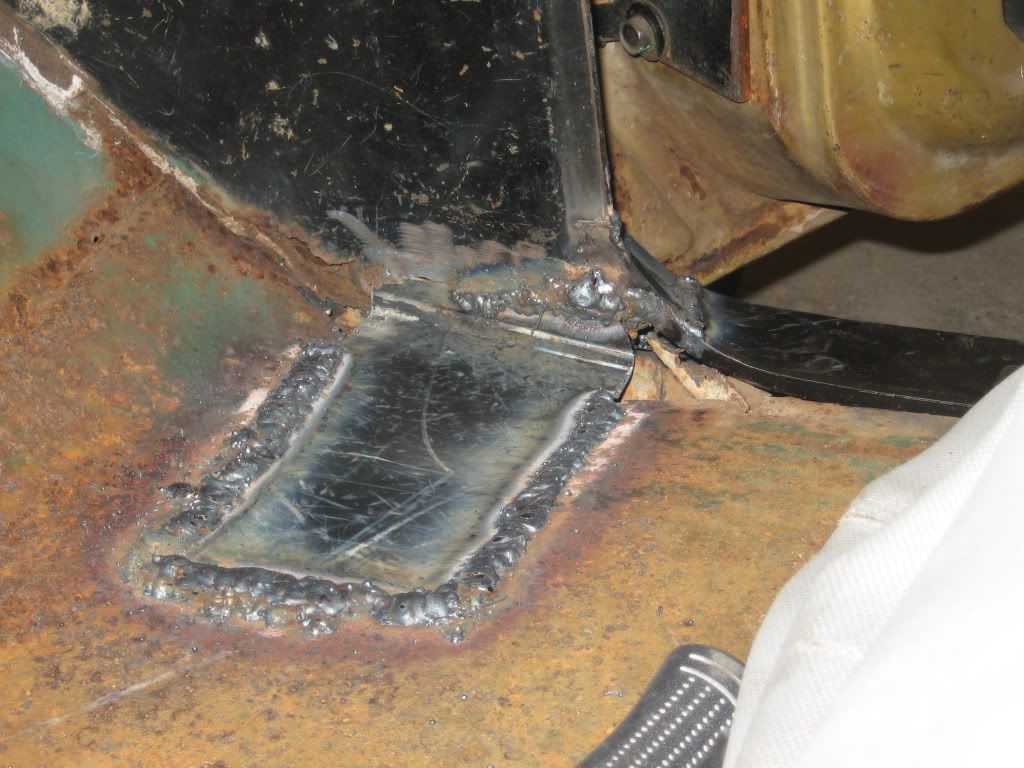
__________________
Looking for a 67-72 swb or blazer project in or around VA.
|
|
|
|
|
08-17-2011, 02:38 AM
|
#113 |
|
VA72C10
Join Date: Mar 2008
Location: Midlothian, VA
Posts: 25,269
|
Re: Rebuild on a shoestring.....continued
I'm going to wire wheel the floor plan to take off the surface rust/scale...the rest of both floor plans are really solid actually other than the same area but smaller on the driver's side. Have a couple more small patches to make to get this all sealed up. Then I'll grind down, apply seam sealer, and then paint the floor with some rust converter then undercoating. After that, the black floor mat will go down...
__________________
Looking for a 67-72 swb or blazer project in or around VA.
|
|
|
|
|
08-17-2011, 02:40 AM
|
#114 |
|
Registered User
Join Date: Feb 2011
Location: Langwarrin South, Victoria, Australia
Posts: 121
|
Re: Rebuild on a shoestring.....continued
Good to see ya givin welding a crack! One thing I learnt in trade school was when your welder is set right it should sound like tearing fabric and I always try to set the welder up on a piece of metal as thick as the job your welding. Do a few runs and fine tune it. Not trying to be a smart a$$! Just tryin to help. Keep at it mate. Practice makes perfect! Cheers
Posted via Mobile Device |
|
|
|
|
08-17-2011, 03:08 AM
|
#115 | |
|
VA72C10
Join Date: Mar 2008
Location: Midlothian, VA
Posts: 25,269
|
Re: Rebuild on a shoestring.....continued
Quote:
Like I said...my biggest issue (besides inexperience ) was not being able to see what I was doing...couldn't see how far the tip was from the metal and even where the gap was to weld......before I try again I'm definitely going to practice on some clean scrap sheetmetal...to get the speed down and distance and try to adjust the welding helmet so I can see Any advice on that? (adjusting the welding helmet) it's electronic
__________________
Looking for a 67-72 swb or blazer project in or around VA.
|
|
|
|
|
|
08-17-2011, 04:35 AM
|
#116 |
|
Registered User
Join Date: Feb 2011
Location: Langwarrin South, Victoria, Australia
Posts: 121
|
Re: Rebuild on a shoestring.....continued
I have only used a cheap auto helmet once, I normally use an ol' flip down one. But as far as I remember I think no 8 shaded was for mig. I'd just start at the darkest setting and arc it on scrap metal adjusting the shade down till you can see. Hope it helps. Cheers
Posted via Mobile Device |
|
|
|
|
08-17-2011, 06:02 AM
|
#117 |
|
Registered User
Join Date: Sep 2008
Location: Cornelius Oregon
Posts: 1,073
|
Re: Rebuild on a shoestring.....continued
On the welding sometimes ive found that if you have good light that is directed right at the place your welding and placed so its not faced towards the helmet it really helps you see better. Now the real advice I have for you is to find a magnifying lense and tape it to the inside of your helmet, thats how Im able to see the welding surface better. Now 20 years ago I probably wouldn't have needed the Magnifying lense.
Are you going to fix the kick Panel and the seam above where you welded in the patch panel on the floor? Ive found that the seam running across the floor is prone for rust so probably to be safe look for pin holes and weld them shut then grind that seam and put POR 15 on them to keep them from rusting in the future. These are things Ive found in my builds so Im just suggesting that they may be problem areas in the future so you might want to take care of them while you have it apart. This is a great build. JRBECK64 |
|
|
|
|
08-17-2011, 07:23 PM
|
#118 | ||
|
VA72C10
Join Date: Mar 2008
Location: Midlothian, VA
Posts: 25,269
|
Re: Rebuild on a shoestring.....continued
Quote:
Quote:
No work by me on this for the next several days as my wife goes in at 6:15 tomorrow for a planned c-section for our third daughter...
__________________
Looking for a 67-72 swb or blazer project in or around VA.
|
||
|
|
|
|
08-17-2011, 08:43 PM
|
#119 |
|
Senior Member
Join Date: Jul 2001
Location: Hyattsville, Maryland
Posts: 3,678
|
Re: Rebuild on a shoestring.....continued
Hope all goes well for your wife and you and your 3rd daughter. Looks like your new project is coming along well. Sorry the 72 Super build didn't work out.
Ray
__________________
72 Cheyenne Super (Purchased new by my parents in August of 71) Black and White |
|
|
|
|
08-17-2011, 08:51 PM
|
#120 |
|
Restoration Virgin!
Join Date: Jan 2008
Location: Huntersville, NC
Posts: 8,298
|
Re: Rebuild on a shoestring.....continued
congrats Jonathan....hope Mom and babes do good
...keep us posted!!!
__________________
Geoff with a G 1968 Chevy C10 SWB The Mistress 1972 Custom Deluxe C20 Suburban A Suburban Named Isabella 1966 Ford Mustang Mama's High School Graduation Present |
|
|
|
|
08-17-2011, 10:14 PM
|
#121 | |||
|
'69 Chevy SWB
Join Date: Feb 2009
Location: Surprise, Az
Posts: 1,065
|
Re: Rebuild on a shoestring.....continued
Quote:
 Progress is looking pretty good too. It'll be nice to look down and see sheet metal instead of rust holes.
__________________
Matt   '69 Chevy SWB Fleet, Primer Black; Project No Name '06 Chevy Trailblazer, Blueish Silver?; Wifes DD, Sold '08 Chevy Impala SS, Silver; the new DD, AND IT IS FUN!!! '99 Dodge Dakota R/T, Intense Blue; DD, Sold Quote:
Quote:
|
|||
|
|
|
|
08-18-2011, 01:40 AM
|
#122 |
|
Registered User
Join Date: Oct 2010
Location: Tyro, VA
Posts: 209
|
Re: Rebuild on a shoestring.....continued
Jonathan, here's photos of exhaust.
|
|
|
|
|
08-18-2011, 05:25 AM
|
#123 | |
|
VA72C10
Join Date: Mar 2008
Location: Midlothian, VA
Posts: 25,269
|
Re: Rebuild on a shoestring.....continued
Quote:
__________________
Looking for a 67-72 swb or blazer project in or around VA.
|
|
|
|
|
|
08-18-2011, 05:26 AM
|
#124 | |||
|
VA72C10
Join Date: Mar 2008
Location: Midlothian, VA
Posts: 25,269
|
Re: Rebuild on a shoestring.....continued
Quote:
Quote:
Quote:
__________________
Looking for a 67-72 swb or blazer project in or around VA.
|
|||
|
|
|
|
08-18-2011, 05:41 AM
|
#125 |
|
fat old dude
Join Date: Feb 2010
Location: fresno, california
Posts: 1,424
|
Re: Rebuild on a shoestring.....continued
hey shouldnt u be asleep or is it almost time for u to go to hospital. congrats. i sure freaked out when my son was being born.
__________________
1972 c-10 shortbed 350/400 build thread http://67-72chevytrucks.com/vboard/s...d.php?t=389157 1968 workhorse http://67-72chevytrucks.com/vboard/s...d.php?t=446216 Accepting part donations |
|
|
|
 |
| Bookmarks |
|
|


 Linear Mode

