
|
 10-20-2011, 07:04 PM
|
#176 |
|
Senior Member
Join Date: Aug 2002
Location: Valley Center KS
Posts: 3,525
|
Re: Project No-buck!
So I've been thinking. I need a place to mount the ECM. I tried bought a large tupperware to use to mount in the engine compartment. It wasn't big enough to reasonablly fit, and , I mean, its a tupperware.
The other problem is the A/C. I got the whole underdash unit out. It mounts to the fire wall with several bolts and nuts. When I pull out the factory 69 heater, I'll have the holes to fill, and then would have to locate the new mounting holes and refrigerant/coolant line holes too. So what I came up with is this: cut out the whole passenger side firewall from the donor truck and graft that into the 69's cab. Then I'll have all of the holes in the right location, the right contour so the unit will fit, the ECM wiring goes through a hole in the firewall and mounts on top of the A/C unit. Kinda solves 2 or 3 problems at the same time. The one problem with is, it means that the truck will be out of commission a little longer than I originally planned while I do the firewall work. |

|

|
|
10-20-2011, 08:22 PM
|
#177 | |
|
Registered User
Join Date: May 2007
Location: Southern, Saskatchewan
Posts: 640
|
Re: Project No-buck!
Quote:
I like this whole truck build, all hand made, even tupperware..... lol.
__________________
Kerry My build thread. http://67-72chevytrucks.com/vboard/s....php?p=3657823 1971 Chev SWB with 68 nose, 6.2 diesel th350, and 3.73 rear gears 1988 Chev Extendacab 2010 Honda VT1300CS Sabre 2005 Buick Rendezvous wife's ride Last edited by chevy88; 10-20-2011 at 08:27 PM. |
|
|
|
|
|
10-23-2011, 09:04 PM
|
#178 |
|
Senior Member
Join Date: Aug 2002
Location: Valley Center KS
Posts: 3,525
|
Re: Project No-buck!
So I had some time today and installed my turn signal cam and new steering wheel (off my 91 parts truck) I had another similar steering wheel, just a little messed up. These steering wheels are the perfect size for these trucks.
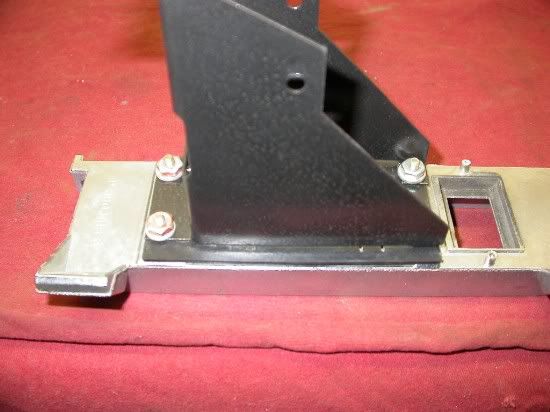
I think I'm going to make how to on the A/C once I have it all figured out, but figure I'll throw in pictures as I do the install as well. I started by removing the firewall from the donor truck. I cut out the whole portion that the A/C unit attaches too. Firewall in: 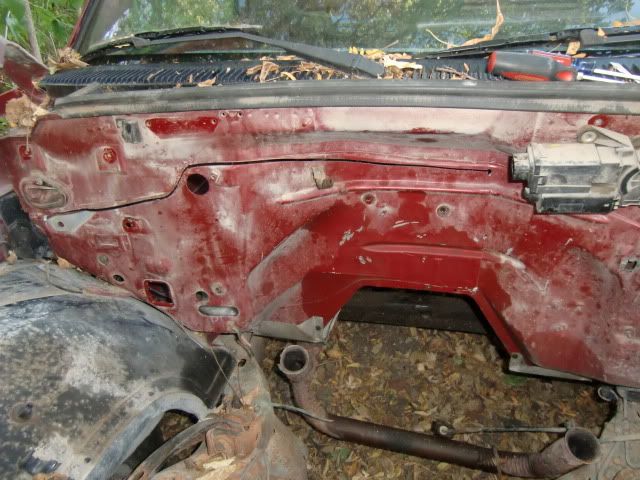 Firewall out: 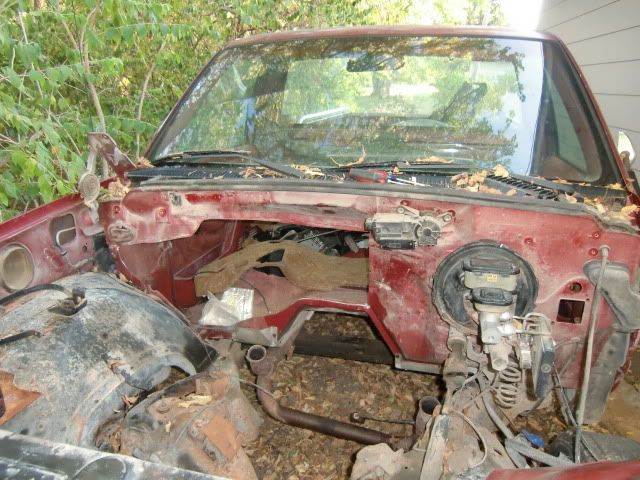 And the firewall with the A/C unit:  The fresh air for this unit comes from the cowl. When installed the A/C unit just butts up to the air intake. This piece is a piece of plastic that goes into the cowl. So I removed this portion as well. Here it is installed with the cowl cut open so I could see what I'm dealing with: 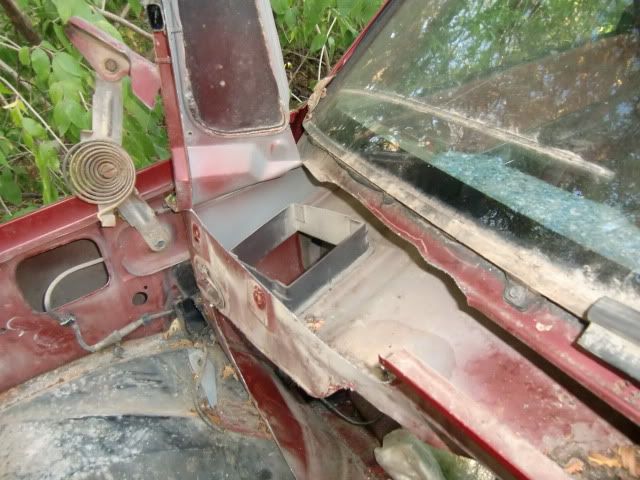 And Here it is with this plastic piece removed: 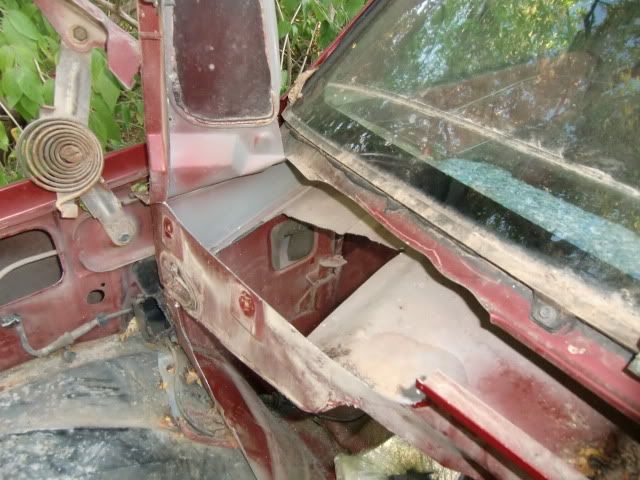
__________________
Project Bruiser: 68 Pro-Touring C-10 5.3L / 4L60E Project Ironhide: 97 GMC Crew Cab 4x4 Cummins SOLD: '69 GMC 1/2T SWB TBI'd: Project No Buck Assembly Manual Index Sign up Thread!!! Factory Service Manual Index Last edited by Ackattack; 11-01-2011 at 11:06 PM. |
|
|
|
|
10-23-2011, 09:12 PM
|
#179 |
|
Senior Member
Join Date: Aug 2002
Location: Valley Center KS
Posts: 3,525
|
Re: Project No-buck!
continued:
Here's the piece removed: 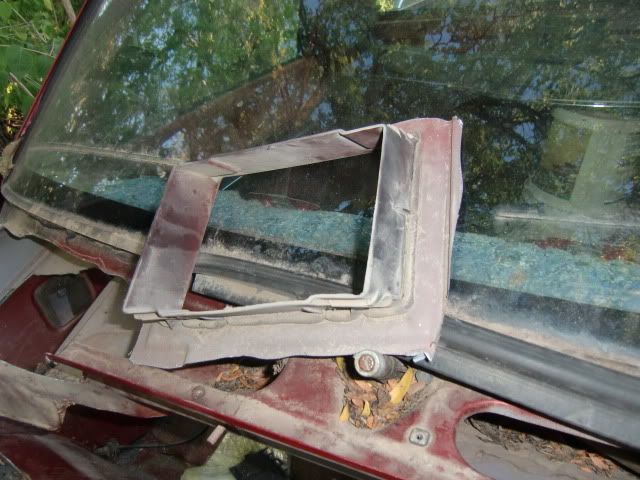 And here is the piece sitting on the A/C unit: 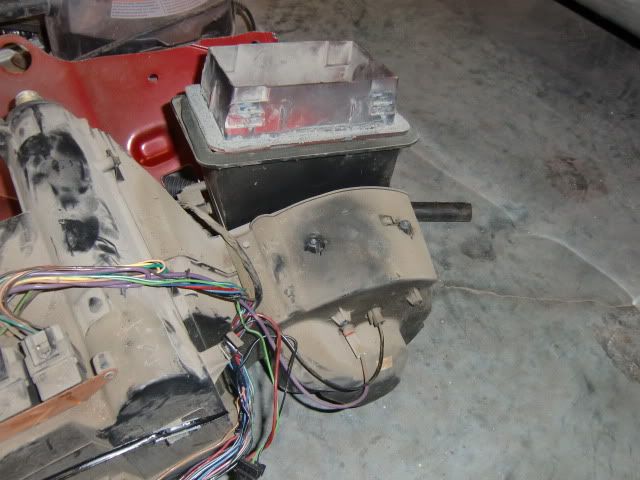 And here is another shot of the A/C unit. The defroster and vents both come out at this location: 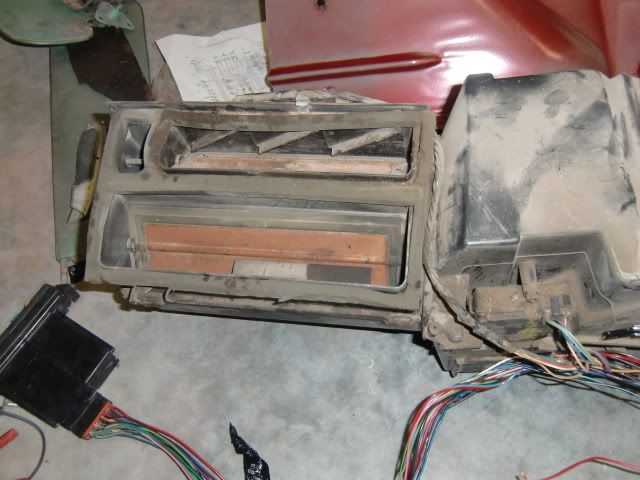 This is right in the middle of the cab. So using this A/C unit I will most like have to remove the CD player, possibly the ashtray. I will be using the donor truck's A/C control unit, so I won't use the factory heater controls. I'm hoping to be able to put the donor truck's A/C controls in the factory location, but not sure if I'll have the room. This unit is all electronic controlled, so no cables to mess with. I ran the unit through its paces and the only thing that doesn't seem to work "properly" is the diverter door that controls the inside/outside air. There is a black/white wire that is not in my wiring diagram and of course there is no coolant/refrigerant going through the unit, so the temp. function has no control over anything. Good progress today! |
|
|
|
|
10-23-2011, 10:37 PM
|
#180 |
|
Man of Mini-Talents
Join Date: Sep 2009
Location: Oklahoma City, OK
Posts: 4,295
|
Re: Project No-buck!
Man, that's a job not many would tackle! I'd love to have your fab skills.
__________________
Steve Project - Ruth 66 Skylark Project - Lola 60 Biscayne Project - Iron Ox 54 GMC 100 Project - Darth 69 Camaro |
|
|
|
|
10-24-2011, 12:23 AM
|
#181 |
|
Still Learning
Join Date: Jul 2009
Location: Central Oklahoma
Posts: 10,108
|
Re: Project No-buck!
Nice work cutting that a/c out. Can't wait to see the rest of this.
|
|
|
|
|
10-24-2011, 11:19 PM
|
#182 |
|
Senior Member
Join Date: Aug 2002
Location: Valley Center KS
Posts: 3,525
|
Re: Project No-buck!
Well I got up this morning to head to work. Go out the the garage and fire up the truck. Turn on the lights....no lights. The parking lights were on, but the headlights weren't. I played around with the light switch a little, stabbing it in and out and twisting it back and forth and still no lights (the dash lights and headlights flashed a few times). So I turned if off and drove the suburban to work. So I need a new headlight switch.
Since it would be about a week before I could get a new switch, I decided it was a good excuse to get started on the engine swap. So that's what I worked on tonight. Basically got everything disconnected and ready to pull the engine out except for the exhaust manifold bolts, tranny bolts, and engine mounts. Now I just need my engine hoist back from my co-worker that borrowed it. Since I'll probably be waiting until at least the weekend for the hoist, I'll probably go ahead and pull all the heater stuff if I get a chance. |
|
|
|
|
10-26-2011, 06:03 PM
|
#183 | |
|
Still plays with trucks
Join Date: Jul 2009
Location: Spokane, WA
Posts: 3,556
|
Re: Project No-buck!
Quote:
__________________
miSSed opportunity - ground up creation of an AWD 1994 454 SS that never was http://67-72chevytrucks.com/vboard/s...d.php?t=795577 69 C10 shortbed stepside 400 small block - built like what a super sport truck could have been 69 K20 lwb TBI 350 4L60E NP208 14-bolt Dana-44 w/disc 68 Camaro SS / RS 500hp 439 inch roller cam big block 4L80E 79 Malibu TPI 350 4L60 w/ Z28 steering & sway bars |
|
|
|
|
|
10-26-2011, 11:16 PM
|
#184 | |
|
Senior Member
Join Date: Aug 2002
Location: Valley Center KS
Posts: 3,525
|
Re: Project No-buck!
Quote:

|
|
|
|
|
|
10-27-2011, 02:56 PM
|
#185 |
|
Registered User
Join Date: Nov 2008
Location: Oklahoma City Oklahoma
Posts: 431
|
Re: Project No-buck!
AC stuff is looking great. I have been thinking about going that route as well. I'm looking forward to seeing how it turns out!
__________________
My build thread - http://67-72chevytrucks.com/vboard/s...d.php?t=391224 |
|
|
|
|
10-27-2011, 05:21 PM
|
#186 | |
|
Still plays with trucks
Join Date: Jul 2009
Location: Spokane, WA
Posts: 3,556
|
Re: Project No-buck!
Quote:
Seems like most headlight switches have the same problem with the dimmer contact area. It is just oxidization where the power jumps across the contact points if there is a sweet spot where things work right elsewhere in the adjustment range. It could probably be scraped clean and work again but the time involved isn't worth it when the new switch is so inexpensive. You would have to remove it to work on it any way so why not just put the new switch in. Have you done the headlight power through a 30-amp relay mod to it yet? It makes them so much brighter and takes much of the load off the switch & dash wiring.
__________________
miSSed opportunity - ground up creation of an AWD 1994 454 SS that never was http://67-72chevytrucks.com/vboard/s...d.php?t=795577 69 C10 shortbed stepside 400 small block - built like what a super sport truck could have been 69 K20 lwb TBI 350 4L60E NP208 14-bolt Dana-44 w/disc 68 Camaro SS / RS 500hp 439 inch roller cam big block 4L80E 79 Malibu TPI 350 4L60 w/ Z28 steering & sway bars |
|
|
|
|
|
10-27-2011, 09:01 PM
|
#187 | |
|
Senior Member
Join Date: Aug 2002
Location: Valley Center KS
Posts: 3,525
|
Re: Project No-buck!
Quote:
|
|
|
|
|
|
10-28-2011, 12:25 AM
|
#188 |
|
Registered User
Join Date: Sep 2011
Location: Overland Park, KS
Posts: 65
|
Re: Project No-buck!
Can I just fill up the cooler, grab a lawn chair and watch you work?
|
|
|
|
|
11-01-2011, 11:24 PM
|
#189 | |
|
Senior Member
Join Date: Aug 2002
Location: Valley Center KS
Posts: 3,525
|
Re: Project No-buck!
Quote:
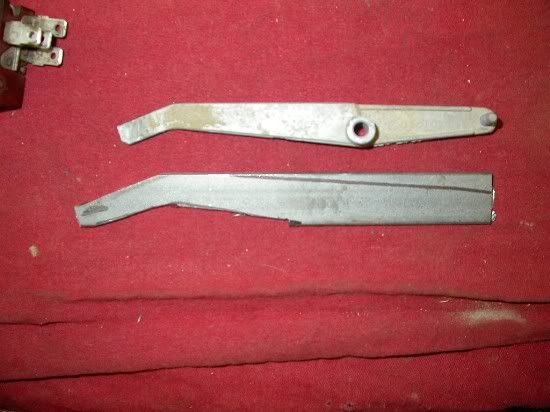
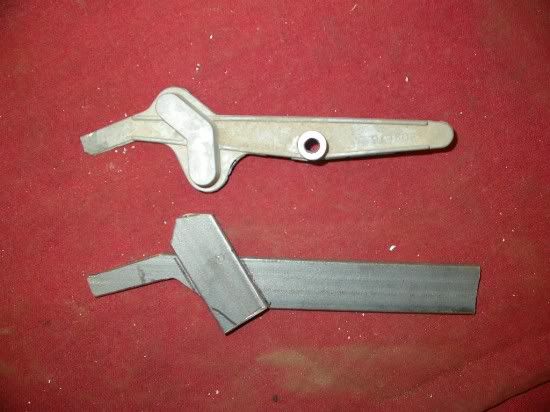
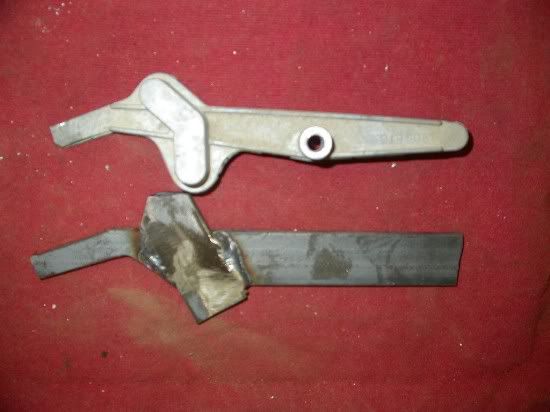
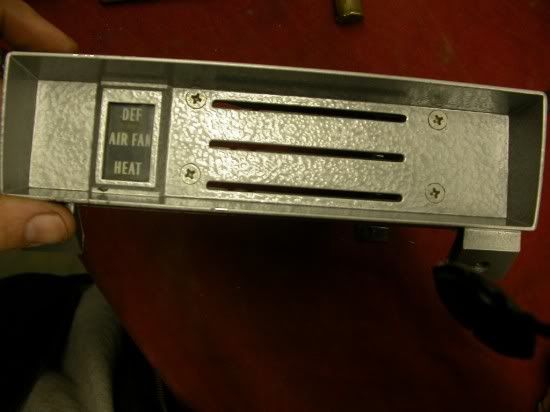
I did some test fitting and measurements. I started by removing the old heater. Figured out why it wasn't blowing real hot. One of the cables that controls the door to bypass the heater core wasn't connected....oh well 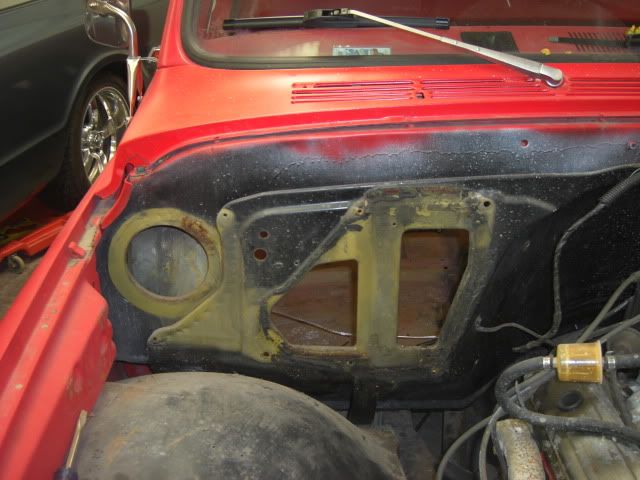 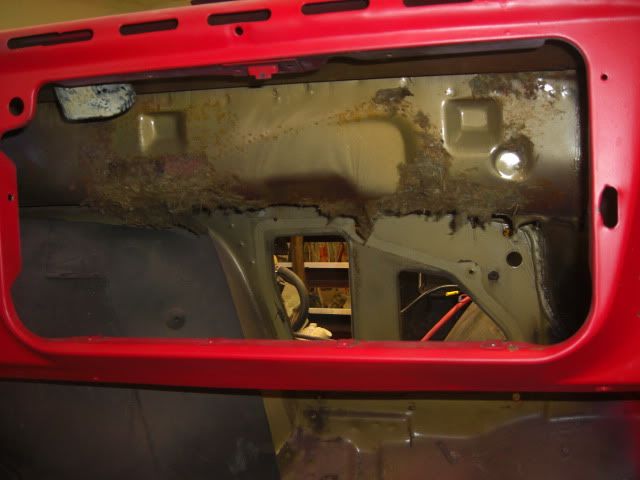 Then I tried to put the A/C unit in. Guess what, it won't fit (not really a big surprise) The unit is so deep that you can't even angle it up to get it past the back of the dash. Not real good. I did some measuring, and it looks like my donor firewall will have to be set forward about 2-1/2" to gain the room to get the unit in and out easily. I have plenty of room between the engine and firewall to do this. Issue 1: The top diverter box that makes it go from A/C to defrost (outlets that is) hits the ashtray frame. On mine, the rod that actuates the a/c door is broke already, so I cut the rear portion of the diverter box off. In this picture you can kinda see the front area (piece on the left): 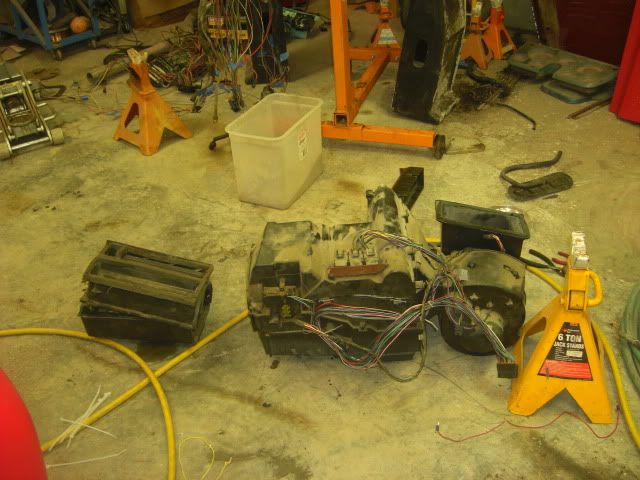 Here's what it looks like after surgery: 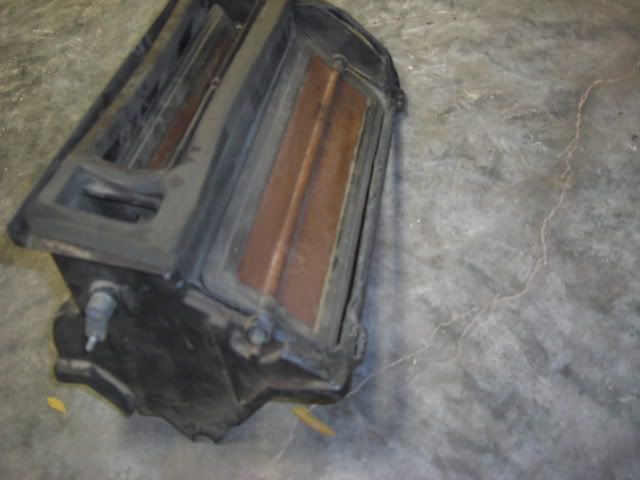 With that, the diverter box will slide up to where it will need to go. I figure what I'll do is connect the vents and defroster outlets. In the winter I'll close the A/C vents, forcing all of the air to the defrosters. So I don't think this is a big deal (for a free A/C system )Next issue: The unit is too wide. Even if you slide it all the way over against the right kick panel, it gets into things around the ignition switch, etc. And then on the upper right under the cowl, there is a little "drop down" so really it needs to slide left a few inches. And this really puts the diverter box in a bad position. What to do?????? Section it! On the diverter box, the right hand side is what connects to the blower/heater core/evaporator, so that has to stay. The left side is what has the actuator in it. About in the middle is a mounting screw. Taking all of this into account, I was able to chop out about 5-1/2" 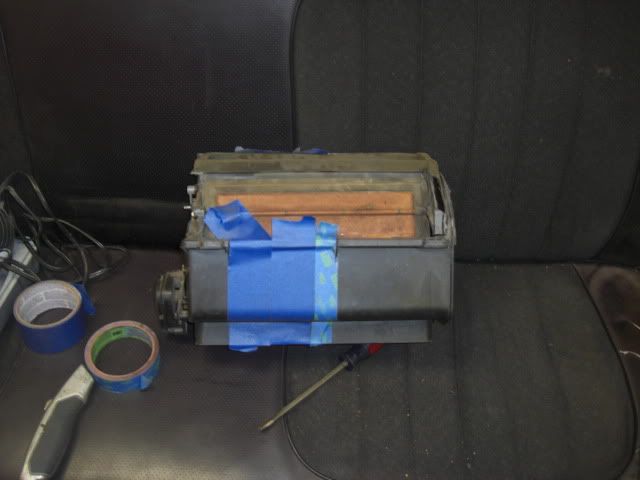 lower half: a little narrower 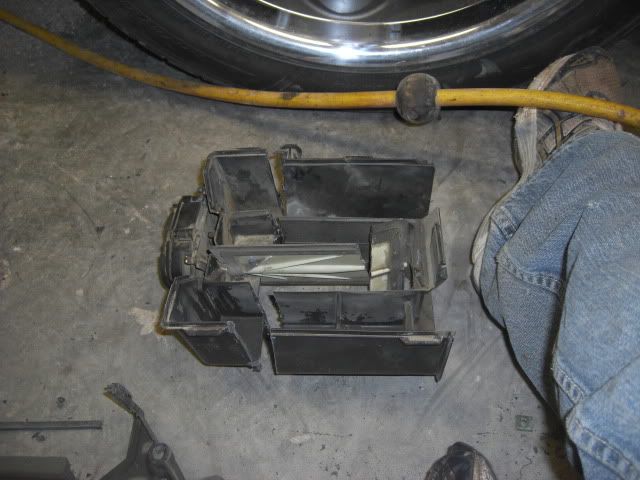 top and bottom halves:  I will just epoxy the box back together. One of the blades is metal, so it will get welded back together and the other two blades are plastic, so more epoxy. I will also silicone the a/c outlet blade (I think its the metal one) shut. |
|
|
|
|
|
11-01-2011, 11:34 PM
|
#190 |
|
Senior Member
Join Date: Aug 2002
Location: Valley Center KS
Posts: 3,525
|
Re: Project No-buck!
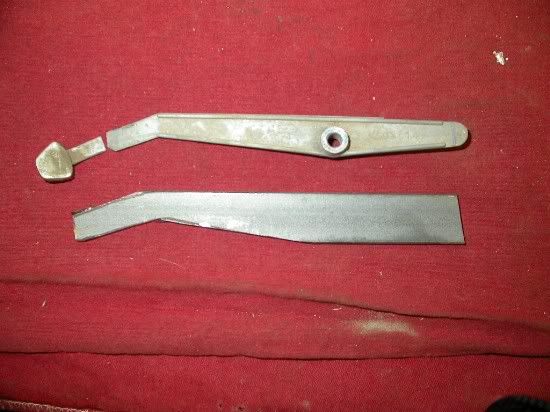
I also got some shorty headers. I've been having a heck of a time getting the stupid manifolds to seal at the collector. These headers (P/N 69640) have a ball-flange collector, so I think they should seal up nicely. Now if you remember I have a 4 speed. I searched and found a thread, and the only headers known to fit with the 4 speed (clutch linkage is the problem) was a set of long tubes from Hooker. I didn't want longtubes since they'd probably hang low and I'd have to run heated O2 sensors.
So I ordered these headers from hedman (via summit). Summit's site listed they'd fit with a 4 speed, hedman's said they wouldn't. I figured they were worth a shot. Initially they wouldn't fit. The clutch rod between the "z-bar" and the shift fork was right at the collector: 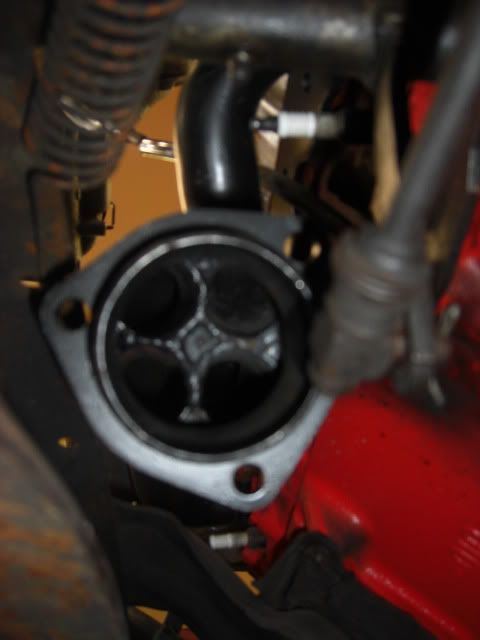 I got to looking at this, and the rod is just held on to the Z-bar with a cotter pin. Pulled the pin, flipped it to the other side, re-installed the pin and walla. 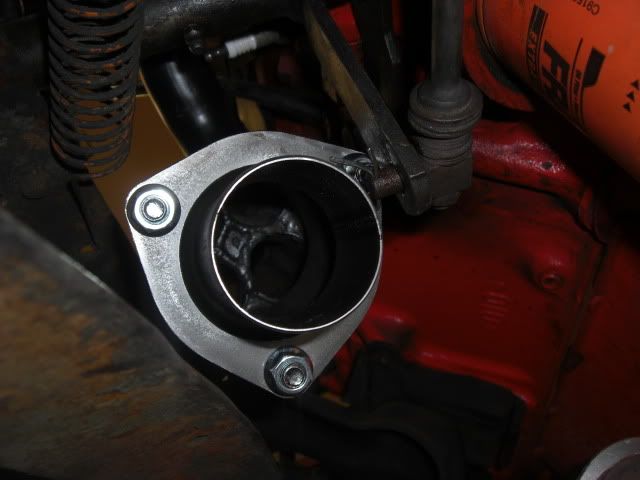 I installed the collector and then pushed in the clutch pedal and all looks good! I'll have to weld in an O2 bung somewhere and obviously weld my exhaust up to the collector. No bid deal though. |
|
|
|
|
11-20-2011, 10:24 PM
|
#191 |
|
Senior Member
Join Date: Aug 2002
Location: Valley Center KS
Posts: 3,525
|
Re: Project No-buck!
Well I did A LOT of welding to get the donor truck's firewall grafted into the 69's cab. All in all I got the A/C unit to fit, but for the HUGE amount of work that it was to get it to fit, I would not recommend doing it and I definatly won't do it again. I'm not done getting the A/C diverters controlers installed, but I will most likely have to move the radio, get rid of the ash tray, and move the A/C controls. I'll get to that later. I was going to make a HOW TO, but the difficulty involved and describing/photographing the process would be difficult to.
Also, the headers aren't going to work  On the passenger side they are hitting the frame, and would not clear the tranny crossemember. Just not worth it. So I cleaned up the mating surfaces of the manifolds (69 ramhorns for clarification) On the passenger side they are hitting the frame, and would not clear the tranny crossemember. Just not worth it. So I cleaned up the mating surfaces of the manifolds (69 ramhorns for clarification)The engine is in. I have the radiator in place (also using the donor truck radiator). The clearance between the accessories and electric fan are VERY tight, probably 1/4". I had to change out the studs on the water pump pulley for some bolts so they didn't stick out as far. I switched out the fuel sending unit for a 72 with a return line. I plumbed all of the fuel system. For the power steering lines, I used the donor trucks high pressure line and cut off the o-ring fitting that goes into the gearbox, and flared the end for the to fit the original gearbox. For the return line, I just undid the original hose clamp and slid it onto the line coming out of the pump. New spark plugs, rotor and cap (original cap destroyed during engine install). So now I pretty much have the heater hoses to hook up, weld in an O2 sensor and hook up the exhaust, and a few wiring leads and hopefully it will fire up. |
|
|
|
|
11-20-2011, 10:55 PM
|
#192 |
|
Still Learning
Join Date: Jul 2009
Location: Central Oklahoma
Posts: 10,108
|
Re: Project No-buck!
Sounds like you're making some great progress. Too bad about the figment issues with the ac conversion. Glad to hear you got the engine installed.
So did you rework the harness already?Posted via Mobile Device |
|
|
|
|
11-21-2011, 12:51 PM
|
#193 | |
|
Senior Member
Join Date: Aug 2002
Location: Valley Center KS
Posts: 3,525
|
Re: Project No-buck!
Quote:
|
|
|
|
|
|
11-26-2011, 02:07 AM
|
#194 |
|
Senior Member
Join Date: Aug 2002
Location: Valley Center KS
Posts: 3,525
|
Re: Project No-buck!
It LIVES!!!!!
I fired up the TBI engine tonight. I let it run for about 15 min. or so keeping an eye on the temp, oil pressure, coolant level, etc. No issues there .The only issue I had getting it to fire up ended up being a bad ground that really surprised me. I had a stud screwed into the front of the pass. head, with my battery ground and e-fan wires connected to it. The first time I tried firing it up, click, like the battery was dead. So I started trouble shooting with the DMM and test light and about 20 min later I found that going from the battery ground to the frame, the frame was positive compared to the battery with the ignition in the on position. A little more checking and realized the block wasn't grounded to the battery. There must be a layer of oil and dirt in the hole in the head. Moved the ground cables onto the intake manifold and did some testing, quickly rehooked up the wires I had undone while troubleshooting and tried. Fired up on the first twist of the key! I figured I'd have to crank it for at least a few seconds to get the fuel up to the throttle body. One kinda "cool thing" that I did: I changed out the sending unit for a 72 sending unit to use the evap line as my return line so there was no fuel in the supply fuel line. I was kinda worried about the fuel pump burning itself up trying to start with no fuel to pull through it. So I disconnected the return line at the sending unit and used a little air to pressurize the fuel tank and force fuel out the supply line down to the pump. I have a see through carb fuel filter before the pump, and sure enough there was fuel in there Hopefully I'll get to drive it tomorrow. I have a few things to button up yet. I'm using the 91's radiator and it is set up for an overflow tank to help control the level. It just happens to hang on the firewall that I swapped in too. However, the top two bolts holes in the tank are higher than what the firewall goes, so I need to add some angle iron or small L brackets to help support it. In order to get the exhaust to seal up, I cut the exhaust pipes after the come down from the manifolds and make a 45* angle to go to the back of the truck. The pipes weren't sitting "square" with the exhaust manifolds, so that is where I believe they were leaking from. Now I can just weld the pipes back together while adjusting for the little bit of misalignment. I probably need to do a few other little things like put the seat back in and other misc. things. Hope to at least take it around the block tomorrow though! |
|
|
|
|
11-26-2011, 02:28 AM
|
#195 |
|
VA72C10
 Join Date: Mar 2008
Location: Midlothian, VA
Posts: 25,269
|
Re: Project No-buck!
Great work on the A/C and congrats on getting it fired up!!!
__________________
Looking for a 67-72 swb or blazer project in or around VA. 
|
|
|
|
|
11-26-2011, 10:10 AM
|
#196 |
|
67cheby
 Join Date: Sep 2008
Location: siloam springs ar 72761
Posts: 17,890
|
Re: Project No-buck!
nice cant wait to see more, seeing that the TBI system is what i am running also
|
|
|
|
|
11-26-2011, 11:40 AM
|
#197 |
|
Still Learning
Join Date: Jul 2009
Location: Central Oklahoma
Posts: 10,108
|
Re: Project No-buck!
Congrats on getting the enging fired up! you are moving really fast on this swap.
|
|
|
|
|
11-26-2011, 01:12 PM
|
#198 | |
|
Senior Member
Join Date: Aug 2002
Location: Valley Center KS
Posts: 3,525
|
Re: Project No-buck!
Quote:
Basically just using it for the ignition hot connections. I only had to connect up 3 ignition circuits. I also had to tap into the start wire coming off the ignition switch. Pretty easy. I need to get some pictures. In order to finish the exhaust I'm going to pull the bed off. I left a crossmember in the frame from when it had leaf springs. Now that is where my mufflers need to be to get them tucked up tight. I also have to lengthen the pipes going over the axle so they will also clear the panhard bar. And while I've got the bed off, I'll remove the factory upper shock mounts and install my ECE ones. |
|
|
|
|
|
11-26-2011, 02:51 PM
|
#199 |
|
Still Learning
Join Date: Jul 2009
Location: Central Oklahoma
Posts: 10,108
|
Re: Project No-buck!
Easy.....that's a relative term and yep we're gonna need some pics.
Posted via Mobile Device |
|
|
|
|
11-27-2011, 02:03 AM
|
#200 |
|
Senior Member
Join Date: Aug 2002
Location: Valley Center KS
Posts: 3,525
|
Re: Project No-buck!
Today's progress:
Removed the one leaf spring truck crossmember and installed the ECE upper shock relocator brackets. Exhaust welded up and all connected. For Simplicity and time's sake, I just dumped it before the axle. It sounds like its sealed up good and is relatively quiet. I started it up to hear the exhaust, and one of the fuseable links started to melt! Uh OH! I shut it down and after doing a little research, it looks like that fuseable link is undersized. Not sure why it is there as it is what came out of the donor truck, but never the less, its undersized. I wired in a different wire for now that I'll get a fuseable link tomorrow. I got the heater controls wired up for now. So it blows air....that's about all I know for now. Tranny cover installed. New light switch. Removed the alternator. I don't think its putting out a charge. The battery was reading about 11.6V with the engine off, and slightly less than that with it running. Figured it should be ~14 with it running. I set up a test rig on my workbench and basically got the same results. I'll have it tested at the parts store tomorrow. Set the donor truck's bench seat in there. Looks like I"ll have to drill a few holes to mount it up. No test drive today. Removing the bed, getting the exhaust welded up, removing the crossmember, installing the shock brackets, and reinstalling the bed took quite a bit of time. Hopefully tomorrow. |
|
|
|
 |
| Bookmarks |
|
|


 Linear Mode

