
|
|
|
 08-10-2010, 01:50 PM
|
#1 |
|
Junk Yartist
Join Date: Jul 2009
Location: Greeley, CO
Posts: 2,203
|
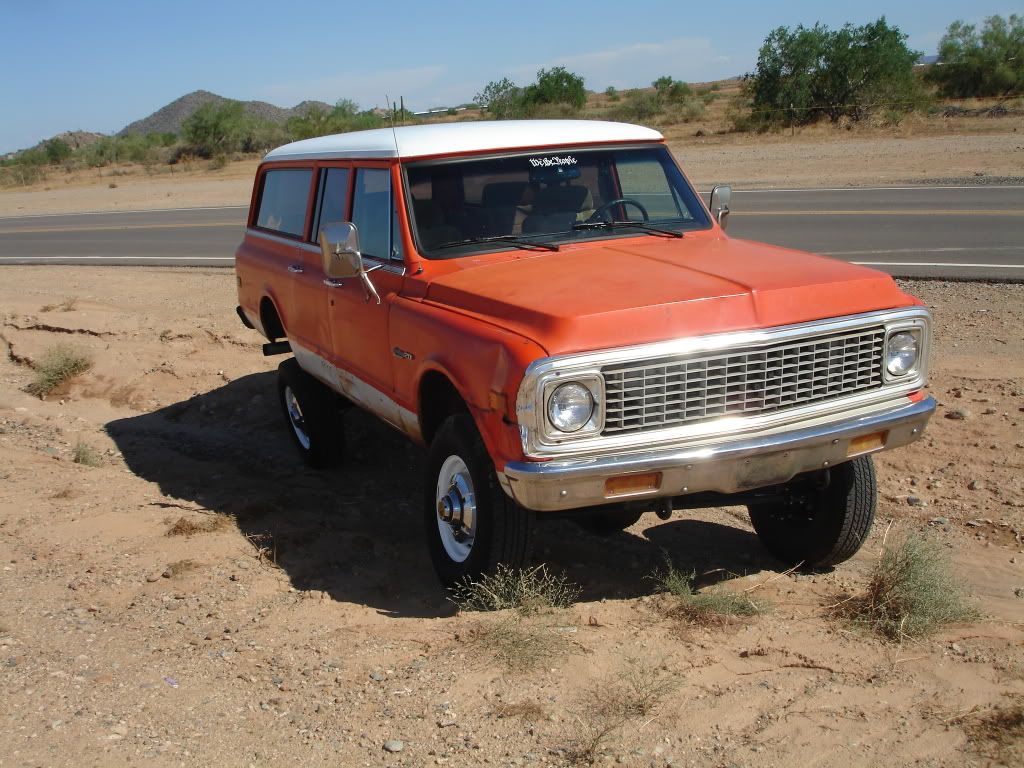
Re: The Story Of A Suburban (Lots Of Pics)
No BFG's for the show? Every time my wife sees your pictures she starts thinking more and more about moving to Flagstaff...
__________________
-Jeremy YOU ONLY FAIL IF YOU STOP TRYING 70 Crew Cab Build Link 70 GMC Suburban 4X4 build thread 95 Yukon Daily Driver Rebuilding an NP205 |

|

|
|
08-11-2010, 12:41 AM
|
#2 | |||
|
I had a V-8
Join Date: May 2003
Location: Phoenix AZ
Posts: 1,116
|
Re: The Story Of A Suburban (Lots Of Pics)
Quote:
Quote:
Quote:
__________________
1972 K20 Suburban, 5.9L Cummins, Banks Power Pack, NV4500HD, NP205, H.A.D., D60/14FF ARB Link To Build: HERE. |
|||
|
|
|
|
08-11-2010, 01:39 PM
|
#3 | |
|
All around good guy
Join Date: May 2009
Location: Pendleton Oregon
Posts: 131
|
Re: The Story Of A Suburban (Lots Of Pics)
Quote:
you know you want the nice looking tires so you can win all the hardware at the show 
|
|
|
|
|
|
08-13-2010, 09:35 AM
|
#4 |
|
Happy to be here
 Join Date: Mar 2000
Location: Cypress, TX
Posts: 39,023
|
Re: The Story Of A Cummins Suburban (Lots Of Pics)
Thanks for sharing
__________________
Follow me on Facebook and Instagram @N2trux.com Articles- "Jake" the 84 to 74 crewcab "Elwood" the77_Remix 85 GMC Sierra "Scarlett" "Refining Sierra" |
|
|
|
|
08-15-2010, 12:10 AM
|
#5 | ||
|
I had a V-8
Join Date: May 2003
Location: Phoenix AZ
Posts: 1,116
|
Re: The Story Of A Cummins Suburban (Lots Of Pics)
Quote:
Quote:
I just realized that I started this post two years ago. It sure has come a long way in that time (like being able to be driven instead of being just a big orange yard ornament--you know, little things like that)
__________________
1972 K20 Suburban, 5.9L Cummins, Banks Power Pack, NV4500HD, NP205, H.A.D., D60/14FF ARB Link To Build: HERE. |
||
|
|
|
|
08-28-2010, 02:20 PM
|
#6 |
|
I had a V-8
Join Date: May 2003
Location: Phoenix AZ
Posts: 1,116
|
Re: The Story Of A Cummins Suburban (Lots Of Pics)
Well, no real big update right now, but I filled the tank on Thursday and got a new high mileage to report....
20.88!! Yessir, almost 21mpg in town, stop and go, front and rear A/C cranked, fan clutch on, rush hour--pretty much everything that will kill mileage numbers and I got 20.88. Woo-hoo!!
__________________
1972 K20 Suburban, 5.9L Cummins, Banks Power Pack, NV4500HD, NP205, H.A.D., D60/14FF ARB Link To Build: HERE. |
|
|
|
|
09-24-2010, 10:12 PM
|
#7 | |
|
I had a V-8
Join Date: May 2003
Location: Phoenix AZ
Posts: 1,116
|
Re: The Story Of A Cummins Suburban (Lots Of Pics)
Quote:
So this last tank of fuel which ended today, seemed to burn at a slower rate than the two previous tanks. I filled up on the way home and lo-and-behold, I was rewarded with a new high mileage--21.66!! Almost 22mpg!! I felt that this was going to be a good one, but I am wondering what was up with the last two as they are complete anomalies in regards to previous mileages of late. Strange. Anyways, I have a new record and I am liking it. Hopefully it will be followed by a similar tank next time. We'll see.
__________________
1972 K20 Suburban, 5.9L Cummins, Banks Power Pack, NV4500HD, NP205, H.A.D., D60/14FF ARB Link To Build: HERE. |
|
|
|
|
|
09-27-2010, 12:02 AM
|
#8 |
|
Too many projects
Join Date: Mar 2004
Location: Fargo, ND land of the flat hills
Posts: 1,147
|
Re: The Story Of A Cummins Suburban (Lots Of Pics)
Seems like I need to get started on my 68 Burb conversion. I wonder if that's why I just bought a 91 dodge with a cummins last week???
I'll be using your thread as examples of how to cram it in the engine bay.
__________________
Andrew 84 GMC C1500 SWB 6.2 Diesel/700R4/3.42 "Grandpa's odd duck" |
|
|
|
|
08-28-2010, 02:30 PM
|
#9 |
|
Future TOTM Winner
Join Date: Aug 2006
Location: Bulverde, TX
Posts: 2,692
|
Re: The Story Of A Cummins Suburban (Lots Of Pics)
THAT'S AWESOME! Power, mileage, good looks and gobs of interior room, that thing is a win-win-win-win vehicle!
__________________
72 Chevy CST K5 HIGHLANDER BLAZER Getting a 6.0,NV4500,NP205,14BFF (Currently laying all over the place in little pieces) 72 Chevy swb step-side "LS" 6.0 Here's a build thread of sorts 2002 HD2500 Crew Cab, 8.1L Allison 4x4 Daily Driver Check it out www.lsdyno.com |
|
|
|
|
08-30-2010, 02:54 AM
|
#10 | |
|
I had a V-8
Join Date: May 2003
Location: Phoenix AZ
Posts: 1,116
|
Re: The Story Of A Cummins Suburban (Lots Of Pics)
Quote:
__________________
1972 K20 Suburban, 5.9L Cummins, Banks Power Pack, NV4500HD, NP205, H.A.D., D60/14FF ARB Link To Build: HERE. |
|
|
|
|
|
08-30-2010, 03:08 AM
|
#11 |
|
I had a V-8
Join Date: May 2003
Location: Phoenix AZ
Posts: 1,116
|
Re: The Story Of A Cummins Suburban (Lots Of Pics)
I have been avoiding a situation on this truck for some time now. The front suspension was kind of jacked up in that I never really finished it. Because of my engine being set so low, my engine crossmember was pretty close to my front diff making uptravel rather limited. When I bought my shocks many years ago, I bought shocks that were too long (as it sat) because I had different upper shock mounts for it, but those had not made it into the truck yet. So, I had a couple projects that needed to be tackled simultaneously on it. I started by taking it out and flexing it a little bit to get an idea of where bumpstops needed to be placed.
 In doing this I learned something that turned out to be rather important. I had found marks on my crossmember from the diff hose and I wrongfully figured that the diff had contacted the crossmember. What I found out actually happened was the shock was bottoming out and the witness marks on the crossmember must have been from the hose bouncing up to hit the crossmember. I had known my shocks were a little too long, but I did not realize they were that long. Well, ok, I already had bought the bumpstops and mounting material, so they were going on regardless. I had been researching bumpstops for some time and had bought some of those big inverted triangle urethane units and had planned on using them, but I had found where several people had experienced failures with otherwise new looking units. I did not like the idea of making them work, just to have them fail shortly thereafter. That got me to looking at air bumps. I liked the features they brought, but I kept hanging up on the fact that they have seals and oil and nitrogen all of which can leak creating a situation of "no-bump". They are very cool, but way more than I need in both performance and reliability. I need something similar but with much less technology involved. During my research I came across Daystar's Stinger Bump Stop Kit. It shares many of the same features of the air bumps, including mounting configuration and basic idea of operation--piston/shaft contacting suspension and compressing a media that resists compression to limit travel. Instead of nitrogen they use a puck made of hard foam. Three of these pucks stack up in the cylinder to create the media resistant to compression. Two different density pucks are supplied so compression resistance can be tailored to your liking. This fit my bill exactly. The features of an air bump that I want without the potential problems of the air bumps. Stupid simple--perfect. 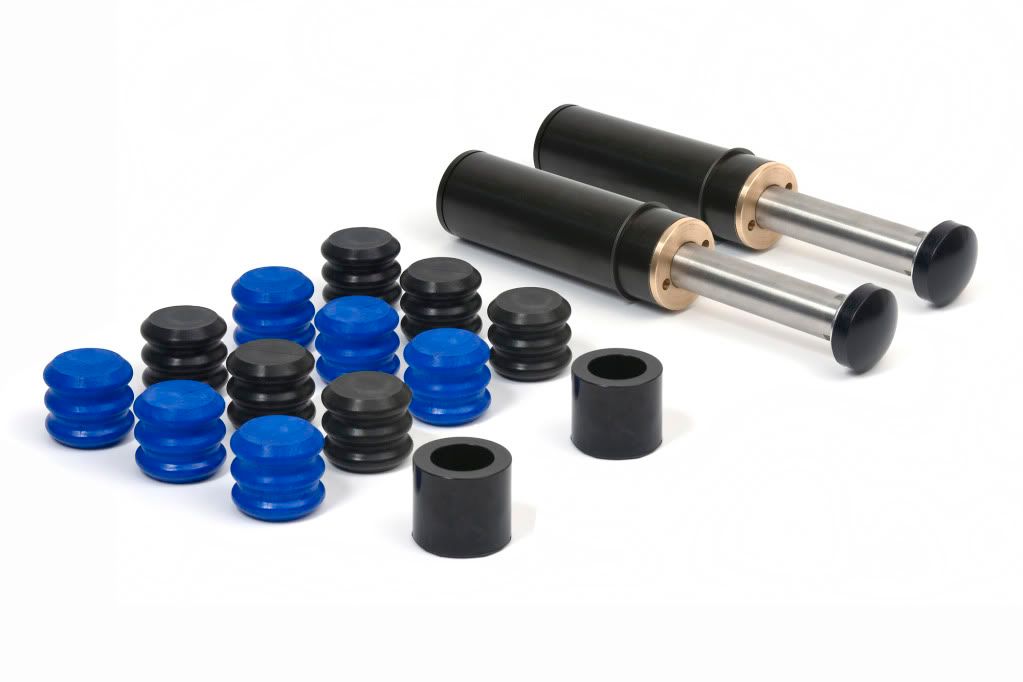 So I got these and did some measuring and decided what I needed to mount them. They will mount in a standard 2" bump can, but that would be pretty easy, so I decided to make some of my own. I picked up a piece of 2-1/4, .125 wall DOM tubing. I quickly found out that the 2"od of the bump did not fit in the 2"id of the tubing. With that, I took it over to my favorite machine shop and had Russ turn out a few thou's on the id. While I was there I had him make a couple aluminum slugs that share the same dimensions as the foam pucks supplied with the bumps. Once he finished with that stuff I was able to get going on my project. I took a piece of 1/4" plate and flame cut the mounting plate for the tube out of it. I figured out where on the frame it needed to be and then welded the DOM tube to it. I then took some 1.125 x .125 flat stock and made some gussets to it. I took some 5/16" coupler nuts, drilled the threads out of them and welded one toward the top of the tube and one toward the bottom. I then took a cutoff wheel and slotted the tube from top to bottom through the coupler nuts. This provides the mounting/pinch function. I then drilled some 31/64" holes through the plate and the frame and mounted the plate to the frame with four 12mm 10.9 flange head bolts with flange-head steel lock nuts. That got the bumpstops mounted, but I still had to deal with the shocks. Several years ago I had picked up a bunch of the typical extended shock mounts that get used on these trucks. All that I had to do was mount them. I figured out where they needed to be and drilled the holes and used some more of the 12mm 10.9 flange head bolts and nuts. I then took my air saw out to cut the inner fenderwell for shock clearance. Well, the saw worked for about an inch and then decided it did not want to play anymore so I ended up using a die grinder with a cutoff wheel. Not the most ideal tool for the task, but it did get the job done. 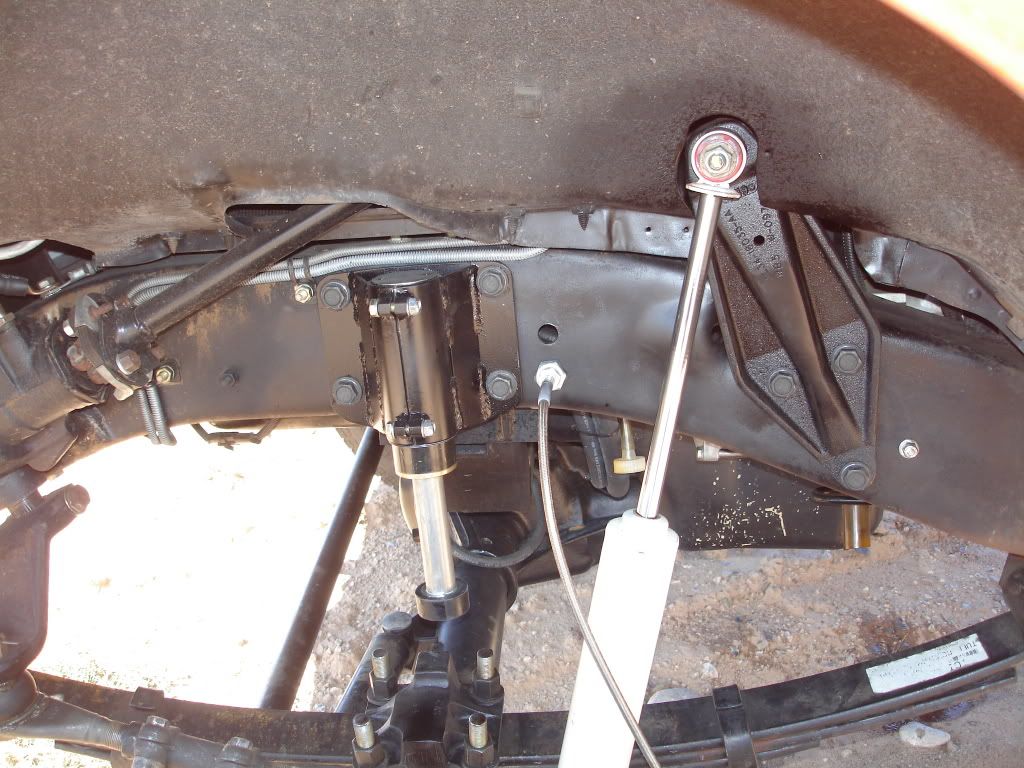 So, that got the shocks mounted. I ran out to my super-secret high-tech suspension testing facility to see how I did. I immediately found that my too-long shocks were now too-short shocks. They went from being bump stops to limiting straps. I did some measuring and found that the fronts would be about the right length for the rears and the rear shocks would probably be better on the front. I swapped the fronts for the rears and headed back out to my private test facility and found that the shocks are almost perfect now. 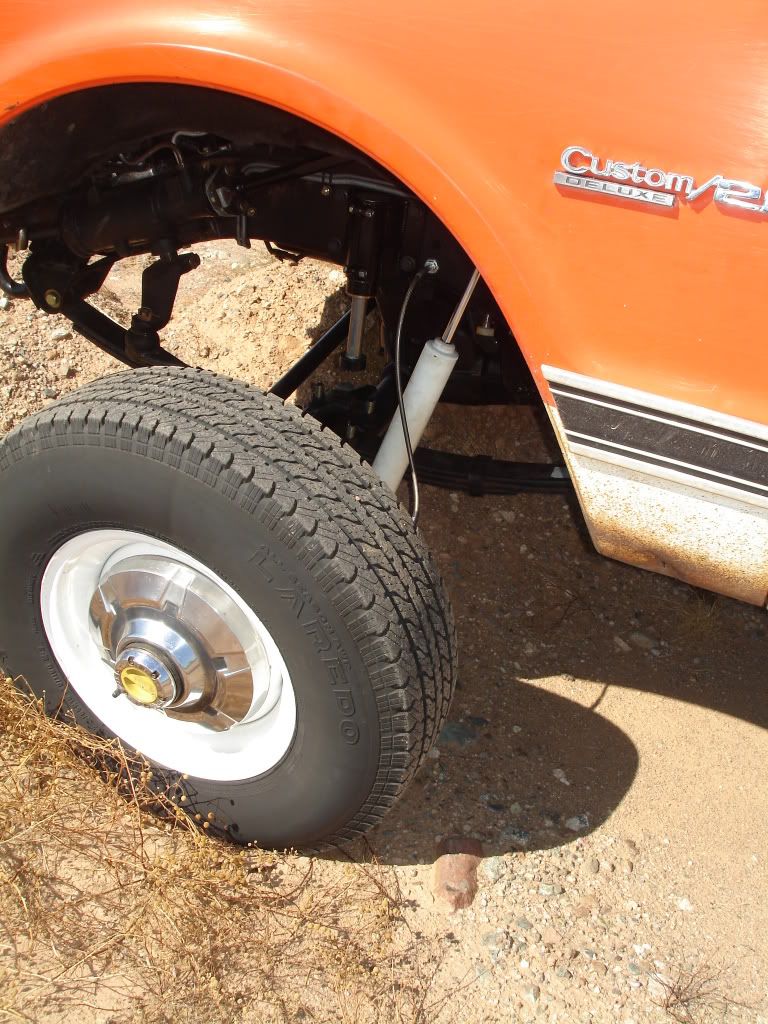 Here it is at bumpstop contact point. There is still some shock travel left, so I will have to keep an eye on it next time it hits the trail. My wheel travel needs to be more limited on the right side because of the differential, so on that side I ran two of the harder (black) pucks along with one aluminum plug (to replace one puck) in the bumpstops. This should keep the wheel travel in the acceptable range. 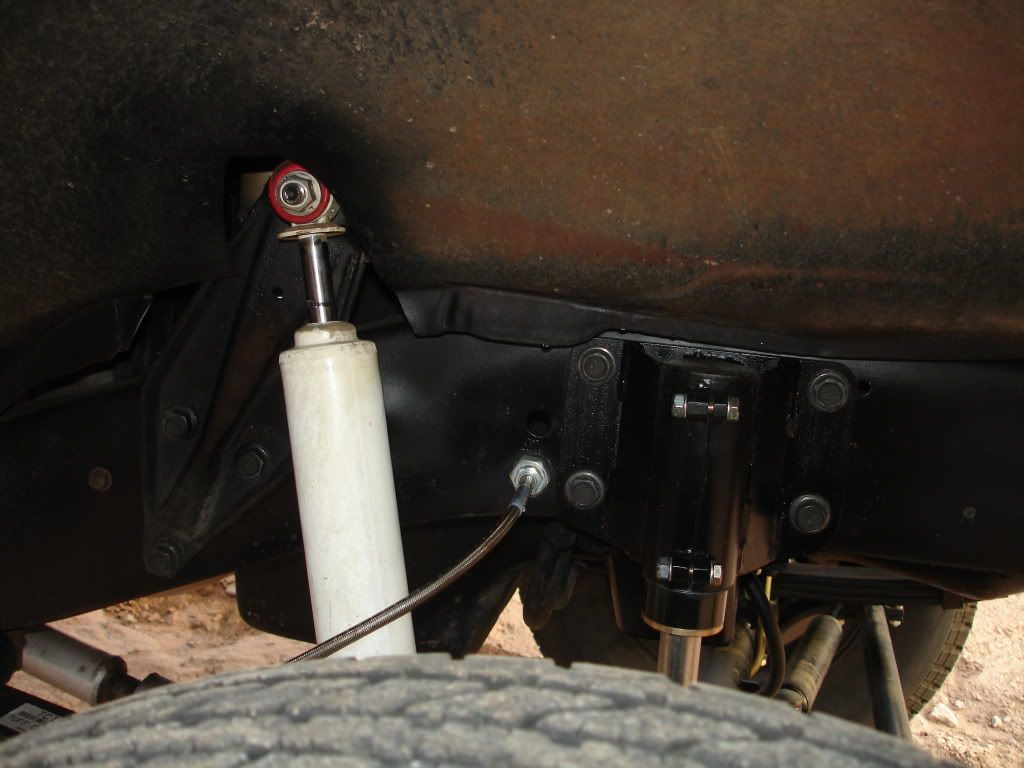 So, with all of this, I have a much more functional suspension system now. I have not had a chance to run it on an actual trail, but from my first test to the last one that I did, I can tell a major difference in how much the suspension moves around already. A good trail will let me know if I am done or have more to do to finish the suspension up. Well see. On an unrelated side-note, I did this work last weekend when it was about 108-110 (in the shade) with enough humidity to make it very uncomfortable. I stuck it out, plugged along and got it done. Now, in comparison, this weekend we had a cold spell roll in and it was only 98* this weekend with very reasonable humidity. I guess I should have waited to do it until this weekend. Oh well.
__________________
1972 K20 Suburban, 5.9L Cummins, Banks Power Pack, NV4500HD, NP205, H.A.D., D60/14FF ARB Link To Build: HERE. |
|
|
|
|
09-18-2010, 01:34 PM
|
#12 |
|
Chevy Enthusiast
Join Date: Jul 2009
Location: Canyon Lake Texas
Posts: 2,024
|
Re: The Story Of A Cummins Suburban (Lots Of Pics)
Holy moses this was an awesome build! You have awesome attention to detail, im a lot like that but not sure as much you! It looks great man, Love the original paint too.
__________________
Tony 1985 GMC K2500 restoration Project: Rust, White & Blue 1989 Chevy R3500 CC Cummins & 4X4 swap some day... 1989 Burb (D60, 14BFF, 12V, NV4500, NP205, 37" tires in progress) |
|
|
|
|
09-18-2010, 01:57 PM
|
#13 |
|
Registered User
Join Date: Feb 2008
Location: Albuquerque
Posts: 359
|
Re: The Story Of A Cummins Suburban (Lots Of Pics)
Gotta link on the Daystar's Stinger Bump Stop Kit?
Mick |
|
|
|
|
09-18-2010, 03:54 PM
|
#14 |
|
Registered User
Join Date: Jun 2006
Location: Indiana
Posts: 4,859
|
Re: The Story Of A Cummins Suburban (Lots Of Pics)
http://www.daystarweb.com/productlis...ger+Bump+Stops
They have great poly bushing kits too. (fixed my linc)
__________________
'70 GMC C1500 LWB Power disc brakes. WooHoo! Posi 6 Lug Dana 60 Last edited by ERASER5; 09-18-2010 at 10:49 PM. |
|
|
|
|
09-18-2010, 07:14 PM
|
#15 |
|
Registered User
Join Date: May 2008
Location: Alta Loma, Ca.
Posts: 930
|
Re: The Story Of A Cummins Suburban (Lots Of Pics)
Looking great! Next time you want to check your shock travel just wrap some tie wraps around the shock shaft, then go run your test track and when you get back home you see where your maximum compression is. If the tie wrap is gone you topped out the shock.
|
|
|
|
|
09-19-2010, 01:56 AM
|
#16 | |||
|
I had a V-8
Join Date: May 2003
Location: Phoenix AZ
Posts: 1,116
|
Re: The Story Of A Cummins Suburban (Lots Of Pics)
Quote:
Quote:
Quote:
__________________
1972 K20 Suburban, 5.9L Cummins, Banks Power Pack, NV4500HD, NP205, H.A.D., D60/14FF ARB Link To Build: HERE. |
|||
|
|
|
|
09-19-2010, 02:30 AM
|
#17 |
|
I had a V-8
Join Date: May 2003
Location: Phoenix AZ
Posts: 1,116
|
Re: The Story Of A Cummins Suburban (Lots Of Pics)
I had done the window/vent window weatherstripping on the drivers side awhile back and with this and that it took all day, so I had been successfully putting off doing the passenger side since. Well, I figured today is the day. The only problem is the passenger door has an issue that the driver door did not. It has some minor damage around the upper hinge area:
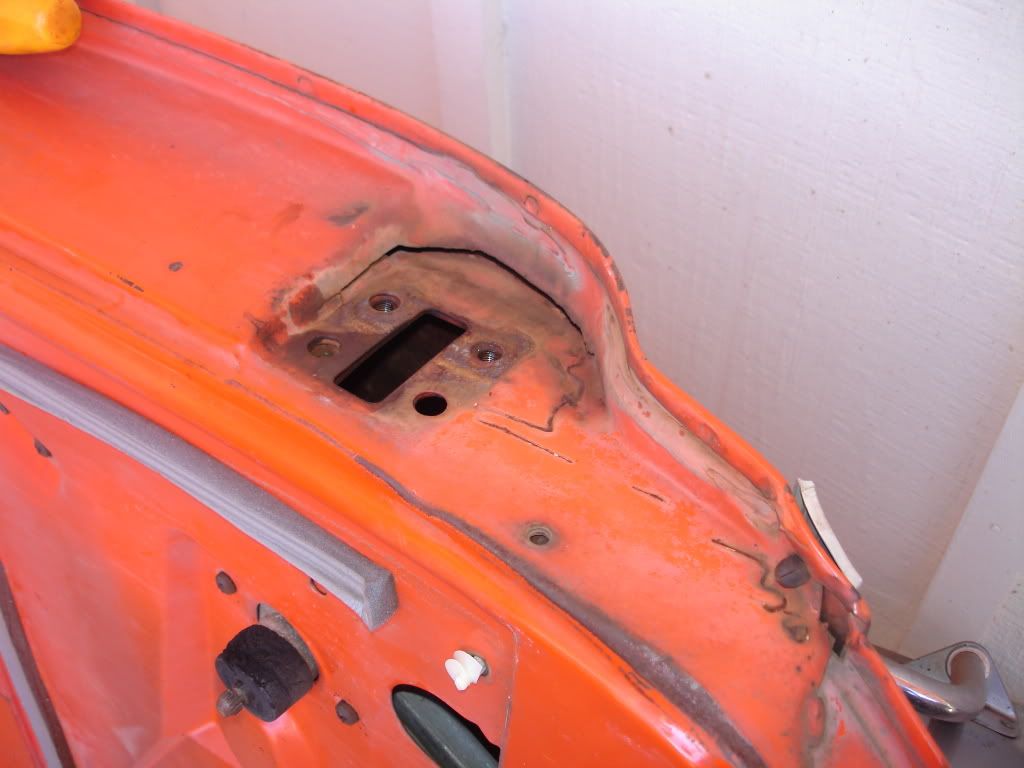 I figured, no problem half an hour to get the door off, an hour of welding, half an hour back on, boom, done. Simple. Right. As soon as I grabbed one of the upper hinge bolts and it turned but didn't loosen up, I knew I was in for a long day. I finally got the upper hinge bolts out. One hole was completely galled out. Then the fun started. Unfortunately I did not photo-document my misery, so a quick blurb will have to suffice. The pic I really wish I would have taken was when I cleaned the area to start welding and found the whole are was spider-webbed with cracks--a few pretty good ones. Oof, the day just got a bit longer. Now, most of that big perimeter crak in the pic I did with the MIG, while most of the smaller spider-web cracks I did with TIG. I used over three feet of 1/16" TIG rod welding up all those little cracks. I probably would not have paid any attention to it other than I had to grab a fresh piece before I was done and thought holy cow, that seems like a lot of filler for some sheetmetal cracks. All of this welding ended up taking a few hours with all of the welding and cooling and welding and cooling and welding.... Anyways, I got it done and welded up the galled hole to drill a new hole and tap some fresh threads into it. That all went well until I couldn't fine my 3/8-24 tap. Tore the place up--couldn't find it. Called a neighbor, he couldn't remember who he lent his set to. Finally ended up putting everything away just so I could go to the store and buy another one to finish my day. So I got the tap and cut the threads and blew some paint on it. It turned out pretty good. I did not get carried away grinding down the welds that were not under the hinge as I figured the less heat and thinning of the base metal the better. This is what I ended up with: 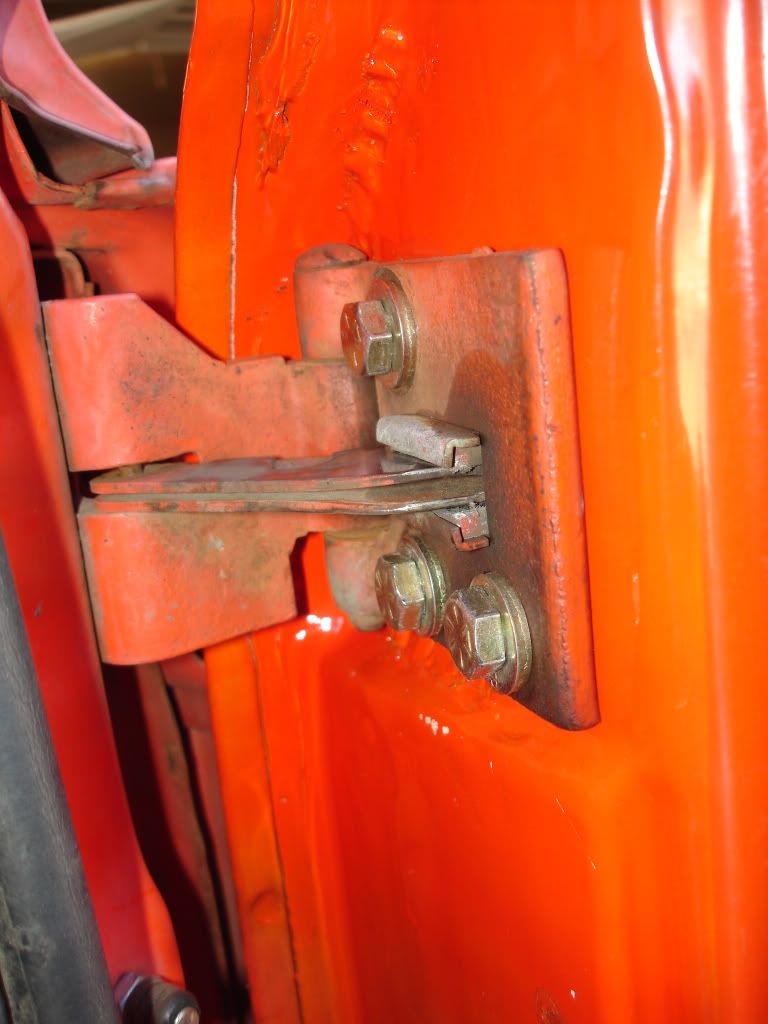 It works very well now and only has one thud when it closes--not two. So, after all of that, I ran out of time/gumption to do the window weatherstrip. Probably tomorrow.....
__________________
1972 K20 Suburban, 5.9L Cummins, Banks Power Pack, NV4500HD, NP205, H.A.D., D60/14FF ARB Link To Build: HERE. |
|
|
|
|
09-20-2010, 11:33 PM
|
#18 |
|
6>8 Plugless........
 Join Date: Sep 2007
Location: Prairie City, Ia
Posts: 17,140
|
Re: The Story Of A Cummins Suburban (Lots Of Pics)
I just wanted to thank you for my new problem!
 I'm now searching for a 68-72 burban to build a cummins powered family ride. I'm now searching for a 68-72 burban to build a cummins powered family ride.
__________________
Ryan 1972 Chevy Longhorn K30 Cheyenne Super, 359 Inline 6 cylinder, Auto Trans, Tilt, Diesel Tach/Vach, Buckets, Rare Rear 4-link and air ride option Build Thread 1972 GMC Sierra Grande Longhorn 4x4 1972 Chevy Cheyenne Super K20 Long Step side tilt, tach, tow hooks, AC, 350 4 speed 1972 C10 Suburban Custom Deluxe 1969 Chevy milk truck 1971 Camaro RS 5.3 BTR STG3 Cam Super T10 1940 Ford 354 Hemi 46RH Ford 9" on air ride huge project Tired of spark plugs? Check this out. |
|
|
|
|
09-20-2010, 11:44 PM
|
#19 | |
|
I had a V-8
Join Date: May 2003
Location: Phoenix AZ
Posts: 1,116
|
Re: The Story Of A Cummins Suburban (Lots Of Pics)
Quote:
__________________
1972 K20 Suburban, 5.9L Cummins, Banks Power Pack, NV4500HD, NP205, H.A.D., D60/14FF ARB Link To Build: HERE. |
|
|
|
|
|
09-20-2010, 11:58 PM
|
#20 |
|
6>8 Plugless........
Join Date: Sep 2007
Location: Prairie City, Ia
Posts: 17,140
|
Re: The Story Of A Cummins Suburban (Lots Of Pics)
Yeah, it's still a go. But I have really thought about using my frame from the longhorn for the burb I found. But I can't bring myself to do that since the longhorn is so close. I'll get the Longhorn drivable and then get the burb. I'm sure it will be a couple months before I get a burb anyhow.
__________________
Ryan 1972 Chevy Longhorn K30 Cheyenne Super, 359 Inline 6 cylinder, Auto Trans, Tilt, Diesel Tach/Vach, Buckets, Rare Rear 4-link and air ride option Build Thread 1972 GMC Sierra Grande Longhorn 4x4 1972 Chevy Cheyenne Super K20 Long Step side tilt, tach, tow hooks, AC, 350 4 speed 1972 C10 Suburban Custom Deluxe 1969 Chevy milk truck 1971 Camaro RS 5.3 BTR STG3 Cam Super T10 1940 Ford 354 Hemi 46RH Ford 9" on air ride huge project Tired of spark plugs? Check this out. |
|
|
|
|
10-02-2010, 03:22 AM
|
#21 |
|
Registered User
Join Date: Jul 2009
Location: Russellville, Arkansas
Posts: 1,699
|
Re: The Story Of A Cummins Suburban (Lots Of Pics)
Thats an awesome suburban. Makes me wish I had put a Cummins in my 68 C20 instead of the 5.3.I got about 11 mpg hauling a travel trailer and motorcycle from Arkansas here. I'm in Tonapah working the outage at Palo Verde. Love the pics of the scenery. I'm hoping to make it that way on my days off. Be on the bike and following more traveled roads than you though. Great stories. Thanks for sharing. Hope to see the burb in passing someday.
|
|
|
|
|
10-02-2010, 03:49 AM
|
#22 |
|
Registered User
Join Date: Jul 2009
Location: Russellville, Arkansas
Posts: 1,699
|
Re: The Story Of A Cummins Suburban (Lots Of Pics)
You didn't happen to paint that thing a sunburst orange metallic color and put a black pipe roofrack on it did you? I saw 1 going west on 10 near Buckeye the other day. Nice looking ,but only saw it for a few seconds. Also saw a nice gold C20 with gold topper up in Phoenix. Got some nice ones around here.
|
|
|
|
|
10-03-2010, 04:37 PM
|
#23 | ||
|
I had a V-8
Join Date: May 2003
Location: Phoenix AZ
Posts: 1,116
|
Re: The Story Of A Cummins Suburban (Lots Of Pics)
Quote:
Quote:
__________________
1972 K20 Suburban, 5.9L Cummins, Banks Power Pack, NV4500HD, NP205, H.A.D., D60/14FF ARB Link To Build: HERE. |
||
|
|
|
|
10-04-2010, 03:43 AM
|
#24 |
|
Registered User
Join Date: Jul 2009
Location: Russellville, Arkansas
Posts: 1,699
|
Re: The Story Of A Cummins Suburban (Lots Of Pics)
Sorry.Palo Verde Nuclear Plant outage. Putting new fuel rods in so it can run another 18 months and run your AC, fridge lights....
|
|
|
|
|
10-05-2010, 01:37 AM
|
#25 | |
|
I had a V-8
Join Date: May 2003
Location: Phoenix AZ
Posts: 1,116
|
Re: The Story Of A Cummins Suburban (Lots Of Pics)
Quote:
I didn't get much time to work on it this weekend, but I did manage to get out on Sunday and got a couple things done. The upper shock mounts I installed have created a couple head scratchers so far. The biggest being the shock length. The shocks I had on the front were too long with the stock mounting and too short with the new shock mounting. I swapped the rears to the front and they looked good at first, but it didn't take long to realize they were too long. Great, buy some new parts to replace new parts. I bought some shorter shocks for it, but the newer design of the RS9000s are larger in diameter than the ones that I bought way back when. This creates a problem with the lower shock mount on the driver side. With the older design RS9000 shocks and the relocated upper mount, the draglink would just miss the bottom of the shock in right turn conditions. WIth the thicker body of the new RS9000 shock it was no longer a miss, but a full-on hit. After some playing around with angles and dimensions, I ended up lengthening the lower mount about 1/2" for clearance. No big deal, but it turned a twenty minute shock change into a three hour ordeal once I got done with it. This shows the difference in body girth: 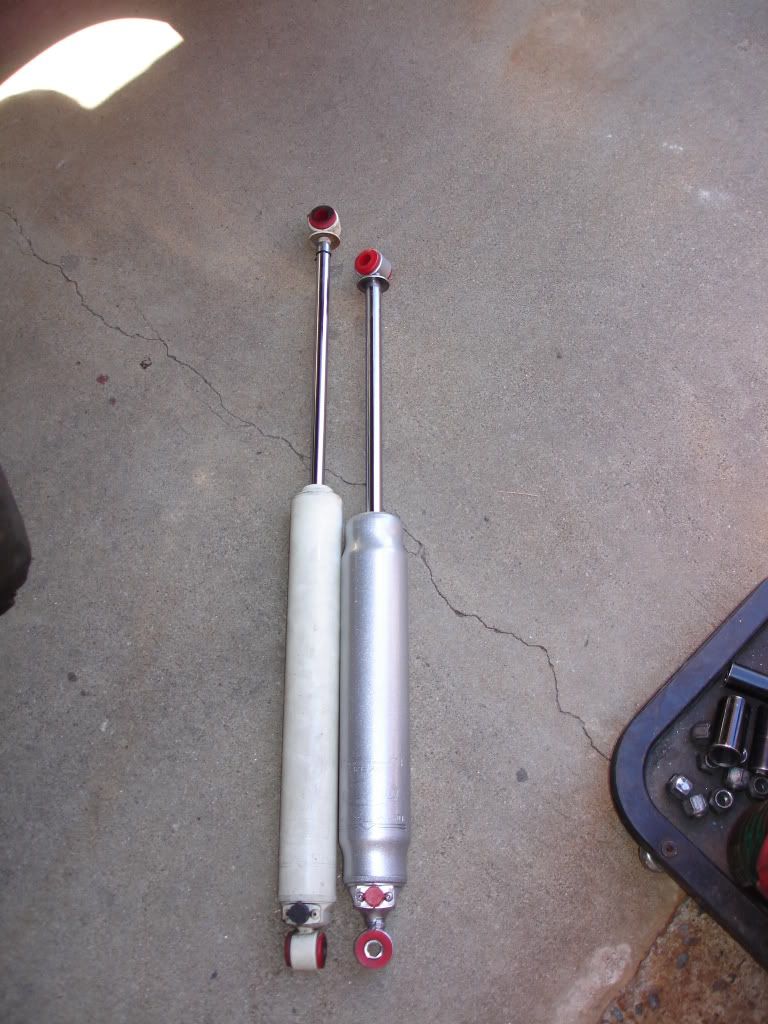 This shows the final mounting, but I forgot to take a pic of the lower bracket: (the strange color is the bright sun bouncing off of the orange truck, reflecting off of a nearly white house into the wheel well area) 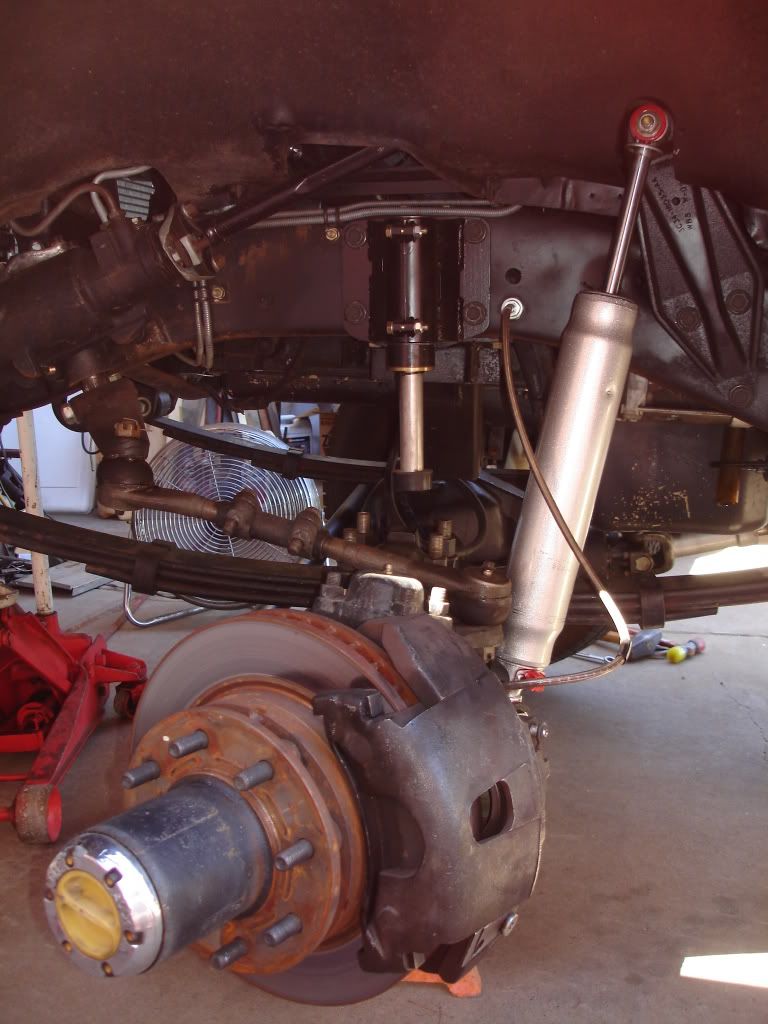 Once upon a time, when I first built this thing, I ran hoses off of each vent nipple up to the underhood area. (front diff, trans, t/case, rear diff, fuel tank) 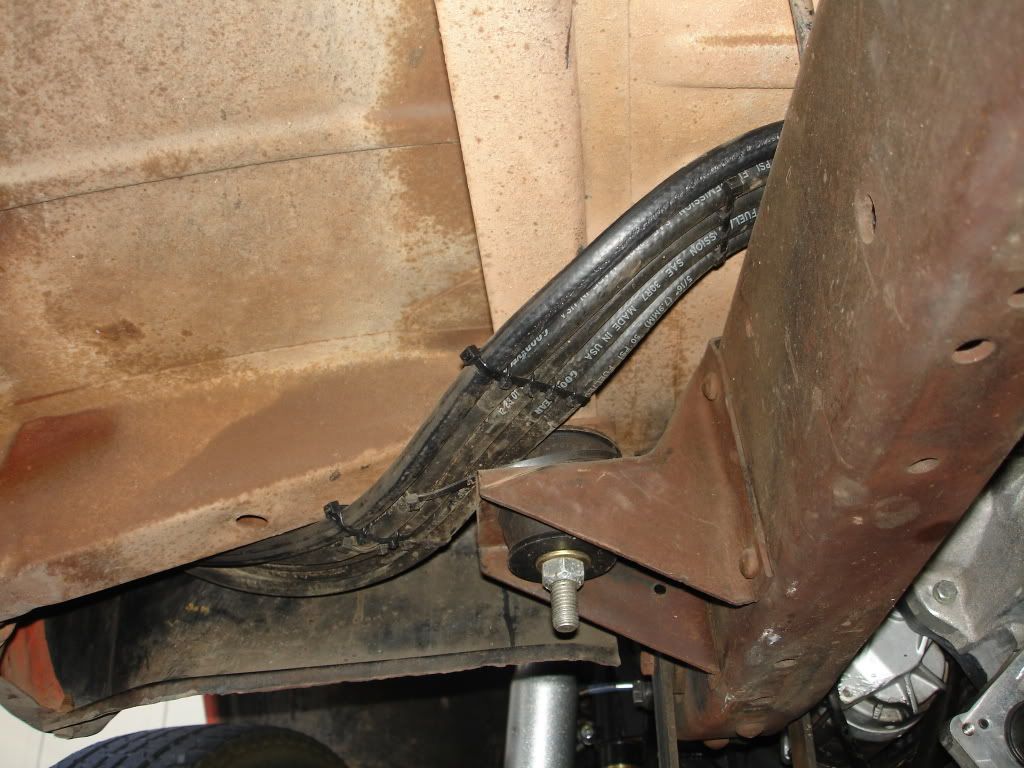 While they were run up there, I had never finished the install. I had bought the vent caps back then but never installed them. I had some grandiose plans of how I was going to mount them, but I figured if I kept waiting to do that, I would never get them done. That being the case, I used a few zip-ties and got the job done in a lees-than-grandiose style: 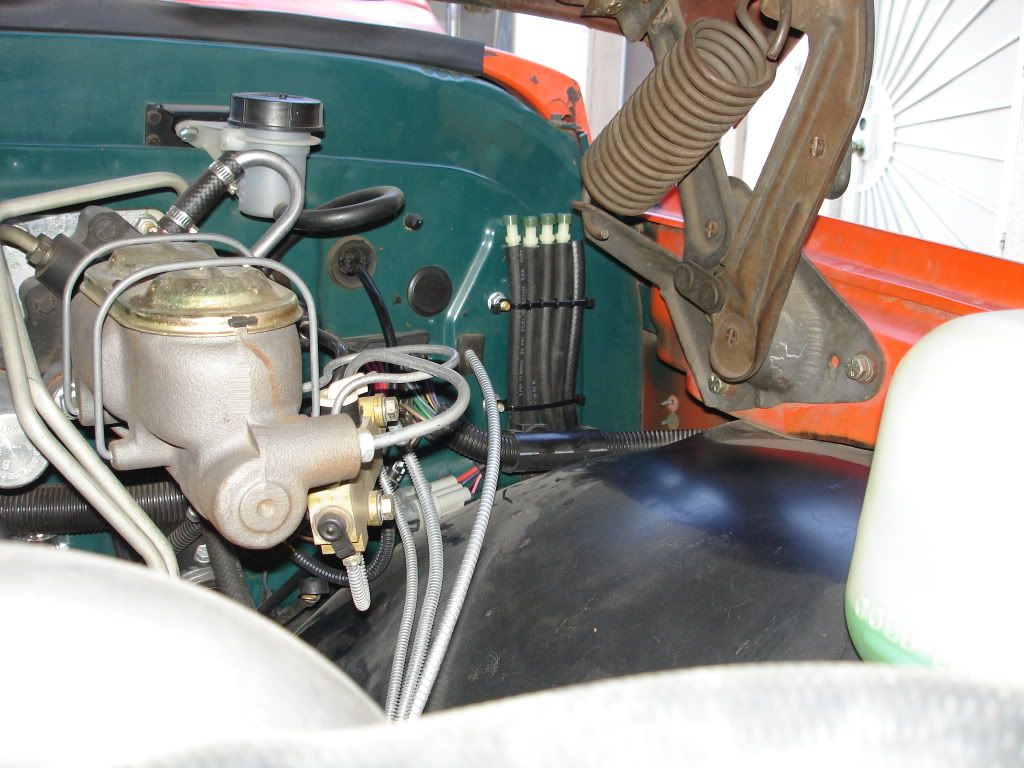 Somewhere in the passing years, one of the caps got pilfered for another project, so I still need one to finish it--but hey, it's much closer. Yet another problem that the upper shock mounts created was I had to remove the grid heater solenoids for cold starting. Not really a problem at all when the thermometer doesn't see the south side of 95, but there is a possible adventure in the near future that just might require the use of them. That being the case, they need to go back in. I really like the original mounting location and bracket, but the bracket was not going to work. I figured out that I could put them back in the same vicinity, but a new bracket is in order. So after dinner I got back out there and whipped up this little gem: 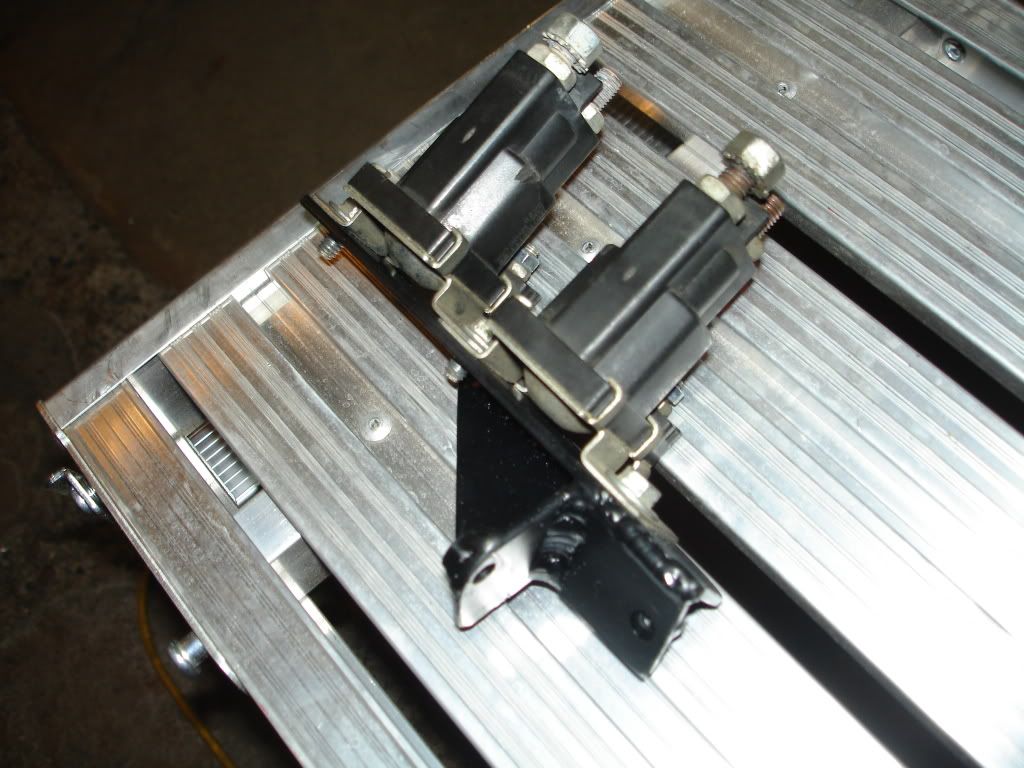 The pic isn't so good, but I was in a rush to get it done before my family duties came to call. I mounted it up and was able to reuse the wiring and cables from the original mounting configuration. 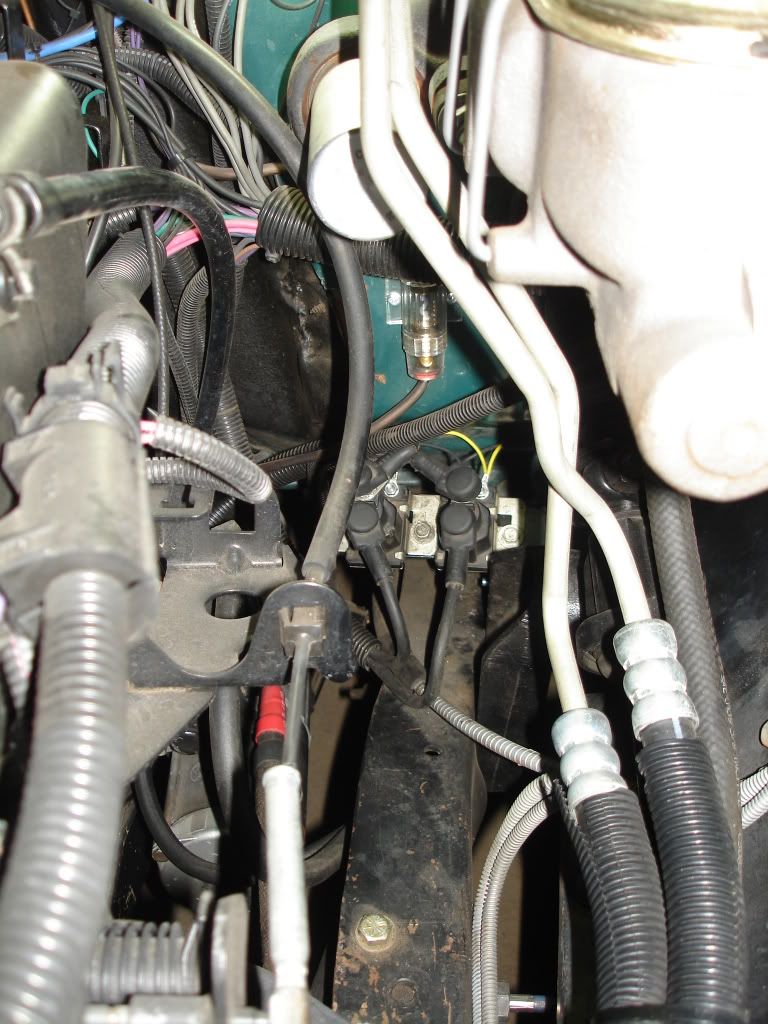 It fits good, is very stout and doesn't grab your eye where it is at. I did take some time and crawl around with a grease gun and I also installed some zip-ties here and there for good measure. So, not a whole lot of progress, but with each little thing here and there, my to-do list is steadily shrinking.
__________________
1972 K20 Suburban, 5.9L Cummins, Banks Power Pack, NV4500HD, NP205, H.A.D., D60/14FF ARB Link To Build: HERE. |
|
|
|
|
 |
| Bookmarks |
|
|


 Hybrid Mode
