
|
 09-15-2011, 06:25 PM
|
#751 |
|
Registered User
Join Date: Aug 2011
Location: P.E.I Canada eh
Posts: 158
|
Re: Make it handle
oups
|

|

|
|
09-16-2011, 11:44 AM
|
#752 |
|
Senior Member
 Join Date: Jul 2010
Location: Dandridge, Tn. USA
Posts: 2,226
|
Re: Make it handle
Fabricating/mounting of a torque arm to the stock rear is really too much work/trouble. The mount locations you show in the pict aren't strong enough, and will fail. I do understant the desire to keep the 12 bolt, and not swap in the 1o bolt, but consider the application. The truck had at best 290 hp, with a big block, unloaded rear weight was 1100 lbs. the Camaro had 330 hp, and rear weight was 1280 lbs. So if your not hauling, there may not be an issue. If you want to keep the stock rear, go with option 1. The camaro torque arm swap only makes sense if your goiunt to use the new rear axle.
__________________
GoodGuys 2012 Pro-Truck Champion  2012 Truckin' Throwdown Champion GoodGuys 2011 National Champion 2011 Truckin' Throwdown Champion GoodGuys 2010 National Champion Proud to put our products up against all others! |
|
|
|
|
09-16-2011, 03:16 PM
|
#753 |
|
Senior Member
Join Date: Jul 2010
Location: Dandridge, Tn. USA
Posts: 2,226
|
Re: Make it handle
TEST QUICK QUESTION: Which frame rail design is stronger?? If you said 'B', you're right (also lighter) Gradual changes to the frame structure are stronger. So, why all the steep step notches?? You tell me. You can sell a step notch in a smaller box, maybe that's it 1. Everyone is asking how we did the rear of the J.T. Truth is, I did it so quickly, there are no pictures. But, here is How I did it Step 1 is most important. Set the chassis level all around, Front/back, Side/Side. Put jackstands under the cab mount area of the chassis and way out front (6 total). Use some square stock and clamps to support the rear of the chassis. Then check and note the height of the rear rails to the floor 2. Cut 1. - - Cut up from the bottom DO NOT CUT ALL THE WAY! Leave the top connected. The cut should be centered in the factor bend just behind the cab. I use a 1/16" cut off wheel. Jigsaw or sawzall is ok too. Make sure your cut is 90 degrees to the rail. Loosen the rear clamps and raise the rear until a 1 3/8" spacer fits in each side. Check level Side/Side, rear... and tack weld in. 3. Cut 2 - - Center the cut in the middle of the factory bend. This will be in front of the spring mount. Measure to make sure the cuts in both sides are in the same place. Loosen the rear clamps and lower the rear rails until the rear sections are level. The gap should be 1 3/8" . Tack in spacers. Double check all level areas See below....
__________________
GoodGuys 2012 Pro-Truck Champion 2012 Truckin' Throwdown Champion GoodGuys 2011 National Champion 2011 Truckin' Throwdown Champion GoodGuys 2010 National Champion Proud to put our products up against all others! |
|
|
|
|
09-16-2011, 03:22 PM
|
#754 |
|
Senior Member
Join Date: Aug 2002
Location: Plymouth, MA
Posts: 891
|
Re: Make it handle
Rob, you read my mind. I am thinking of redoing the rear of my frame and wondered exactly what you pointed out. Gradual vs steep steps. Thanx!
Posted via Mobile Device
__________________
1972 Blazer body...need to get a thread started for the rest of the story |
|
|
|
|
09-16-2011, 03:28 PM
|
#755 |
|
Senior Member
Join Date: Jul 2010
Location: Dandridge, Tn. USA
Posts: 2,226
|
Re: Make it handle
4. Cut 3 - -, AGAIN, In the Center of the factory bend down, Cuts 3 & 4 will be opened up more to get the rails back down to the original height. Make Cut # 3, loosen the clamps, and drop the rear until a 1 5/8" spacer fits in. Check your level Side/Side in the rear and tack in.
Cut 4 - -Make these two cuts, and lift the rear rails until level. Check the height to the floor. If the height is back to O.E., fit in the 1 5/8" spacers and tack in. If not, Adjust the # 3, # 4 spacers. Shorter spacers lift the rear, longer spacers lower it. The rear section should be level and at the stock height when done. Take your time....... this effects the bed, fit later. Fab fishplates (fit inside) First, I use 1/2" holes to plug weld. Then, fab and fit in side inserts. When everything is tacked, check all levels again, then weld up
__________________
GoodGuys 2012 Pro-Truck Champion 2012 Truckin' Throwdown Champion GoodGuys 2011 National Champion 2011 Truckin' Throwdown Champion GoodGuys 2010 National Champion Proud to put our products up against all others! |
|
|
|
|
09-16-2011, 04:52 PM
|
#756 |
|
Senior Member
Join Date: Jul 2010
Location: Dandridge, Tn. USA
Posts: 2,226
|
Re: Make it handle
This can be done in about 8 hrs. It's actually easier if the cab/ft/eng.. is in place. The weight of these items helps to stabilize the chassis. If it's a bare chassis, tie it down (if your lucky enough to have chain hooks sunk in the floor) or wieght it down in the center. A pallet loaded with parts works well.
What do you really get? 4" of drop, with no loss of travel or axle clearance. Now, you can add a 2" block, for a 6" drop, and then a 2" spring for a net 8" drop. And, at 8", the suspesion will feel like it has a 2" spring! What else do you have to do? The panhard rod will need some attention, - but there are plenty of good adjustable ones around. The front trailing arm mounts should be raised. Nock the rivits out, flip the brackets, bolt and weld back on. You need to raise the bed floor 4". Don't chop the center out, unbolt the entire floor and re-fit it back in 4" up.
__________________
GoodGuys 2012 Pro-Truck Champion 2012 Truckin' Throwdown Champion GoodGuys 2011 National Champion 2011 Truckin' Throwdown Champion GoodGuys 2010 National Champion Proud to put our products up against all others! |
|
|
|
|
09-17-2011, 10:18 PM
|
#757 |
|
I'm just glad to be here!
Join Date: Jan 2008
Location: Longview, TX
Posts: 4,788
|
Re: Make it handle
Thanks Rob for posting that. I thought about it for a while and I have a question or two. Since it is a trailing arm set up, the wheel base do not change since the work is behind the crossmember. But, with the cuts and movement of the rails, didn't the OE spring mount move forward some? Also, didn't the overall length of the frame get shorter?
Posted via Mobile Device
__________________
Karl  1965 Chevy Stepside(Grandpa's Old Blue) and (July 2015 Shop Build!)(2020, the Saga Continues) http://67-72chevytrucks.com/vboard/s...d.php?t=372424 The LST Challenge: http://67-72chevytrucks.com/vboard/s...=1#post7812257 Korbin's 1st Square: "Sunburn" http://67-72chevytrucks.com/vboard/s...d.php?t=418618 1985 GMC Sierra: "White Trash", Korbin's 2nd now... http://67-72chevytrucks.com/vboard/s...d.php?t=632305 Henry - 1984 Chevrolet, Owen's 1st Square |
|
|
|
|
09-18-2011, 01:01 PM
|
#758 |
|
Senior Member
Join Date: Jul 2010
Location: Dandridge, Tn. USA
Posts: 2,226
|
Re: Make it handle
good point. Yes, the frame did get a little shorter, about 1/2". Most of that was from the step down after the axle, it is a steeper step. the sping mount on the chassis moved forward 1/8" - 3/16", not anything to worry about. The front bed mount stays the same, grind the hole back for the rear mount. Once the bed floor was raised, we fabbed in the four center mounts.
__________________
GoodGuys 2012 Pro-Truck Champion 2012 Truckin' Throwdown Champion GoodGuys 2011 National Champion 2011 Truckin' Throwdown Champion GoodGuys 2010 National Champion Proud to put our products up against all others! |
|
|
|
|
09-18-2011, 06:21 PM
|
#759 |
|
Registered User
Join Date: Oct 2008
Location: Parsons, KS
Posts: 652
|
Re: Make it handle
Thanks for posting that up Rob, I have been wondering how you guys did that. I am about to do something similar on my truck, but do you think it will work the same on my 74 with leaf springs?
I was originally going to find the best places on both sides, mark and support it then remove the middle section, raise it up 4" and the connect and reinforce it all back together. Posted via Mobile Device
__________________
74 GMC SWB Project "Sin-thia" Static Dropped 8"f/10"r http://67-72chevytrucks.com/vboard/s...d.php?t=460030  97 GMC reg cab short bed, 4.3V6 / 5spd, daily driver 220,000 miles, all stock for now |
|
|
|
|
09-19-2011, 11:54 AM
|
#760 |
|
Senior Member
Join Date: Aug 2002
Location: Plymouth, MA
Posts: 891
|
Re: Make it handle
Rob, Is there any gain to mounting bags/coils towards the end of the axle tubes (as close to the wheel as safe)? Along the same lines, the factory frame rails widen at the rearend. If I built a back-half would it be worth the effort to widen the rails from the cab to over the rearend or just keep them in line with the portion that is under the cab? Is 2" x 4" x 0.120" steel tube strong enough for a frame? I would plate any joints internally or externally with 1/8" steel. Thanx again, Jamison
Posted via Mobile Device
__________________
1972 Blazer body...need to get a thread started for the rest of the story |
|
|
|
|
09-19-2011, 03:20 PM
|
#761 | |
|
Senior Member
Join Date: Jul 2010
Location: Dandridge, Tn. USA
Posts: 2,226
|
Re: Make it handle
Quote:
__________________
GoodGuys 2012 Pro-Truck Champion 2012 Truckin' Throwdown Champion GoodGuys 2011 National Champion 2011 Truckin' Throwdown Champion GoodGuys 2010 National Champion Proud to put our products up against all others! |
|
|
|
|
|
09-19-2011, 03:22 PM
|
#762 | |
|
Senior Member
Join Date: Jul 2010
Location: Dandridge, Tn. USA
Posts: 2,226
|
Re: Make it handle
Quote:
__________________
GoodGuys 2012 Pro-Truck Champion 2012 Truckin' Throwdown Champion GoodGuys 2011 National Champion 2011 Truckin' Throwdown Champion GoodGuys 2010 National Champion Proud to put our products up against all others! |
|
|
|
|
|
09-19-2011, 09:28 PM
|
#763 | |
|
Registered User
Join Date: Oct 2008
Location: Parsons, KS
Posts: 652
|
Re: Make it handle
Quote:
Will I be able to use those same measurements? The 1-3/8" spacer in the cuts? Or is it different? Posted via Mobile Device
__________________
74 GMC SWB Project "Sin-thia" Static Dropped 8"f/10"r http://67-72chevytrucks.com/vboard/s...d.php?t=460030 97 GMC reg cab short bed, 4.3V6 / 5spd, daily driver 220,000 miles, all stock for now |
|
|
|
|
|
09-19-2011, 10:14 PM
|
#764 |
|
Registered User
Join Date: Oct 2008
Location: Parsons, KS
Posts: 652
|
Re: Make it handle
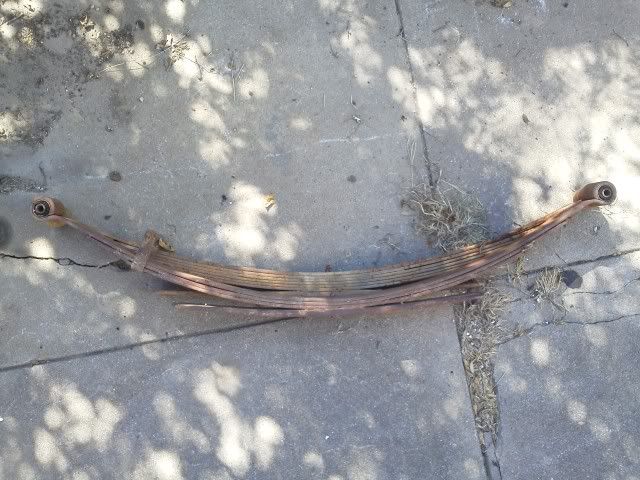
Thought I would show the difference, the 2wd leafs are sitting on top of the 4wd leafs....
__________________
74 GMC SWB Project "Sin-thia" Static Dropped 8"f/10"r http://67-72chevytrucks.com/vboard/s...d.php?t=460030 97 GMC reg cab short bed, 4.3V6 / 5spd, daily driver 220,000 miles, all stock for now |
|
|
|
|
09-20-2011, 11:46 AM
|
#765 |
|
Senior Member
Join Date: Jul 2010
Location: Dandridge, Tn. USA
Posts: 2,226
|
Re: Make it handle
Hey, I learned somethin new. I didn't know that about the 4x4 spring. Did you take some leafs out? I would measure the hieght of the rail at the axle, then use 1 3/8" wedges on steps #1, & #2. Then measure the hieght again to check the gain. You can adjust the wedges to get the step you want.
__________________
GoodGuys 2012 Pro-Truck Champion 2012 Truckin' Throwdown Champion GoodGuys 2011 National Champion 2011 Truckin' Throwdown Champion GoodGuys 2010 National Champion Proud to put our products up against all others! |
|
|
|
|
09-20-2011, 12:09 PM
|
#766 | |
|
Registered User
Join Date: Oct 2008
Location: Parsons, KS
Posts: 652
|
Re: Make it handle
Quote:
Posted via Mobile Device
__________________
74 GMC SWB Project "Sin-thia" Static Dropped 8"f/10"r http://67-72chevytrucks.com/vboard/s...d.php?t=460030 97 GMC reg cab short bed, 4.3V6 / 5spd, daily driver 220,000 miles, all stock for now |
|
|
|
|
|
09-23-2011, 11:34 AM
|
#767 |
|
56 - autocross
Join Date: Apr 2010
Location: Camarillo, Ca
Posts: 1,121
|
Re: Make it handle
Hey Rob:
Can you address parhard bars a little more. I understand that they should be level at ride height, preferably with the middle or bottom of the axle, but what is the desired placement when looking down on them from the top? Parallel with the axle as well? I see so many that are sloping backwards to mount to the frame. Which is ideal? |
|
|
|
|
09-23-2011, 03:14 PM
|
#768 |
|
Senior Member
Join Date: Jul 2010
Location: Dandridge, Tn. USA
Posts: 2,226
|
Re: Make it handle
I use the 5 degree rule. Yes, having the panhard rod parallel to the axle is Ideal, but with 5 deg is OK. Many of them, including our new C-10 panhard rod kit (3 deg), lean back a bit to allow for clearance of the diff cover.
On the hight of the bar, if you average the hieght of the bar, that is the roll center height. For example, if the axle mount is 12" at ride height, and the chassis mount hieght is 13", then the Roll Center is 12 1/2". For these old pick-ups, the lower the roll center the better.
__________________
GoodGuys 2012 Pro-Truck Champion 2012 Truckin' Throwdown Champion GoodGuys 2011 National Champion 2011 Truckin' Throwdown Champion GoodGuys 2010 National Champion Proud to put our products up against all others! |
|
|
|
|
09-23-2011, 03:33 PM
|
#769 |
|
56 - autocross
Join Date: Apr 2010
Location: Camarillo, Ca
Posts: 1,121
|
Re: Make it handle
What about having a longer axle panhard mount to clear the pumpkin so the bar is parallel from above ?
|
|
|
|
|
09-24-2011, 10:27 AM
|
#770 |
|
I'm just glad to be here!
Join Date: Jan 2008
Location: Longview, TX
Posts: 4,788
|
Re: Make it handle
FOr the pan hard bar, if the mounts are long similar to the one in the picture on post #740, would it be ideal if the bar is parrallel to the axle AND the ground at ride height?
The height of the mounts you mentioned above is from the ground, correct?
__________________
Karl 1965 Chevy Stepside(Grandpa's Old Blue) and (July 2015 Shop Build!)(2020, the Saga Continues) http://67-72chevytrucks.com/vboard/s...d.php?t=372424 The LST Challenge: http://67-72chevytrucks.com/vboard/s...=1#post7812257 Korbin's 1st Square: "Sunburn" http://67-72chevytrucks.com/vboard/s...d.php?t=418618 1985 GMC Sierra: "White Trash", Korbin's 2nd now... http://67-72chevytrucks.com/vboard/s...d.php?t=632305 Henry - 1984 Chevrolet, Owen's 1st Square |
|
|
|
|
09-24-2011, 10:43 AM
|
#771 | |
|
Registered User
Join Date: Apr 2001
Location: DALLAS,TX
Posts: 21,910
|
Re: Make it handle
Quote:
__________________
67SWB-B.B.RetroRod 64SWB-Recycle 89CCDually-Driver/Tow Truck 99CCSWB Driver All Fleetsides @rattlecankustoms in IG Building a small, high rpm engine with the perfect bore, stroke and rod ratio is very impressive. It's like a highly skilled Morrocan sword fighter with a Damascus Steel Scimitar..... Cubic inches is like Indiana Jones with a cheap pistol. |
|
|
|
|
|
09-24-2011, 01:28 PM
|
#772 | |
|
Registered User
Join Date: Jul 2008
Location: Springfield, MO
Posts: 35
|
Re: Make it handle
Quote:
Jon |
|
|
|
|
|
09-25-2011, 02:39 PM
|
#773 | |
|
Senior Member
Join Date: Jul 2010
Location: Dandridge, Tn. USA
Posts: 2,226
|
Re: Make it handle
Quote:
__________________
GoodGuys 2012 Pro-Truck Champion 2012 Truckin' Throwdown Champion GoodGuys 2011 National Champion 2011 Truckin' Throwdown Champion GoodGuys 2010 National Champion Proud to put our products up against all others! |
|
|
|
|
|
09-25-2011, 02:47 PM
|
#774 | |
|
Senior Member
Join Date: Jul 2010
Location: Dandridge, Tn. USA
Posts: 2,226
|
Re: Make it handle
Quote:
__________________
GoodGuys 2012 Pro-Truck Champion 2012 Truckin' Throwdown Champion GoodGuys 2011 National Champion 2011 Truckin' Throwdown Champion GoodGuys 2010 National Champion Proud to put our products up against all others! |
|
|
|
|
|
09-26-2011, 11:27 AM
|
#775 |
|
I'm just glad to be here!
Join Date: Jan 2008
Location: Longview, TX
Posts: 4,788
|
Re: Make it handle
Thanks Rob and Scoti.
I am redo in part of my rear suspension and will be running the bar to the trailing arm on the pass. side. I think that will be as low as I want to go for a driver...
__________________
Karl 1965 Chevy Stepside(Grandpa's Old Blue) and (July 2015 Shop Build!)(2020, the Saga Continues) http://67-72chevytrucks.com/vboard/s...d.php?t=372424 The LST Challenge: http://67-72chevytrucks.com/vboard/s...=1#post7812257 Korbin's 1st Square: "Sunburn" http://67-72chevytrucks.com/vboard/s...d.php?t=418618 1985 GMC Sierra: "White Trash", Korbin's 2nd now... http://67-72chevytrucks.com/vboard/s...d.php?t=632305 Henry - 1984 Chevrolet, Owen's 1st Square |
|
|
|
 |
| Bookmarks |
|
|


 Linear Mode

