
|
Register or Log In To remove these advertisements. |
|
|
|
|||||||
 |
|
|
Thread Tools | Display Modes |
 08-20-2014, 12:58 AM
|
#51 |
|
Registered User
Join Date: Sep 2013
Location: fairbanks, ak
Posts: 339
|
Re: 1948 Chev extended cab with attitude
That's awesome.
|

|

|
|
08-20-2014, 02:17 AM
|
#52 |
|
Registered User
Join Date: Sep 2012
Location: Oregon
Posts: 3,303
|
Re: 1948 Chev extended cab with attitude
You are a surgeon. I like it!
__________________
GOD BLESS AMERICA! |
|
|
|
|
08-20-2014, 02:42 AM
|
#53 |
|
Registered User
Join Date: Jun 2010
Location: Oklahoma City, OK
Posts: 1,510
|
Re: 1948 Chev extended cab with attitude
The door/dash transition work is cool! Great vision and execution

__________________
1958 Chevy 1 ton dually 4X4 dump/flat bed My build thread 1966 "Not-So-Original" Chevy Custom Trim Suburban My Time-Killing Project Truck 1966 GMC Extended cab 1 1/4 ton 4X4 My Son's build thread |
|
|
|
|
08-20-2014, 10:11 AM
|
#54 |
|
Senior Member
 Join Date: Mar 2011
Location: West Plains, Missouri
Posts: 7,553
|
Re: 1948 Chev extended cab with attitude
Very nice work...Jim
__________________
my build thread: http://67-72chevytrucks.com/vboard/s...d.php?t=459839 Jimbo's long bed step build:http://67-72chevytrucks.com/vboard/s...t=464626<br /> |
|
|
|
|
08-20-2014, 10:32 AM
|
#55 |
|
Registered User
 Join Date: Mar 2007
Location: Scotts, Michigan
Posts: 3,750
|
Re: 1948 Chev extended cab with attitude
I can smell the burning metal from the welder followed up by the grinder. Nice flow to the dash into the doors.
keep at it Eugene.... Marc
__________________
...........__________ .................. ((__|__||___\____ ..;.;;.:;:;.,;..;((_(O))____ (_(O)) 1948 Chevy Truck - Finished SOLD!! 1953 Chevy Suburban "Family Truckster" Completed: Spring of 2021 http://67-72chevytrucks.com/vboard/s...d.php?t=605484 1994 4x4 Blazer - "Field Find" https://67-72chevytrucks.com/vboard/...ferrerid=30857 |
|
|
|
|
08-29-2014, 03:18 AM
|
#56 |
|
Registered User
Join Date: Mar 2014
Location: Yakima Wa
Posts: 49
|
Re: 1948 Chev extended cab with attitude
Keep up the good work can't wait to see more
|
|
|
|
|
01-01-2015, 01:07 AM
|
#57 |
|
Registered User
Join Date: May 2014
Location: north illinois
Posts: 76
|
Re: 1948 Chev extended cab with attitude
I went up to the anchorage area this last summer and was just dumbfounded by all the old cars just sitting in people's yards and in the woods in the country. I almost wish I lived up there for that reason.
|
|
|
|
|
02-21-2015, 06:13 PM
|
#58 |
|
Registered User
Join Date: Nov 2014
Location: Apex, NC
Posts: 76
|
Re: 1948 Chev extended cab with attitude
Really dig this build. Hope to see more soon!
|
|
|
|
|
02-22-2015, 03:06 AM
|
#59 |
|
Registered User
Join Date: Aug 2013
Location: Ruidoso, NM
Posts: 290
|
Re: 1948 Chev extended cab with attitude
Well, it looks like I have the front fenders and hood sold off the truck, (I have better ones) so I jumped back to it for a few days. I screwed up when I built my motor mounts. I set the motor in regards to the firewall instead of the radiator, so I can only run an electric fan instead of a mechanical one and I do not want that. The only alternative was to move the radiator forward. I decided to get this done before tearing the frontend apart.
Stock Chevy.  Stock GMC. I decided to use these parts from the suburban I hauled home earlier.  I changed the side supports and upper bar to the GMC.  I added a cut up Chevy lower half to get an idea of how it will look.  I didn't like how tall it was, so I cut 1 3/8 " off the upper support and this placed the upper support bolts in the lower support bolt holes.   Once the bodywork is done and the new front sheet metal is together, I'll blend the GMC upper portion with the Chevy lower half. Time to jump back on Diana's truck and the Airstream.
__________________
http://67-72chevytrucks.com/vboard/s...d.php?t=592642 '48 Chev extended cab with attitude http://67-72chevytrucks.com/vboard/s...d.php?t=592769 My daughter's '46 International PU |
|
|
|
|
02-22-2015, 11:51 AM
|
#60 |
|
Senior Member
Join Date: Mar 2011
Location: West Plains, Missouri
Posts: 7,553
|
Re: 1948 Chev extended cab with attitude
Nice job...Jim
__________________
my build thread: http://67-72chevytrucks.com/vboard/s...d.php?t=459839 Jimbo's long bed step build:http://67-72chevytrucks.com/vboard/s...t=464626<br /> |
|
|
|
|
02-22-2015, 06:58 PM
|
#61 |
|
Senior Member
Join Date: Jul 2012
Location: Oblong, Illinois
Posts: 7,017
|
Re: 1948 Chev extended cab with attitude
Looks really good!
|
|
|
|
|
02-22-2015, 11:24 PM
|
#62 |
|
Registered User
Join Date: Mar 2007
Location: Scotts, Michigan
Posts: 3,750
|
Re: 1948 Chev extended cab with attitude
Looks good Eugene.
I remember that suburban. It donated a few good parts to my cause as well... Marc
__________________
...........__________ .................. ((__|__||___\____ ..;.;;.:;:;.,;..;((_(O))____ (_(O)) 1948 Chevy Truck - Finished SOLD!! 1953 Chevy Suburban "Family Truckster" Completed: Spring of 2021 http://67-72chevytrucks.com/vboard/s...d.php?t=605484 1994 4x4 Blazer - "Field Find" https://67-72chevytrucks.com/vboard/...ferrerid=30857 |
|
|
|
|
02-25-2015, 12:56 AM
|
#63 |
|
Registered User
Join Date: Aug 2013
Location: Ruidoso, NM
Posts: 290
|
Re: 1948 Chev extended cab with attitude
Thanks. Another plus to using the GMC parts is that they are way stronger than the Chevy ones. Since I am eliminating the two support rods that go from the fenders to the firewall, this helps beef up the strength.
__________________
http://67-72chevytrucks.com/vboard/s...d.php?t=592642 '48 Chev extended cab with attitude http://67-72chevytrucks.com/vboard/s...d.php?t=592769 My daughter's '46 International PU |
|
|
|
|
09-30-2015, 08:22 AM
|
#64 |
|
Active Member
Join Date: Dec 2009
Location: Killdeer ND
Posts: 118
|
Re: 1948 Chev extended cab with attitude
All I can say is you have true talent! Wish I had you as a neighbor!
|
|
|
|
|
02-02-2016, 08:36 AM
|
#65 |
|
Registered User
Join Date: Oct 2015
Location: Vinton, la
Posts: 189
|
Re: 1948 Chev extended cab with attitude
What happened with this build? It is inspiring to say the least.
__________________
SHAKE N BAKE BABY, SHAKE N BAKE.... http://67-72chevytrucks.com/vboard/s...d.php?t=686729 |
|
|
|
|
02-20-2016, 10:37 AM
|
#66 |
|
Registered User
Join Date: Aug 2013
Location: Ruidoso, NM
Posts: 290
|
Re: 1948 Chev extended cab with attitude
Where has the last year gone? I was surprised to see it has been that long since updating this build. My camera broke and the replacement sucked, so I don't have all the pic's I should have.
My friend with the '50 Chev truck decided to leave Alaska this summer and always wanted to go on a cruise with our two trucks,  so the mad scramble began to get mine running began. I was shooting for our anniversary in April. Both rear fenders are in primer finally. I wanted to replace them, but couldn't see paying $1,000 each with shipping. One came off a truck that burned, so every bolt hole was rusted out as well as the lower front and back edges. Ten patches later, it is solid again. The rad support is finished and in paint. Here is the drivers inner fender.  Smoothed and patched.   The passenger side was just as bad and both are in primer now. Rear cab corners are in.  Tilt your head to the right. This is the new drain tube for the cowl vent. If anyone has ever had a leak here, it is probably due to Chevrolet's great wisdom of using round sheet metal instead of a solid tube to mount the drain hose to. Of course the seam is on the firewall side and no room to really get to it, so I added a liberal amount of windshield urethane to seal it up as a safety precaution.  I got my driveshaft made and then added a driveshaft loop to help create the needed clearance as it was hitting the cross member near the back of the cab and wouldn't even mount up. I used a piece of heavy well casing 8 inches across. I split it in half and added 1 3/4 inches to get more clearance.   I have complained about the steering column ever since I installed it as I never liked the dimmer switch in it. This added two large boxes on the side of it and it was a column shift (I'm going with a floor shift) and I already have my Cal Custom dimmer switch cover (Floor switch) that goes with my Moon gas pedal.  Last summer I obtained a late 60's floor shift tilt column and after complaining again to a buddy when he was at the shop, I ripped the old column out and started the change over. When I told Jackie about it, she wanted to know if that was part of the Must Do list? I told her it is now.  Mocked up. I planned to use the original dash mount I had made, but didn't like the looks of it going back so far.  Here is the old mount after cutting it all apart and rebuilding it so it is thinner and leans forward. The tube on the side is for my ignition switch.  
__________________
http://67-72chevytrucks.com/vboard/s...d.php?t=592642 '48 Chev extended cab with attitude http://67-72chevytrucks.com/vboard/s...d.php?t=592769 My daughter's '46 International PU |
|
|
|
|
02-20-2016, 10:45 PM
|
#67 |
|
Registered User
Join Date: Mar 2007
Location: Scotts, Michigan
Posts: 3,750
|
Re: 1948 Chev extended cab with attitude
Good to see your back around Eugene.
The progress looks good. Marc
__________________
...........__________ .................. ((__|__||___\____ ..;.;;.:;:;.,;..;((_(O))____ (_(O)) 1948 Chevy Truck - Finished SOLD!! 1953 Chevy Suburban "Family Truckster" Completed: Spring of 2021 http://67-72chevytrucks.com/vboard/s...d.php?t=605484 1994 4x4 Blazer - "Field Find" https://67-72chevytrucks.com/vboard/...ferrerid=30857 |
|
|
|
|
02-21-2016, 03:27 AM
|
#68 |
|
Registered User
Join Date: Jun 2013
Location: Winnipeg Manitoba
Posts: 177
|
Re: 1948 Chev extended cab with attitude
Glad you are back! I wondered what had happened to your build. I'm just putting a TF dash in my AD truck too!
|
|
|
|
|
02-22-2016, 01:32 AM
|
#69 |
|
Registered User
Join Date: Aug 2013
Location: Ruidoso, NM
Posts: 290
|
Re: 1948 Chev extended cab with attitude
It's good to be back. LOW AD, what are you doing with your dash? Leaving it stock?
I'm still trying to catch up on pictures. I welded the two corner pieces back in and did the bodywork.   I needed to find a way to get the wiring into the doors, so I decided to use these looms since I had them. To get the angles right, I welded two 45 degree sleeves on both ends.   With the serious chop, the windshield wipers needed to shift sideways. After welding up the old holes, I went with single motor after market wipers because they were cheaper and I decided to mount them above the windshield so they can't be seen once the visor is installed.    Due to the door handle mechanism going through where the stock window mechanism goes, I had to switch to power windows. I want them to look stock, so I'm using the switch that utilizes the stock handle. Here is the new mounting plate for it.  Two weeks ago I pulled the motor out and finished welding the motor mounts, firewall and floor / trans tunnel.  It's nice to see some serious changes again.  I sent the motor out to be rebuilt since it was about time for it.   More to come as time permits. I'm pounding hard on the truck as we just put our house up for sale and are moving back to Arizona once it sells.
__________________
http://67-72chevytrucks.com/vboard/s...d.php?t=592642 '48 Chev extended cab with attitude http://67-72chevytrucks.com/vboard/s...d.php?t=592769 My daughter's '46 International PU |
|
|
|
|
02-22-2016, 02:18 AM
|
#70 |
|
Registered User
Join Date: Jun 2013
Location: Winnipeg Manitoba
Posts: 177
|
Re: 1948 Chev extended cab with attitude
I plan to smooth out my dash. I'll post pics once i have the dash welded in. I have it trimmed and fitting pretty much where i want it. Your truck is coming along nicely! Should be a bit warmer than where you are now if you move to Az!!!
|
|
|
|
|
02-25-2016, 05:30 PM
|
#71 |
|
Registered User
Join Date: Aug 2013
Location: Ruidoso, NM
Posts: 290
|
Re: 1948 Chev extended cab with attitude
I needed to find out exactly where the bed was going to be located, so I mounted the running boards, fenders to the bed and then tried to mount the side splash aprons, but they were too long. I cut the fronts off and ended up shortening them about 3/4 of an inch.
   The front of the bed was hitting the cab and needed to move forward a little more. I also hate seeing a flat bed front against a rounded cab. I made a new rounded front bed pan.  An interesting side note is that this 1 x1 square tubing is the last of what I used to make the bed frame on my '48 Austin bed back in 1988. That was my first hot rod and this is the last one I'm planning to build for myself. I saved it from the crusher and the trucks used in this build. 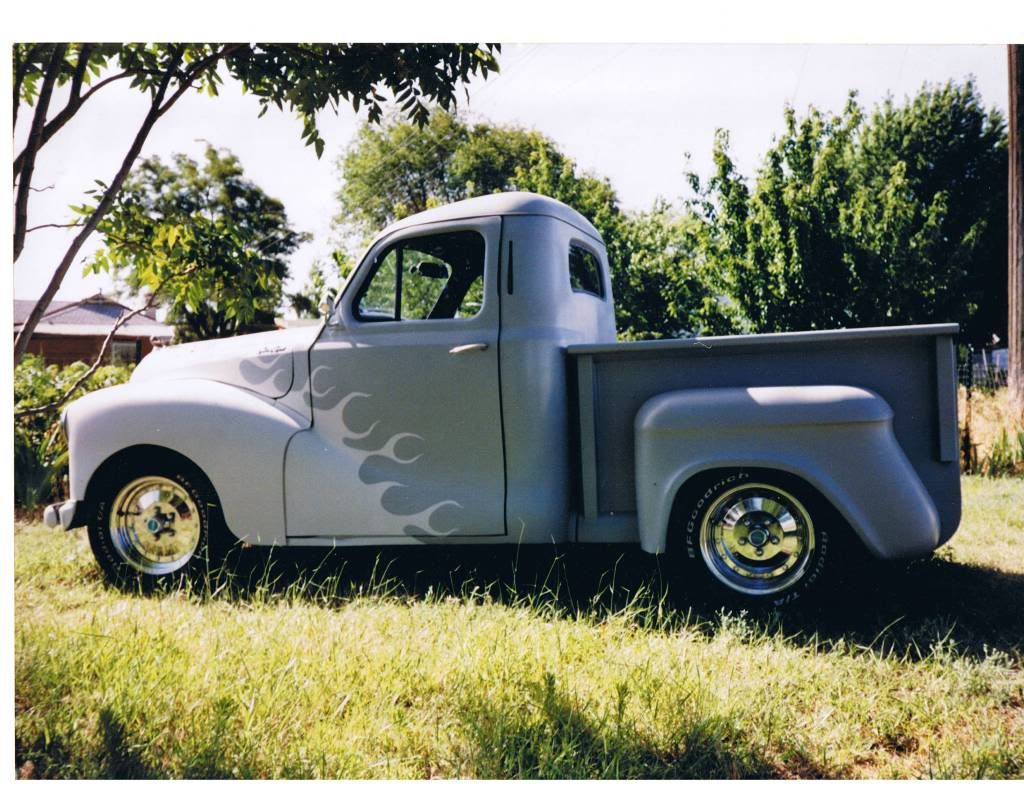 The bed was the right length once it moved forward and the fenders bolted up to the running boards. I made new rear mounts.  The old junk bed was removed and dismantled for parts. I used the old rear sill with the roll pan mounted to it to determine where my tow hitch would go as I wanted it hidden behind the license plate. The hitch is off a 2003 3/4 ton GMC and fit nicely.   The new bedsides are 2 inches taller than stock since the originals look too short to me.  New inner wheel tubs.  Mocked up and shows new fuel cell installed.  Tailgate mocked up and had old chain mounts removed. It will have hidden latches and S10 hinges.  I still need to add 2 inches to the bottom of the tailgate. I have already stretched the stake pockets.  That's it for now.
__________________
http://67-72chevytrucks.com/vboard/s...d.php?t=592642 '48 Chev extended cab with attitude http://67-72chevytrucks.com/vboard/s...d.php?t=592769 My daughter's '46 International PU |
|
|
|
|
02-25-2016, 08:12 PM
|
#72 |
|
Senior Member
Join Date: Jul 2012
Location: Oblong, Illinois
Posts: 7,017
|
Re: 1948 Chev extended cab with attitude
Nice work AG.
|
|
|
|
|
02-25-2016, 10:52 PM
|
#73 |
|
Registered User
Join Date: Jan 2015
Location: Rochester, WA
Posts: 259
|
Re: 1948 Chev extended cab with attitude
I have been thinking the same thing about the height of the bed sides!!
Makes the truck look top-heavy I think. I had figured somewhere between 2-3 1/2" increase in height, bring it up to close to even with the door handle, give or take... When you get them fitted, appreciate some side view pictures if you don't mind. Really enjoying following along on your build, looks like it is going to great!!
__________________
 No bolt or nut in the world will remain tight if you turn it to liquid!!! No bolt or nut in the world will remain tight if you turn it to liquid!!!
|
|
|
|
|
02-26-2016, 02:13 AM
|
#74 | |
|
Registered User
Join Date: Aug 2013
Location: Ruidoso, NM
Posts: 290
|
Re: 1948 Chev extended cab with attitude
Quote:
__________________
http://67-72chevytrucks.com/vboard/s...d.php?t=592642 '48 Chev extended cab with attitude http://67-72chevytrucks.com/vboard/s...d.php?t=592769 My daughter's '46 International PU |
|
|
|
|
|
02-26-2016, 07:58 AM
|
#75 |
|
Registered User
Join Date: Dec 2011
Location: Mobile, Alabama
Posts: 996
|
Re: 1948 Chev extended cab with attitude
Now THIS is an entertaining build. Enjoyed your daughters as well. Keep it up.
__________________
My Build - http://67-72chevytrucks.com/vboard/s...d.php?t=515876 |
|
|
|
|
| Bookmarks |
|
|


 Linear Mode

