
|
 12-24-2015, 02:04 PM
|
#276 |
|
Registered User
Join Date: Dec 2010
Location: washington NJ
Posts: 766
|
Re: 46 pickemup in NJ "the Rebuild"
Here's a better look at the coil bracket and temp sensor housing.
 [/URL] [/URL]After I took a bunch of head meds to calm my analness, I got my fuel line bent up and installed in a way I can somewhat live with. I tried to get it to run paralell with the fins on the valve cover as best I could.  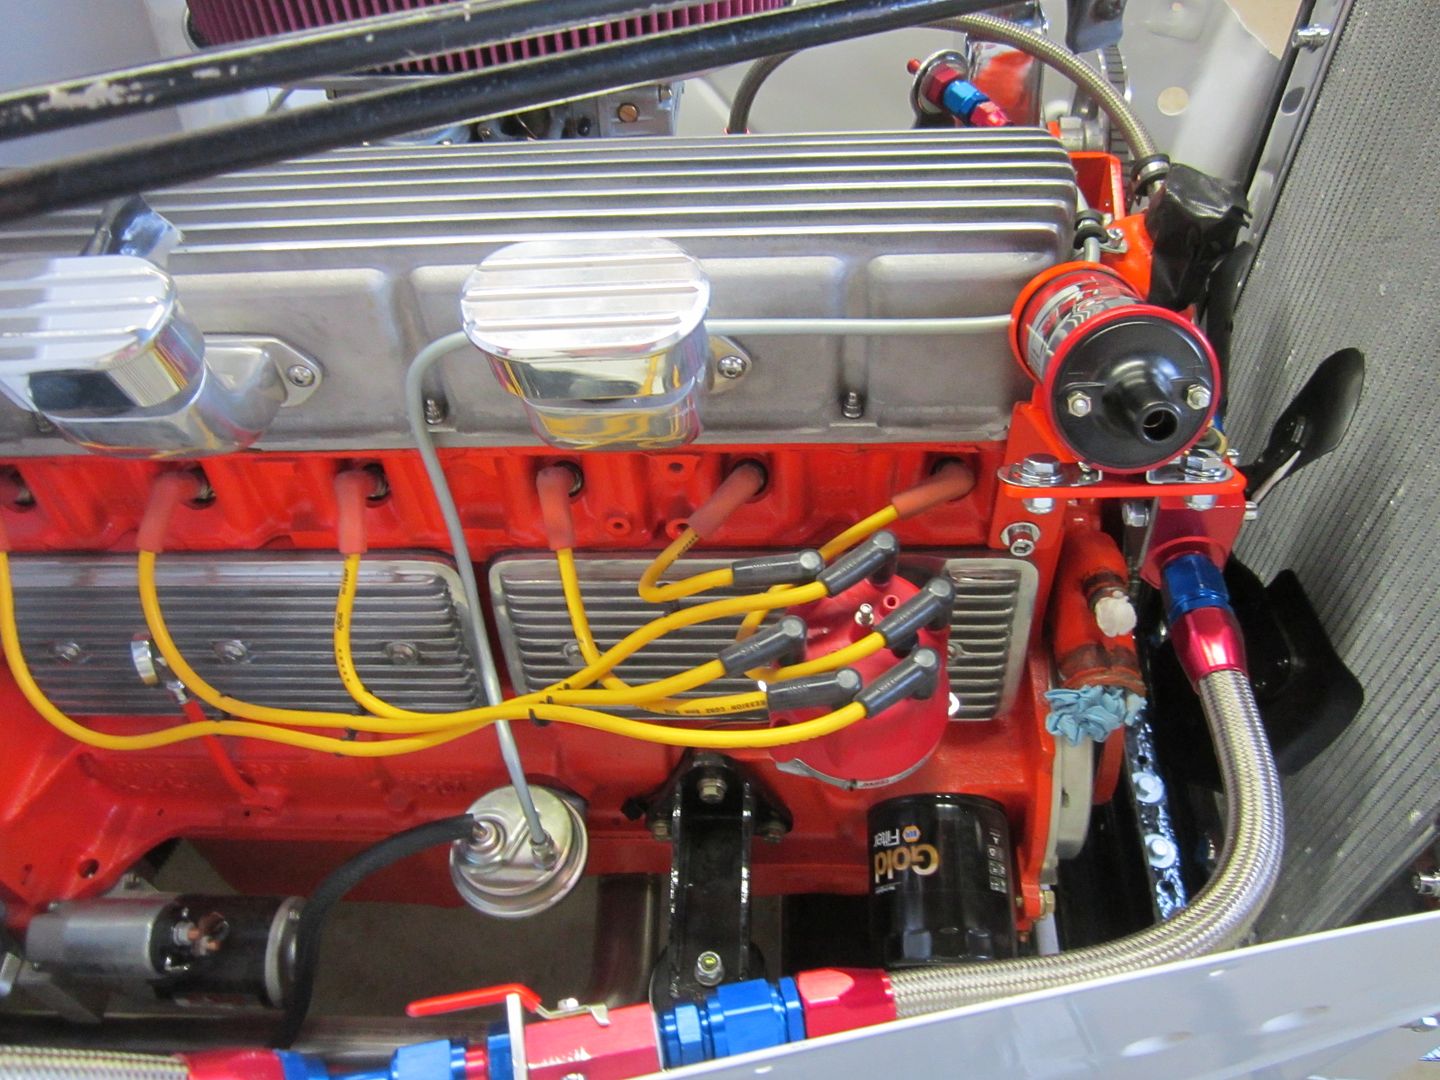 [/URL] [/URL]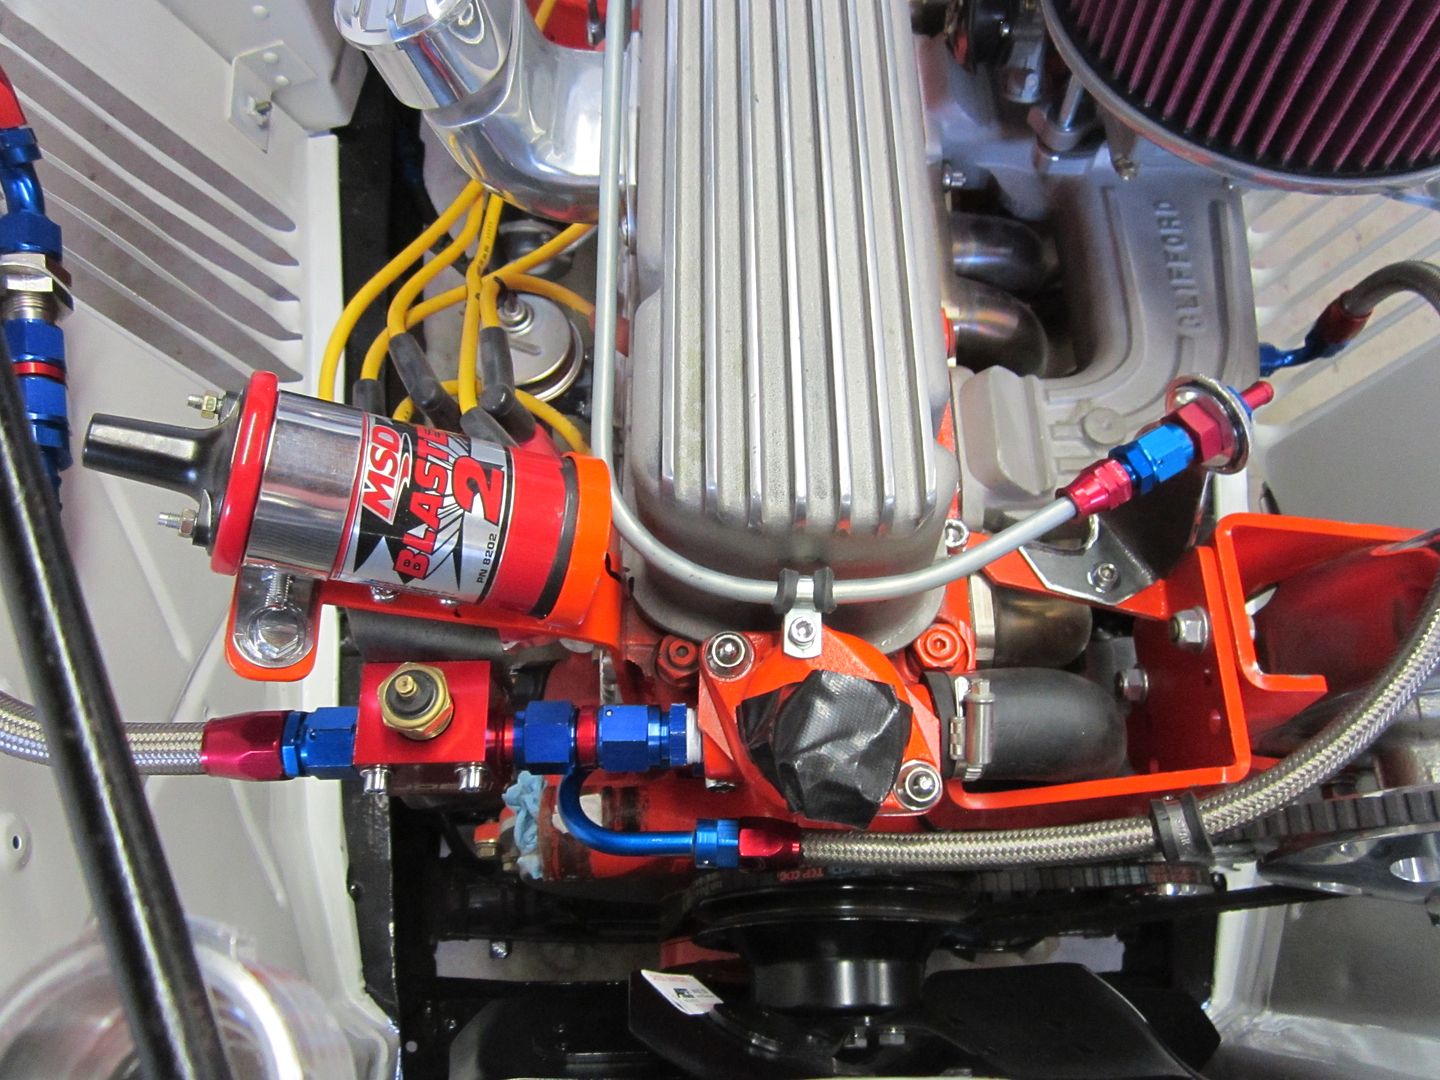 [/URL] [/URL]I made a small bracket and attached it to the power steering mount so I could transition from hard to soft line. 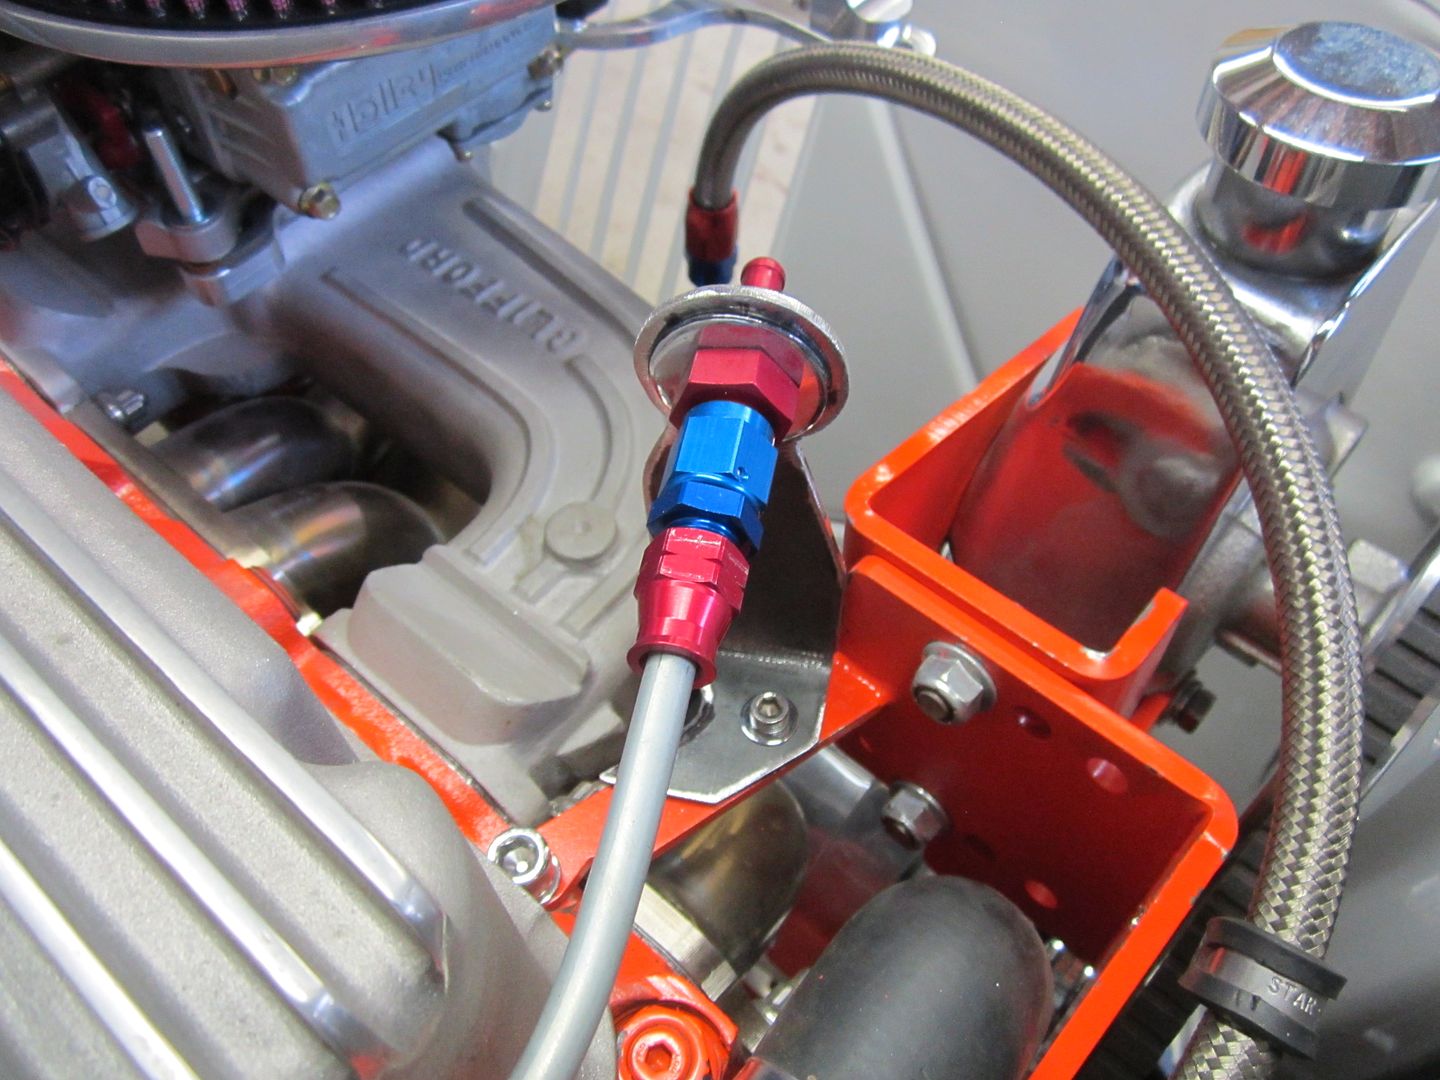 [/URL] [/URL]
|

|

|
|
12-24-2015, 02:10 PM
|
#277 |
|
Registered User
Join Date: Dec 2010
Location: washington NJ
Posts: 766
|
Re: 46 pickemup in NJ "the Rebuild"
Also got some bling for the carb.........
I know most guys have gone with the low profile oval air cleaner on the inlines but the engine bay on a 46 is like looking down into the Grand Canyon, so I thought the taller 4" air cleaner would fill up the space and just look a little better. Also got a fancy throttle return spring bracket so i don't go head long into the first turn fence with a stuck throttle. 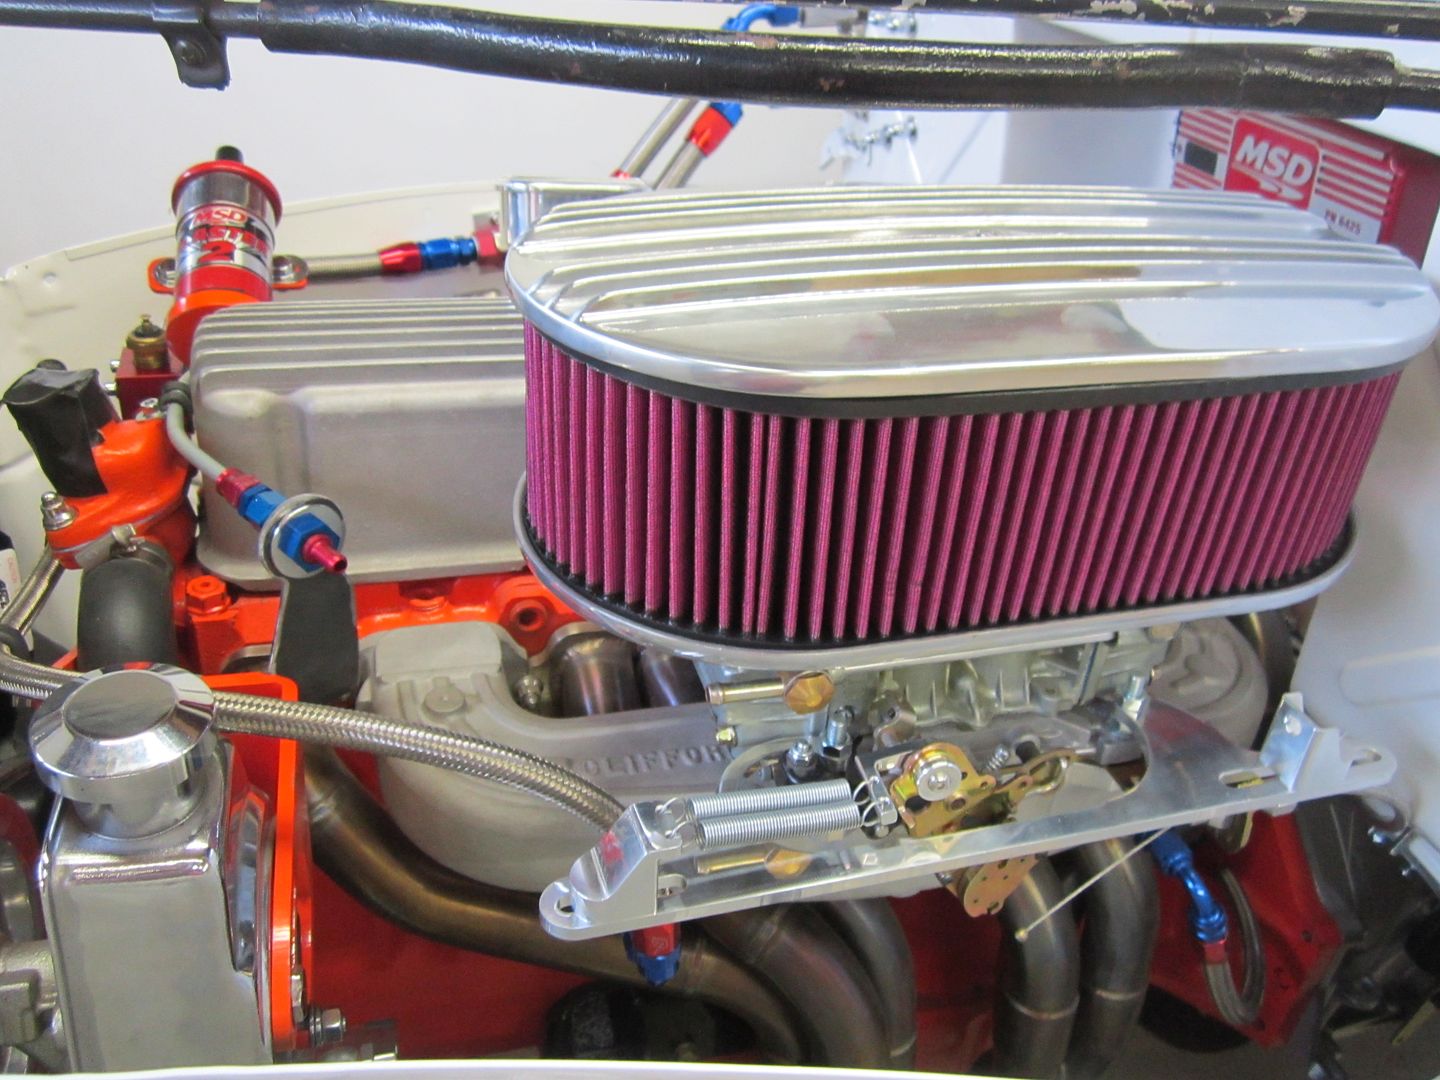 [/URL] [/URL]
|
|
|
|
|
12-24-2015, 02:12 PM
|
#278 |
|
Registered User
Join Date: Dec 2002
Location: Cactus Patch So. Az
Posts: 4,749
|
Re: 46 pickemup in NJ "the Rebuild"
That has to be the most expensive heater I have seen, but I am sure it will heat the cab very good
Keep up the good work
__________________
53 TuTone Extended Cab 350 4-Spd 3:08 (SOLD) 53 Chevy Moldy pearl green ZZ-4 4L60E 9" 3:25 55 GMC 1st Black Mll (ZZ4) ZZ6 TKO 600 5 sp 3:73 62 Solidaxle Corvette Roman Red (327 340hp 4spd 3:36) C4 & C5 suspension tube chassis LS 3 4L70E 65 Corvette Coupe 327 350hp 4spd 4:11 78 Black Silverado SWB (350/350) 5.3 & 4L60E 3:42 2000 S-Type 3.0 (wife cruiser) 2003 GMC SCSB 5.3 4L60E 3:42 |
|
|
|
|
12-24-2015, 02:18 PM
|
#279 |
|
Registered User
Join Date: Dec 2010
Location: washington NJ
Posts: 766
|
Re: 46 pickemup in NJ "the Rebuild"
Now onto the radiator............The one that came with the truck was not original (which didn't bother me) but had alot of the coolinf fins crushed in and looked real nasty inside the filler neck when you removed the cap. Soooo of course you get into a case of the "might as wells". So a phone call and $300 later UPS shows up with a shiny new (supposedly 1946 correct), Champion Radiator. I was somewhat suprised and happy when the dam thing fell right into place in the bracket and all 6 holes line up perfectly with no filling or hackig what so ever. Then everything went to Hell in a hand basket.
Once I got the unit bolted into the truck the first thing I had trouble with was the radiator cap decide it wanted to occupy the same space as the bracket running from the firewall to the rad support.  [/URL] [/URL]as you can see I can't get the bolts to tighten down the support bracket to the top of the rad housing. |
|
|
|
|
12-24-2015, 02:29 PM
|
#280 |
|
Registered User
Join Date: Dec 2010
Location: washington NJ
Posts: 766
|
Re: 46 pickemup in NJ "the Rebuild"
oooppps here's the pic.
 [/URL] [/URL]Now for the biggest concern. When I ordered the radiator I told the guys i wanted the coolant overflow nipple moved. Originaly it was pointed towards the drivers side. I wanted it positioned towards the passenger side because that's the only place I have room for the overlow tank. When I popped the rad cap to try and determine exactly how they had don the relocation here is what I found. All kinds of crap around the inside of the filler neck 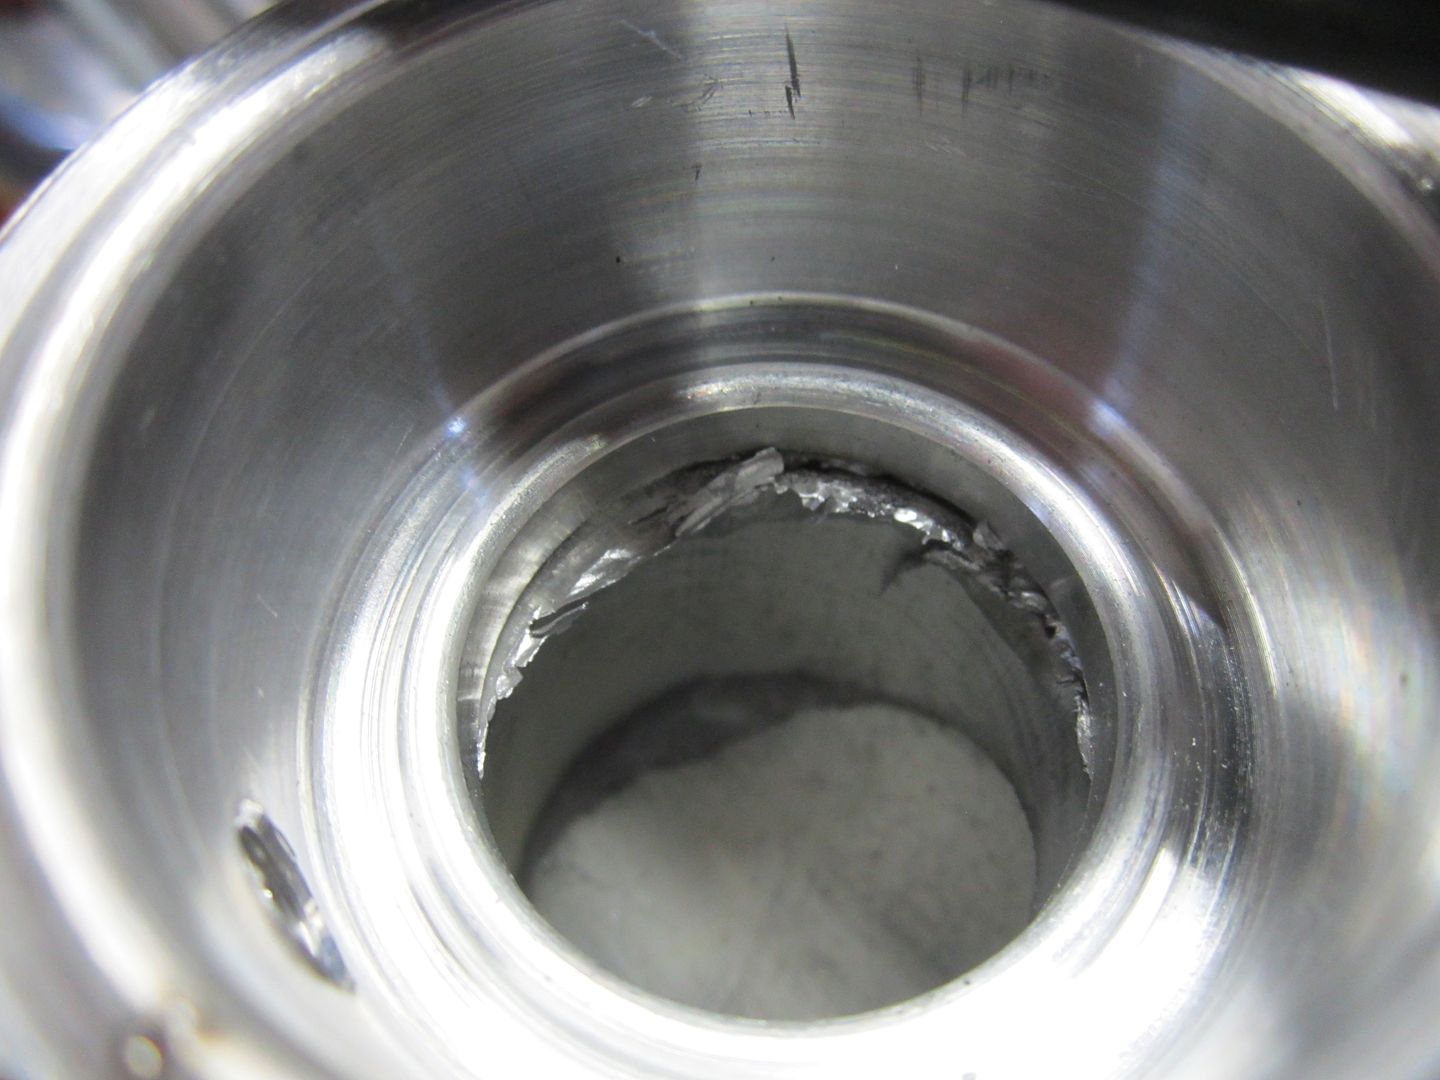 [/URL] [/URL]What has me totally confused is all the 46 radiators I have seen on the web has the filler neck in this poistion but if you look at the top of the rad housing you can see a half oval area where it looks as if the rad cap should be. Anybody know what dillio is on this???????????? [/URL]
|
|
|
|
|
12-24-2015, 02:38 PM
|
#281 |
|
Registered User
Join Date: Dec 2010
Location: washington NJ
Posts: 766
|
Re: 46 pickemup in NJ "the Rebuild"
So now I need to decide wether I want to fix all this crap or send it back. It seems to me the only way for me to fix the radiator cap hitting the bracket would be to drill new holes in the mounting brackets on the side of the radiator, thus lowering the rad about an 2". This would not be a bad thing as it would put the fan more in the center of the radiator. But then I would have 6 unused holes in my brand new $300 radiator.
Its also easy enough to just turn the radiator upside down and scrape out all the crap inside the next preventing it from going down inside the radiator. The question is should I have to do all this.  . At the very least I think I should post this crap on as many forums so everybody can be for warned about Champion Radiator.......... . At the very least I think I should post this crap on as many forums so everybody can be for warned about Champion Radiator..........
|
|
|
|
|
12-24-2015, 02:48 PM
|
#282 | |
|
Registered User
Join Date: Dec 2010
Location: washington NJ
Posts: 766
|
Re: 46 pickemup in NJ "the Rebuild"
Quote:
But I look at it this way............I've worked my ass off for the last 30 years, I have more days behind then ahead of me, and when I am gone at least my daughters won't have to worry about the heater hoses, just everything else I have done half assed
|
|
|
|
|
|
12-24-2015, 03:44 PM
|
#283 |
|
Registered User
Join Date: Dec 2002
Location: Cactus Patch So. Az
Posts: 4,749
|
Re: 46 pickemup in NJ "the Rebuild"
Not to worry that truck will out live all of you !!
You could have had real expensive rad and had the cap end up under the bracket. Take it out now and have the filler neck removed and placed where you want it to be, this is just another step in exercise of WTF, why can't the do it right the first time
__________________
53 TuTone Extended Cab 350 4-Spd 3:08 (SOLD) 53 Chevy Moldy pearl green ZZ-4 4L60E 9" 3:25 55 GMC 1st Black Mll (ZZ4) ZZ6 TKO 600 5 sp 3:73 62 Solidaxle Corvette Roman Red (327 340hp 4spd 3:36) C4 & C5 suspension tube chassis LS 3 4L70E 65 Corvette Coupe 327 350hp 4spd 4:11 78 Black Silverado SWB (350/350) 5.3 & 4L60E 3:42 2000 S-Type 3.0 (wife cruiser) 2003 GMC SCSB 5.3 4L60E 3:42 |
|
|
|
|
12-24-2015, 03:53 PM
|
#284 |
|
Registered User
Join Date: Dec 2002
Location: Cactus Patch So. Az
Posts: 4,749
|
Re: 46 pickemup in NJ "the Rebuild"
The 37 Chevy I had, had the same problem with the filler neck, it hit the core brace.
I had to remove the rad and have the neck "tilted" to the right so I could fill the rad. Moving right along!
__________________
53 TuTone Extended Cab 350 4-Spd 3:08 (SOLD) 53 Chevy Moldy pearl green ZZ-4 4L60E 9" 3:25 55 GMC 1st Black Mll (ZZ4) ZZ6 TKO 600 5 sp 3:73 62 Solidaxle Corvette Roman Red (327 340hp 4spd 3:36) C4 & C5 suspension tube chassis LS 3 4L70E 65 Corvette Coupe 327 350hp 4spd 4:11 78 Black Silverado SWB (350/350) 5.3 & 4L60E 3:42 2000 S-Type 3.0 (wife cruiser) 2003 GMC SCSB 5.3 4L60E 3:42 |
|
|
|
|
12-24-2015, 05:39 PM
|
#285 |
|
Registered User
Join Date: Dec 2010
Location: washington NJ
Posts: 766
|
Re: 46 pickemup in NJ "the Rebuild"
I think the best thing to do is just lower the hole radiator by moving the holes that attach it to the core support. I figure by the time I send it all the way back to CA and hope the dope smoker thats in charge of fixing actualy does it right, and then have it shipped back with all the goons at UPS throwing it around, it will be 4 weeks before I get it back.
I certainly have plenty of room to drop it lower into the core support. almost 4" under the bottom of the radiator I really only need 1 1/2 to get the cap off  [/URL] [/URL] 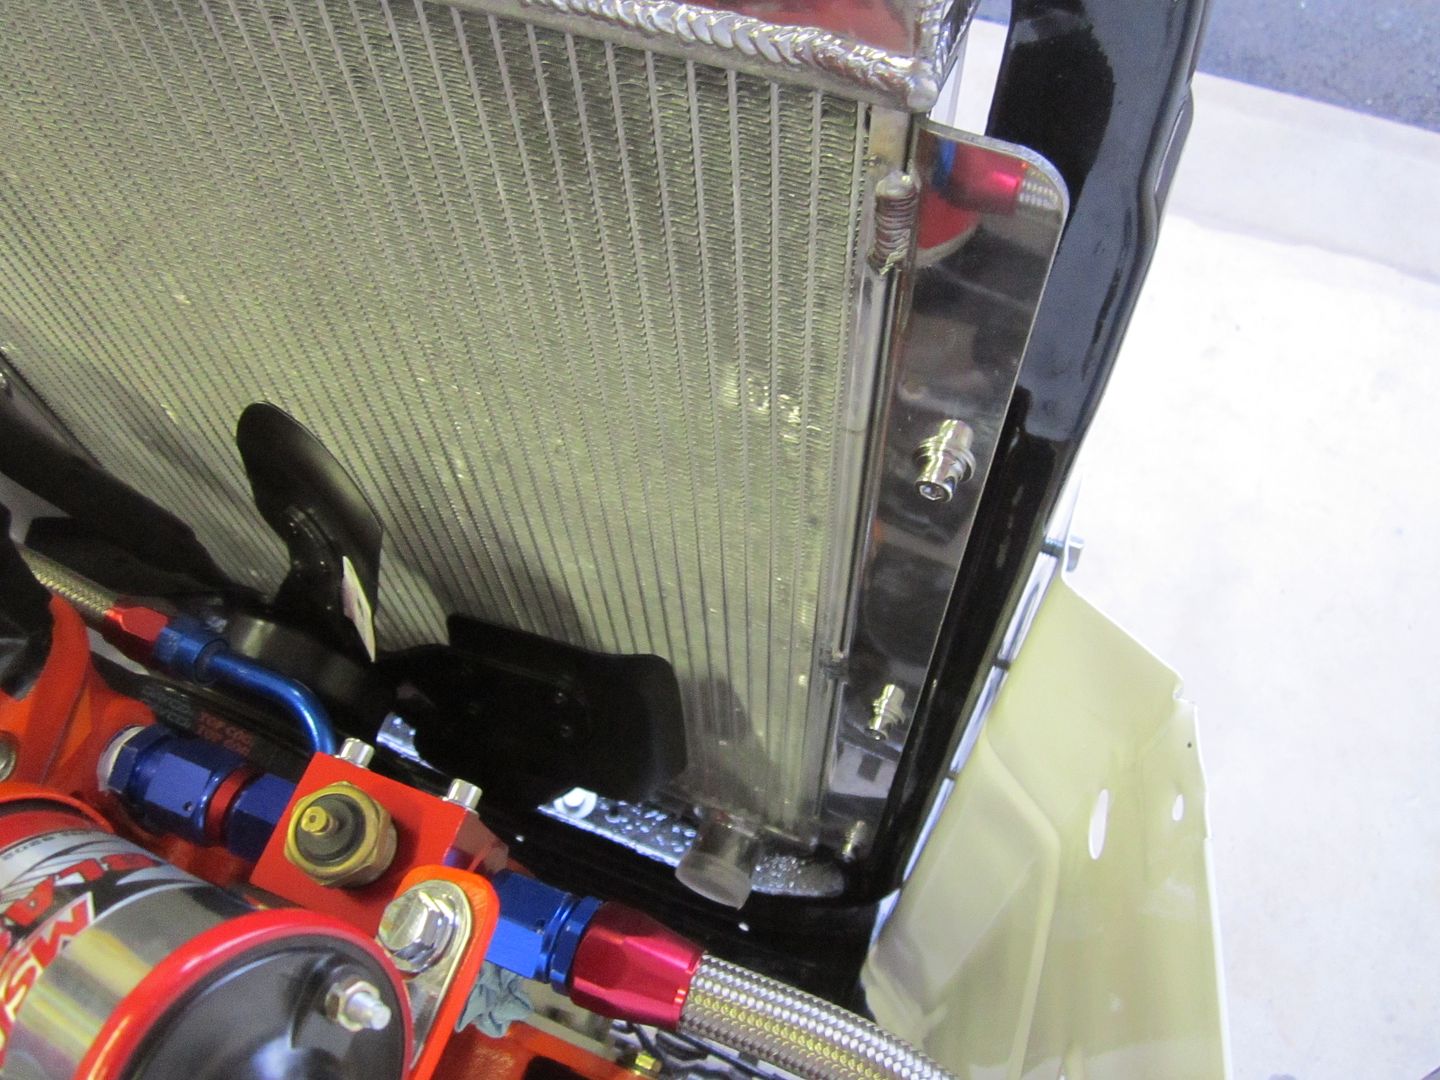 [/URL] [/URL]By the way does anybody know what the hell these little "U" tabs are for on the face of the radiator? Looks like tabs to hold some kind of hose in place. 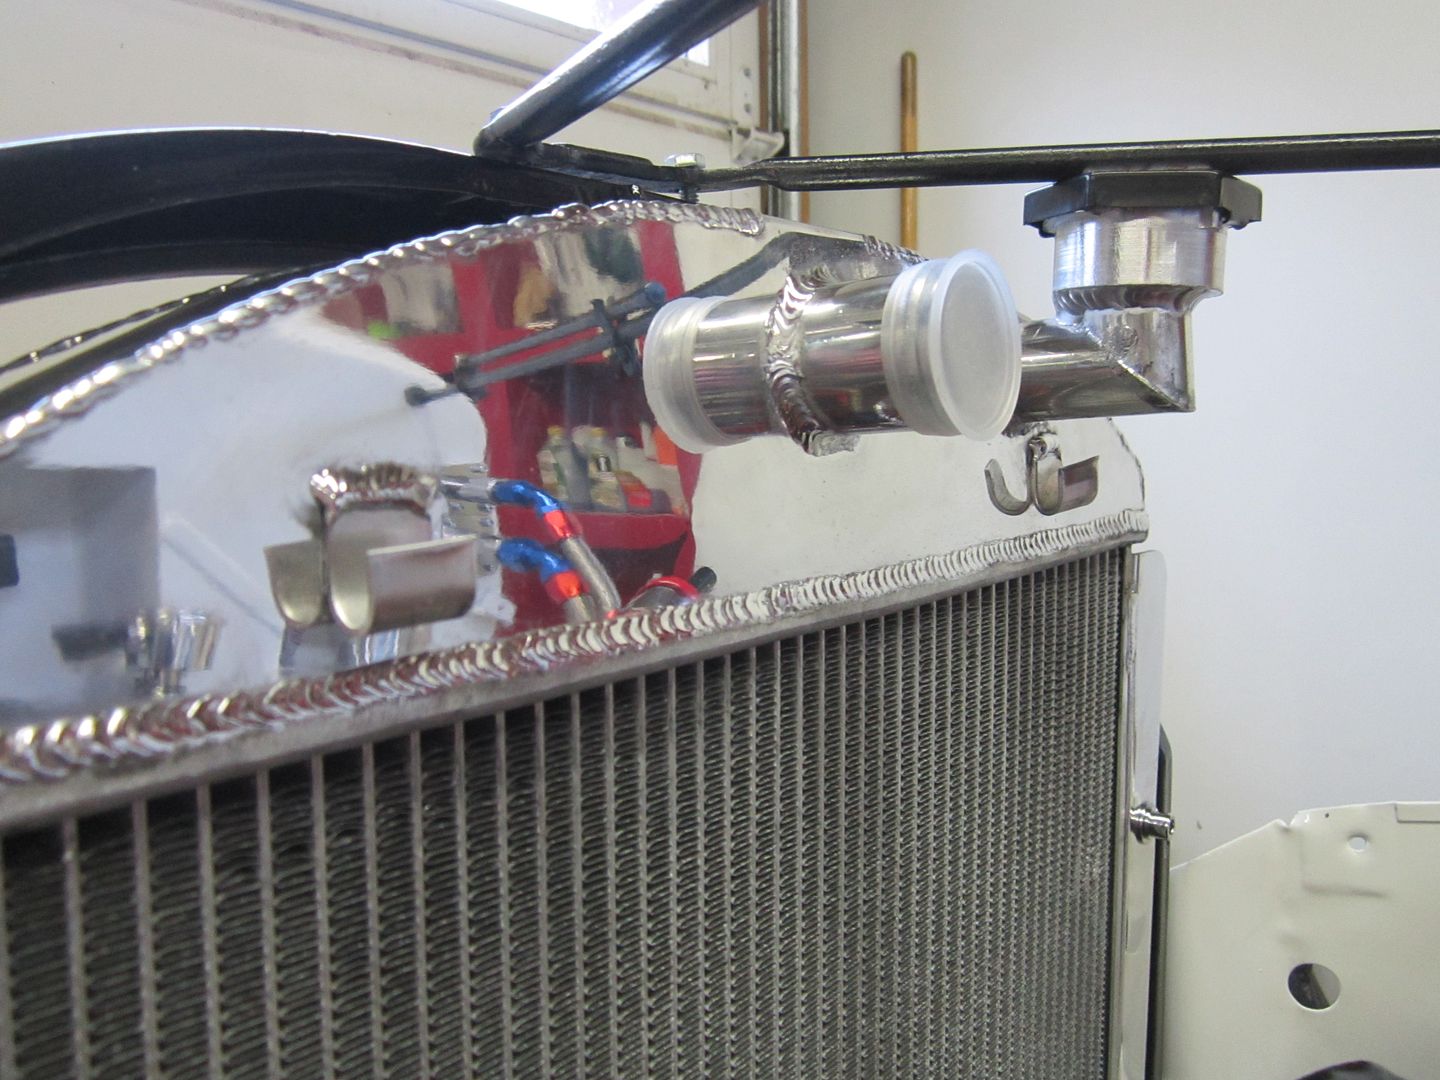 [/URL] [/URL]
|
|
|
|
|
12-24-2015, 06:20 PM
|
#286 |
|
Registered User
Join Date: Nov 2013
Location: Antioch, Ca.
Posts: 442
|
Re: 46 pickemup in NJ "the Rebuild"
Maybe to hang a shroud? Or dress wires from a electric fan?
__________________
Take Care Troy |
|
|
|
|
12-24-2015, 06:41 PM
|
#287 |
|
Registered User
Join Date: Dec 2010
Location: washington NJ
Posts: 766
|
Re: 46 pickemup in NJ "the Rebuild"
Upon further review..... I think the plan of attack will be to re-work the tubular brace that comes from the firewall. I think just making a bend in it to go around the cap is the solution. sometimes the easiest solution is hiding right in front of you.
[/URL]
|
|
|
|
|
12-24-2015, 07:50 PM
|
#288 |
|
Registered User
Join Date: Dec 2002
Location: Cactus Patch So. Az
Posts: 4,749
|
Re: 46 pickemup in NJ "the Rebuild"
Do you still have the "bend" on the other side where the air cleaner used to be for the one barrel?
__________________
53 TuTone Extended Cab 350 4-Spd 3:08 (SOLD) 53 Chevy Moldy pearl green ZZ-4 4L60E 9" 3:25 55 GMC 1st Black Mll (ZZ4) ZZ6 TKO 600 5 sp 3:73 62 Solidaxle Corvette Roman Red (327 340hp 4spd 3:36) C4 & C5 suspension tube chassis LS 3 4L70E 65 Corvette Coupe 327 350hp 4spd 4:11 78 Black Silverado SWB (350/350) 5.3 & 4L60E 3:42 2000 S-Type 3.0 (wife cruiser) 2003 GMC SCSB 5.3 4L60E 3:42 |
|
|
|
|
12-24-2015, 07:57 PM
|
#289 | |
|
Registered User
Join Date: Dec 2010
Location: washington NJ
Posts: 766
|
Re: 46 pickemup in NJ "the Rebuild"
Quote:
|
|
|
|
|
|
12-26-2015, 06:31 PM
|
#290 |
|
Registered User
Join Date: Dec 2010
Location: washington NJ
Posts: 766
|
Re: 46 pickemup in NJ "the Rebuild"
Well after running around for nearly 2 hours trying to find a piece of round stock the same size as the original, I said the hell with it and went a different route.
I just cut the center out of the bracket where it bolted at the radiator housing. Pinched the 2 pieces together, and hot snotted it to a new piece of flat stock. I tried to make it look like something that would have come originally on the truck. Instead of just booger blasting it together. Should look alright once it's painted white. Easy, Cheesy, I fixed the Chinaeezy 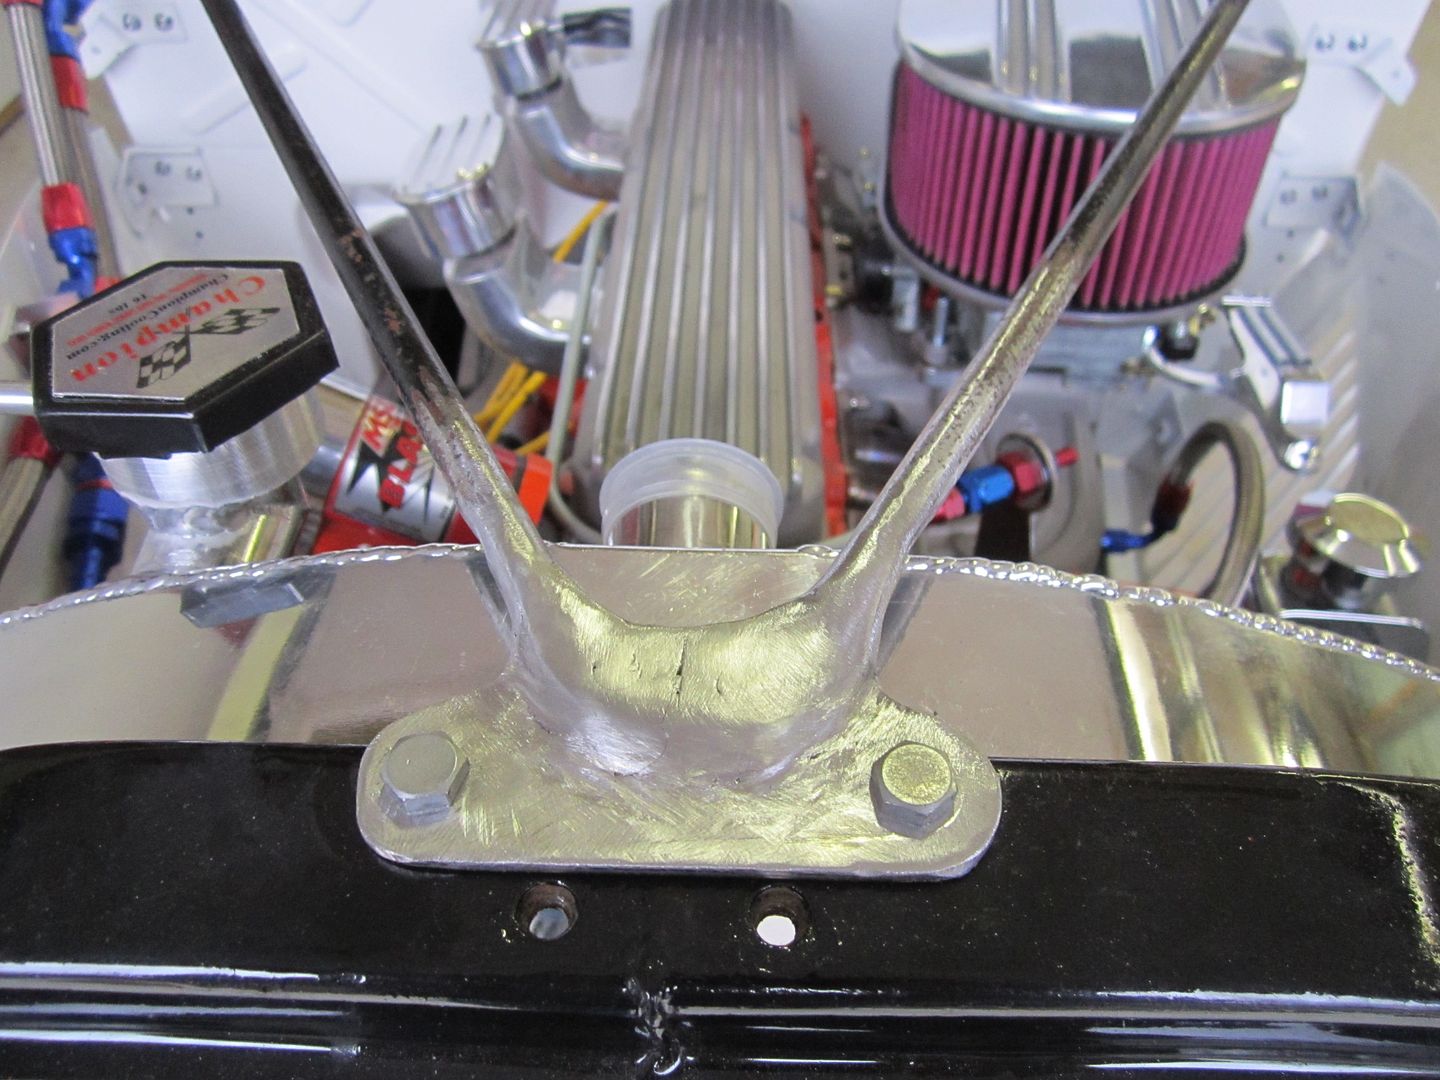 [/URL] [/URL]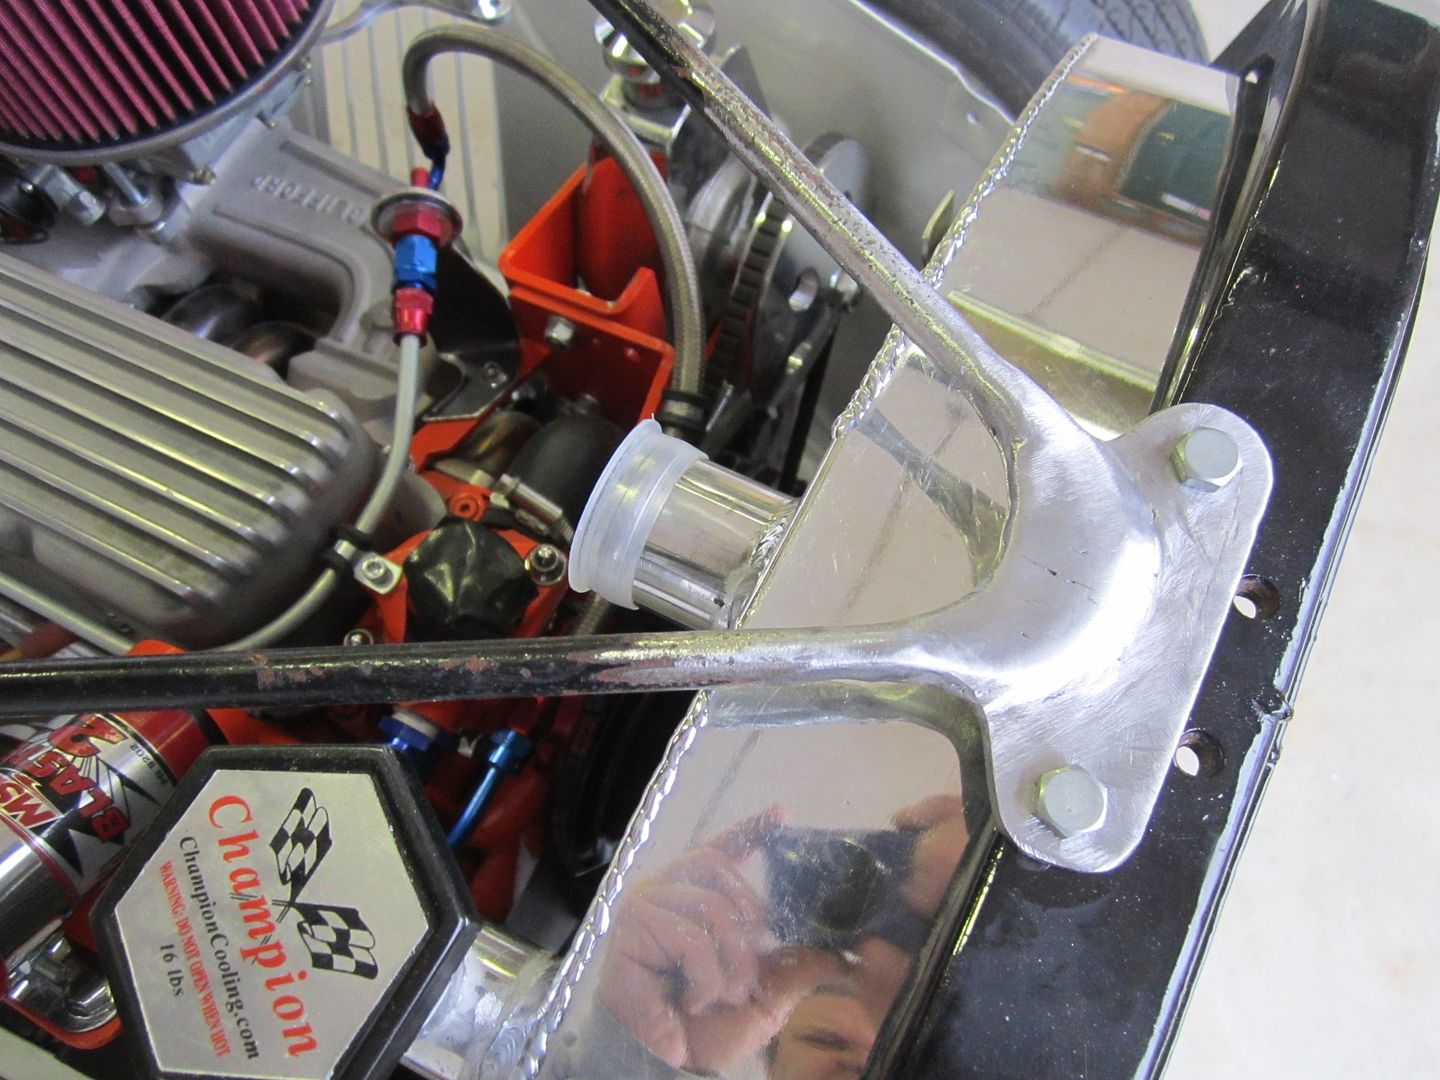 [/URL] [/URL]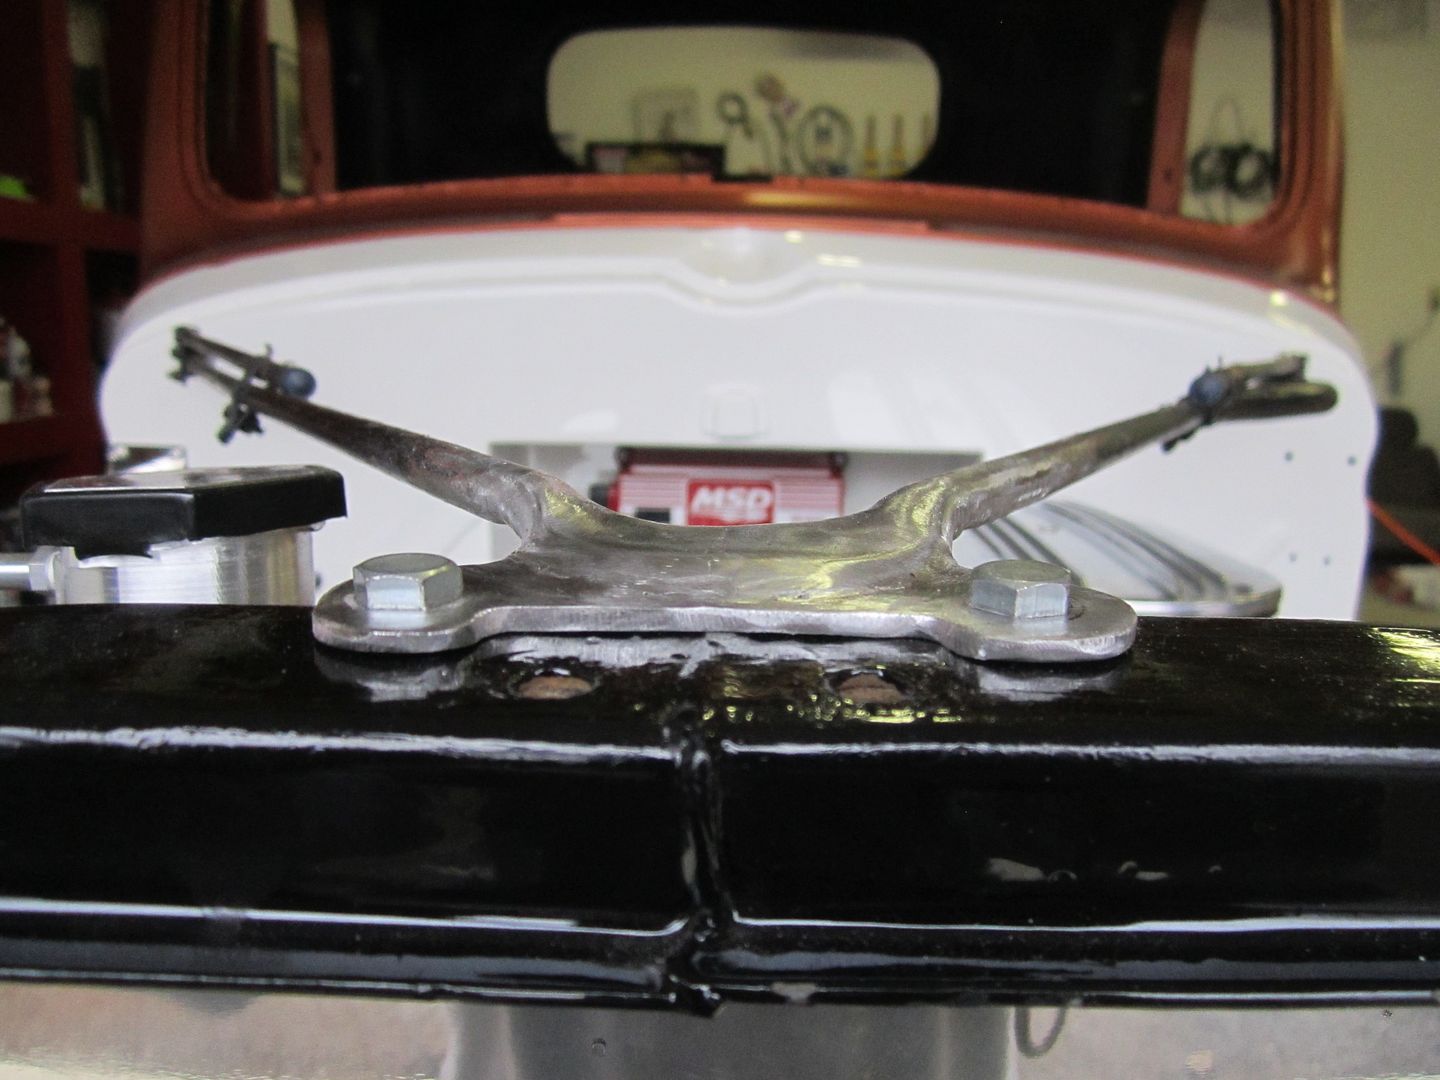 [/URL] [/URL]
|
|
|
|
|
12-27-2015, 08:02 AM
|
#291 |
|
Registered User
Join Date: Aug 2010
Location: Lafayette In.
Posts: 252
|
Re: 46 pickemup in NJ "the Rebuild"
That repair makes it look like it was meant to be like that. Good Job! Symmetrical too! I like it!
|
|
|
|
|
12-27-2015, 09:37 AM
|
#292 |
|
Registered User
Join Date: Dec 2002
Location: Cactus Patch So. Az
Posts: 4,749
|
Re: 46 pickemup in NJ "the Rebuild"
That was easier than cutting and pasting the bend for the air cleaner, to the side where the rad cap is, I like your idea much better
Where did you get the hood holders, or did I ask you that before? How about a close up pic of one of those
__________________
53 TuTone Extended Cab 350 4-Spd 3:08 (SOLD) 53 Chevy Moldy pearl green ZZ-4 4L60E 9" 3:25 55 GMC 1st Black Mll (ZZ4) ZZ6 TKO 600 5 sp 3:73 62 Solidaxle Corvette Roman Red (327 340hp 4spd 3:36) C4 & C5 suspension tube chassis LS 3 4L70E 65 Corvette Coupe 327 350hp 4spd 4:11 78 Black Silverado SWB (350/350) 5.3 & 4L60E 3:42 2000 S-Type 3.0 (wife cruiser) 2003 GMC SCSB 5.3 4L60E 3:42 |
|
|
|
|
12-27-2015, 05:50 PM
|
#293 |
|
Registered User
Join Date: Dec 2010
Location: washington NJ
Posts: 766
|
Re: 46 pickemup in NJ "the Rebuild"
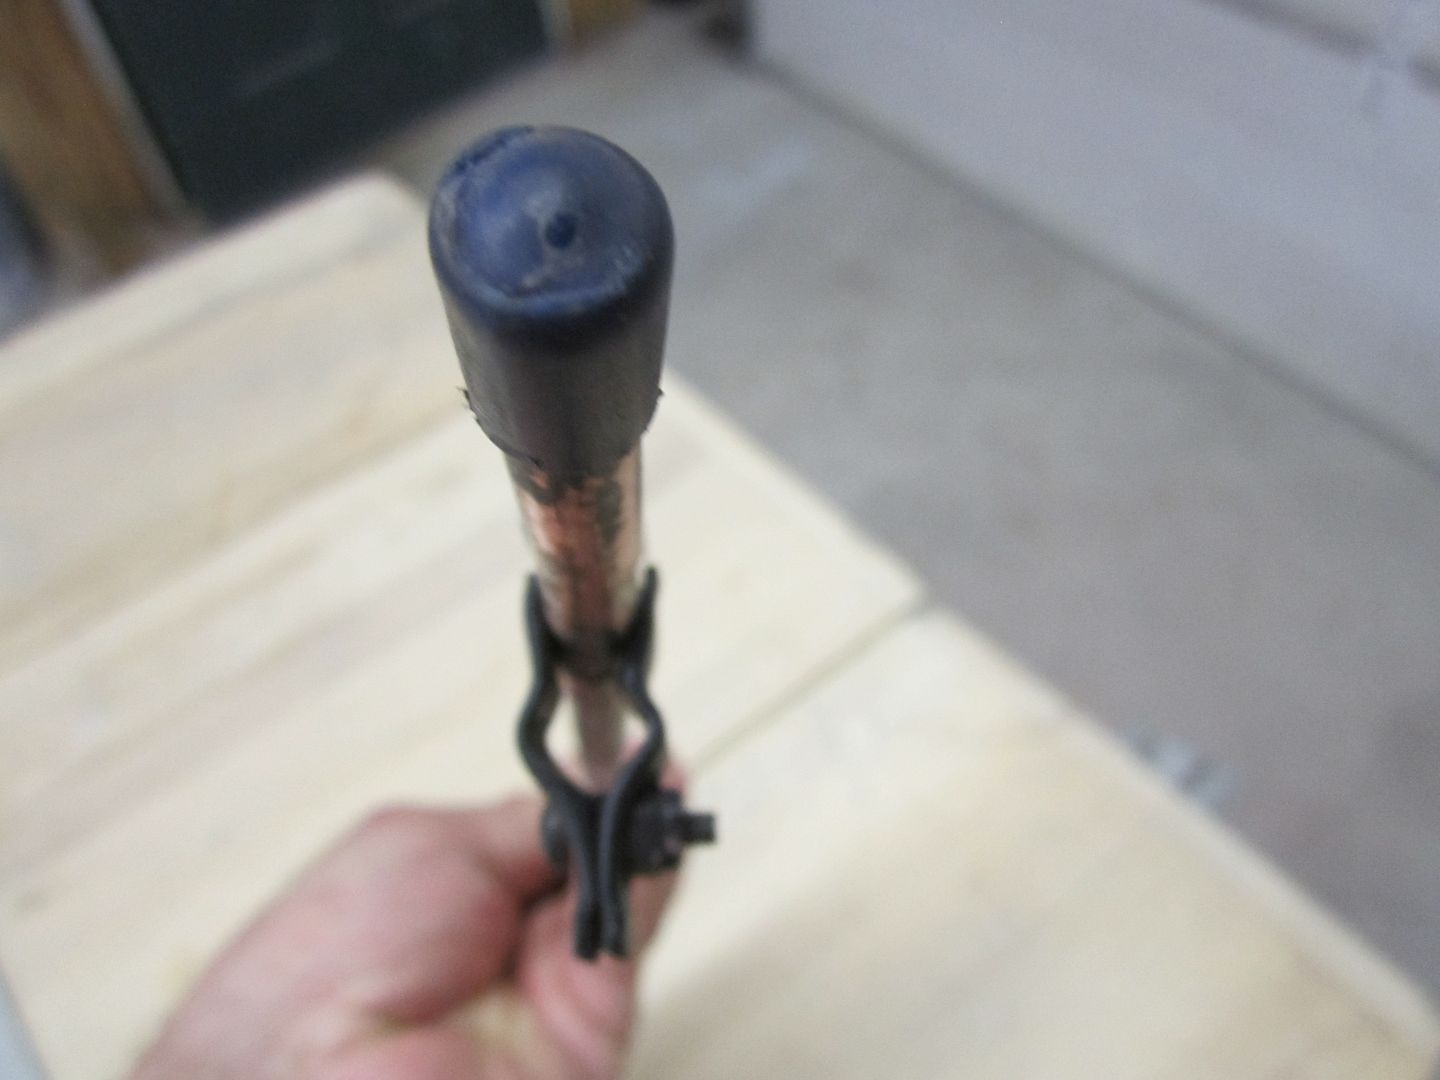
Where did you get the hood holders, or did I ask you that before?
How about a close up pic of one of those[/QUOTE] Hey Solid! Here's the only 2 pics I have of the hood prop. They came with the truck when I bought it. It looks like whoevere built the truck, boogered them together with off the shelf stuff from the hardware store. The actual rod that props the hood up is just an aluminium tube that he took and pinched the one end together so he could drill a hole to mount it to the little steel bracket. That little bracket is held to the rad support with just a little u-bolt clamp. I guess the best part is what holds the other end of the hod prop. It's just a 2 way clasp, one side holds onto the rad support the other side holds the hood prop in place when not in use. Unfortunatley I don't have a pic of that. The hole contraption is kind of 1/2 assed, not sure if I am going to use it or not.  [/URL] [/URL]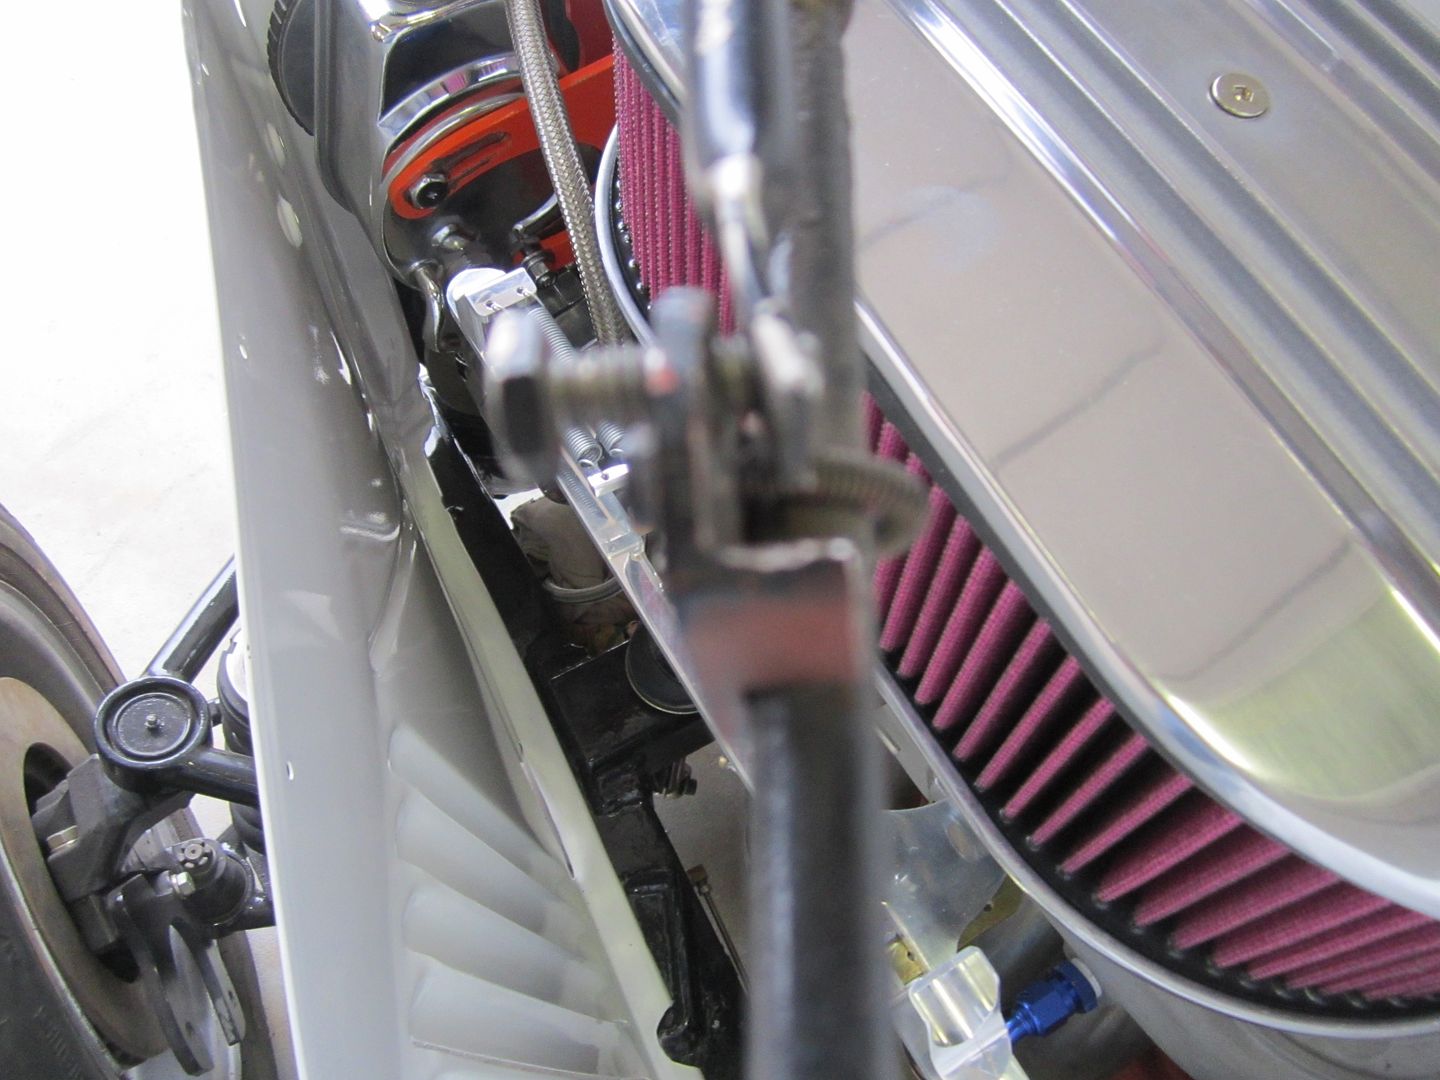 [/URL] [/URL]
|
|
|
|
|
12-27-2015, 06:01 PM
|
#294 |
|
Registered User
Join Date: Dec 2010
Location: washington NJ
Posts: 766
|
Re: 46 pickemup in NJ "the Rebuild"
Here ya go Solid. I made a special trip out to the garage when the wife wasn't looking and snapped these pics of the front mounts. Not sure where you would get them. I have never seen them in a store.
 [/URL] [/URL]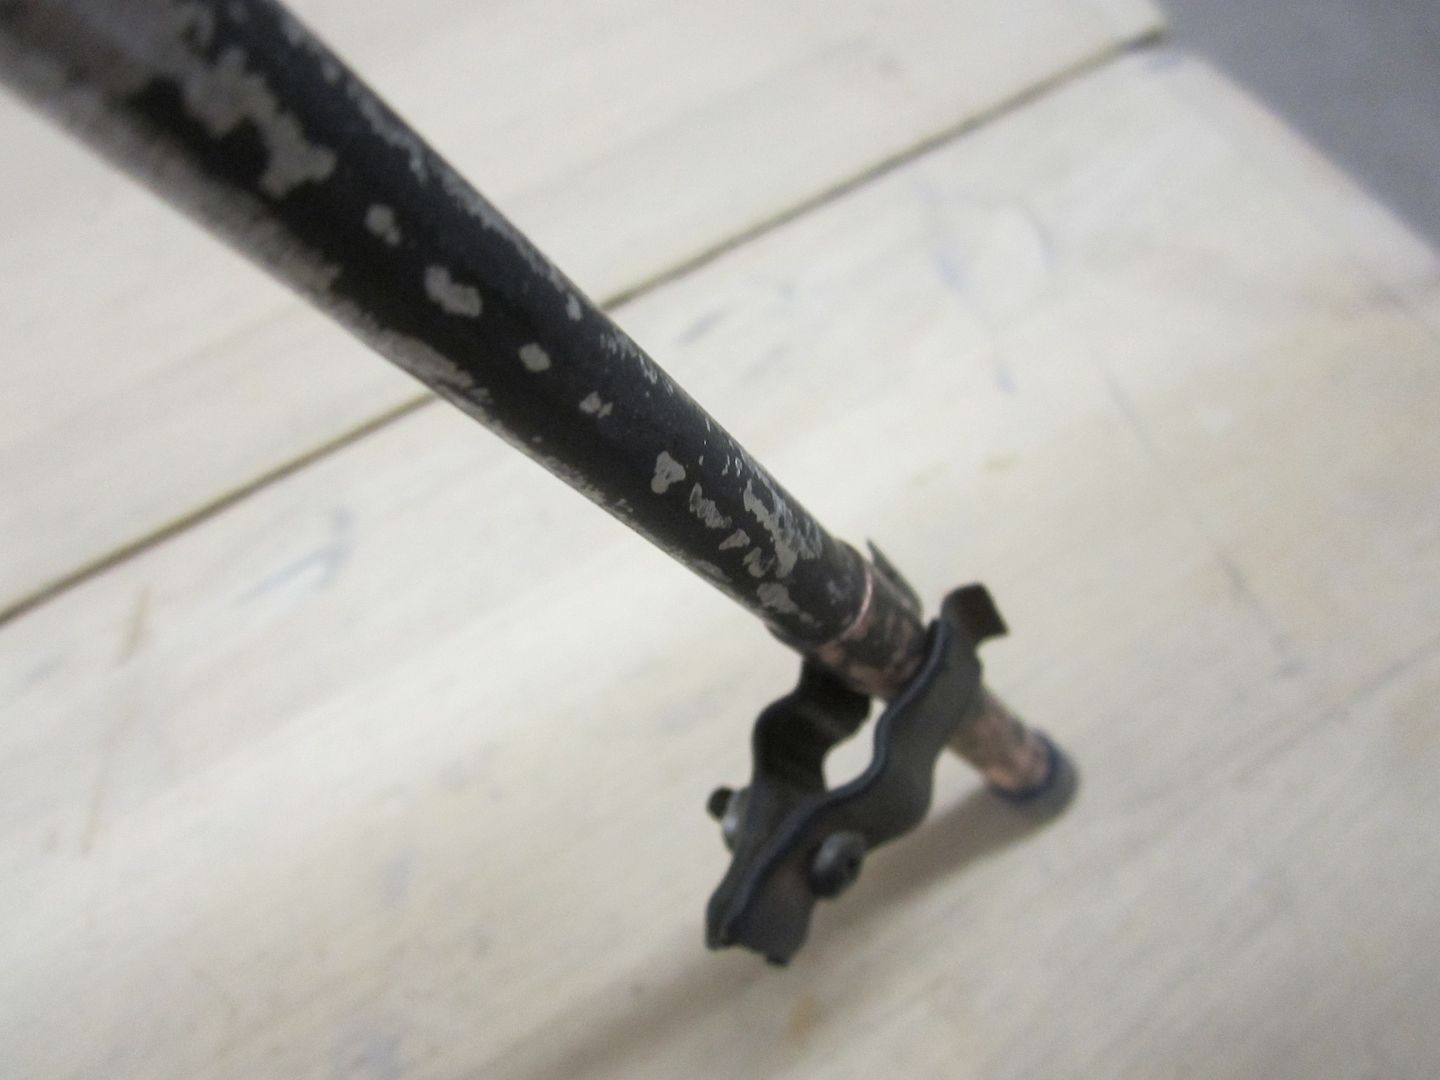 [/URL] [/URL]
|
|
|
|
|
12-28-2015, 01:01 PM
|
#295 |
|
Registered User
Join Date: Dec 2002
Location: Cactus Patch So. Az
Posts: 4,749
|
Re: 46 pickemup in NJ "the Rebuild"
Thanks that gives me some ideas!
__________________
53 TuTone Extended Cab 350 4-Spd 3:08 (SOLD) 53 Chevy Moldy pearl green ZZ-4 4L60E 9" 3:25 55 GMC 1st Black Mll (ZZ4) ZZ6 TKO 600 5 sp 3:73 62 Solidaxle Corvette Roman Red (327 340hp 4spd 3:36) C4 & C5 suspension tube chassis LS 3 4L70E 65 Corvette Coupe 327 350hp 4spd 4:11 78 Black Silverado SWB (350/350) 5.3 & 4L60E 3:42 2000 S-Type 3.0 (wife cruiser) 2003 GMC SCSB 5.3 4L60E 3:42 |
|
|
|
|
02-06-2016, 05:11 PM
|
#296 |
|
Registered User
Join Date: Dec 2010
Location: washington NJ
Posts: 766
|
Re: 46 pickemup in NJ "the Rebuild"
No, the Paintman did not fall off the face of the earth.........he's just been real busy tending to some other things around the house. First and foremost is his 200 gallon salt water fish and reef tank. Ever since I bought my 46 I have been neglecting my other hobby to the point that the tank was on the verge of having everything die. Sooooo, I had to take some time and give it a major cleaning and re-work some of the plumbing and equipment problems it was having. Then came the Wife asking me to repaint our Daughters bedroom for her 14th birthday. Then of course New Jersey also got walloped with 34" of snow meaning paintman was turned into "SHOVELMAN". But I digress.
First thing I had to do was get out to the garage to feed the shop cat and get back to work. 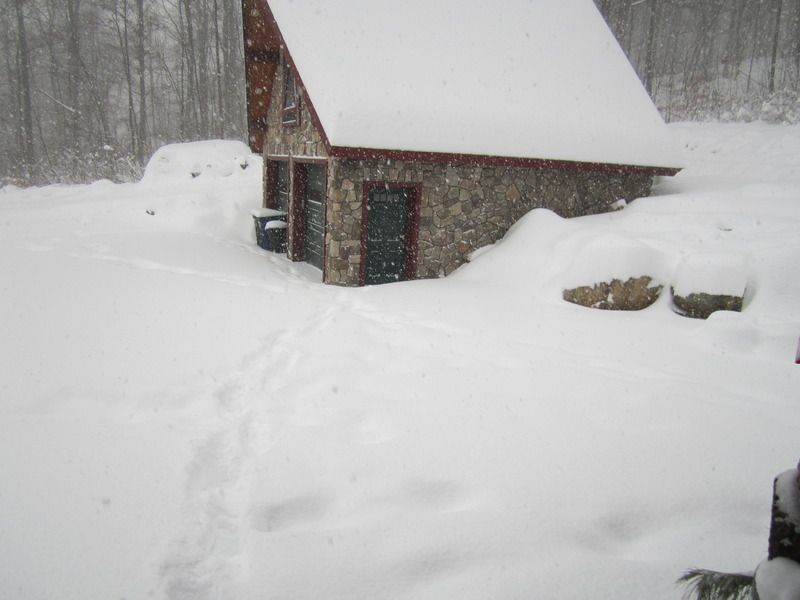 [/URL] [/URL]I was able to get a few small things done on the truck once I shoveled a path to the garage. I bought a coolant overflow container from speedway hoping it would bolt right up to the holes in the rad core. Of course the holes in the bracket were about an inch off from the holes in the support. So that meant I had to make a retro fit bracket for the tank. I just used some aluinium angle. 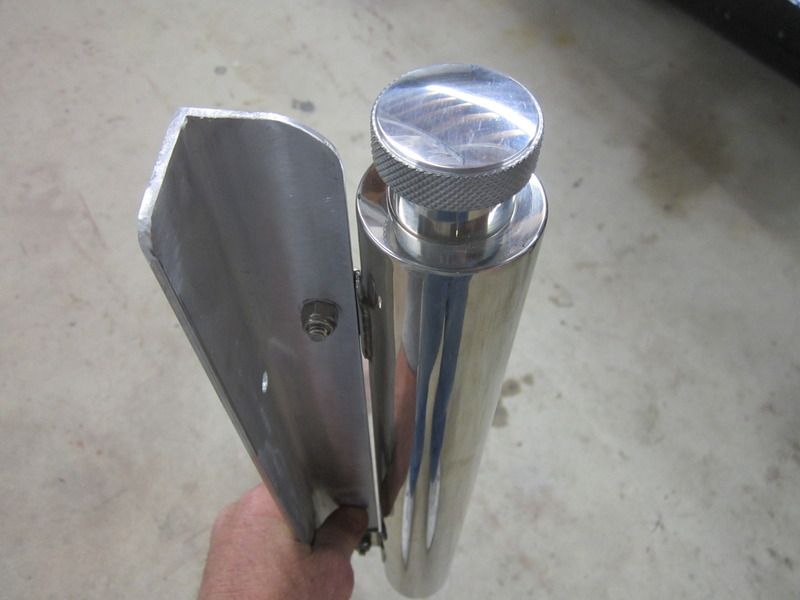 [/URL] [/URL]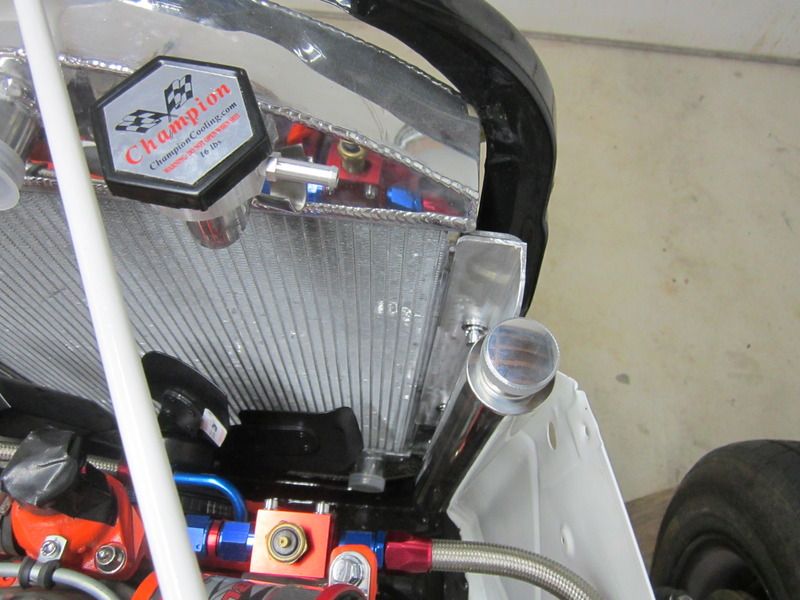 [/URL] [/URL]Also trimmed up the bracket I made for the E-brake cables. I also got the rear tail pipe hangers installed. That is after getting screwed around by Yogi's and Ravenworks. I used billet hangers up front from Ravenworks. Unfortunately they discontinued them before I got a chance to order 2 more for the back. After spending nearly a full day online trying to find another vendor with 2 1/4" billet hangers, Yogi's was the only place who had them. Well after ordering them I get an e-mail saying they were backordered for 2 weeks. After waiting 3 months I finally made a phone call to Yogi's to ask whats up? All they could tell me was they had no idea when or if they would ever get them in, so I canceled the order and just got generic hangers from Summit. UGHHHH 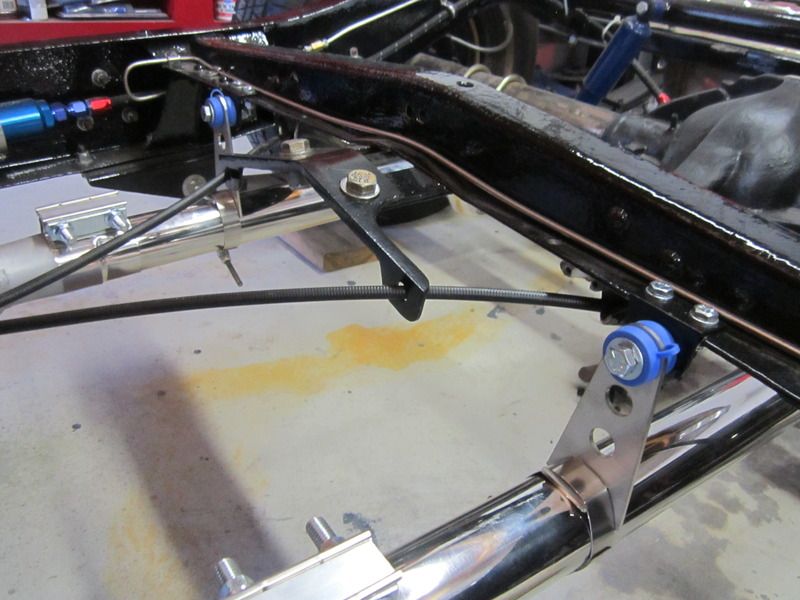 [/URL] [/URL]The other hurdle I got done was the trans tunnel. Previously I had made 2 attempts at making a tunnel but failed miserably. For over a year I had been staring at a pice of sheet metal in my garage that was just big enough for one last attempt. So I fianlly decide it was not going to kick my ass this time. Fortunately I had a piece of log left over from when we built our house to use as a form. Well after about 4 hours of bending, rolling, cussinging, smashing, grinding, beating, and of course drinking, I finally got it. 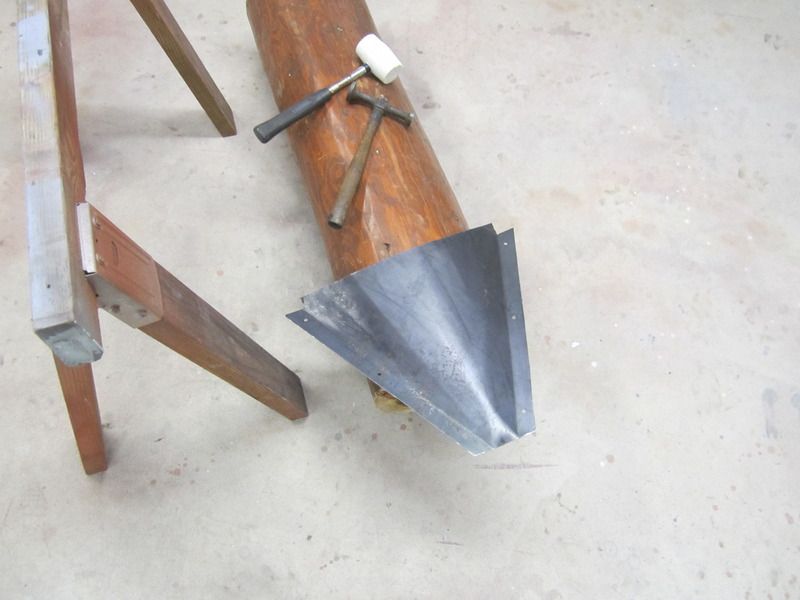 [/URL] [/URL]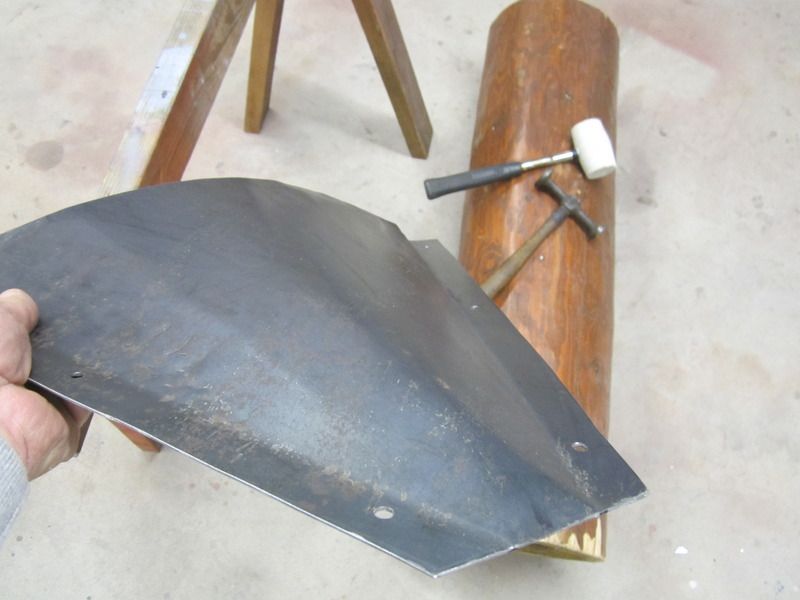 [/URL] [/URL]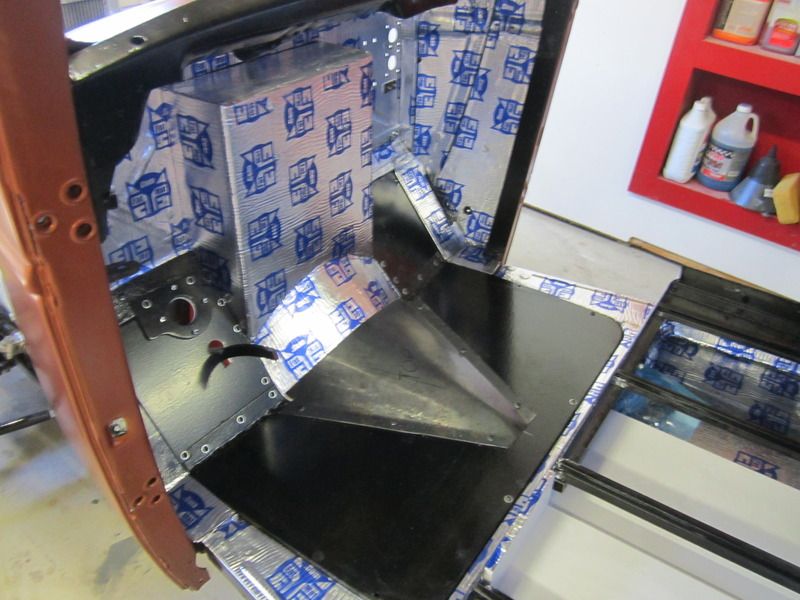 [/URL] [/URL]Also got the new drive shaft. Nice thing is I have a drive shaft shop about 5 minutes down the road. Of course when you go from a V8 to an inline 6 everything changes in this case about 5 inches. 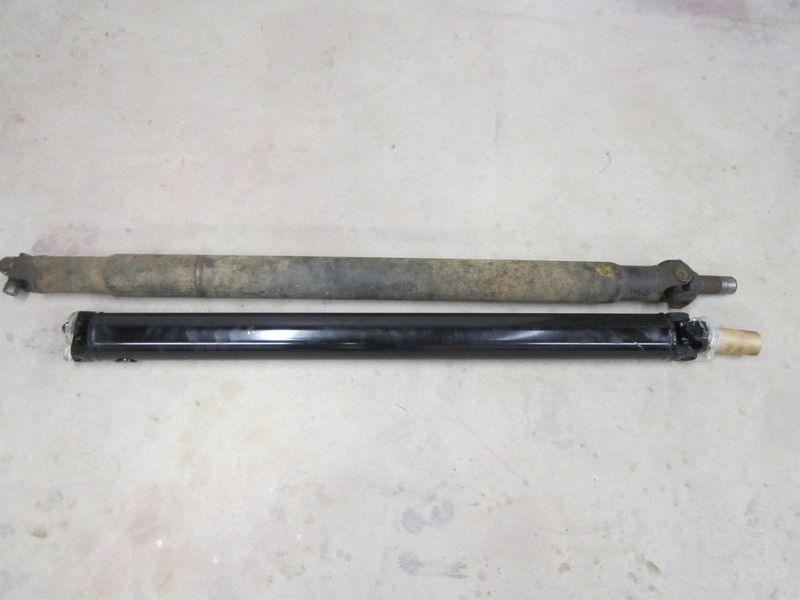 [/URL] [/URL]
|
|
|
|
|
03-26-2016, 02:45 PM
|
#297 |
|
Registered User
Join Date: Dec 2010
Location: washington NJ
Posts: 766
|
Re: 46 pickemup in NJ "the Rebuild"
Updates!!! Not much though, I have been busy doing all the little stuff that should only take about 5 minutes but turns into hours. I had a chance to button up all the engine stuff. Mainly a big hurdle........the throttle linkage.
Because the carb is all the way on the other side of the world on an inline 6 the gas pedal and the carb mechanism does not line up at all. So much so that I wouldof had to put a double 90 degree bend in the cable. I have seen it done but I prefer a throttle rod instead. Here's where the throttle hole needed to be with the holley mechanism. Right on the firewall rib. The other problem is if I left it there it would have come through into the cab directly behing the steering column. 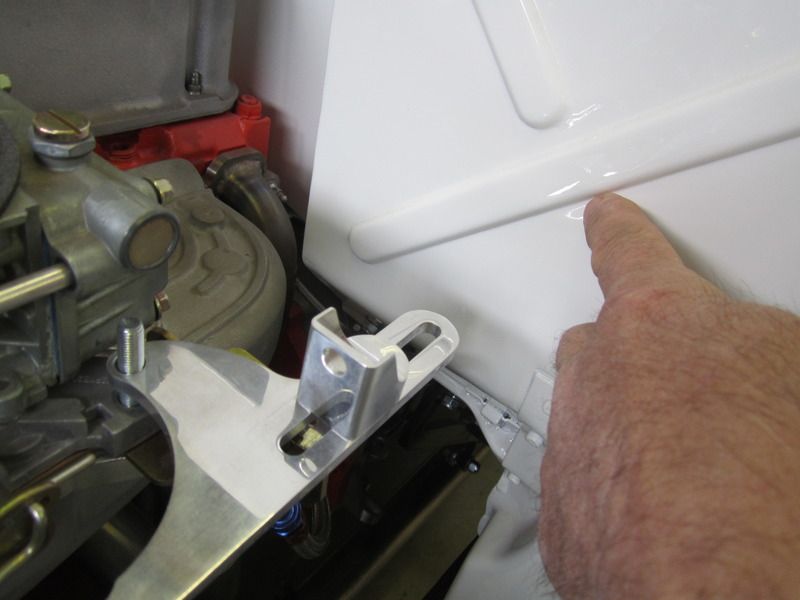 [/URL] [/URL]You can see that if I brought the hole through in this location I would have bee nearly 6 inches away from the throttle pedal that will eventually mount on the dog house portion of the firewall. To me that seemed to radical of a bend for a cable. 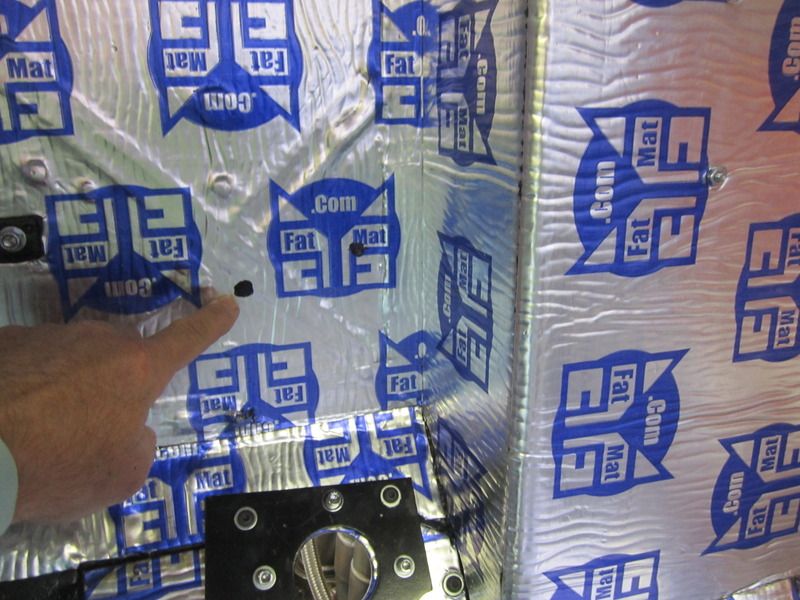 [/URL] [/URL]Then I noticed another problem.....The throttle linkage and return spring plate I bought from Jegs would not lay flat because of the way the bowtie overdrive throttle valve bracket sits. I tried putting spacers under the plate to raise it but that messed up the angle and geometry with the linkage. 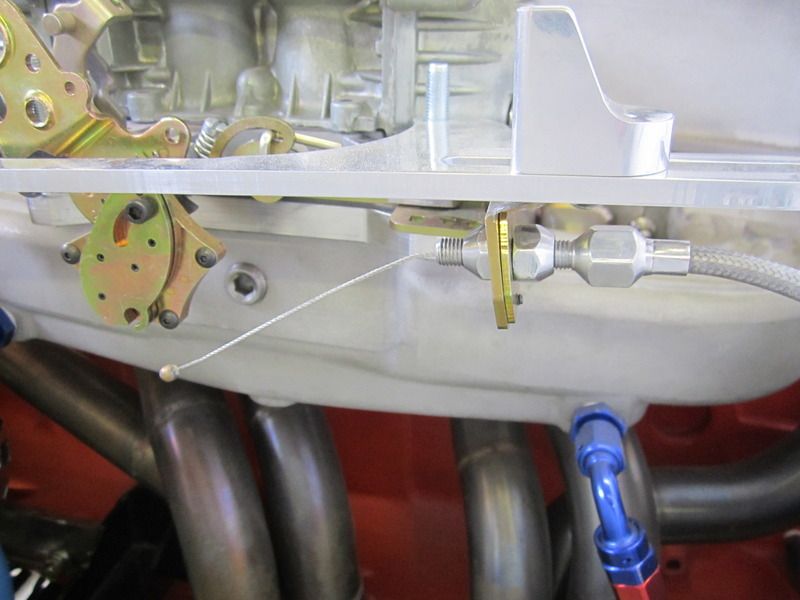 [/URL] [/URL]Sooooo....with all 3 of these issues bugging the hell out of me I set fourth on another episode of NOT WANTING THIS TO GET TO INVOLVED!!! The fix was a new homemeade throttle plate that would off set the linkage more towards the center of the truck thus aligning the linkage with the throttle pedal. To do this I took a piece of 1/4" alumimium plate. Mated it to the carb, put 2 heim joints and a splined rod with levers on it. Turned out pretty damn slick and has zero bind. You can see in this pic the lever that the pedal will connect to is now lined up right with the side of the recess on the firewall. 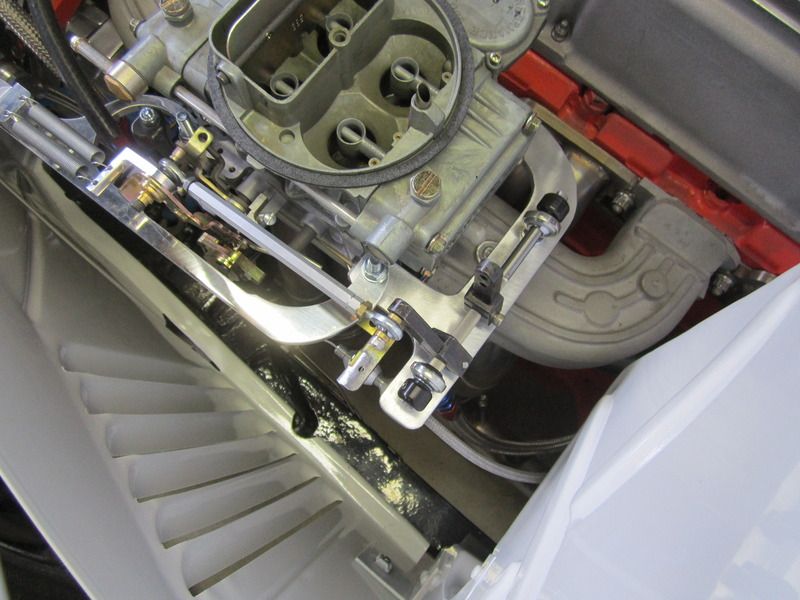 [/URL] [/URL]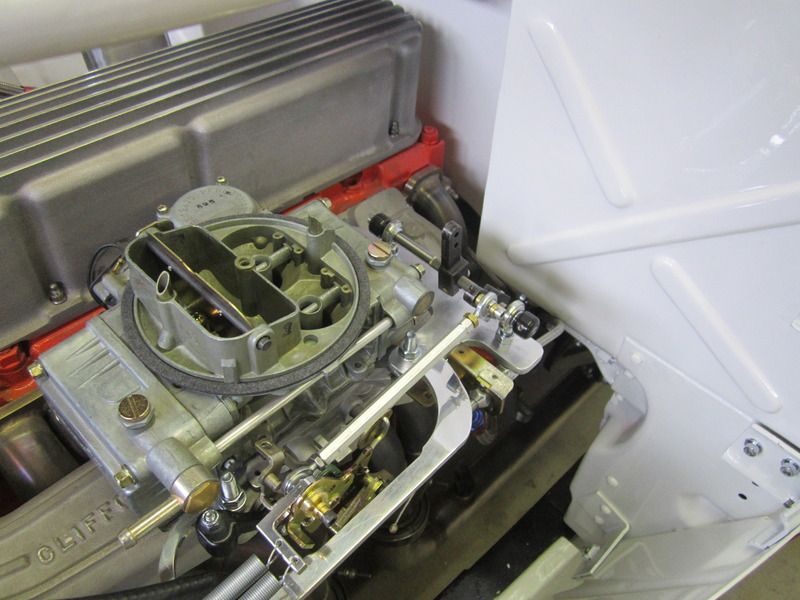 [/URL] [/URL]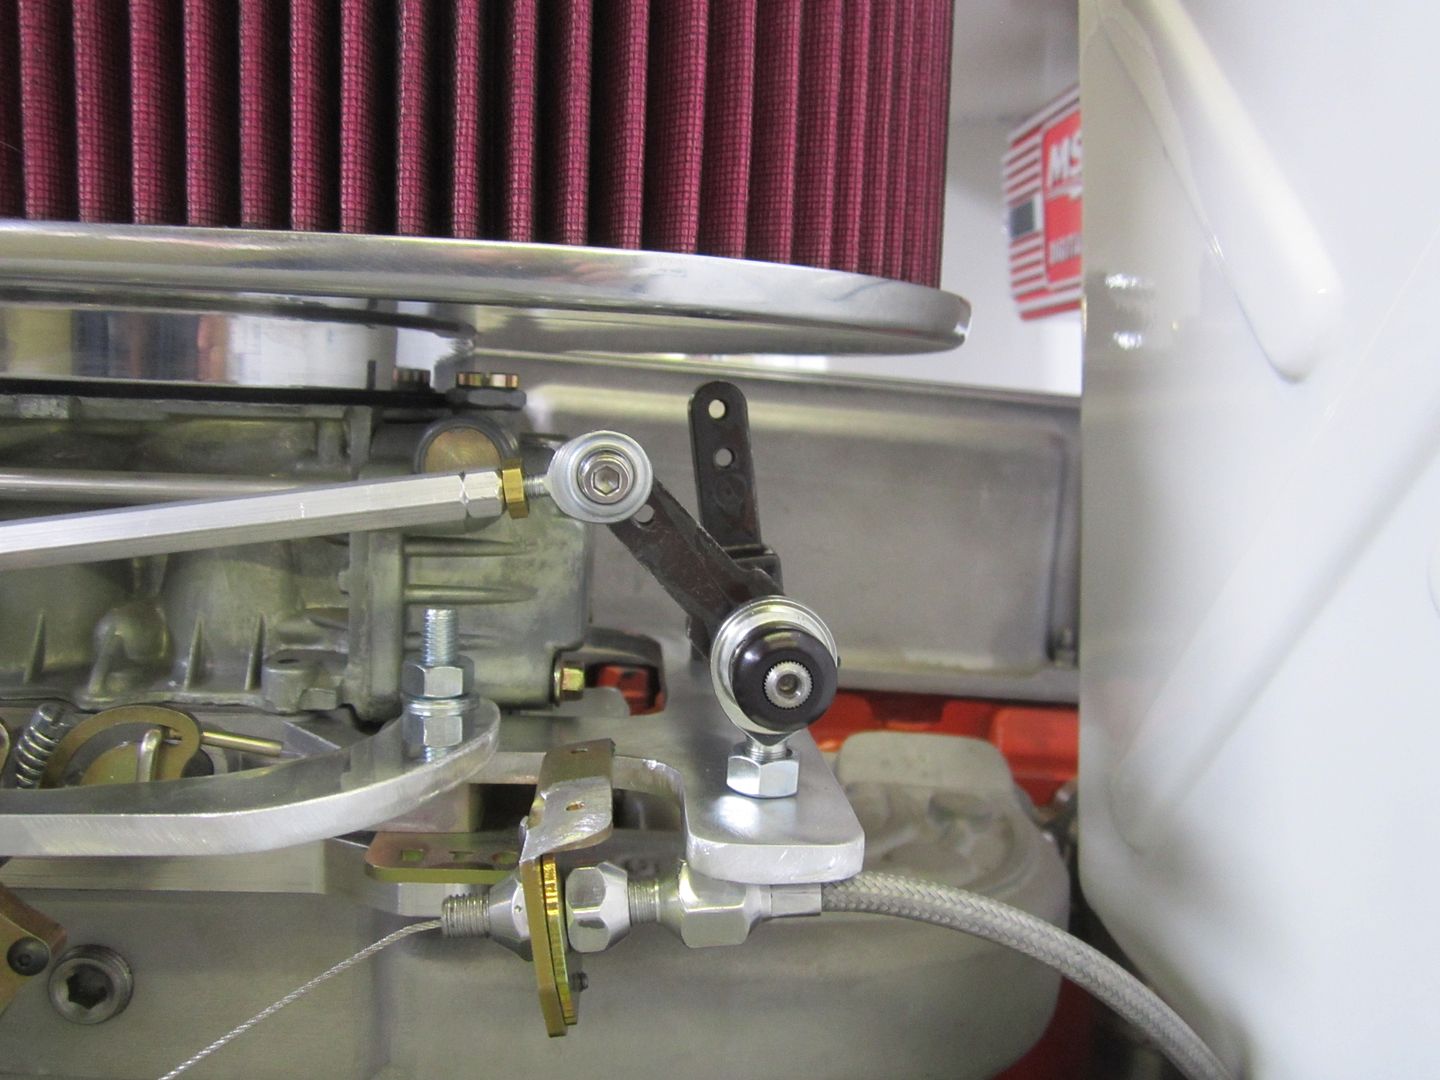 [/URL] [/URL]I was then able to re-use the original return spring a throttle bracket I bought by cutting off the back throttle portion and just using the front return spring area. I just needed to put a spacer under the front to level it out with the back side as it sits on top of the new throttle bracket. If that makes anu sense. 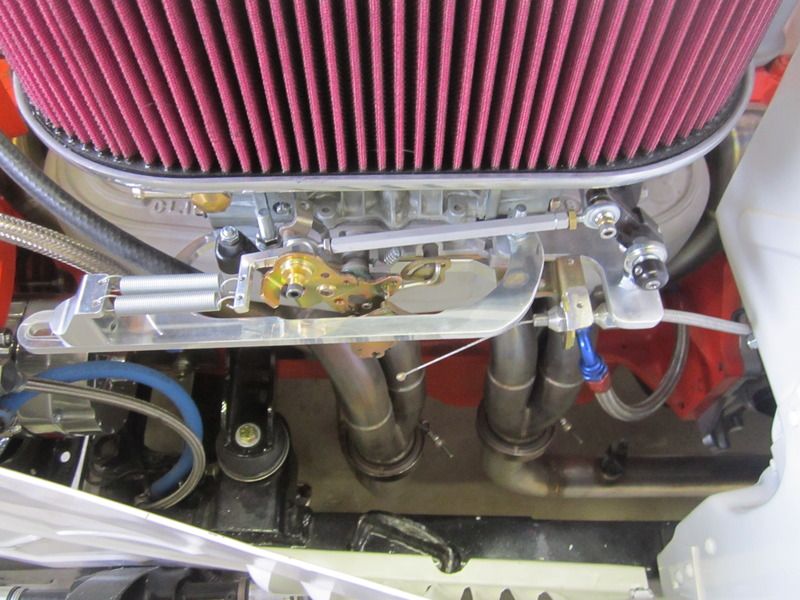 [/URL] [/URL]
|
|
|
|
|
03-26-2016, 03:29 PM
|
#298 |
|
Registered User
Join Date: Dec 2010
Location: washington NJ
Posts: 766
|
Re: 46 pickemup in NJ "the Rebuild"
Now with everything pretty much buttoned up, it is time to move onto the thing I have been dreading the most! WIRING HARNESS! Let me just say before I get started......I hate this $%@#! Seeing as how I have analness disease, I don't have to tell you how much I hate messy, bundled up, spaghetti looking wires. I hate it behind my computer, behind my TV and certainly in my truck! So with that being said, this may take me forever, and 3 or 4 wiring harnesses to get it to a point which I am happy.
Also let me say this before I get started. DISCLAIMER: I know nothing about wiring a truck! So please, anybody watching and wanting to copy something I do, PLEASE DON'T! I don't want to see anybody burn their truck or garage down because of something stupid I am about to do. We will all have enough fun watching me burn my owntruck and garage down So my choice was to go with American Autowire. They got great reviews and the kit seemed to be pretty much complete so there is no need to go looking for other parts like trun signals and switches. Also they are about an hour away from were i live so when I screw something up I can shoot down and get another hundred foot of wire.  [/URL] [/URL]American Autowire is so good they even know I am a friggin idiot so they sent me some practice wires!  [/URL] [/URL]For those of you who have been following along, You know I have alot of back problems so much so I decided to mount the fuse block under the seat on a sliding drawer for easy access. Unfortuanetly i will still have to get somewhat contourted when it comes time to make a few connections under the dash.  [/URL] [/URL]I decided to run the wires out the bottom of the seat riser, along the top of the frame rail, and back up into the cab up to the dash. 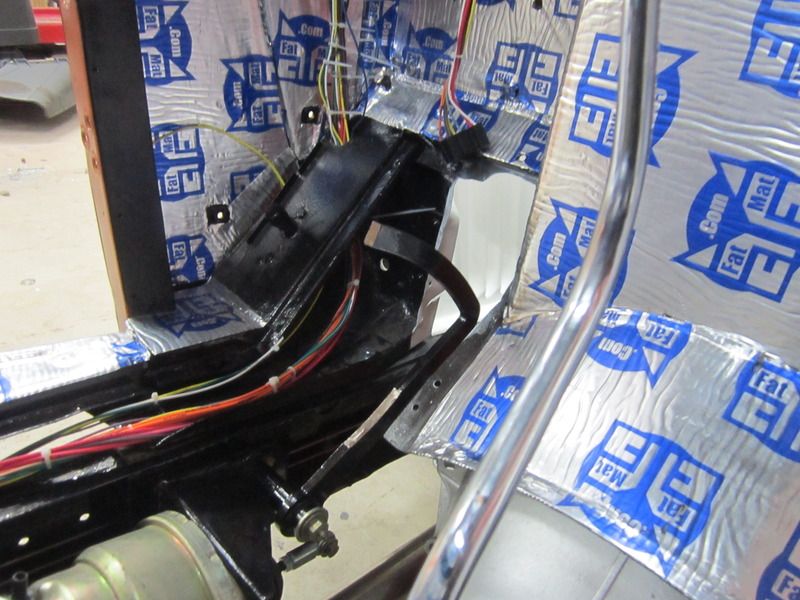 [/URL] [/URL]I started off by taking each harness and running the individual wires towards their final location. This way when it comes time to do the final button up, I can wrap all the wires that go to the rear portion of the truck together and what ever goes to the front the same way, as well as what ever goes from the fuse block to the dash can all be wrapped together. 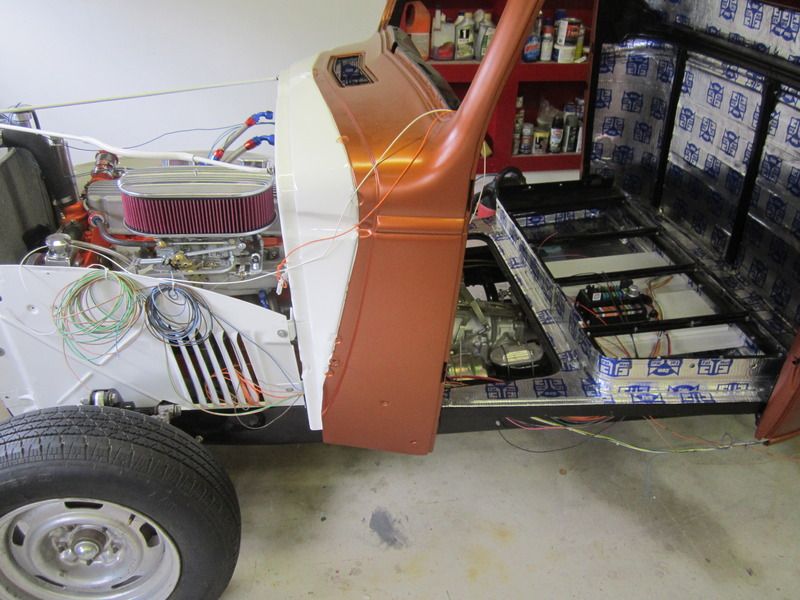 [/URL] [/URL]In an effort to keep everything as neat as possible under the dash I took a piece of aluinium angle and drilled a bunch of holes in it so I could mount some wire loops to it. This will mount under the dash to the radiator core support braces. It will give me a place to attach all my wires once they are wrapped with wire loom. 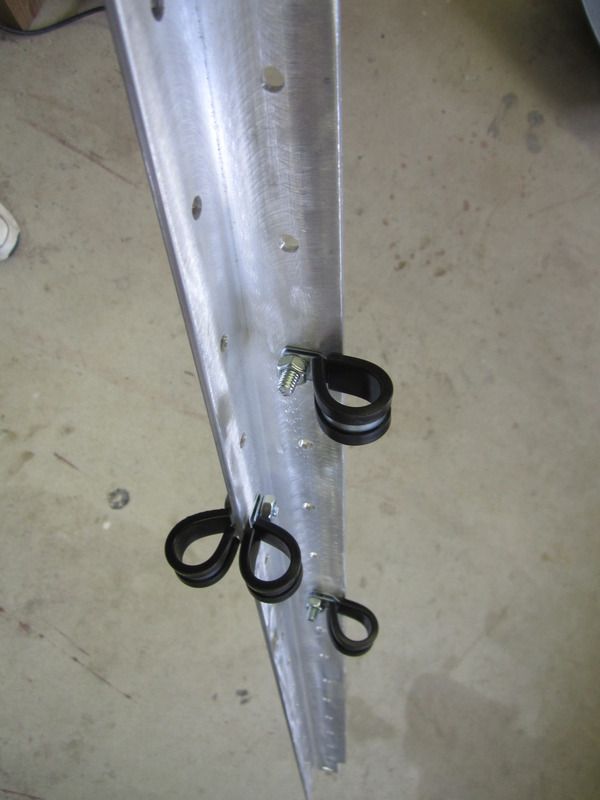 [/URL] [/URL]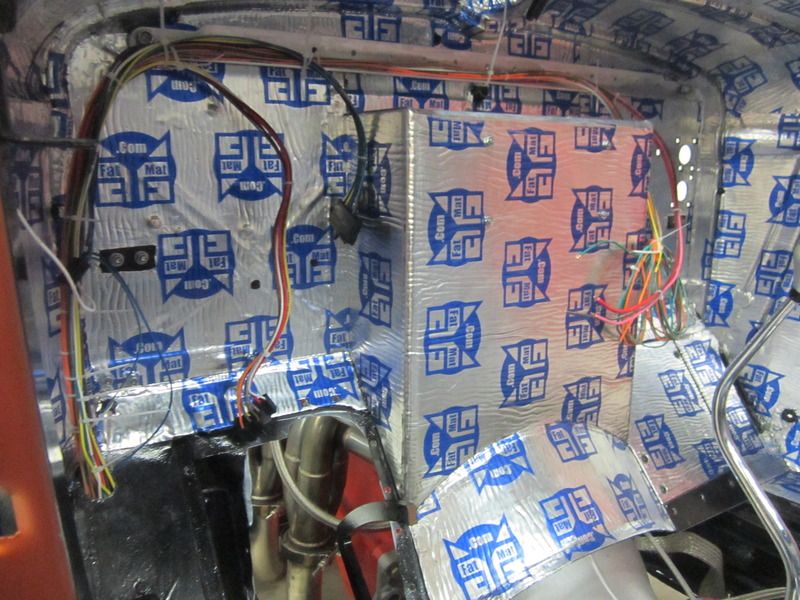 [/URL] [/URL]
|
|
|
|
|
03-26-2016, 06:46 PM
|
#299 |
|
Senior Member
 Join Date: Jul 2012
Location: Oblong, Illinois
Posts: 7,017
|
Re: 46 pickemup in NJ "the Rebuild"
Very nice work. Your truck is looking good!
|
|
|
|
|
03-29-2016, 11:07 AM
|
#300 |
|
Registered User
Join Date: Dec 2010
Location: washington NJ
Posts: 766
|
Re: 46 pickemup in NJ "the Rebuild"
Ok guys, how the hell do I make a round hole with a flat side for the ignition switch? Seems to me if I just make a round hole, the unit will spin with the key when I go to start the engine. Is there a special flat sided drill bit i don't know about?
Or is this another one of those deals where I have to spend 100S of hours with jewelers files making a custom handmade hole? 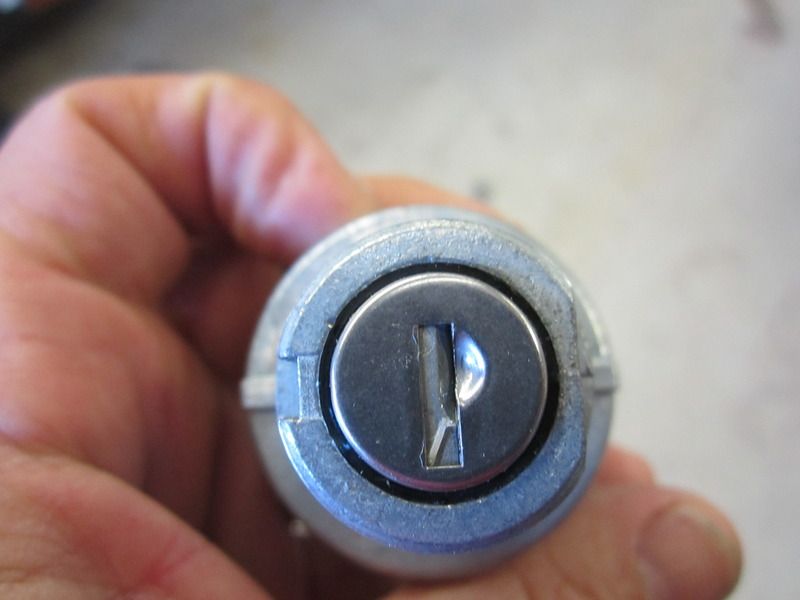 [/URL] [/URL]
|
|
|
|
 |
| Bookmarks |
|
|


 Linear Mode

