
|
Register or Log In To remove these advertisements. |
|
|
|
|||||||
 |
|
|
Thread Tools | Display Modes |
 03-27-2018, 07:36 AM
|
#1 |
|
Senior Member
 Join Date: Jan 2015
Location: Tampa, Fl.
Posts: 420
|
So I finally decided to start my wiring project.
I've been patch working this old truck's wiring so I could drive and enjoy it but it left me on the side of the road over the weekend due to this rats nest so I decided it's time to fix it. I'm currently ripping all the wiring out of the truck. I was kinda scared to remove the floor mat I was worried about what I would find under it but I'm really happy with the condition of what's under there. There is one spot I'm going to fix but other wise the floor is nice. In the pics on the gold? paint that's insulation not rust. Looks rusty in the pics.
I do have a few questions. 1) Has anyone removed the gas tank brackets? Does that cause damage to the back wall of the cab? 2) Does anyone have a wiring diagram of the headlight switch? I bought a universal harness, I've used a few of these and have been happy with them, and will wire it to the switch so I'd like to know which wires do what. It was so hacked I really couldn't trace it out. Because everyone likes pics here are some progress shots. Before:  After:  
|

|

|
|
03-27-2018, 09:51 AM
|
#2 |
|
Registered User
Join Date: Apr 2015
Location: Gallatin, MO
Posts: 295
|
Re: So I finally decided to start my wiring project.
Headlight switch wiring info and pinout:
http://67-72chevytrucks.com/vboard/s...d.php?t=509049 This link is in reference to a '68, but with the exception of pin #7 for the front parking lights, it's basically identical to the earlier models. Last edited by Rust-O-Matic; 03-27-2018 at 10:50 AM. Reason: typo |
|
|
|
|
03-31-2018, 01:10 PM
|
#3 |
|
Senior Member
Join Date: Jan 2015
Location: Tampa, Fl.
Posts: 420
|
Re: So I finally decided to start my wiring project.
Thanks for the link
|
|
|
|
|
03-31-2018, 01:16 PM
|
#4 |
|
Senior Member
Join Date: Jan 2015
Location: Tampa, Fl.
Posts: 420
|
Re: So I finally decided to start my wiring project.
So out with the old and in with the new. I ripped out all the wiring in the truck over the last few days then waited on the new harness to arrive. I patched the rust spot and filled all the random holes in the firewall including where the stock heater was. It's going to get an aftermarket ac system so no use for that anymore. To answer my gas tank mount question I just cut off the part that sticks out and cut the bolts off flush to the floor. I'll weld those when I get back to that part of the cab. The rest of the bracket doubles as cab mount so I left it. I had to make a bracket to mount the fuse panel to the firewall. The wires stick out the back too far to just flat mount it to the firewall. I also got the rear wires all wrapped in loom and ran to the back of the truck. Progress. lol
     
|
|
|
|
|
03-31-2018, 04:33 PM
|
#5 |
|
Senior Member
Join Date: Jul 2014
Location: Los Gatos, Ca.
Posts: 407
|
Re: So I finally decided to start my wiring project.
Did your new harness come a new headlight and ignition switch? Brake light switch? High beam switch? If not, now is a good time to replace these too.
__________________
1966 K20 flatbed build thread - http://www.67-72chevytrucks.com/vboa...d.php?t=768827 62 C20 build thread - http://67-72chevytrucks.com/vboard/s...d.php?t=703583 |
|
|
|
|
03-31-2018, 04:48 PM
|
#6 | |
|
Senior Member
Join Date: Jan 2015
Location: Tampa, Fl.
Posts: 420
|
Re: So I finally decided to start my wiring project.
Quote:
|
|
|
|
|
|
03-31-2018, 05:23 PM
|
#7 |
|
Registered User
Join Date: Apr 2017
Location: Bozeman
Posts: 219
|
Re: So I finally decided to start my wiring project.
You know...now would be an excellent time for you to in extreme detail document this install😂! I have a new harness and I am stressed about it . You could take pictures and part numbers and make it so easy for me I mean us lol! It all ways seems so daunting for some reason. Hope it goes smooth for ya!
|
|
|
|
|
03-31-2018, 05:32 PM
|
#8 |
|
Registered User
Join Date: Jan 2015
Location: Arlington VA
Posts: 359
|
Re: So I finally decided to start my wiring project.
I did this to a truck last year - best investment is the AAW crimping tool its actually a GM part.
|
|
|
|
|
03-31-2018, 06:17 PM
|
#9 | |
|
Registered User
Join Date: Apr 2012
Location: Cambridge, Ontario, Canada
Posts: 1,771
|
Re: So I finally decided to start my wiring project.
Quote:
__________________
Craigerrr My build thread, CRGRS 66 Winter Build: http://67-72chevytrucks.com/vboard/s...09#post5638709 |
|
|
|
|
|
03-31-2018, 07:24 PM
|
#10 |
|
Moderator
  Join Date: Aug 2011
Location: China Spring, TX
Posts: 7,280
|
Re: So I finally decided to start my wiring project.
The FAQ section has your answers.
__________________
Master Chief, US Navy, Retired 1964 C10 Step-side Short Bed - In Progress 2009 2500HD Duramax LTZ 1948 GMC Panel 1956 Big Window Stepside 1953 5 Window Chevy Stepside 1932 Coupe New Seat Foam for Bench Seats? |
|
|
|
|
03-31-2018, 09:03 PM
|
#11 |
|
Registered User
Join Date: Dec 2017
Location: Niceville Florida
Posts: 347
|
Re: So I finally decided to start my wiring project.
i also would benefit greatly from a detailed write up.
|
|
|
|
|
04-01-2018, 08:08 AM
|
#12 |
|
Registered User
Join Date: Sep 2012
Location: Leander, TX
Posts: 969
|
Re: So I finally decided to start my wiring project.
You can pull the gas tank brackets but they are spot welded in about 12-14 places on both brackets. Mine were missing in my truck and the PO pulled them out instead of cutting the spot welds so the back of my cab behind them looked horrible. I actually put mine back in to run a factory gas tank.
You can see all the spot weld spots in this photo. The bottom is bolted in. I believe one bolt on each side is the body mount. So if you take them out you will need to weld a nut to the floor to install the body mount. 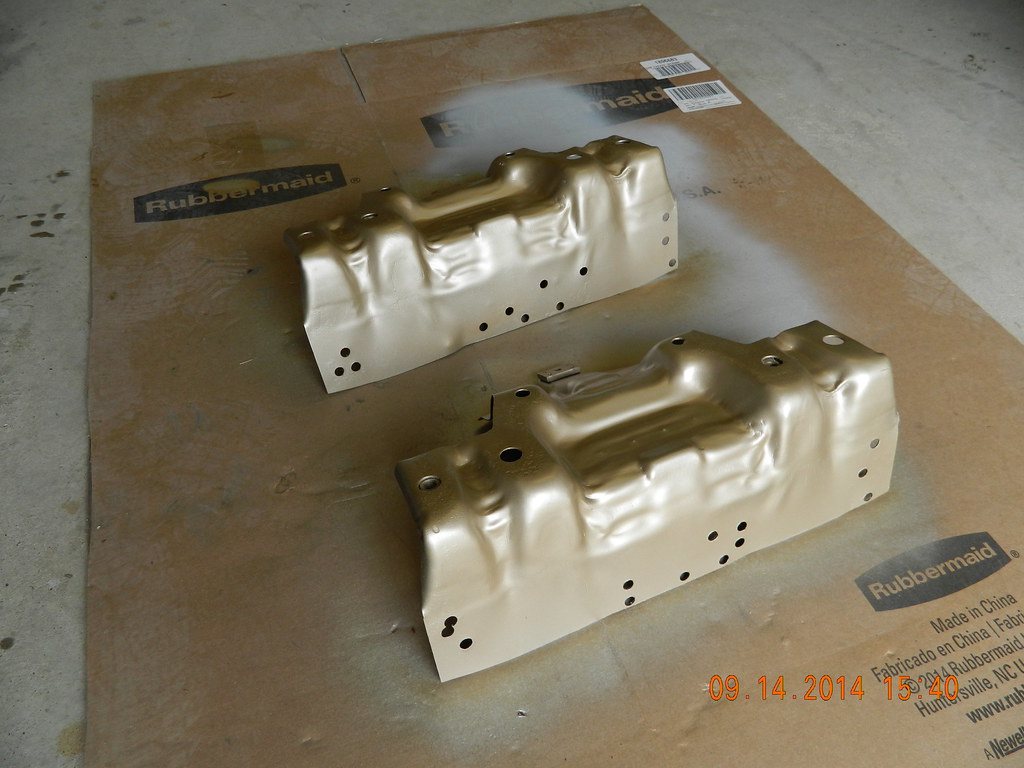 DSCN8623 by bjohnson388, on Flickr DSCN8623 by bjohnson388, on Flickr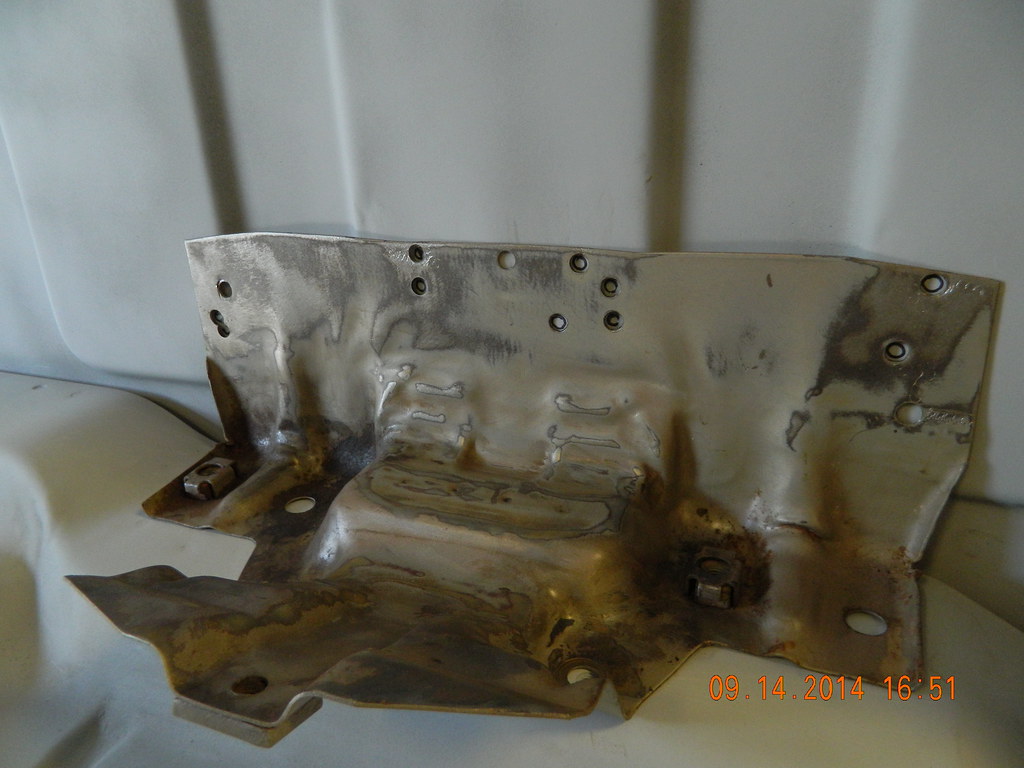 DSCN8628 by bjohnson388, on Flickr DSCN8628 by bjohnson388, on FlickrBret
__________________
64' Build Thread http://67-72chevytrucks.com/vboard/s...d.php?t=586955 |
|
|
|
|
04-01-2018, 09:10 AM
|
#13 |
|
Registered User
Join Date: Feb 2015
Location: Montevallo, AL
Posts: 272
|
Re: So I finally decided to start my wiring project.
Is that a Speedway harness? Let us know how you like it.
|
|
|
|
|
04-01-2018, 11:25 AM
|
#14 |
|
Registered User
Join Date: Oct 2016
Location: san bernardino ca
Posts: 1,611
|
Re: So I finally decided to start my wiring project.
I am getting ready to wire mine up. I think i will get the stock one plug and play.
|
|
|
|
|
04-01-2018, 05:44 PM
|
#15 |
|
Senior Member
Join Date: Jan 2015
Location: Tampa, Fl.
Posts: 420
|
Re: So I finally decided to start my wiring project.
It's a Rebel Harness. This is my 5th car doing a complete rewire. It's really easy just tedious. You have to take time and think out your install. I'm bad about taking pics but will try as I go. I broke the harness apart and ran some out the middle of the firewall and some out the left side. I put it all in wire loom and tape the loom every few feet just for prosperity sake. I looked at the factory replacement harnesses but just couldn't spent the extra money. This is a 16 circuit harness that will allow upgrading as wanted/needed and it was $253 to my door. You do have to terminate the wires but if you can't do basic soldiering this probably isn't a job for you. Just take your time. The wires are all marked every 6" where they go. Not quite plug and play but easy enough for someone with an interest and a want to do it.
|
|
|
|
|
04-01-2018, 05:45 PM
|
#16 | |
|
Senior Member
Join Date: Jan 2015
Location: Tampa, Fl.
Posts: 420
|
Re: So I finally decided to start my wiring project.
Quote:
That's what I was seeing when I looked at it and didn't want to make holes in my cab so I left the upper part and just cut the forward part off it. |
|
|
|
|
|
04-01-2018, 08:25 PM
|
#17 |
|
Senior Member
Join Date: Jan 2015
Location: Tampa, Fl.
Posts: 420
|
Re: So I finally decided to start my wiring project.
Not sure what you are looking for as details so ask anything you'd like I'll try to remember to take pics as I go. Here is under the hood. You will see where the wires come into the engine bay and you will see how I separated them in different looms. This will help me down the road if I have to work on something. Each loom has certain items in them. Ignore some of the loops you see. I'm building a small block for it and didn't want to cut the wires to fit this engine so they will be long till I put that in here and trim them to fit it the right way.
The red wire on the top is for the electric choke. Again it will be shortened and loomed when the small block goes in. I included how I did the parking light wiring. What I did was cut each one progressively shorter so the connections would be staggered and they would all fit in the loom. I like to use heat shrink on the end of the connectors just to add water proofing. The loom on the valve cover carries the water, coil and tach wires. The loom going down carries the oil pressure and Ign wires.  Just another shot of the top wires and the choke wire.  The heat shrunk connector  One of the best tools I've ever bought. It's a power probe. Great for finding breaks in wires and for testing circuits. You can put 12v to any wire anywhere. So testing a new circuit before you button everything up is great but if you are looking for a short you can attach the power to any point of a wire and it will tell you where the short is.  Back to the hood wiring. Above was one of the wires, here are the staggers I was talking about and everything a mess.  Here is everything loomed and cleaned up.  Here is that same area with all the rest of the wiring loomed and run where they belong.  Here they are down the frame rail and attached.  Hope these help someone and if I can answer any questions I'd love to help. I have to go buy some relays tomorrow and some more connectors. I'm going to do the relay set up for the headlights I've read it will make them brighter. Mine aren't bad but anything that will help is worth it in my opinion. The rear of the truck is all done until I broke one of the sockets. I've ordered it already so when it comes in I'll post how I attached it too. Nothing to see as far as running the wires. They are all in the same loom and attached to the frame all the way back. After getting the headlight relays and the lone taillight done I will move inside the truck. I want to clear my plate and only have to think about what to do in there so I can focus without thinking of things not done outside. There is some thinking involved in there with in and out of the dimmer and switches and what not. Wish me luck. |
|
|
|
|
04-24-2018, 02:49 PM
|
#18 |
|
Senior Member
Join Date: Jan 2015
Location: Tampa, Fl.
Posts: 420
|
Re: So I finally decided to start my wiring project.
It always looks worse before it gets better.
    Picked up a whole host of front end parts. New control arms with new ball joints and bushings. Drop springs for the rear. 2 sets of drop springs for the front. Drop spindles and a few other items. Also bought my new intake and engine controller for the LS that's going in it with a new clutch and flywheel.    
|
|
|
|
|
04-25-2018, 07:58 PM
|
#19 |
|
Scrapper 1
Join Date: Jan 2007
Location: Riverside Calif
Posts: 1,649
|
Re: So I finally decided to start my wiring project.
I know a lot of you are Broke fools and wont spend 900.00 for the Re pop harness for are trucks.One thing you really might want to try next time when making your own wire harness.Make places where you can disconnect the wire harness from your engine making it all 1 peace is a nightmare.I like the M&H harness they have all the plugs and connections you suppose to have its plug and play..I put this harness in back in 2000 never had a wiring problem sense I payed 550.00 to do my 1965 3/4 ton work truck.Yes lots of updates there done to truck disc power brake and power steering with a box.Its a joy to drive
Last edited by stsalvage; 04-25-2018 at 08:03 PM. |
|
|
|
|
04-25-2018, 08:05 PM
|
#20 |
|
Moderator
Join Date: Aug 2011
Location: China Spring, TX
Posts: 7,280
|
Re: So I finally decided to start my wiring project.
An electrical thread. Interesting.
__________________
Master Chief, US Navy, Retired 1964 C10 Step-side Short Bed - In Progress 2009 2500HD Duramax LTZ 1948 GMC Panel 1956 Big Window Stepside 1953 5 Window Chevy Stepside 1932 Coupe New Seat Foam for Bench Seats? |
|
|
|
|
04-25-2018, 08:06 PM
|
#21 |
|
Scrapper 1
Join Date: Jan 2007
Location: Riverside Calif
Posts: 1,649
|
Re: So I finally decided to start my wiring project.
I don't have wires laying all about.I hate when i go see a truck to buy and some one has wires every where.Next time you sell a truck think to your self Curb appeal You would fix up your house4 be for you sold it why not do the right thing when you sell a old truck.
One last thing if nothing works in your truck.Look at the horn rely its GOD in are 1960--66 chevy trucks the main power wire goes throw it |
|
|
|
|
04-25-2018, 09:51 PM
|
#22 |
|
Senior Member
Join Date: Jan 2015
Location: Tampa, Fl.
Posts: 420
|
Re: So I finally decided to start my wiring project.
The harness I used came from Rebel wiring and only cost $230. Well worth it in my opinion.
|
|
|
|
|
04-25-2018, 11:27 PM
|
#23 |
|
Registered User
Join Date: Oct 2016
Location: san bernardino ca
Posts: 1,611
|
Re: So I finally decided to start my wiring project.
I just went to car truck shop today. I got all of the wire harness. Yep its all from M@H
|
|
|
|
|
| Bookmarks |
|
|


 Linear Mode

