
|
|
|
 09-24-2008, 06:57 PM
|
#1 |
|
Registered User
Join Date: Dec 2005
Location: The land of fruits and nuts
Posts: 193
|
Re: LFD's 4dr Burb Build
Sooo, after seeing your builds, I'm wondering: "Why's this guy taking a class!? he should be teaching!"
But seriously... Kevin, I'm sure you have some pics somewhere else on the bb, but I'm wondering what your shop set up is like? I know you were redoing your house and stuff a long time ago, but I just am curious what you're working with. btw, I have a good friend in Fairfield, one of these days I'll have to come bother you up in Winters!
__________________
Have mercy, I'm recovering from my 4x4 addiction. 
|

|

|
|
09-25-2008, 12:29 AM
|
#2 | |
|
Senior Member
Join Date: Jul 2005
Location: Winters Ca. 95694
Posts: 4,843
|
Re: LFD's 4dr Burb Build
Quote:
My shop is just a 25x45 concrete building that was built around 1920 or so. It was the original carriage house for working on horse and buggy's back in the day. It is very cluttered (full of tools, parts and cars) and needs a second story added on soon. I have the plans drawn up for the second floor and over half the metal for it but I just don't have the time to do it right now or the break in builds to be down for as long as it will take. I will happen in the next few years before I go full time at fabricating because I will need a place for the other sheet metal fabricating tools I need to get like the English wheel, power Bead roller, shrinker and stretchers and so on. My classes next week will be with Lazzy who is an amazing metal former and it should be a great class. Also I have Friday off so I hope to get the door just about finished up so I can start on the back half chop  Kevin LFD Inc. Here are a few more pics from my last class. It is a 37 sedan, glass body, tube chassis, 2000 Norstar rear mounted V8 and way too much time. This car was not built by Dominator but by a home builder that spent 7yrs and I don't even want to know how much money. 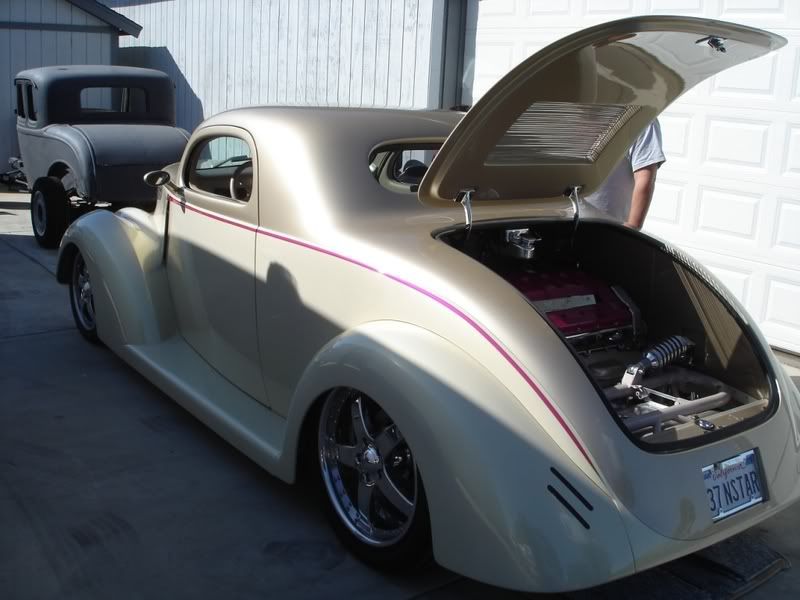 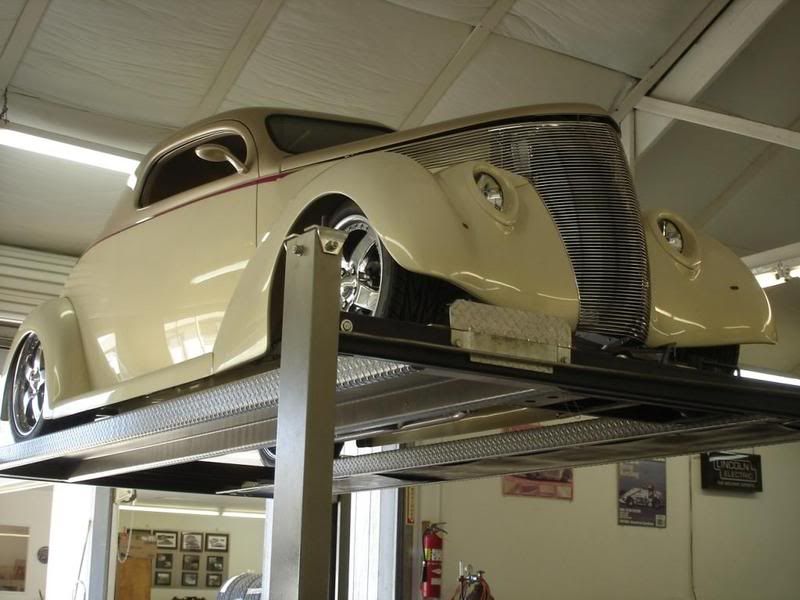 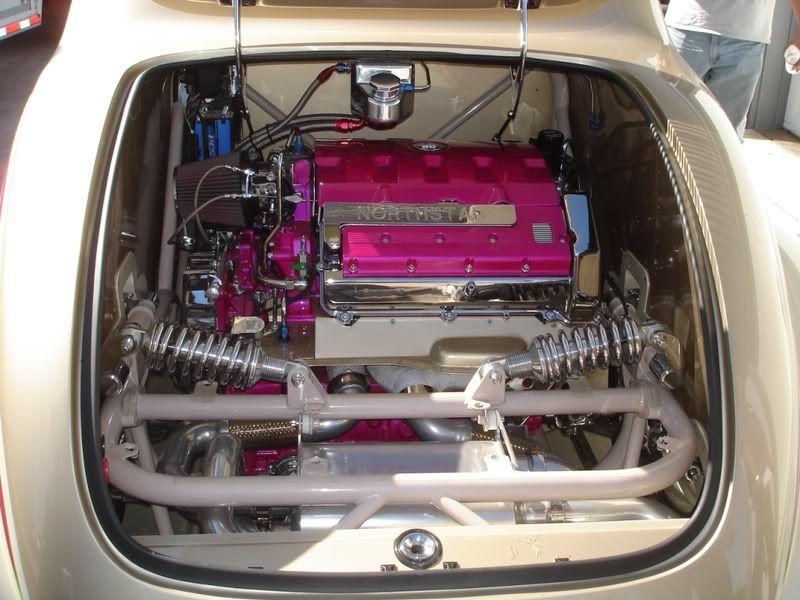 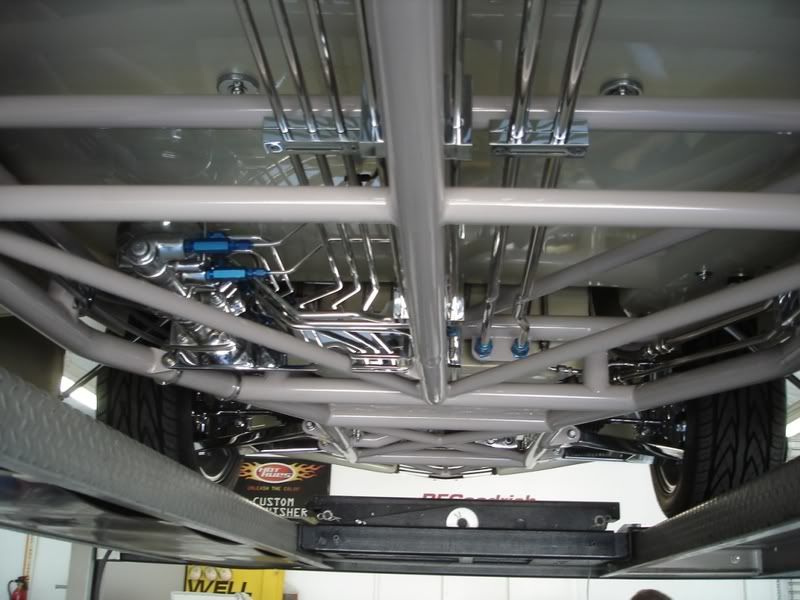 Notice the radiator hose's and were they go! 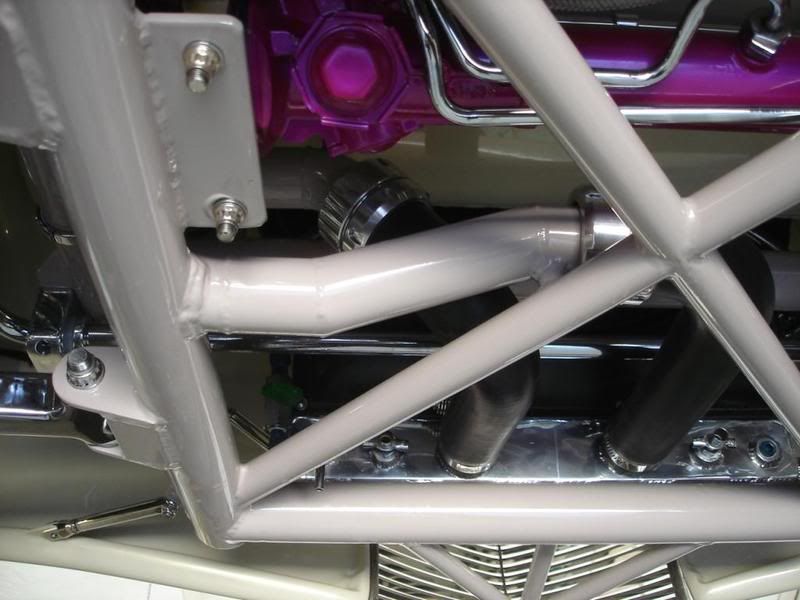
Last edited by Rokcrln; 09-25-2008 at 01:19 AM. |
|
|
|
|
|
09-26-2008, 04:13 PM
|
#3 |
|
Senior Member
Join Date: Jul 2005
Location: Winters Ca. 95694
Posts: 4,843
|
Re: LFD's 4dr Burb Build
Well the door is turning out good and should be finished by Sunday if all goes well. I had to take a slice out of the door skin to get the profile just right. I decided to use my Tig welder for this job (guess I was feeling Lucky) but I have never really Tig'd body panels just some brackets and "Play stuff". I guess luck was on my side because it turned out great and after some time of Tacking, Dollying, Tacking, Dollying and after about two hours it will only need a few good cotes of fill primmer and blocking.
Kevin LFD Inc. 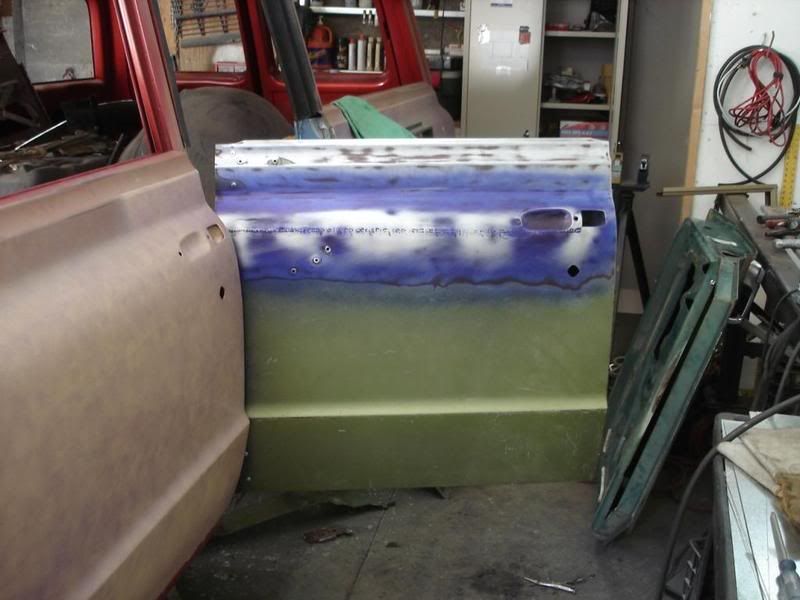 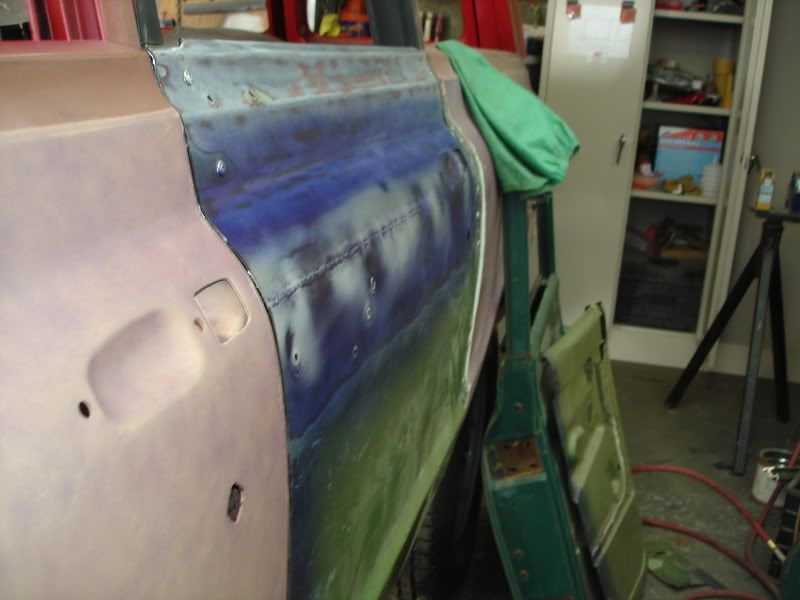 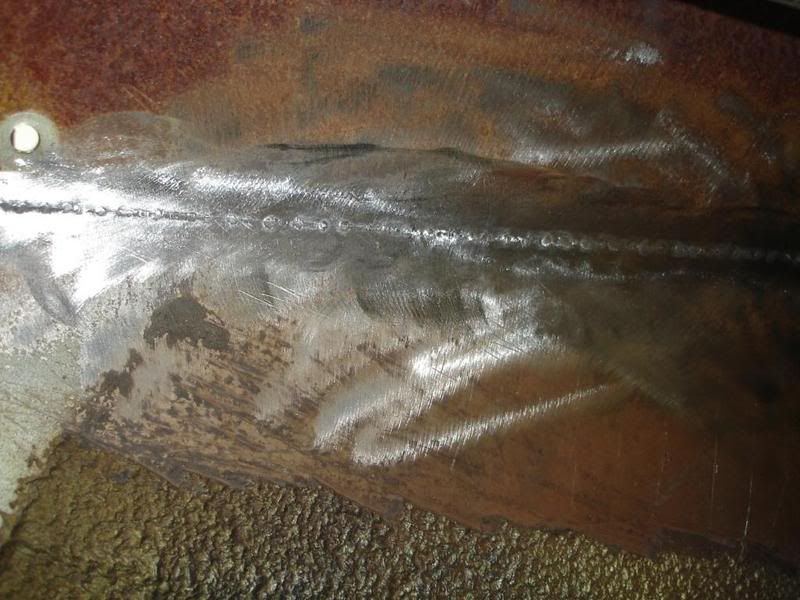 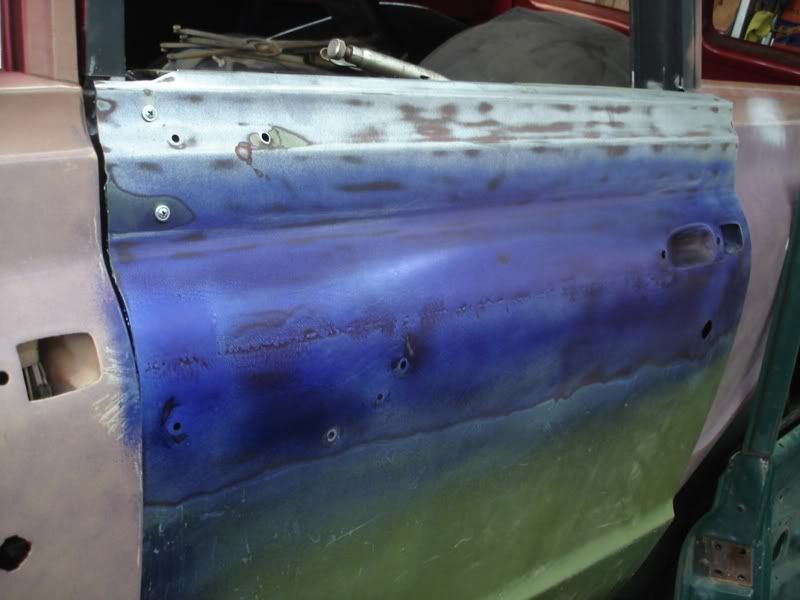 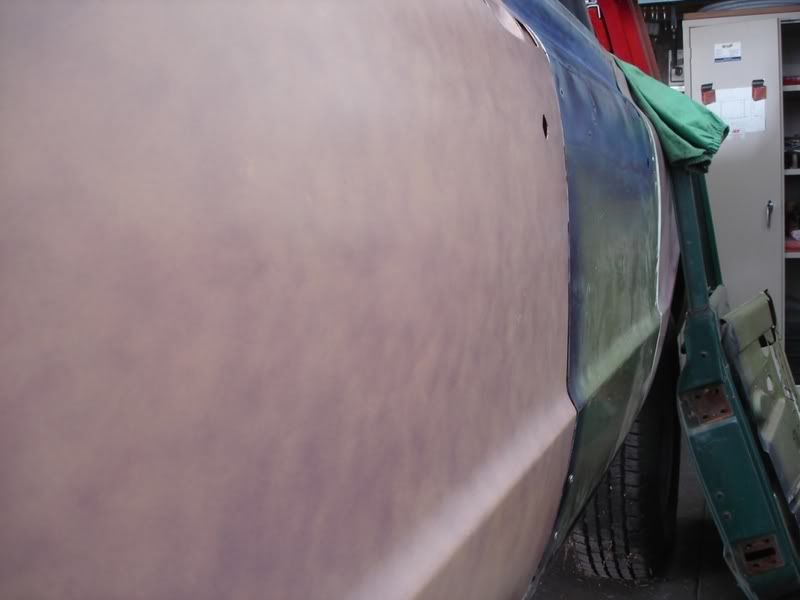 Now I am starting on the rear jamb before I tackle the upper window rail. 
Last edited by Rokcrln; 09-26-2008 at 04:19 PM. |
|
|
|
|
09-26-2008, 04:55 PM
|
#4 |
|
Registered User
Join Date: Jun 2007
Location: DFW (Forney)
Posts: 1,529
|
Re: LFD's 4dr Burb Build
Nice work ,and craftsmanship.
__________________
'58 SWB Fleetside...Front & Rear Porterbuilt Dropmember, 6.0 LS /4L60E. Accuair E-level, 20 Billet Specialties (Vintecs) '63 Buick Riviera ... AccuAir E-level, 20" Billet Specialties (Vintecs) http://67-72chevytrucks.com/vboard/s...=528853&page=5 |
|
|
|
|
09-26-2008, 07:26 PM
|
#5 |
|
Registered User
Join Date: Jul 2007
Location: Fresno, Ca
Posts: 89
|
Re: LFD's 4dr Burb Build
badazz az alwayz!!! Stop making it look so easy... Im starting to think I can do it too...

Last edited by noteron; 09-26-2008 at 07:28 PM. |
|
|
|
|
09-26-2008, 09:20 PM
|
#6 |
|
Registered User
Join Date: Mar 2008
Location: Waukee, Iowa
Posts: 1,608
|
Re: LFD's 4dr Burb Build
What's the blue stuff on the door?
Do you dolly after each tack, or after a series? Is the procedure with the TIG similar to that of the MIG? I also have a TIG that I've only played with a little bit, practice pieces and a few tube adapters. I want to get good with it, but can't seem to find the time to practice.
__________________
build threads: 86 Suburban 88 Jeep 6.0 swap 49 Chevy truck 54 Chevy wagon 86 Suburban lowered 4/6 54 Chevy wagon 49 Chevy/s10 mix 88 Jeep Wrangler rockcrawler |
|
|
|
|
09-26-2008, 11:06 PM
|
#7 | ||
|
Senior Member
Join Date: Jul 2005
Location: Winters Ca. 95694
Posts: 4,843
|
Re: LFD's 4dr Burb Build
Quote:
 But really thanks it has been along road but one anyone can take. Just give it a shot and it will start getting easier. But really thanks it has been along road but one anyone can take. Just give it a shot and it will start getting easier.Quote:
Tig is far superior to Mig for doing body work because the welds are softer and they can be worked with a hammer and dolly much better then Mig can. Also a proper Tig weld is much flatter then Mig and this means less grinding to get it flat and that means less heat and less work hardening. As far as do I hammer and dolly each tack or after a few it just depends on what it is that I am doing. Kevin LFD Inc. Well it is really starting to take shape now. I started and finished the upper rail tonight and started tacking the door together. I still have allot of work to do before it is finished but I can sure see the light now. 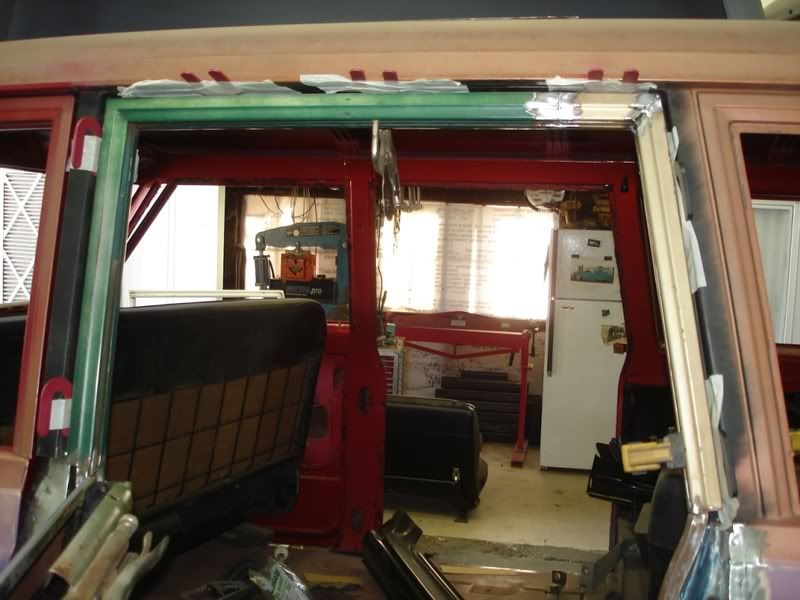 I used shims for spacers to keep the gap even. 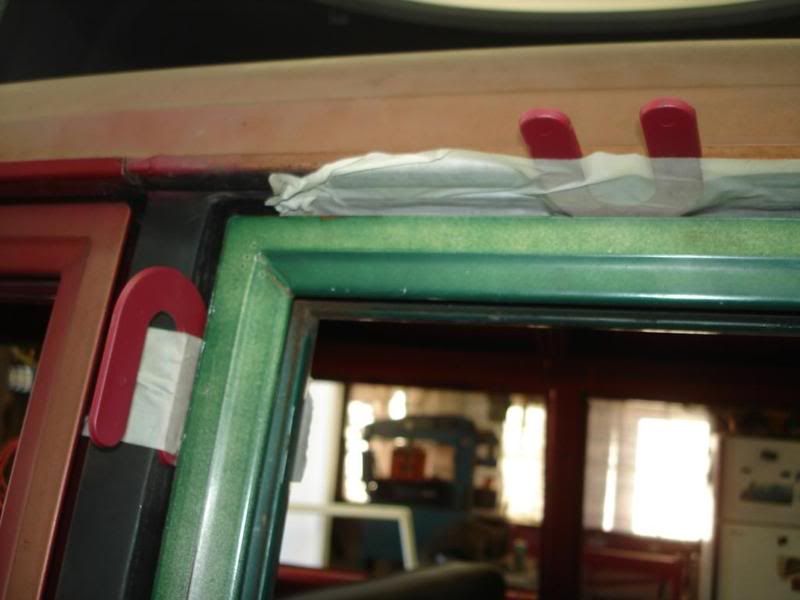 More Tig welds. 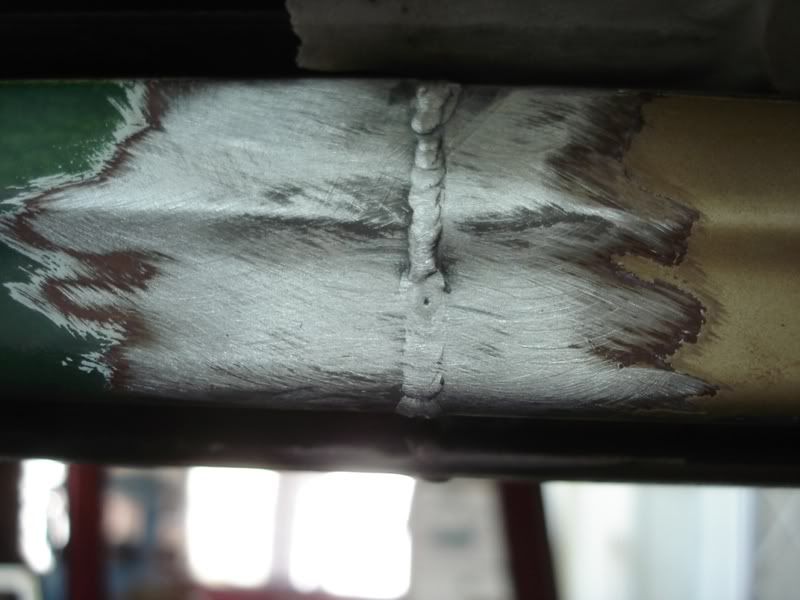
Last edited by Rokcrln; 09-26-2008 at 11:11 PM. |
||
|
|
|
 |
| Bookmarks |
|
|


 Hybrid Mode
