
|
 02-05-2015, 09:16 AM
|
#351 |
|
Senior Member
 Join Date: Jul 2012
Location: Oblong, Illinois
Posts: 7,017
|
Re: 55 Wagon Progress
Yes, really nice work. The magnetic brake is pretty handy.
|

|

|
|
02-05-2015, 10:02 AM
|
#352 |
|
Registered User
Join Date: Jan 2013
Location: Leonardtown, MD
Posts: 1,634
|
Re: 55 Wagon Progress
Kyle is a quick learner, I think he enjoys welding especially, but we'll see this weekend how he fares with sheet metal
 The magnetic brake does have some limitations over an apron brake, but overall it really comes in handy for radius forming and other situations where the truss of the brake would normally get in the way..
__________________
Robert |

|
|
|
02-07-2015, 09:39 PM
|
#353 |
|
Registered User
Join Date: Jan 2013
Location: Leonardtown, MD
Posts: 1,634
|
Re: 55 Wagon Progress
Today Kyle needed to start some welding on the hood brace, so while he was getting set up with the welder, I started making him an anvil that he could use to planish the weld dots inside the radius voids..
Heat applied... 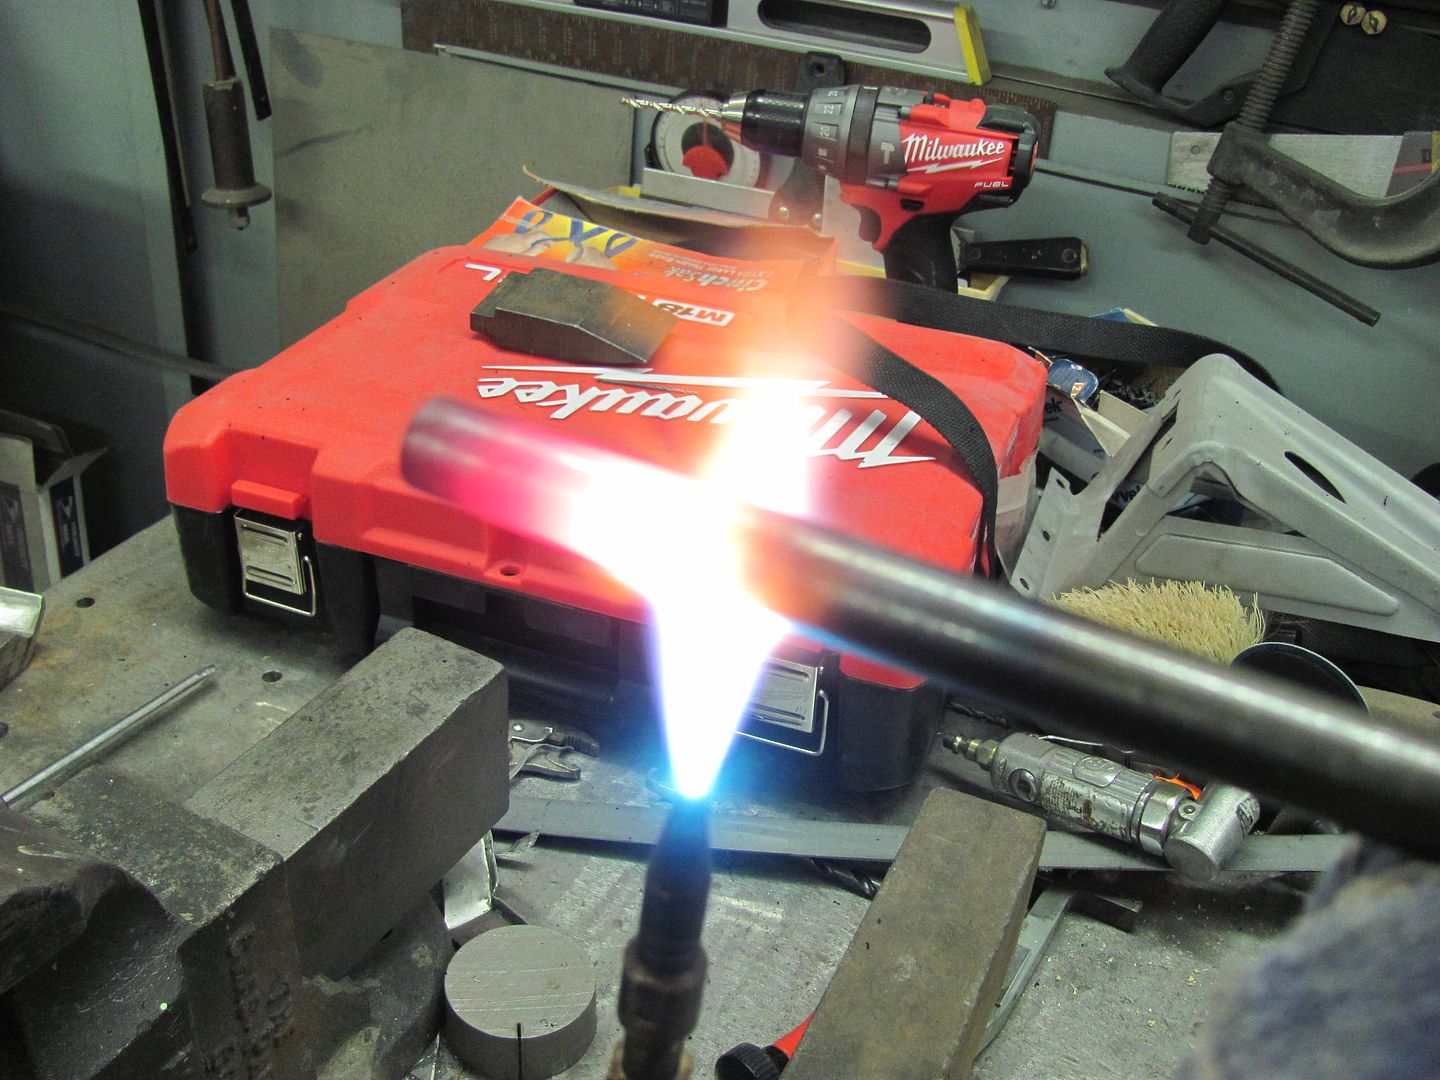 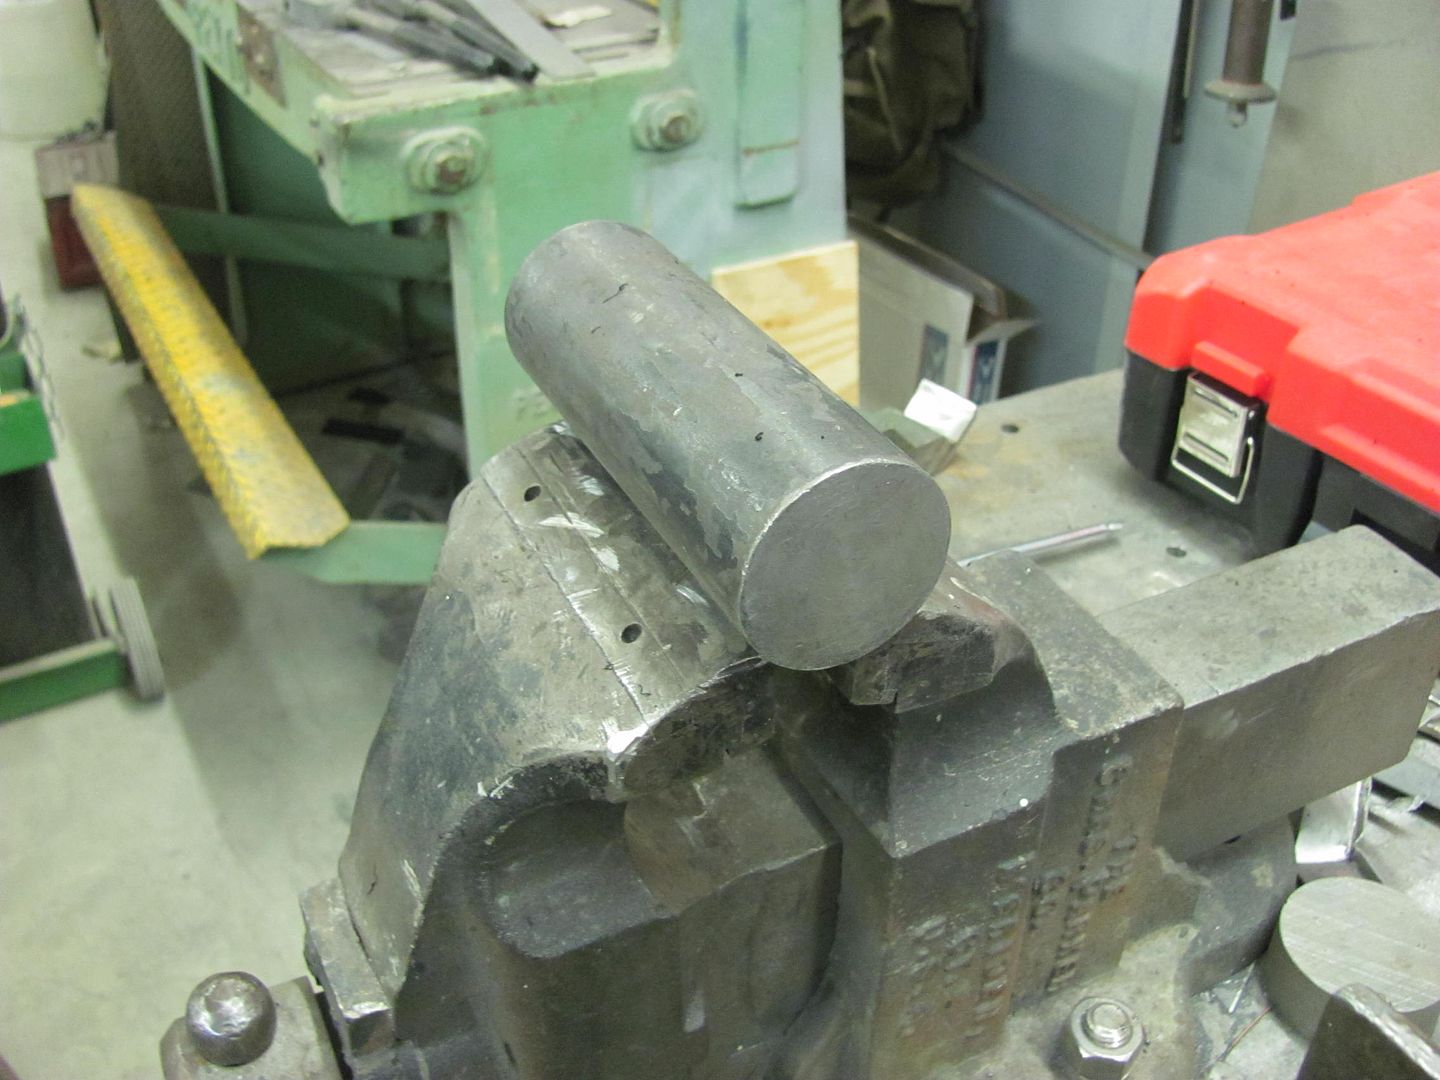 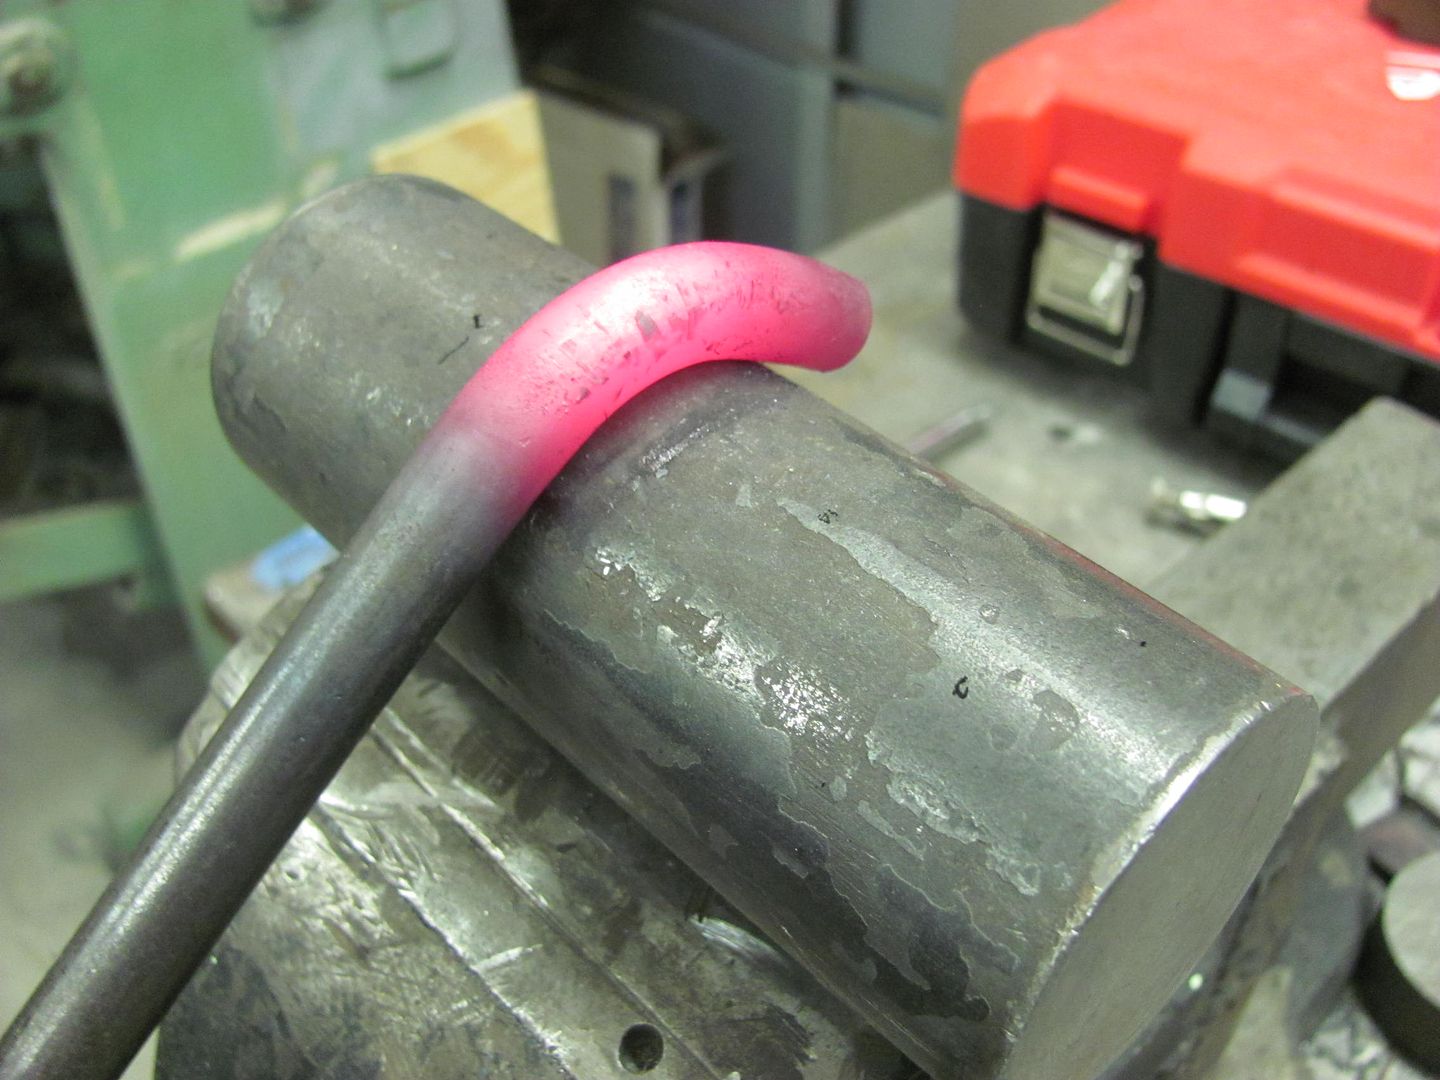 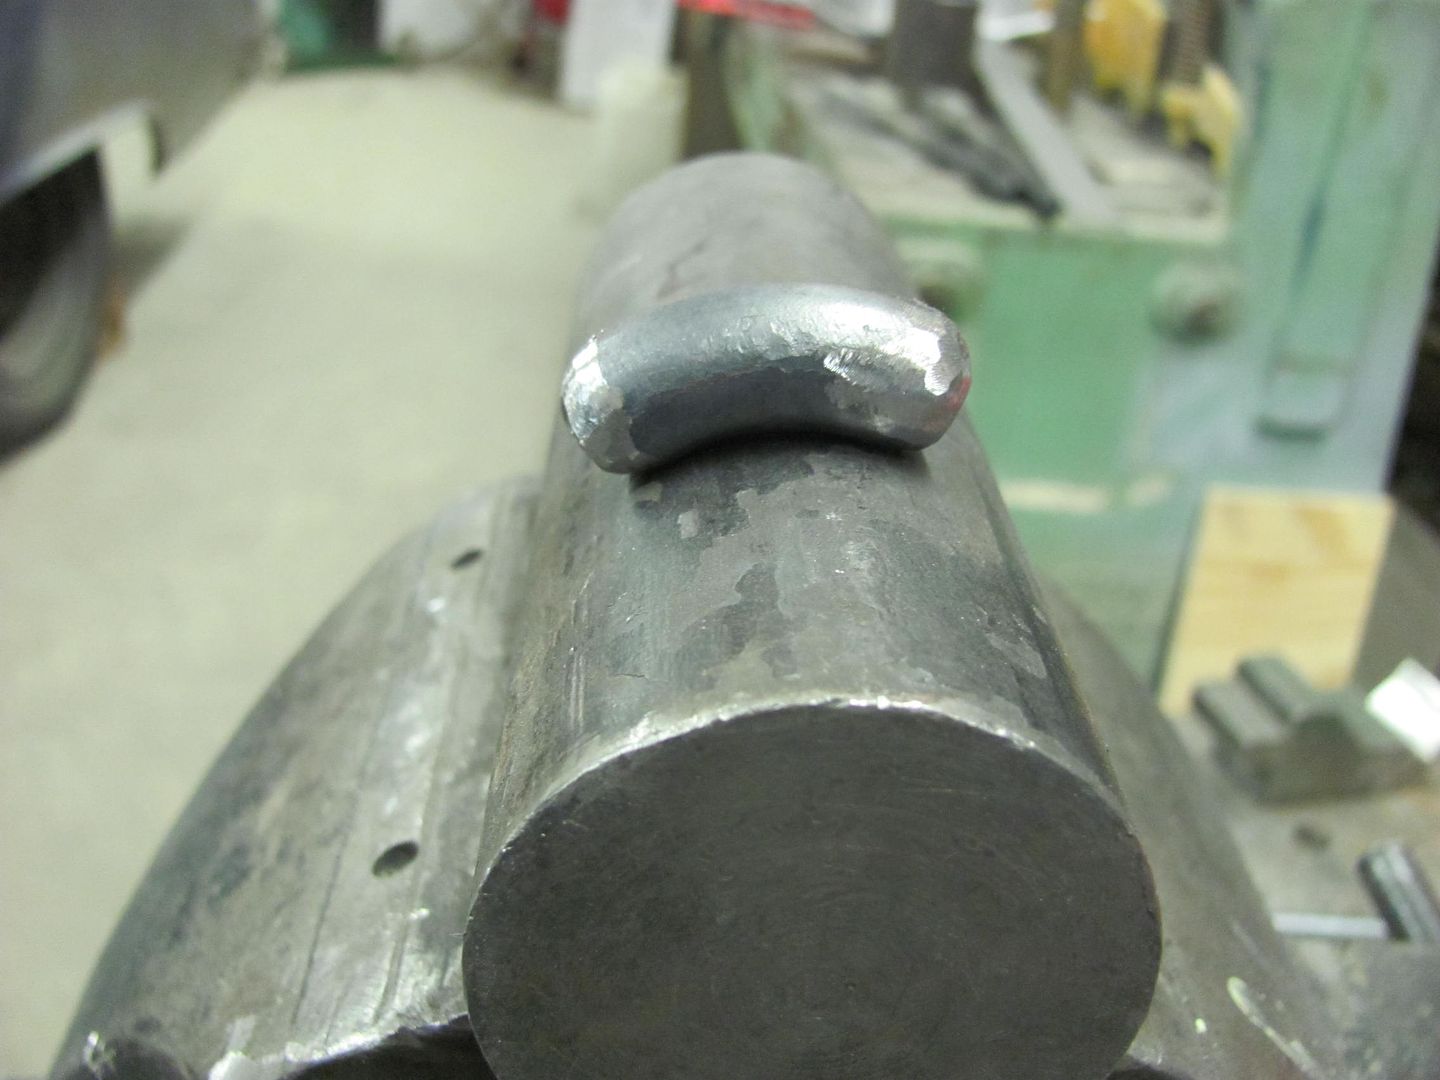 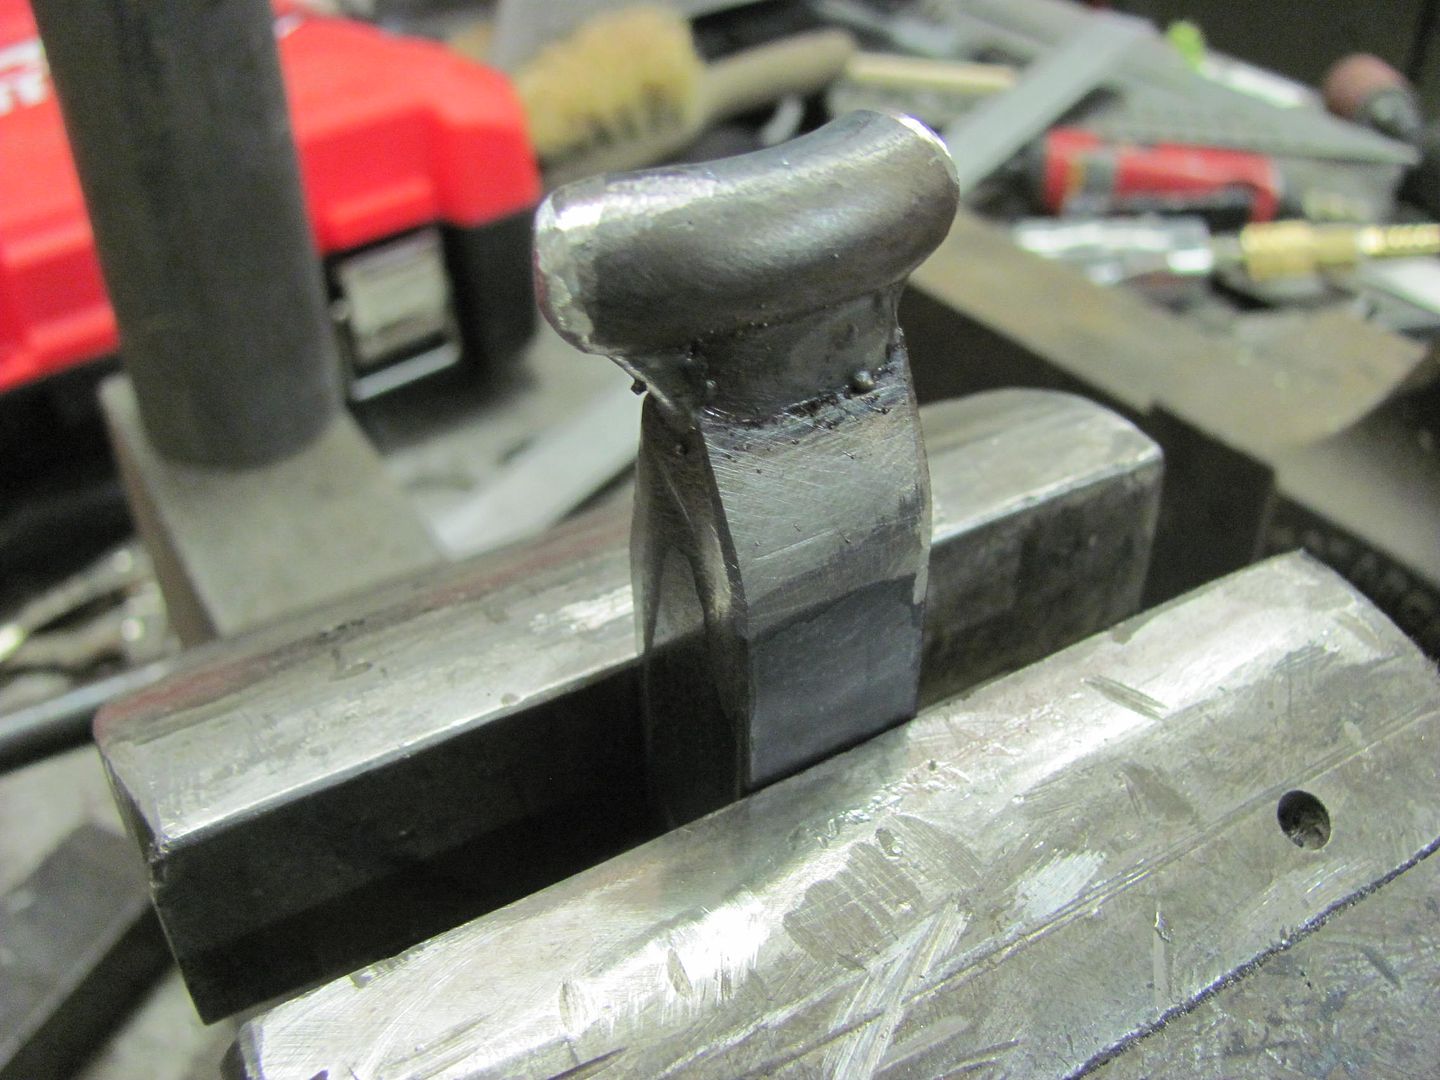 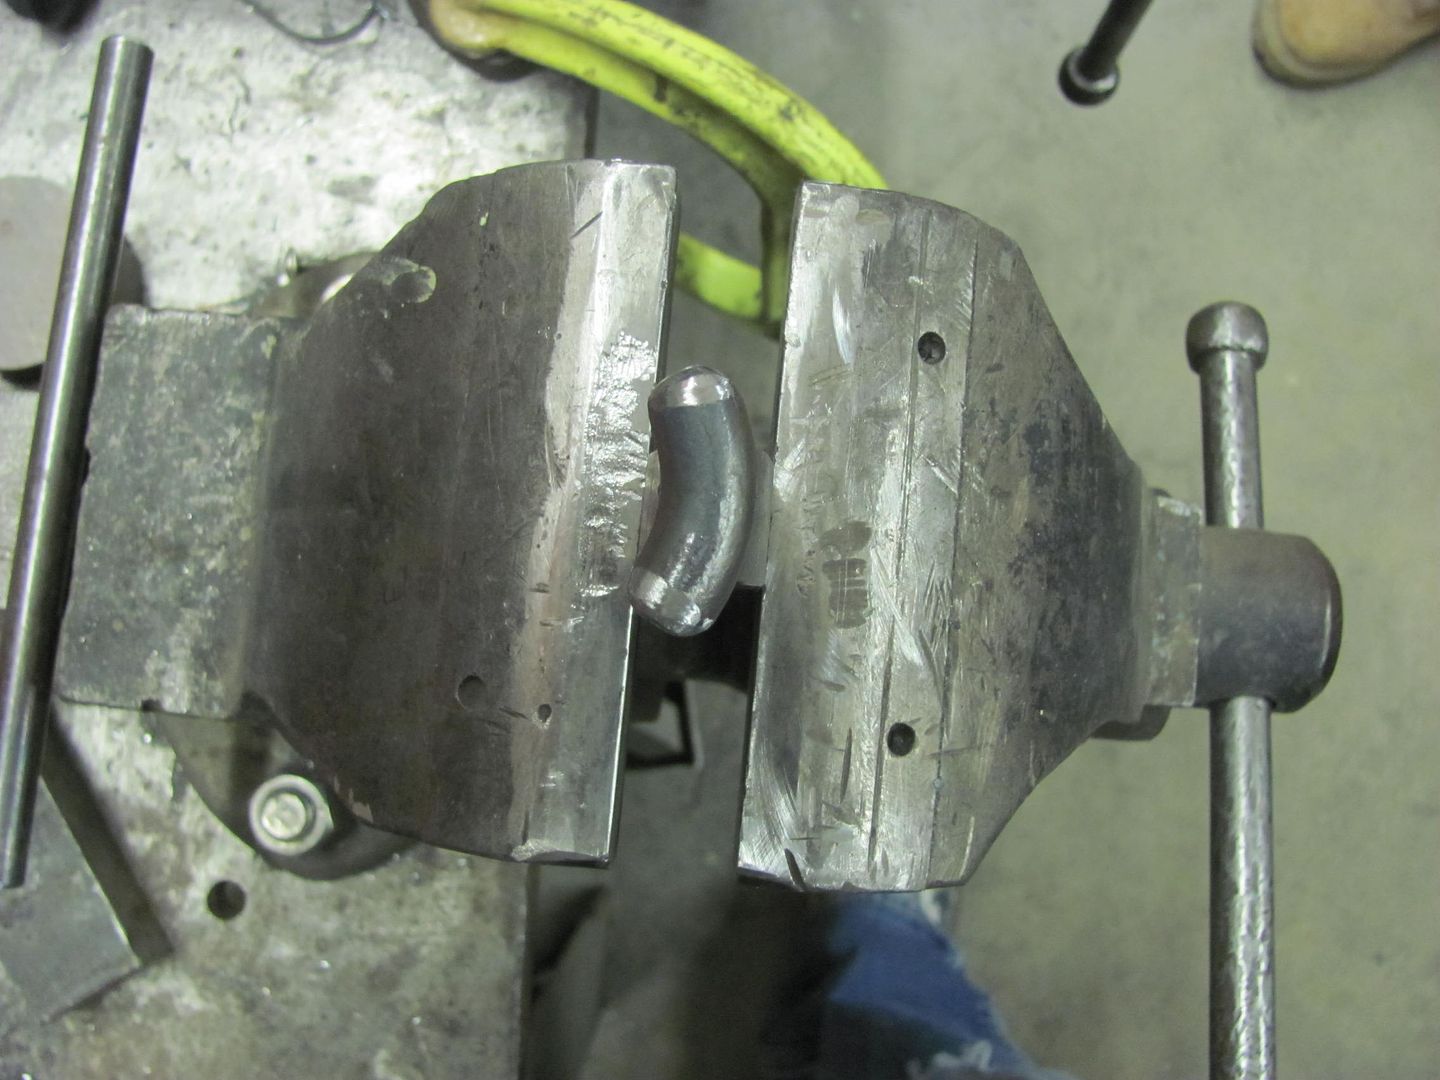 Kyle's first job at welding sheet metal, he's a quick learner. He did have a couple spots that didn't like the heat and blew a hole, but he did a real nice job in getting those fixed as well. 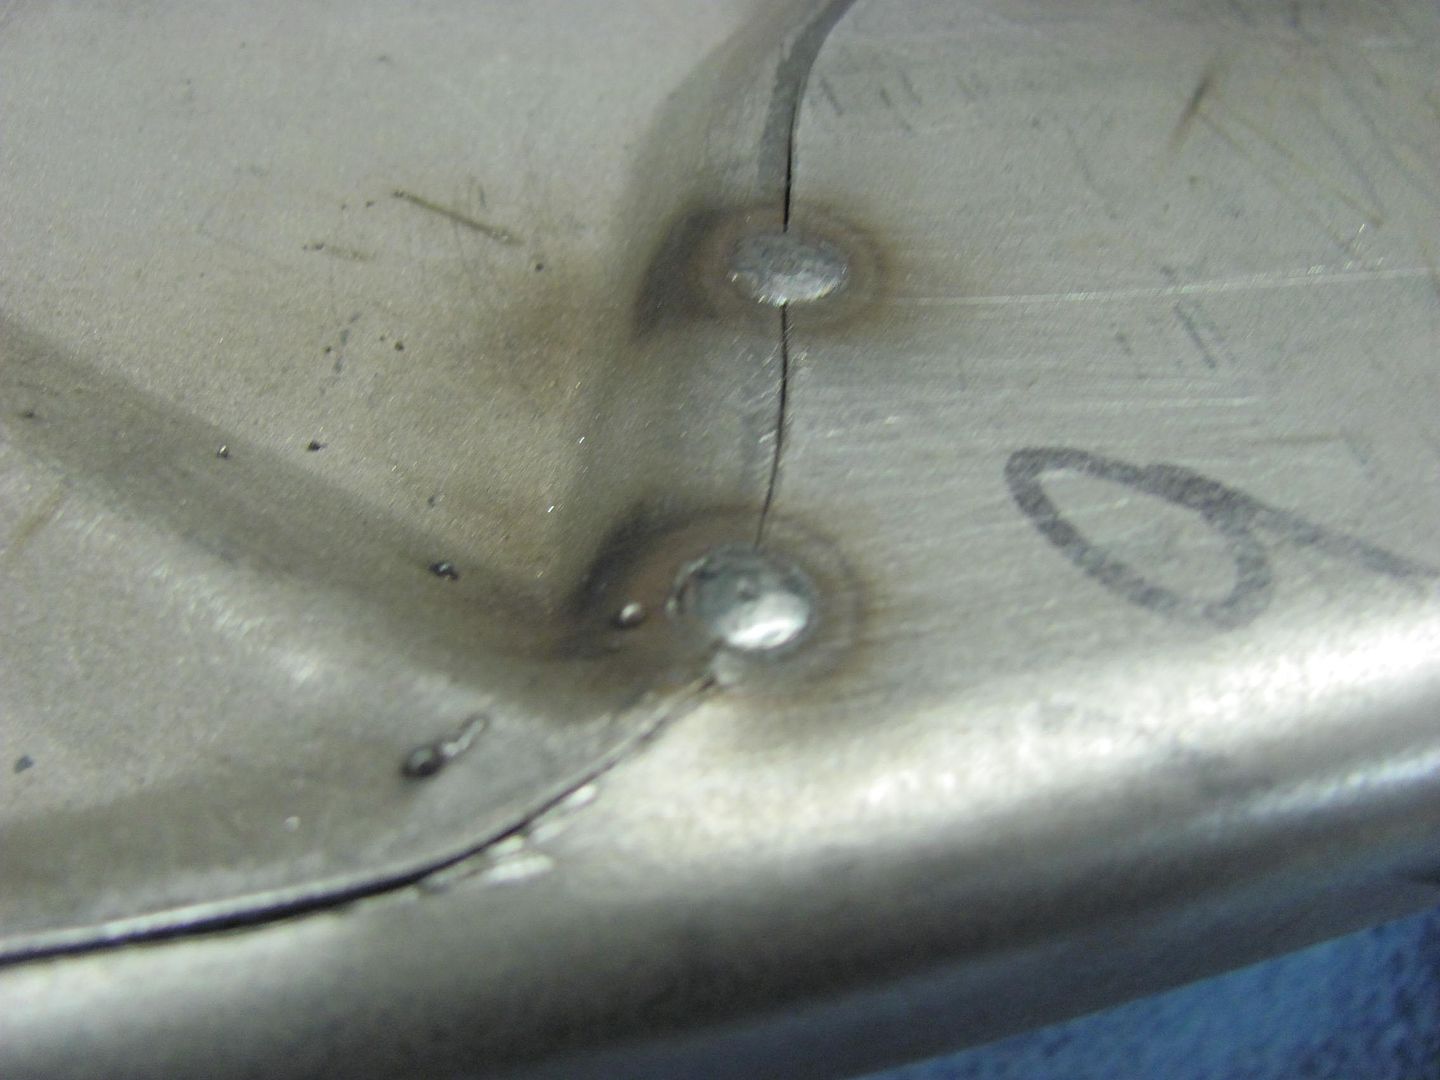 Planishing weld dots on the new "anvil".. 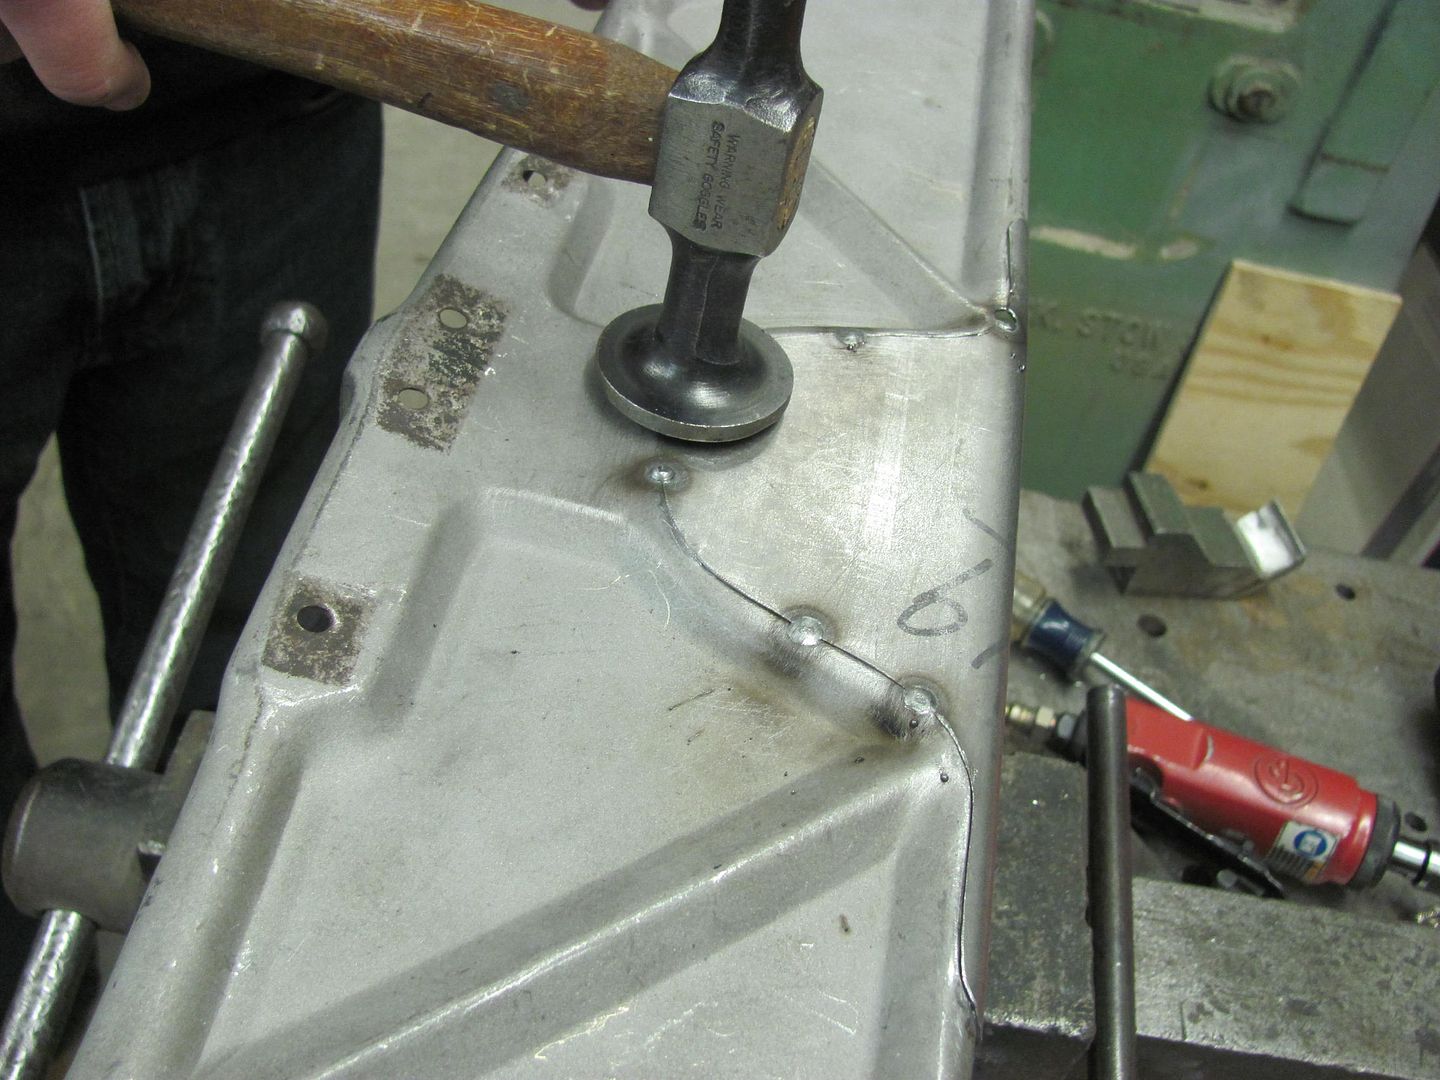 Full weld penetration... 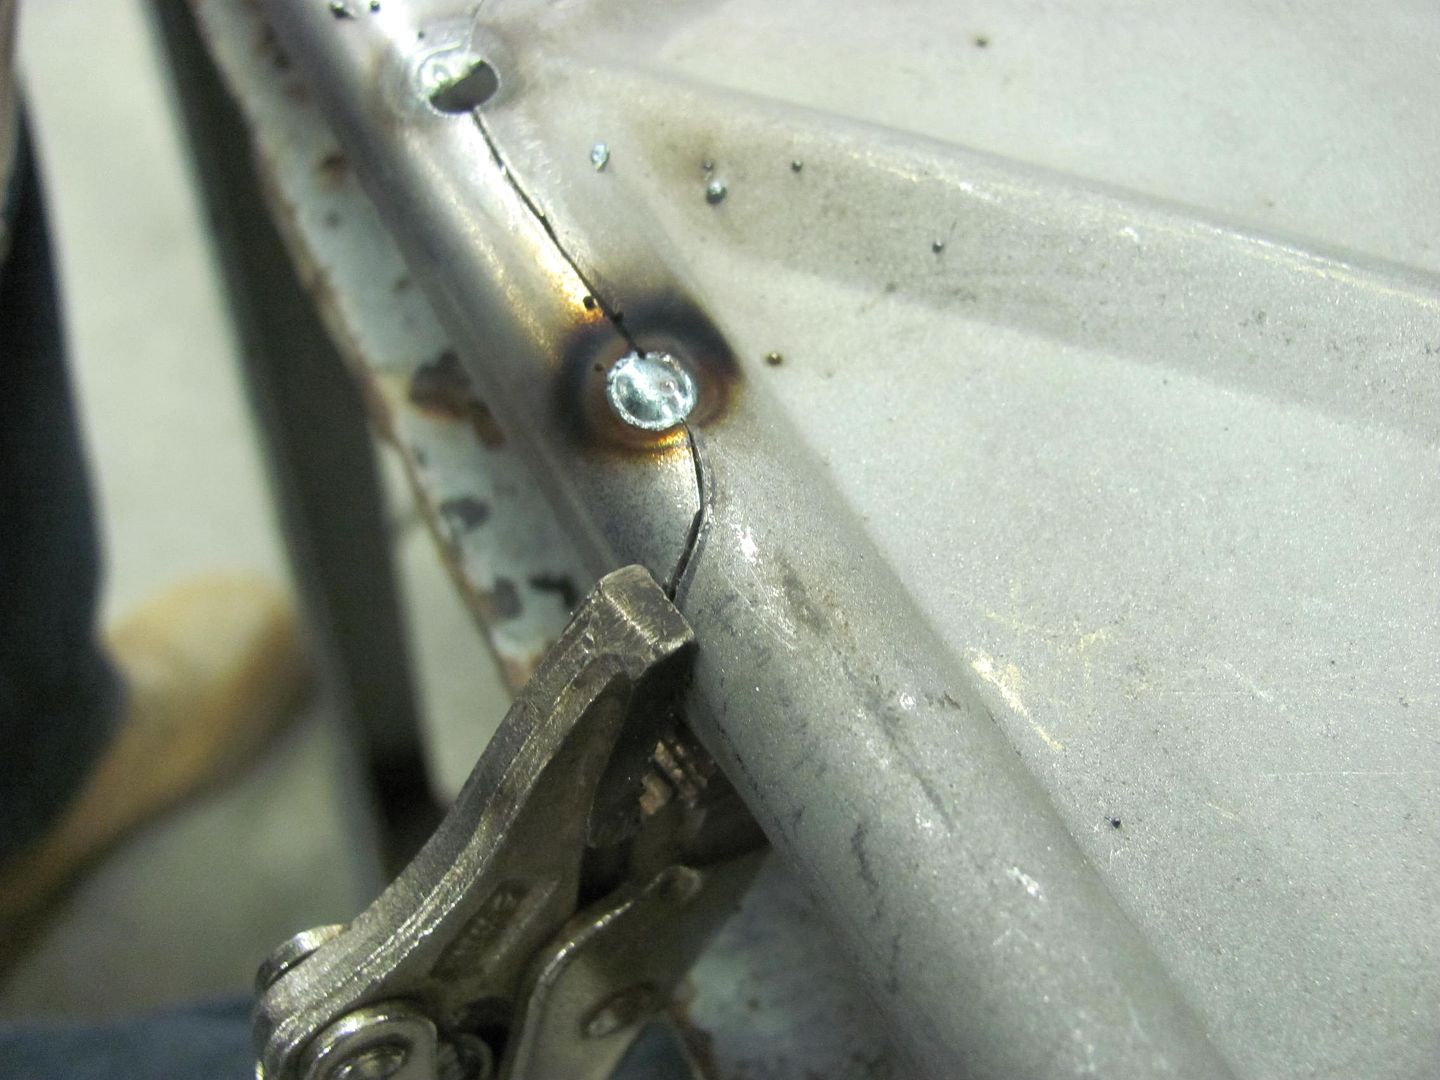 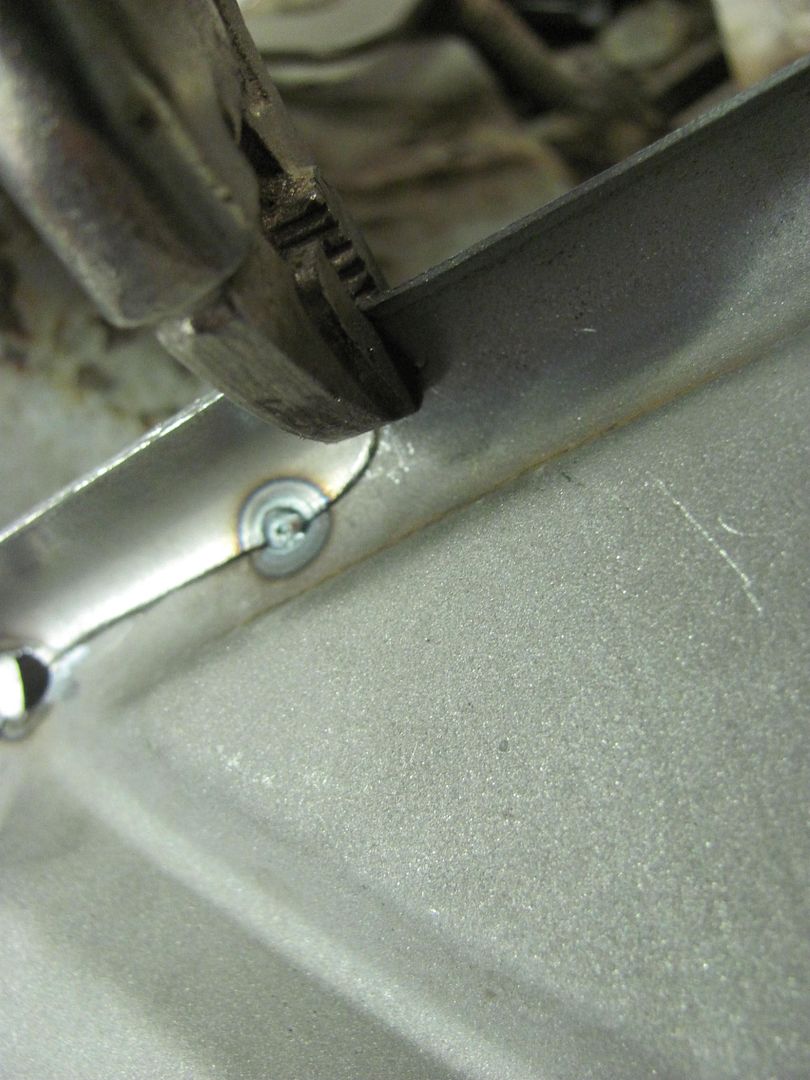 While he welded away, I turned my attention to the front end. The passenger door had a bit of a tight spot to the rear edge of the fender while opening.. Using a hack saw blade as a "feeler gauge", it was tight in one area. To help out the situation, time for another tool. I have a dent puller with a small pair of vise grips permanently attached, so we just need an adapter kit... This was some leftover square tubing scraps... 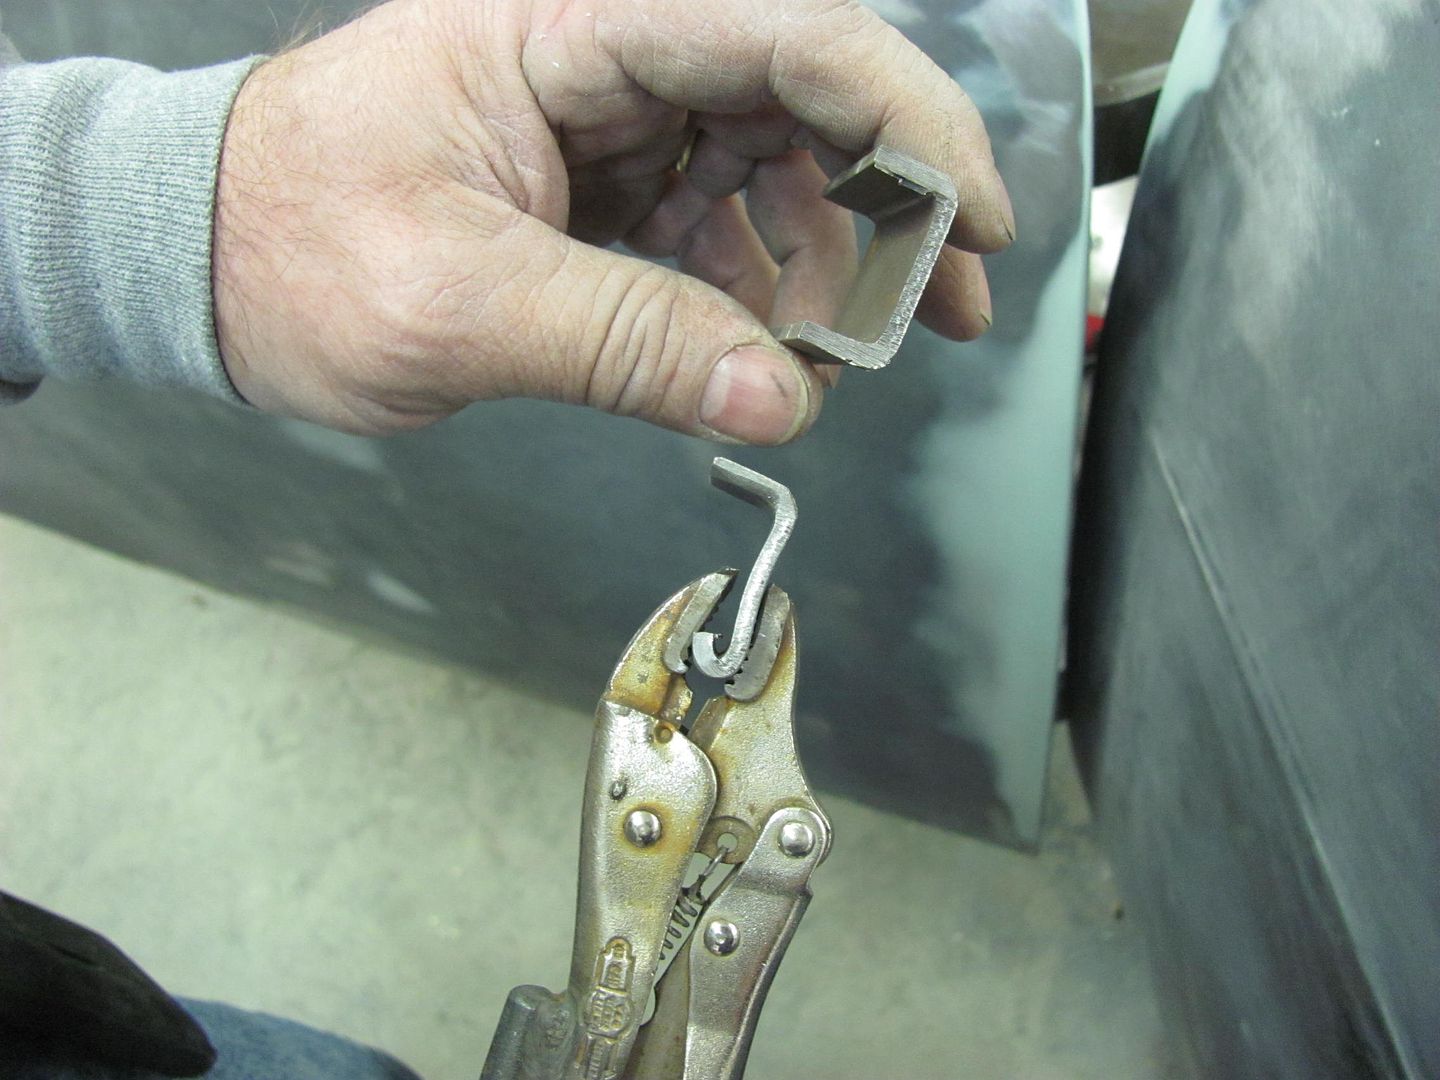 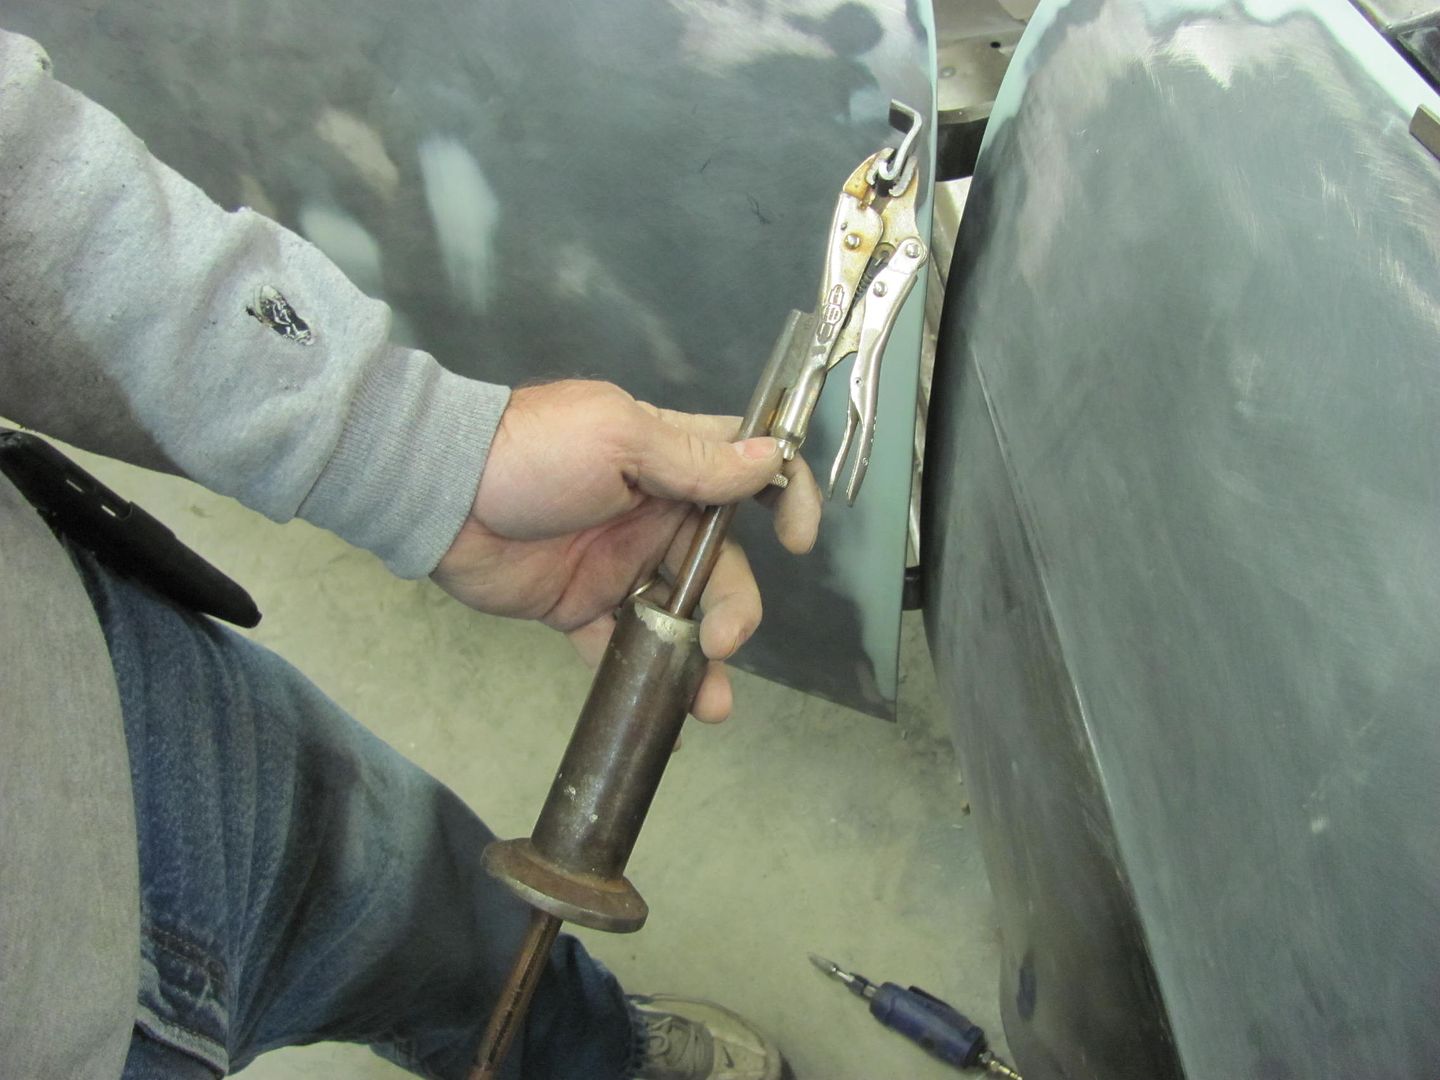 In use.. 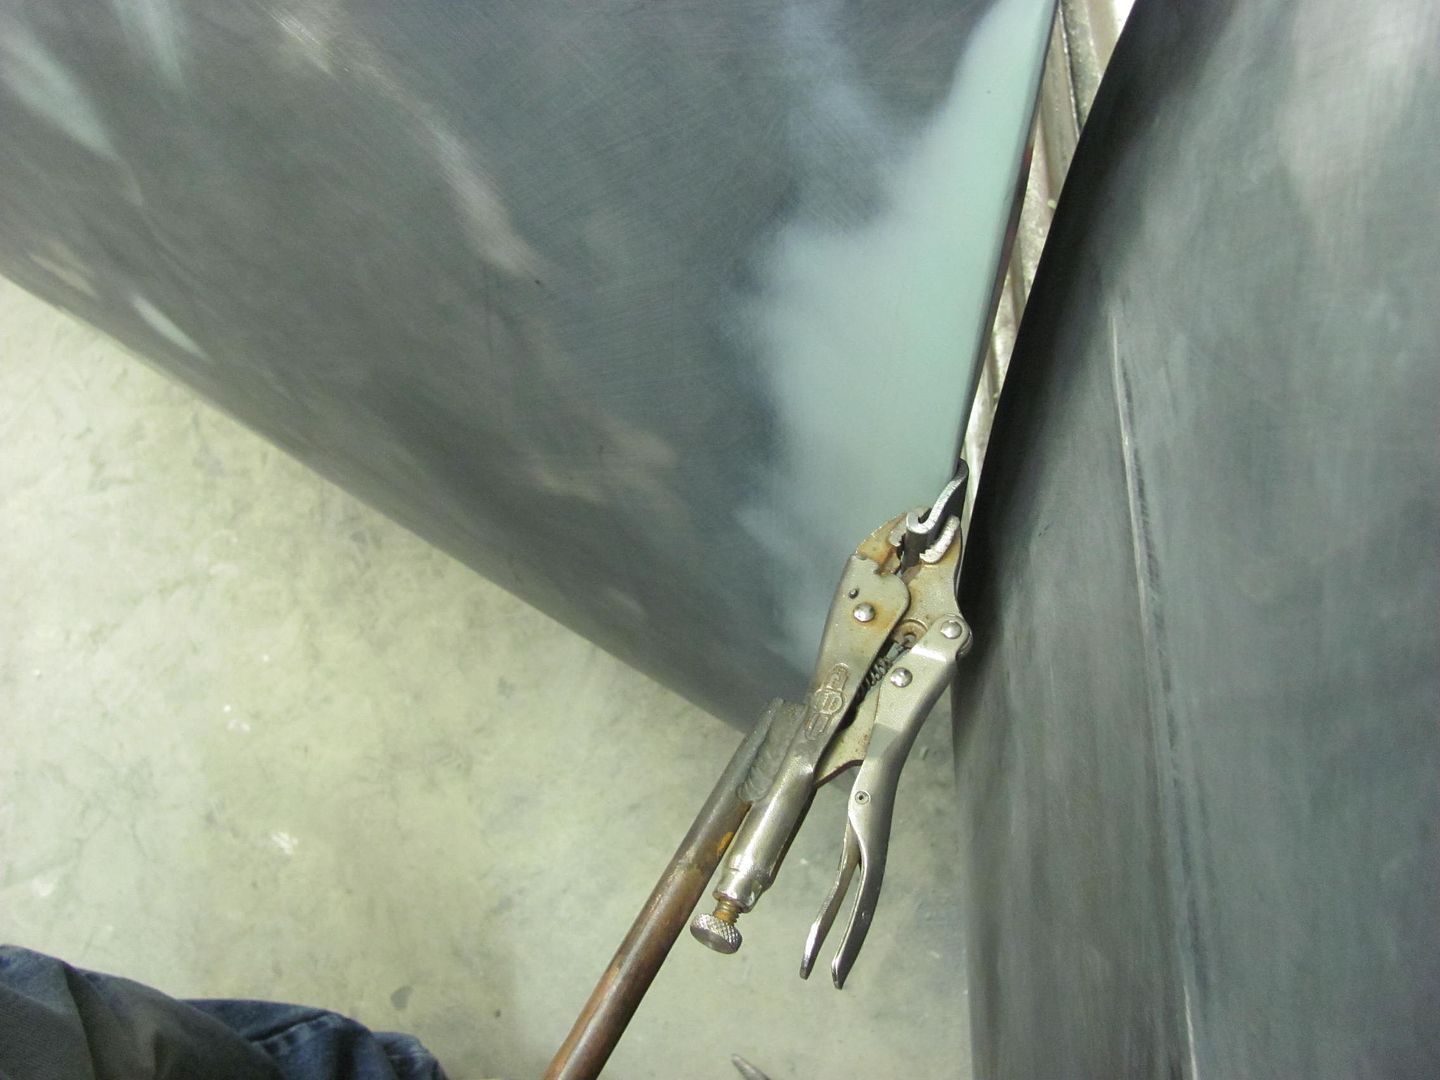 After the pulling effort, the tight gap was well over two HSB thicknesses.  Moving on to other fender fitment, the bottom edge of the fender was higher than the adjacent rocker. Any adjustment was futile as the bolt was at the bottom of the adjustment hole. Time for some die grinder action to bring the hole downward and also flatten the bottom edge of the hole so any movement forward or backward doesn't push the bolt upward..... This was done on both fenders.. 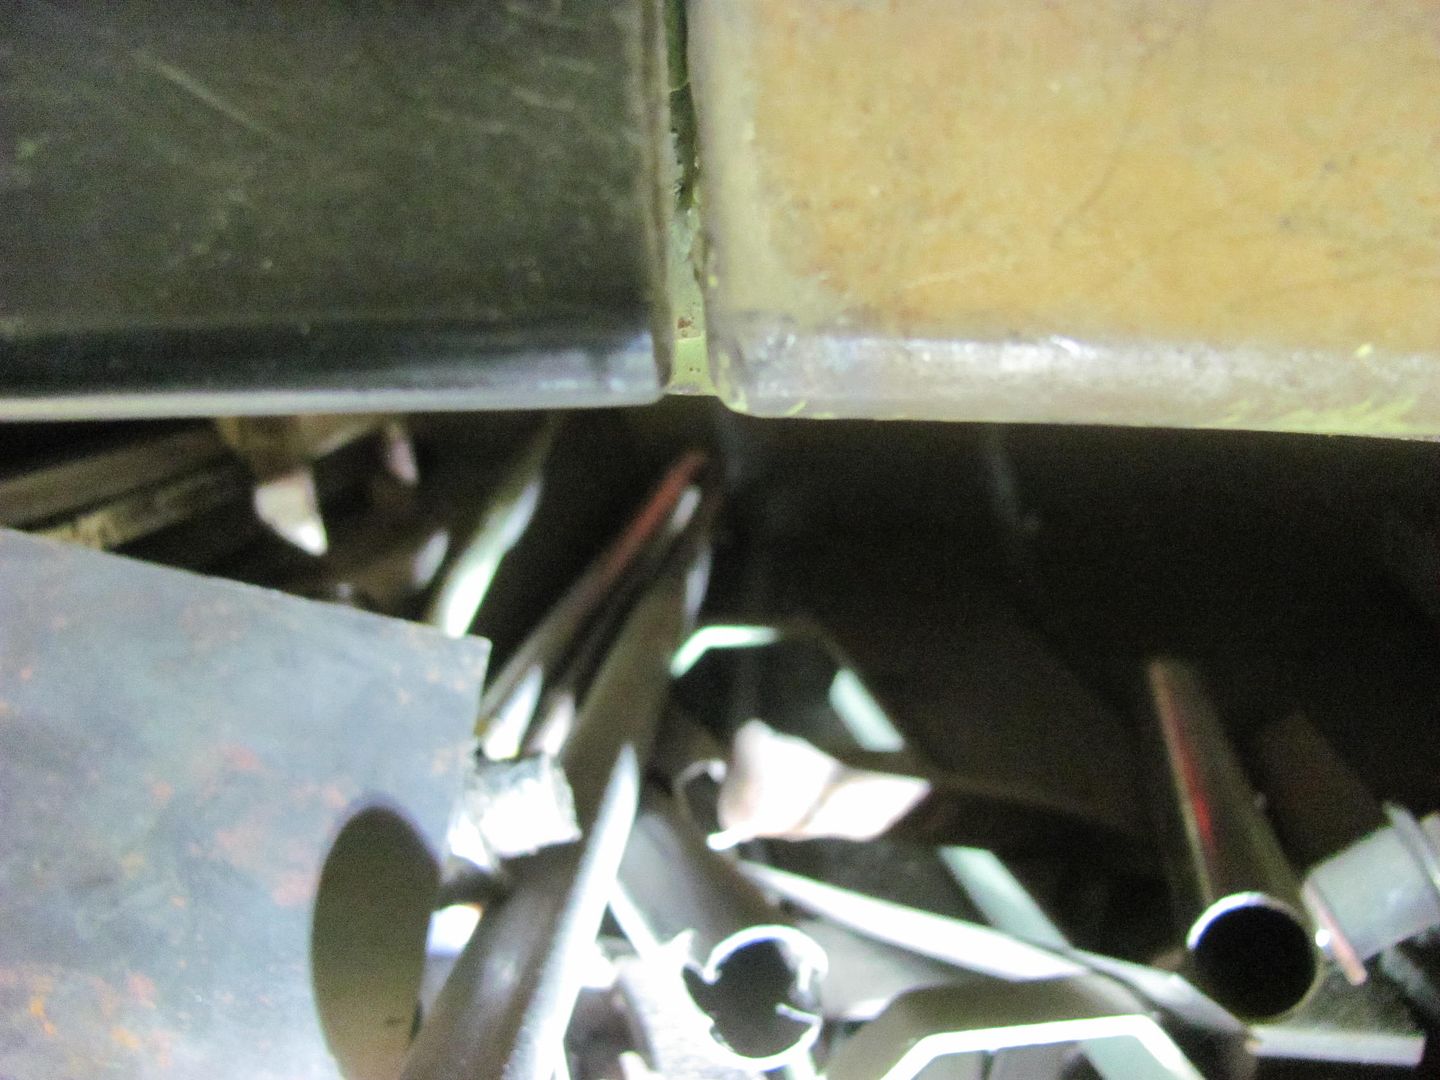 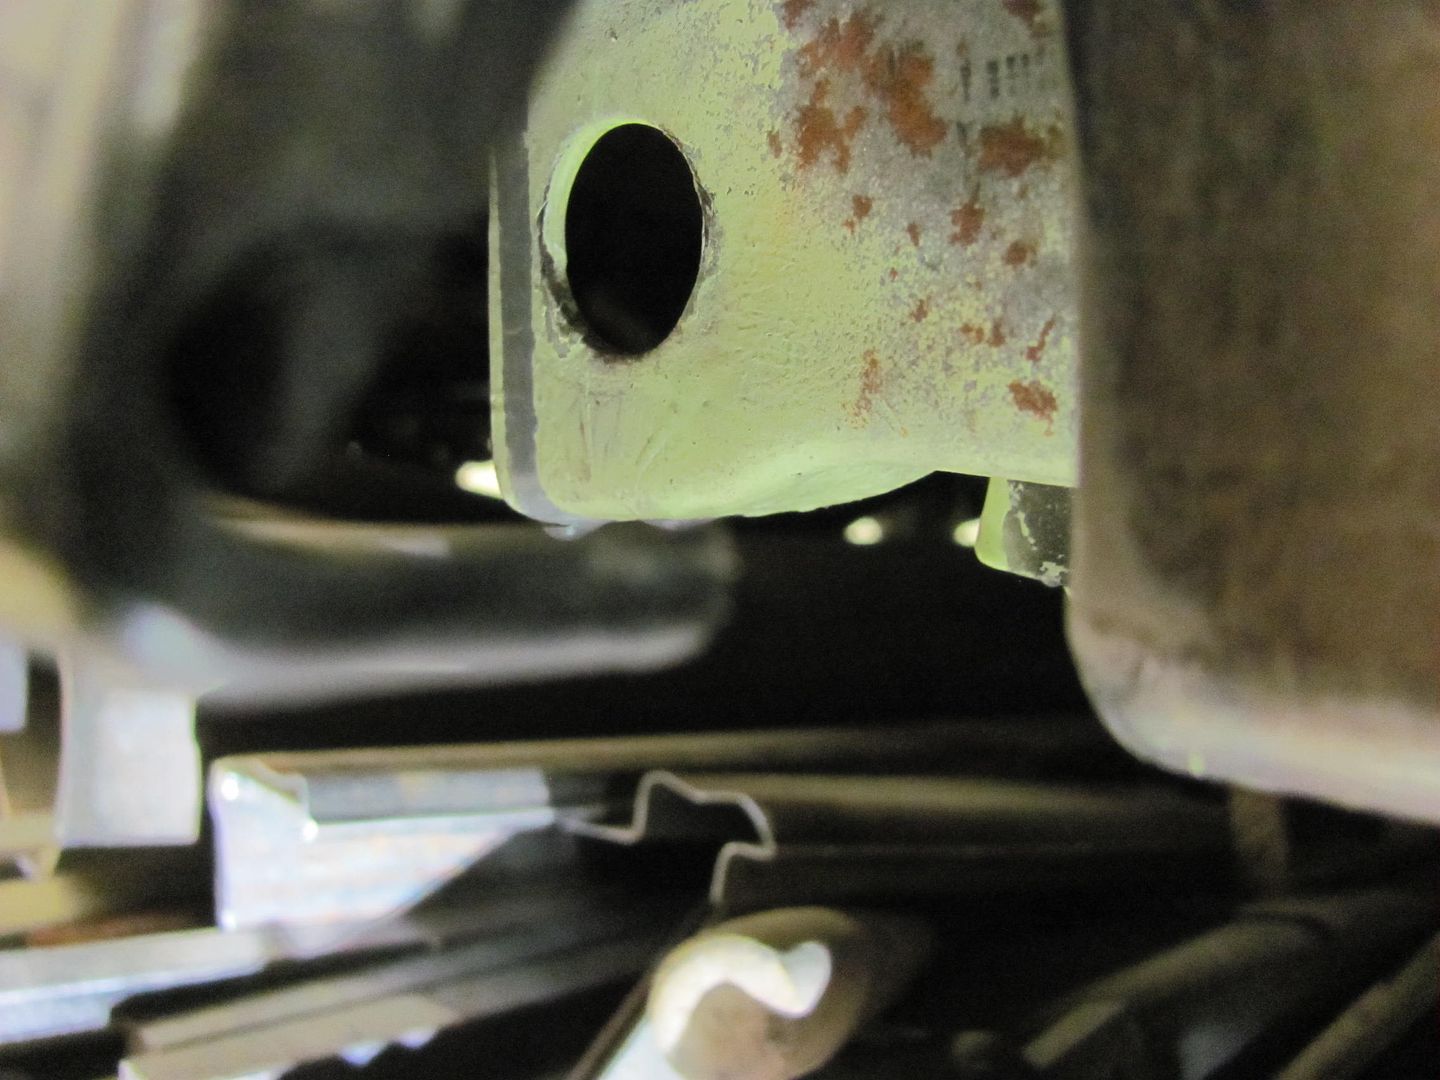  Test fit shows much better alignment.. This may be why the 57 went to a square hole.. 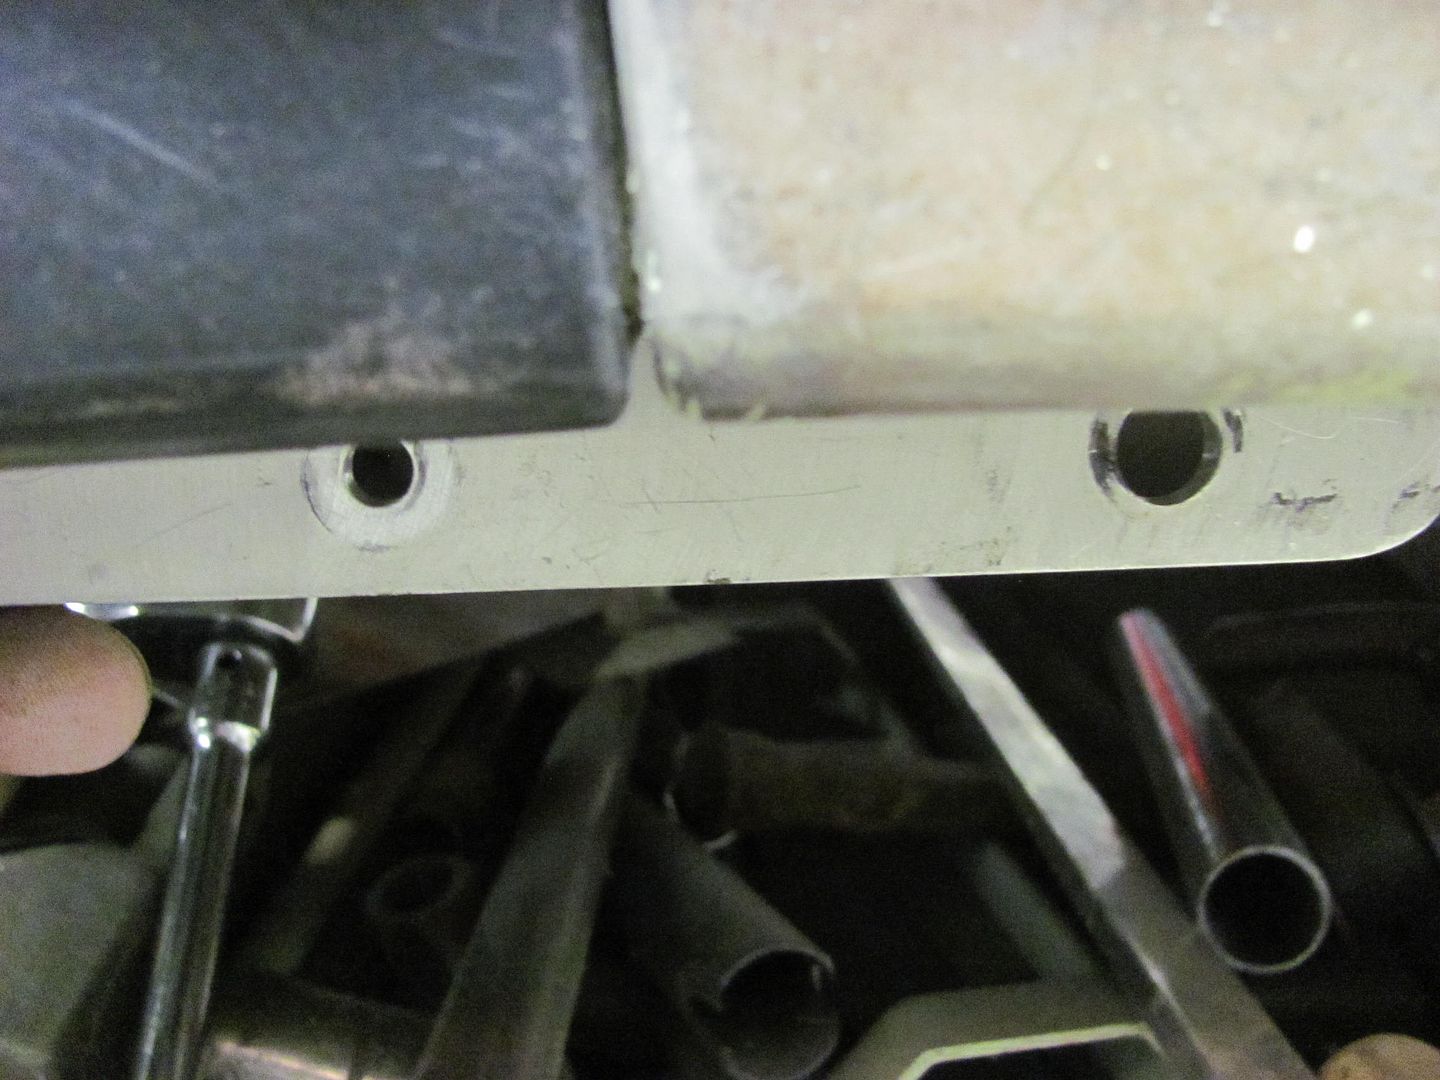 Kyle done with his welding on the center patch, just needs to be dressed with the sanding disc. We'll save that for after the other patch gets welded in place.. Front: 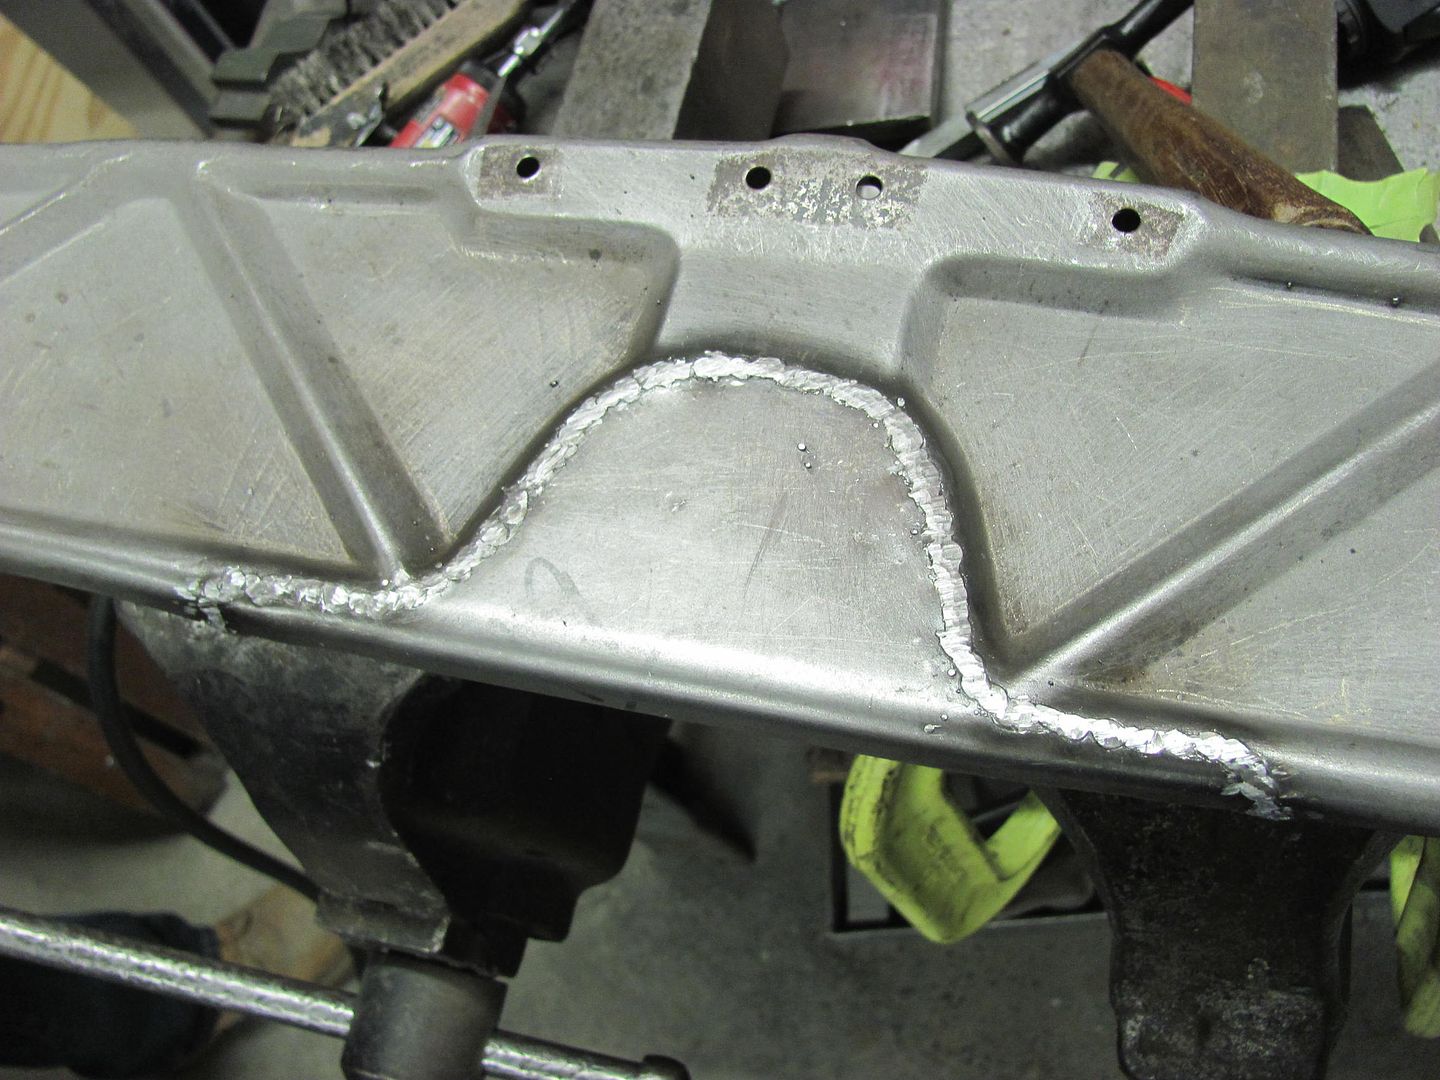 Rear: 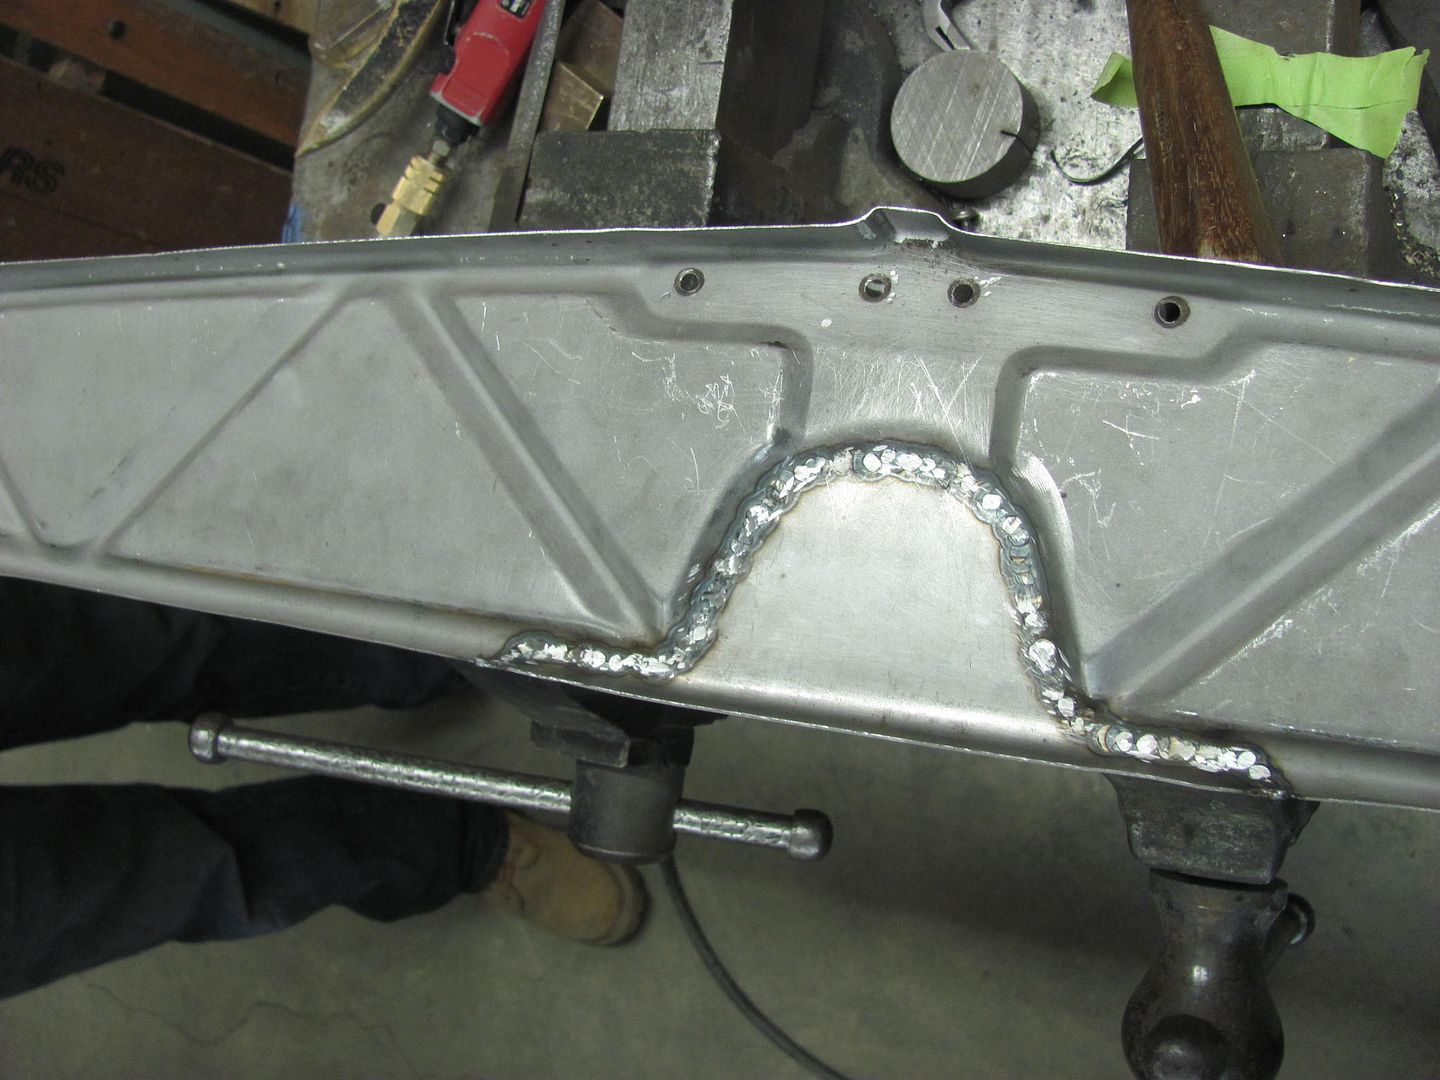 And I was also busy making more dust... Can't wait for springtime and the leaf blower  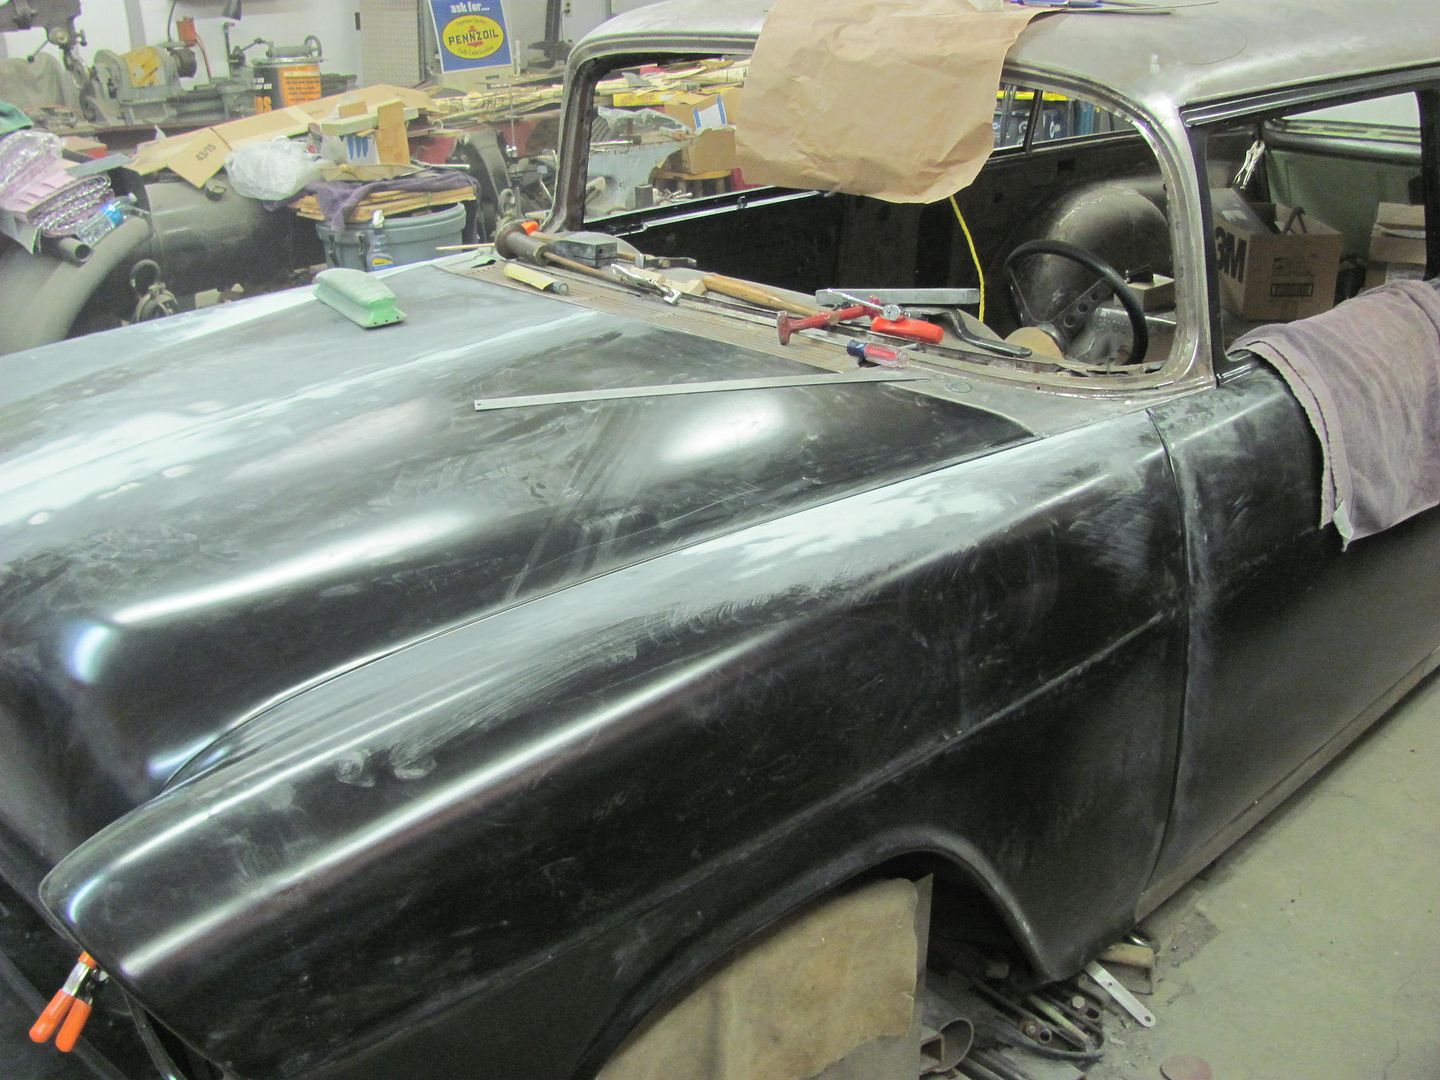 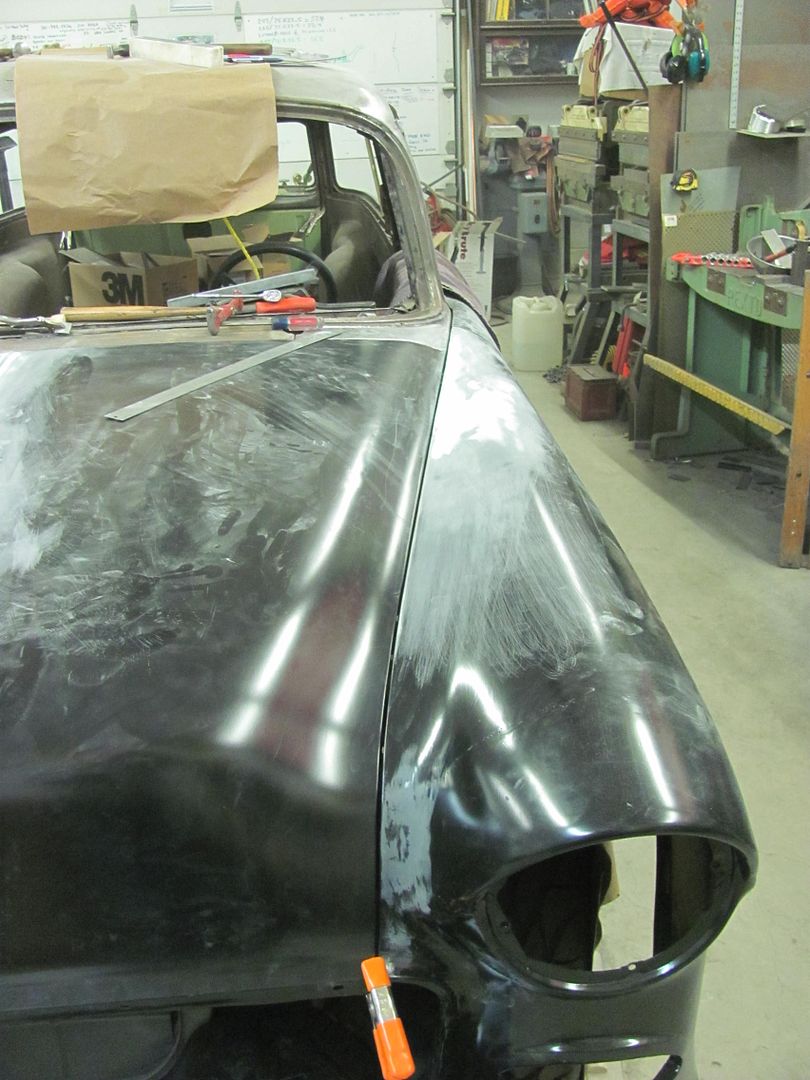  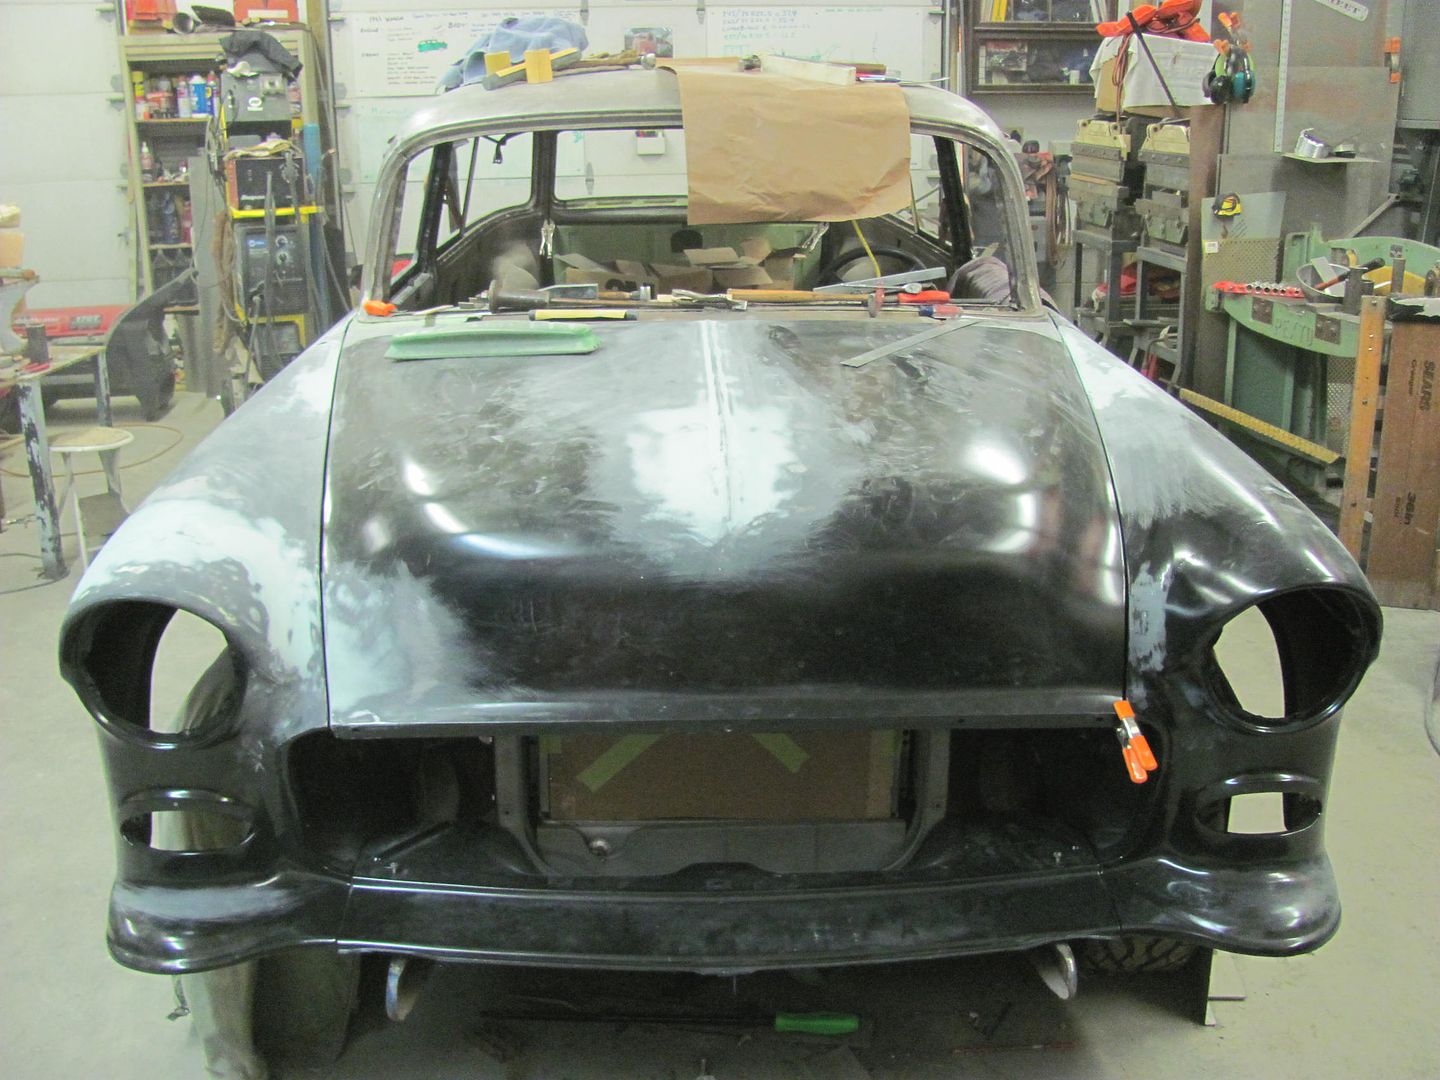
__________________
Robert |
|
|
|
|
02-07-2015, 10:54 PM
|
#354 |
|
Registered User
Join Date: May 2007
Location: Deale Md
Posts: 4,663
|
Re: 55 Wagon Progress
Are you keeping track of how many hours you have on this project.
__________________
James 63 GMC V6 4speed carryall 65 chevy swb bbw V8 auto 68 K20 327/4 speed, buddy buckets 2002 GMC CC Dually Duramax 64 GMC lwb 3/4 V6 4speed SOLD 66 GMC swb bbw buddy buckets SOLD IG duallyjams The only thing that stays the same is constant change! |
|
|
|
|
02-07-2015, 11:01 PM
|
#355 |
|
Registered User
Join Date: Jan 2013
Location: Leonardtown, MD
Posts: 1,634
|
Re: 55 Wagon Progress
Yes, I got a time clock at an auction a few years back and have been keeping better track of all the projects since then. Don't have a running total right now, someone asked me about that a couple weeks ago.

__________________
Robert |
|
|
|
|
02-10-2015, 11:12 AM
|
#356 |
|
Registered User
Join Date: Jan 2013
Location: Leonardtown, MD
Posts: 1,634
|
Re: 55 Wagon Progress
Someone noticed we use some rather "vintage" ice picks as scribes for metalwork, and asked to see a closer look.. I had picked these up a few years ago at an auction as my wife looks at me with that "and why do we need those" looks... The one came shorter as shown, but to prolong the life of the picks, sharpen with a very fine file, never use a grinder
 The auction was in Fredericksburg VA, if anyone recognizes any of the old ice plants, be sure to chime in so we can all get a history lesson. I tried calling them but nobody answered 8 or 30.. 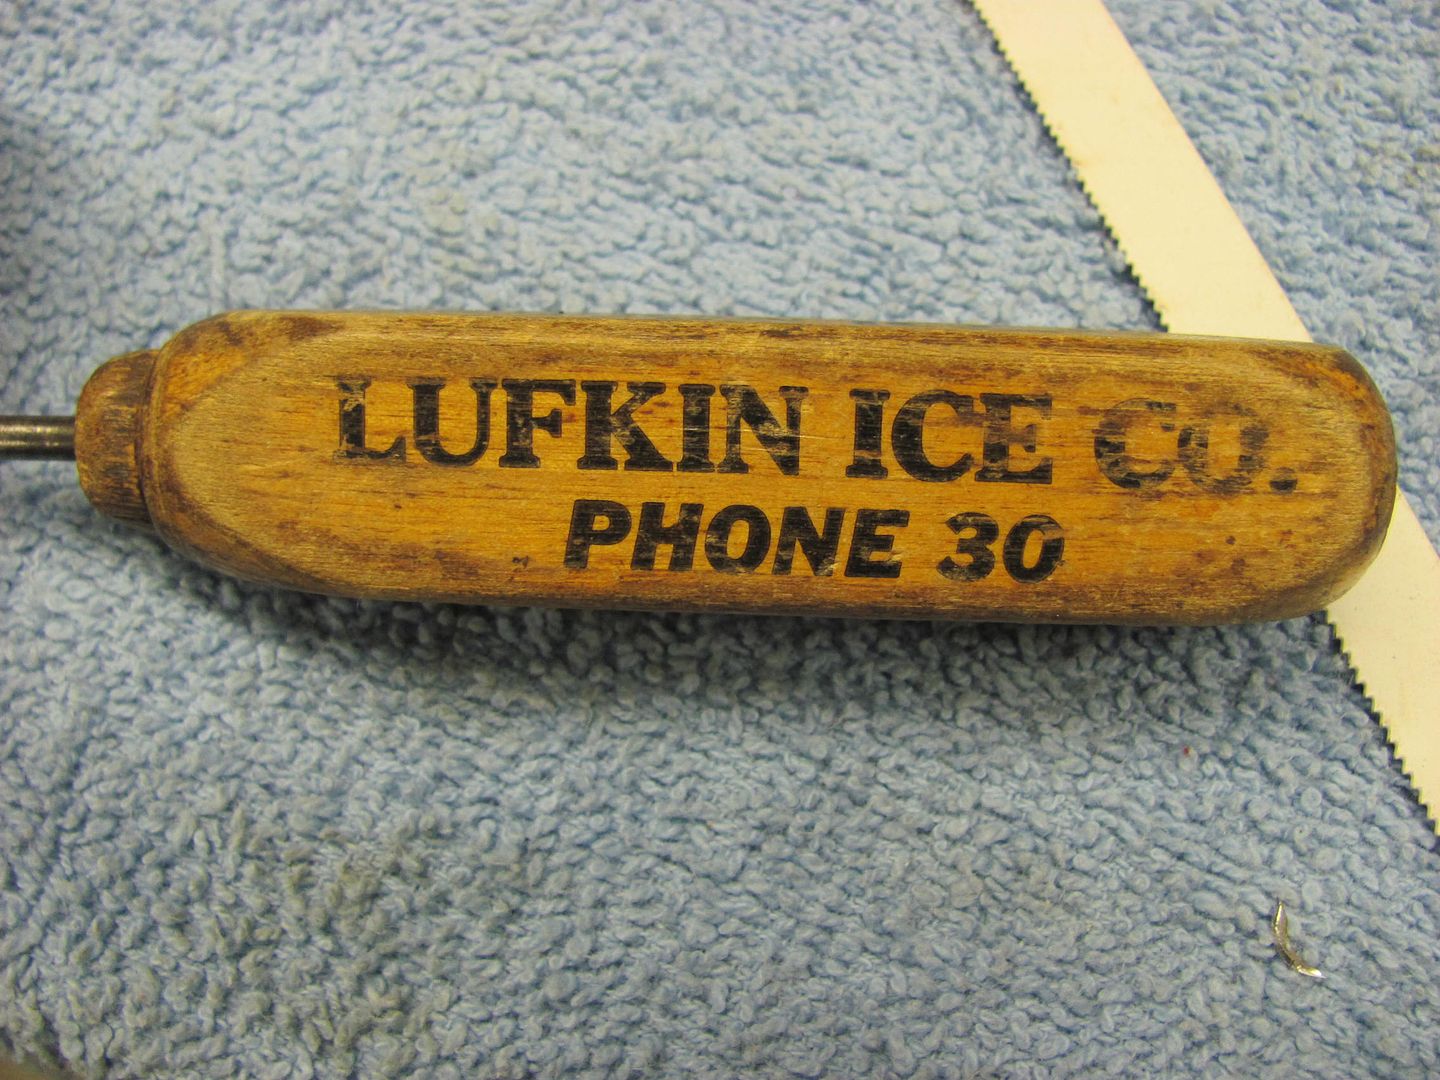 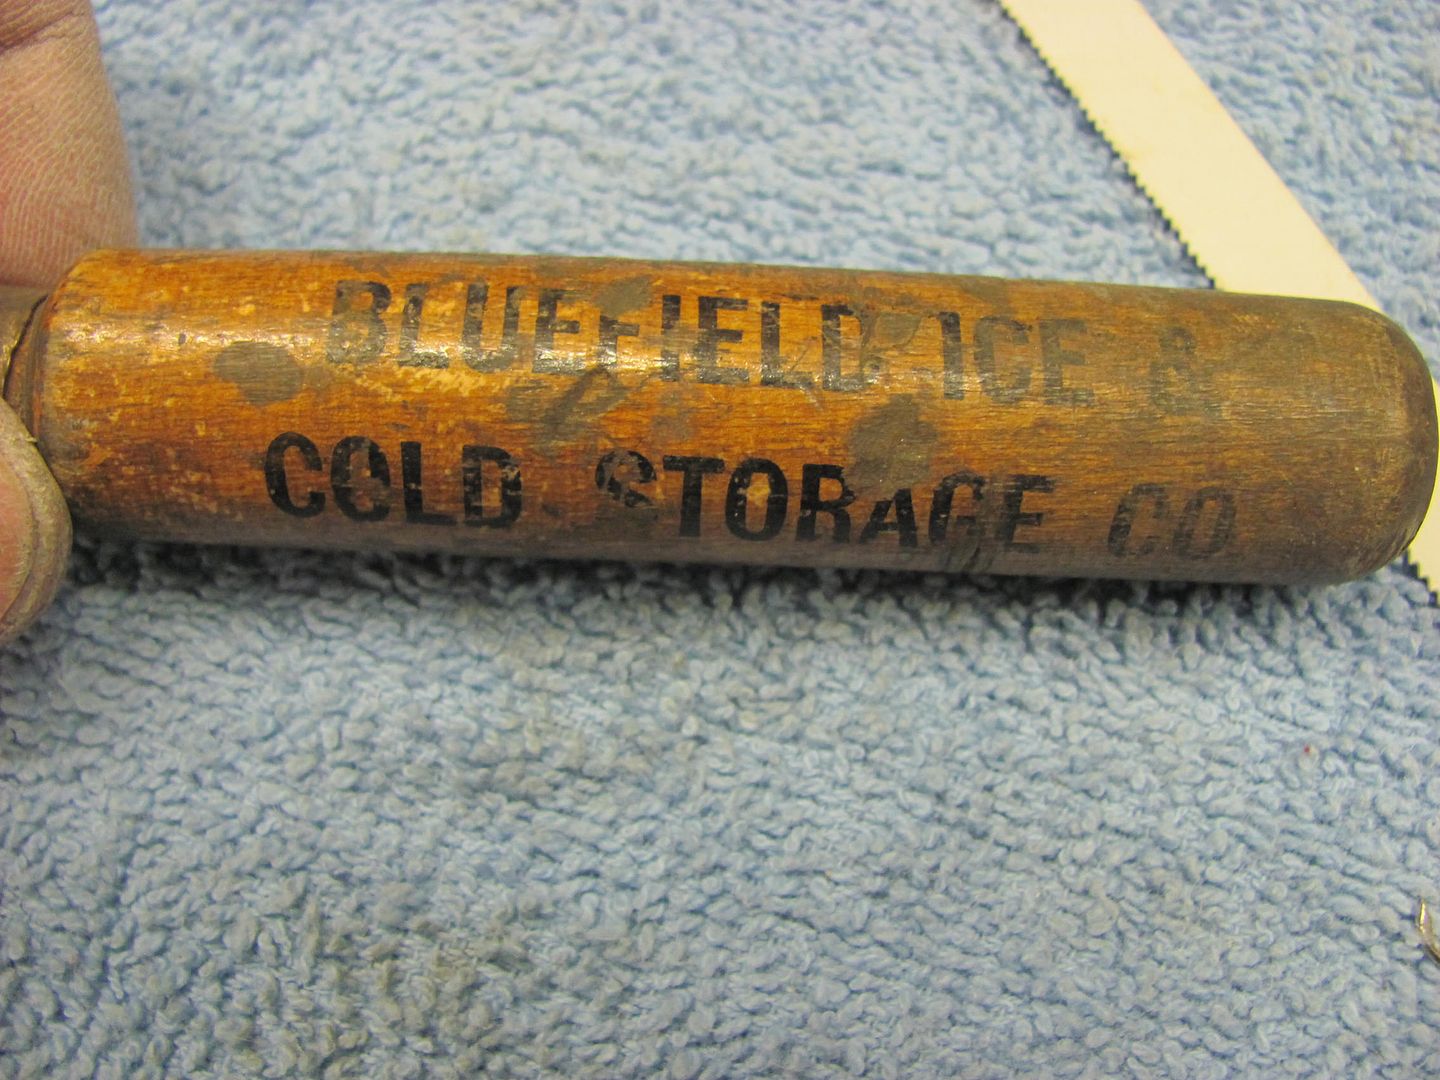 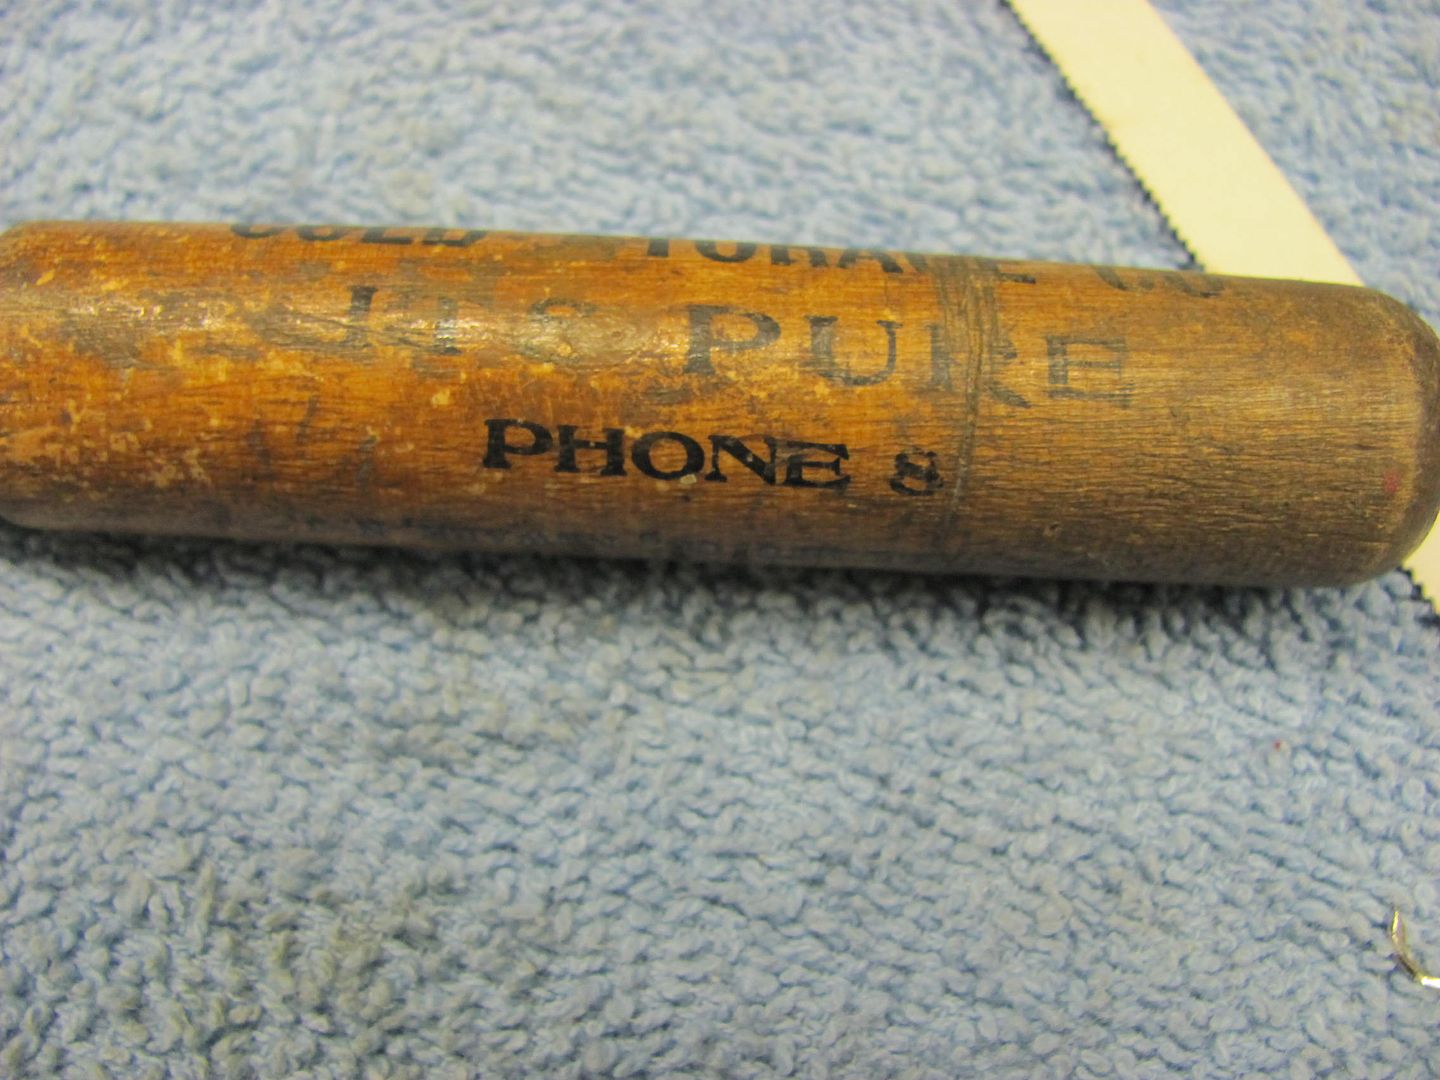 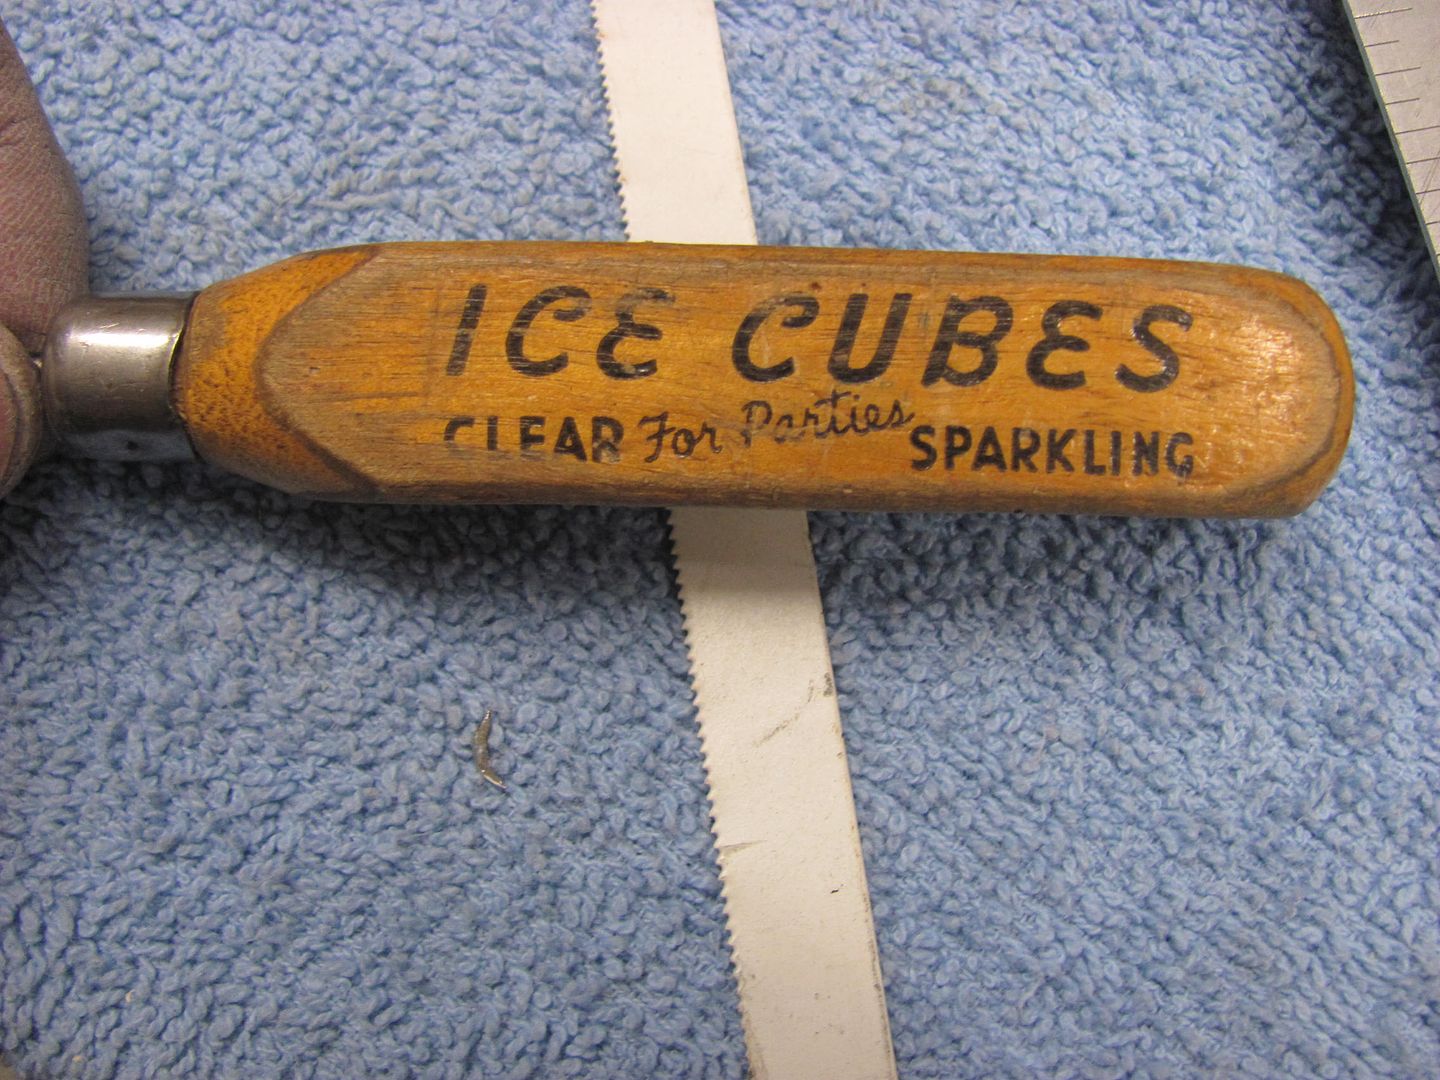 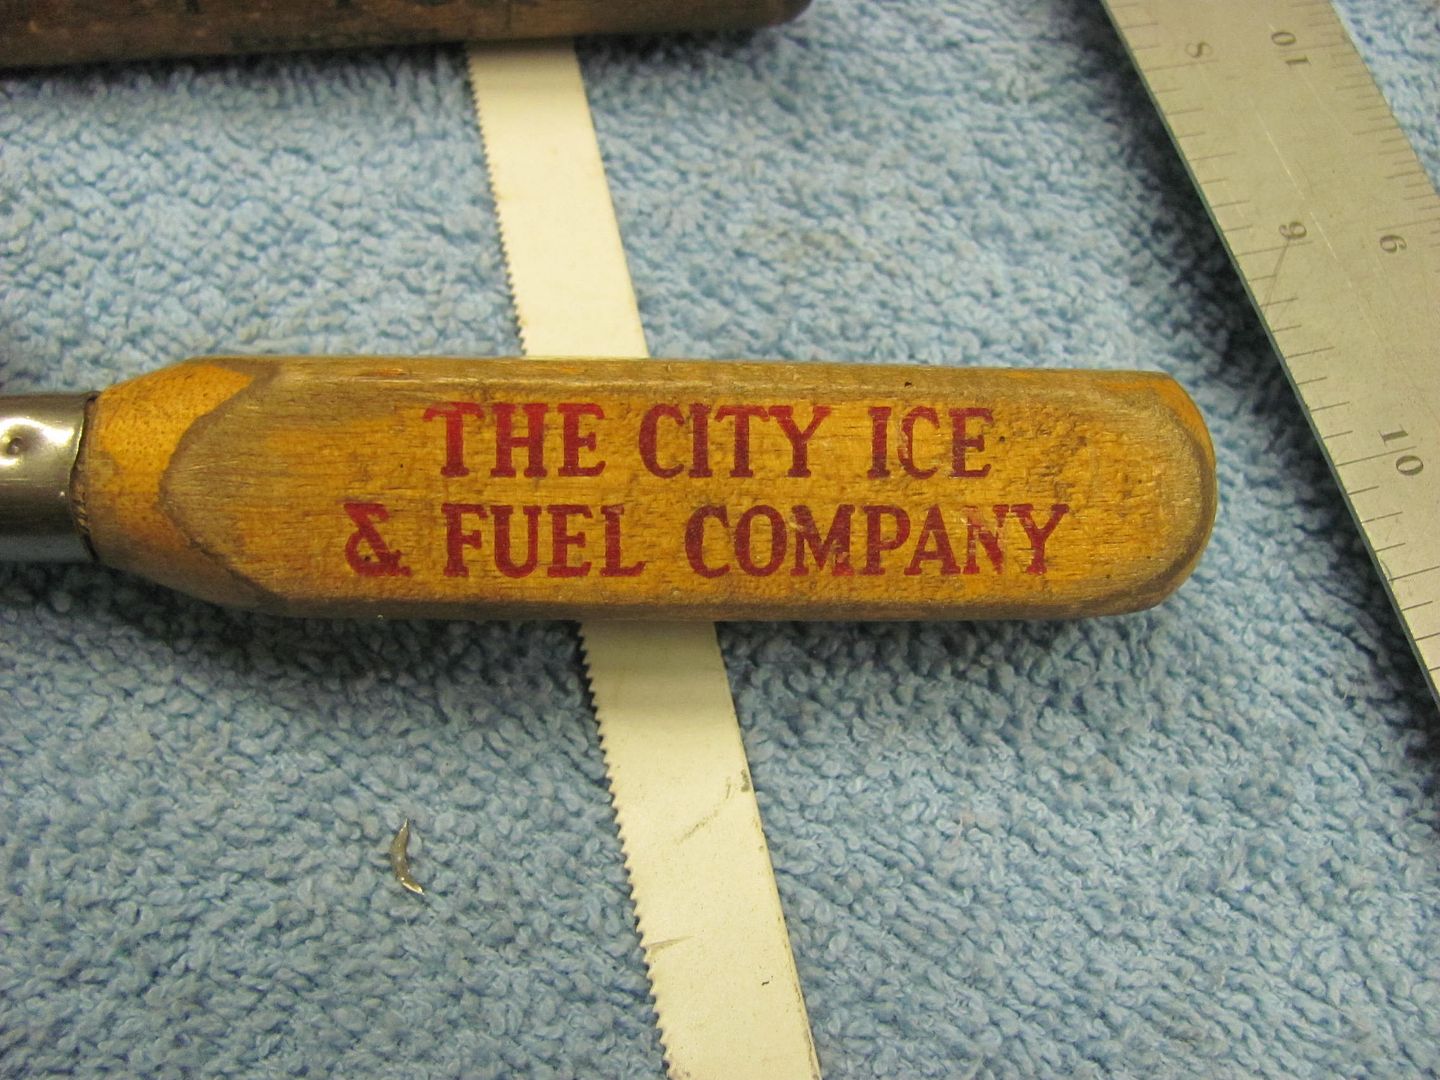 
__________________
Robert |
|
|
|
|
02-10-2015, 08:43 PM
|
#357 |
|
Registered User
Join Date: Oct 2007
Location: Spanaway
Posts: 8,451
|
Re: 55 Wagon Progress
Thats too funny, phone 8, phone 30, thats back in the 20's era i would guess, back when every little town had a switchboard and operator to physically connect each call.
__________________
Mike. Swamp Rat build thread : http://67-72chevytrucks.com/vboard/s...d.php?t=595019 72 3/4T 4X4 4" BDS Lift 33" BFG's |
|
|
|
|
02-11-2015, 10:28 AM
|
#358 |
|
Registered User
Join Date: Nov 2011
Location: West Plains Missouri
Posts: 2,088
|
Re: 55 Wagon Progress
Rob...Just was able to get up to date on your build...Love the metal and detail work.
Alot of cool tools in your shop!! Makes life easier for metal shaping.. Mark..
__________________
http://67-72chevytrucks.com/vboard/s...d.php?t=645774 Project Orangepeel 52 A.D. http://67-72chevytrucks.com/vboard/s...d.php?t=653337 John's LS 49 dodge http://67-72chevytrucks.com/vboard/s...d.php?t=655780 Blake's 67 GMC LS stepside http://67-72chevytrucks.com/vboard/s...d.php?t=690527 Reed 78 FJ40 Rebuild http://67-72chevytrucks.com/vboard/s...d.php?t=733259 Barger's 78 FJ40 |
|
|
|
|
02-11-2015, 11:53 PM
|
#359 |
|
Registered User
Join Date: Jan 2013
Location: Leonardtown, MD
Posts: 1,634
|
Re: 55 Wagon Progress
Thanks for the comments guys!
Kyle finishing up on the hood brace.... 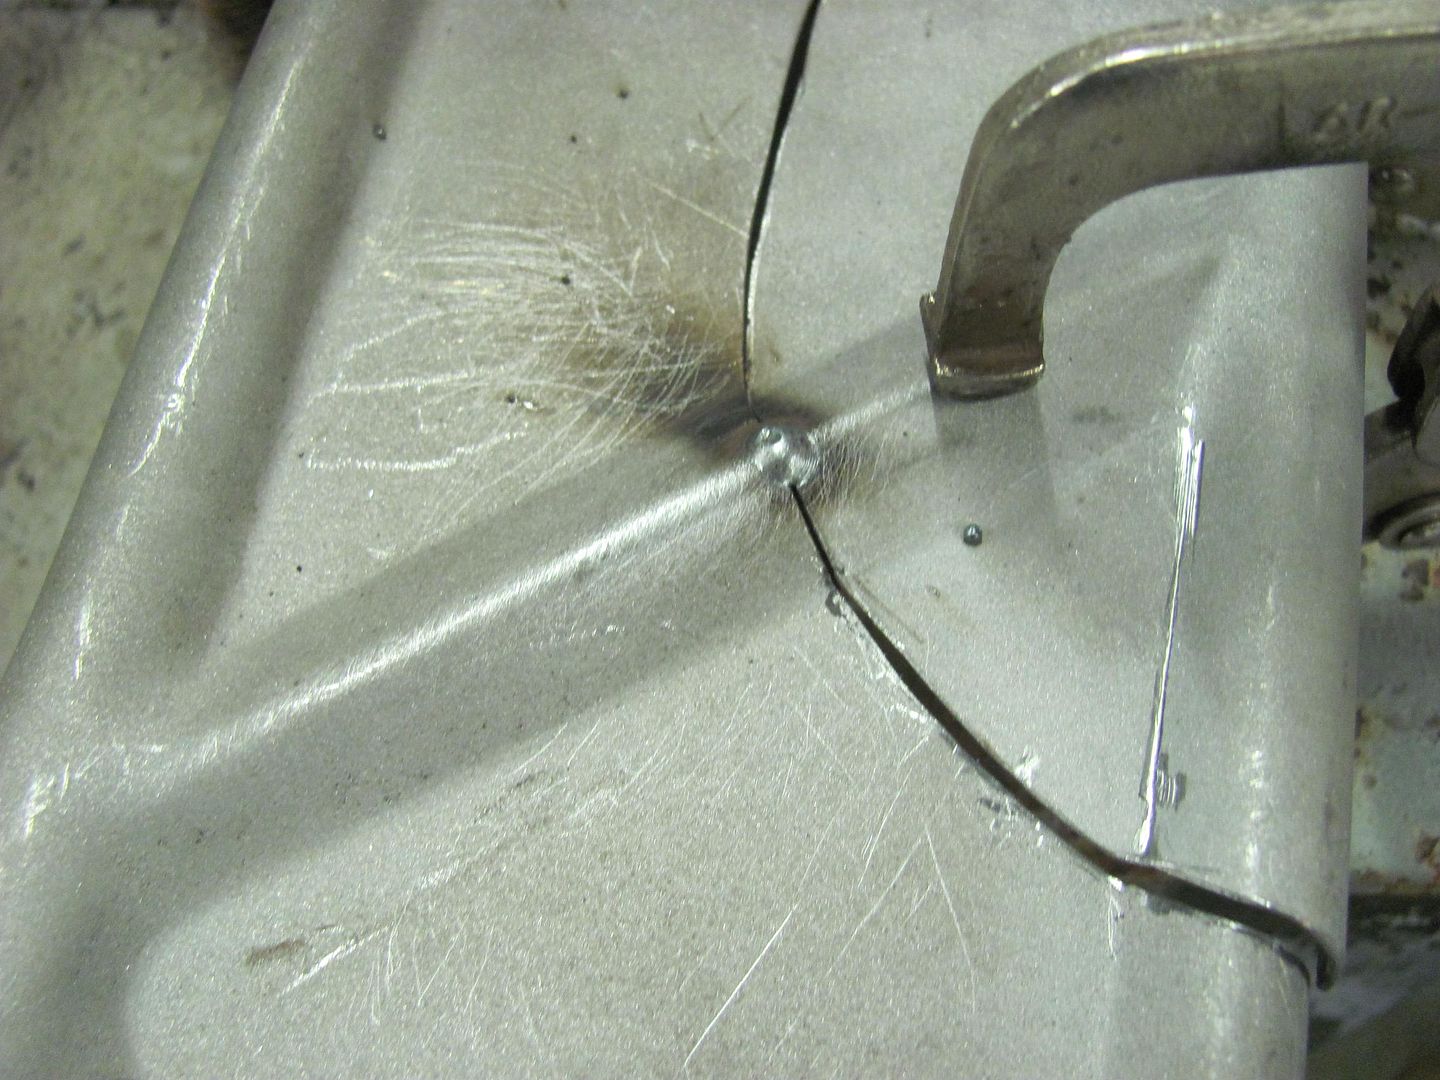 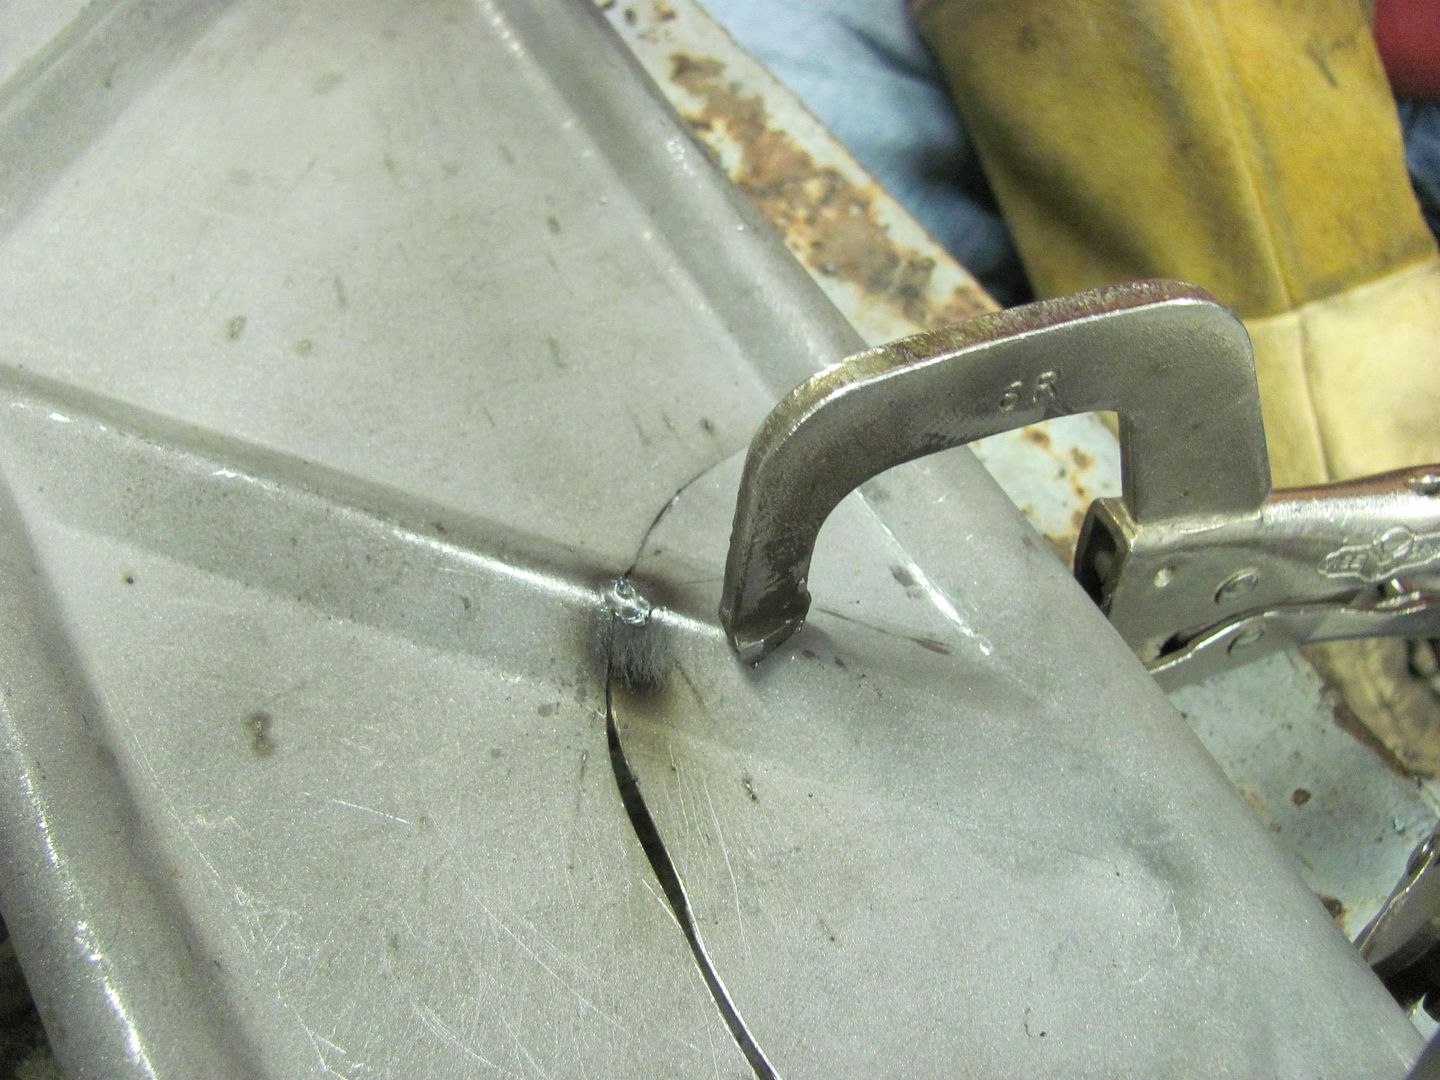 Because he had gaps to contend with, we used some copper to insure less chance of blow outs. A piece of 1/2" copper pipe was flattened and bent in the press brake to make a fitted backing for the vee bead detail.. 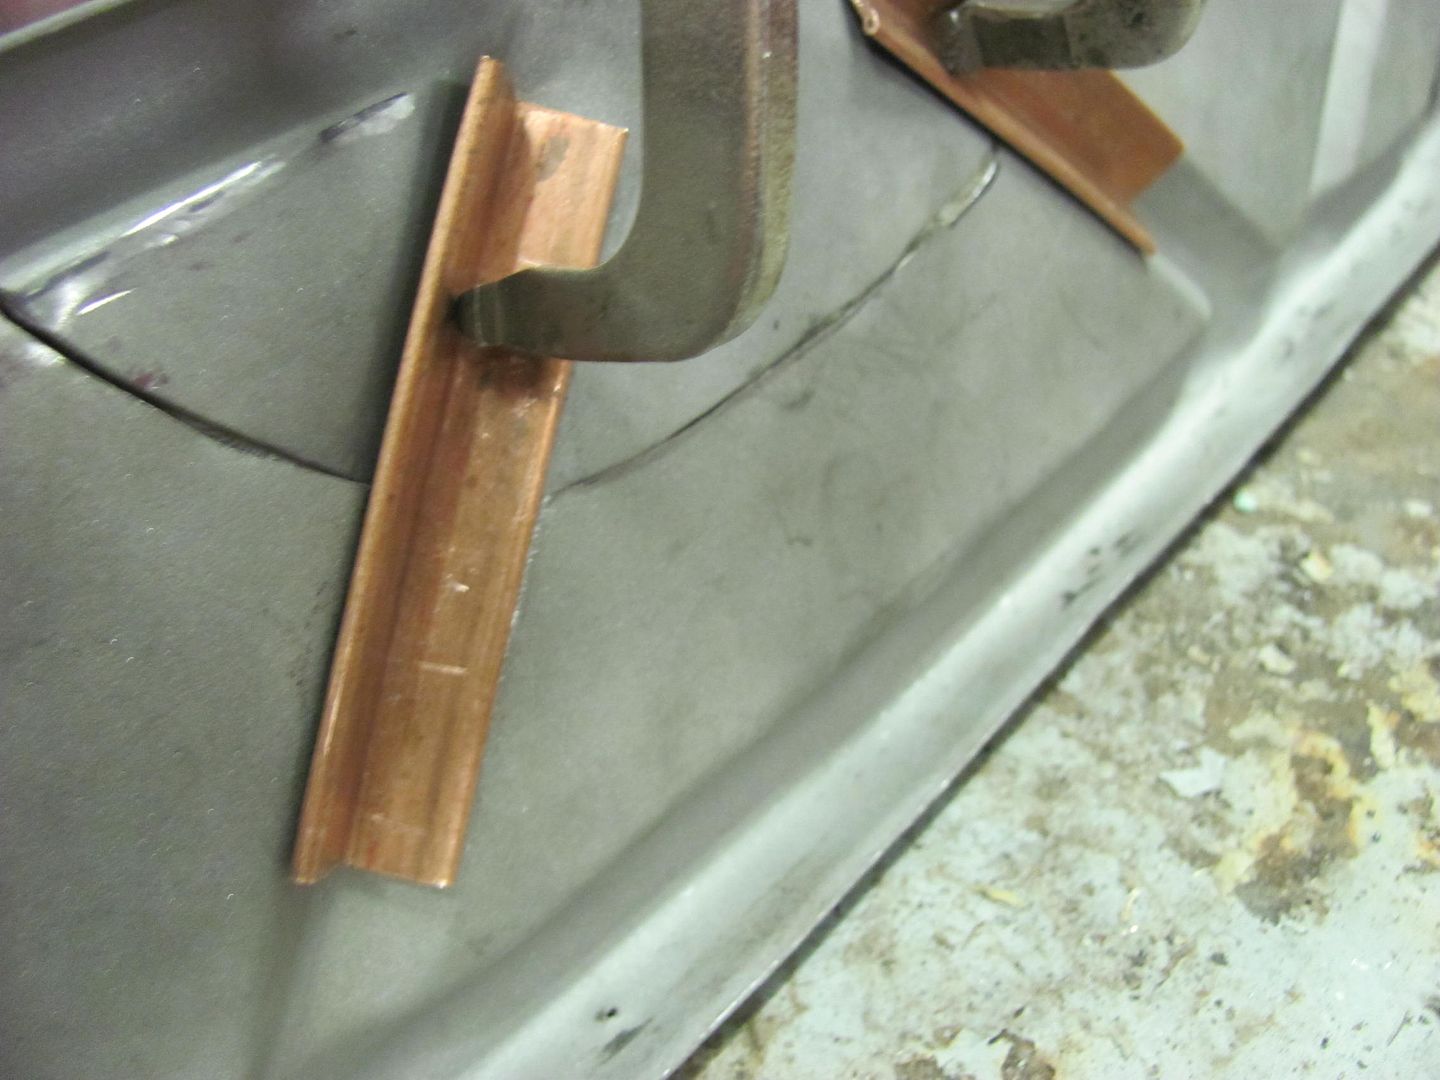 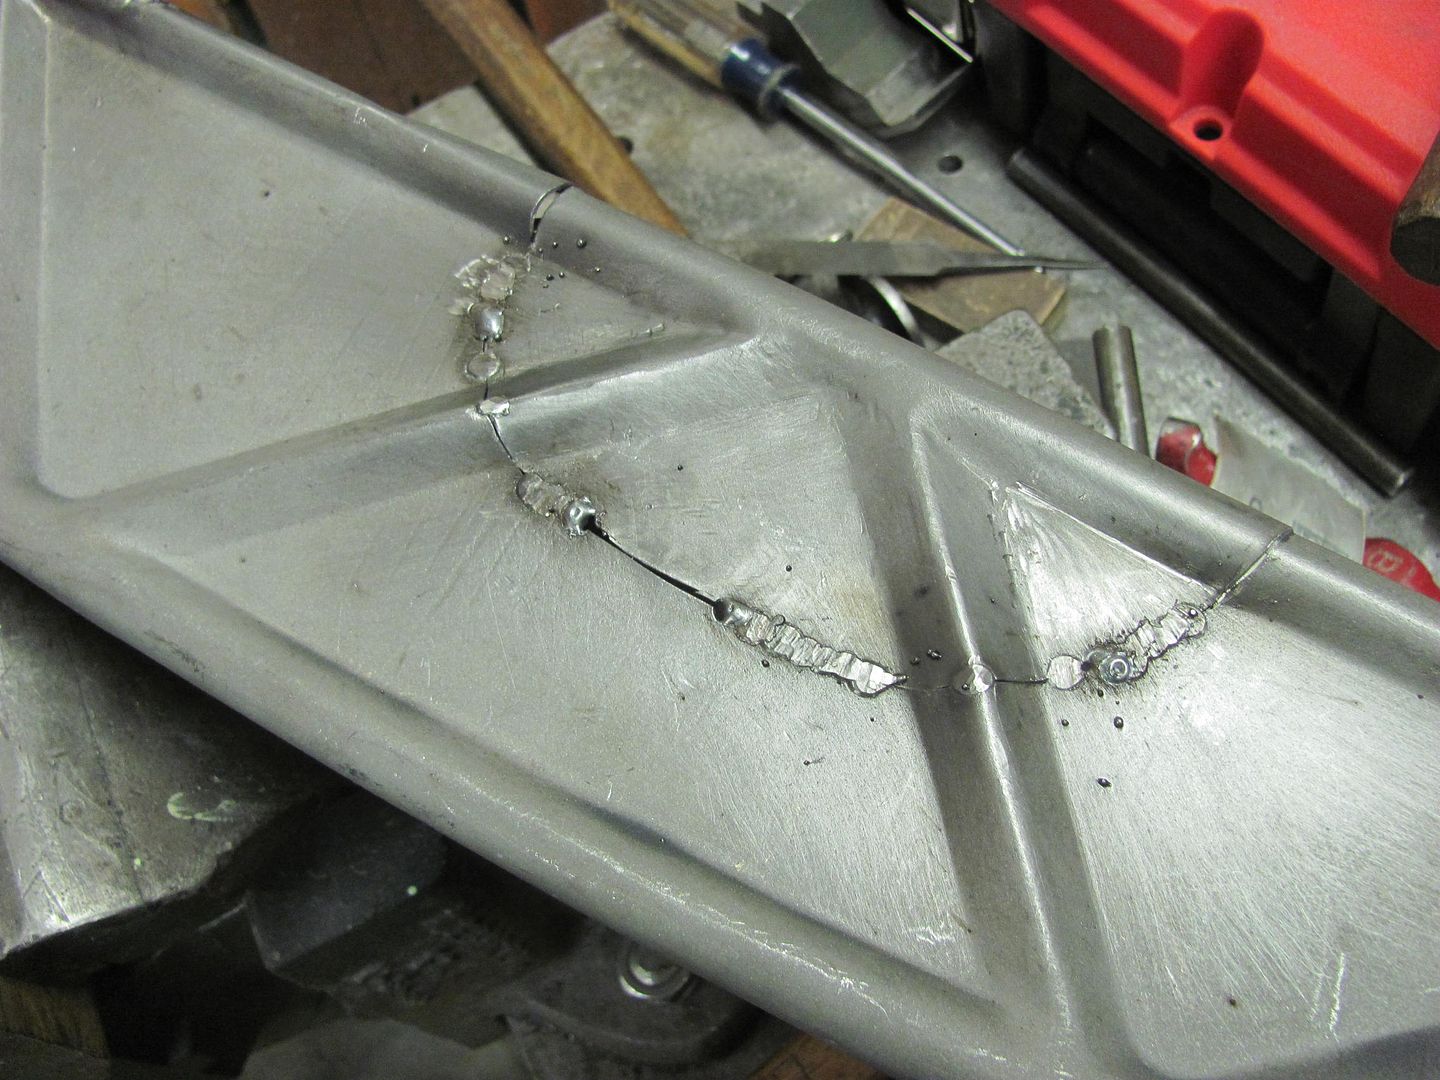 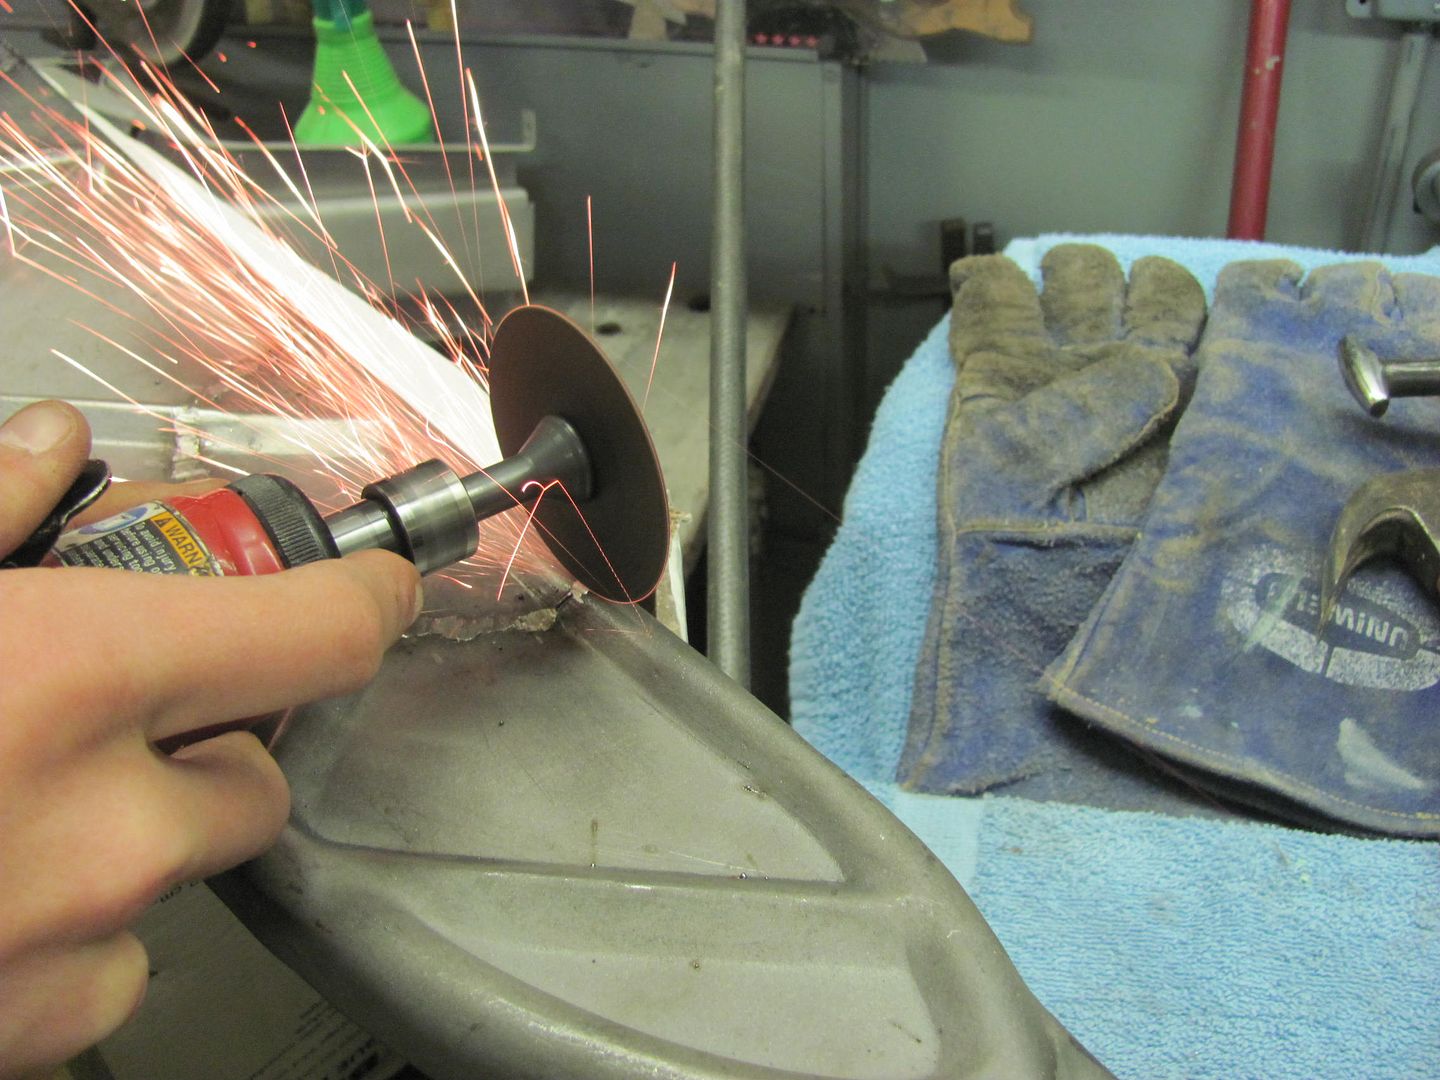 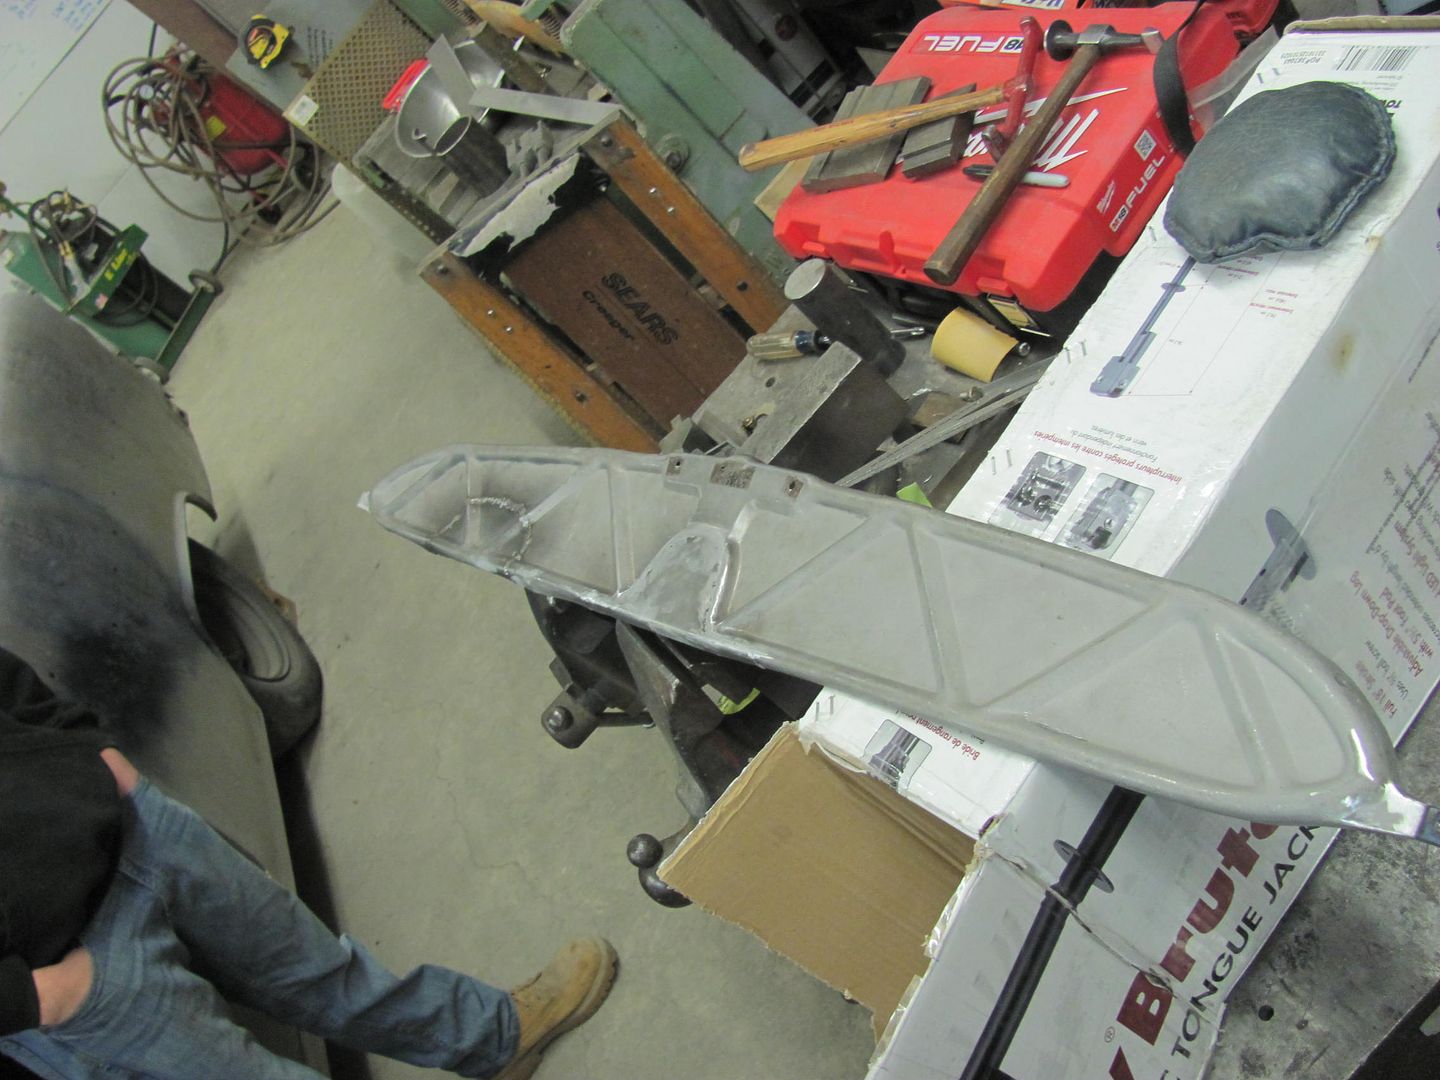 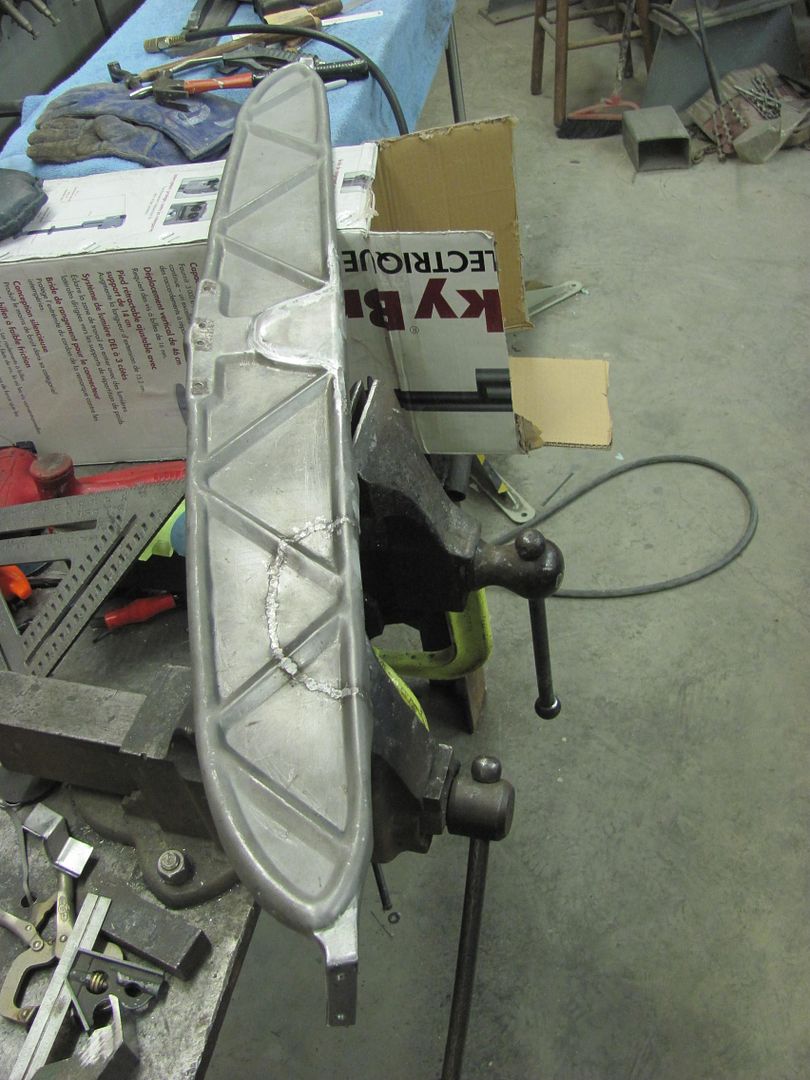 Just a bit of work with the sander and this part should be done. Like the new look without all the gaping holes.. Meanwhile, I continued to make dust. Here's a good view of the built in "guide coat" feature of the SPI. Blocking on the top of the hood shows a low spot..... 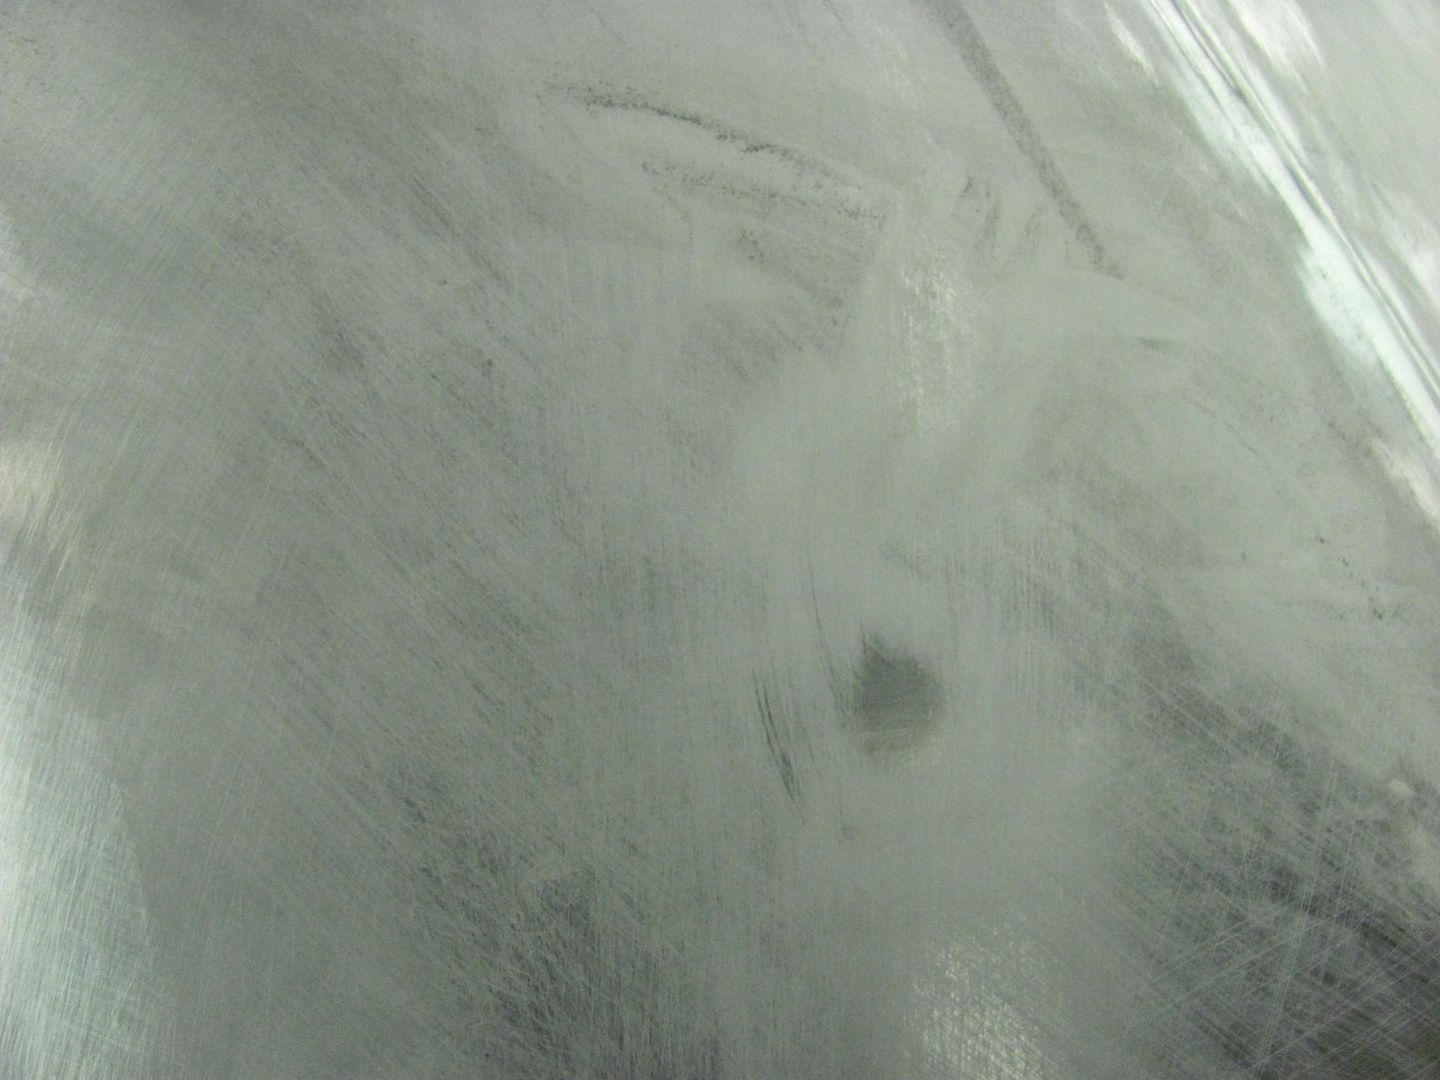 And with just a couple scuffs from the bottom, the low shows up there as well 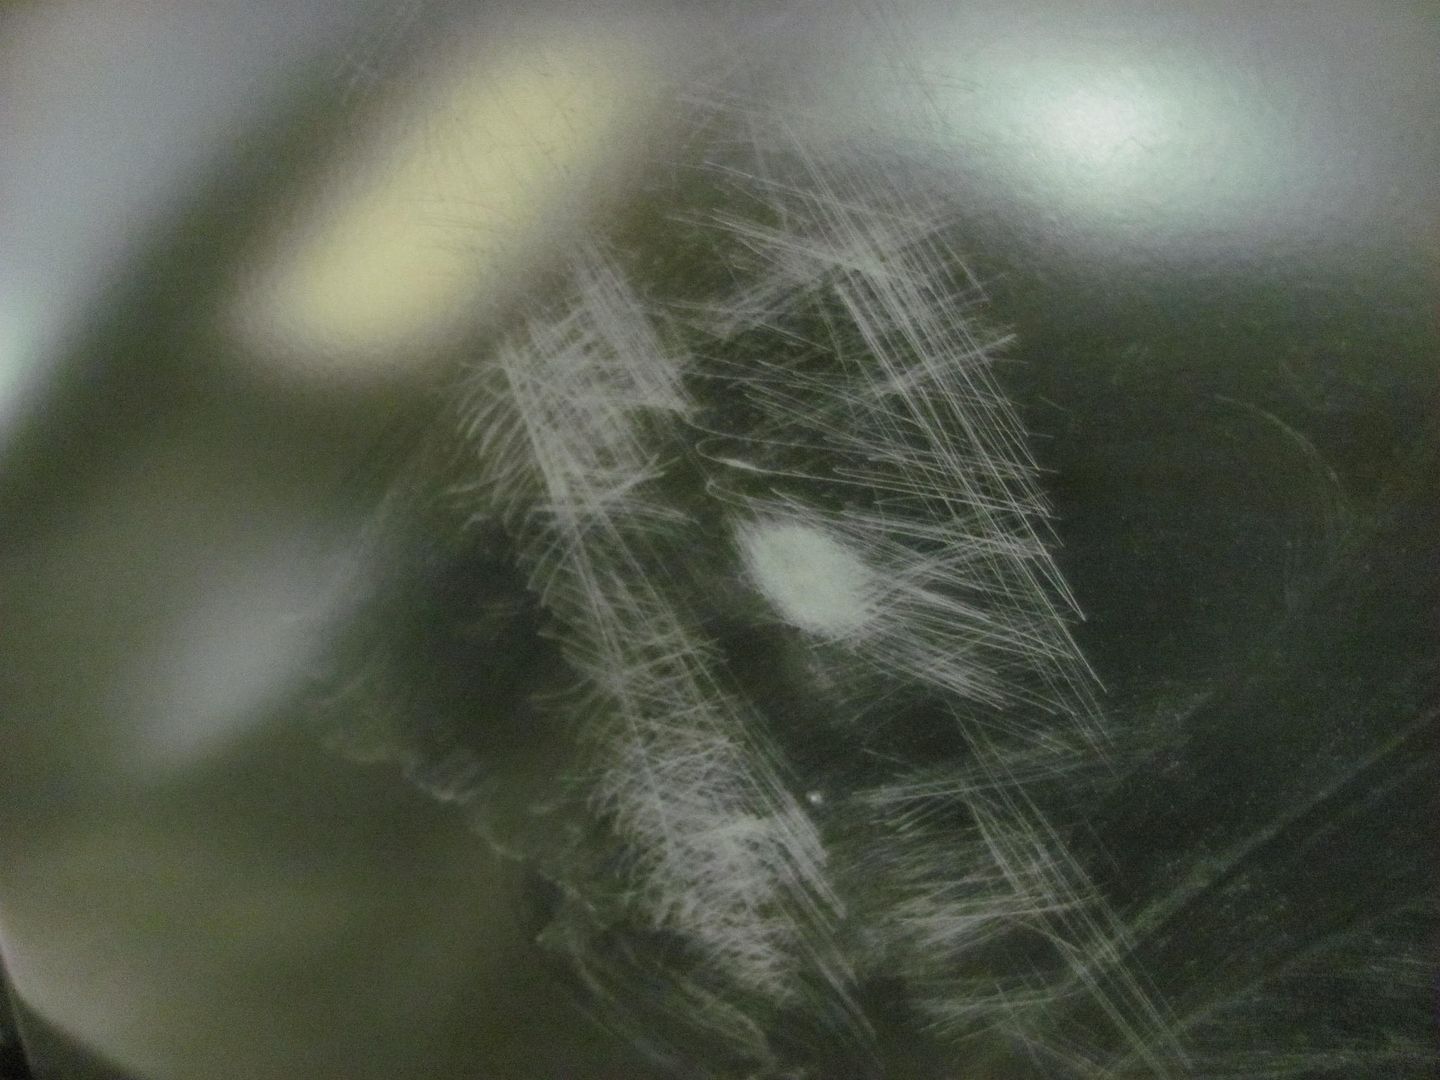 Just a few bumps with the hammer from the bottom into the small shot bag on top and the low is gone. And the rest looks pretty much the same other than the piles of dust on the floor moving around.. 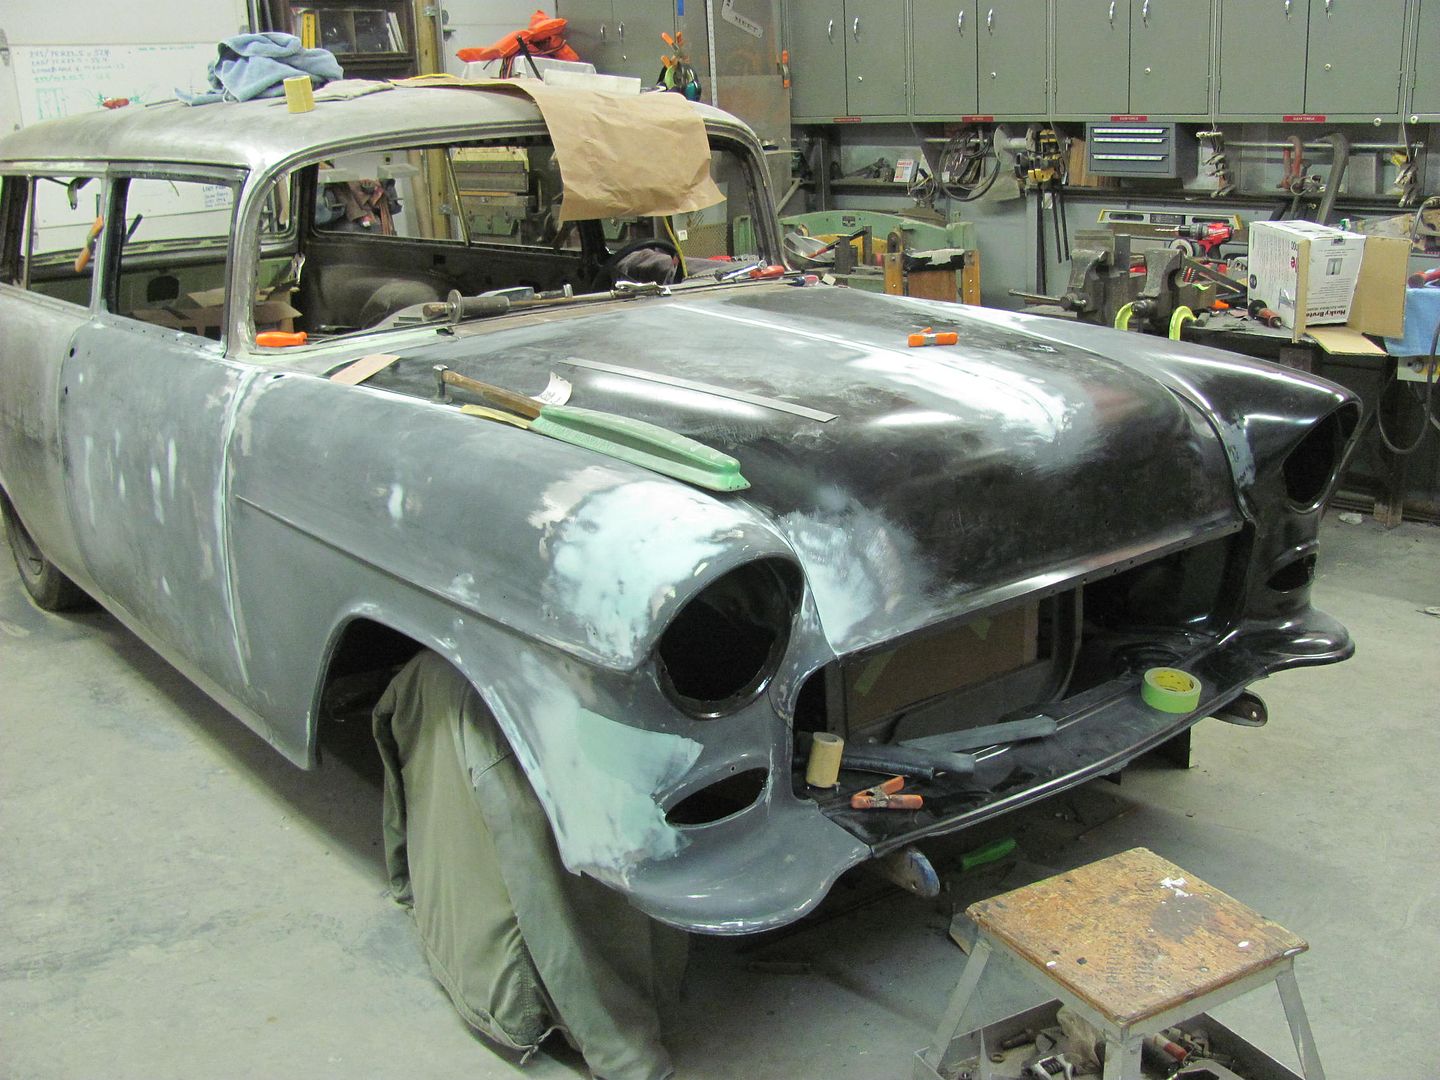
__________________
Robert |
|
|
|
|
02-12-2015, 12:44 AM
|
#360 |
|
Senior Member
Join Date: Jul 2012
Location: Oblong, Illinois
Posts: 7,017
|
Re: 55 Wagon Progress
Kyle did a really nice job on the hood brace!
|
|
|
|
|
02-12-2015, 10:23 AM
|
#361 |
|
Registered User
Join Date: Nov 2011
Location: West Plains Missouri
Posts: 2,088
|
Re: 55 Wagon Progress
Looking good Guys...
__________________
http://67-72chevytrucks.com/vboard/s...d.php?t=645774 Project Orangepeel 52 A.D. http://67-72chevytrucks.com/vboard/s...d.php?t=653337 John's LS 49 dodge http://67-72chevytrucks.com/vboard/s...d.php?t=655780 Blake's 67 GMC LS stepside http://67-72chevytrucks.com/vboard/s...d.php?t=690527 Reed 78 FJ40 Rebuild http://67-72chevytrucks.com/vboard/s...d.php?t=733259 Barger's 78 FJ40 |
|
|
|
|
02-12-2015, 10:54 AM
|
#362 |
|
Senior Member
Join Date: Mar 2011
Location: West Plains, Missouri
Posts: 7,553
|
Re: 55 Wagon Progress
Nice work, thanks for the update...Jim
__________________
my build thread: http://67-72chevytrucks.com/vboard/s...d.php?t=459839 Jimbo's long bed step build:http://67-72chevytrucks.com/vboard/s...t=464626<br /> |
|
|
|
|
02-12-2015, 11:24 PM
|
#363 | |
|
Registered User
Join Date: Jan 2013
Location: Leonardtown, MD
Posts: 1,634
|
Re: 55 Wagon Progress
Thanks for the comments guys!
Quote:
He's a quick learner.. I've been pleased with his work. A while back we had made the brackets to make up three "reproduction" battery trays based on a 1955 Chevy factory air conditioned car. 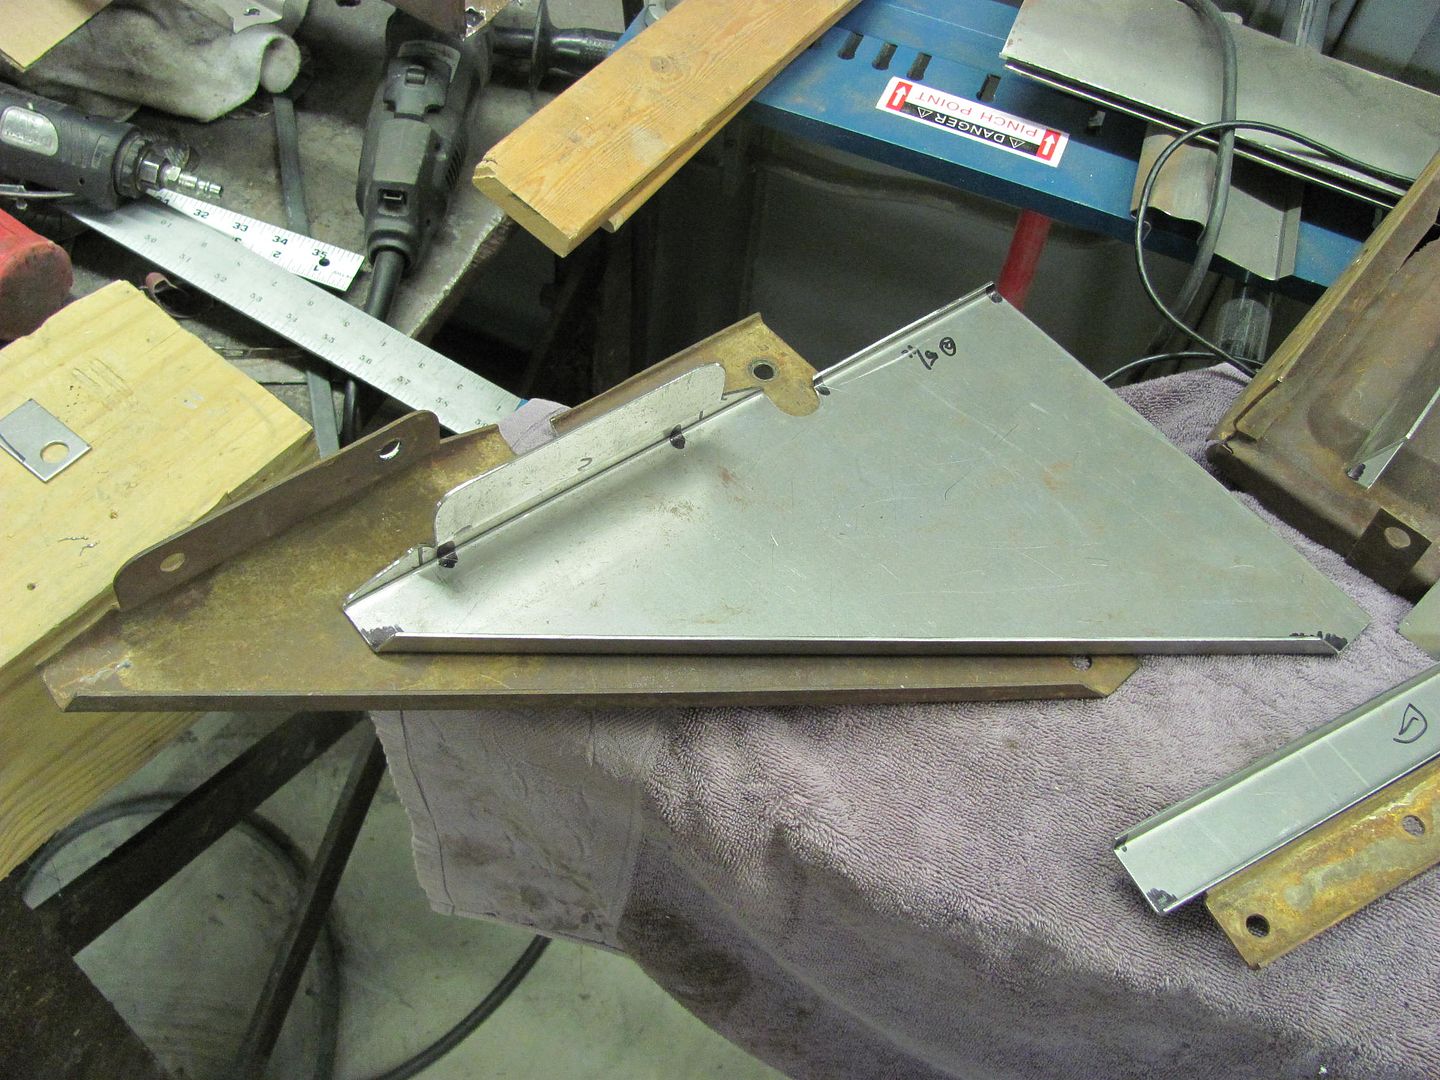 The only part that did not come with the used original pieces we had as patterns was the factory hold down with it's attached "zee" bracket that secures the battery hold down to the rear of the core support, as seen here in the factory assembly bulletin. 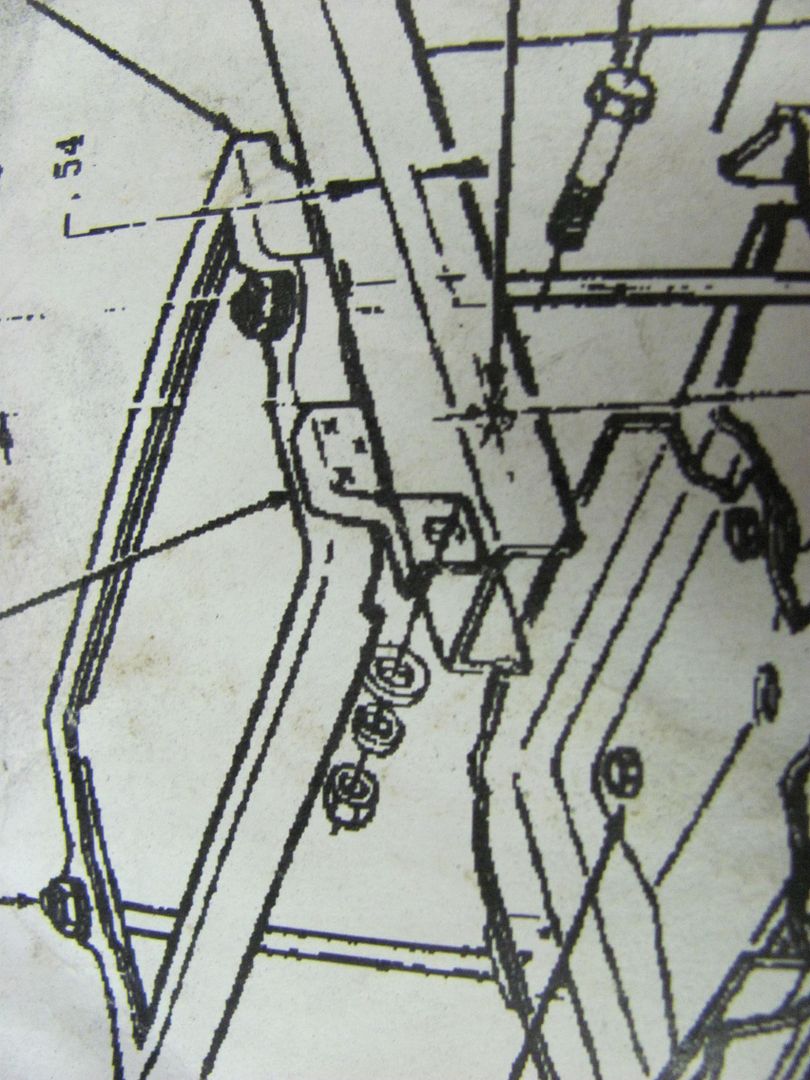 We recently mocked up the battery location, and made a zee bracket based on the picture and the dimensions we had in front of us. 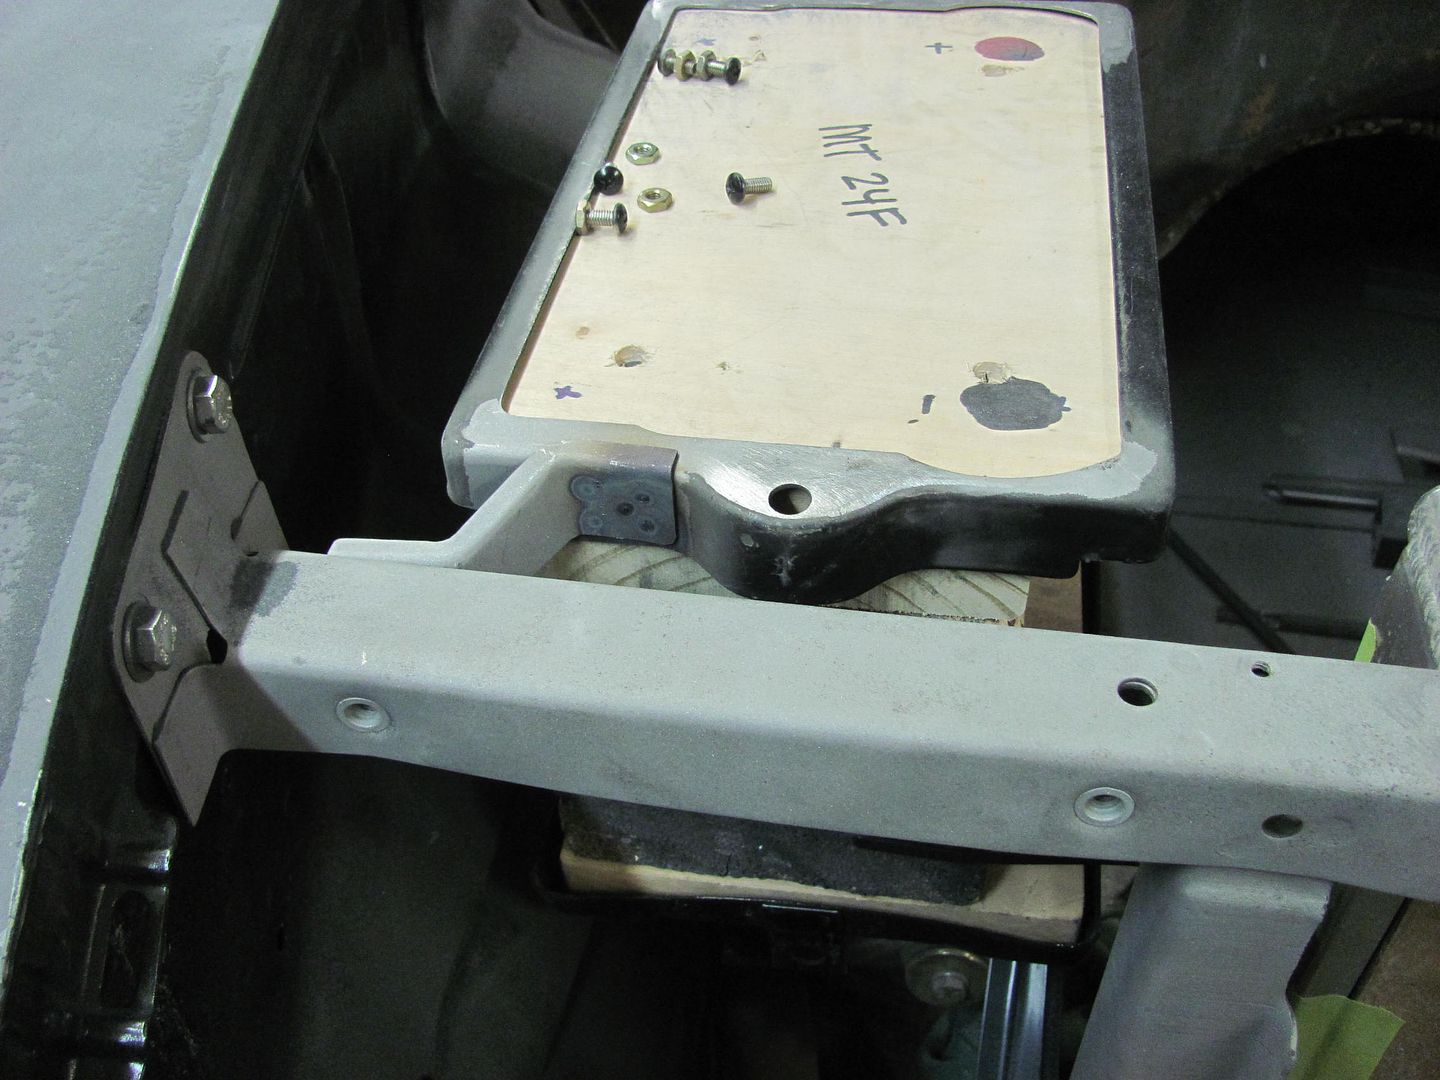 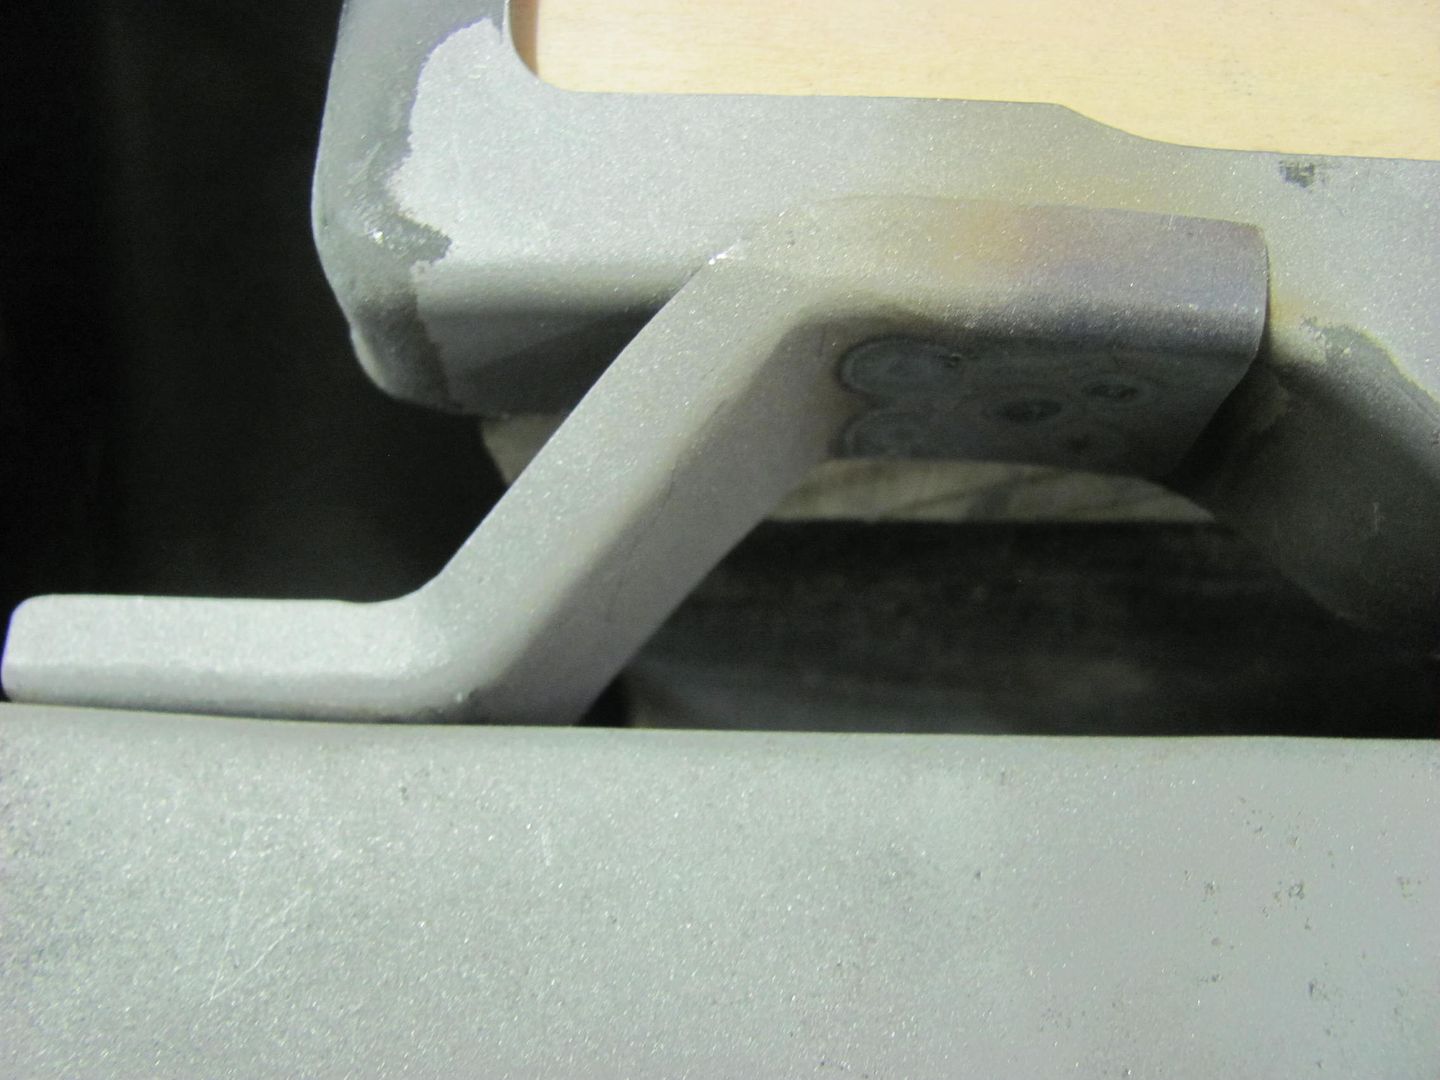 Now to make the remaining two brackets for the other two battery trays.. A roll former die in the press brake was used to make the vertical bends. 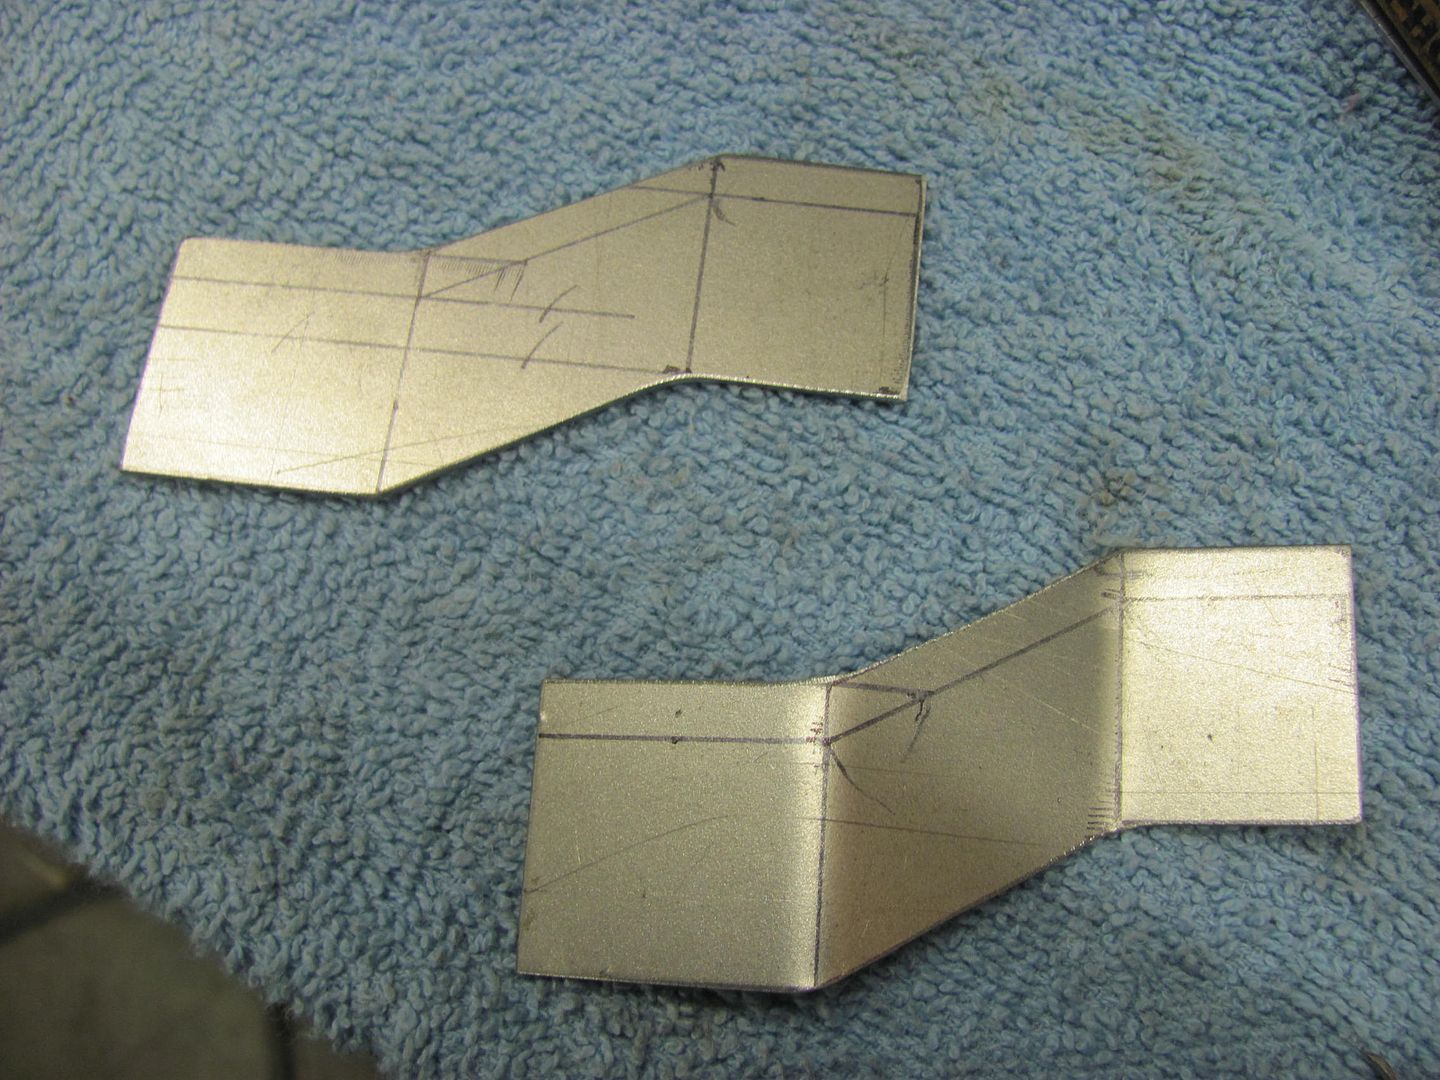 A bit of tipping using a press brake die as an anvil, and then using the tipping tool... 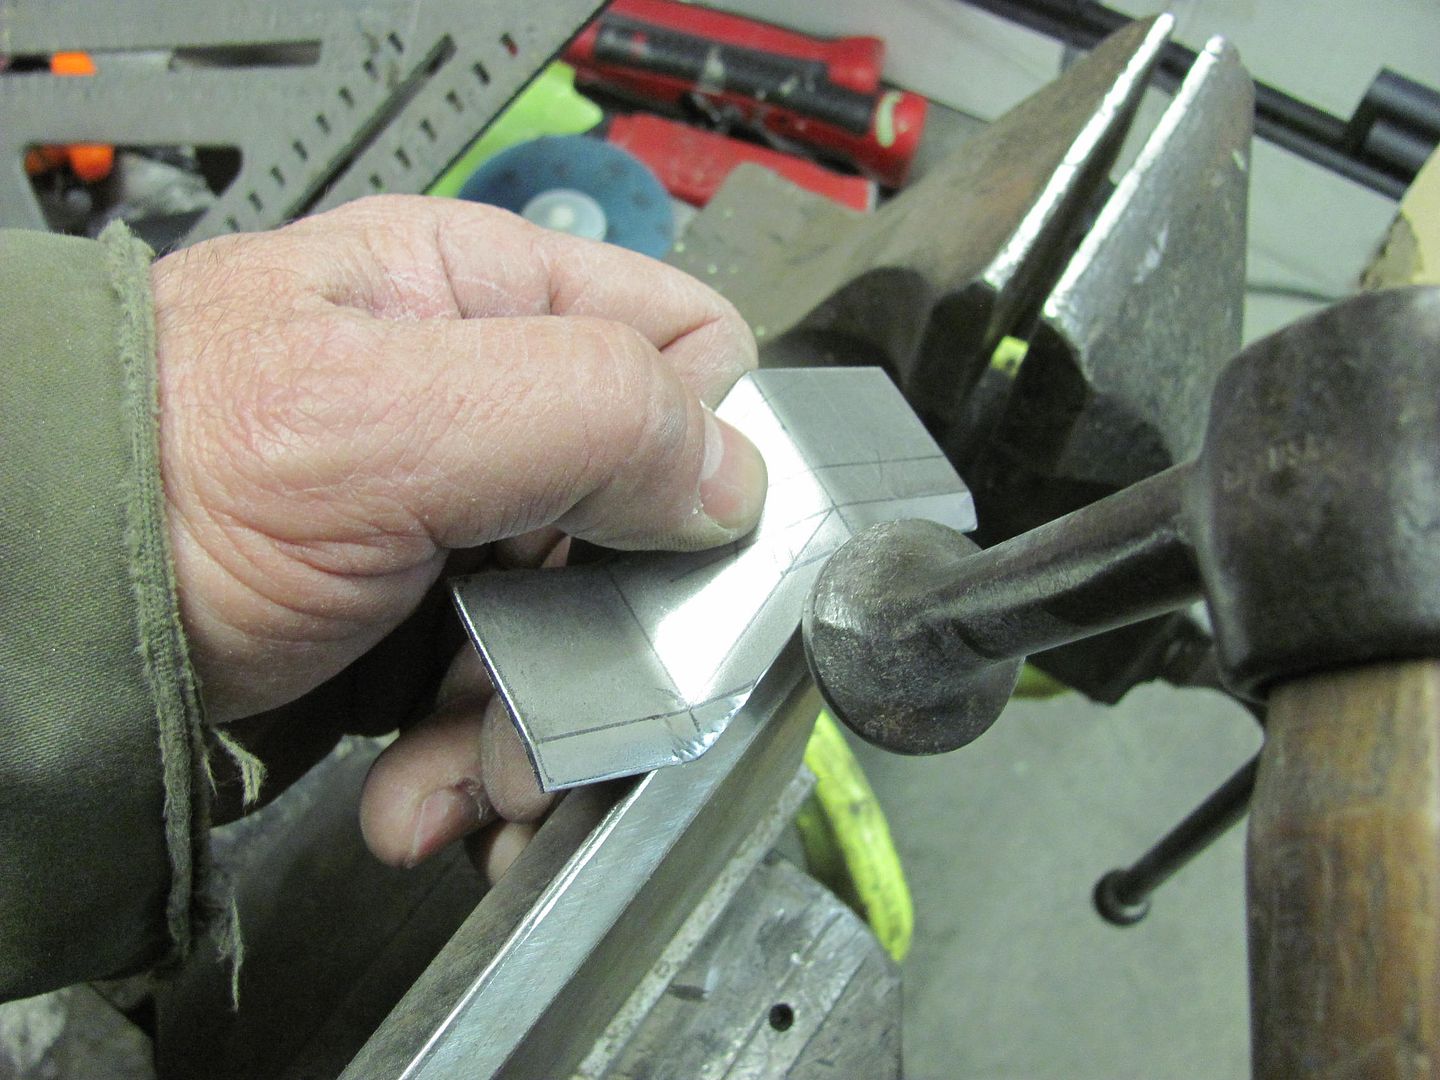 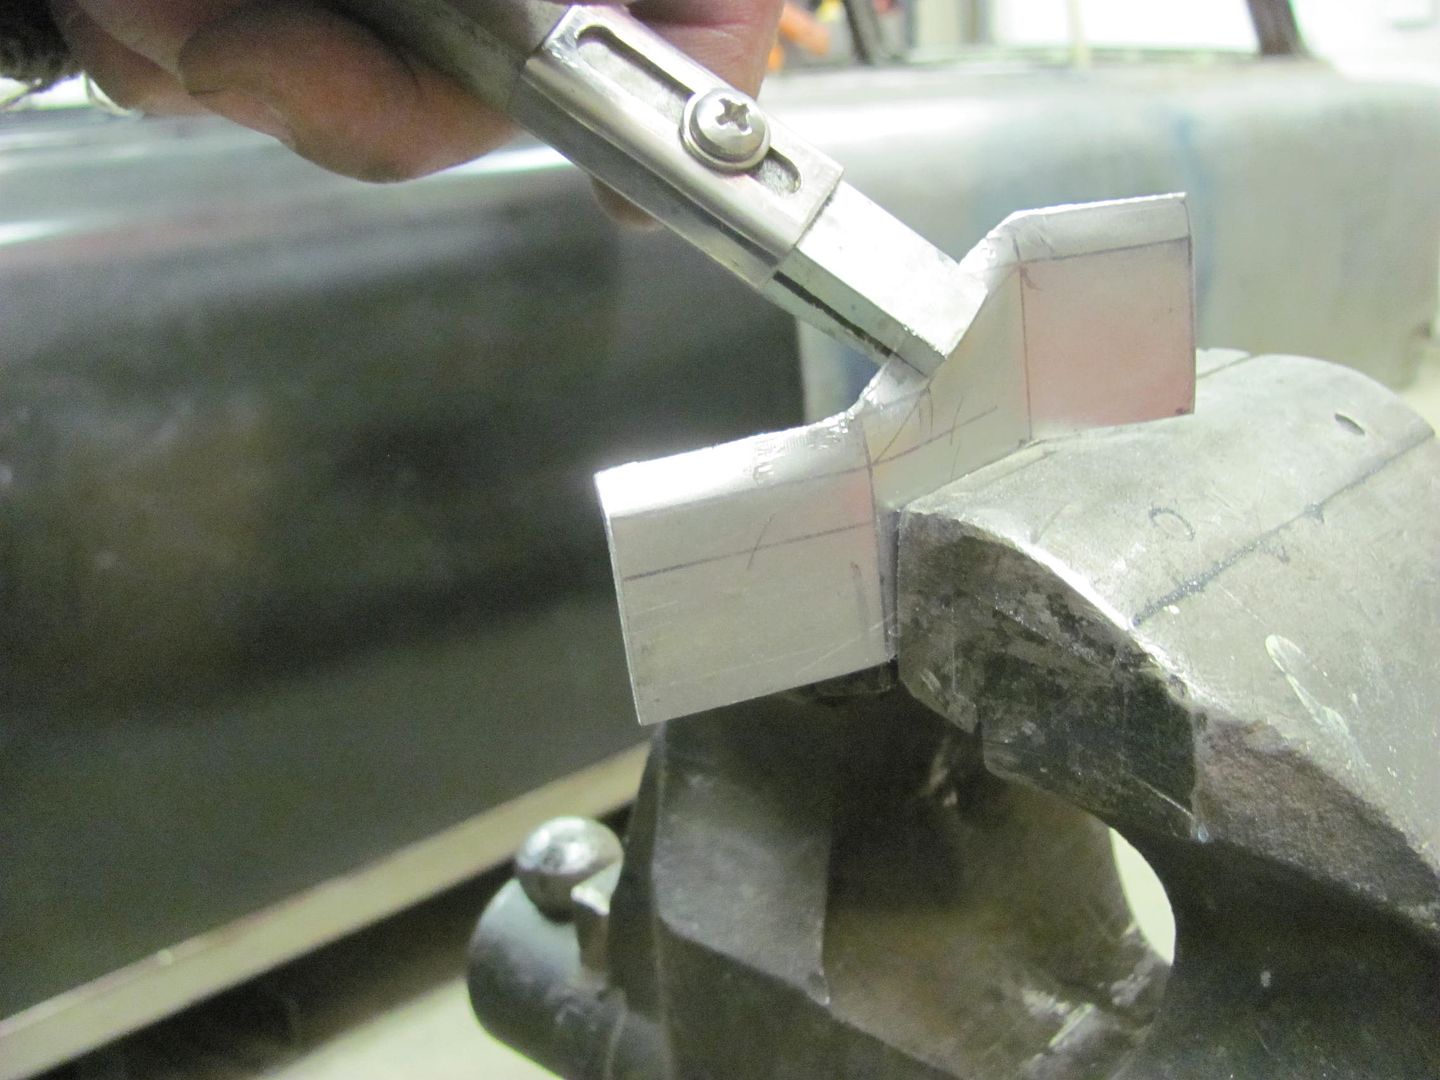 The finished brackets and a comparison.... 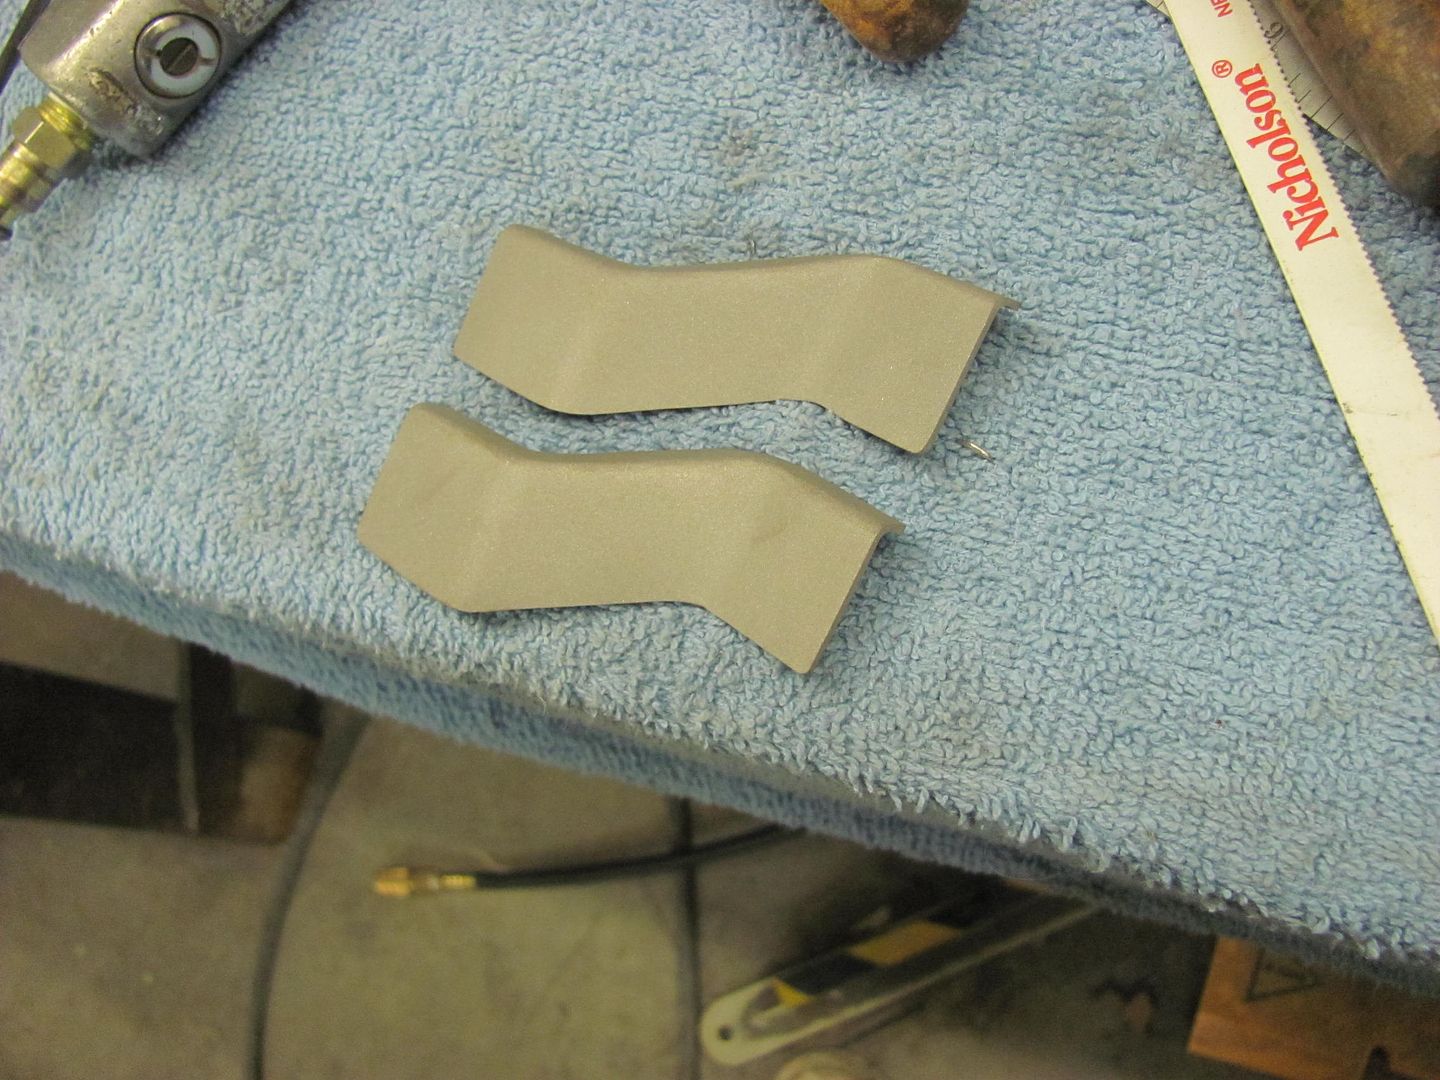 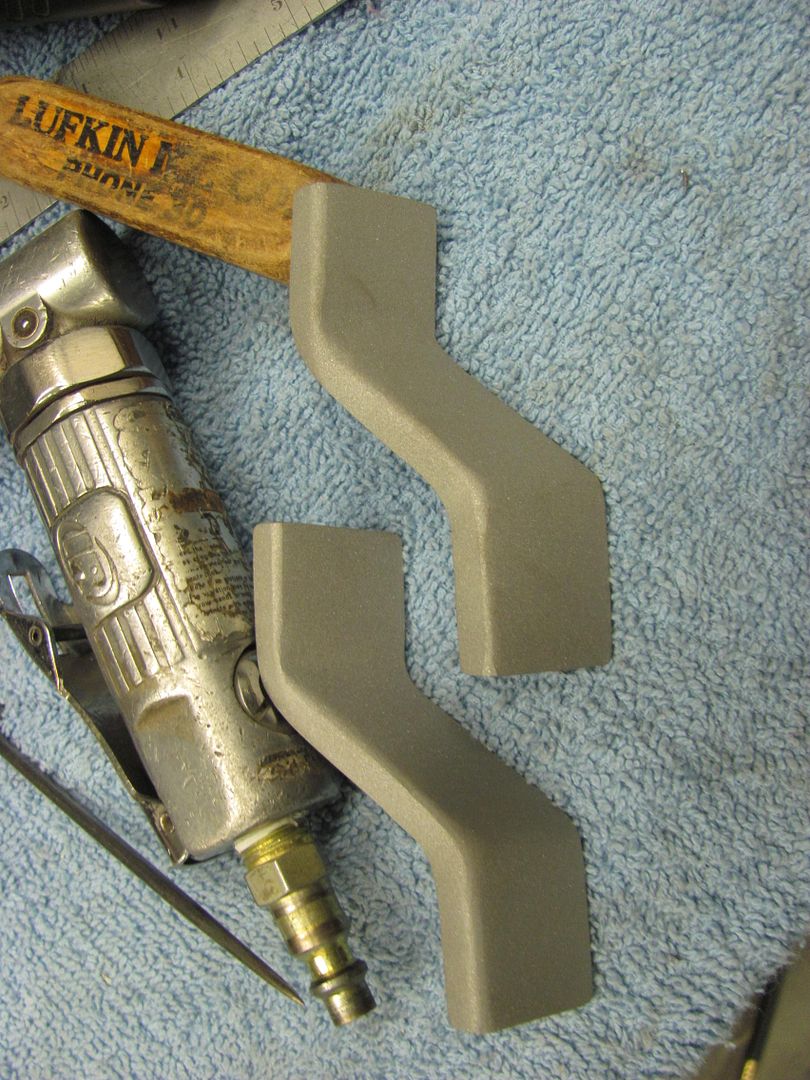  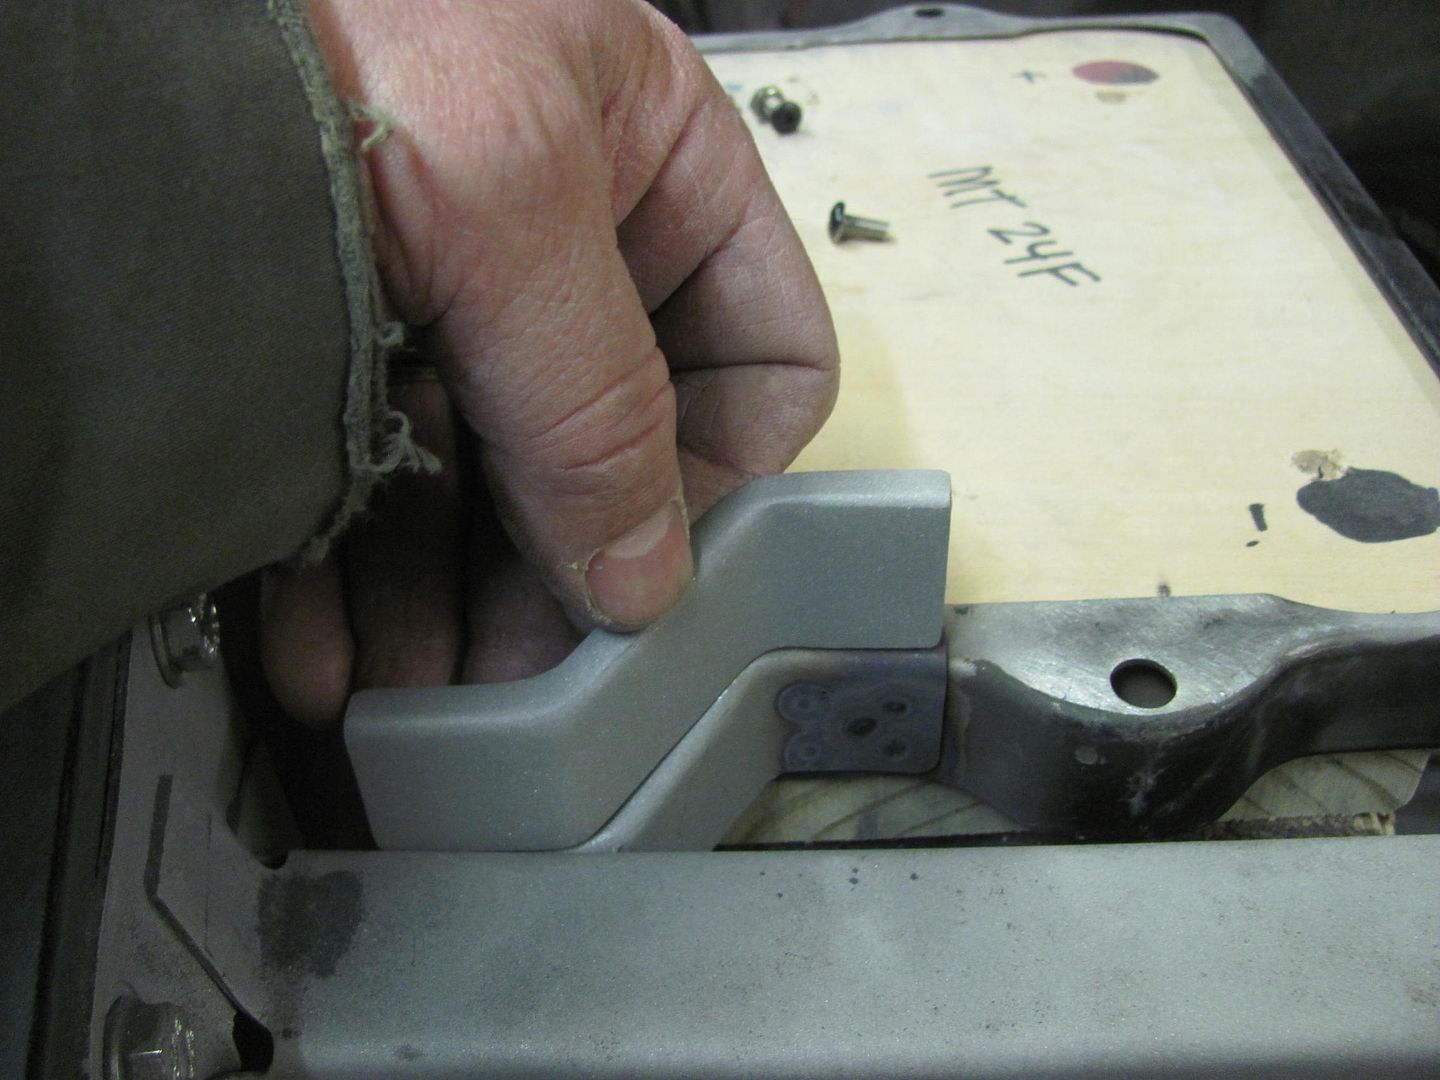
__________________
Robert |
|
|
|
|
|
02-13-2015, 12:28 AM
|
#364 |
|
Senior Member
Join Date: Mar 2011
Location: West Plains, Missouri
Posts: 7,553
|
Re: 55 Wagon Progress
Very nice work...Jim
__________________
my build thread: http://67-72chevytrucks.com/vboard/s...d.php?t=459839 Jimbo's long bed step build:http://67-72chevytrucks.com/vboard/s...t=464626<br /> |
|
|
|
|
02-14-2015, 09:53 PM
|
#365 |
|
Registered User
Join Date: Jan 2013
Location: Leonardtown, MD
Posts: 1,634
|
Re: 55 Wagon Progress
Thanks Jim!
Today's progress, Kyle finishing up the hood brace.. 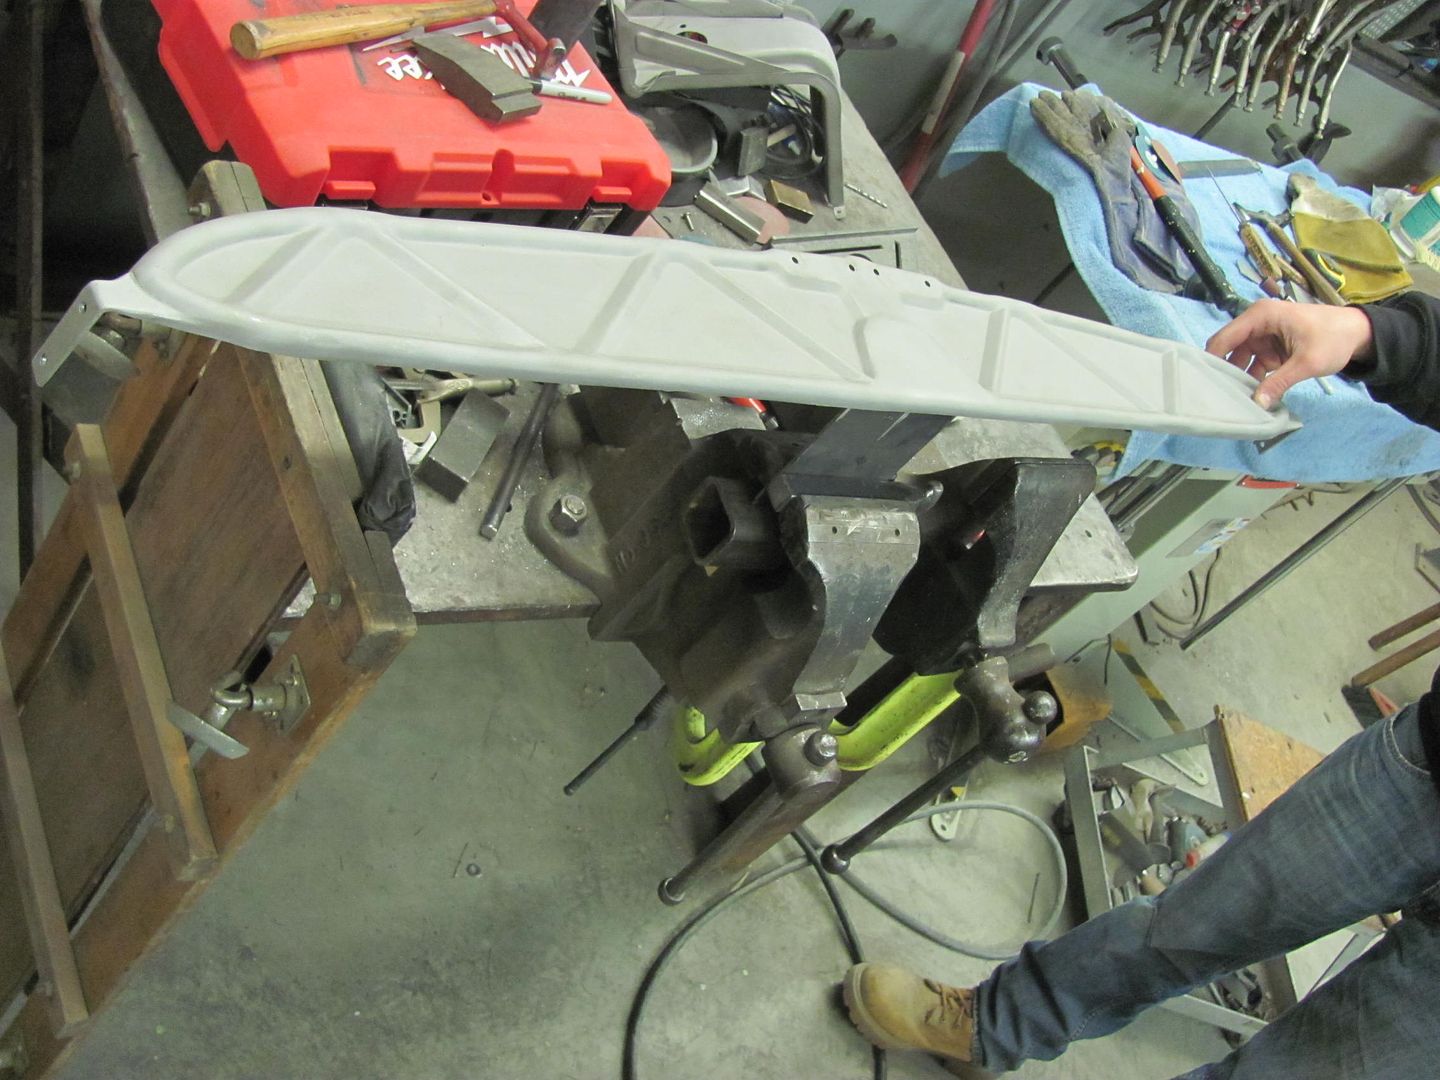 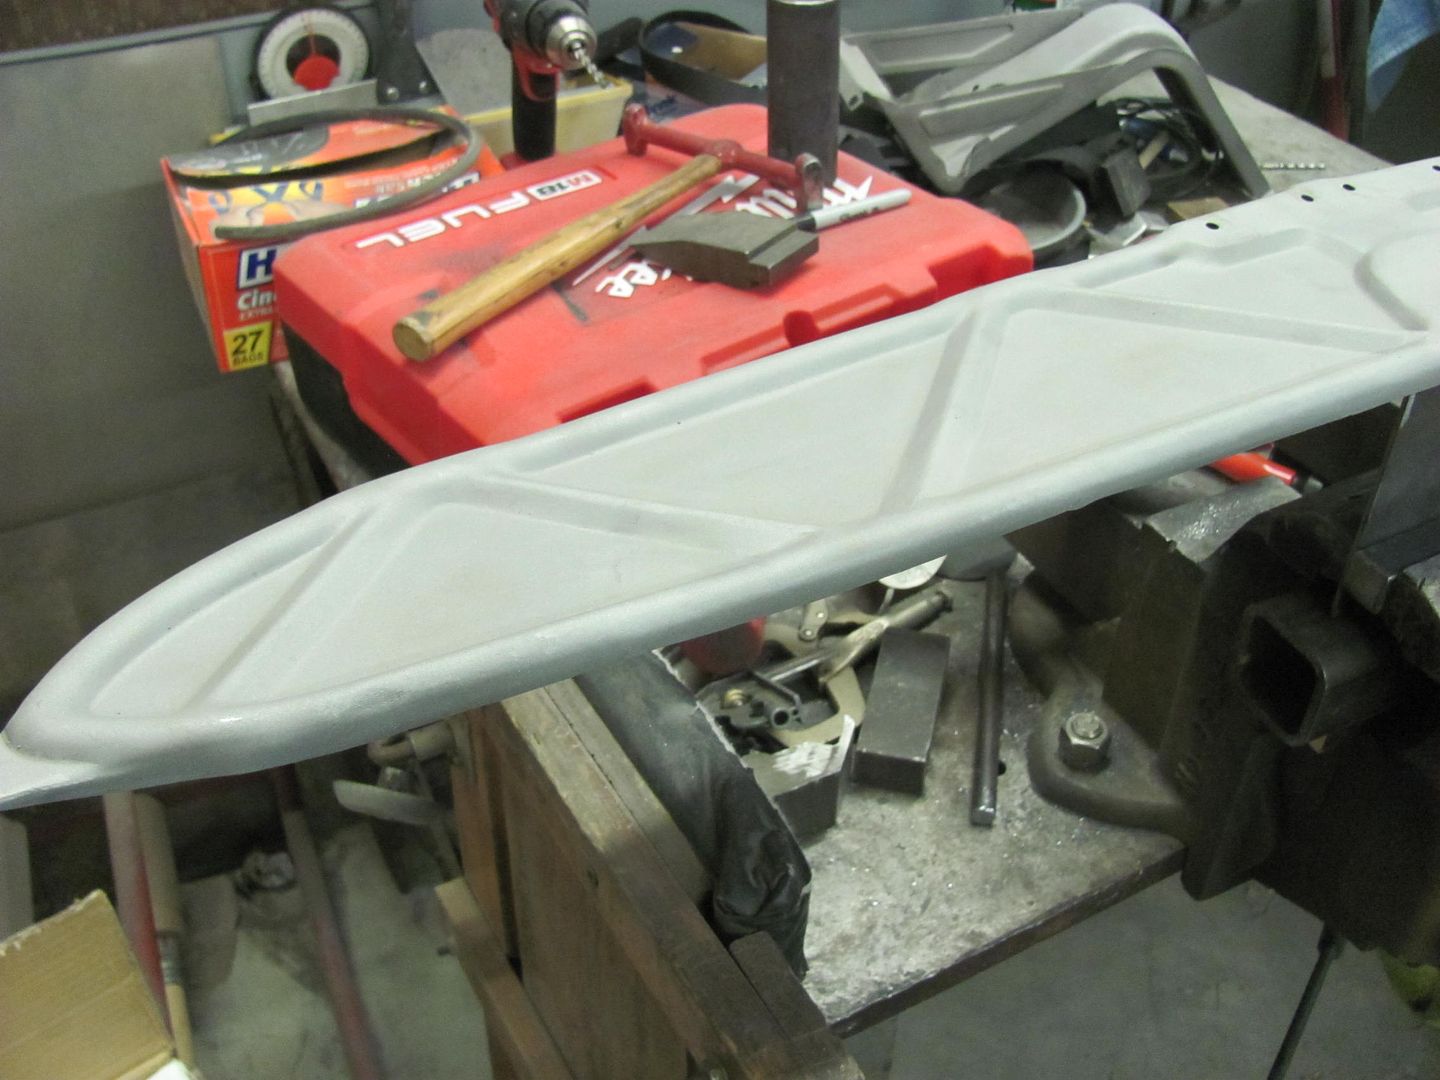 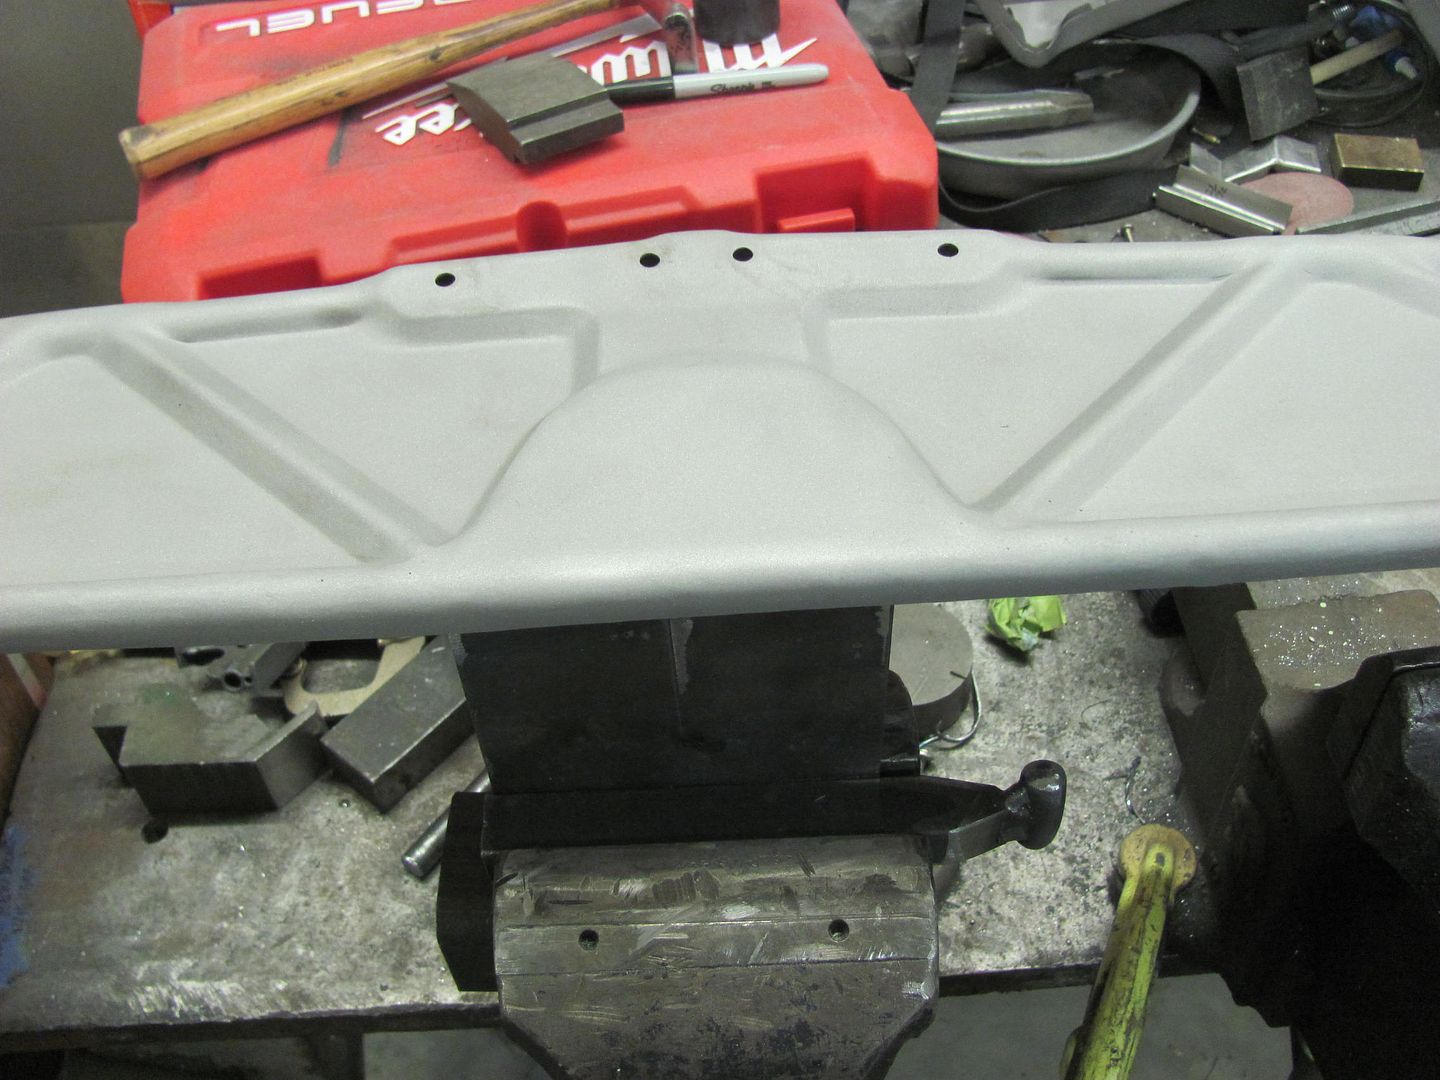 While I continue to generate dust on the floor... 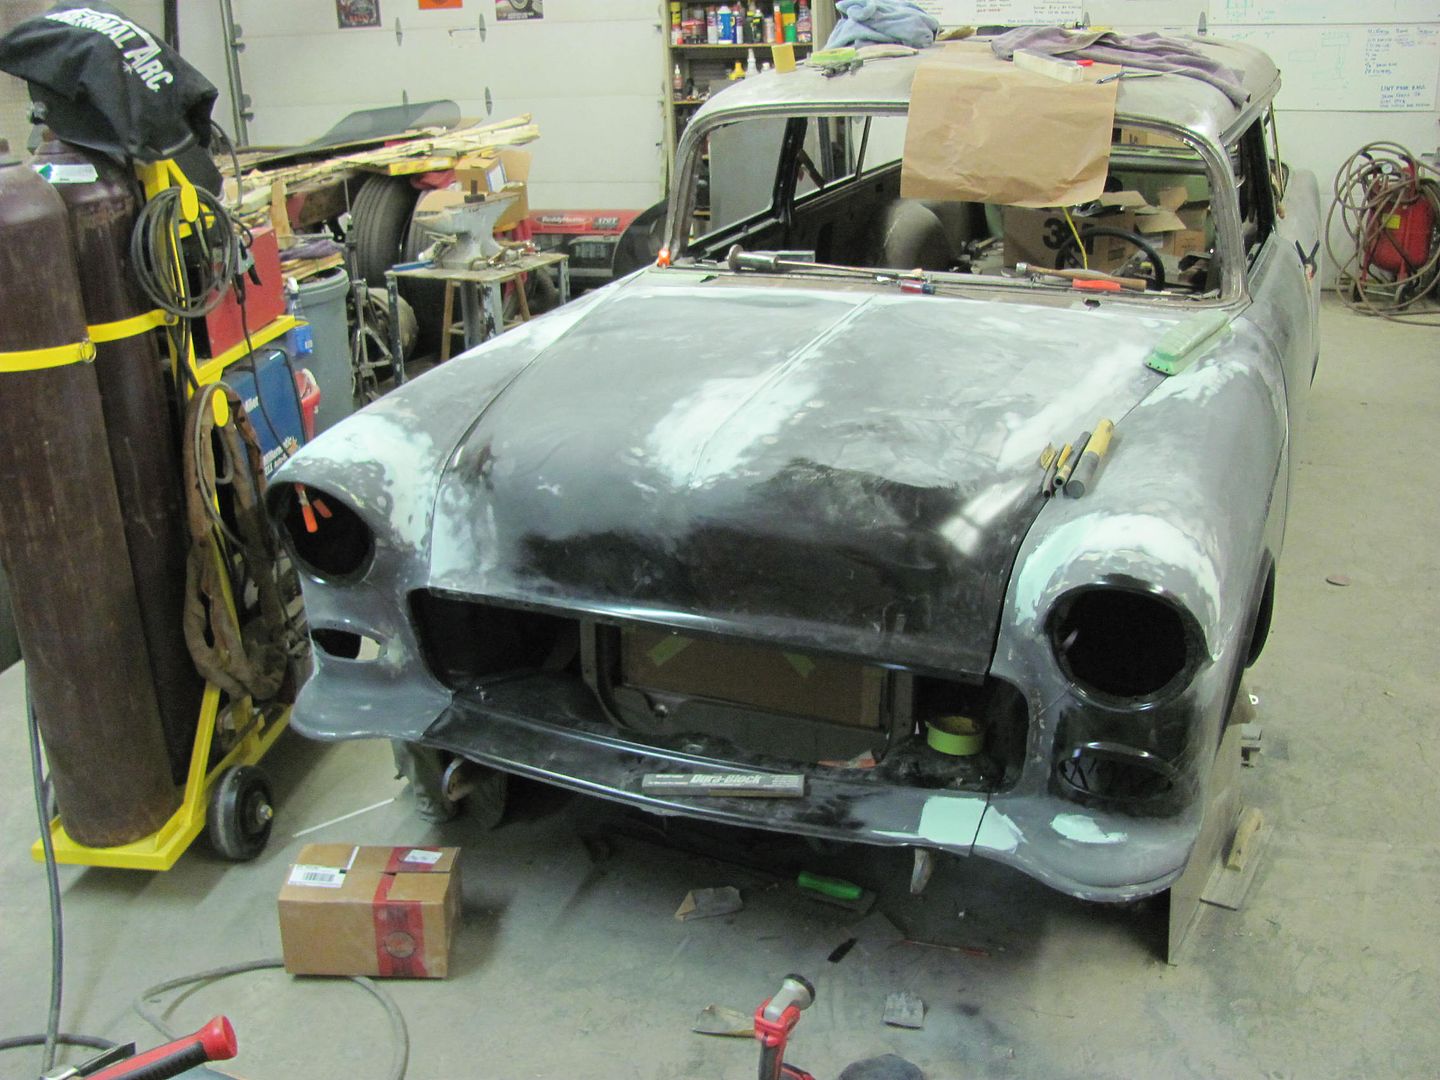 Recently we installed a used core support that was quite a bit nicer than our original, but still showed some issues... 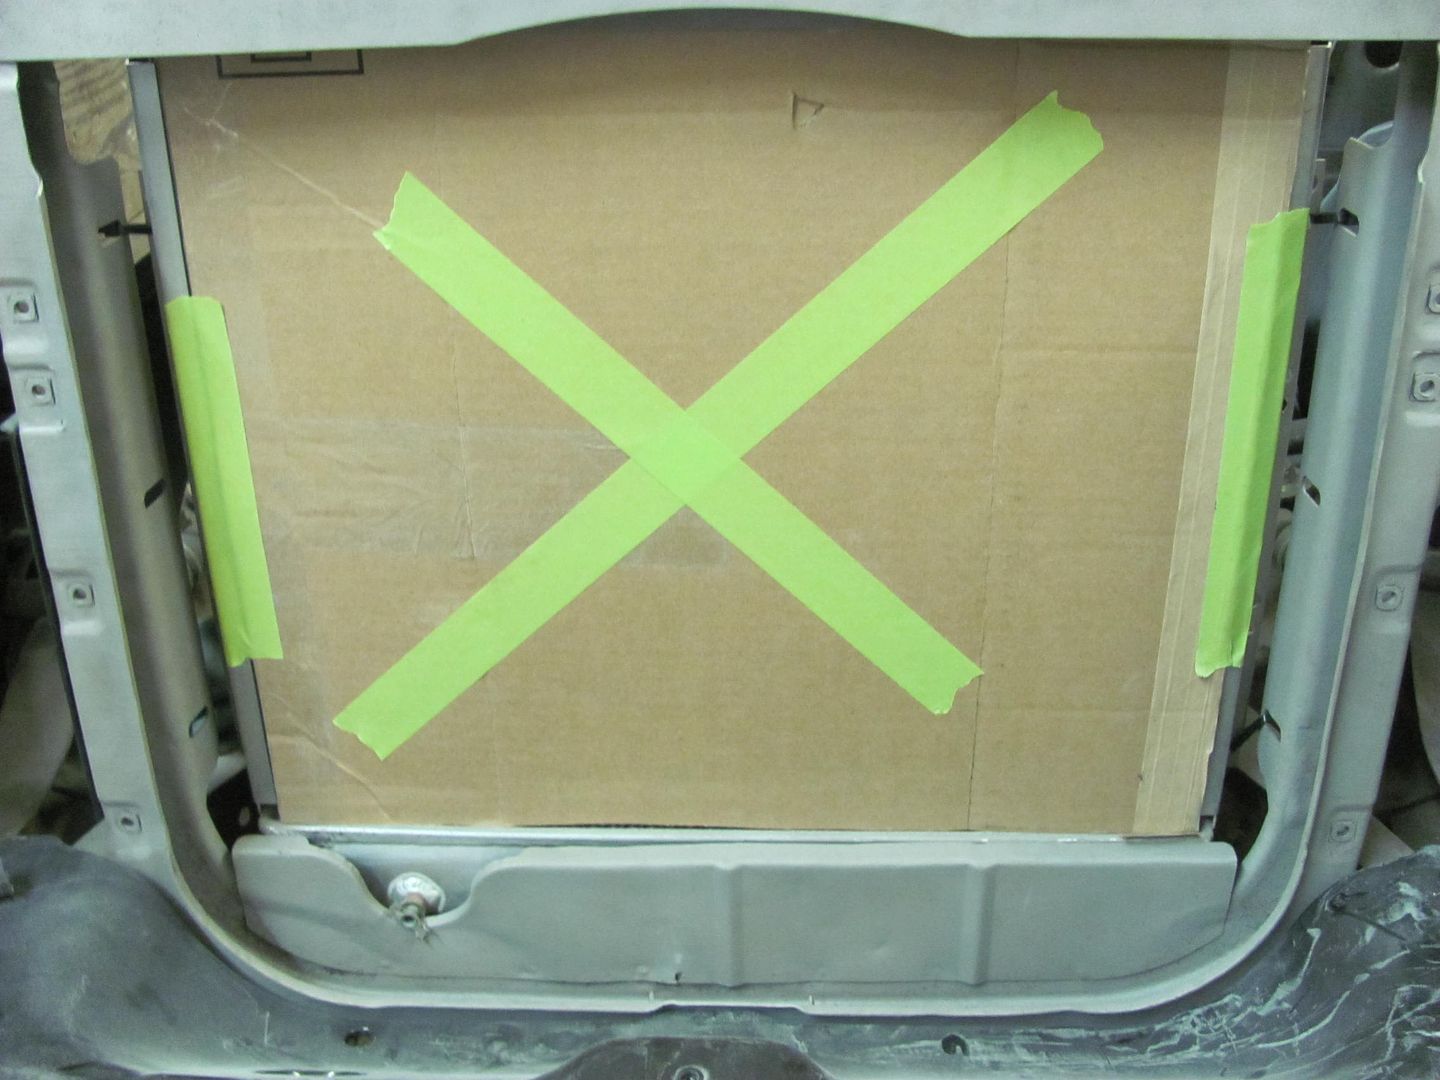 Here we see some rust... 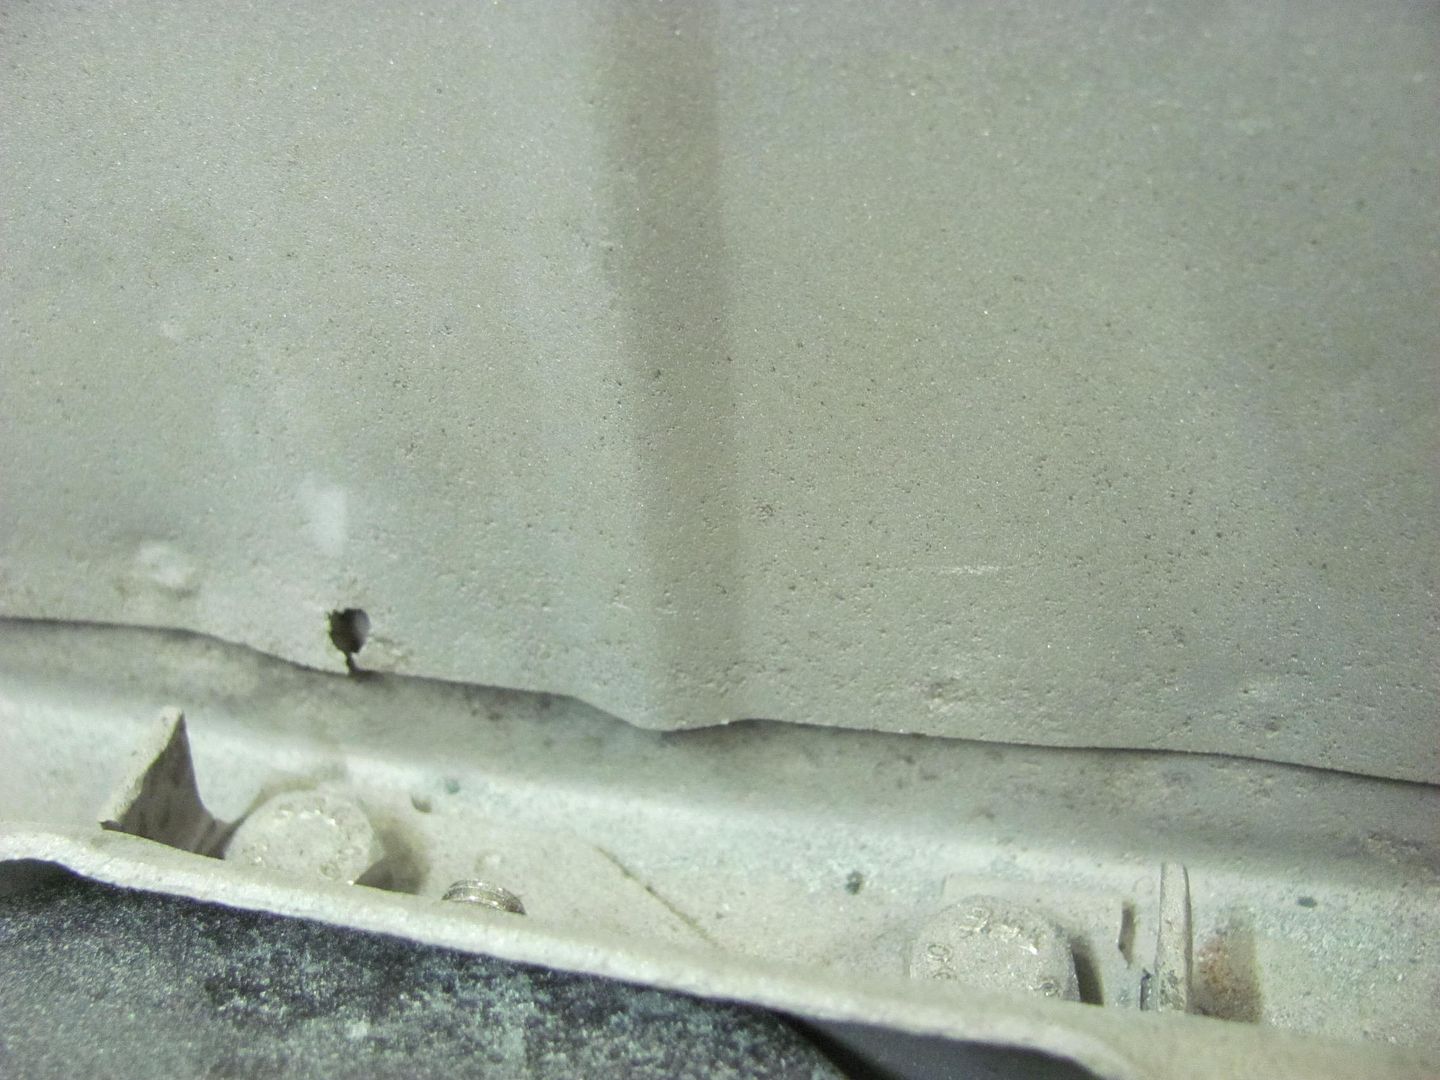 And not quite enough clearance to the petcock.. 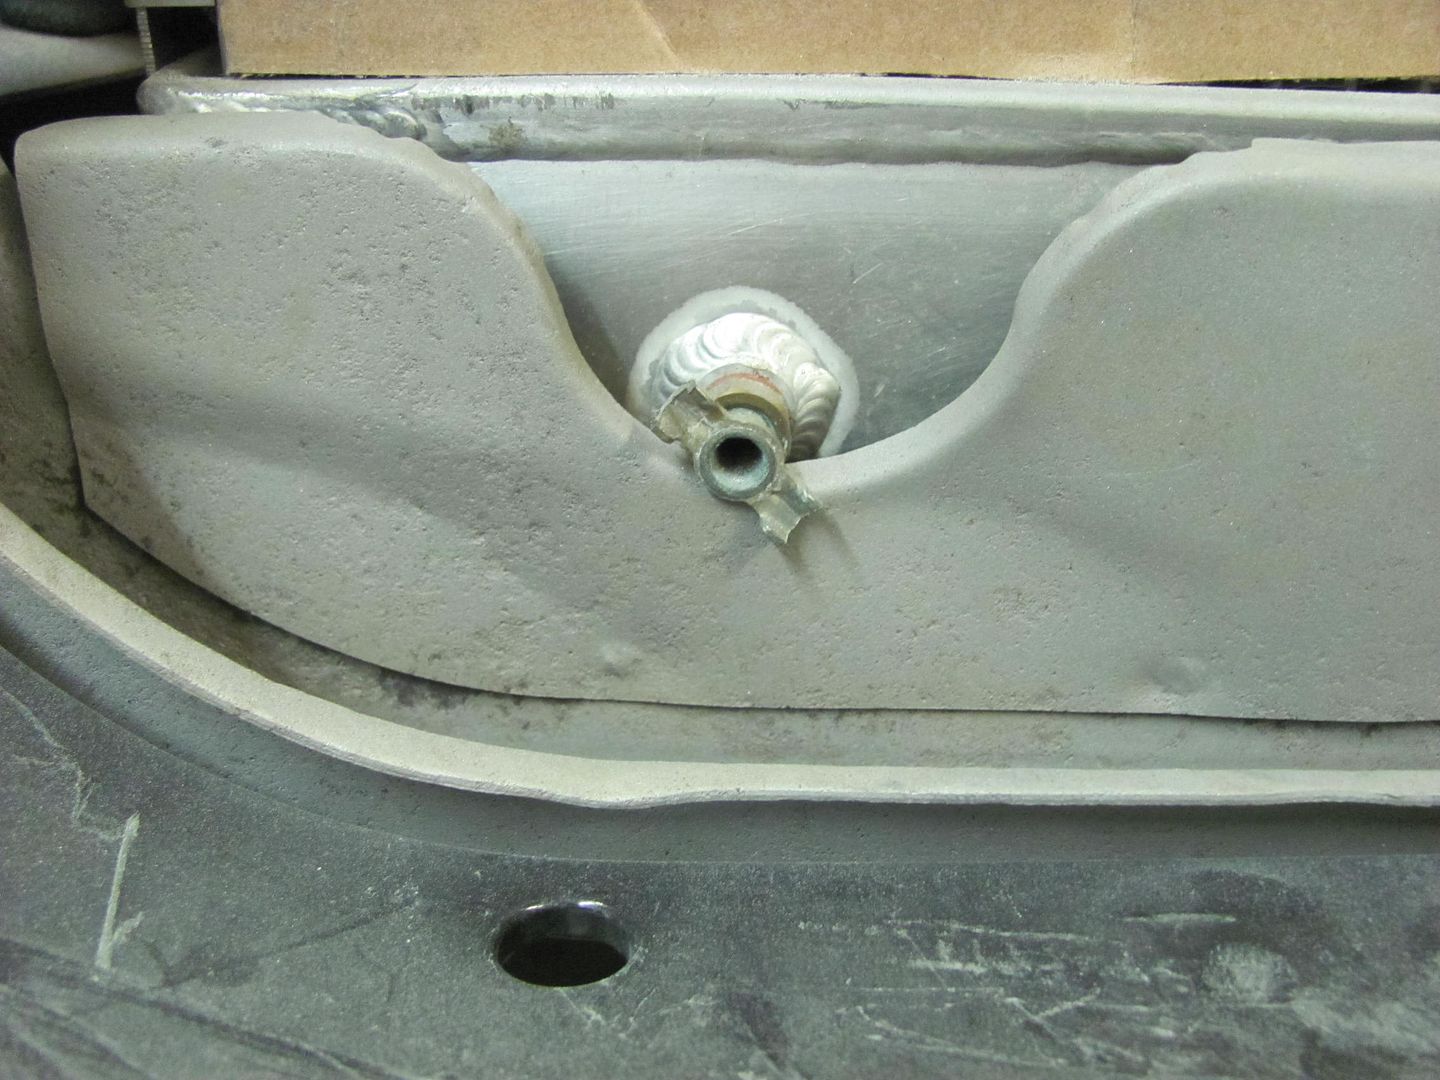 So this will be next on the list, cutting out a new one with a bit better fitment.
__________________
Robert |
|
|
|
|
02-15-2015, 12:10 AM
|
#366 |
|
Senior Member
Join Date: Mar 2011
Location: West Plains, Missouri
Posts: 7,553
|
Re: 55 Wagon Progress
Brace came out really nice, young man is doing some great work...Jim
__________________
my build thread: http://67-72chevytrucks.com/vboard/s...d.php?t=459839 Jimbo's long bed step build:http://67-72chevytrucks.com/vboard/s...t=464626<br /> |
|
|
|
|
02-15-2015, 10:14 AM
|
#367 |
|
Senior Member
Join Date: Jul 2012
Location: Oblong, Illinois
Posts: 7,017
|
Re: 55 Wagon Progress
You guys make a great team.
|
|
|
|
|
02-16-2015, 08:15 PM
|
#368 |
|
Registered User
Join Date: Jan 2013
Location: Leonardtown, MD
Posts: 1,634
|
Re: 55 Wagon Progress
Thanks for the comments guys... We had an early schedule today to try and miss the weather.. As I still hadn't finished blocking the front end, rather than pull the core support just yet, Kyle will start on the rear of the wagon in wrapping up some details there. Before pulling the tailgate, there was one gap that was inconsistent, so I gave him a hand with the rework before he got welding..
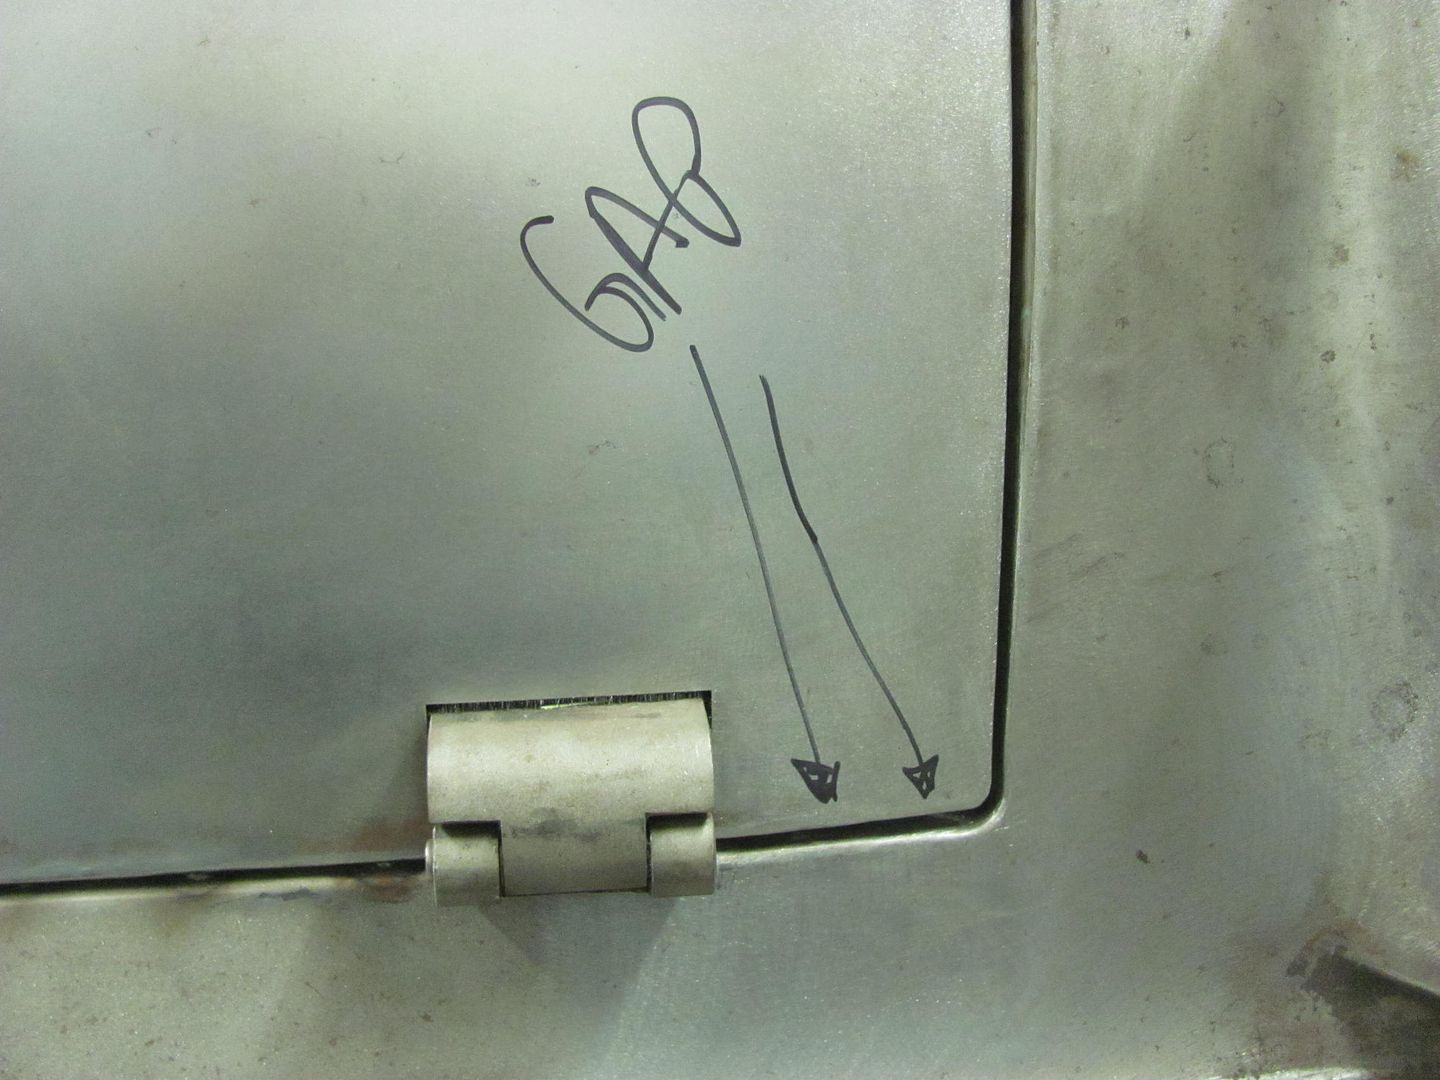 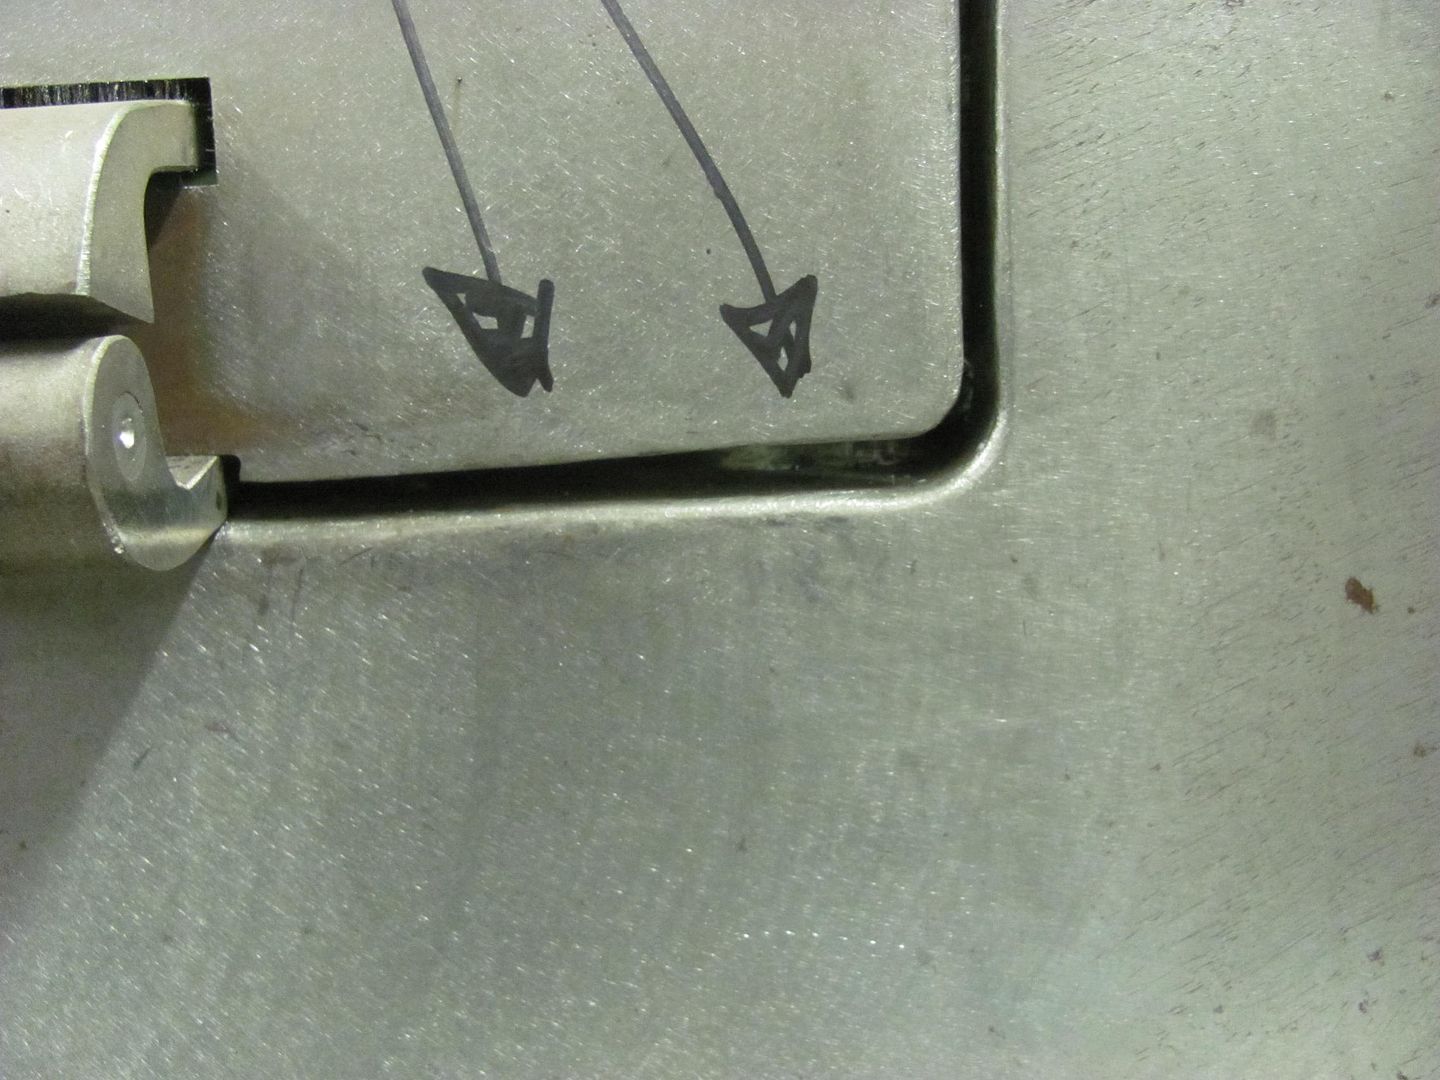 First to unfold the flange a bit... 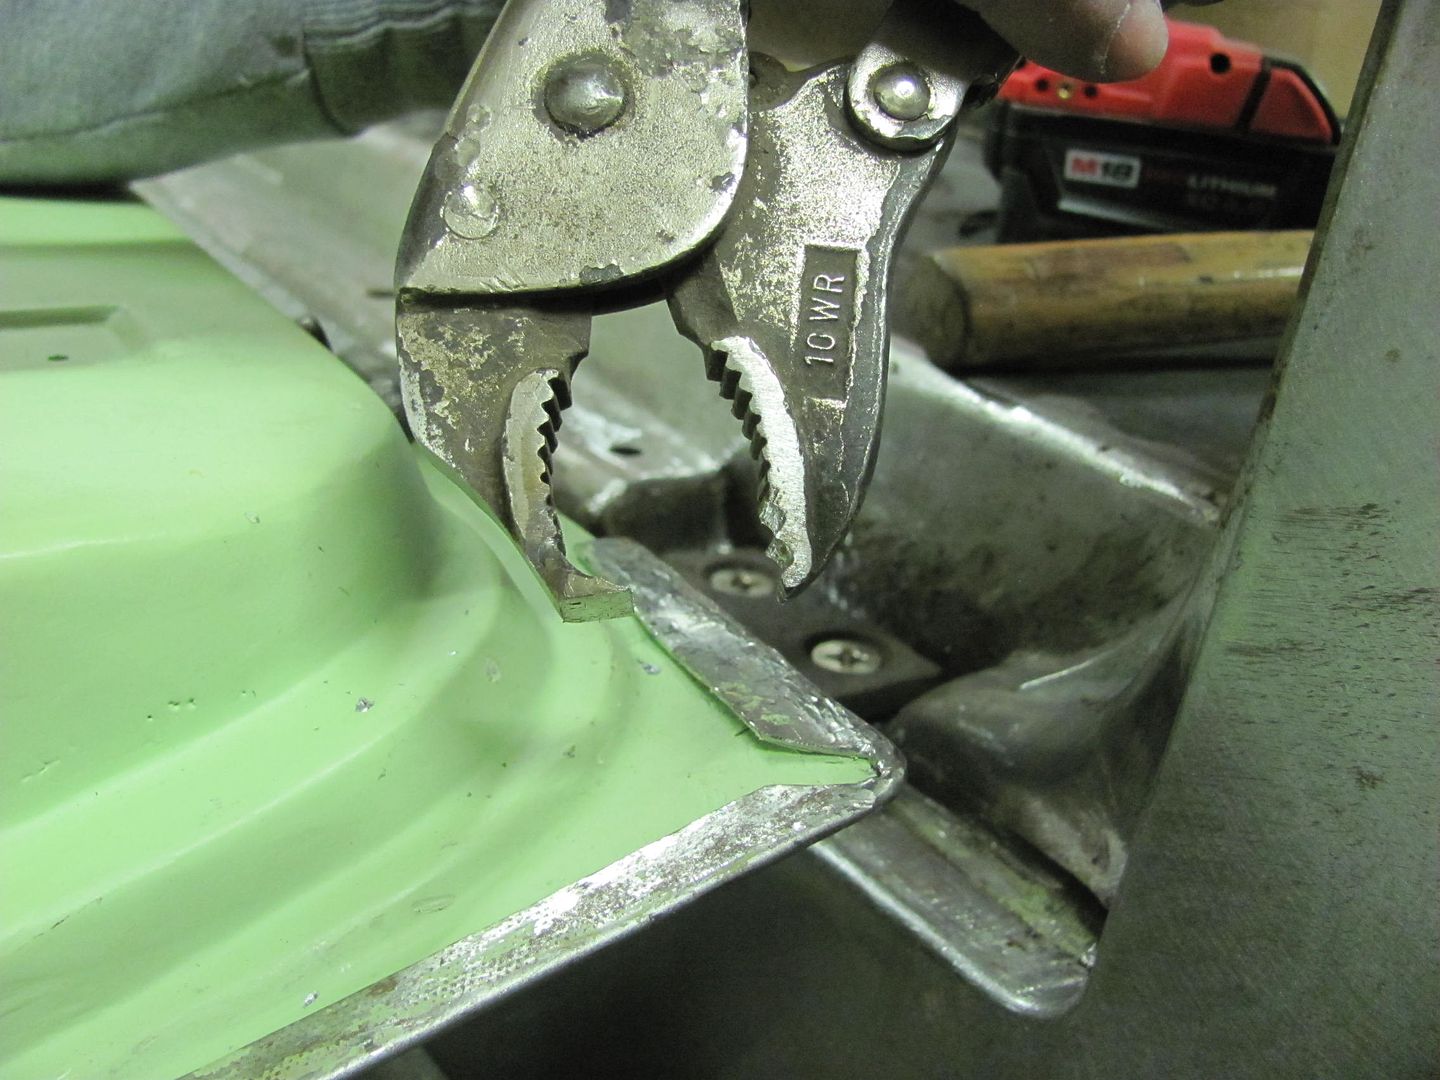 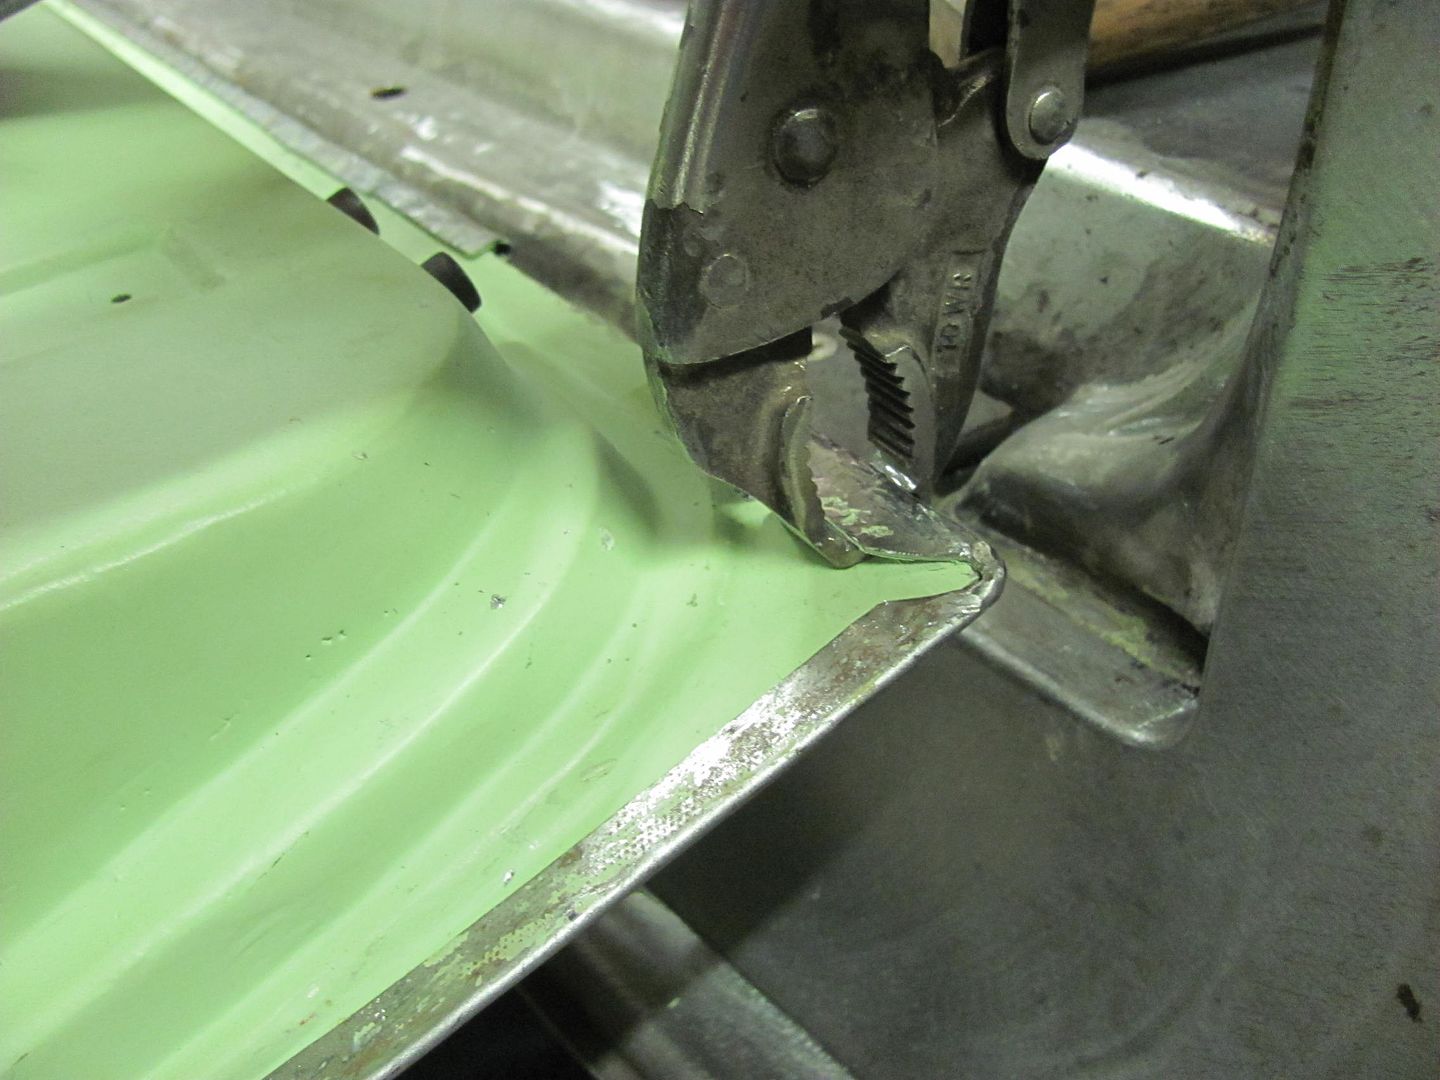 Next, some 14 gauge steel was cut out and a strengthening bend added to use for some friendly persuasion.. 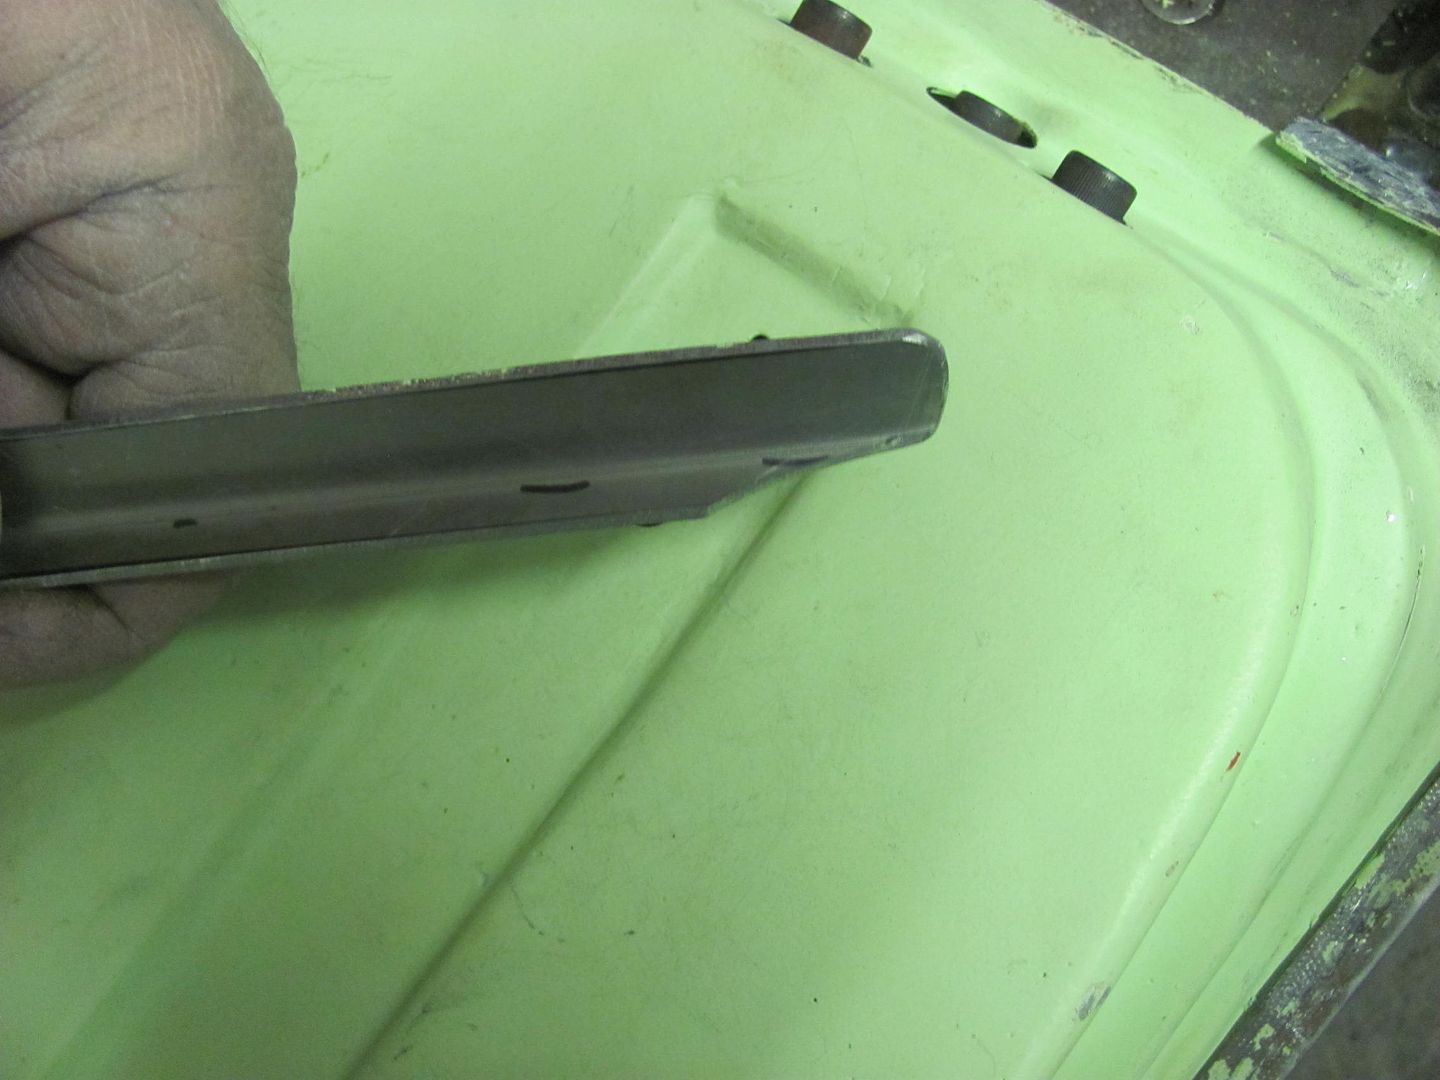 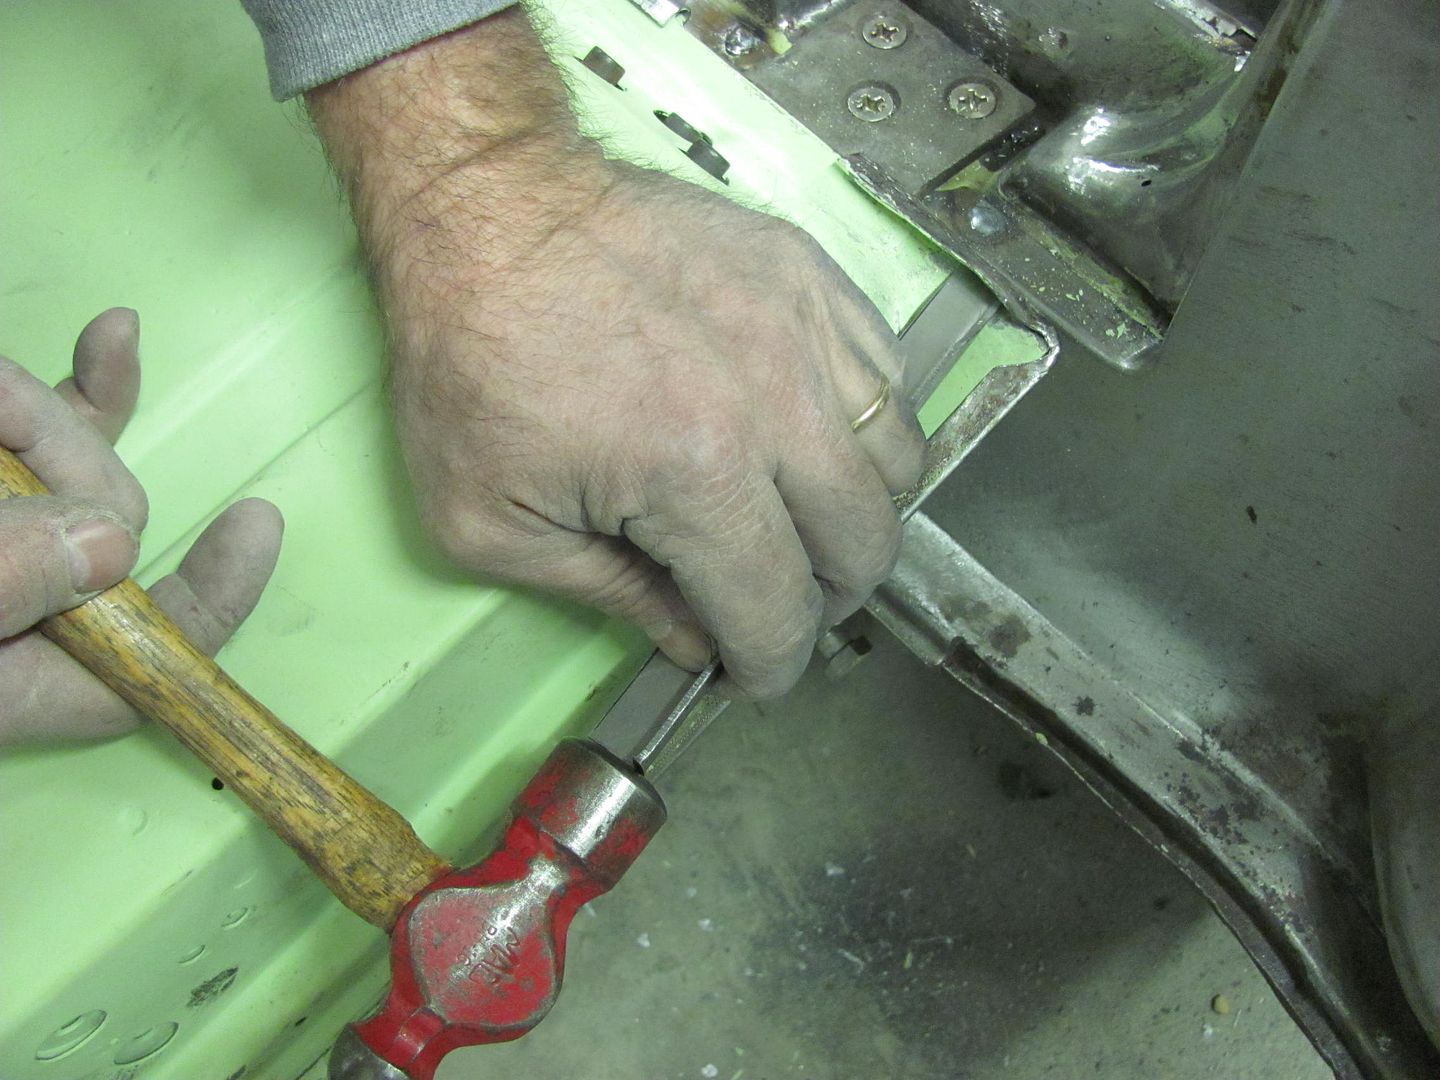 Refolded... 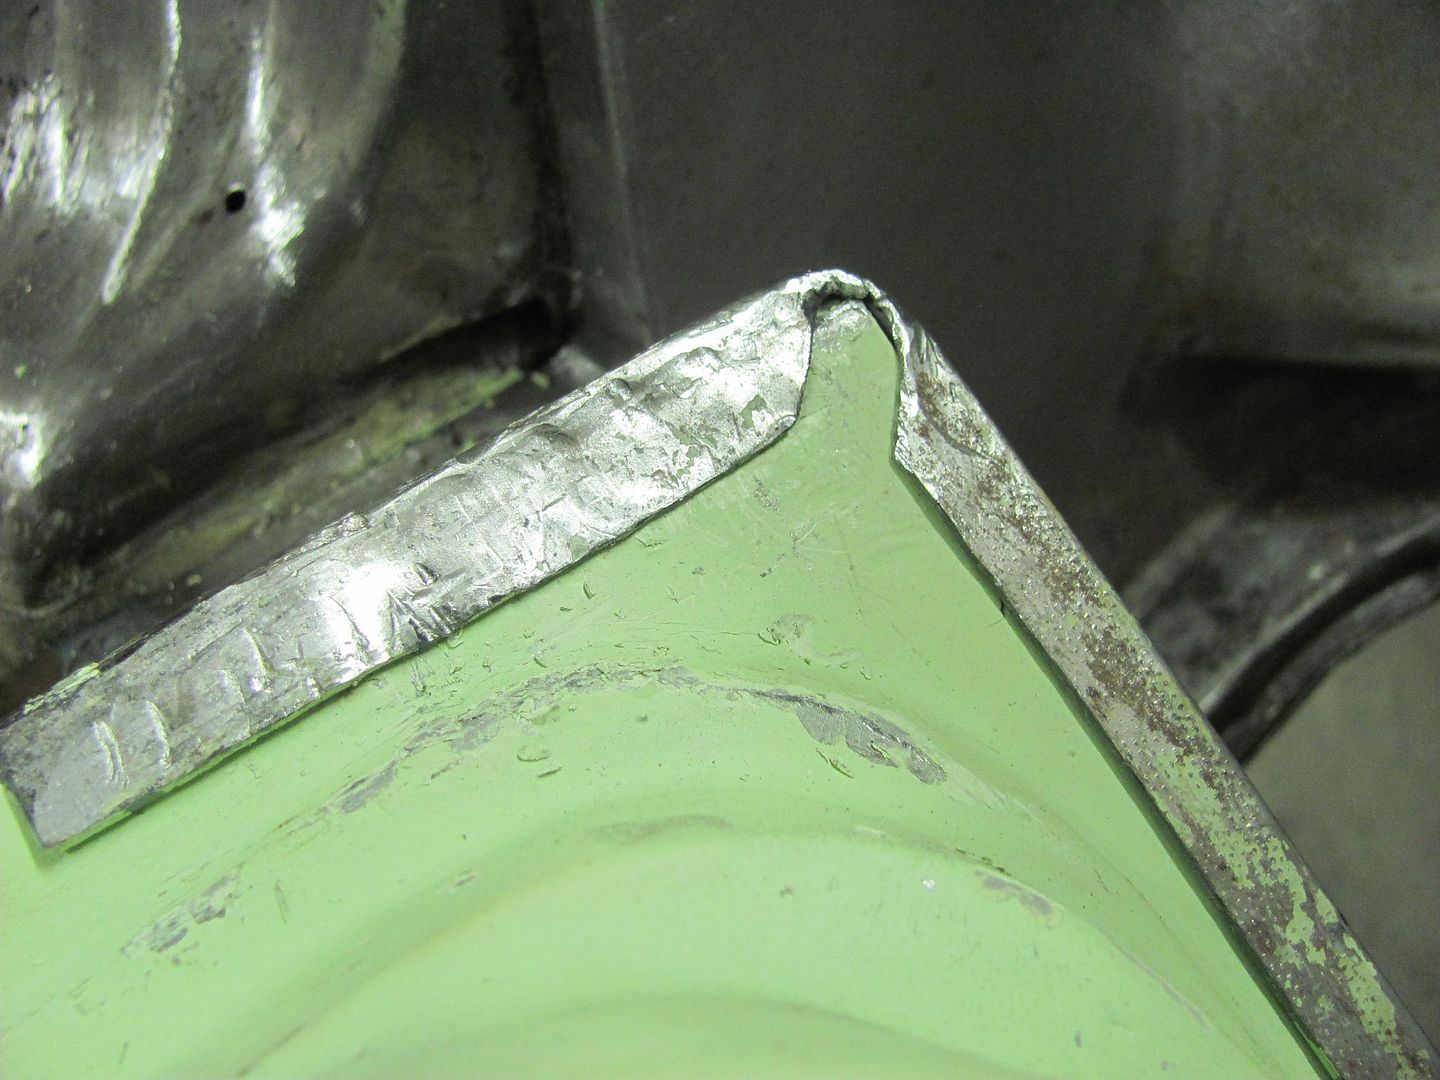 For comparison, before: After: 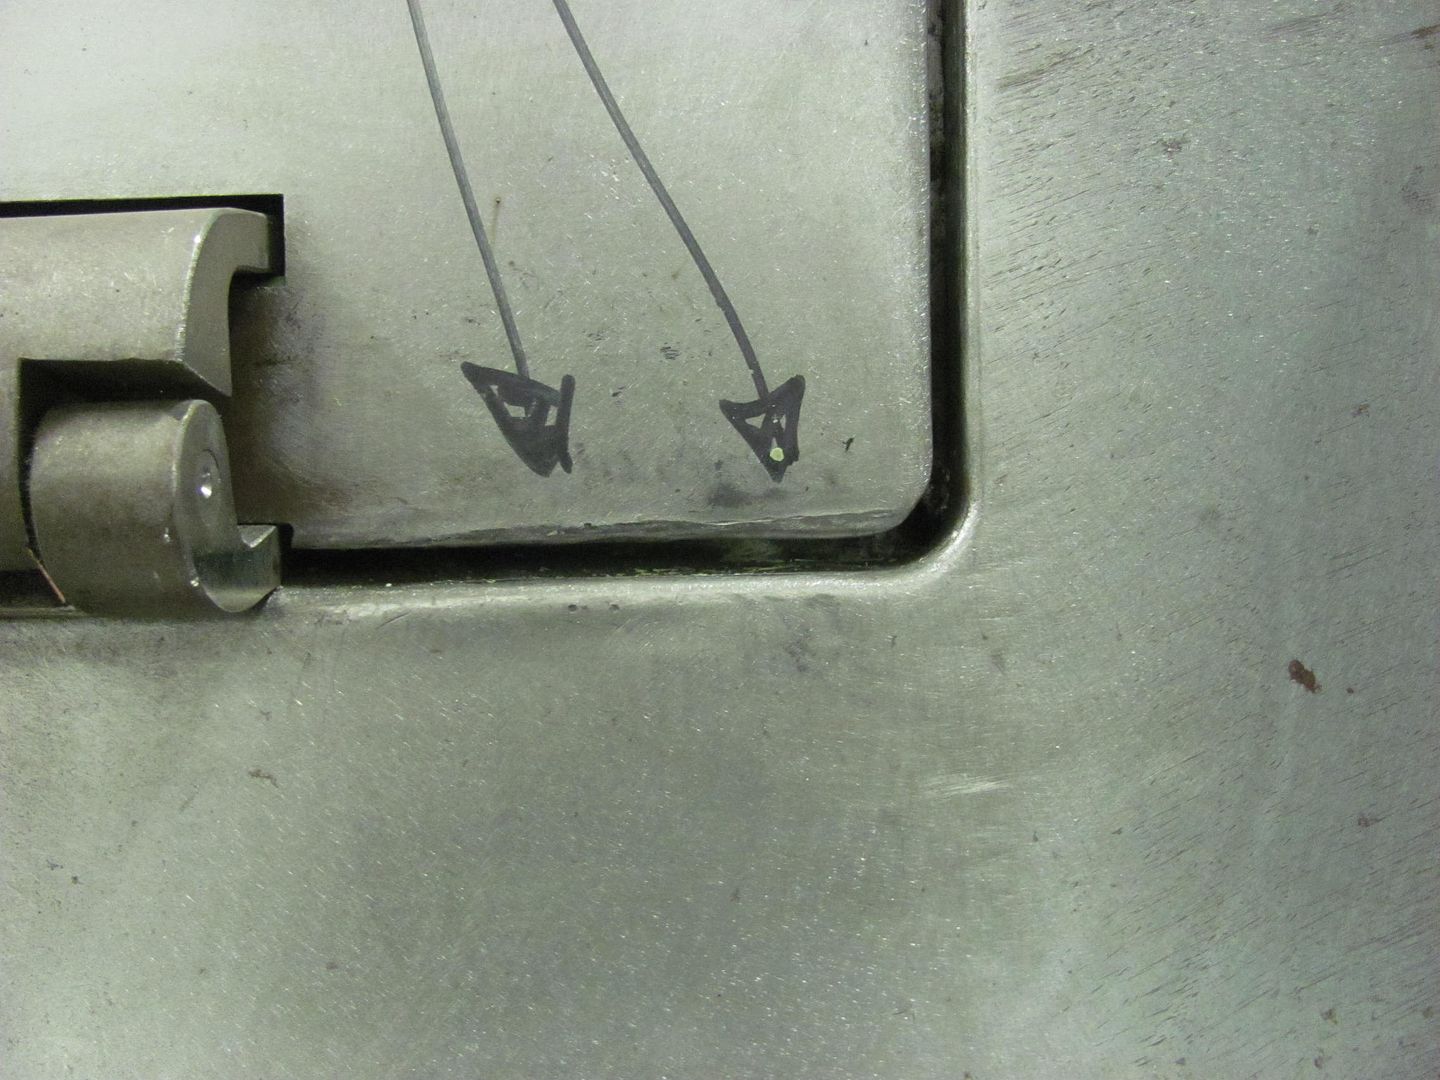 Then we tweaked the twist of the tailgate for good fitment to the opening and Kyle added three plug welds down each side to lock the skin to the inner tail gate. 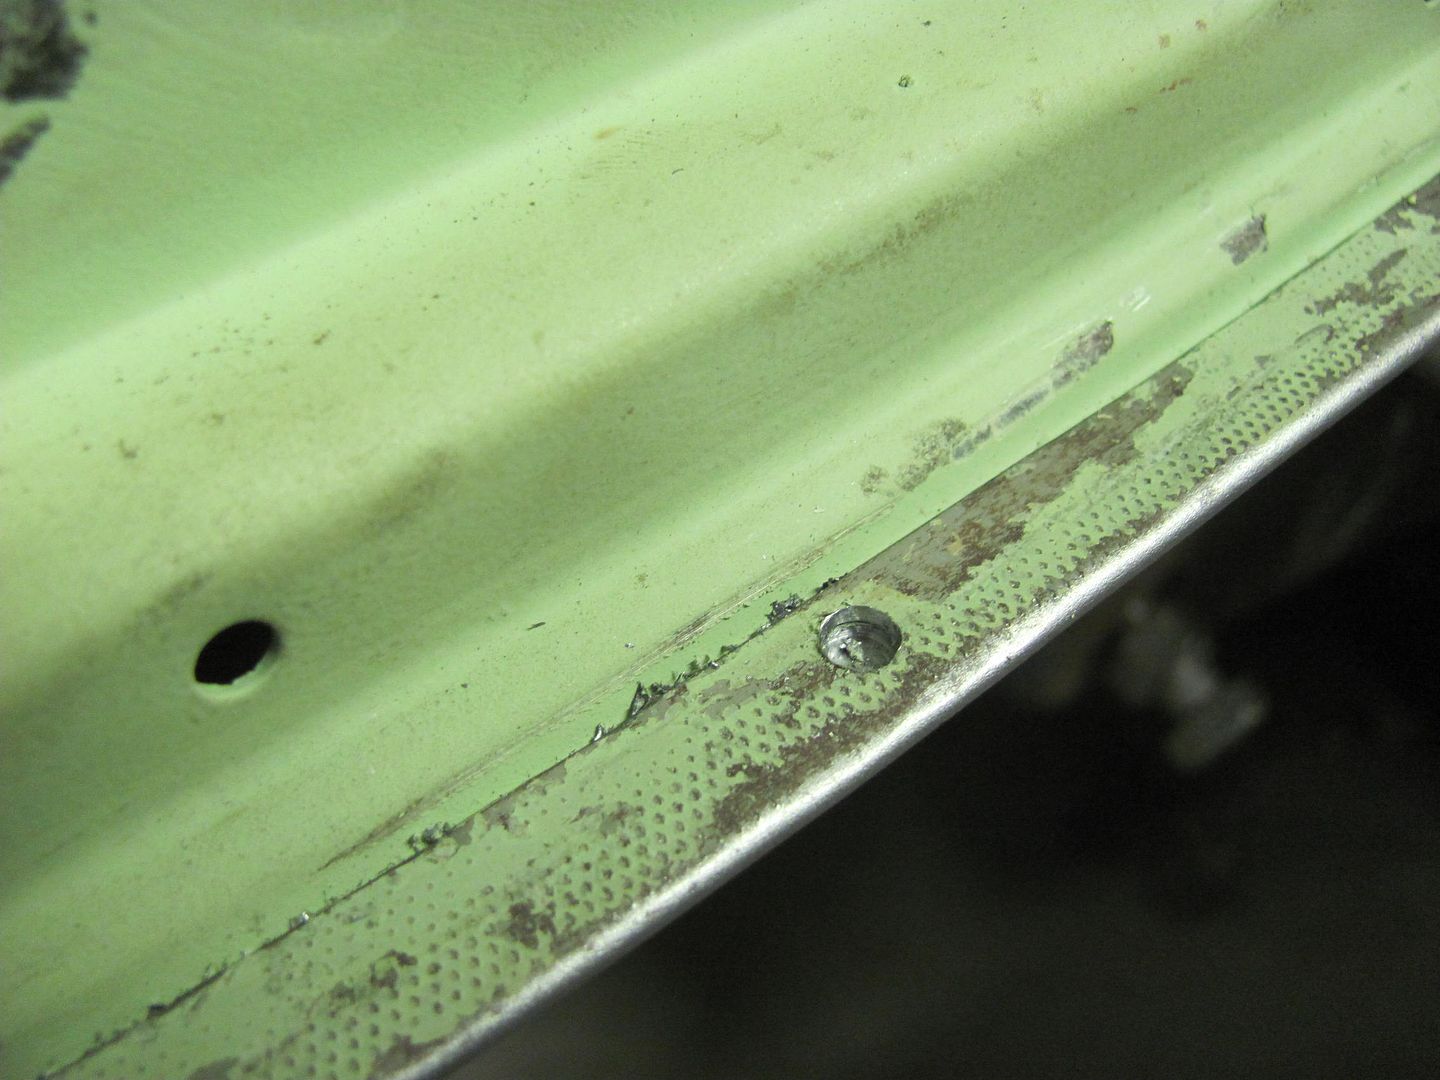 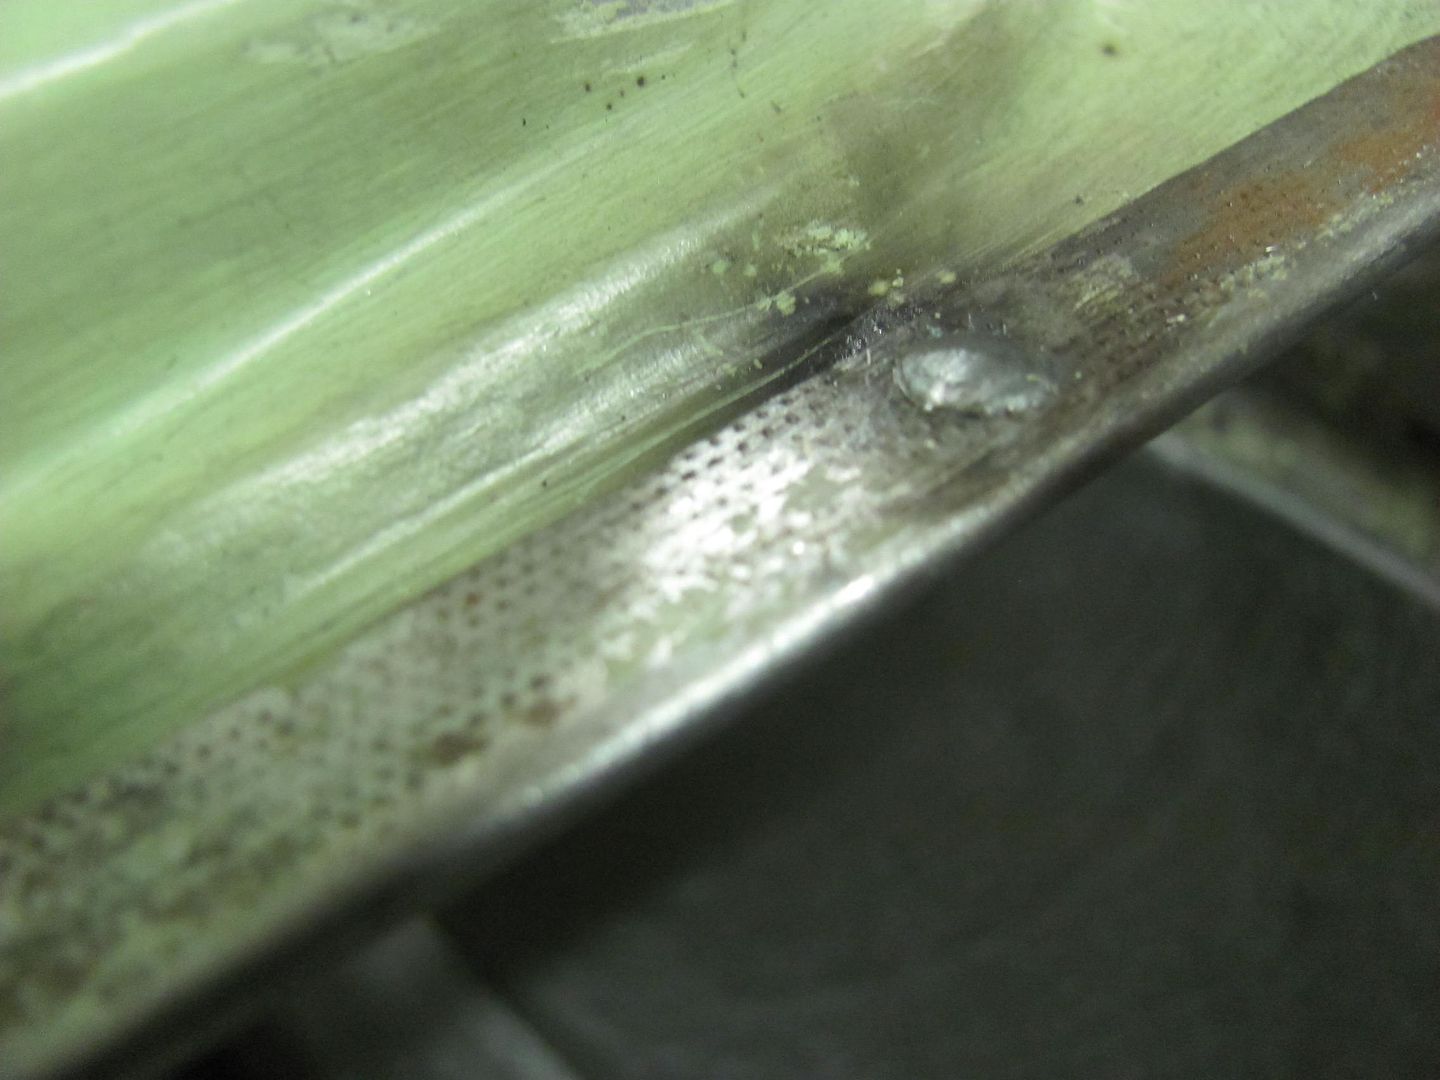 ...Then we removed the tail gate so he could finish the plug welds for the top flange of the tail pan, I had only tacked it in place when the tailpan was installed, so this should help check off another item from the list...... Meanwhile I continued blocking out the front end..  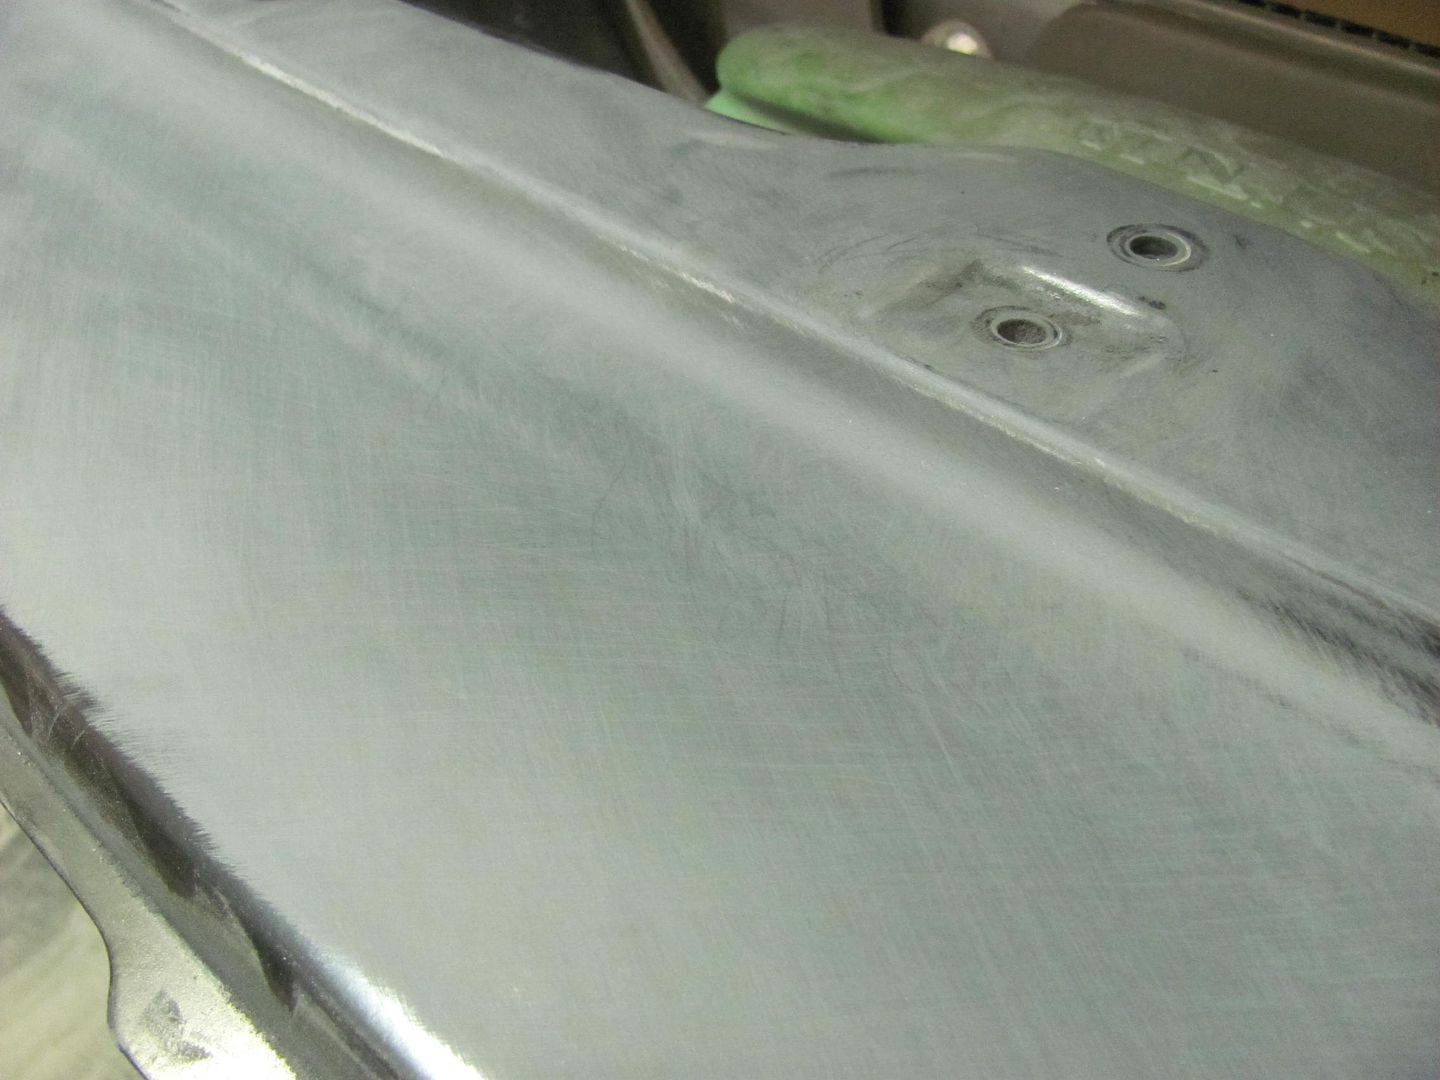 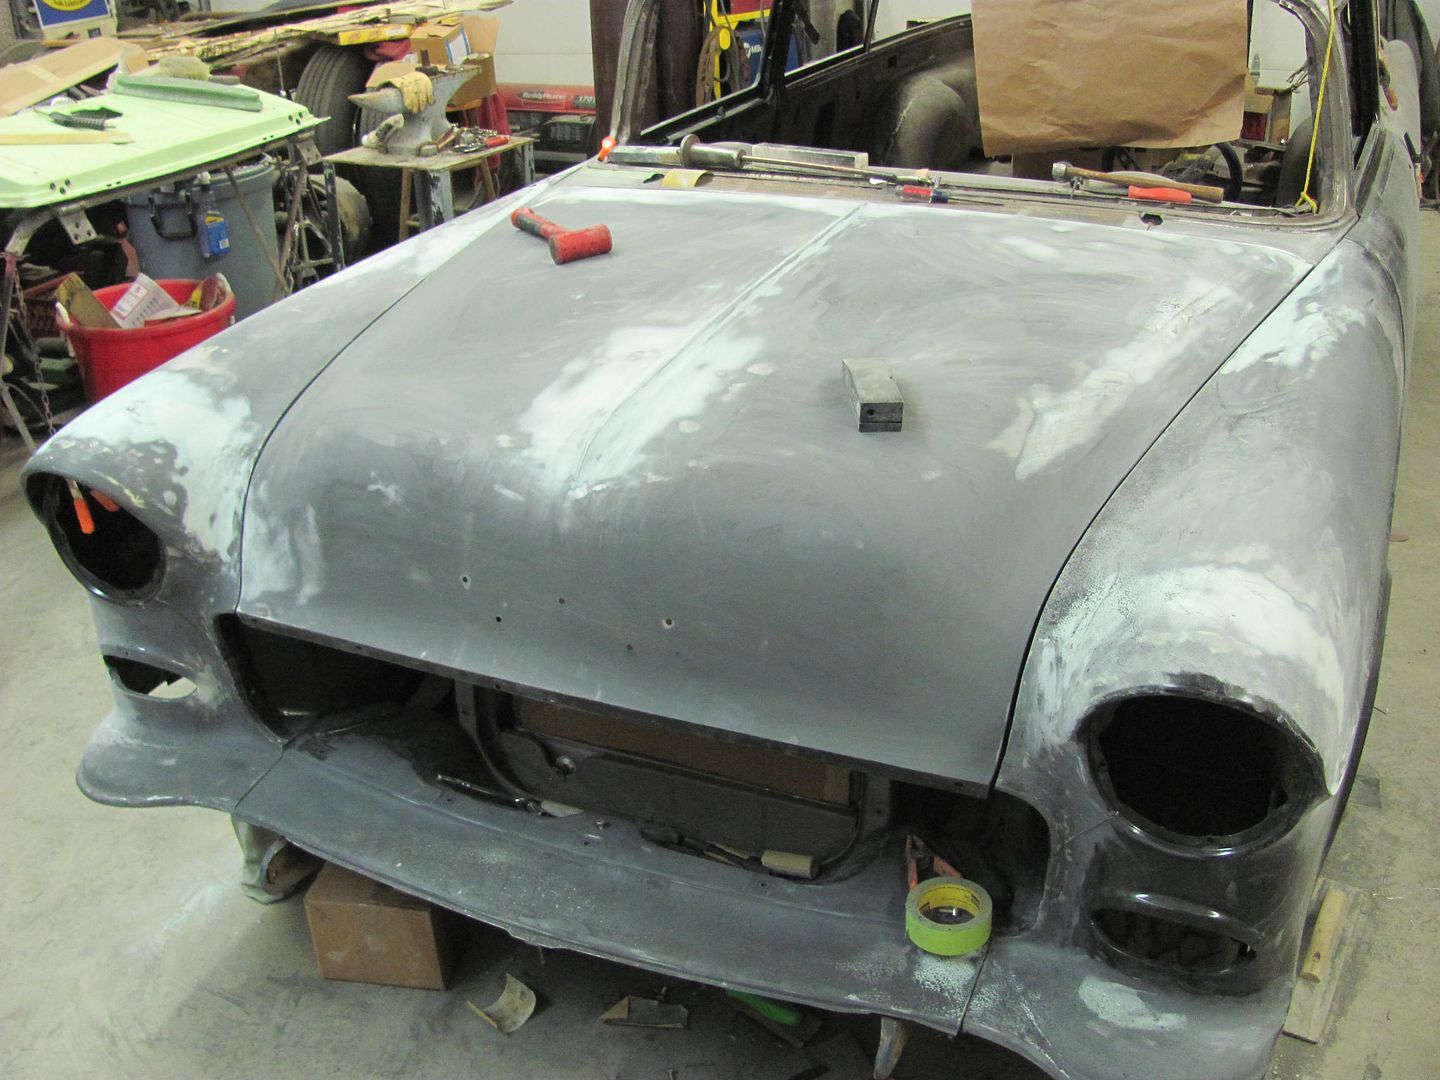 
__________________
Robert |
|
|
|
|
02-16-2015, 09:54 PM
|
#369 |
|
Senior Member
Join Date: Jul 2012
Location: Oblong, Illinois
Posts: 7,017
|
Re: 55 Wagon Progress
Wow, this is going to be about the most perfect 55 wagon on the planet. Nice process on the tail gate gap...I am learning a lot following along.
|
|
|
|
|
02-18-2015, 11:32 PM
|
#370 |
|
Registered User
Join Date: Jan 2013
Location: Leonardtown, MD
Posts: 1,634
|
Re: 55 Wagon Progress
Thanks!
Well Kyle skipped out on me tonight, something about a birthday and his parents taking him out to dinner.. and here he could have been welding! So I took the opportunity to have dinner with the family, so tonight was a short night... One of the other areas I skipped over at the rear of the wagon was when the tail pan was installed. The factory version with the pinch welded flanges has a gap in the crimp seam for the rear bumper seal: 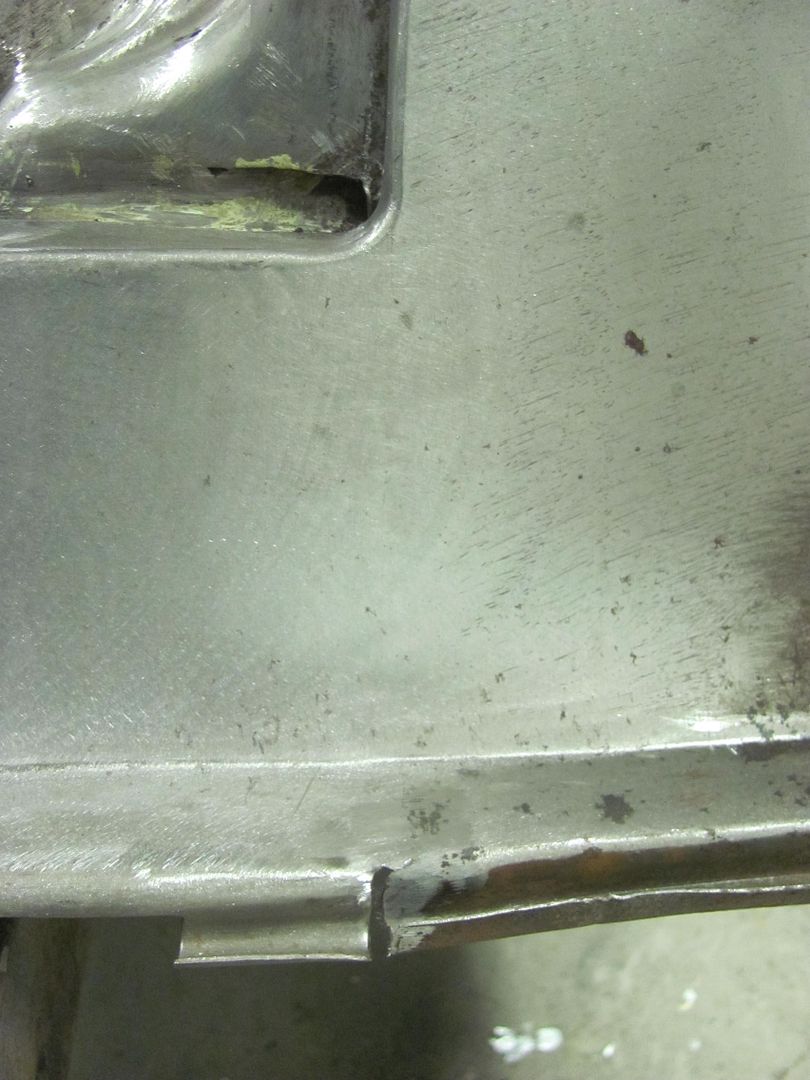 As I got rid of all the pinch weld seams at the rear of the wagon to eliminate those rust traps, the gap at the crimp seam will be filled in. To assist in filling in the wide gap, a piece of copper flat bar is used as a backer.. 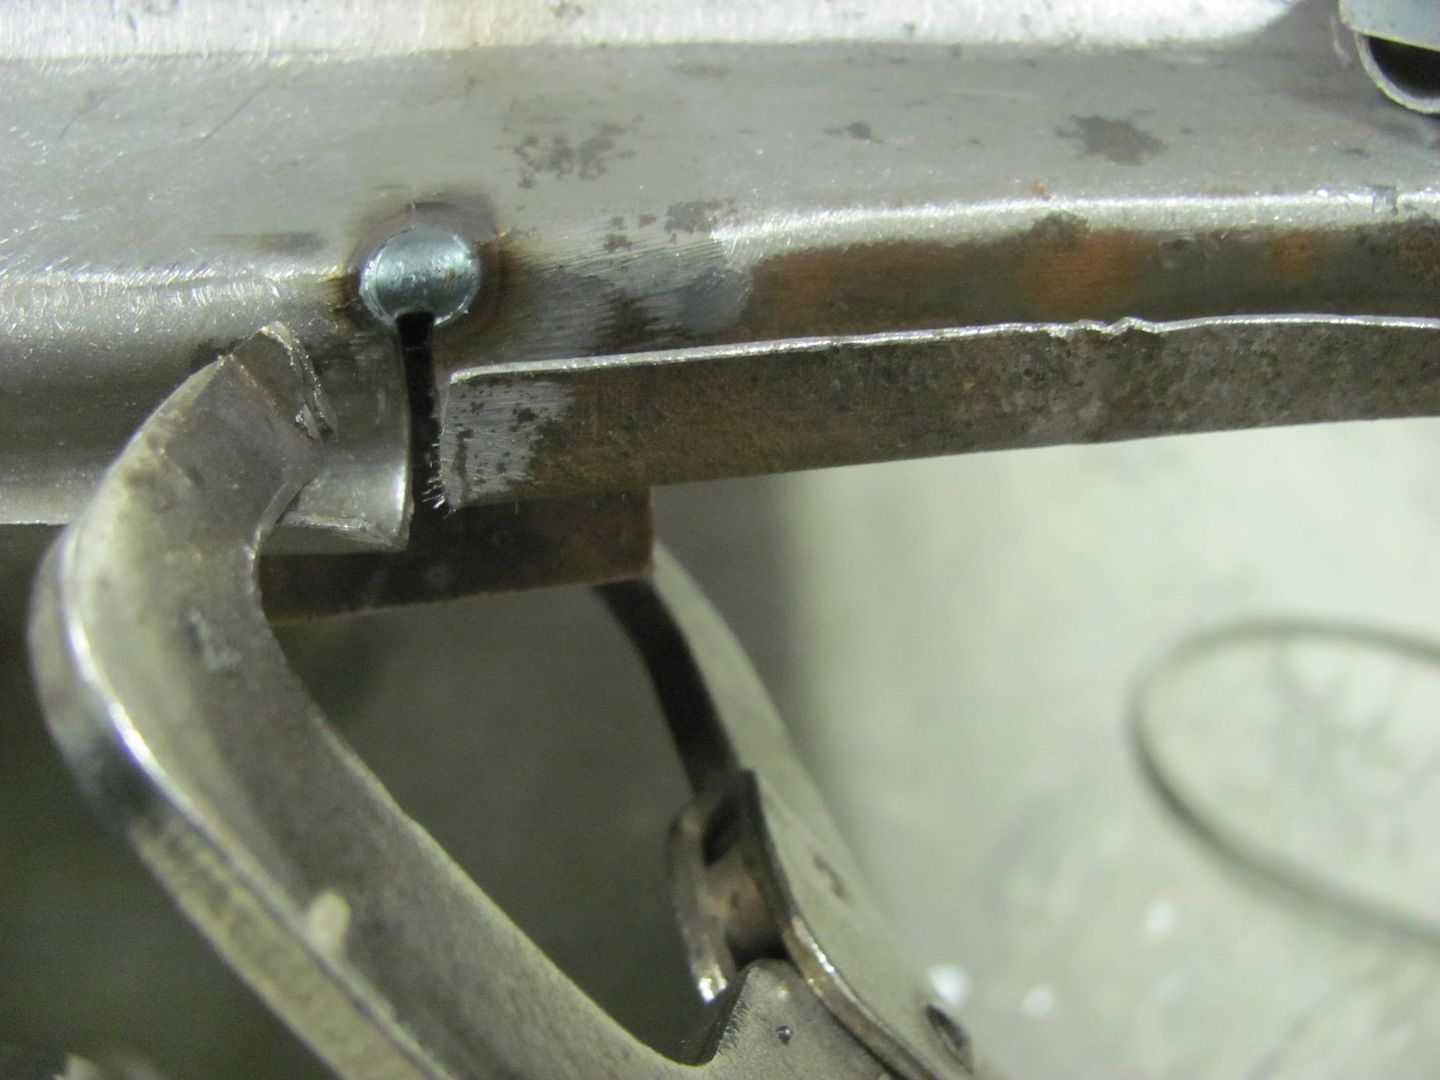 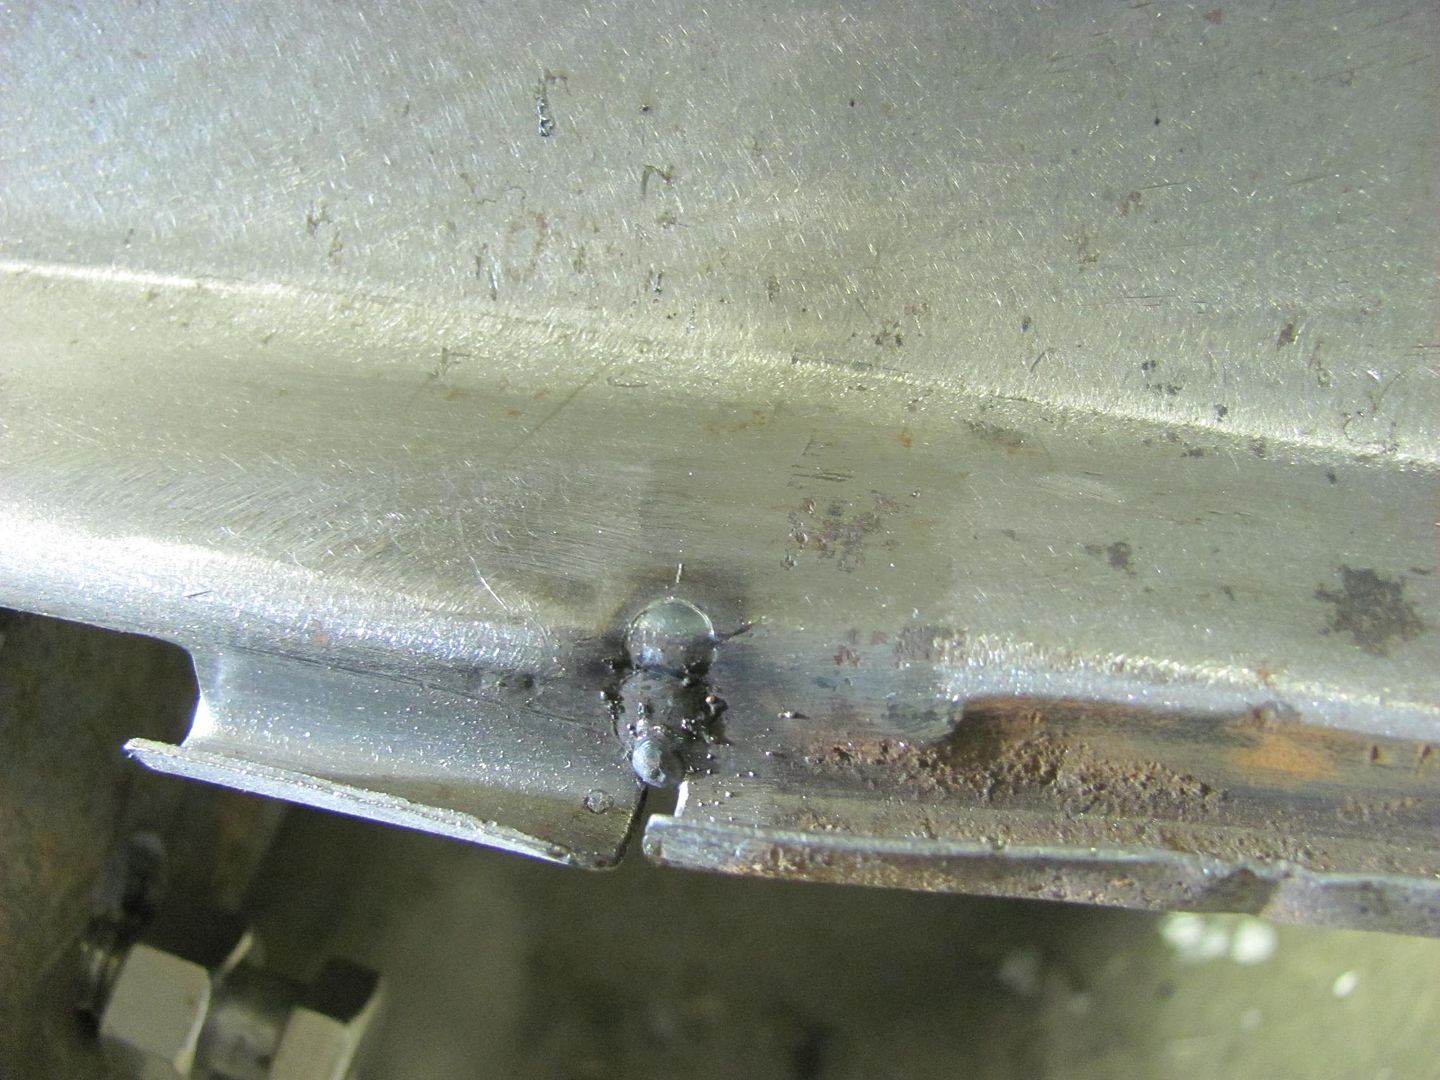 Next, as the reproduction tail pan has a rounded crimp seam and the area on the original quarters is more of a square, we'll add some hammer action here. The remaining piece of the flat bar is clamped in and used as an anvil.. 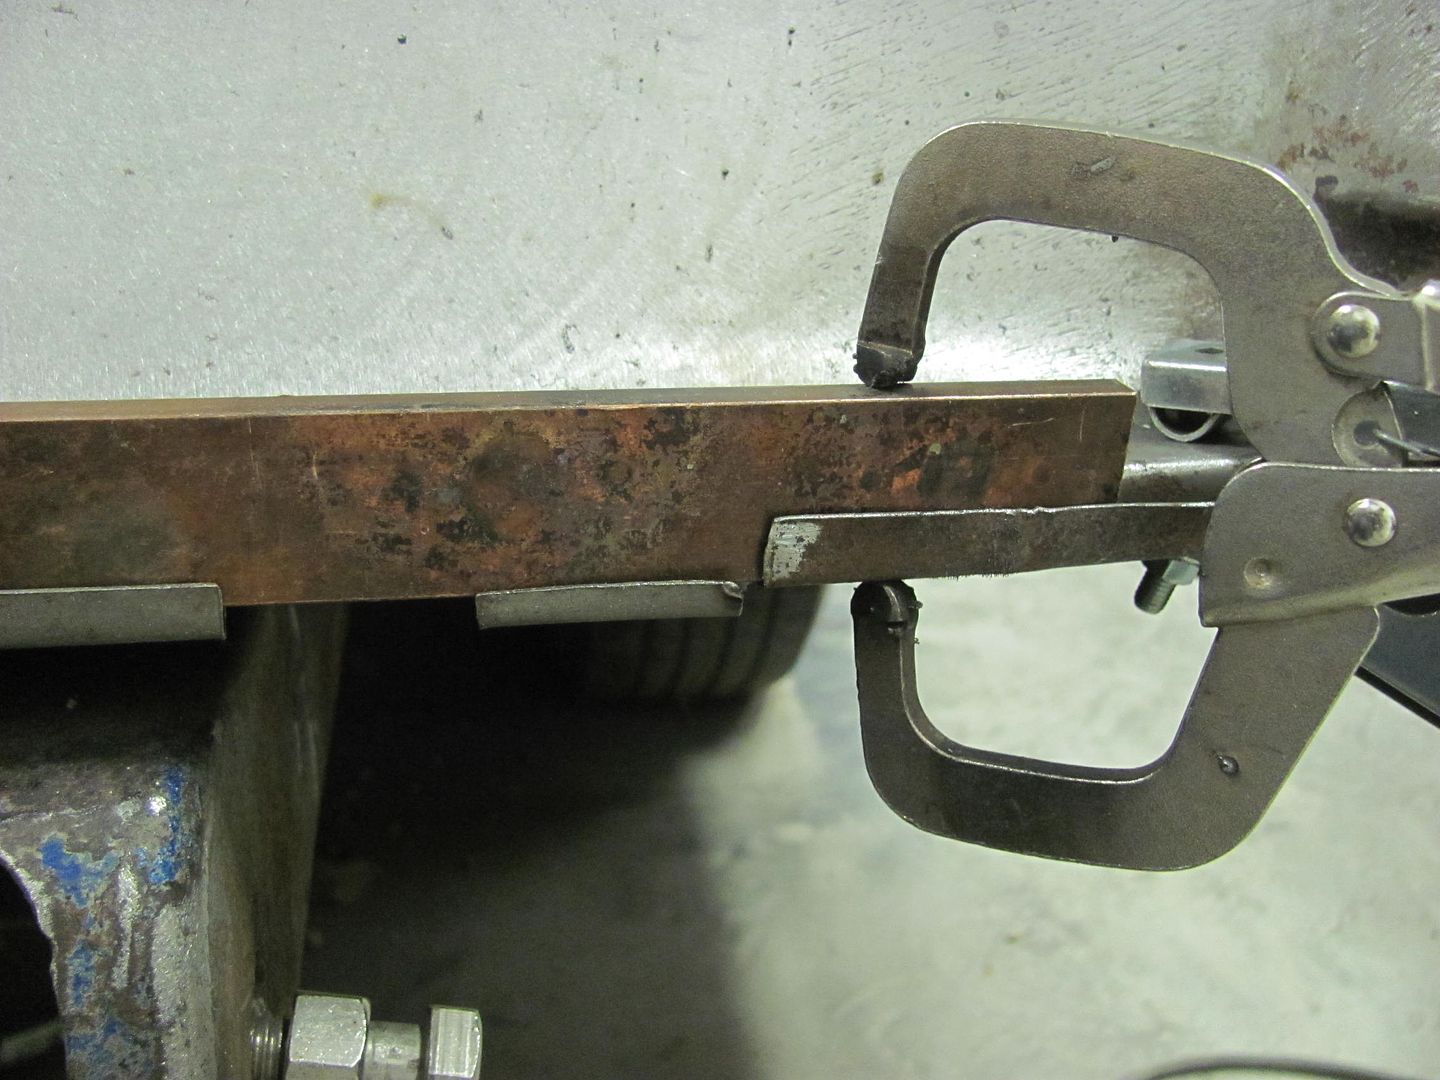 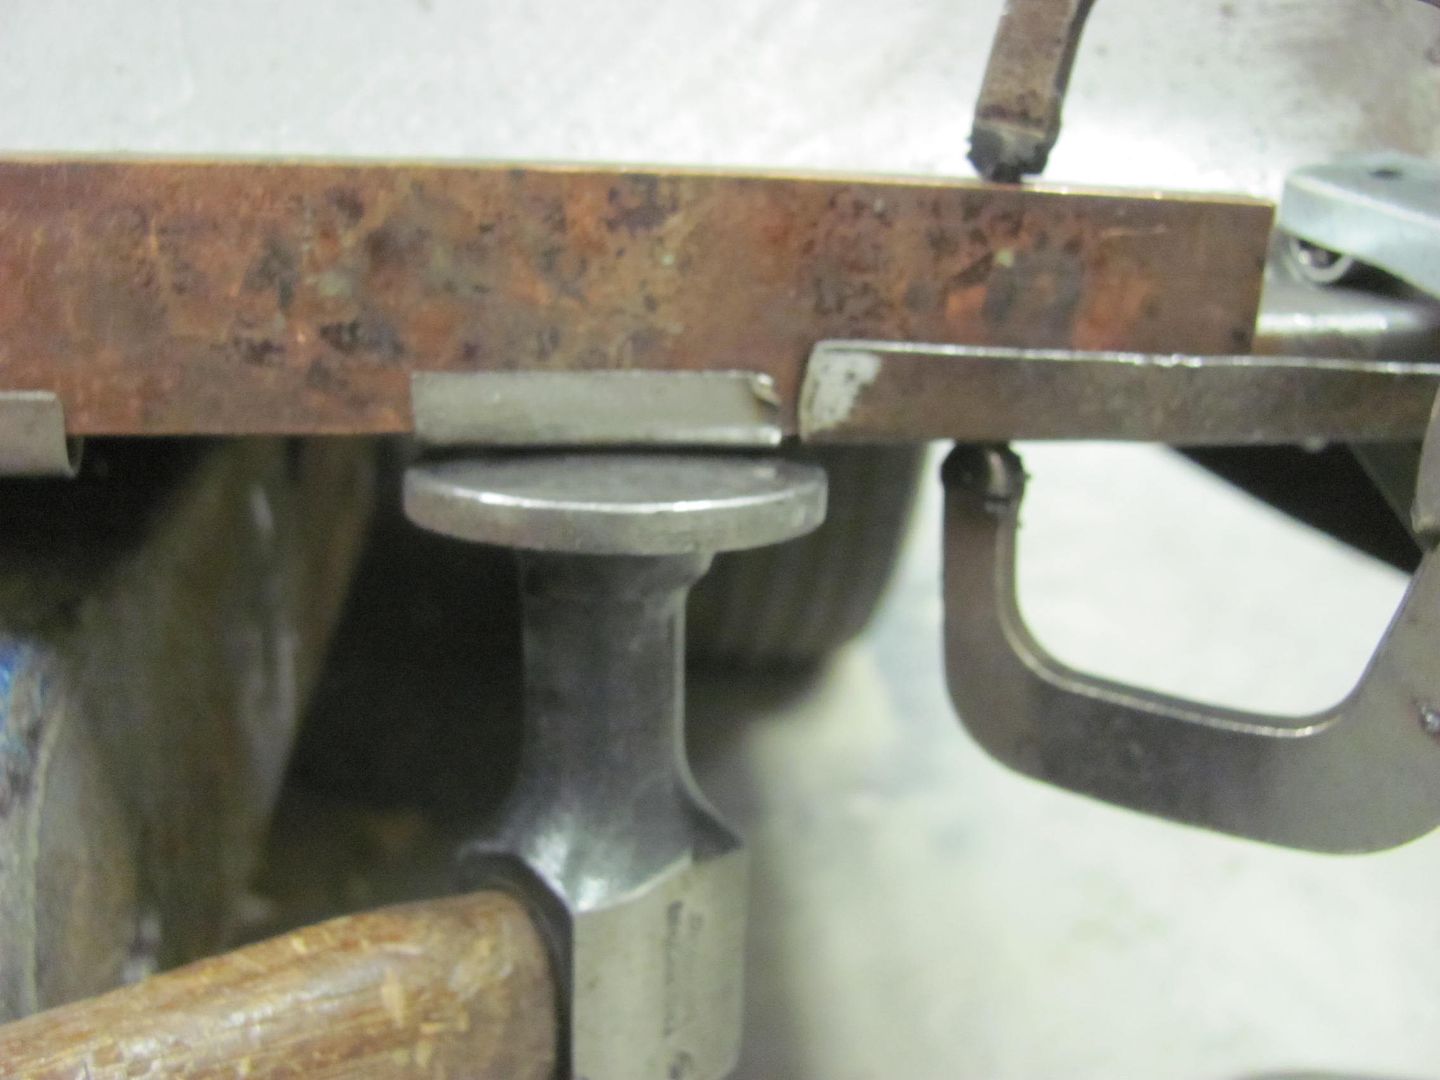 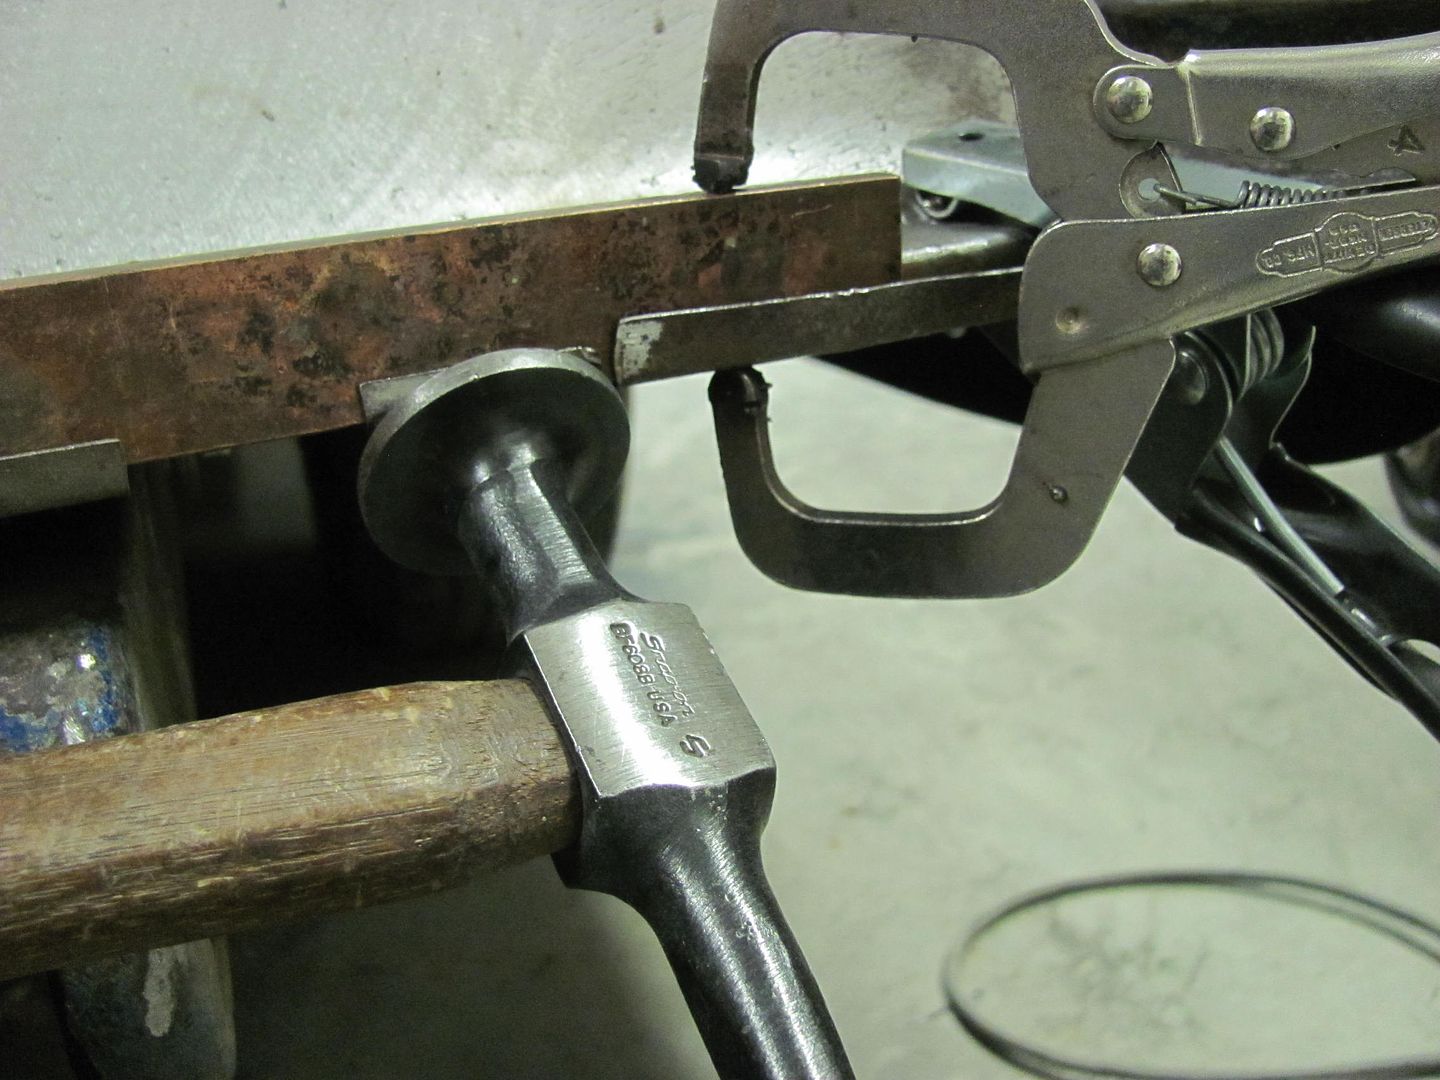 Continuing welding... 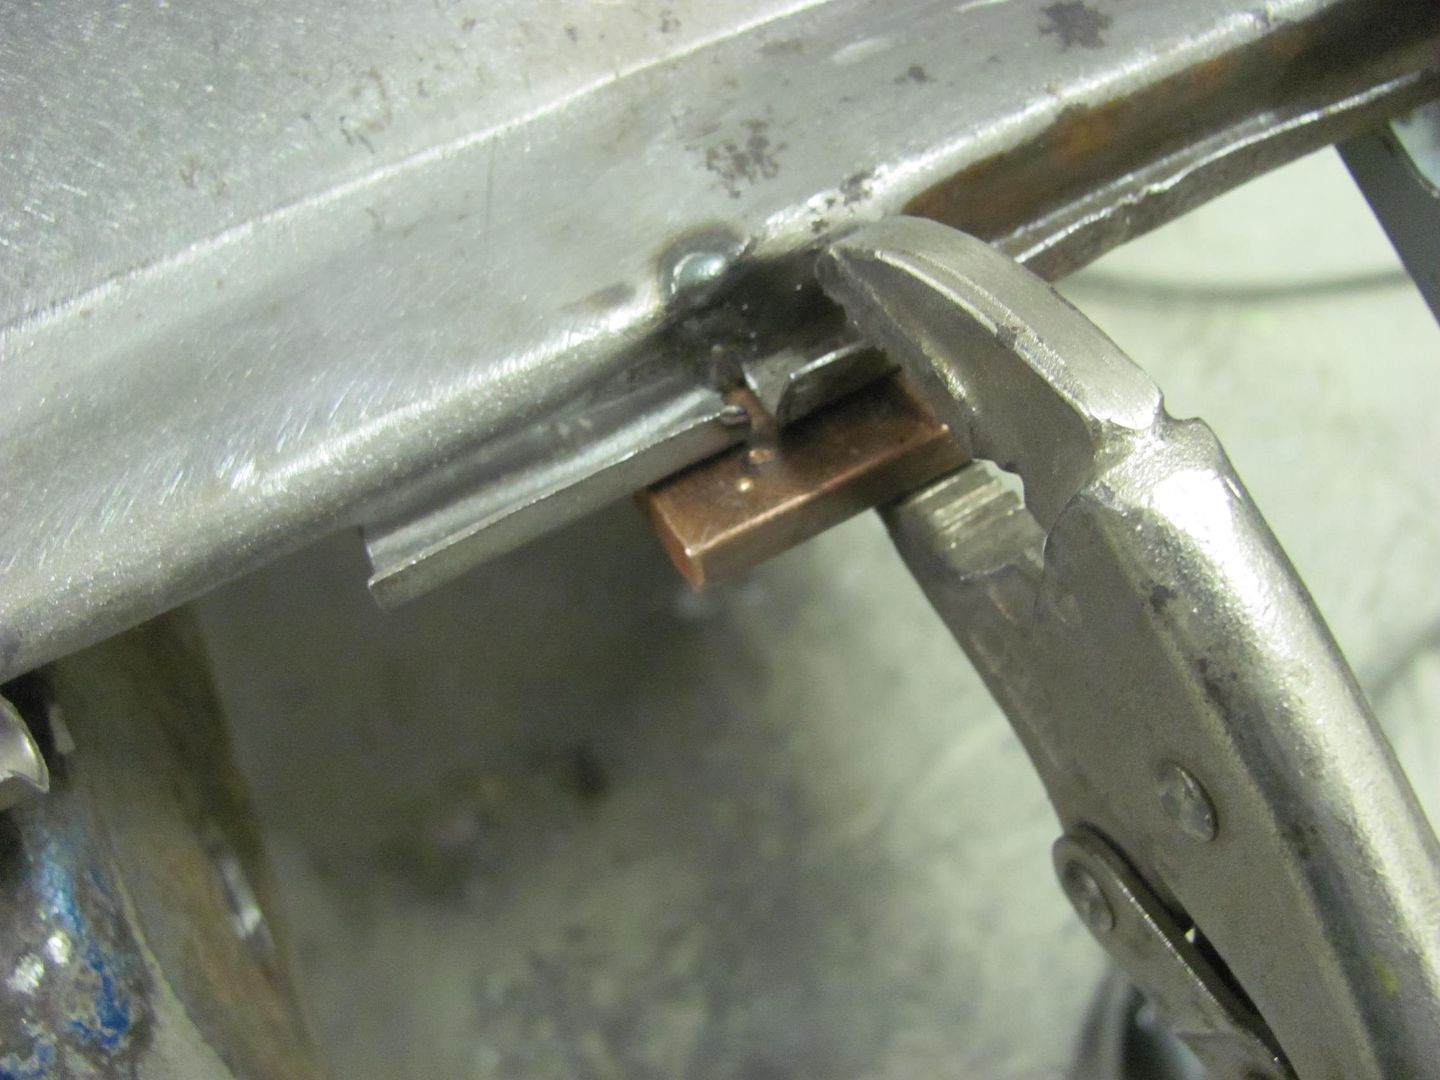 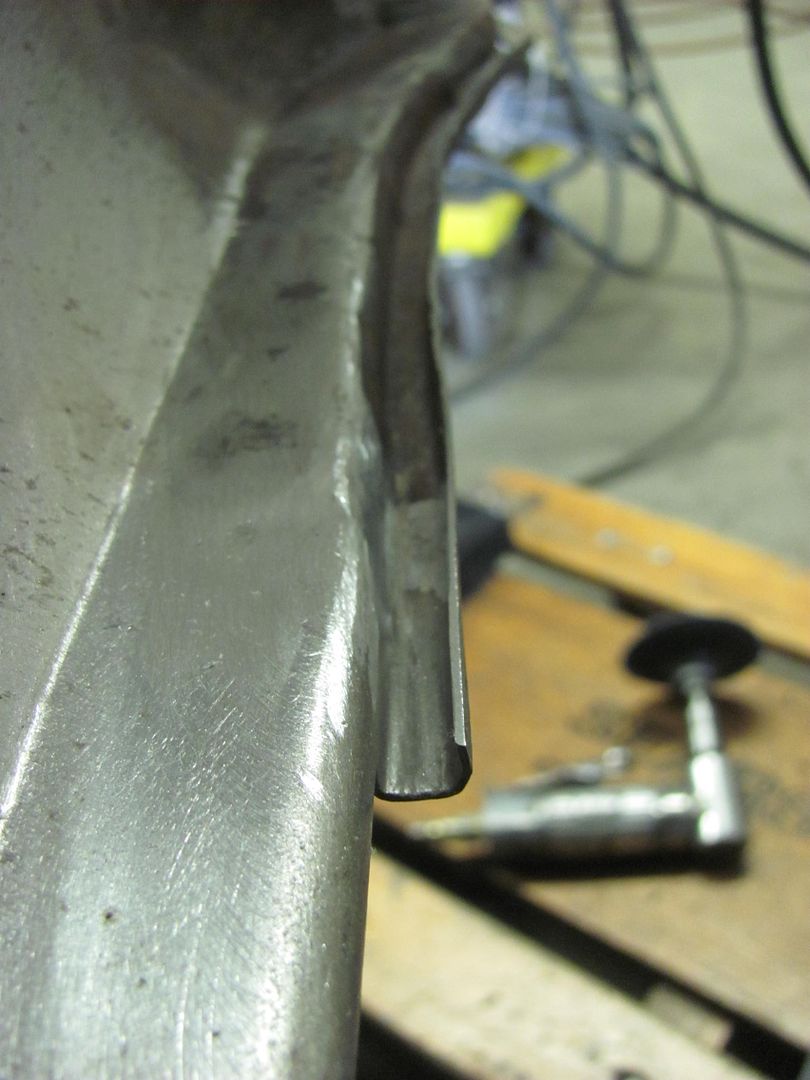 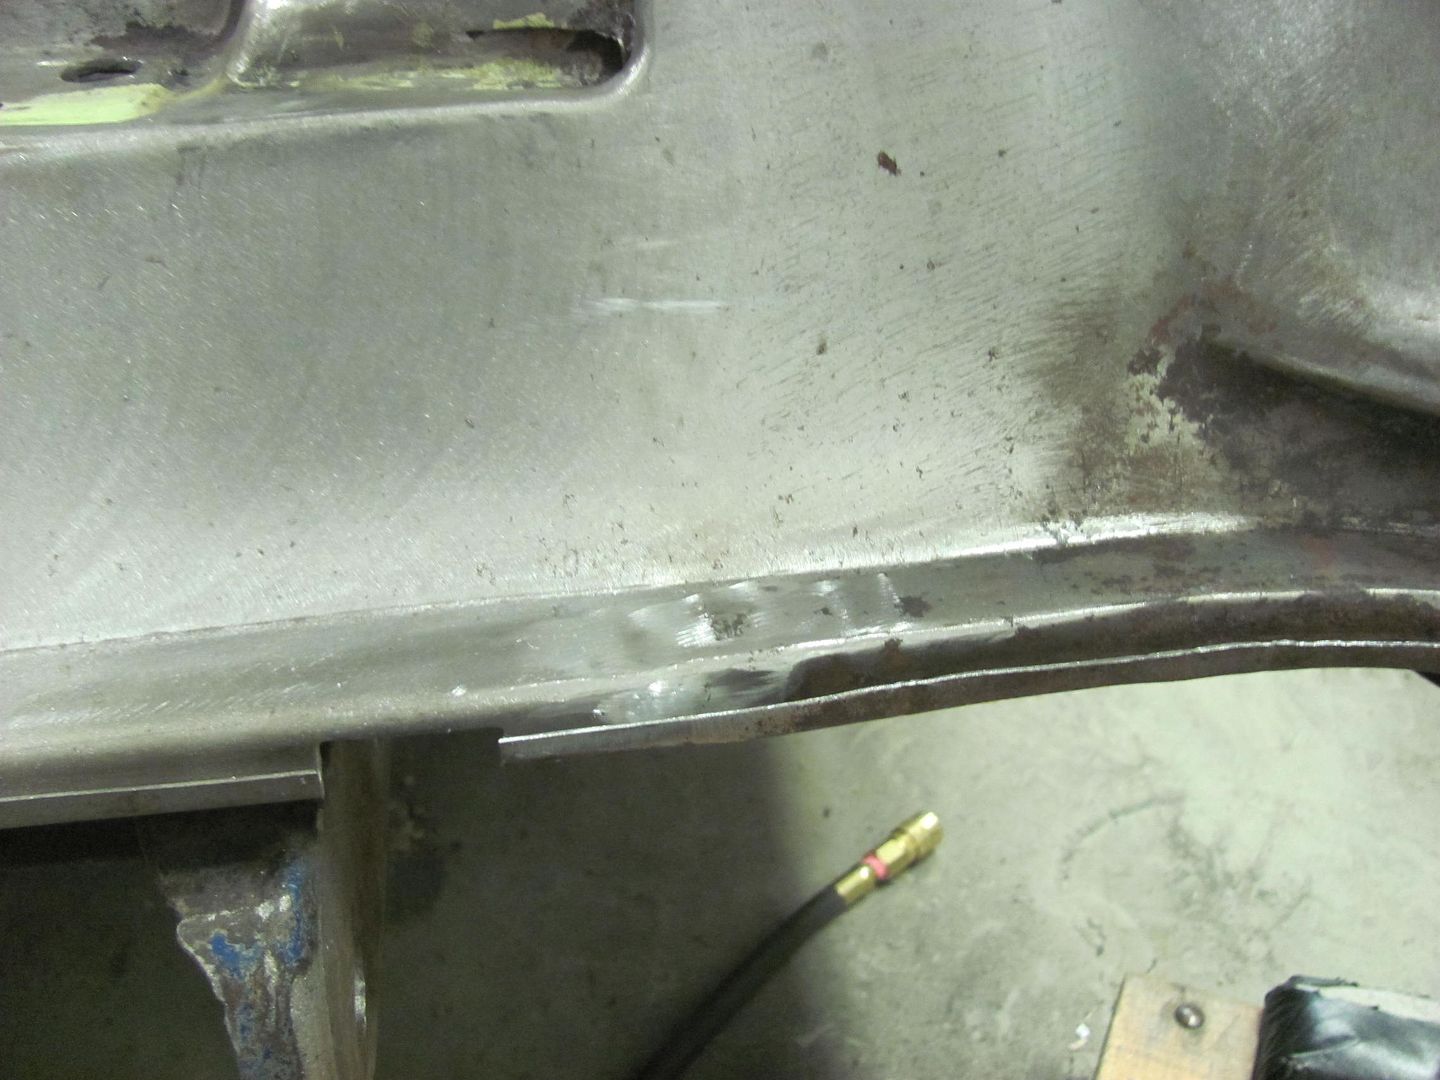 .....and a repeat on the driver's side... 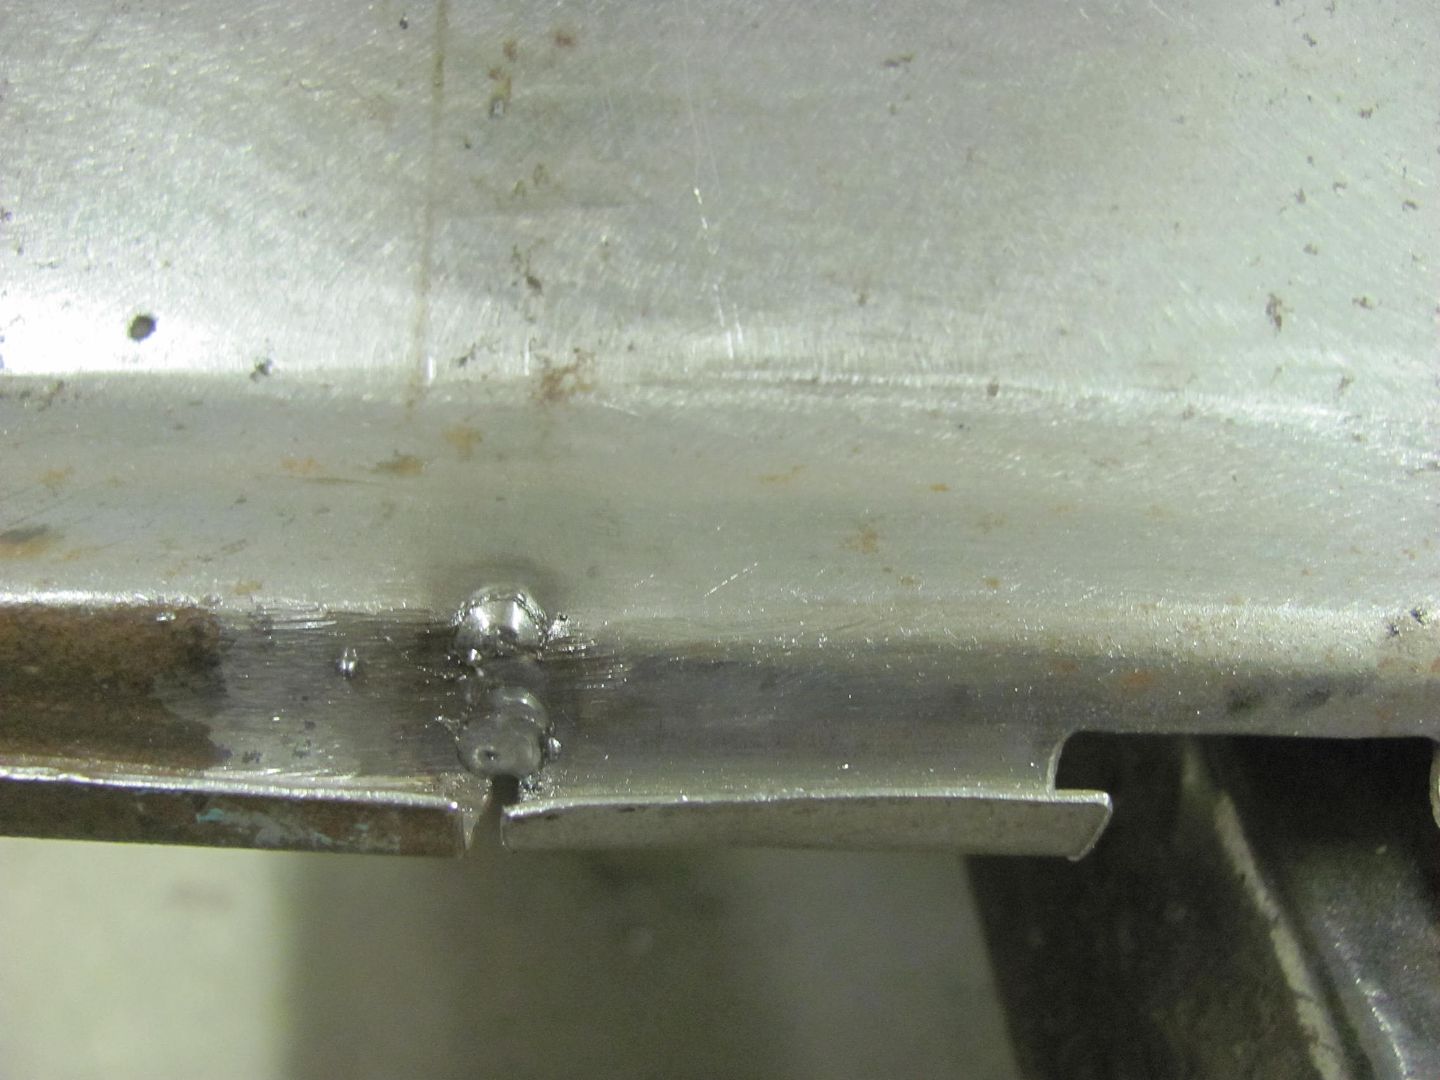 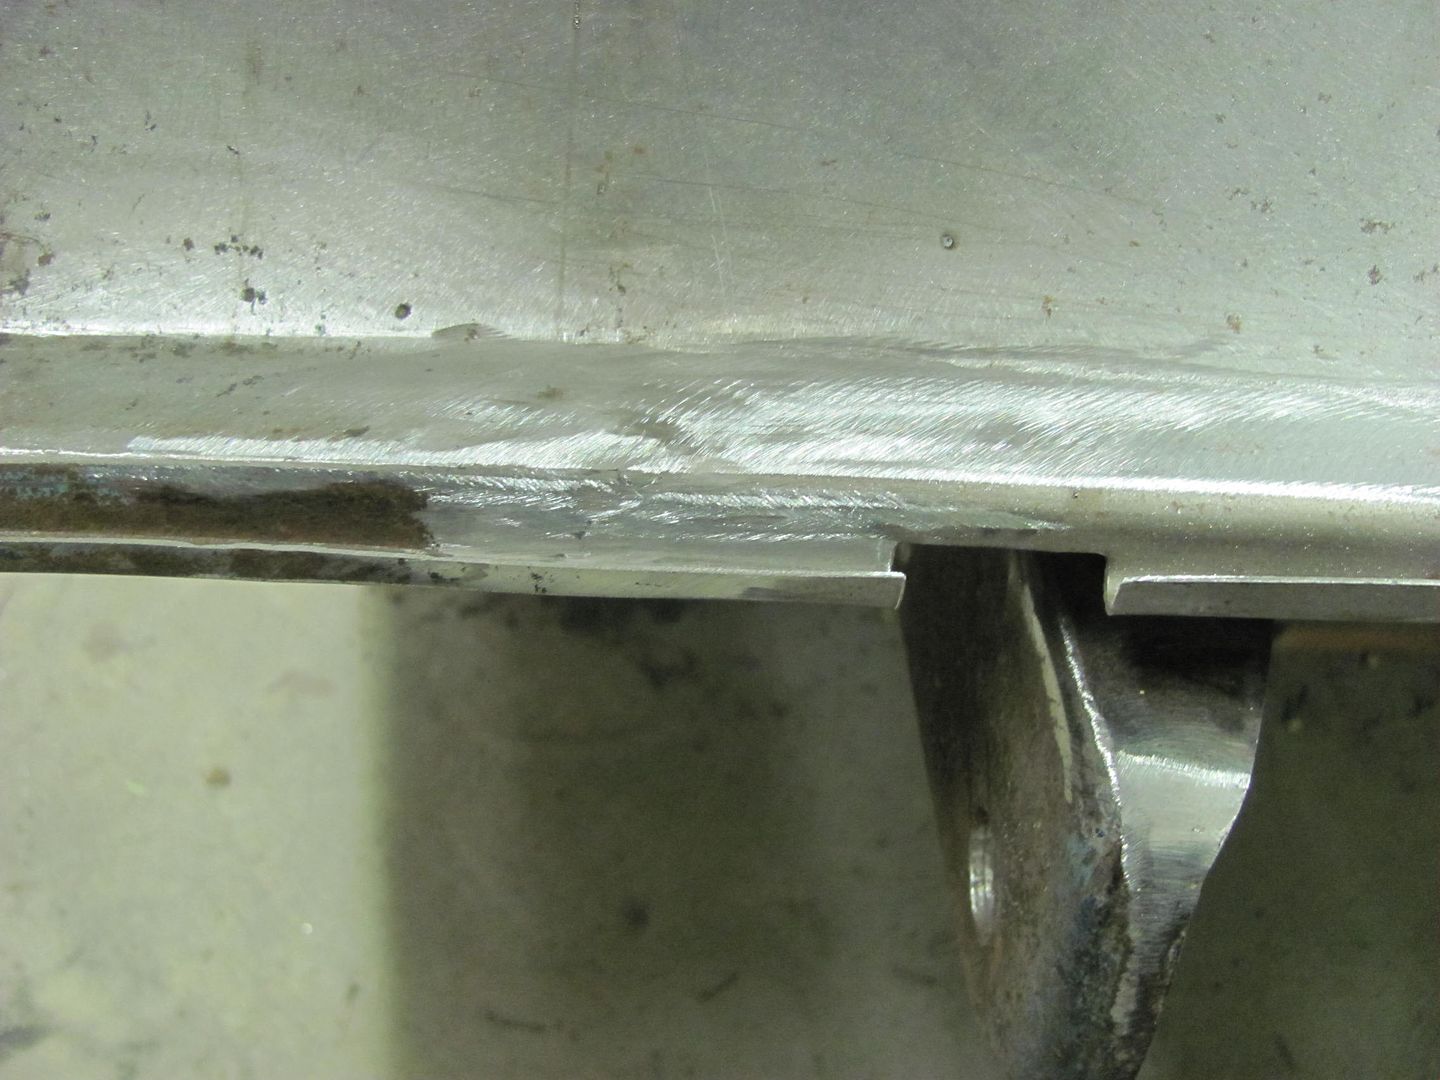 
__________________
Robert |
|
|
|
|
02-19-2015, 12:18 AM
|
#371 |
|
Registered User
Join Date: Sep 2010
Location: carthage,tx
Posts: 7
|
Re: 55 Wagon Progress
Wow! Very amazing work! I really like the fabrication of the factory style A/C battery box. It gets that ugly battery off the firewall and will let everyone focus on the engine when the hood is open. I am helping a friend with a 55 handyman wagon and there is no trunk to hide the battery. So why not hide it in plain sight? Genius! I see that you made an extra bracket so if one comes up for sale I would be first in line.
|
|
|
|
|
02-19-2015, 05:15 PM
|
#372 |
|
Registered User
Join Date: Jan 2013
Location: Leonardtown, MD
Posts: 1,634
|
Re: 55 Wagon Progress
Thanks, but I only have the one set here. All the other sets were sent to WI..
__________________
Robert |
|
|
|
|
02-19-2015, 05:41 PM
|
#373 |
|
Registered User
Join Date: Sep 2010
Location: carthage,tx
Posts: 7
|
Re: 55 Wagon Progress
Well if you decide to build more, keep me in mind. Thanks!!
|
|
|
|
|
02-21-2015, 07:08 AM
|
#374 |
|
Registered User
Join Date: Nov 2014
Location: Omaha
Posts: 558
|
Re: 55 Wagon Progress
I have already started using your welding process on my project. this is just too cool! Rock on bro!
|
|
|
|
|
02-21-2015, 07:18 AM
|
#375 |
|
Registered User
Join Date: Nov 2014
Location: Omaha
Posts: 558
|
Re: 55 Wagon Progress
And another thing, I can see that you make most of your body tools
but where do you buy them at and what brand do you prefer?
|
|
|
|
 |
| Bookmarks |
|
|


 Linear Mode

