
|
 06-25-2012, 05:06 PM
|
#1 |
|
Registered User
Join Date: Jun 2012
Location: St. Robert, MO
Posts: 160
|
Clean up advice
Hey everyone
 So I am trying to figure out the best way to start cleaning up some pieces, specifically the gauges and the steering wheel. I have several newbie questions for all of you, haha. My questions are: Would it be smart to remove the rubber covering the steering wheel since it is so cracked? Will we be able to get that replaced later on? Has anyone refaced their gauges themselves? I saw online how expensive they are to buy new ones and I am trying to see if we can just clean them up ourselves. What is the best product to clean up the pieces and make them look new again? A friend mentioned covering them in ketchup... does that work? A few photos: 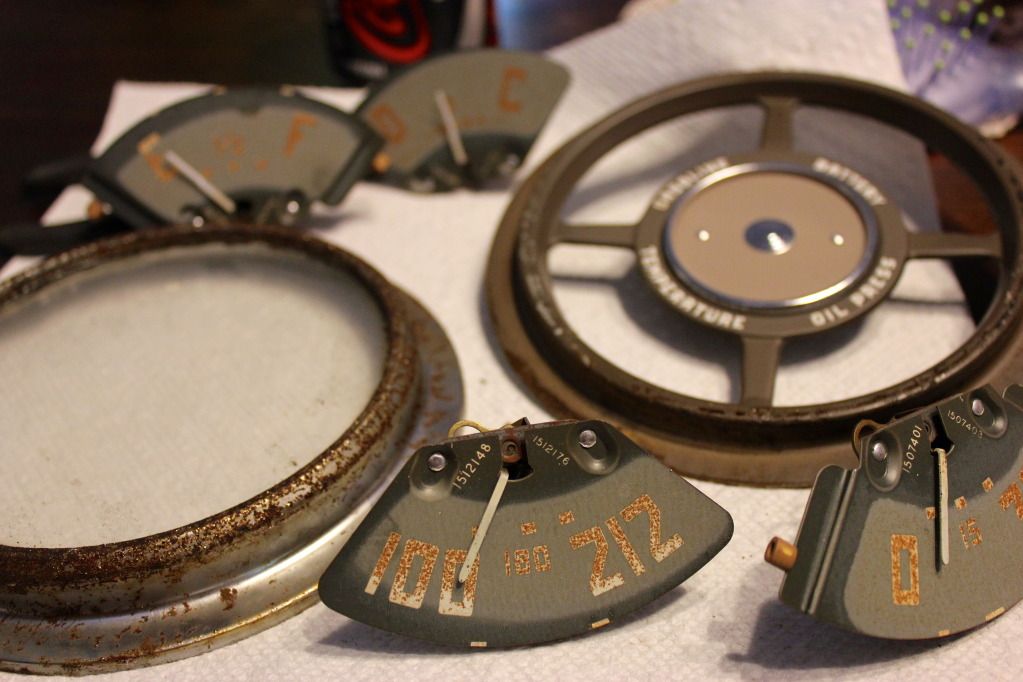 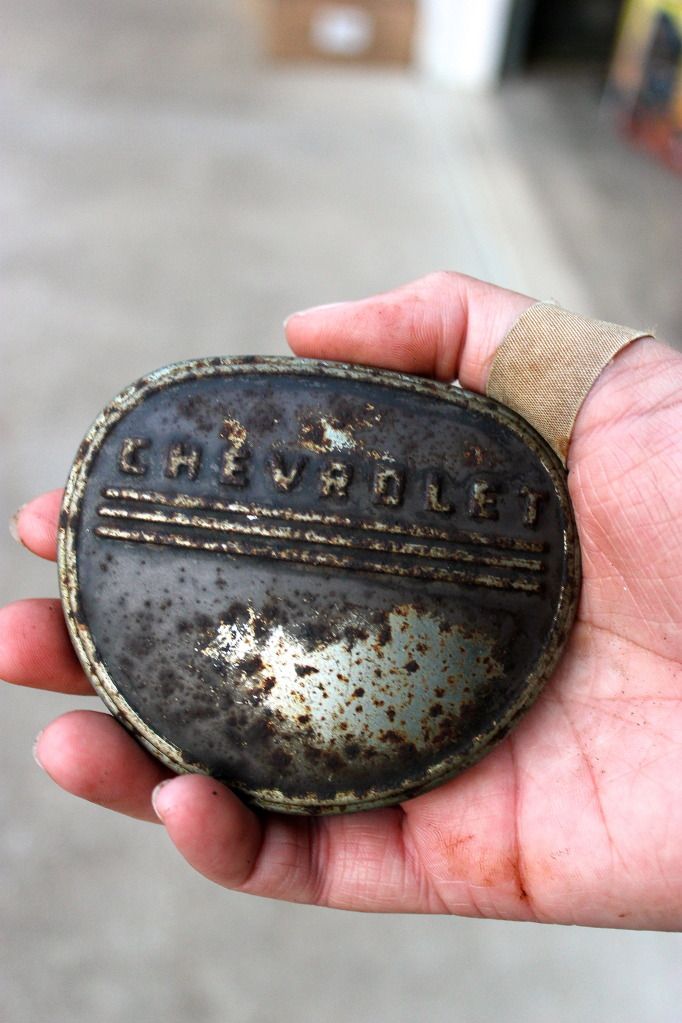 Thank you all for your help and advice!
__________________
Boys aren't the only ones that like to get their hands dirty! \m/(@o@)\m/ 1950 Army Chevy 3100 build: The Chester Chronicles Proud Army Wife! 
|

|

|
|
06-25-2012, 05:37 PM
|
#2 |
|
Senior Member
 Join Date: Aug 2010
Location: Shasta Lake, CA.
Posts: 1,619
|
Re: Clean up advice
The "Rubber" covering on the steering wheel is over a steel wire armature. If you remove it you won't have a steering wheel, you'll have a wire hoop with spokes.
Check out Stacey David's Gears web site. He did a show on how to repair a cracked steering wheel. You can buy the video and learn how to repair yours. http://staceydavid.com I think episode 6 of season 3 is the one your looking for. http://staceydavid.com/episodes/all The other option is to buy a good used one or a new one from companies like LMC Truck. They also have all the horn button parts. http://www.lmctruck.com There are companies that specialize in gauge repair and finishing like United Speedometer. They can install new movements to match aftermarket sending units, convert ammeters to volt meters and finish the gauge faces to better then new. http://www.speedometershop.com Last edited by G&R's57GMC; 06-25-2012 at 06:02 PM. |
|
|
|
|
06-25-2012, 05:43 PM
|
#3 | |
|
Registered User
Join Date: Jun 2012
Location: St. Robert, MO
Posts: 160
|
Re: Clean up advice
Quote:
Thanks for all the tips and sites to check out! Much appreciated! 
__________________
Boys aren't the only ones that like to get their hands dirty! \m/(@o@)\m/ 1950 Army Chevy 3100 build: The Chester Chronicles Proud Army Wife!
|
|
|
|
|
|
06-25-2012, 05:45 PM
|
#4 |
|
Registered User
Join Date: Jul 2007
Location: Toppenish, WA
Posts: 15,400
|
Re: Clean up advice
The ketchup thing is new one on me but I believe that it's acid based so that might clean the crud off.
You might try CLR to wipe some of the surface rust off the gauge faces but most of the truck parts vendors like LMC sell decals to redo them too. On the horn button I think I'd look for a new horn button. They aren't too hard to find in decent shape usually. Put that on the swapmeet list. I saw one nice one and one in not much better shape than yours on Ebay both for 25.00 but I think that is too high. One thing I'd do if you haven't done so already is to order all of the paper catalogs I can get for the truck. Brothers, LMC and any others. The Brother's catalog often gives you good color photos of what things should look like and the LMC catalog has good detailed drawings that show how parts interact with companion parts. Last edited by mr48chev; 06-25-2012 at 05:54 PM. |
|
|
|
|
06-25-2012, 05:57 PM
|
#5 | |
|
Registered User
Join Date: Jun 2012
Location: St. Robert, MO
Posts: 160
|
Re: Clean up advice
Quote:
Thank you! I'll start searching ebay for some good finds
__________________
Boys aren't the only ones that like to get their hands dirty! \m/(@o@)\m/ 1950 Army Chevy 3100 build: The Chester Chronicles Proud Army Wife!
|
|
|
|
|
|
06-25-2012, 05:58 PM
|
#6 |
|
Registered User
Join Date: Jun 2012
Location: St. Robert, MO
Posts: 160
|
Re: Clean up advice
Also, anyone have any good tips on what to use to get the glass out of the gauges so you can place a new piece in? Mine seems to be stuck incredibly well...
__________________
Boys aren't the only ones that like to get their hands dirty! \m/(@o@)\m/ 1950 Army Chevy 3100 build: The Chester Chronicles Proud Army Wife!
|
|
|
|
|
06-25-2012, 06:04 PM
|
#7 |
|
Senior Member
Join Date: Aug 2010
Location: Shasta Lake, CA.
Posts: 1,619
|
Re: Clean up advice
I just added a couple more links to my post above while you were posting.
Here's the horn button http://www.lmctruck.com/icatalog/ca/full.aspx?Page=87 Last edited by G&R's57GMC; 06-25-2012 at 06:16 PM. |
|
|
|
|
06-25-2012, 06:51 PM
|
#8 |
|
Registered User
Join Date: Jun 2006
Location: Idaho
Posts: 8,800
|
Re: Clean up advice
Look at my build thread starting at post 624, I am restoring a 48 wheel. Need to be careful or the "rubber" will turn to goo. Not hard but labor intensive, I have about 16 hours in mine and haven't painted it yet (its ready, waiting for some other small parts I want to paint the same color to arrive). I was pleased that my cap buffed out to a nice shiney finish, thats in the thread too.
__________________
1959 Chevy Short Fleetside w/ 74 4WD drive train (current project) OrrieG Build Thread 1964 Chevelle Malibu w/ 355-350TH (daily driver) Helpful AD and TF Manual Site Old Car Manual Project |
|
|
|
|
06-25-2012, 07:44 PM
|
#9 | |
|
Registered User
Join Date: Jun 2012
Location: St. Robert, MO
Posts: 160
|
Re: Clean up advice
Quote:
And I must add, your truck is looking amazing!! Going to enjoying reading through your build
__________________
Boys aren't the only ones that like to get their hands dirty! \m/(@o@)\m/ 1950 Army Chevy 3100 build: The Chester Chronicles Proud Army Wife!
|
|
|
|
|
|
06-25-2012, 07:56 PM
|
#10 | |
|
Registered User
Join Date: Jun 2011
Location: Floyds Knobs, IN
Posts: 430
|
Re: Clean up advice
Quote:

|
|
|
|
|
|
06-25-2012, 08:16 PM
|
#11 | |
|
Registered User
Join Date: Jul 2011
Location: Auburn ca.
Posts: 2,886
|
Re: Clean up advice
Quote:
|
|
|
|
|
|
06-25-2012, 09:33 PM
|
#12 |
|
Registered User
Join Date: Aug 2011
Location: Barnum, Mn
Posts: 795
|
Re: Clean up advice
Guages!
First thing is to make sure they work. You can buy each of the 4 little guages separetly so if only 1 is bad its far cheaper than buying the whole kit and kaboodle. This is also good to do first so you can reface your new guage to match the refaced old ones otherwise they may not match very well in color. As you can see I started with guages that were just as bad as yours. 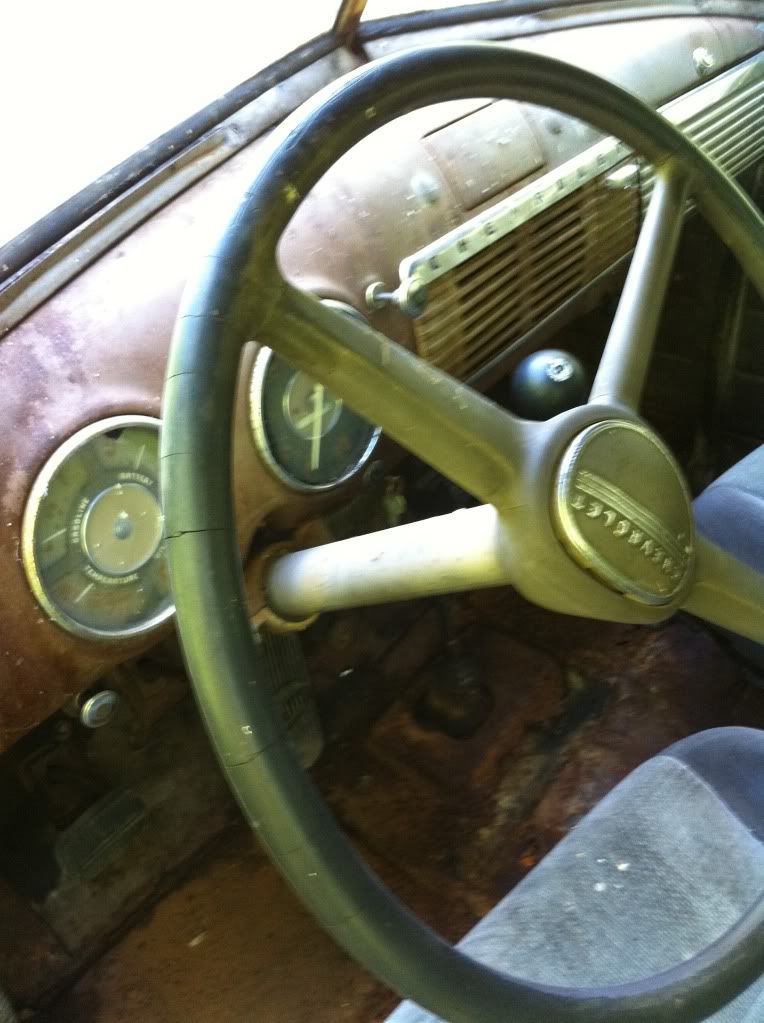 I spent about $50 to reface mine to make them look like this.. 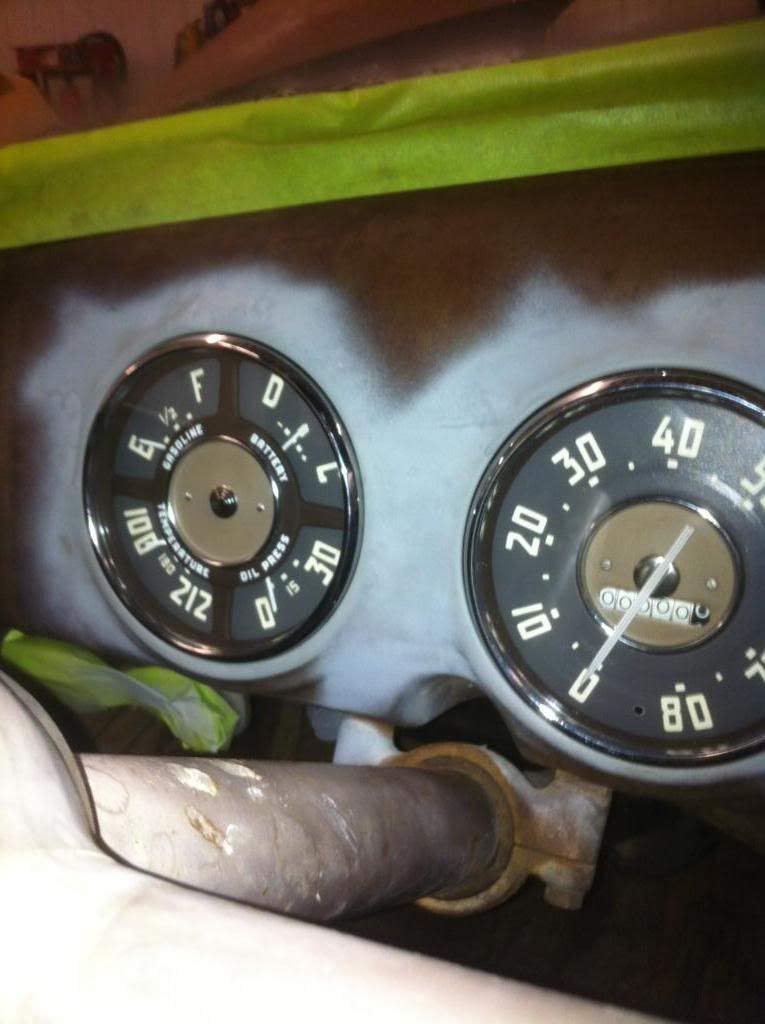 I don't have pics of the process but I can share some of my tale... Order new bezels and gaskets, they are cheap and will look good. (Classic Parts) Order a new set of guage faces(Classic Parts) Order a new needle (classic parts) Go buy a small vile of white model paint and a tiny brush (hobby store) A can of Krylon Camo Brown spray paint (Wal-mart) Some sand paper (anywhere) And lastly new transfers (Only Archer transfers makes these that I know of! http://www.archertransfers.com/AR33001.html ) With a screw driver gently pry the edge of the bezels away from the houseing. You can see where its folded over to hold it on. Then remove the guts from the housings. Look for the bolts on the back. lets talk guages and not speedo first. -Clean up you glass. My old gasket pretty much dried to it and I have to use a rasor blade to get it clean. If all else fails order new glass too. -take the brown center part that says battery, temperature, ect and if it looks like crap clean it, sand it, clean it again, and spray it with the krylon camo. That color is a little dark but is a close match. Once that drys you can apply the new transfers. Make sure you apply them in the correct place. After that you've got one part down. -Now the delicate part. Gently sand the guage faces smooth. You will end up removing some of the original numbers. Clean it. Now using your while paint and brush paint the needles on the 4 guages so they look nice and new!. Lastly follow the instructions with the guage faces and apply them. -Finally reasemble the unit. This is the delicate part because you have to bend the trim around the back edge like it was before without breaking anything. Now the speedo, This is the tricky SOB. Lets start at guts out of the housing. -You have to remove the needle. It must be removed straight. Even the slightest angle will break the pin and then you need a new Guage. Ask me how I know..... On my second attempt I suspended the guage upside down with a few boxes so the needle was pointing down and I sprayed PB blaster on the back of the needle to loosten things up. To facilitate the straight removal of this needle I removed the 2 screws in the face that hold it on and I grasped the face on both sides while my dad held the guage housing. He held and I pulled up. The face dispersed the force on the needle and it poped off. - Reface the guage same as you did on the others using the hole for the headlight indicator to make sure the new face goes on correctly. -Carefully remove the odometer and reface the numbers. This is actually pretty easy. But when you put it back together test it before you reassembe the face. There is a small part in the roating assembly that stops the needly from going the wrong way. If you have that one the wrong side you speedo spins backwards. Just pay attention and test it and you are fine. I didn't want to put the needle on for the test so I used a peice of tape as a flag. - Reassemble the guage. -Peal the old needle base from the inner part on the needle (the inner part is what the gear on the end of the pin goes into). You will know what I am talking about when you see it. Then put the new needle on it and bend the flaps down. I also used some super glue and a security measure. - last step is to index the needle and carefully put it back on the pin. Then put the guage back together with the new gasket same as on the other guage. Viola..... Last edited by Root2812; 06-25-2012 at 09:47 PM. Reason: Forgot to say buy a new needle too. |
|
|
|
|
06-25-2012, 09:34 PM
|
#13 |
|
Registered User
Join Date: Aug 2011
Location: Barnum, Mn
Posts: 795
|
Re: Clean up advice
Sorry for a wall of text
|
|
|
|
|
06-25-2012, 10:45 PM
|
#14 | |
|
Registered User
Join Date: Jul 2011
Location: Auburn ca.
Posts: 2,886
|
Re: Clean up advice
Quote:
|
|
|
|
|
|
06-25-2012, 11:25 PM
|
#15 |
|
Senior Member
Join Date: Aug 2010
Location: Shasta Lake, CA.
Posts: 1,619
|
Re: Clean up advice
"What does 400 wet dry mean ?"
Its a fine grit sandpaper. The 400 refers to the grit. The bigger the number the finer the grit. Example : 80 grit for removing body filler, 1500 grit for color sanding a finished paint job. The wet dry refers to the papers ability to sand with water. General use is on automotive paint work. Dry sandpaper will fall apart when used with water. General use is on wood. Head down to any hardware store or body shop supply house for it. Last edited by G&R's57GMC; 06-25-2012 at 11:32 PM. |
|
|
|
|
06-26-2012, 12:08 AM
|
#16 |
|
Registered User
Join Date: Feb 2012
Location: Brigham City Utah
Posts: 157
|
Re: Clean up advice
My advice on the guages is to buy the decals and recover them. In my experience, the after market guages are junk. The originals are built better and will actually work. A gas guage smoked a wire immediately after installation and a temp guage didn't even come close to being accurate.
As far as the rust on the surface, I have had good luck by soaking the parts in white vinegar. |
|
|
|
|
06-26-2012, 01:16 AM
|
#17 | |
|
Registered User
Join Date: Jun 2012
Location: St. Robert, MO
Posts: 160
|
Re: Clean up advice
Quote:
Your walk through is just awesome!! Thank you very much! I enjoyed the wall of text very much! Haha!Especially on where to find the parts I will need The walk through was so great, I only have one questions for you, and it is a newbie questions so please forgive me, hehe. How do I go about properly testing the gauges to make sure they all work??
__________________
Boys aren't the only ones that like to get their hands dirty! \m/(@o@)\m/ 1950 Army Chevy 3100 build: The Chester Chronicles Proud Army Wife!
|
|
|
|
|
|
06-26-2012, 01:18 AM
|
#18 | |
|
Registered User
Join Date: Jun 2012
Location: St. Robert, MO
Posts: 160
|
Re: Clean up advice
Quote:
Thank you very much for the detailed explanation
__________________
Boys aren't the only ones that like to get their hands dirty! \m/(@o@)\m/ 1950 Army Chevy 3100 build: The Chester Chronicles Proud Army Wife!
|
|
|
|
|
|
06-26-2012, 01:19 AM
|
#19 | |
|
Registered User
Join Date: Jun 2012
Location: St. Robert, MO
Posts: 160
|
Re: Clean up advice
Quote:
Ah wonderful! Thank you for the white vinegar tip! And I am all for keeping my gauges if I can, good to know that not all of the new stuff is the best stuff
__________________
Boys aren't the only ones that like to get their hands dirty! \m/(@o@)\m/ 1950 Army Chevy 3100 build: The Chester Chronicles Proud Army Wife!
|
|
|
|
|
|
06-26-2012, 07:51 PM
|
#20 | |
|
Registered User
Join Date: Aug 2011
Location: Barnum, Mn
Posts: 795
|
Re: Clean up advice
Quote:
Good luck. |
|
|
|
|
|
06-26-2012, 11:51 PM
|
#21 |
|
Registered User
Join Date: Feb 2012
Location: Brigham City Utah
Posts: 157
|
Re: Clean up advice
I have tested the temp guages by heating some water in an old pot and sticking the end in the water and see if it moves.
|
|
|
|
|
06-27-2012, 01:06 AM
|
#22 | |
|
Registered User
Join Date: Jun 2012
Location: St. Robert, MO
Posts: 160
|
Re: Clean up advice
Quote:
I will definitely do that
__________________
Boys aren't the only ones that like to get their hands dirty! \m/(@o@)\m/ 1950 Army Chevy 3100 build: The Chester Chronicles Proud Army Wife!
|
|
|
|
|
 |
| Bookmarks |
|
|


 Linear Mode

