
|
 12-30-2008, 04:52 PM
|
#26 |
|
Registered User
Join Date: Feb 2008
Location: st cloud, fl
Posts: 266
|
Re: Project "49 No Buck$"
When installing a Camaro IFS you usually use the upper shock holes to make sure the IFS is square in respect to the AD frame. THe G body shock holes are not symetrical, thus the question....what points did you use on the G body sub frame to measure to?
thanks Don |

|

|
|
12-30-2008, 05:35 PM
|
#27 |
|
Registered User
Join Date: Nov 2008
Location: So. Cal.
Posts: 452
|
Re: Project "49 No Buck$"
Hey Don... On that particular frame there were 2 sets of holes on the back of the frame behind the upper A-arm and another 3 sets in front. We measured out the front AND the back, cross checked them and used both sets. If you have one of those chassis, you can see all the different sets of holes Chevy was so nice to give us. DON'T use the body mount holes as they aren't even close! My shock holes were busy holding the allthread in place anyway, so I couldn't use those if they were straight. Thanks, Brad
|
|
|
|
|
01-02-2009, 07:38 PM
|
#28 |
|
Registered User
Join Date: Jan 2007
Location: tacoma wa.
Posts: 1,037
|
Re: Project "49 No Buck$"
great so far. those pic's are great and the bumper mount is sweet. your having too much fun building your cheap ride.

|
|
|
|
|
01-06-2009, 01:01 PM
|
#29 |
|
Registered User
Join Date: Nov 2008
Location: So. Cal.
Posts: 452
|
Re: Project "49 No Buck$"
Here's how the stock motor mounts are located.
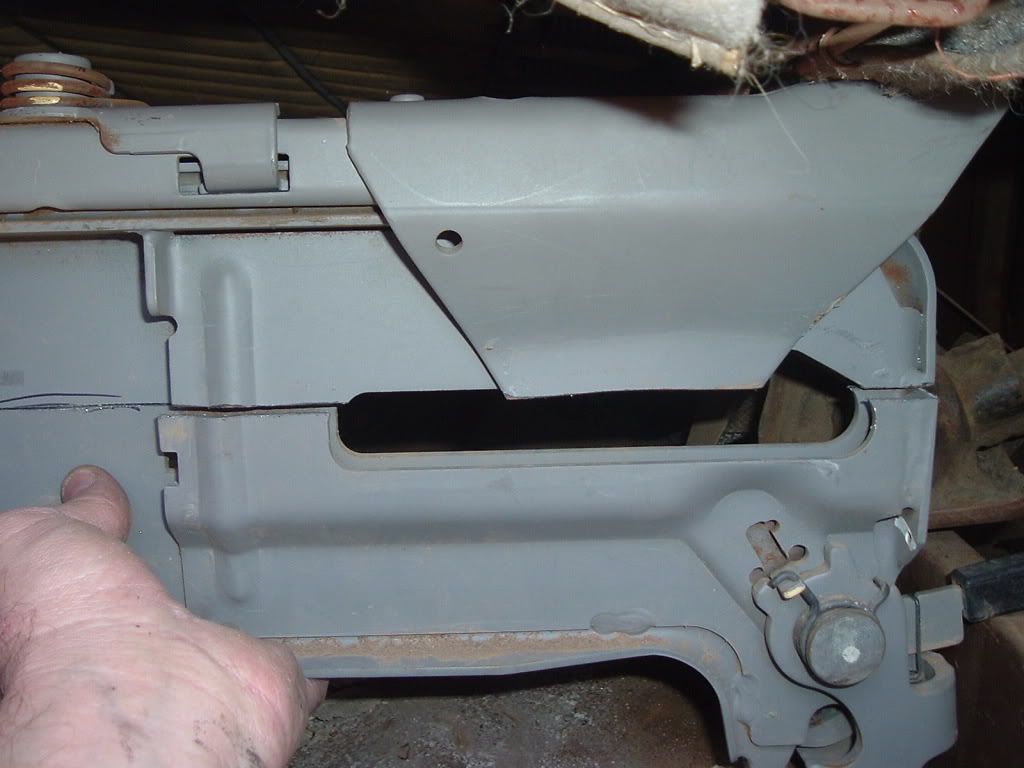
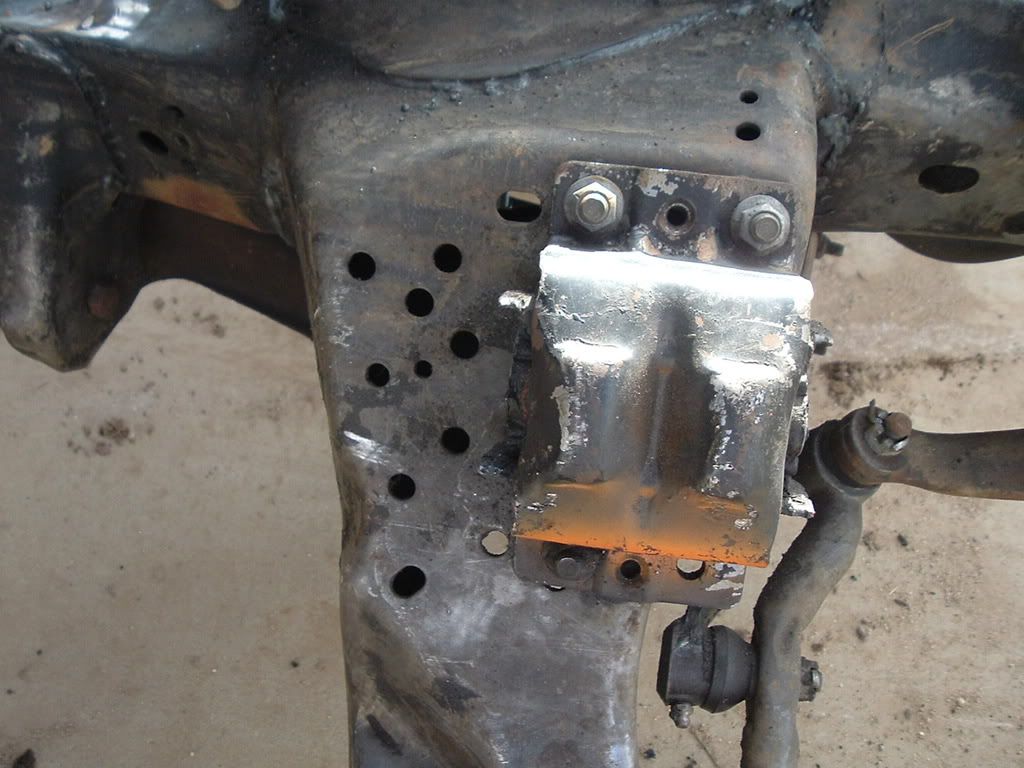 They are too far forward in this spot for what I wanted. Thanks Chevrolet for making LOTS of other holes to move the mounts around! I took the 3 bolts out and slid them back to the next set, which is about an 1 1/4" from the front spot. They are too far forward in this spot for what I wanted. Thanks Chevrolet for making LOTS of other holes to move the mounts around! I took the 3 bolts out and slid them back to the next set, which is about an 1 1/4" from the front spot. 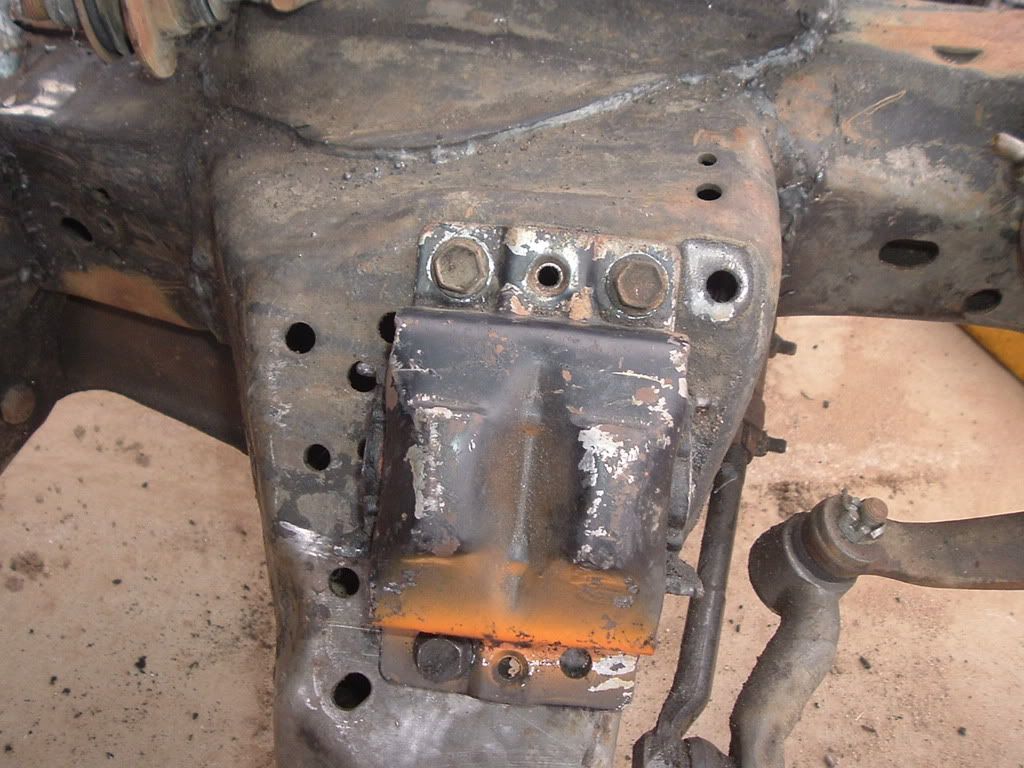 Now I know stuff looks rough and messy, buts that's ok because I'm just building the truck roughly at this moment. When it's all built and all the fab work is done, it will come apart and get sandblasted, painted and put together with new fasteners, bushings, tie rods, etc. so I'm not worrying too much about perfection at this moment. The truck will be new and tight underneath, but like an old truck from the outside. Now that the mounts are slid back, the trans will hit the front of the firewall tunnel. Now I know stuff looks rough and messy, buts that's ok because I'm just building the truck roughly at this moment. When it's all built and all the fab work is done, it will come apart and get sandblasted, painted and put together with new fasteners, bushings, tie rods, etc. so I'm not worrying too much about perfection at this moment. The truck will be new and tight underneath, but like an old truck from the outside. Now that the mounts are slid back, the trans will hit the front of the firewall tunnel. 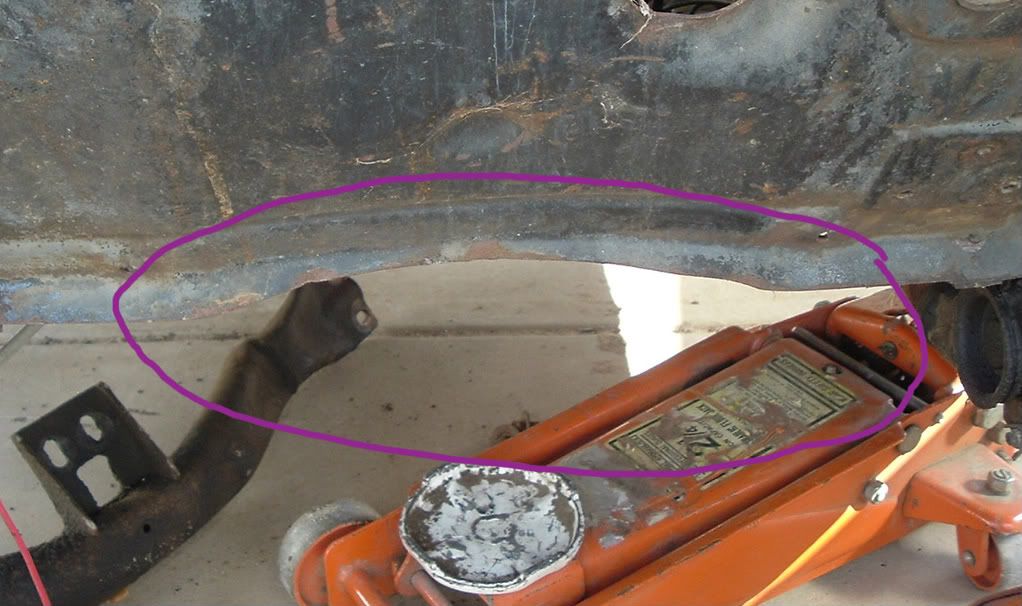 I took a pair of channel locks and folded the lip back and under to get an extra 3/4" clearance for the trans ( a few smacks with a hammer to make it nice and even finishes it up) I took a pair of channel locks and folded the lip back and under to get an extra 3/4" clearance for the trans ( a few smacks with a hammer to make it nice and even finishes it up) 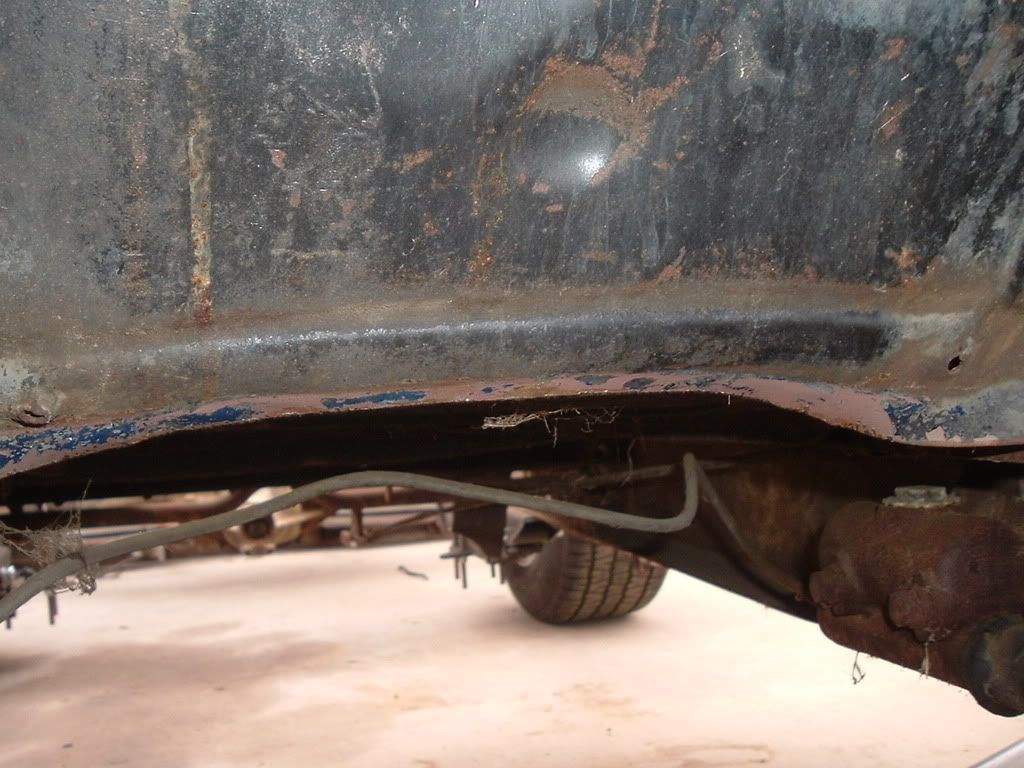 Next up.. Installing an engine and trans to put the exhaust together and installing the 69 Nova fuel tank (more cheap!!!) Next up.. Installing an engine and trans to put the exhaust together and installing the 69 Nova fuel tank (more cheap!!!)
|
|
|
|
|
01-07-2009, 01:13 PM
|
#30 |
|
Senior Member
Join Date: Jun 2005
Location: Clovis Ca.
Posts: 3,311
|
Re: Project "49 No Buck$"
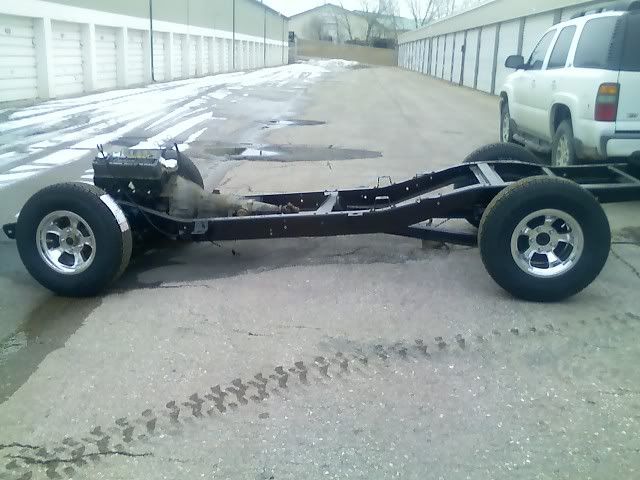
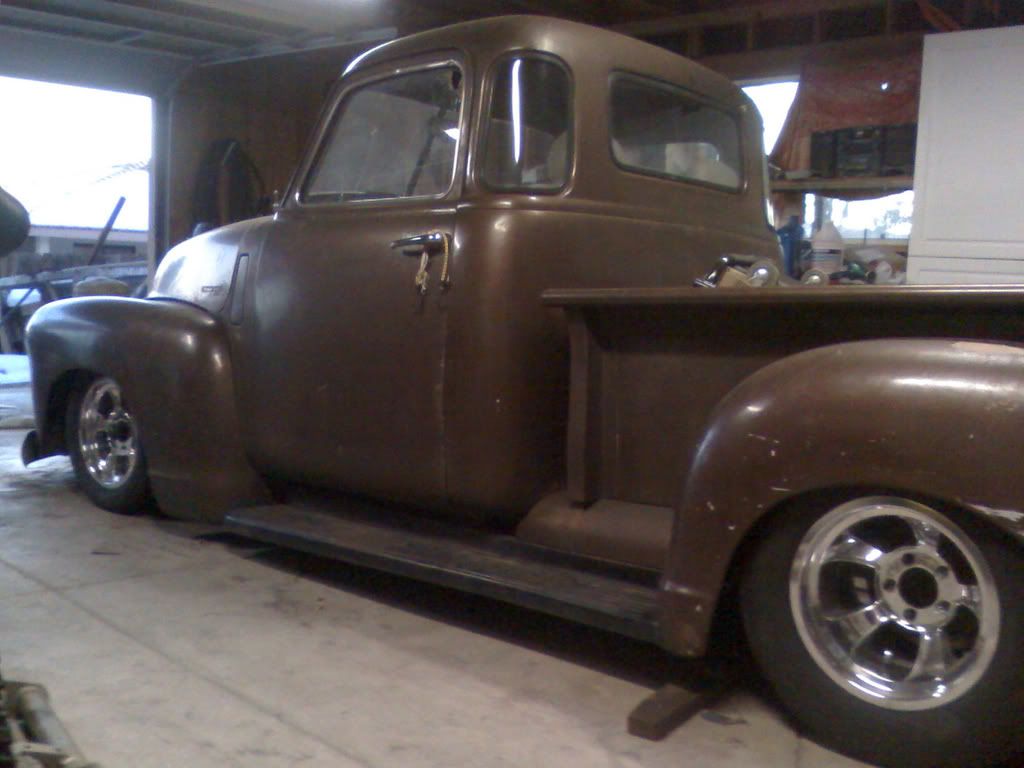
Nice job on the clip! Your truck sits perfect!
__________________
Classic Trucks Link http://www.classictrucks.com/feature...uck/index.html 1958 GMC.Project Build http://67-72chevytrucks.com/vboard/s...d.php?t=162816 1966 Chevelle Build http://67-72chevytrucks.com/vboard/s...d.php?t=443576 Video http://www.youtube.com/watch?v=prrNKo8F7Zw#GU5U2spHI_4 Last edited by CAL 58 GMC; 12-16-2009 at 06:42 PM. |
|
|
|
|
01-19-2009, 03:45 PM
|
#31 |
|
Registered User
Join Date: Nov 2008
Location: So. Cal.
Posts: 452
|
Re: Project "49 No Buck$"
I started on the exhaust with a pile of u-bends (3") that I'd bought on Ebay and a 10' tube of 3" muffler pipe I'd had laying around. Now being the cheap guy I am, I figured I'd rather make it than going to the muffler shop. I had a set of 1 5/8" med. tube Thorley headers and figured I'd start from there. I mocked up the left side and decided move the flange back. I cut off the original flange and after cutting up some bends moved it back another foot and a half.
 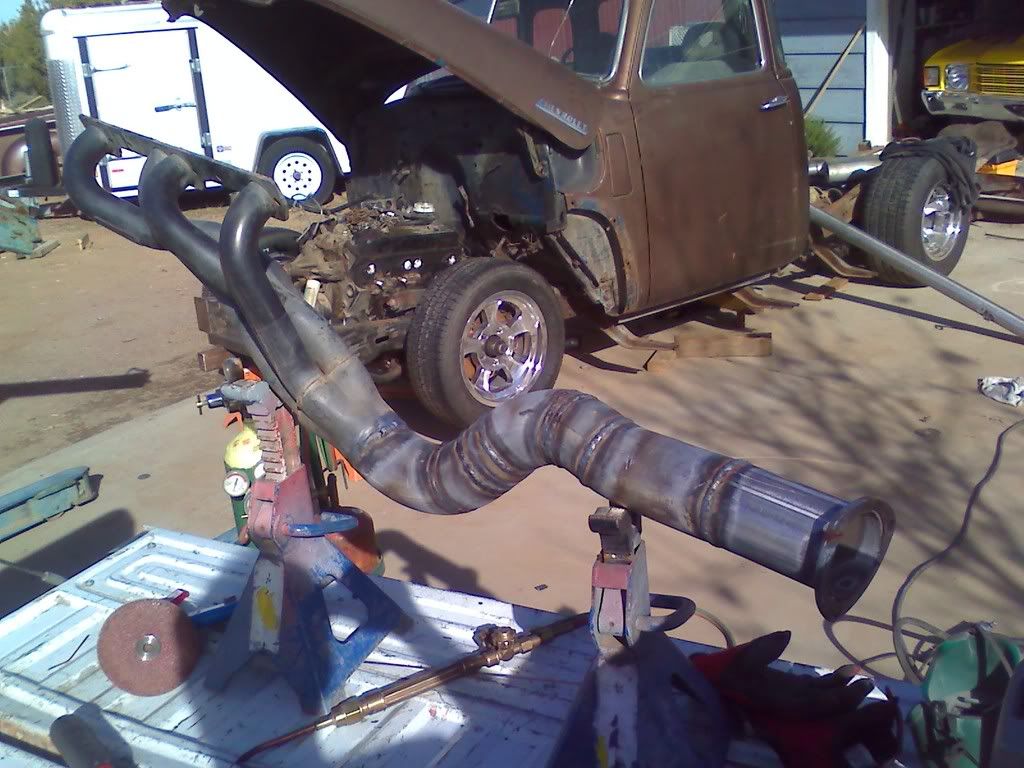 I went the high route because I didn't want the exhaust hanging too low and getting banged up. Next I did the pass. side. I hade to notch the frame a smidge (sorry, I like the word) so I had clearance for engine movement. Did the same with the flange on that side too. I went the high route because I didn't want the exhaust hanging too low and getting banged up. Next I did the pass. side. I hade to notch the frame a smidge (sorry, I like the word) so I had clearance for engine movement. Did the same with the flange on that side too. 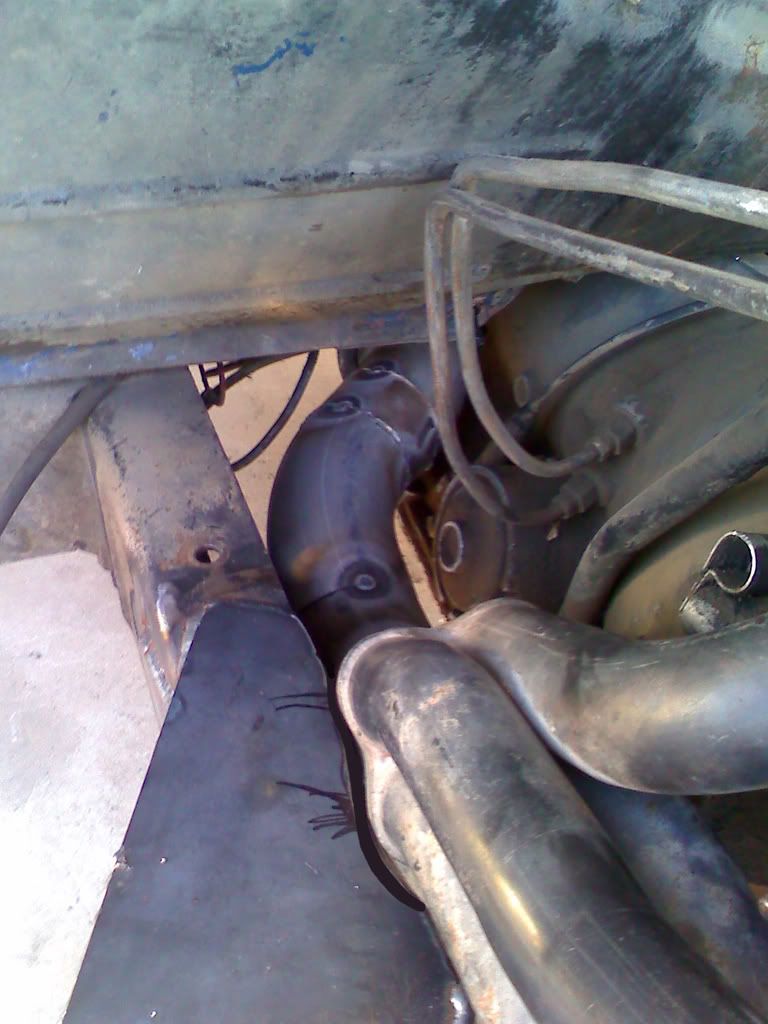 and then ran some pipe to the back of the cab. Trying to keep it all up high I figured I'd mount the mufflers at an angle, plus it keeps them out of the way. I need to finish adding the bolt flanges to the mufflers (thought I had enough and was 1 set short) so I need to finish those. and then ran some pipe to the back of the cab. Trying to keep it all up high I figured I'd mount the mufflers at an angle, plus it keeps them out of the way. I need to finish adding the bolt flanges to the mufflers (thought I had enough and was 1 set short) so I need to finish those. 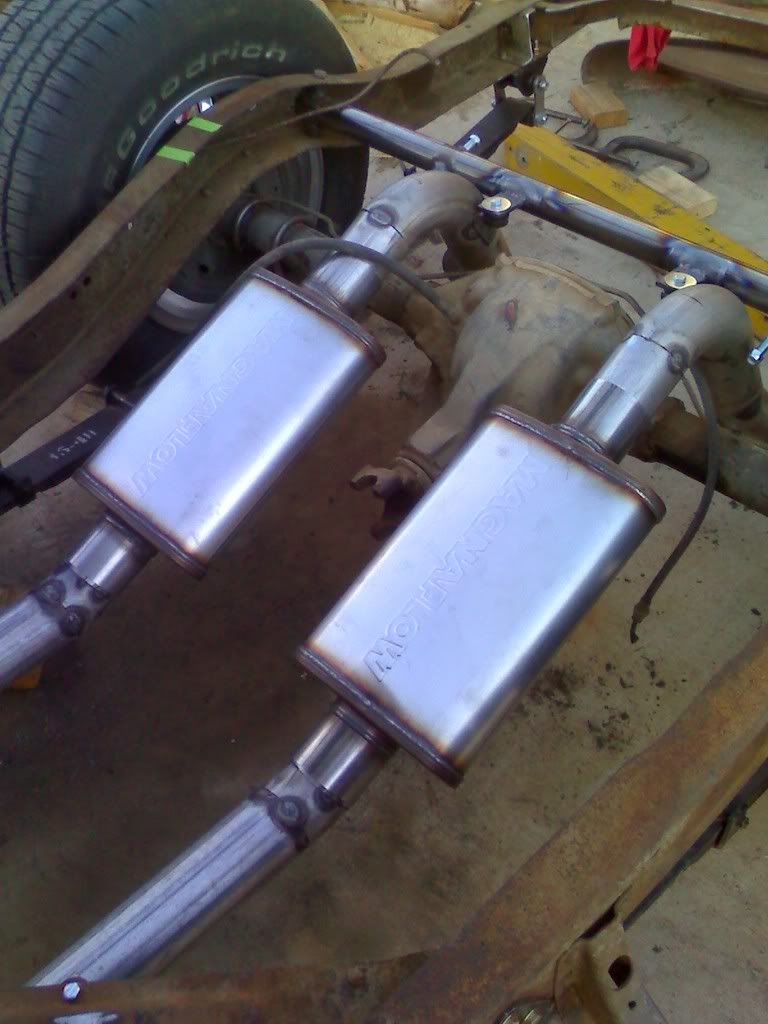 Ended up using Magnaflow mufflers after deciding I wanted to drive the crap out of this thing and not be deaf from using Flowmasters! Went against my plan, because I already had the flowmasters. Oh well! I gas welded the tubes together and a mig for all the brackets and heavier stuff. After I ran the tubes over the rearend, I decided to kick them out about 2" to the inside of the leafsprings. Ended up using Magnaflow mufflers after deciding I wanted to drive the crap out of this thing and not be deaf from using Flowmasters! Went against my plan, because I already had the flowmasters. Oh well! I gas welded the tubes together and a mig for all the brackets and heavier stuff. After I ran the tubes over the rearend, I decided to kick them out about 2" to the inside of the leafsprings. 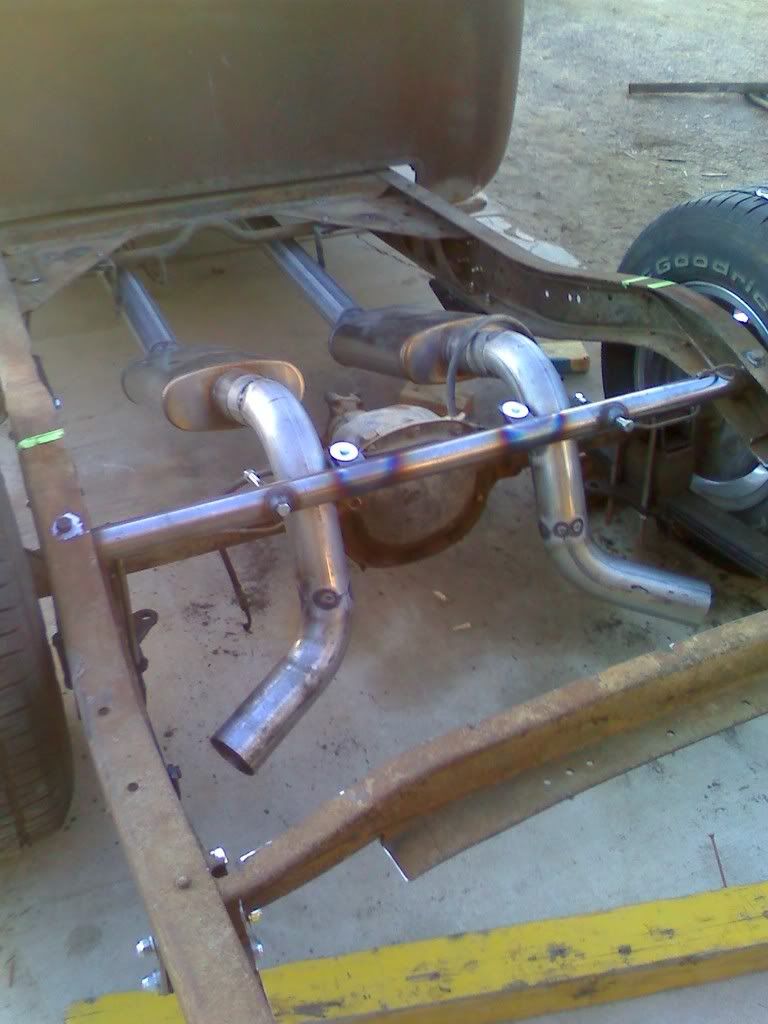 You could run them out farther if you wanted, but I hate seeing pipes sticking out of the sides of the truck. I need to finish welding the tubes up and then we move to the fuel tank mounting! You could run them out farther if you wanted, but I hate seeing pipes sticking out of the sides of the truck. I need to finish welding the tubes up and then we move to the fuel tank mounting!
|
|
|
|
|
01-20-2009, 02:18 PM
|
#32 |
|
Registered User
Join Date: Sep 2006
Location: thousand oaks, California
Posts: 732
|
Re: Project "49 No Buck$"
I've always wanted to ask what clearances should you have on the exhaust. i mean how close should your pipes be to you tank or your bed wood. also how close can you put your exhaust to wires.. what is the norm?
GT ps i love your welding on your pipes!
__________________
Greg 1953 chevy 1/2 ton 5 window, chevy 350 330 horse 700r tranz, lowering spindels mustang 2 frount. ford 9", airbags on 4 corners . purchased in 1983 for $325 while in high school http://67-72chevytrucks.com/vboard/s...=215079&page=5 |
|
|
|
|
01-20-2009, 02:56 PM
|
#33 |
|
Registered User
Join Date: Nov 2008
Location: So. Cal.
Posts: 452
|
Re: Project "49 No Buck$"
Thanks! I always tried to keep exhaust at least an inch from anything too critical. On this one it will be a little different. Since it was a 3" system, room went away REAL fast. I'll end up wrapping this one in the close areas by the trans, master cylinder and frame. It's about an 1 1/2" away from any part of the fuel tank, so no worries there. I'll also end up covering the trans cooler lines when I run them, so they stay cool also. Hope that helps. By the way... You have a VERY nice truck!!!
Last edited by kustombrad; 01-20-2009 at 03:00 PM. |
|
|
|
|
01-22-2009, 12:20 PM
|
#34 |
|
Registered User
Join Date: Nov 2008
Location: So. Cal.
Posts: 452
|
Re: Project "49 No Buck$"
I need a drivers window for this truck. Anybody have anything in not too bad of shape they want to sell? Thanks, Brad
Last edited by kustombrad; 01-22-2009 at 12:21 PM. |
|
|
|
|
01-22-2009, 06:02 PM
|
#35 |
|
Registered User
Join Date: Nov 2008
Location: So. Cal.
Posts: 452
|
Re: Project "49 No Buck$"
Here's an illustration I just did for a guy who's doing a VERY cool frame up f100. He wanted to see how it was going to look finished. Should be cool!

|
|
|
|
|
01-22-2009, 06:36 PM
|
#36 | |
|
Registered User
Join Date: Oct 2003
Location: Carmichael, California
Posts: 3,006
|
Re: Project "49 No Buck$"
Quote:
__________________
Anthony |
|
|
|
|
|
02-06-2009, 01:38 PM
|
#37 |
|
Registered User
Join Date: Oct 2003
Location: Carmichael, California
Posts: 3,006
|
Re: Project "49 No Buck$"
Any updates?
__________________
Anthony |
|
|
|
|
02-08-2009, 09:23 PM
|
#38 |
|
Registered User
Join Date: Mar 2008
Location: Wilmington,Delaware
Posts: 13
|
Re: Project "49 No Buck$"
Brad, Great project. I am trying to build the same project on the East coast. Are the wheels you have American Racing Hopsters and what are the offsets on the front wheels? I have a sub framed chassis and the hub to hub is 61.5", so I need a narrow wheel and around 4" of offset.
Thanks for sharing your build with us! |
|
|
|
|
02-09-2009, 01:35 AM
|
#39 | |
|
Registered User
Join Date: Oct 2003
Location: Carmichael, California
Posts: 3,006
|
Re: Project "49 No Buck$"
Quote:
http://jdwheels.com/
__________________
Anthony |
|
|
|
|
|
02-10-2009, 09:12 AM
|
#40 | |
|
Registered User
Join Date: Mar 2008
Location: Wilmington,Delaware
Posts: 13
|
Re: Project "49 No Buck$"
Quote:
Has anybody bought from this company? With only"10" responses I am a little reluctant to buy from them. Thanks |
|
|
|
|
|
03-06-2009, 04:04 AM
|
#41 | |
|
Senior Member
 Join Date: Nov 2001
Location: Rapid City, SD
Posts: 2,281
|
Re: Project "49 No Buck$"
Dude, love the wheels...
Quote:
__________________
My Trucks: 1967 Chevrolet Short Wide Box 327 TH350 9" w/3.90 gears paint will be White - Current Project 1967 Chevrolet Custom LWB 283 TH400 3.73 Posi, no-AC, no-PS, no-PB, bench-seat, small-window - mostly orig driver 1967 Chevrolet CST LWB originally a 327 TH400 3.73 Posi AC PS PB, had Buddy Buckets, Small Window - parts truck 1967 Chevrolet CST LWB, 283 MT 3.73 had Buddy Buckets, Panoramic Window - parts truck 2001 Chevrolet 3500 2WD Crew Cab Dually 8.1L Allison White 2002 Chevrolet 1500HD 4x4 Crew Cab 6.0L 4L80E Red Last edited by 67 cst swb; 03-06-2009 at 04:05 AM. |
|
|
|
|
|
03-12-2009, 06:10 PM
|
#42 |
|
Registered User
Join Date: Nov 2008
Location: So. Cal.
Posts: 452
|
Re: Project "49 No Buck$"
Sorry about the being side tracked...Here goes some more. Starting with a 68-72 Nova fuel tank ( I think this was a 70). I used a couple of pieces of angle iron (1 1/2" back, 1 1/4" front) because I figured it would be lightweight and somewhat easy to fab into the mount I needed. I also used some 1 1/4"x1/8" strap for the top as a containment area for the tank. After figuring how far I wanted it back (to clear exhaust) I made my marks and started drilling. On the front piece I used (2) 5/16"x2" eyebolts for the front hooks of the stock tank straps to hook on to.
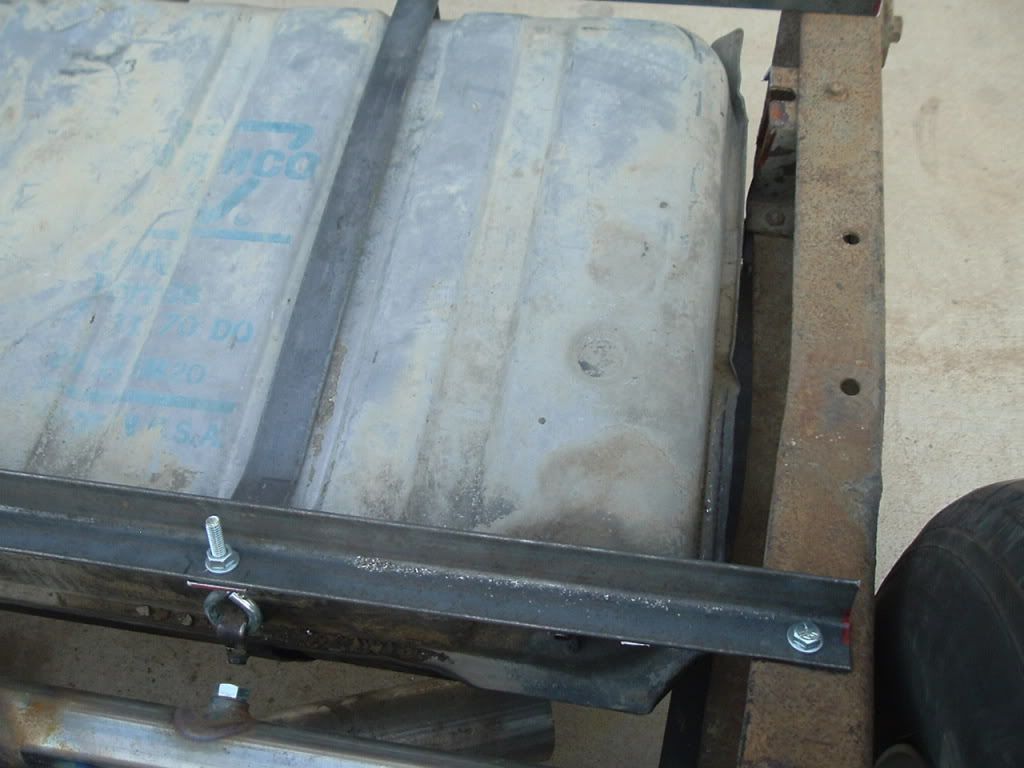 On the back I used The bolts that were on the stock straps ( I'll put new ones on) and in a little over an hour the tank was mounted. On the back I used The bolts that were on the stock straps ( I'll put new ones on) and in a little over an hour the tank was mounted. 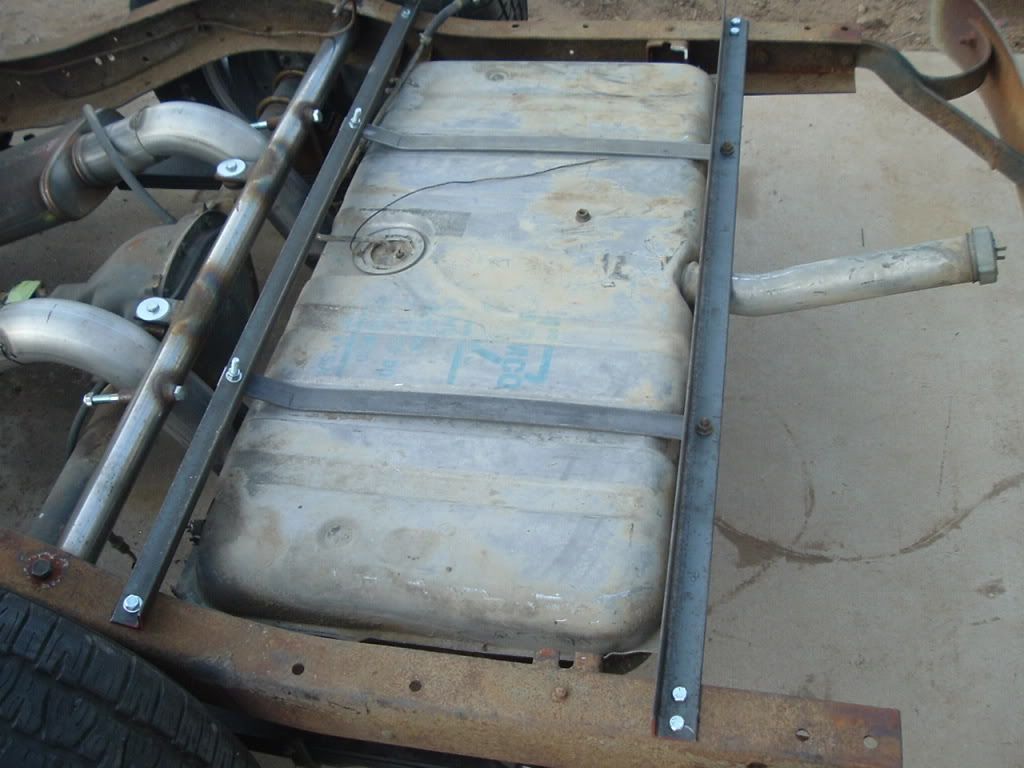
Last edited by kustombrad; 11-12-2009 at 04:33 PM. Reason: typo |
|
|
|
|
03-12-2009, 06:17 PM
|
#43 |
|
Registered User
Join Date: Nov 2008
Location: So. Cal.
Posts: 452
|
Re: Project "49 No Buck$"
I used a steering column from a '70 GMC pickup I found on Craigslist for $30! (he sold me another one that the blinker arm didn't work on for an extra $10!!!! I so scored!!!) I used the stock lower bracket and the original '49 upper bracket.
 After figuring out the right bolt length ( I used 4 1/2" bolts), I found some 1" long sleeves to drop the column down to where it needed to be. Now I need to trim all the floor area that the previous owner cut with a torch and make a nice filler panel that goes around the column. After figuring out the right bolt length ( I used 4 1/2" bolts), I found some 1" long sleeves to drop the column down to where it needed to be. Now I need to trim all the floor area that the previous owner cut with a torch and make a nice filler panel that goes around the column. 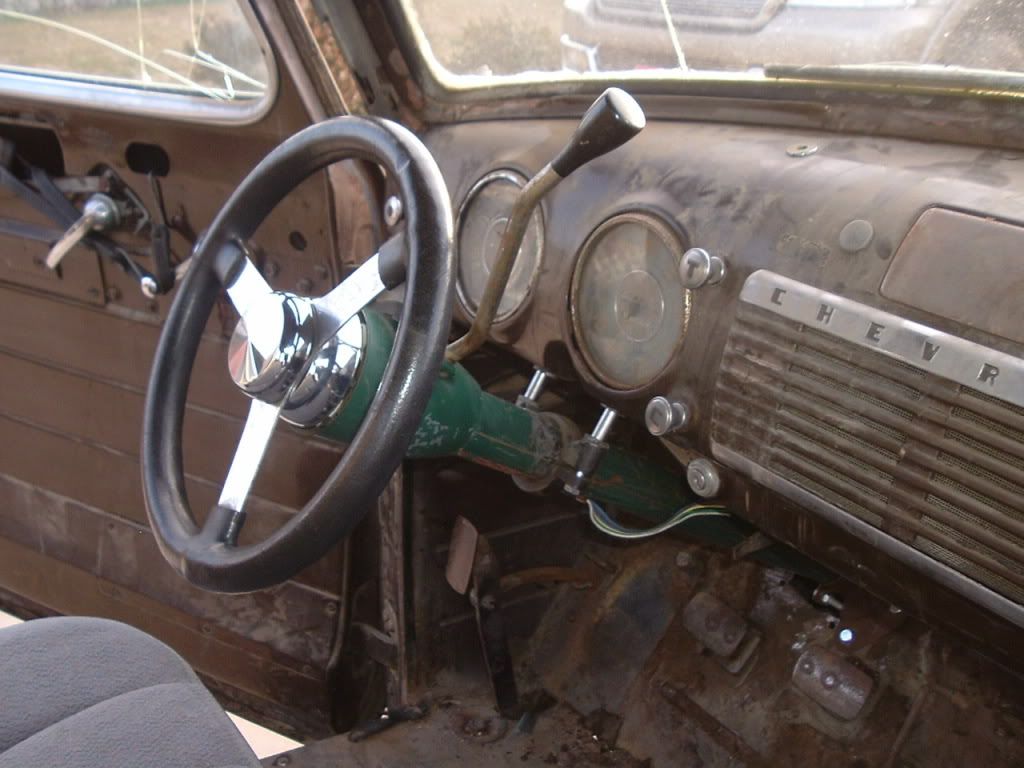 On the outside, I had a game plan to mate the box and column together. I took the steering shaft that I got with the column, drilled out the plastic plugs and knocked the male and female pieces apart. I did the same with the wagon box' shaft. I then slid the 2 pieces together to make them work as one. After pulling them to the length I figured would be about right, I drilled an 1/8" hole using the female shafts original holes (where I drilled out the plastic) just deep enough for a couple of aluminum rivets. I have about 3/8" clearance at the header, so I'm ok. 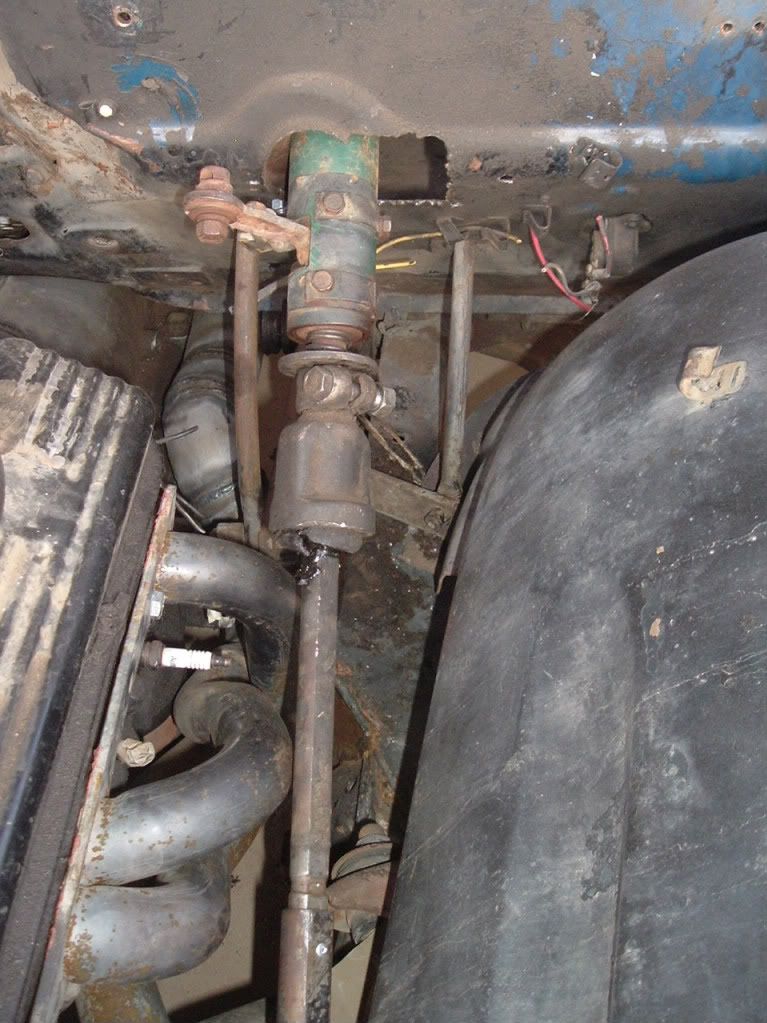 I still want the column to collapse in an accident, so those should work. As soon as I get the brakes done, I can blow this thing apart to sandblast and paint. I'm getting excited now... I still want the column to collapse in an accident, so those should work. I still want the column to collapse in an accident, so those should work. As soon as I get the brakes done, I can blow this thing apart to sandblast and paint. I'm getting excited now... I still want the column to collapse in an accident, so those should work.
Last edited by kustombrad; 11-12-2009 at 04:34 PM. |
|
|
|
|
03-12-2009, 06:22 PM
|
#44 |
|
Registered User
Join Date: Nov 2008
Location: So. Cal.
Posts: 452
|
Re: Project "49 No Buck$"
I got my wheels from Ron's Rims in PA. They are Majestic Wheels (15x10, 15x6)and were cheap! Call him at 888 734-1999 and find out what the deal is. I've bought a few sets of wheels from him on Ebay and his service is excellent!
|
|
|
|
|
03-12-2009, 08:51 PM
|
#45 |
|
Registered User
Join Date: Feb 2009
Location: bronx ny
Posts: 167
|
Re: Project "49 No Buck$"
what size tires? they look cool

|
|
|
|
|
03-12-2009, 09:58 PM
|
#46 |
|
Registered User
Join Date: Oct 2007
Location: Carbondale, Kansas
Posts: 547
|
Re: Project "49 No Buck$"
great build you diffantely got my attention. subscribing.
|
|
|
|
|
03-13-2009, 12:46 PM
|
#47 |
|
Registered User
Join Date: Nov 2008
Location: So. Cal.
Posts: 452
|
Re: Project "49 No Buck$"
275x60 and 205x60 for tire sizes. All about the big and littles!
|
|
|
|
|
03-16-2009, 12:16 PM
|
#48 |
|
Registered User
Join Date: Nov 2008
Location: So. Cal.
Posts: 452
|
Re: Project "49 No Buck$"
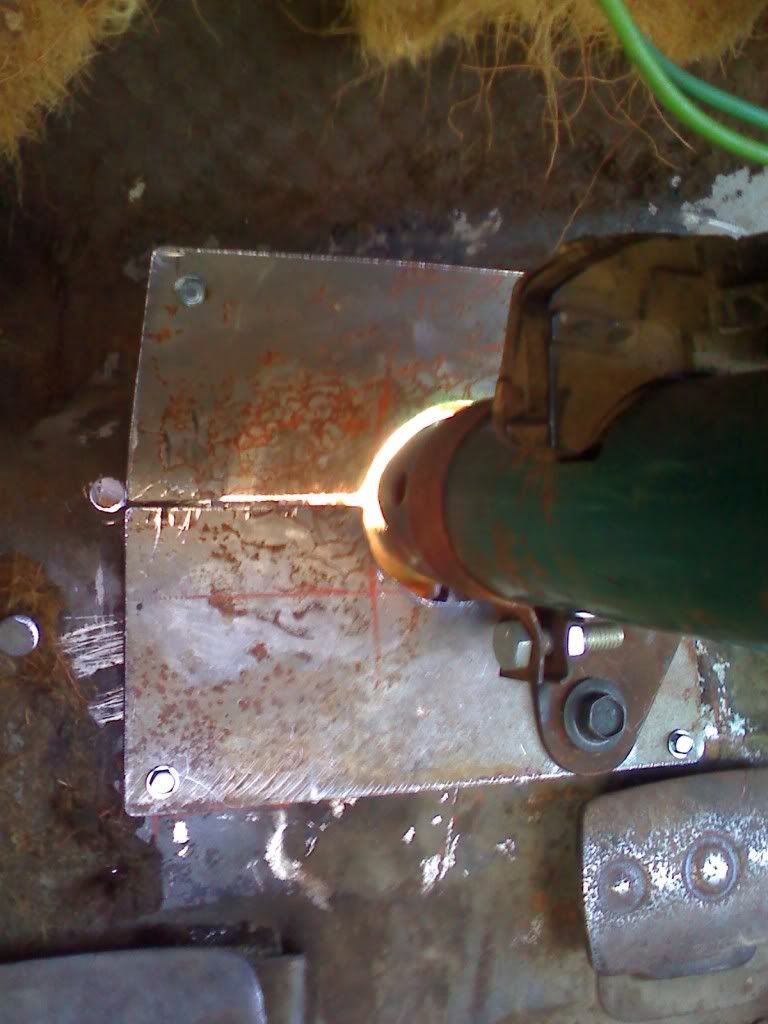
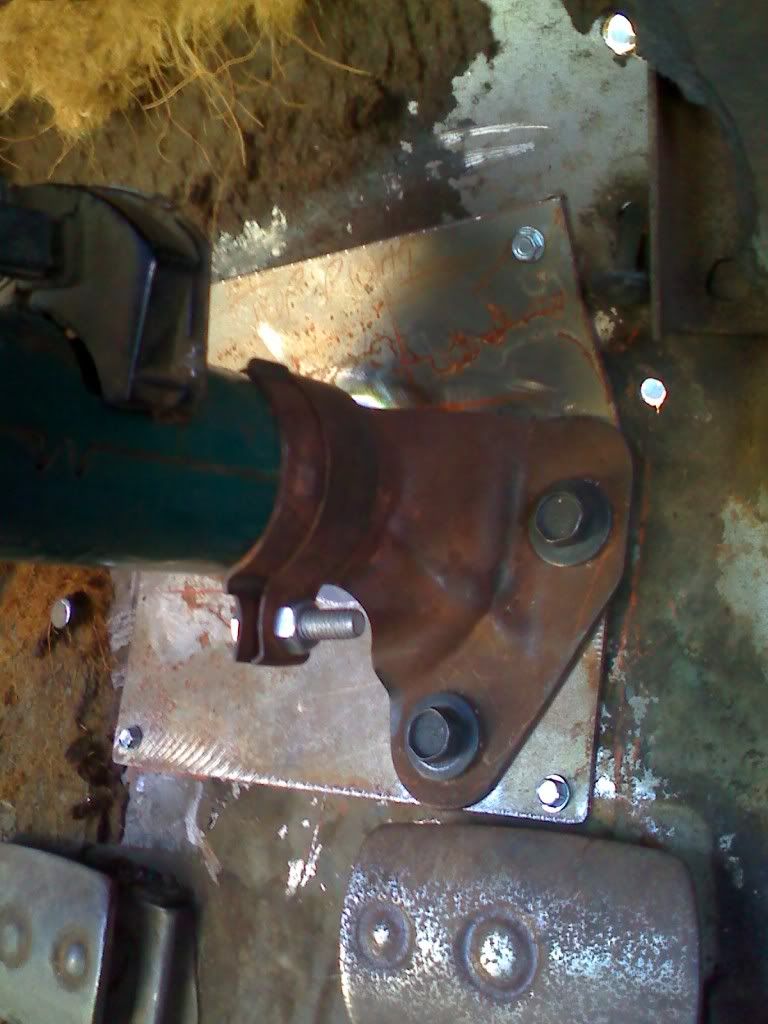
I made a filler panel for the firewall out of .060. After cleaning up the torch cut ragged hole with a cutoff wheel, I measured out a template and fit this in place. I'll use seam sealer once it's going back together for the final time. I need to find a big o-ring or something like it to seal the steering shaft.
|
|
|
|
|
03-16-2009, 12:43 PM
|
#49 |
|
Registered User
Join Date: Nov 2008
Location: So. Cal.
Posts: 452
|
Re: Project "49 No Buck$"
Now the seat was a little different, but it seems to work well. I scored a middle seat out of an Astro van on it's way to the wrecking yard (FREE!) after someone on the HAMB said it was the right size. Good call, it fits very nice! After setting it inside to see the height of it, I knew it had to come down. I measured from the bottom of the seat cushion itself to the top of the factory mount and took around 3 1/2" off all the way around with a sawzall.
 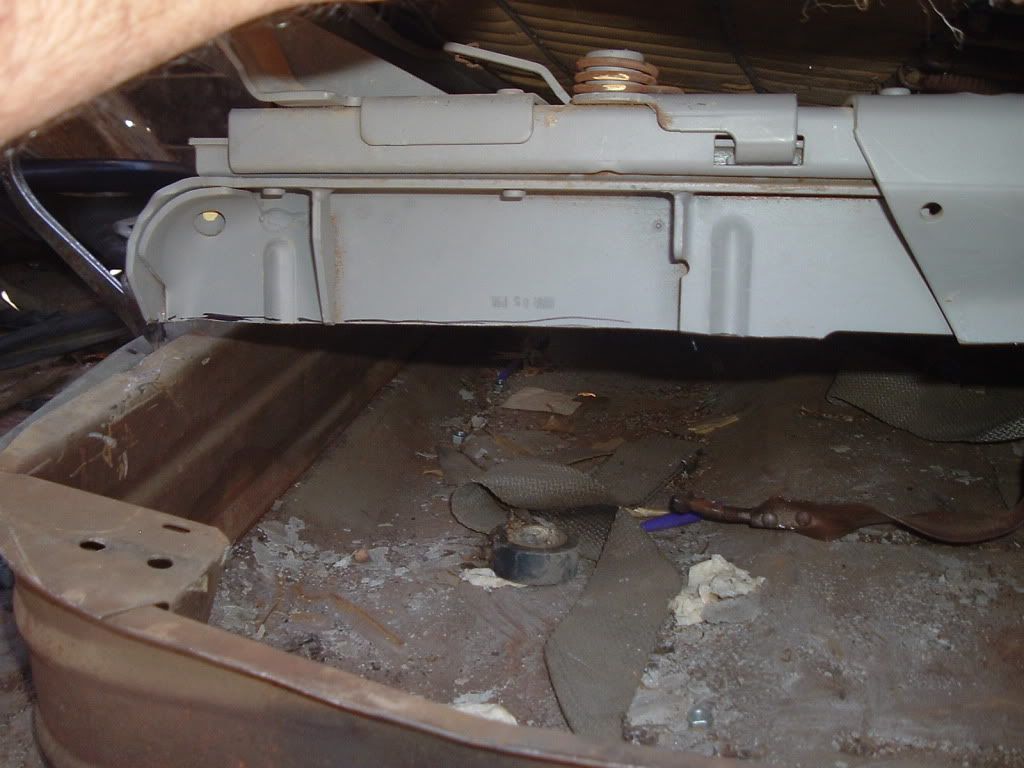 Now the mount sits flat on the floor, cushion resting on the factory mount. I used a piece of 1/8"x2" angle iron and after drilling 3 holes for the grade 8 7/16" bolts, we welded the angle in everyspot we could to the bottom of the seat bracket. Now the mount sits flat on the floor, cushion resting on the factory mount. I used a piece of 1/8"x2" angle iron and after drilling 3 holes for the grade 8 7/16" bolts, we welded the angle in everyspot we could to the bottom of the seat bracket. 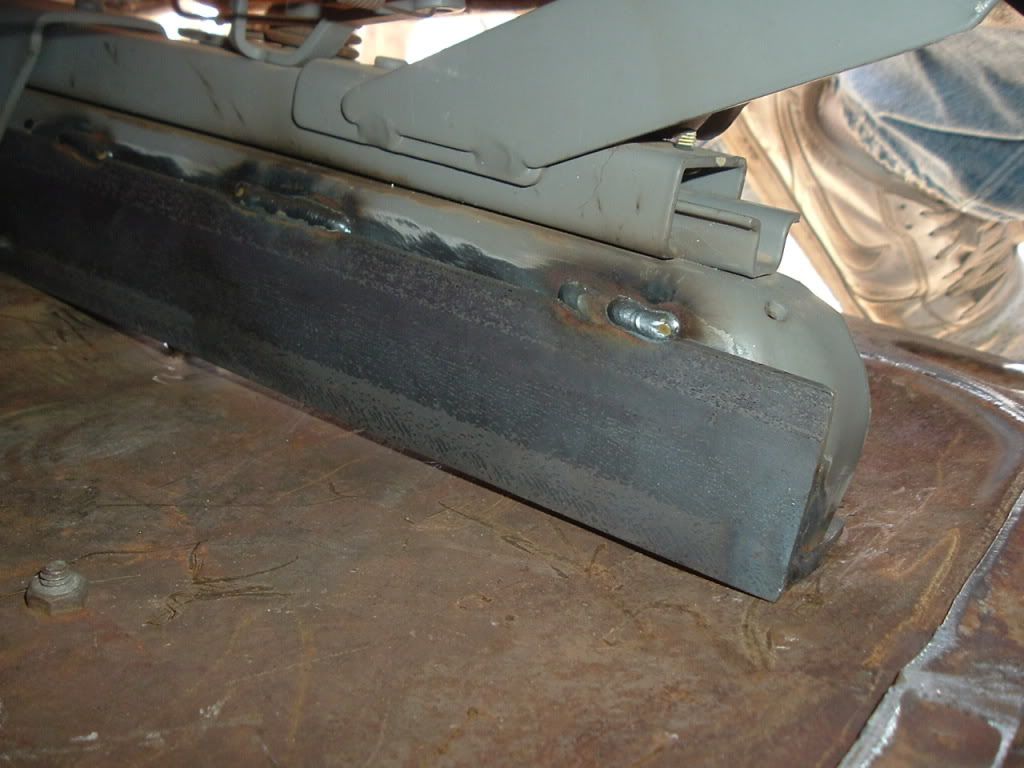 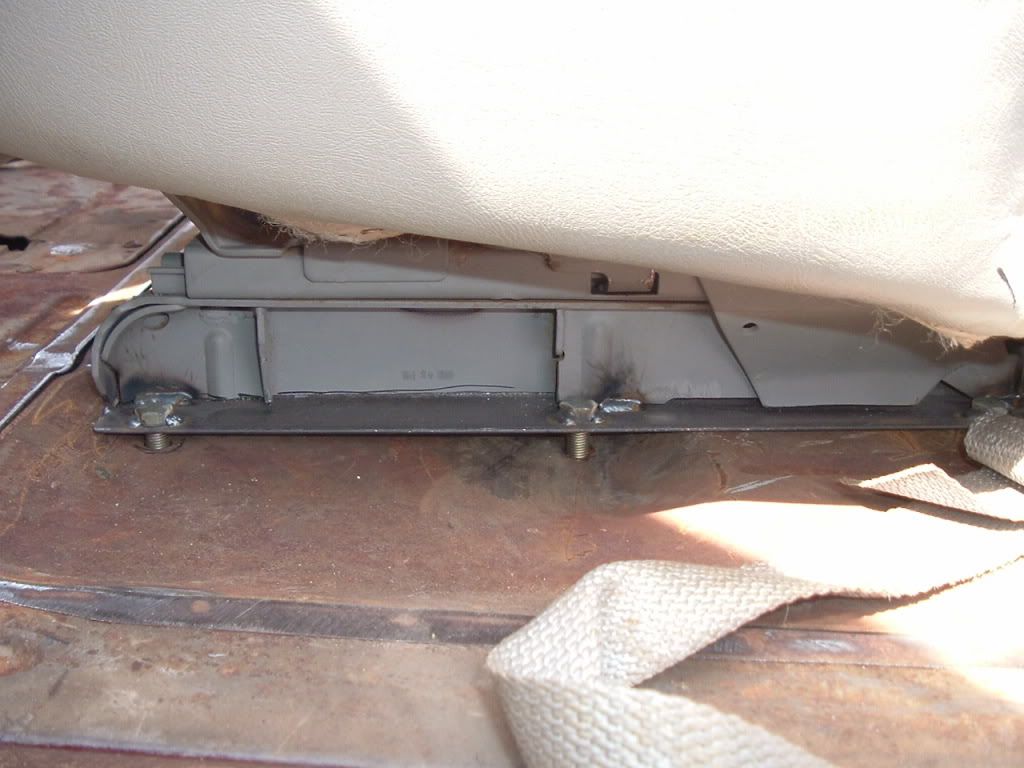 After it was centered and holes drilled in the floor, I took the seat out and using a 4" cutoff wheel, I removed the factory bracket. After grinding it smooth, it should look fine with some carpet covering everything up. I'll use a piece of 1/8"x 2" strap the length of the seat bracket underneath to bolt it to the floor. After it was centered and holes drilled in the floor, I took the seat out and using a 4" cutoff wheel, I removed the factory bracket. After grinding it smooth, it should look fine with some carpet covering everything up. I'll use a piece of 1/8"x 2" strap the length of the seat bracket underneath to bolt it to the floor.  I'm 5'11" and I'm comfortable with the layout so far. I'm 5'11" and I'm comfortable with the layout so far.
Last edited by kustombrad; 12-15-2009 at 09:22 PM. |
|
|
|
|
03-16-2009, 01:27 PM
|
#50 |
|
Registered User
Join Date: Feb 2009
Location: bronx ny
Posts: 167
|
Re: Project "49 No Buck$"
ur doing a good job man with no money,, keep it up nice pics,goodluck

|
|
|
|
 |
| Bookmarks |
|
|


 Linear Mode

