
|
|
|
 09-04-2008, 06:25 PM
|
#1 | |
|
1 thing at a time is progress.
Join Date: Jun 2007
Location: Ball Ground GA
Posts: 5,511
|
Re: My 1965 build thread
Quote:
__________________
Alan
Philippians 2:14-16 |
|

|

|
|
09-08-2008, 01:02 AM
|
#2 |
|
Registered User
 Join Date: Aug 2005
Location: Hillsboro Oregon
Posts: 6,449
|
Re: My 1965 build thread
You are doing some nice work there!
|
|
|
|
|
09-08-2008, 10:39 AM
|
#3 |
|
The Few, The Proud
Join Date: Jun 2007
Location: Ball Ground, Georgia
Posts: 1,830
|
Re: My 1965 build thread
Ok everybody I'm going to spill the beans on Alan. I'm his neighbor and I've watched him work on this truck since he first towed it home. He plays this little modest, naive body man act pretty good. Don't let him fool you about his talent. This guy is good. I've watched him in action and it comes pretty easy for him. Plus, he has every tool known to man.
 So don't fall victim to his "pity" story about him not being any good. So don't fall victim to his "pity" story about him not being any good.
__________________
Shannon |
|
|
|
|
09-08-2008, 11:20 AM
|
#4 |
|
Registered User
Join Date: Mar 2007
Location: West Virginia
Posts: 481
|
Re: My 1965 build thread
Looks like some good quality work going on right there. Keep it up.
__________________
My Build Thread http://67-72chevytrucks.com/vboard/s...d.php?t=269019 Petitioning *No Regrets* MD/WV |
|
|
|
|
09-08-2008, 09:14 PM
|
#5 |
|
1 thing at a time is progress.
Join Date: Jun 2007
Location: Ball Ground GA
Posts: 5,511
|
Re: My 1965 build thread
Thanks fellas.
I don't know if I believe sdailey or not. For you see I was having trouble with my new chain fall. The chains were in the way. I was just going to tie them back to the wall and then he said just hang a bucket on the hook to hold the chains. Now who is the smart one and who is the naive one? 
__________________
Alan
Philippians 2:14-16 |
|
|
|
|
01-17-2014, 12:54 PM
|
#6 | |
|
Registered User
Join Date: Nov 2013
Location: Henderson, NV
Posts: 306
|
Re: My 1965 build thread
Quote:
|
|
|
|
|
|
09-08-2008, 09:41 PM
|
#7 |
|
1961 crewcab
Join Date: Dec 2007
Location: missoula, mt
Posts: 6,164
|
Re: My 1965 build thread
I saw one of those "let go" of a 440 once...
I saw sparks , and was thinking wtf?' and then slamo 440 on the floor! glad I was watching and not a participant. |
|
|
|
|
09-08-2008, 10:54 PM
|
#8 | |
|
1 thing at a time is progress.
Join Date: Jun 2007
Location: Ball Ground GA
Posts: 5,511
|
Re: My 1965 build thread
Quote:
__________________
Alan
Philippians 2:14-16 |
|
|
|
|
|
09-09-2008, 07:30 AM
|
#9 |
|
1961 crewcab
Join Date: Dec 2007
Location: missoula, mt
Posts: 6,164
|
Re: My 1965 build thread
yeah the chain did not break, whatever style ratcheting mechanism that was in there just stripped out and let the chain go,hence the sparks as the chain shot through there!
That motor was about 4 1/2 feet off the ground , and it hit the cement in 1 second, bounced a tad and fell on its side. I think the weight limit was way exceded, and it was kinda worn out too..... |
|
|
|
|
09-13-2008, 12:22 AM
|
#10 |
|
1 thing at a time is progress.
Join Date: Jun 2007
Location: Ball Ground GA
Posts: 5,511
|
Re: My 1965 build thread
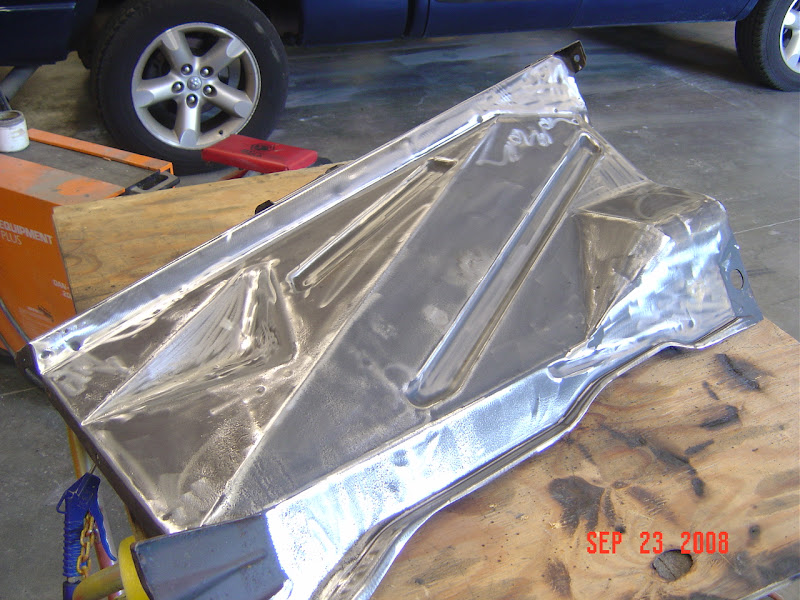
I've been busy, but not all of my time was spent on the truck. The bottom of the cab is getting a little closer to being done. I have to patch the left rear cab support and finish the filler.
I painted my wifes 92 sunburst yellow (only 1519 made). This is the last personal project other than my truck. Maybe I can concentrate on my truck more now. On-the-other hand, I've got a couple people in line to get some body work done. I've got to put a trunk floor pan in a 65 Buick GS (I think that is what it is). The other one is replace a quarter panel and do a complete color change on a Miata. Link to Miata in pix http://picasaweb.google.com/mx5miata...rstYellowMiata
__________________
Alan
Philippians 2:14-16 |
|
|
|
|
09-15-2008, 11:45 PM
|
#11 |
|
1 thing at a time is progress.
Join Date: Jun 2007
Location: Ball Ground GA
Posts: 5,511
|
Re: My 1965 build thread
Since my build is slow and boring at this stage, I thought why not make it informational. Since I'm a bodyman why not share some of my knowledge. Every bodyman has his or her own way of doing things and by no means do I know everything. What I will talk about works for me. Give me some feeback on this. If it's not any help to anyone then I won't do anymore.
These pix are from what I was working on tonight. I only had time to block on one door. The first pic is an assortment of blocks and air tools. There are numerous blocks on the market. You can get creative in making a block that works best for you. In the pic there is long 3/4" PVC pipe covered with file paper to block the inside long curves. I also made up a 18" wood block (ash) ran it thru a joiner to get a true flat side. I'm using it to block my doors. Once I prime I dust a light coat of black paint called guide coat to assist in showing low spots as seen in the pic. If this is helpful, let me know and I will keep posting info like this as I go.
__________________
Alan
Philippians 2:14-16 |
|
|
|
|
09-16-2008, 01:39 AM
|
#12 |
|
Registered User
Join Date: Feb 2008
Location: Avondale, Arizona
Posts: 54
|
Re: My 1965 build thread
Alan, thats great informationk, that would be great if you could give us little hints on things that will make life easier on us trying to do bodywork. My question is when you are blocking the area do you go in a criss-cross motion over the area? Any help would be greatly appreciated, keep up the great work, thanks Michael from Arizona.

|
|
|
|
|
09-16-2008, 06:47 AM
|
#13 | |
|
1 thing at a time is progress.
Join Date: Jun 2007
Location: Ball Ground GA
Posts: 5,511
|
Re: My 1965 build thread
Quote:
Thanks for the feedback. You do want to go in a criss cross pattern as much as possible with steady pressure. Let the sand paper do the work. Choosing the right block is pretty important. Take my door for example, you wouldn't want to use a 6" block on a big area like that. Remember lots of patience (sp).
__________________
Alan
Philippians 2:14-16 |
|
|
|
|
|
09-17-2008, 01:12 PM
|
#14 | |
|
I'm just glad to be here!
Join Date: Jan 2008
Location: Longview, TX
Posts: 4,788
|
Re: My 1965 build thread
Quote:
Keep the tips and tricks coming...
__________________
Karl  1965 Chevy Stepside(Grandpa's Old Blue) and (July 2015 Shop Build!)(2020, the Saga Continues) http://67-72chevytrucks.com/vboard/s...d.php?t=372424 The LST Challenge: http://67-72chevytrucks.com/vboard/s...=1#post7812257 Korbin's 1st Square: "Sunburn" http://67-72chevytrucks.com/vboard/s...d.php?t=418618 1985 GMC Sierra: "White Trash", Korbin's 2nd now... http://67-72chevytrucks.com/vboard/s...d.php?t=632305 Henry - 1984 Chevrolet, Owen's 1st Square |
|
|
|
|
|
09-17-2008, 08:43 PM
|
#15 |
|
Registered User
Join Date: Apr 2007
Location: Jane,Missouri
Posts: 844
|
That will look cool Alan
color combo cant wait see it!
|
|
|
|
|
09-18-2008, 10:25 PM
|
#16 | |
|
1 thing at a time is progress.
Join Date: Jun 2007
Location: Ball Ground GA
Posts: 5,511
|
Re: My 1965 build thread
Quote:
__________________
Alan
Philippians 2:14-16 |
|
|
|
|
|
09-16-2008, 05:44 AM
|
#17 |
|
1961 crewcab
Join Date: Dec 2007
Location: missoula, mt
Posts: 6,164
|
Re: My 1965 build thread
haha.. just do as Mr Miagi say "wax on-wax off!"
nice addition alan, I think a post like this will help some. this is where the cost of your paint job starts taking off. lots of labor in sanding. look forward to more tips and pointers. |
|
|
|
|
09-16-2008, 08:39 AM
|
#18 |
|
Registered User
Join Date: Dec 2007
Location: Palmer, Alaska
Posts: 13,821
|
Re: My 1965 build thread
good info, thanks
__________________
CHEVY ONLY
|
|
|
|
|
09-16-2008, 11:07 PM
|
#19 |
|
1 thing at a time is progress.
Join Date: Jun 2007
Location: Ball Ground GA
Posts: 5,511
|
Re: My 1965 build thread
Here is the paint scheme I'm thinking about. I changed the color to hugger orange, it used to be white. The stripes and wheels are like a charcoal grey.
I'm thinking Orange all over including the inside the cab and engine bay. The charcoal will be on the top, inside the side trim, wheels, frame and highlights on the impala dash. All of the bolt on pieces on the frame will be a gloss black.
__________________
Alan
Philippians 2:14-16 |
|
|
|
|
09-26-2008, 09:49 AM
|
#20 |
|
Registered User
Join Date: Dec 2007
Location: Palmer, Alaska
Posts: 13,821
|
Re: My 1965 build thread
here is one of your pics
 that link you posted above is a link to your entire album i just clicked on one of your pics to make it bigger in picasa then right click it and copy image location, then click on the little picture button that looks like a pic of a mountain and paste the copied text in the window that pops up...make sense? or you should be able to just put the img tags around it  yeah that works too..... so here is the text of the sunset pic without the first and last brackets img]http://lh6.ggpht.com/mx5miatanut/SNWGPpYKKSI/AAAAAAAACJ0/RTtserFFRJI/s512/DSC07651.JPG[/img
__________________
CHEVY ONLY
Last edited by joe231; 09-26-2008 at 09:58 AM. |
|
|
|
|
09-26-2008, 10:42 AM
|
#21 |
|
Registered User
Join Date: Sep 2008
Location: Newport, North Carolina
Posts: 618
|
Re: My 1965 build thread
This thread freakin motivates me! Haha, I love looking at these pictres, seeing this truck done right, it's great! Keep the pics and updates coming. As soon as I joined this site and saw this thread, I started ordering parts to finish up my floors.
|
|
|
|
|
09-26-2008, 11:53 AM
|
#22 |
|
1 thing at a time is progress.
Join Date: Jun 2007
Location: Ball Ground GA
Posts: 5,511
|
Re: My 1965 build thread
 Thanks Joe and everyone else. I got it. 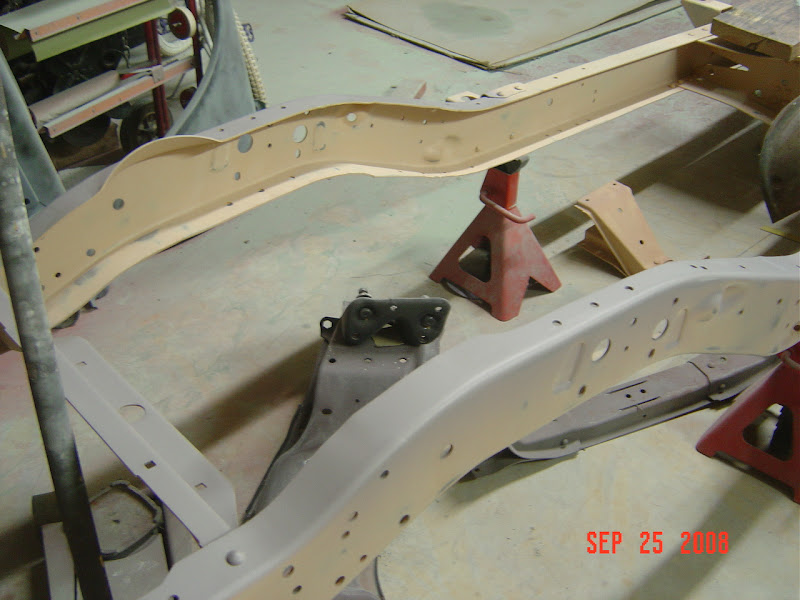 I'm liking this. I have to go to the properties of the pic I want to show and copy and paste the data from there. If I right click on the pic that I want to embed and copy it, it won't let me paste it when I click on the insert image icon (with mountains). Thanks Again
__________________
Alan
Philippians 2:14-16 |
|
|
|
|
09-26-2008, 11:40 PM
|
#23 |
|
1 thing at a time is progress.
Join Date: Jun 2007
Location: Ball Ground GA
Posts: 5,511
|
Re: My 1965 build thread
I got some seam sealing done tonight. This pic shows the primer sanded with 320 alittle past where the sealer will be so it will have something to bite too.
 Taped off and ready to seal. 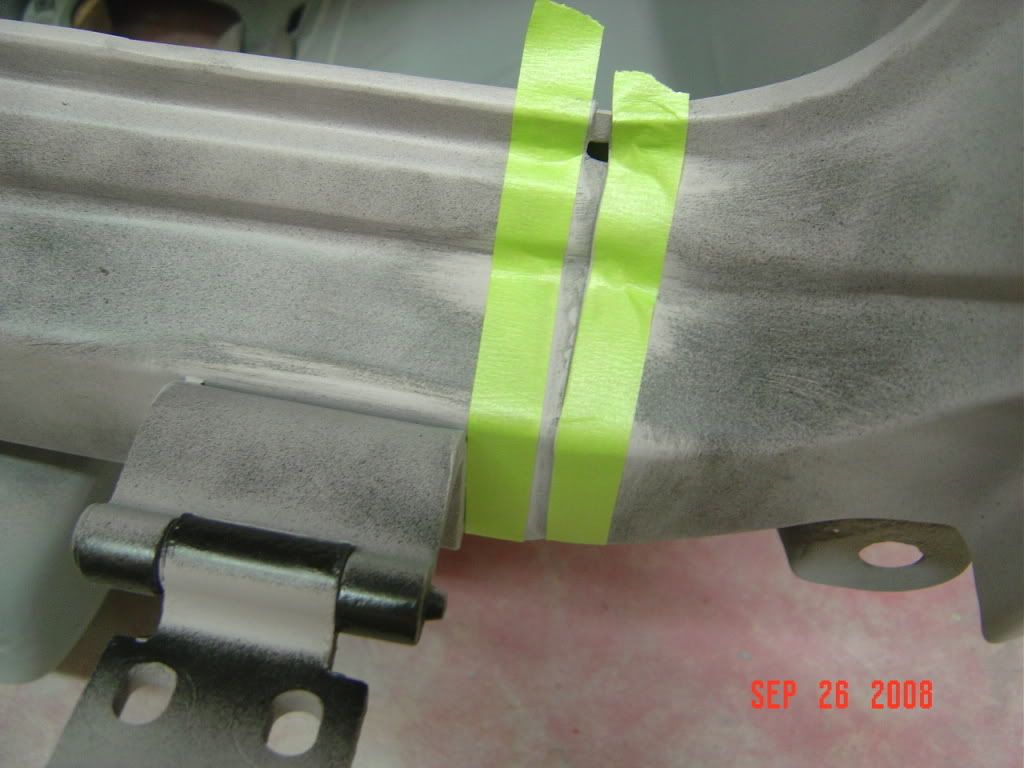 Bottom of the cab sealed. 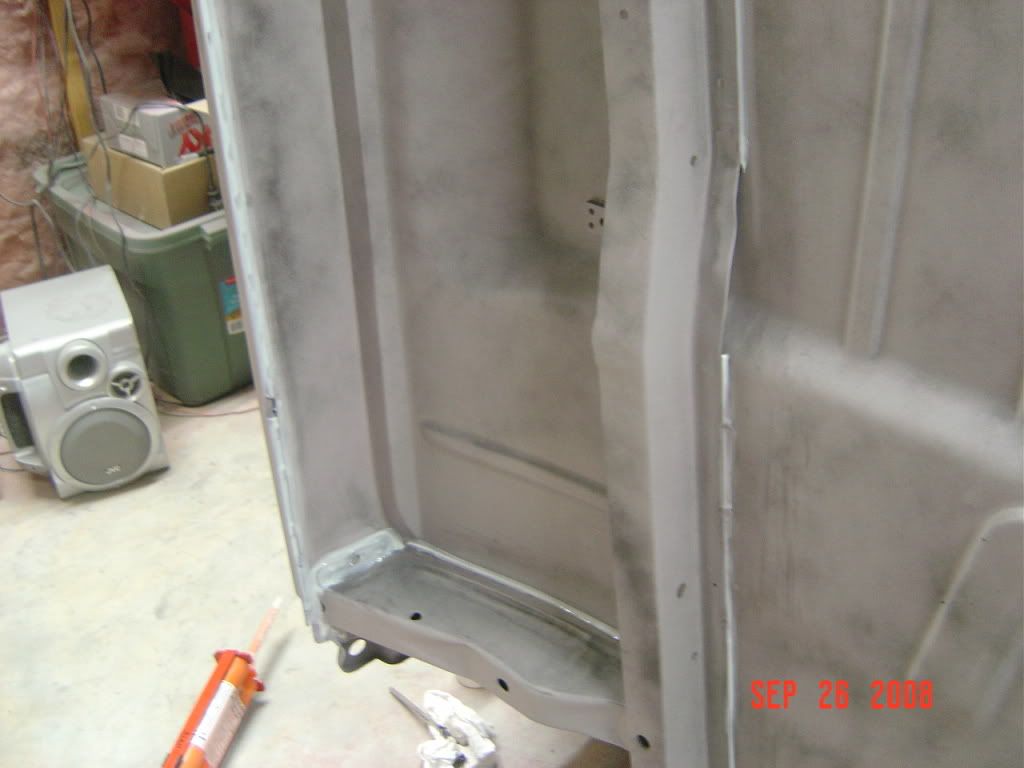 I'm gambaling on this. I'm leaving the hinges where they were when I aligned everything. This normally works for me. It might bite me later if things don't line up. 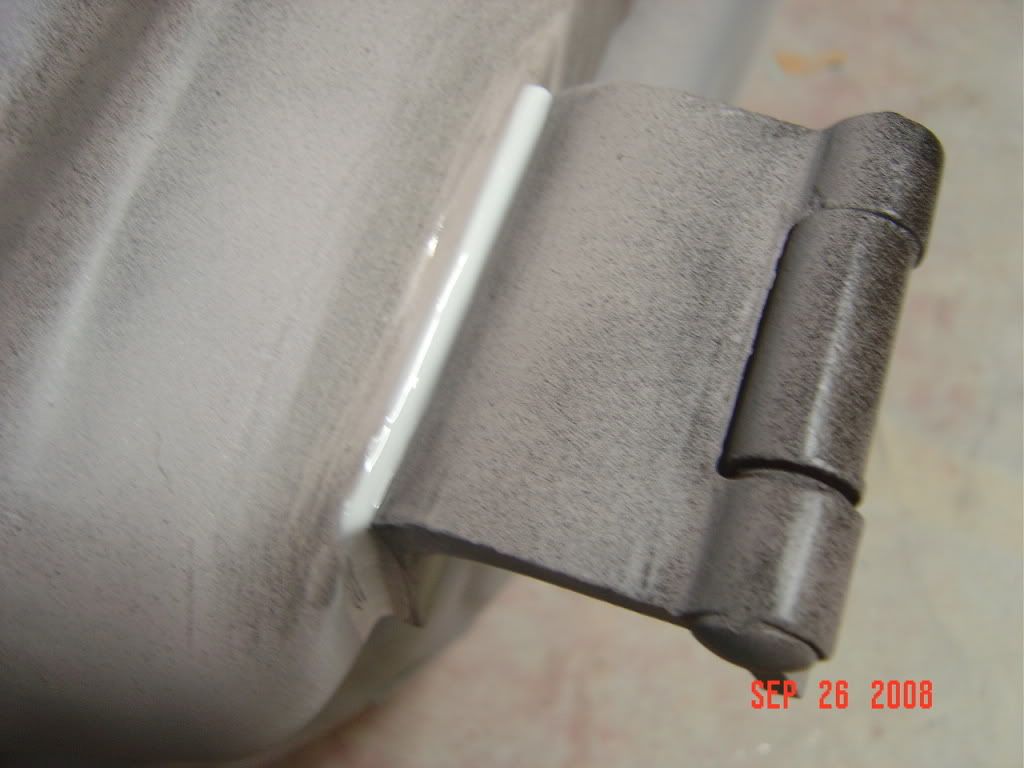 I'm going to try photobucket.com for my pix. It's alot easier to insert an image than Picassa. I just signed up tonight and I'm still learning it. I can't figure out how to put the pix in a certain order. Here is the link to it. http://s369.photobucket.com/albums/o...20C10%20Build/
__________________
Alan
Philippians 2:14-16 |
|
|
|
|
09-27-2008, 12:04 AM
|
#24 | |
|
1 thing at a time is progress.
Join Date: Jun 2007
Location: Ball Ground GA
Posts: 5,511
|
Re: My 1965 build thread
Quote:
Send me a link to your progress and good luck.
__________________
Alan
Philippians 2:14-16 |
|
|
|
|
|
09-27-2008, 01:04 AM
|
#25 |
|
Registered User
Join Date: Dec 2007
Location: Palmer, Alaska
Posts: 13,821
|
Re: My 1965 build thread
 Alan, glad to help! Alan, glad to help!looking good!!!
__________________
CHEVY ONLY
Last edited by joe231; 09-27-2008 at 01:05 AM. |
|
|
|
 |
| Bookmarks |
| Tags |
| 1959, 1960, 1964, 1965, 1966, c10, hugger, impala, orange |
|
|


 Hybrid Mode
