
|
 05-02-2016, 06:43 AM
|
#826 |
|
Registered User
Join Date: Apr 2011
Location: .
Posts: 3,104
|
Re: Project '64 Cheapskate
Nice job on the gate.
|

|

|
|
05-02-2016, 07:54 AM
|
#827 |
|
Registered User
Join Date: Apr 2003
Location: Indep, MO
Posts: 5,893
|
Re: Project '64 Cheapskate
Came out clean! Gives a neat effect.
__________________
Boppa's Old Yeller Truck Build, Old Yeller's New Heart! Project Buzz Bomb Flyin' Low! |
|
|
|
|
05-04-2016, 09:20 PM
|
#828 |
|
Registered User
Join Date: Jul 2012
Location: Longview WA
Posts: 738
|
Re: Project '64 Cheapskate
[QUOTE=chevyrestoguy;7579144]Spent the last couple of days cleaning up my tailgate. I absolute despise rust, so it had to go. After many applications of CLR and scrubbing with a Scotchbrite, it was ready for many more applications of Naval Jelly. A final application of 50/50 bleach and water, and then a bath of baking soda and water to neutralize the acid. I should taken a "before" picture of the backside of the tailgate. It was way worse than the front, and it looked like it was used a shelf to store rusty parts. It was 100% covered in rust that felt like 60 grit. I'm going with a clean, rust-free patina on this truck, and when it's all said and done, I'll probably have more time in preserving the original paint than if I had just done a complete paint job!
NICE!
__________________
Seth Instagram: sethrosa11 My Build Thread: "Betty" http://67-72chevytrucks.com/vboard/s...d.php?t=613225 1966 C10 Patina: http://67-72chevytrucks.com/vboard/s...d.php?t=716802 1978 Big 10 http://67-72chevytrucks.com/vboard/s...d.php?t=771383 |
|
|
|
|
05-04-2016, 09:59 PM
|
#829 | |||||||
|
Registered User
 Join Date: Mar 2005
Location: apple valley, ca
Posts: 2,670
|
Re: Project '64 Cheapskate
Quote:
Quote:
Quote:
Quote:
Quote:
Quote:
Quote:
__________________
Check out my latest endeavor: https://roundsixpod.com My build threads: '55 Chevy: http://67-72chevytrucks.com/vboard/s...d.php?t=247512 '64 C-20: http://67-72chevytrucks.com/vboard/s...d.php?t=446527 |
|||||||
|
|
|
|
05-06-2016, 06:44 AM
|
#830 |
|
Registered User
Join Date: Mar 2005
Location: apple valley, ca
Posts: 2,670
|
Re: Project '64 Cheapskate
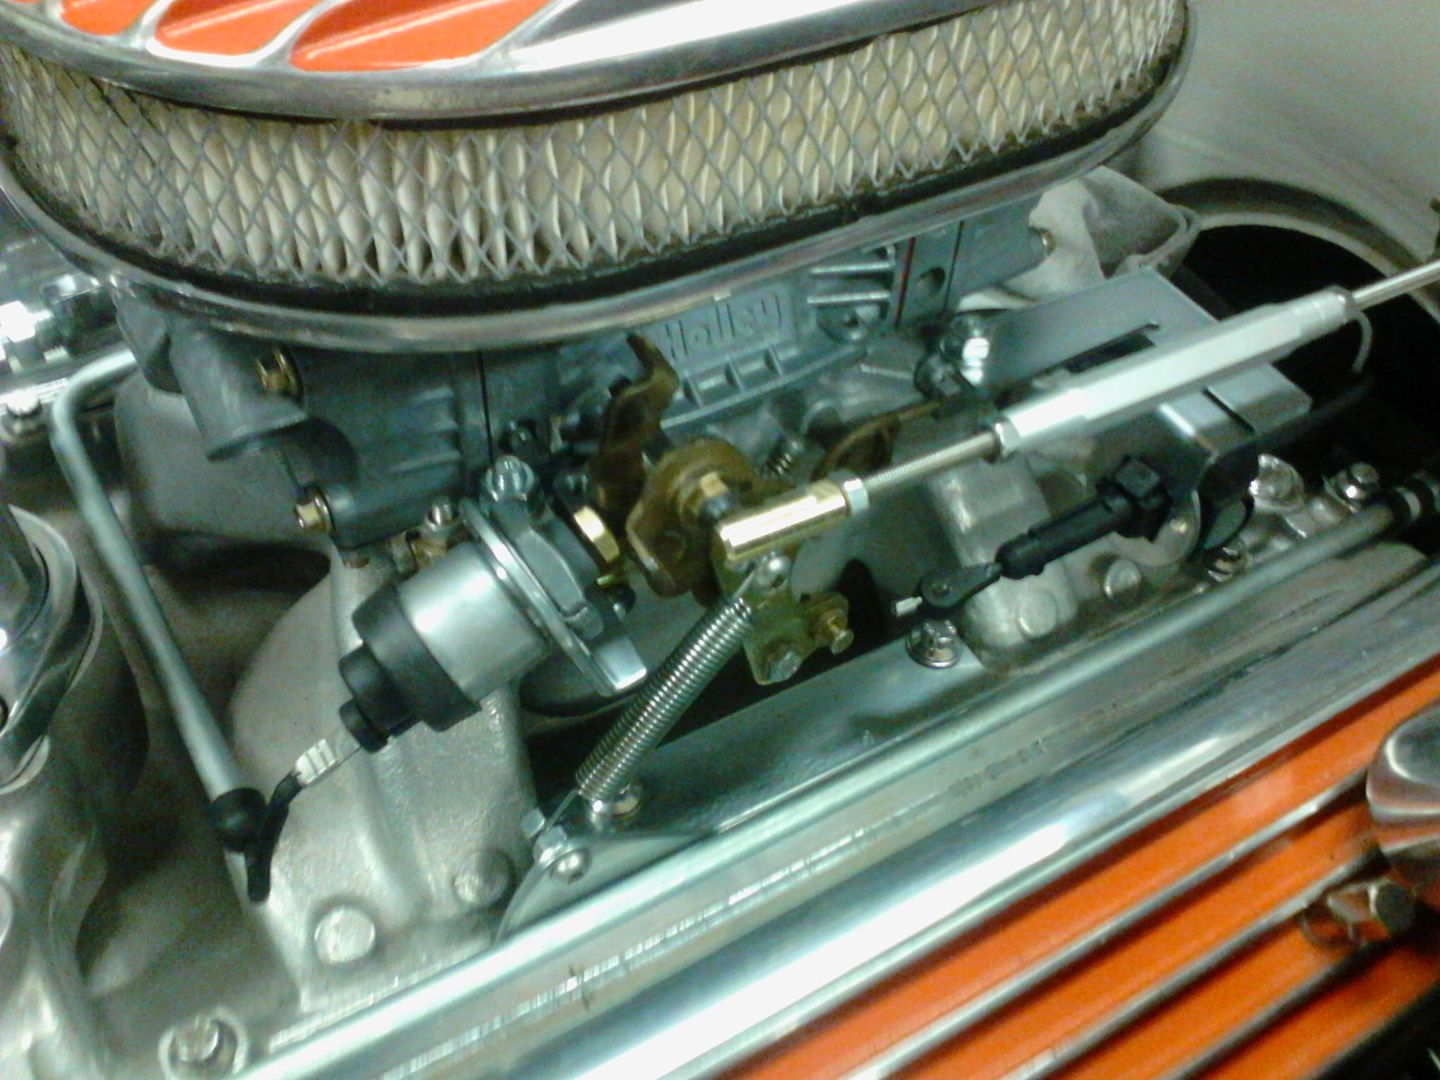
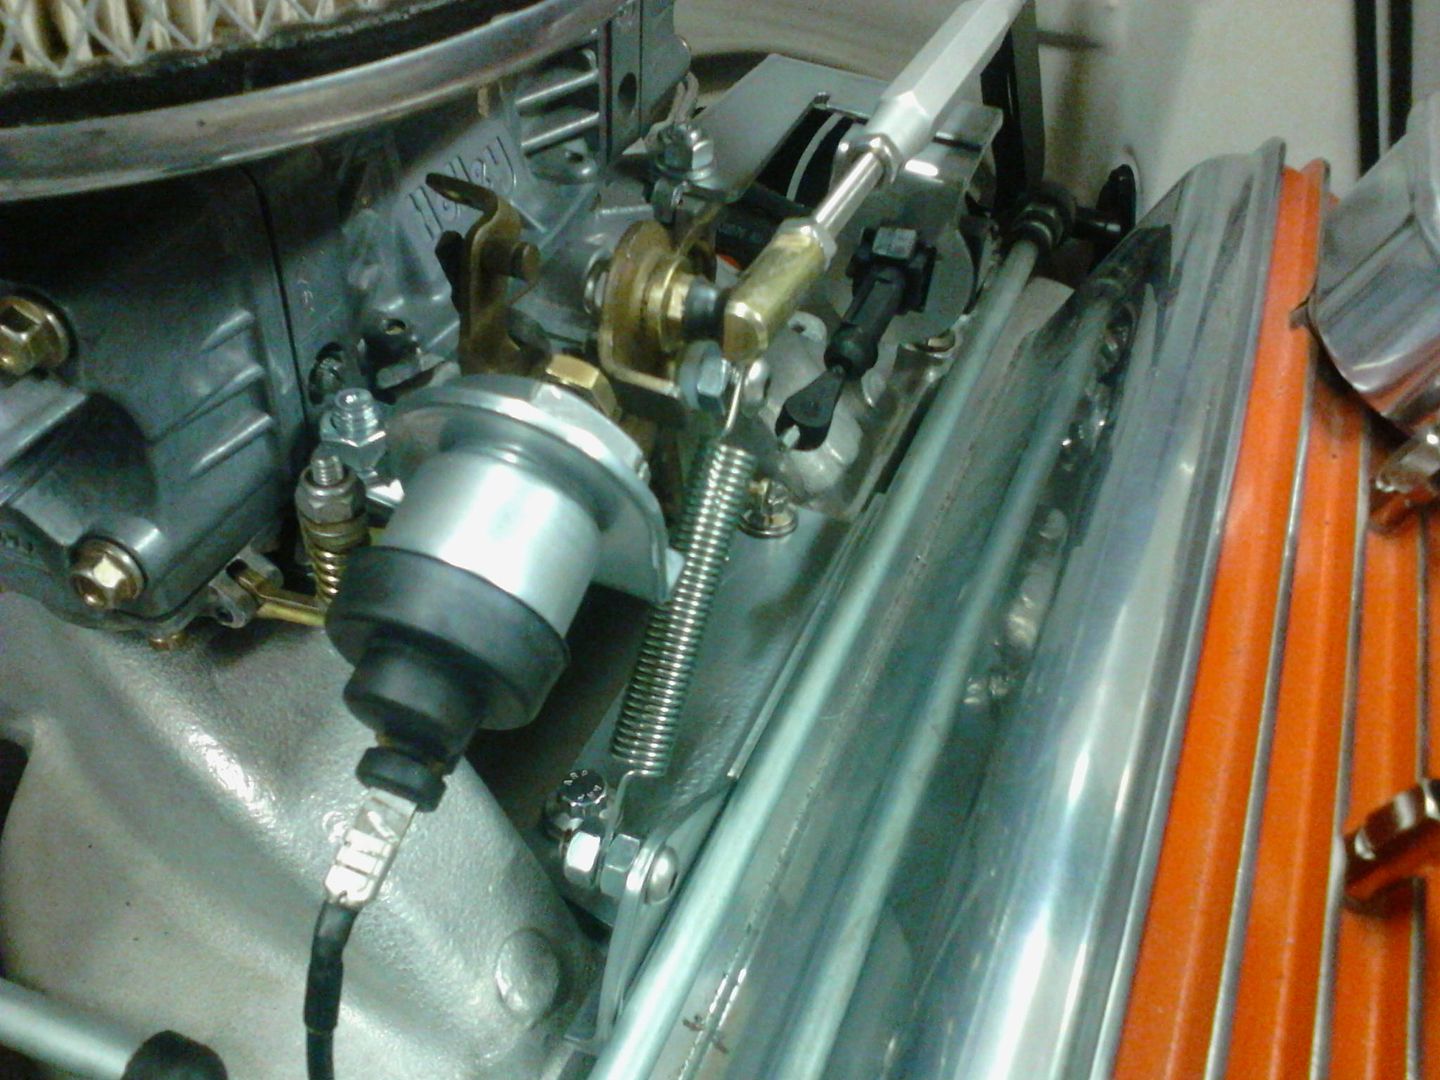
Starting to do a lot of the detail items that aren't much fun. Built an A/C idle solenoid bracket, a throttle spring bracket, and modified a Holley TV cable bracket. The A/C solenoid bracket was made from one off of a Quadrajet that I chopped up. The throttle spring bracket was made from a piece of scrap angle iron, and the TV cable bracket was one from Holley that I cut all of the unused appendages off of. Then, I sent them all out for powdercoat. They sprayed them in Super Chrome and added a clear coat for extra protection.
__________________
Check out my latest endeavor: https://roundsixpod.com My build threads: '55 Chevy: http://67-72chevytrucks.com/vboard/s...d.php?t=247512 '64 C-20: http://67-72chevytrucks.com/vboard/s...d.php?t=446527 |
|
|
|
|
05-06-2016, 08:42 PM
|
#831 |
|
Registered User
Join Date: Sep 2012
Location: Midway, NC
Posts: 3,275
|
Re: Project '64 Cheapskate
Awesome attention to detail.
__________________
http://67-72chevytrucks.com/vboard/s...d.php?t=581873 The low buck build threads. Check'em out! http://67-72chevytrucks.com/vboard/s...d.php?t=666022 My build thread Crossmembers CC |
|
|
|
|
05-07-2016, 01:08 AM
|
#832 |
|
Registered User
Join Date: Apr 2011
Location: .
Posts: 3,104
|
Re: Project '64 Cheapskate
Small attention to details is what puts this build in the top 10 on my list.
|
|
|
|
|
05-07-2016, 12:38 PM
|
#833 | |
|
Registered User
Join Date: Feb 2009
Location: Southern Oregon
Posts: 1,352
|
Re: Project '64 Cheapskate
Quote:
__________________
1967 C10 Suburban 454/TH400/3.07's An Average Joe and His 'Burb: http://67-72chevytrucks.com/vboard/s...d.php?t=775843 |
|
|
|
|
|
05-08-2016, 06:27 PM
|
#834 |
|
Registered User
Join Date: Sep 2012
Location: Midway, NC
Posts: 3,275
|
Re: Project '64 Cheapskate
I think one of these fine days I'll be standing in your driveway with my 76 waiting to see your truck. You laugh now but you never know. Then maybe we can hop over to Brads so I can see his truck.
__________________
http://67-72chevytrucks.com/vboard/s...d.php?t=581873 The low buck build threads. Check'em out! http://67-72chevytrucks.com/vboard/s...d.php?t=666022 My build thread Crossmembers CC |
|
|
|
|
05-12-2016, 01:23 PM
|
#835 |
|
Registered User
Join Date: Apr 2003
Location: Indep, MO
Posts: 5,893
|
Re: Project '64 Cheapskate
Neat and tidy!
__________________
Boppa's Old Yeller Truck Build, Old Yeller's New Heart! Project Buzz Bomb Flyin' Low! |
|
|
|
|
05-28-2016, 11:45 AM
|
#836 |
|
Registered User
Join Date: Mar 2005
Location: apple valley, ca
Posts: 2,670
|
Re: Project '64 Cheapskate
This week's project.......rebuilding a broken hood latch.
As far as I know, nobody reproduces a hood latch for the 60-66 trucks, and I have to think that a lot of them got pitched in the trash because they were considered to be broken. The main culprit is usually the secondary hood latch spring, also known as the safety latch. With the huge size of our hoods, you never want to use a latch without an operating safety because you'll fold the hood back on the freeway and destroy a lot of other stuff in the process. Unfortunately, none of the aftermarket companies make a replacement spring, but with a little research, you can find a suitable substitute. First of all, you have to remove the spring by grinding down the head of the locating pin and driving it out. A suggestion would be to make marks on the latch before you pull it apart in order to ensure that it goes back together in the right position. Once you remove the pin, you will have to open the hole in the latch arm to 5/16 (.312). The pin will be replaced with a 2.25" 5/16 bolt (grade 8) and a Nylock. The biggest problem I found with finding a replacement spring was that nobody made one in the same outside coil diameter as the original spring. I went to McMaster-Carr and found a spring that was as close to the factory as I could find. Part# 9271K589 (Music wire torsion spring, 90 degree angle, .848" spring OD, .105 wire diameter, left hand). Make sure it's wound in a left hand orientation, same as factory! Now, the spring has a tight winding and will need to be stretched in order for the spring legs to align with the locating tangs on the latch, so I put mine in a vice and stretched it to give a little spacing between the windings and increasing the edge to edge length. In order to locate the spring correctly, I had to make a spacer that fit inside the inner diameter of the spring. The reason is, the added diameter of the replacement spring with cause it to sit cocked when it's installed because the spring is under pressure. The fix is to make an aluminum spacer, 1.5" in length, .600 in outer diameter, and a center hole of .312. If you've got a lathe, it's a simple piece to make, or any machinist can whip one out quickly. Tighten the 5/16 bolt, but not too tight to cause the latch movement to bind. I ground the height of the Nylock slightly to ensure that there was enough threads protruding out of the end. Reassembly is a little tricky because you have to compress the spring, and a word of advice is to NOT trim the excess length of the spring ends until you install the spring for the final time! Here are some pictures of the final product. Works great, and it saved the latch from being tossed in the scrap pile. 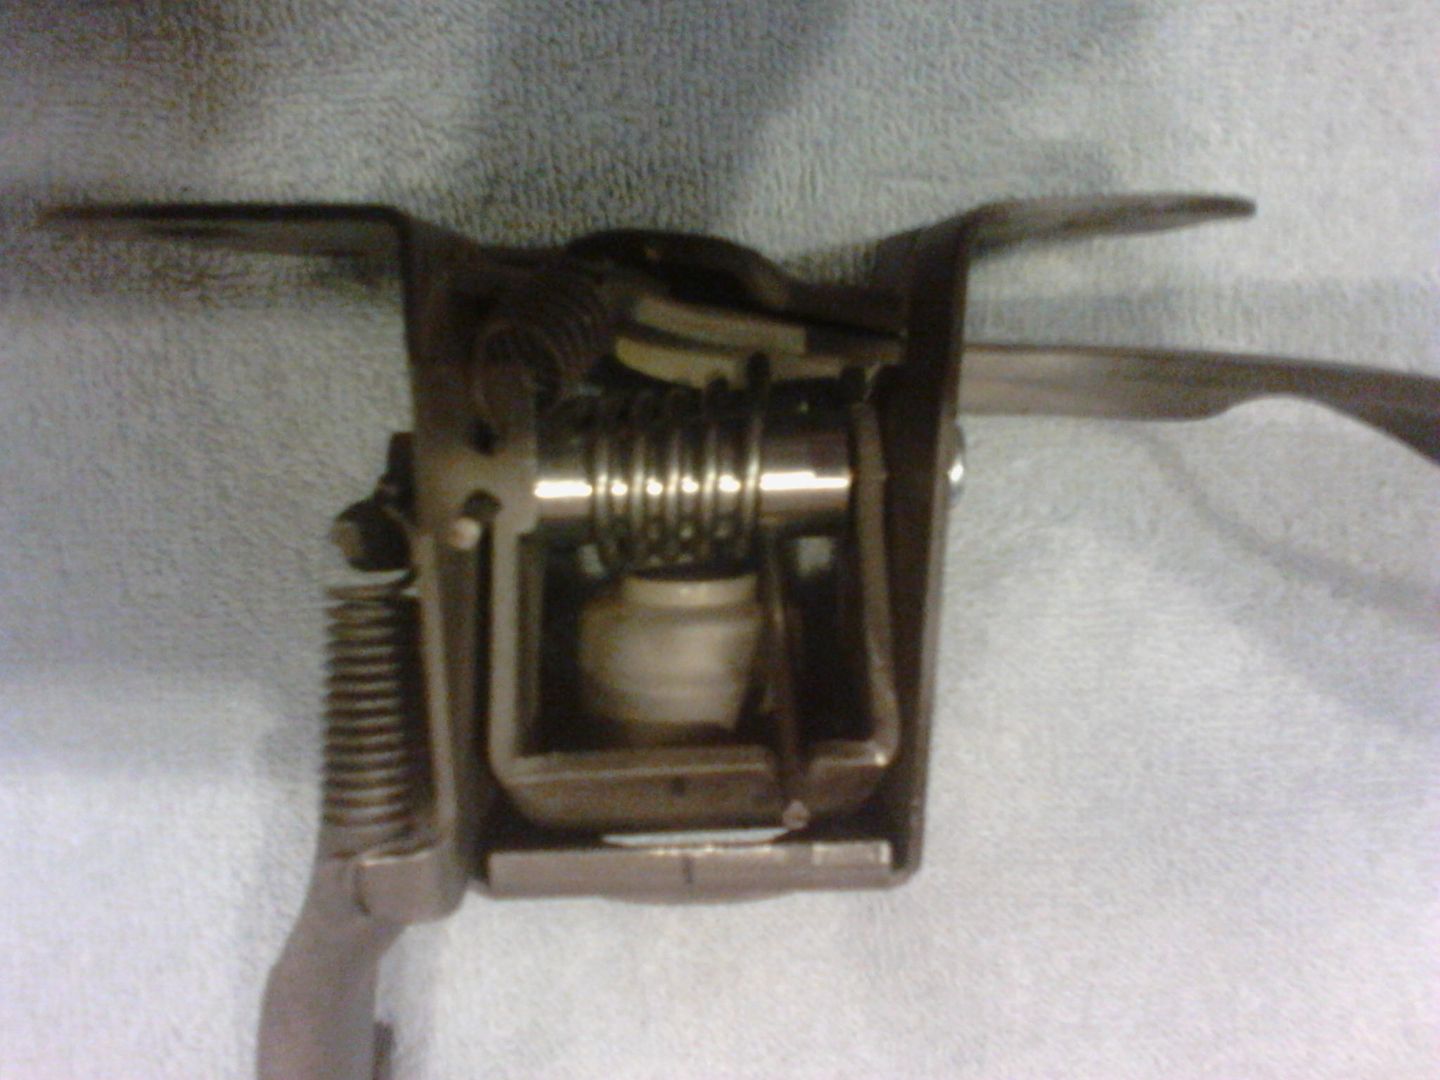  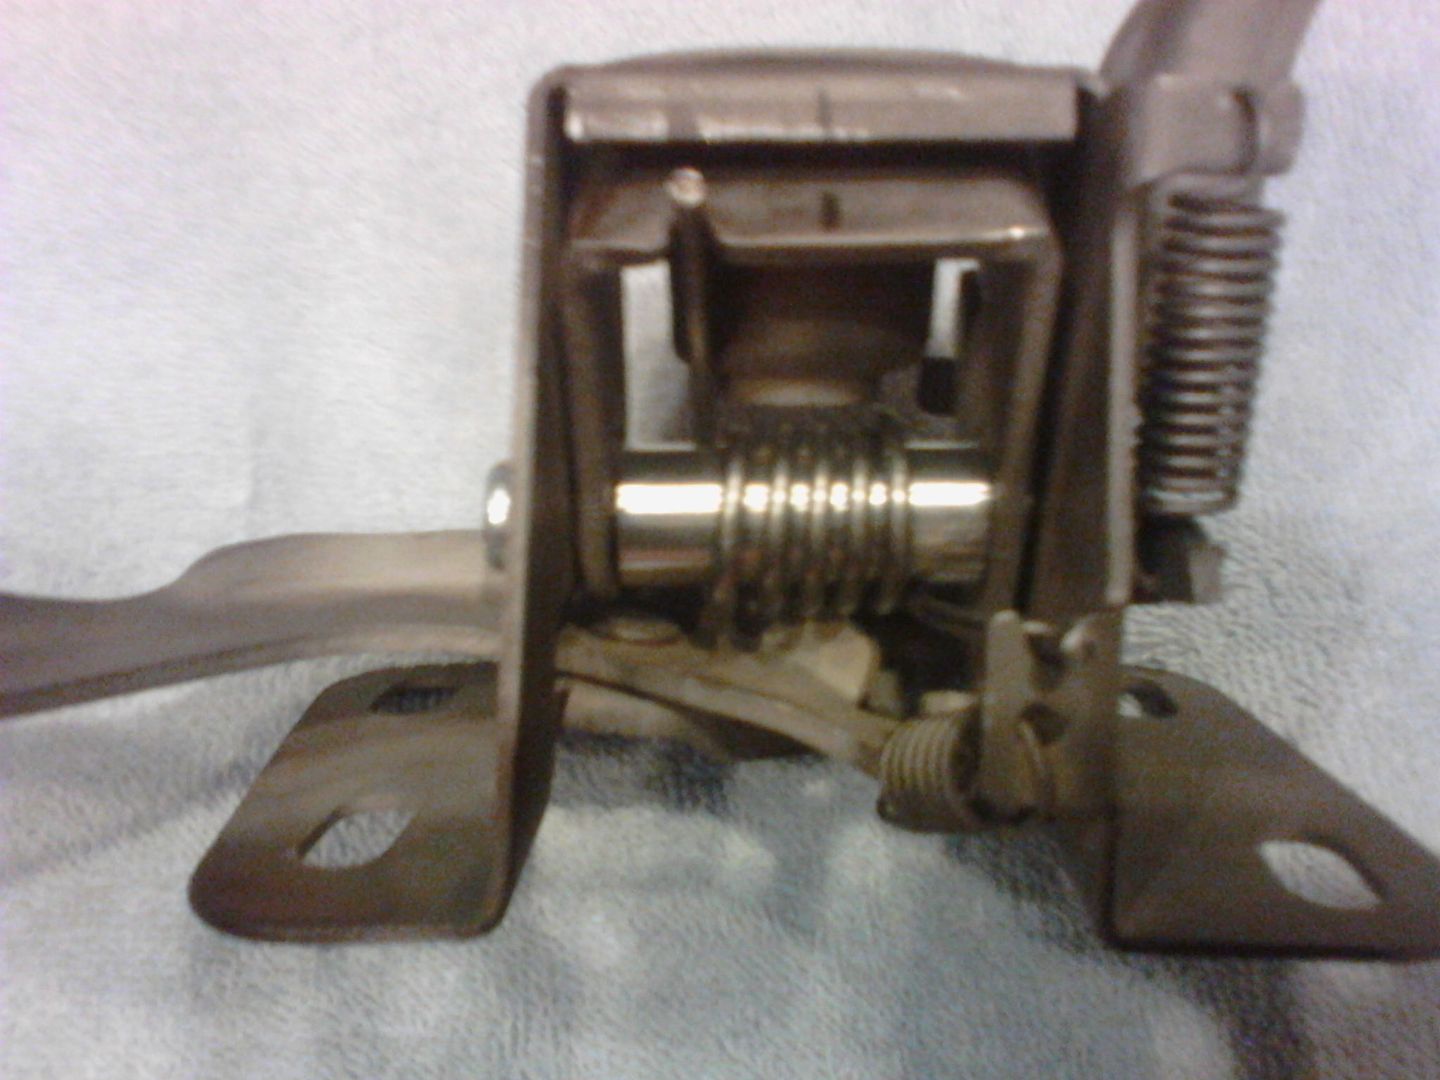
__________________
Check out my latest endeavor: https://roundsixpod.com My build threads: '55 Chevy: http://67-72chevytrucks.com/vboard/s...d.php?t=247512 '64 C-20: http://67-72chevytrucks.com/vboard/s...d.php?t=446527 |
|
|
|
|
05-28-2016, 07:51 PM
|
#837 |
|
Registered User
Join Date: Sep 2012
Location: Midway, NC
Posts: 3,275
|
Re: Project '64 Cheapskate
Always endeavorous you are.
__________________
http://67-72chevytrucks.com/vboard/s...d.php?t=581873 The low buck build threads. Check'em out! http://67-72chevytrucks.com/vboard/s...d.php?t=666022 My build thread Crossmembers CC |
|
|
|
|
05-31-2016, 12:18 PM
|
#838 |
|
Registered User
Join Date: Apr 2003
Location: Indep, MO
Posts: 5,893
|
Re: Project '64 Cheapskate
Nice!
__________________
Boppa's Old Yeller Truck Build, Old Yeller's New Heart! Project Buzz Bomb Flyin' Low! |
|
|
|
|
06-07-2016, 05:24 PM
|
#839 |
|
Registered User
Join Date: Mar 2016
Location: Mazatlan, Sinaloa, Mexico.Harbor in the Pacific
Posts: 3
|
Re: Project '64 Cheapskate
:diablo excellent job, hope updates:diablo:
|
|
|
|
|
06-15-2016, 07:40 PM
|
#840 |
|
Registered User
Join Date: Oct 2012
Location: cortland, oh
Posts: 792
|
Re: Project '64 Cheapskate
I've been referencing the work you did on your evap AC box for awhile (trying to do the same but with small extension fittings, no luck yet.)
Saw you just redid the hood spring, had the same issue with mine! Used a pin from tractor supply and i think a spring i made from a coat hangar? Glad to see i'm not the only one fickle on these details! You wouldn't happen to remember the # sizes on the a/c lines would you? Best i can guess larger one from evap is #10 and from valve is #6?
__________________
Project "i'm just going to clean up the interior and the engine bay": http://67-72chevytrucks.com/vboard/s...d.php?t=550931 |
|
|
|
|
08-14-2016, 09:34 PM
|
#841 |
|
Registered User
Join Date: Dec 2015
Location: Fullerton ca
Posts: 13
|
Re: Project '64 Cheapskate
Bump for an update hopefully
|
|
|
|
|
08-15-2016, 01:12 PM
|
#842 |
|
Registered User
Join Date: Apr 2003
Location: Indep, MO
Posts: 5,893
|
Re: Project '64 Cheapskate
Yeah! Yeah!
__________________
Boppa's Old Yeller Truck Build, Old Yeller's New Heart! Project Buzz Bomb Flyin' Low! |
|
|
|
|
08-15-2016, 04:54 PM
|
#843 |
|
Registered User
Join Date: Sep 2012
Location: Midway, NC
Posts: 3,275
|
Re: Project '64 Cheapskate
Bump bump
__________________
http://67-72chevytrucks.com/vboard/s...d.php?t=581873 The low buck build threads. Check'em out! http://67-72chevytrucks.com/vboard/s...d.php?t=666022 My build thread Crossmembers CC |
|
|
|
|
11-19-2016, 10:27 PM
|
#844 |
|
Registered User
Join Date: Apr 2016
Location: san diego ça
Posts: 121
|
Re: Project '64 Cheapskate
Just did hood latch repair worked awesome
 any updates? any updates?
|
|
|
|
|
01-16-2017, 07:33 PM
|
#845 |
|
Registered User
Join Date: Dec 2015
Location: Fullerton ca
Posts: 13
|
Re: Project '64 Cheapskate
This is such a great build , any updates
|
|
|
|
|
02-21-2017, 11:48 PM
|
#846 |
|
Registered User
Join Date: Apr 2016
Location: san diego ça
Posts: 121
|
Re: Project '64 Cheapskate
bump
|
|
|
|
|
03-11-2017, 11:58 PM
|
#847 |
|
Registered User
Join Date: Apr 2016
Location: san diego ça
Posts: 121
|
Re: Project '64 Cheapskate
Bump
|
|
|
|
|
04-15-2017, 03:47 PM
|
#848 | |
|
Registered User
Join Date: Dec 2010
Location: konawa ok/oakdale Ca.
Posts: 1,648
|
Re: Project '64 Cheapskate
Quote:
|
|
|
|
|
|
04-20-2017, 12:33 AM
|
#849 |
|
Senior Member
Join Date: May 2014
Location: Vancouver, BC
Posts: 472
|
Re: Project '64 Cheapskate
More underhood shots please..!! I want to see the whole thing cuz what I see here looks great.
__________________
Kitsbeach (Ken) 1967 C10 LWB (now SWB) Fleetside 6cyl Saginaw three-on-the-tree "No Frills" |
|
|
|
|
06-10-2017, 05:06 PM
|
#850 |
|
Moderator
  Join Date: Aug 2011
Location: China Spring, TX
Posts: 7,280
|
Re: Project '64 Cheapskate
Wow, very nice work on this truck!

__________________
Master Chief, US Navy, Retired 1964 C10 Step-side Short Bed - In Progress 2009 2500HD Duramax LTZ 1948 GMC Panel 1956 Big Window Stepside 1953 5 Window Chevy Stepside 1932 Coupe New Seat Foam for Bench Seats? |
|
|
|
 |
| Bookmarks |
|
|


 Linear Mode

