
|
 11-15-2014, 05:02 PM
|
#276 |
|
Registered User
Join Date: Jan 2013
Location: Leonardtown, MD
Posts: 1,633
|
Re: 55 Wagon Progress
Okay, got things together today. Here's the total conglomeration...
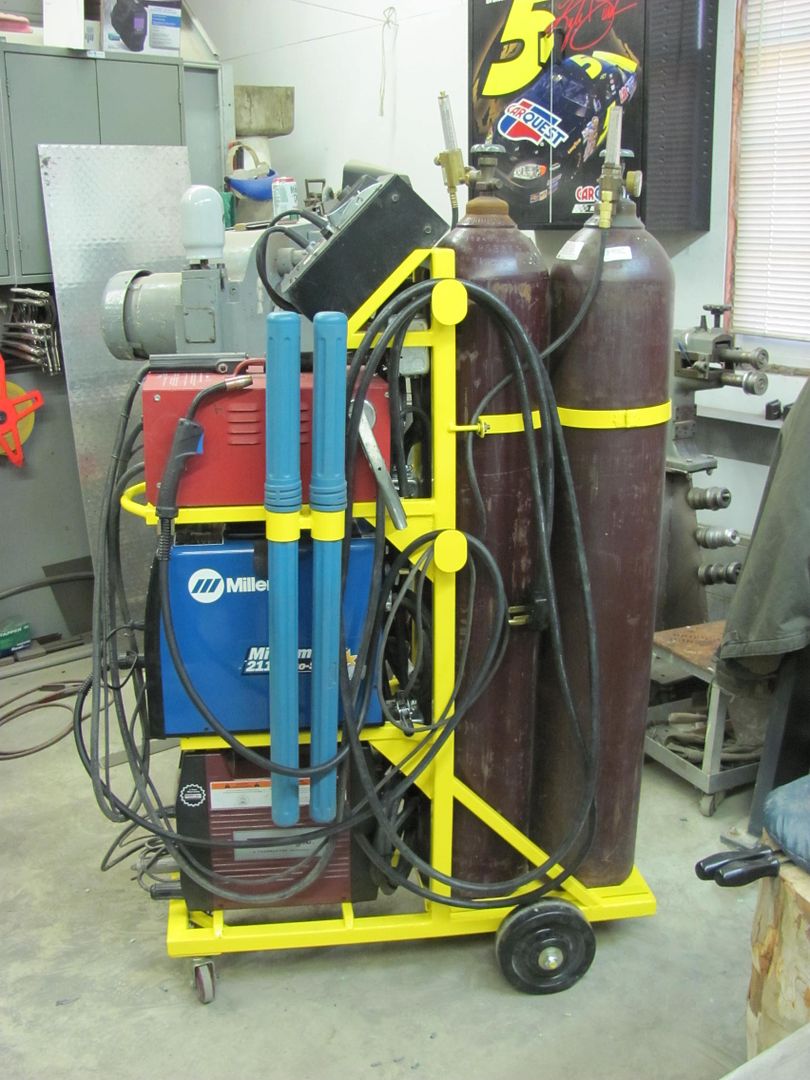 Welded rings to hold the Tig rod tubes...... 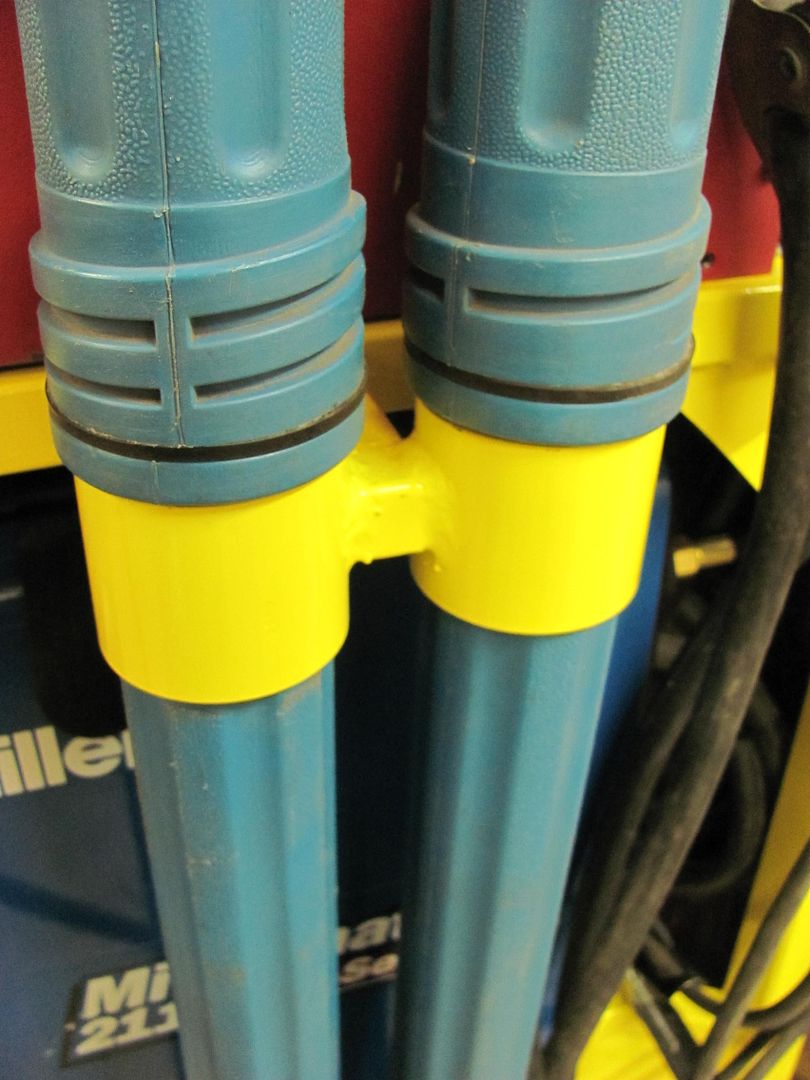 Retaining clip so the Mig torch doesn't have to lay on the floor... 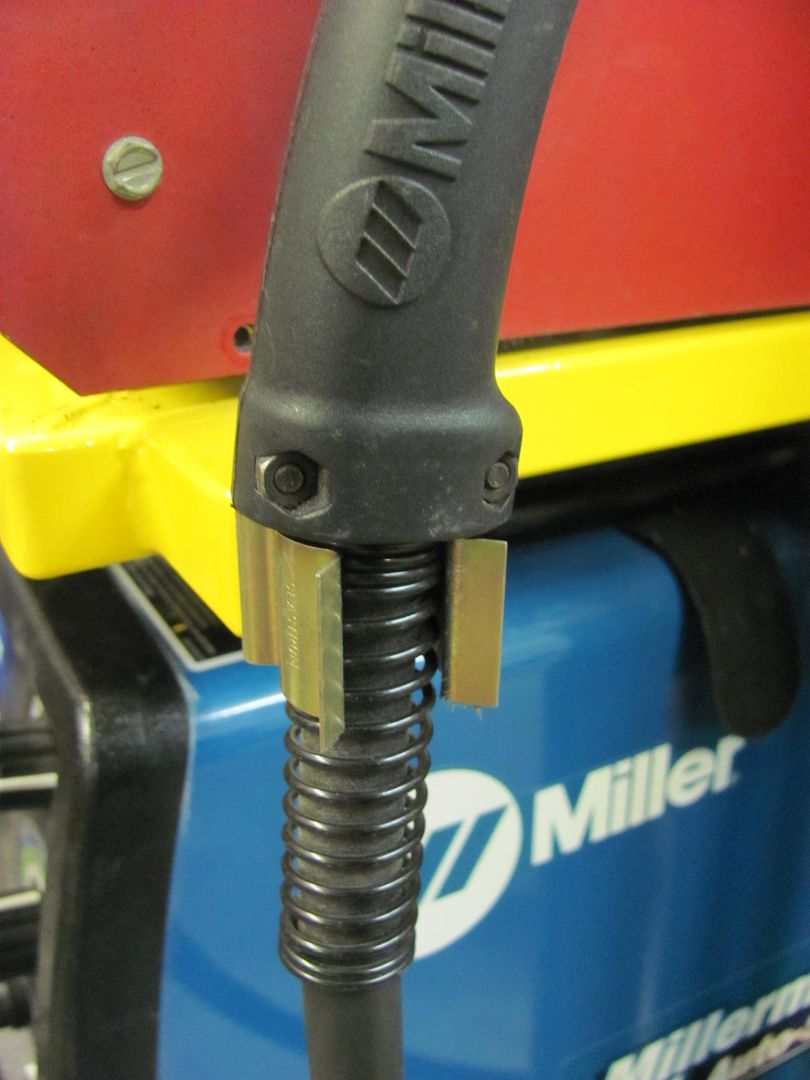 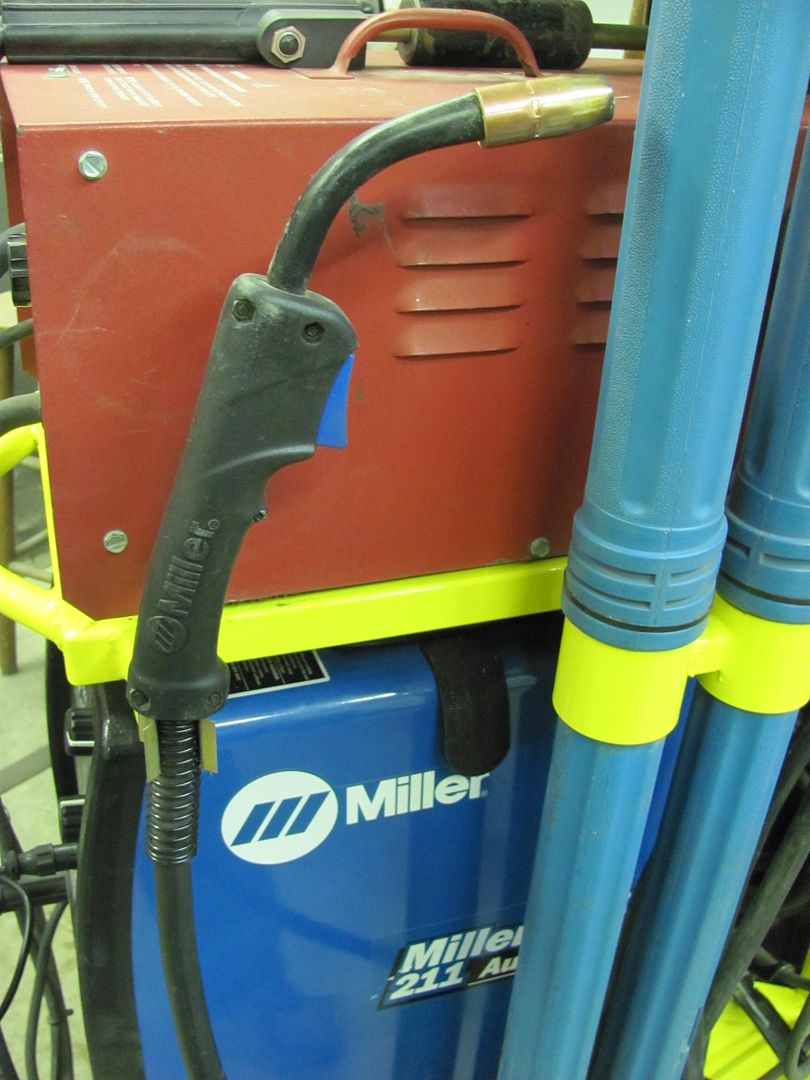 As you can see, not much for wasted space. Here's the outlet box for the Mig.... 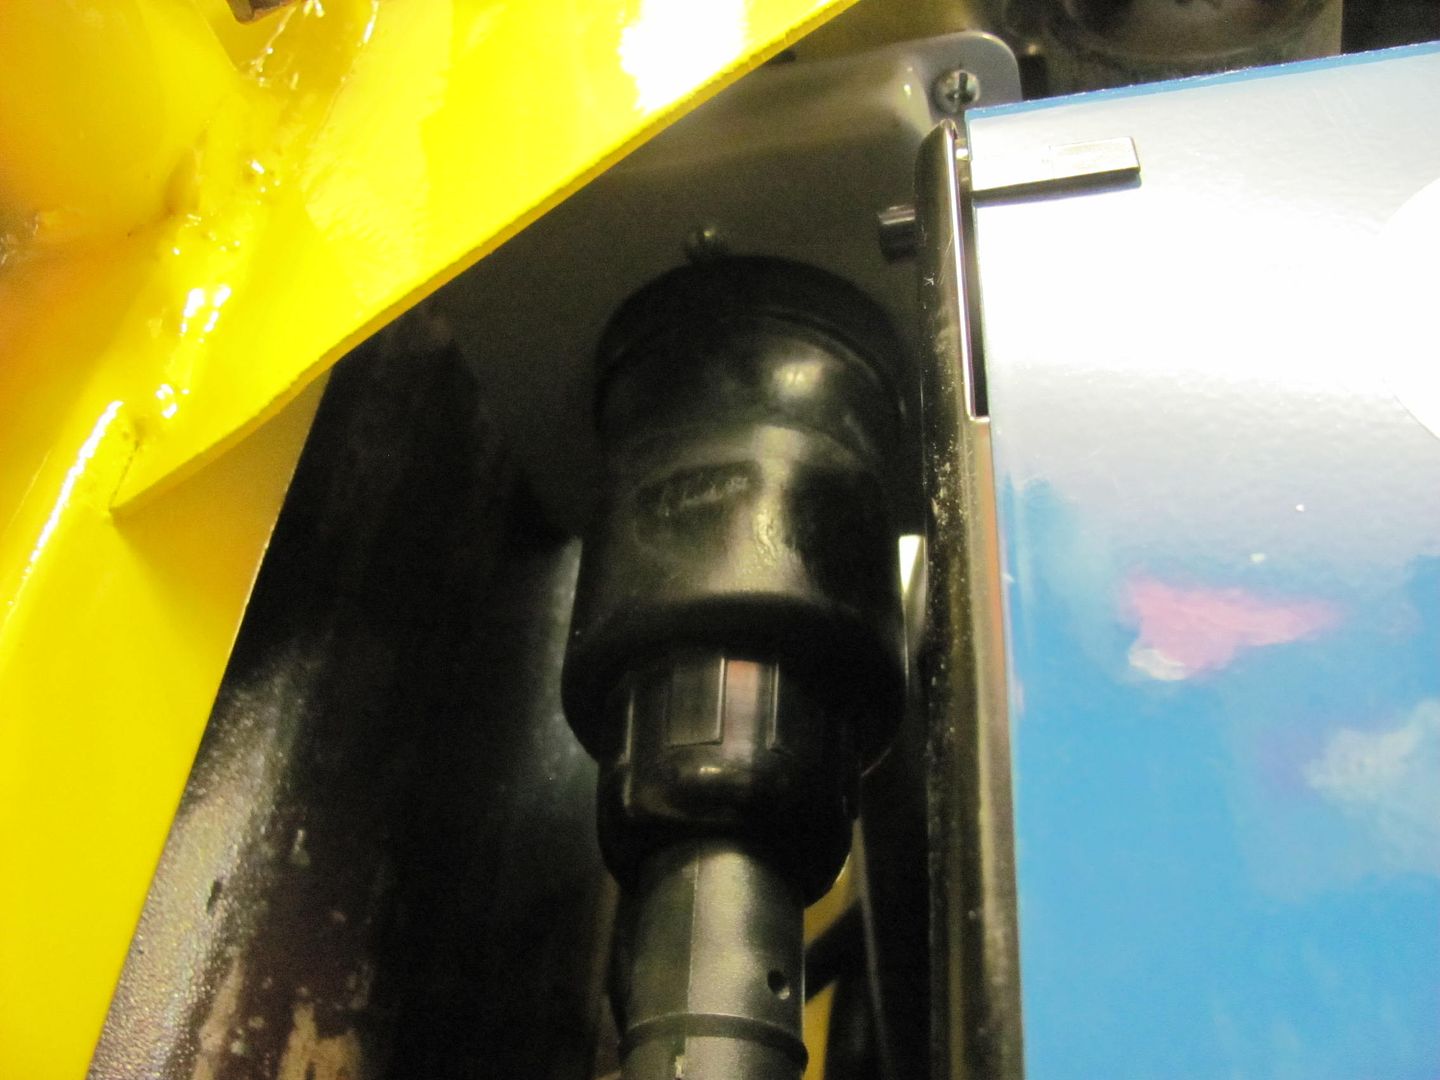 and Tig..... 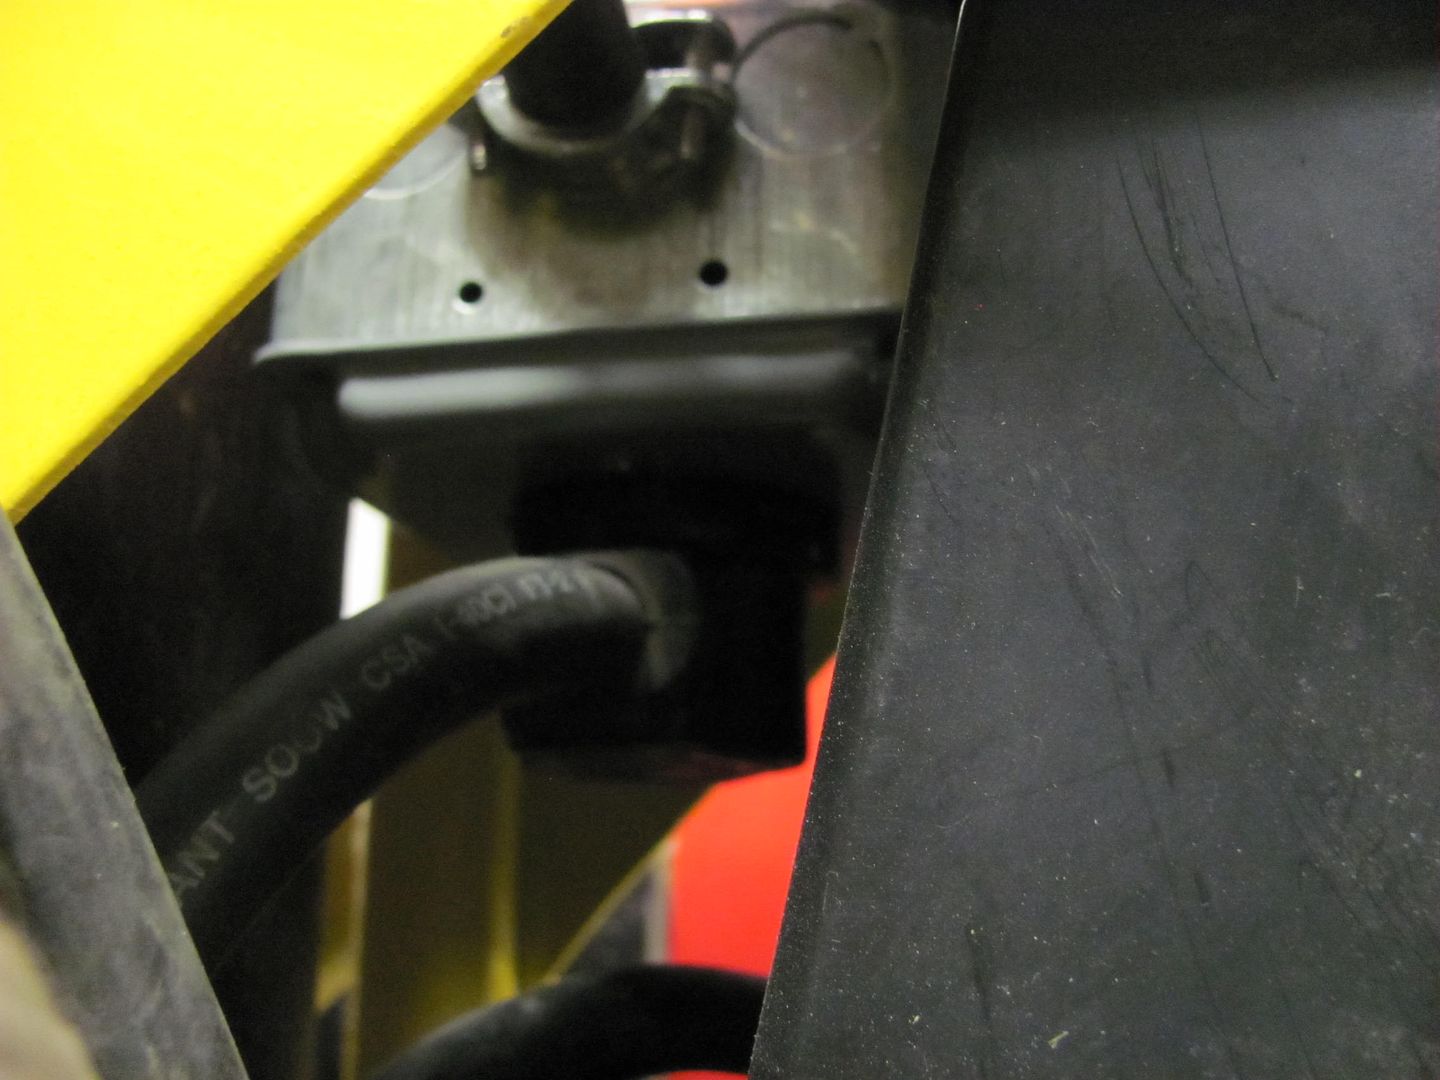 Bottle bracket..... 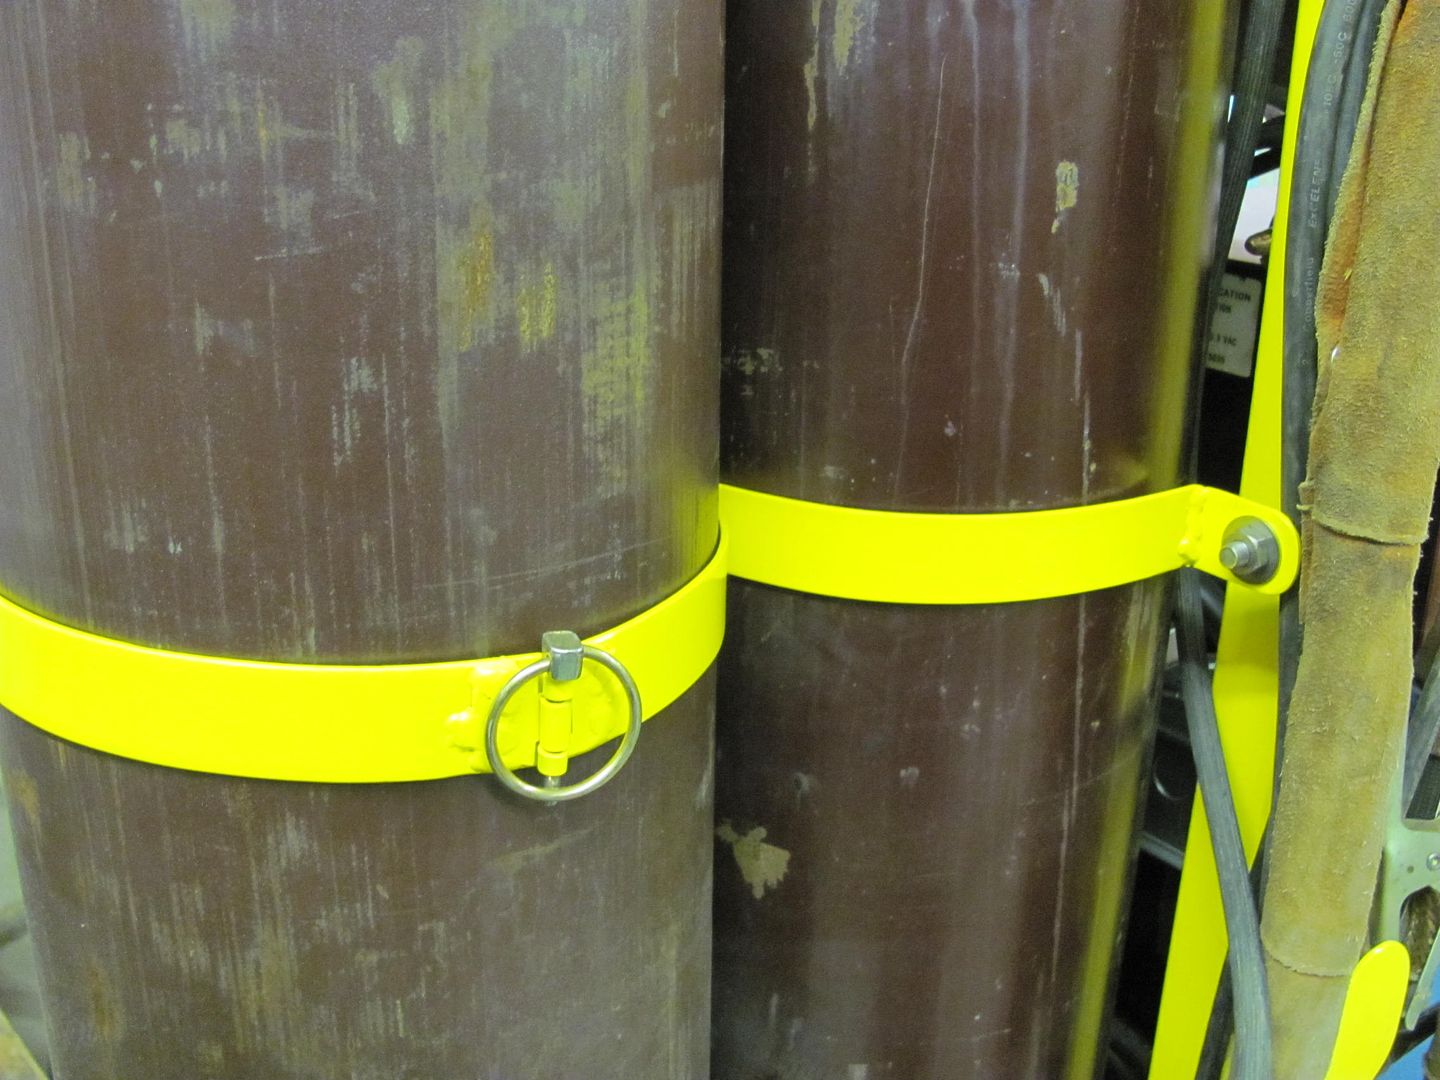 I did give it a good shove to see how top heavy it was, and with the two bottles directly over the rear wheels it's very stable. Don't think I'll need worry about any accidental turnovers... 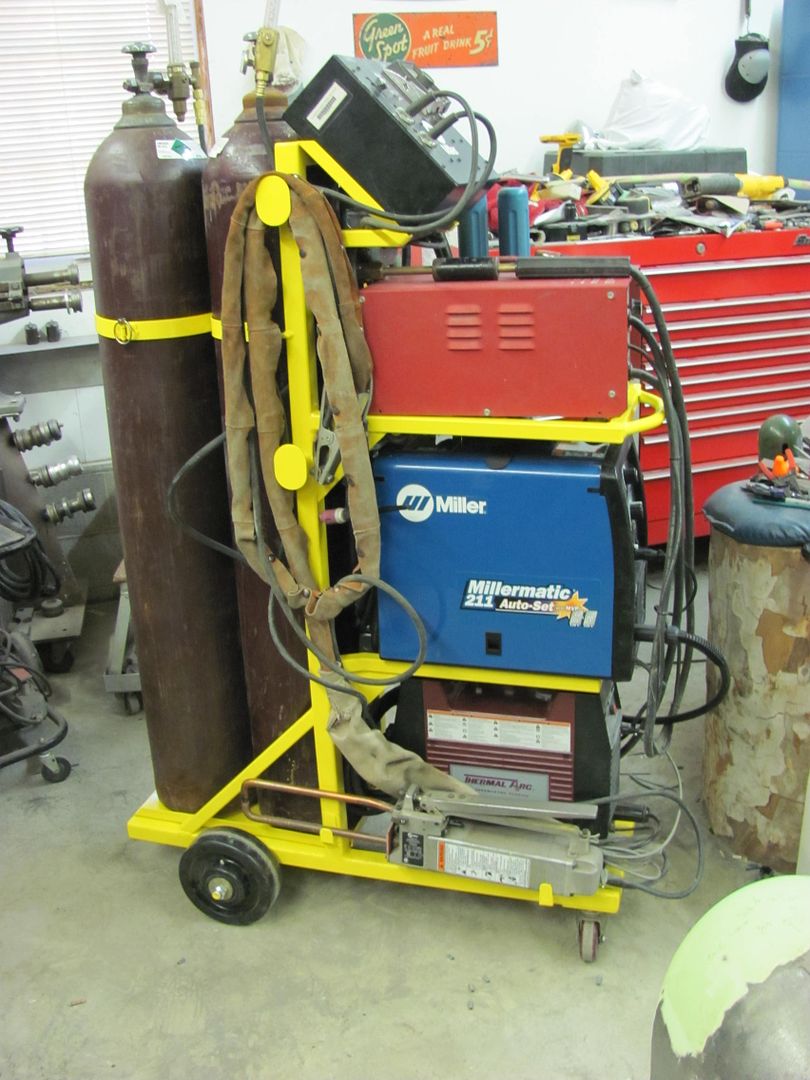
__________________
Robert |

|

|
|
11-15-2014, 07:23 PM
|
#277 |
|
Registered User
Join Date: Jan 2012
Location: Eastern Ontario, Canada
Posts: 1,041
|
Re: 55 Wagon Progress
Nice! Great way of organizing all those tools in one ice nifty package.
__________________
1952 Canadian Chevy 1300 C4 IFS & D44 IRS 5.3 HO L33 My Build: http://67-72chevytrucks.com/vboard/s...d.php?t=632938 
|
|
|
|
|
11-15-2014, 10:54 PM
|
#278 |
|
Registered User
 Join Date: May 2007
Location: Deale Md
Posts: 4,663
|
Re: 55 Wagon Progress
I like the yellow it looks good.
__________________
James 63 GMC V6 4speed carryall 65 chevy swb bbw V8 auto 68 K20 327/4 speed, buddy buckets 2002 GMC CC Dually Duramax 64 GMC lwb 3/4 V6 4speed SOLD 66 GMC swb bbw buddy buckets SOLD IG duallyjams The only thing that stays the same is constant change! |
|
|
|
|
11-16-2014, 03:27 AM
|
#279 |
|
Registered User
Join Date: Oct 2007
Location: Spanaway
Posts: 8,451
|
Re: 55 Wagon Progress
Probably about 250 lbs worth huh? how does it roll? pretty easy?
__________________
Mike. Swamp Rat build thread : http://67-72chevytrucks.com/vboard/s...d.php?t=595019 72 3/4T 4X4 4" BDS Lift 33" BFG's |
|
|
|
|
11-16-2014, 09:07 PM
|
#280 |
|
Registered User
Join Date: Jan 2013
Location: Leonardtown, MD
Posts: 1,633
|
Re: 55 Wagon Progress
I was assembling the welding cart yesterday, as Kyle tried his hand at the rocker panel roller on the driver's side. It had a poor match to the fender, just as the passenger side did.
 This made a noticeable improvement, and the front edge was tweaked using the door skin hammer.. 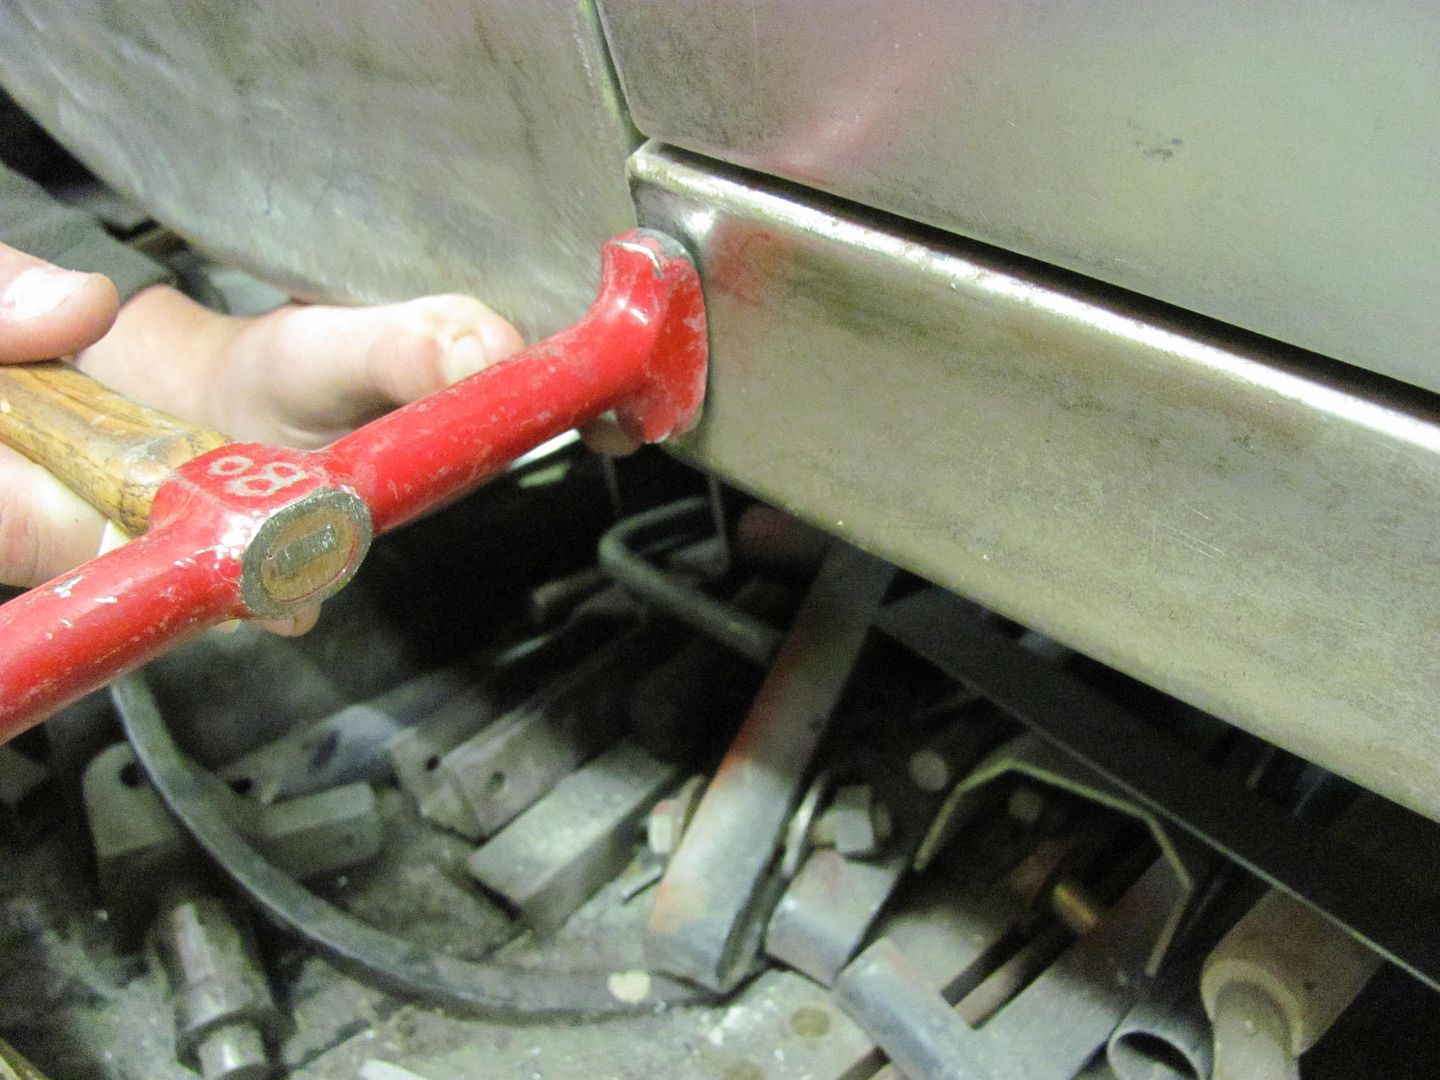 With a more consistent contour across the gap, we can start getting the front end ready for some epoxy.. 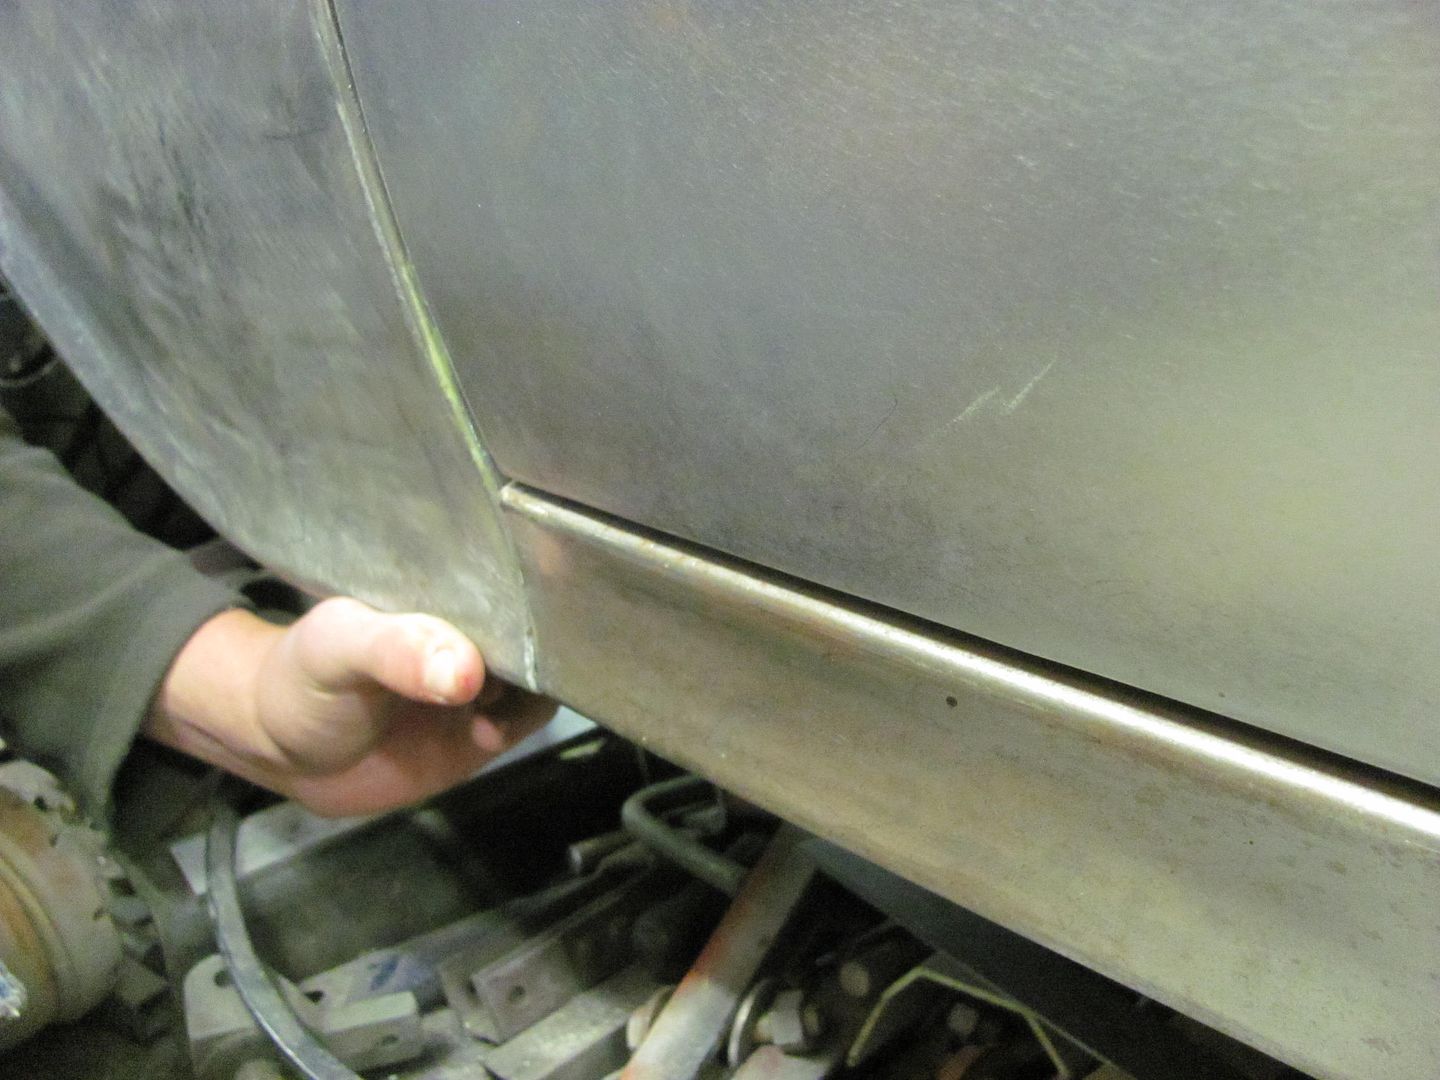 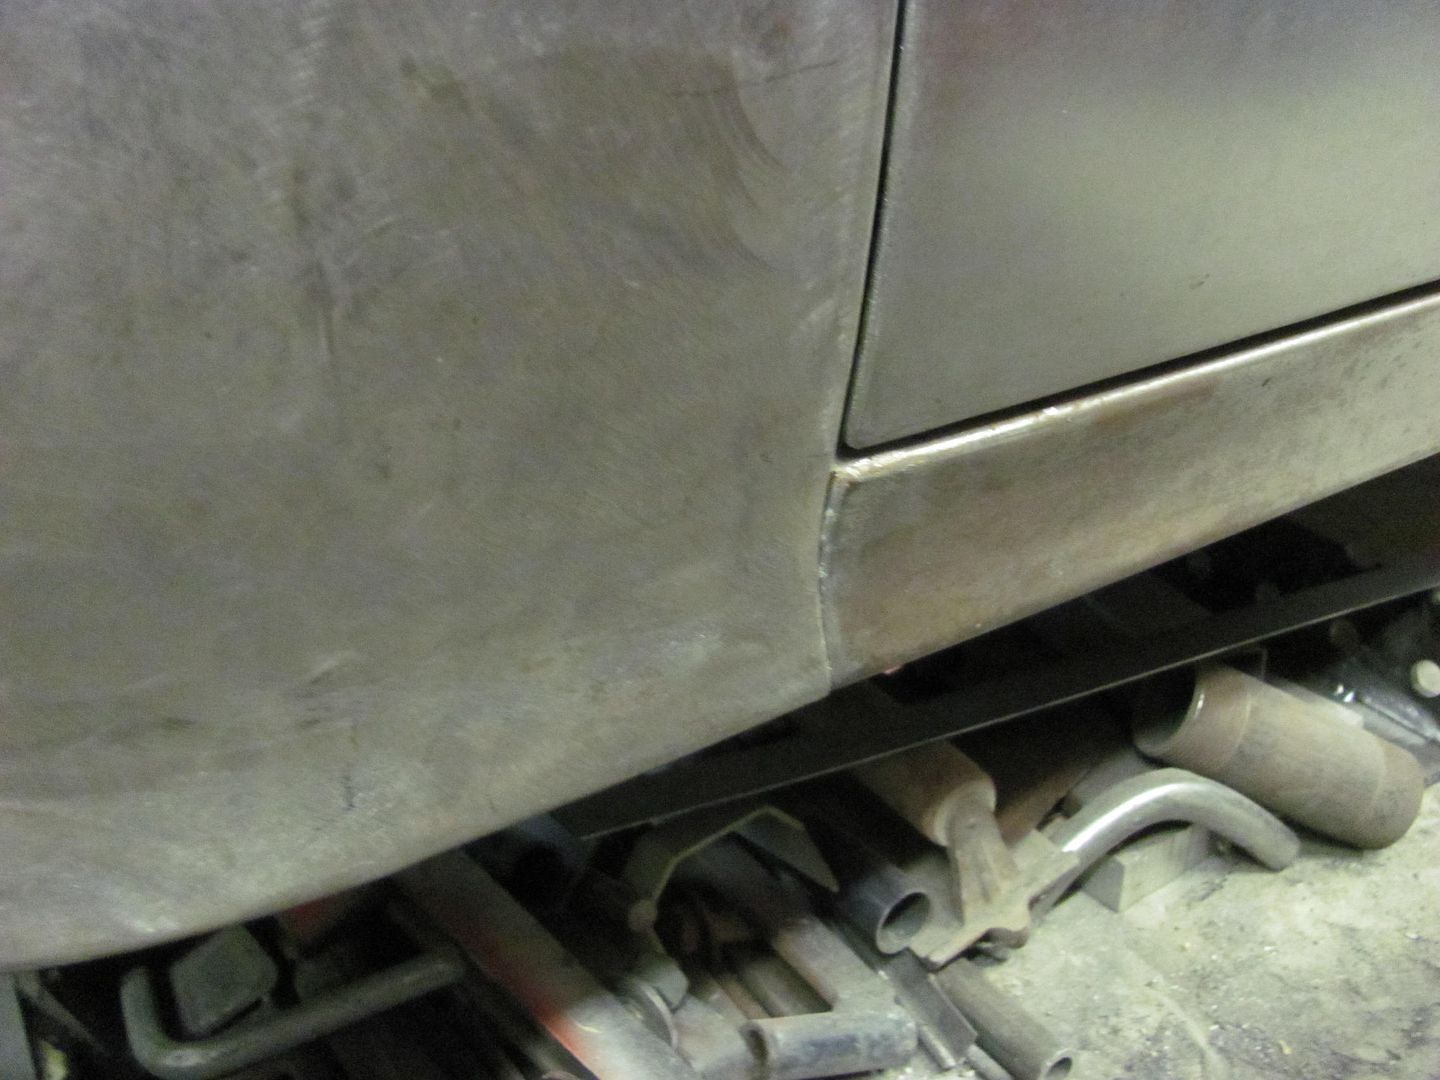
__________________
Robert |
|
|
|
|
11-30-2014, 02:03 AM
|
#281 | |
|
Registered User
Join Date: Jan 2013
Location: Leonardtown, MD
Posts: 1,633
|
Re: 55 Wagon Progress
Quote:
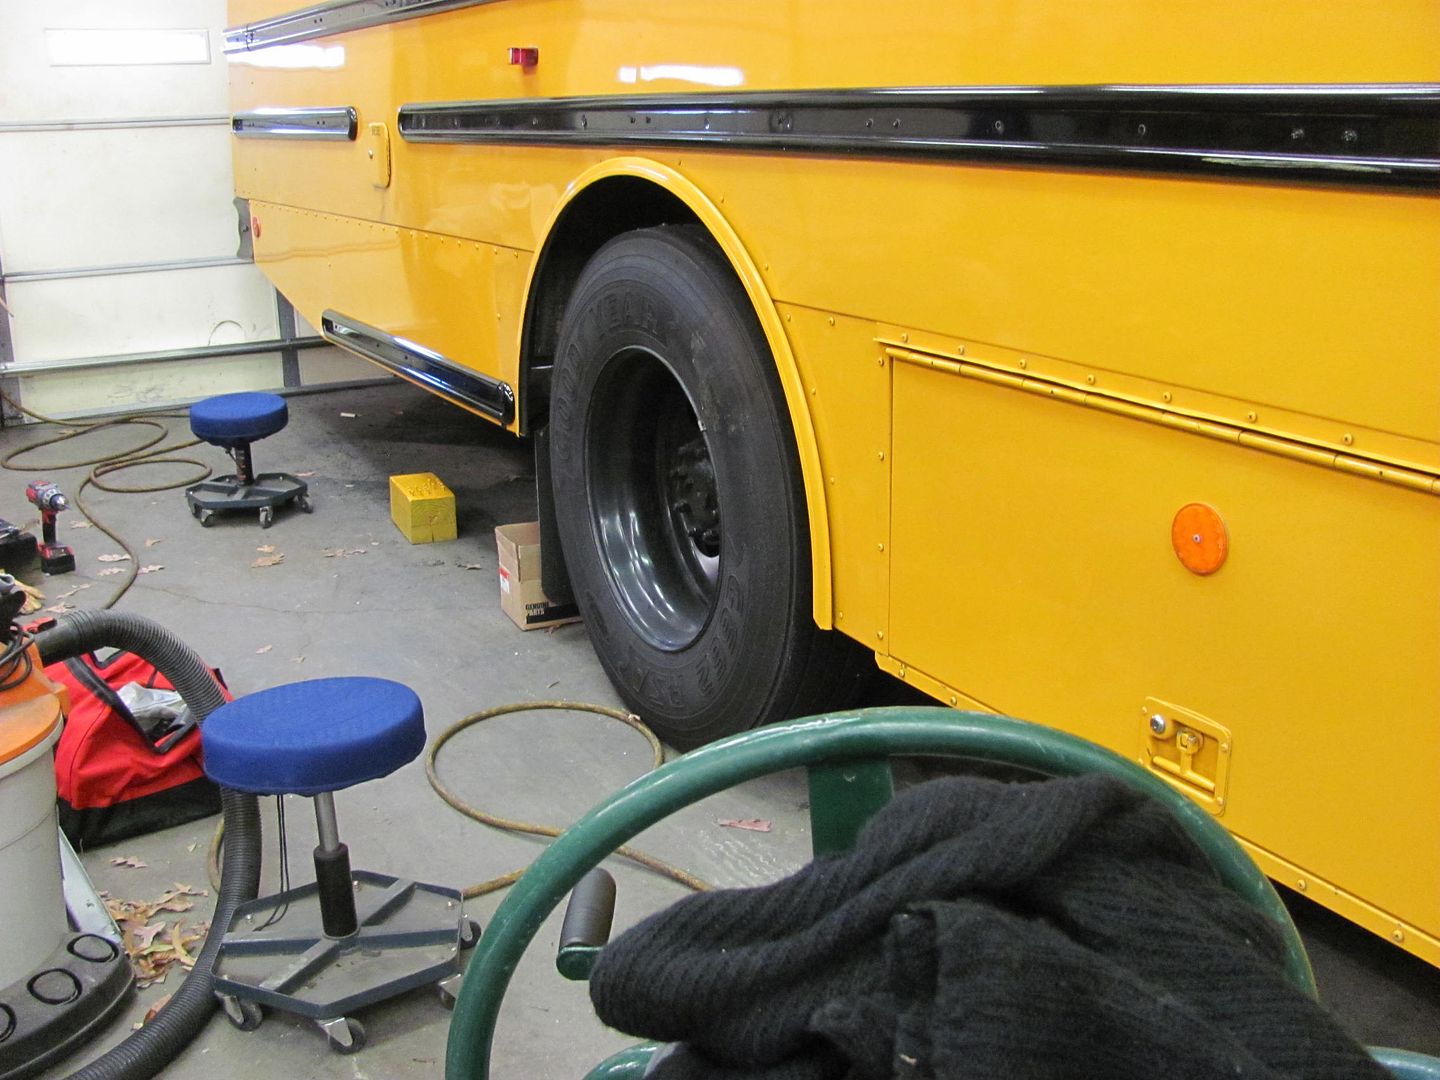
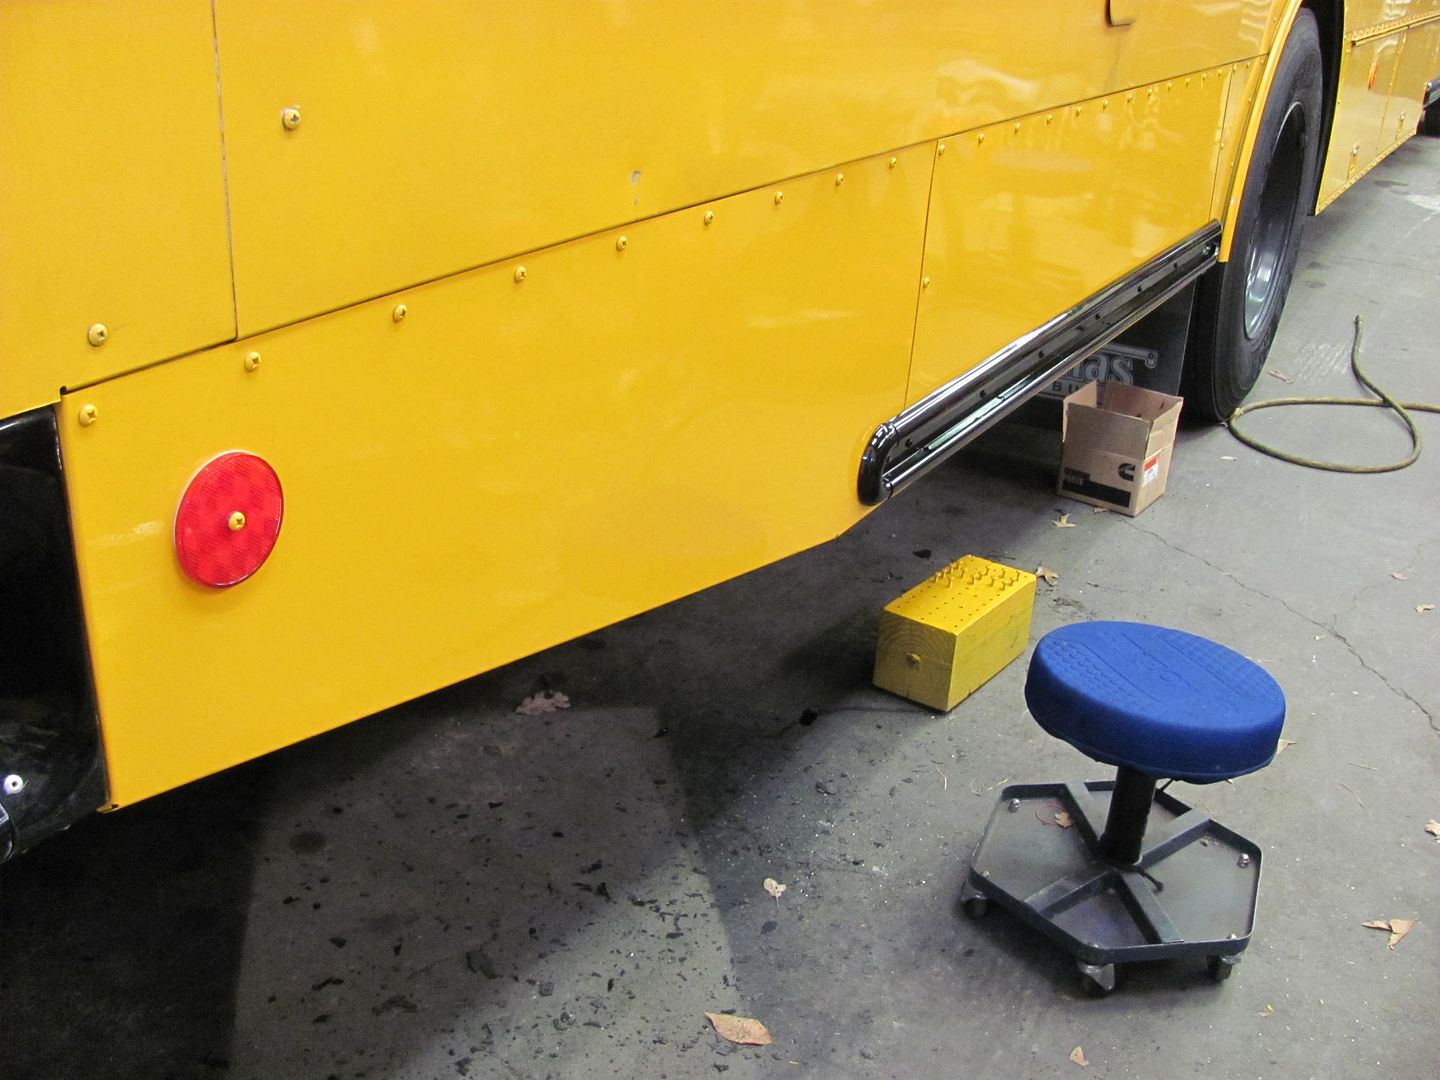
Well I thought we were done spraying yellow paint when the welding cart was complete, but I guess it's been long overdue. It's been quite a while that we've seen any bus repairs, but one got the side skirt panel mangled up enough that the county's transportation dept took it out of service. 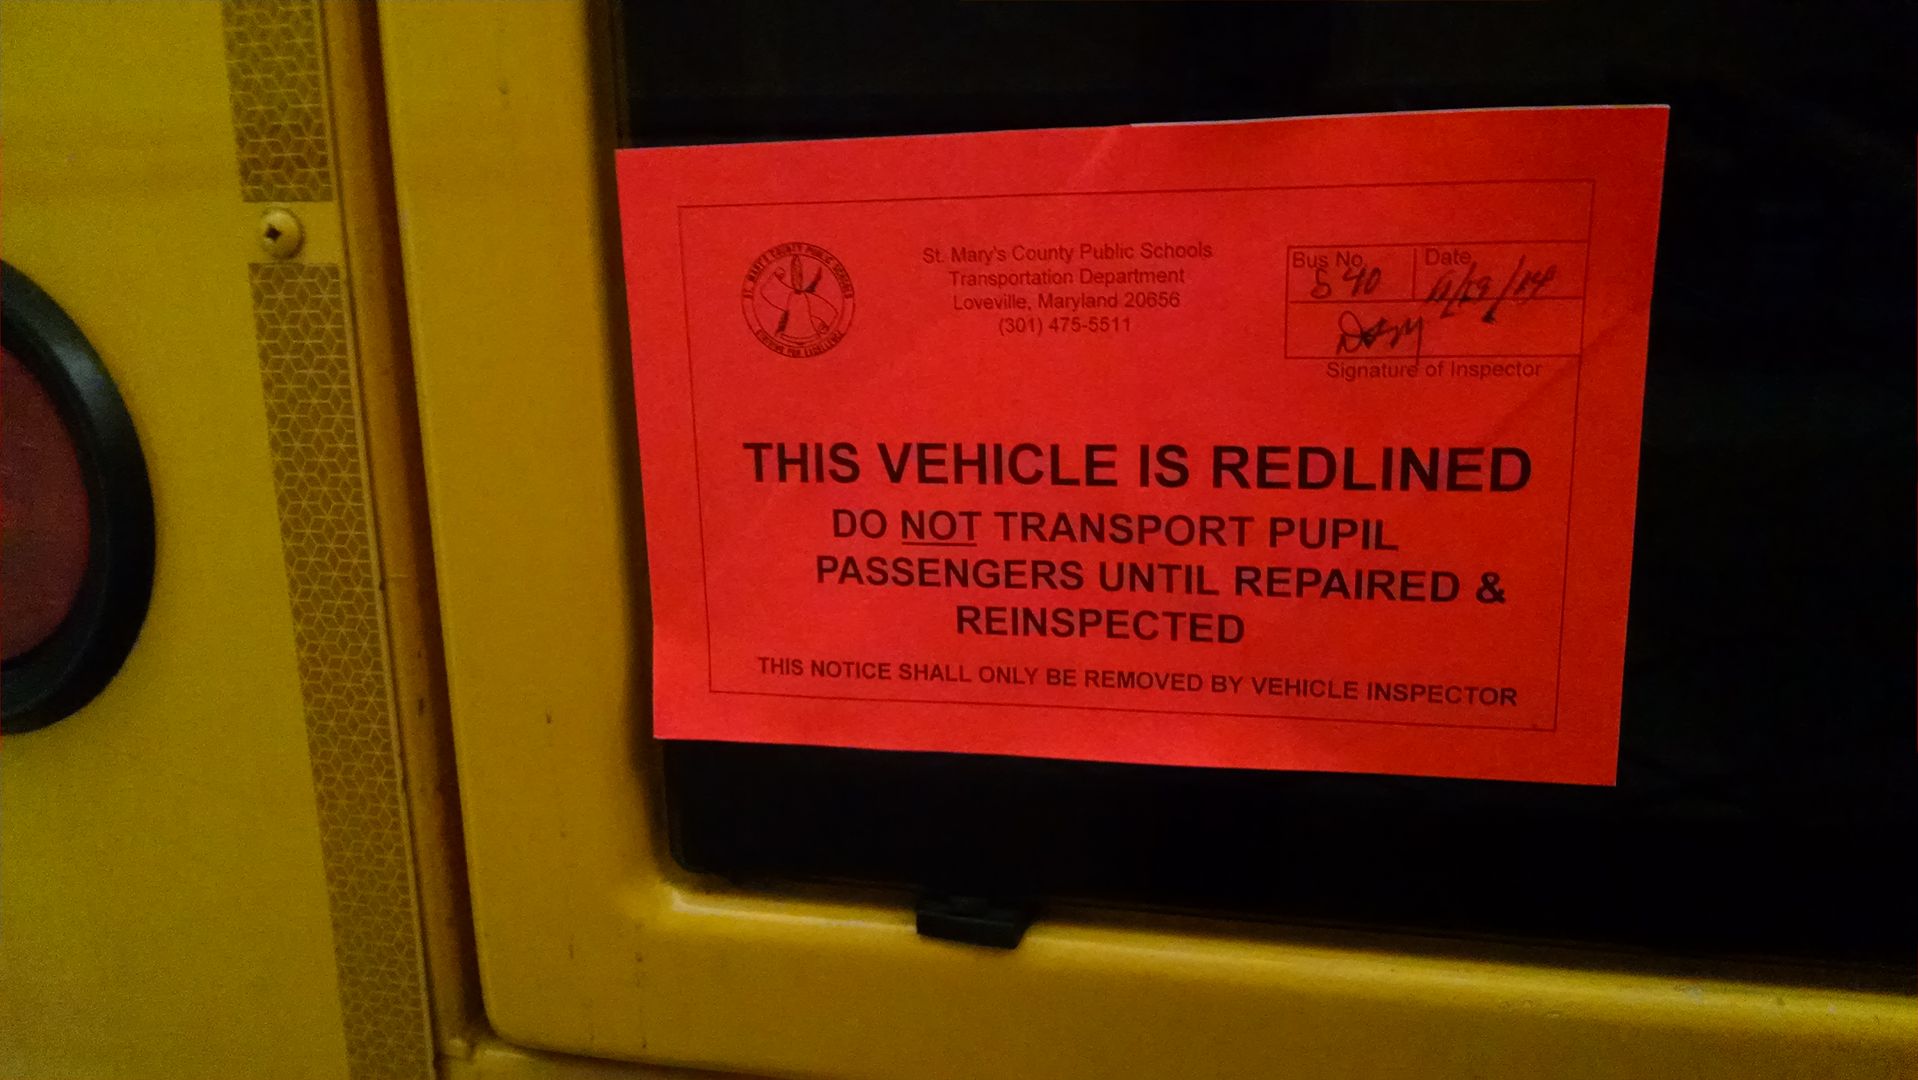 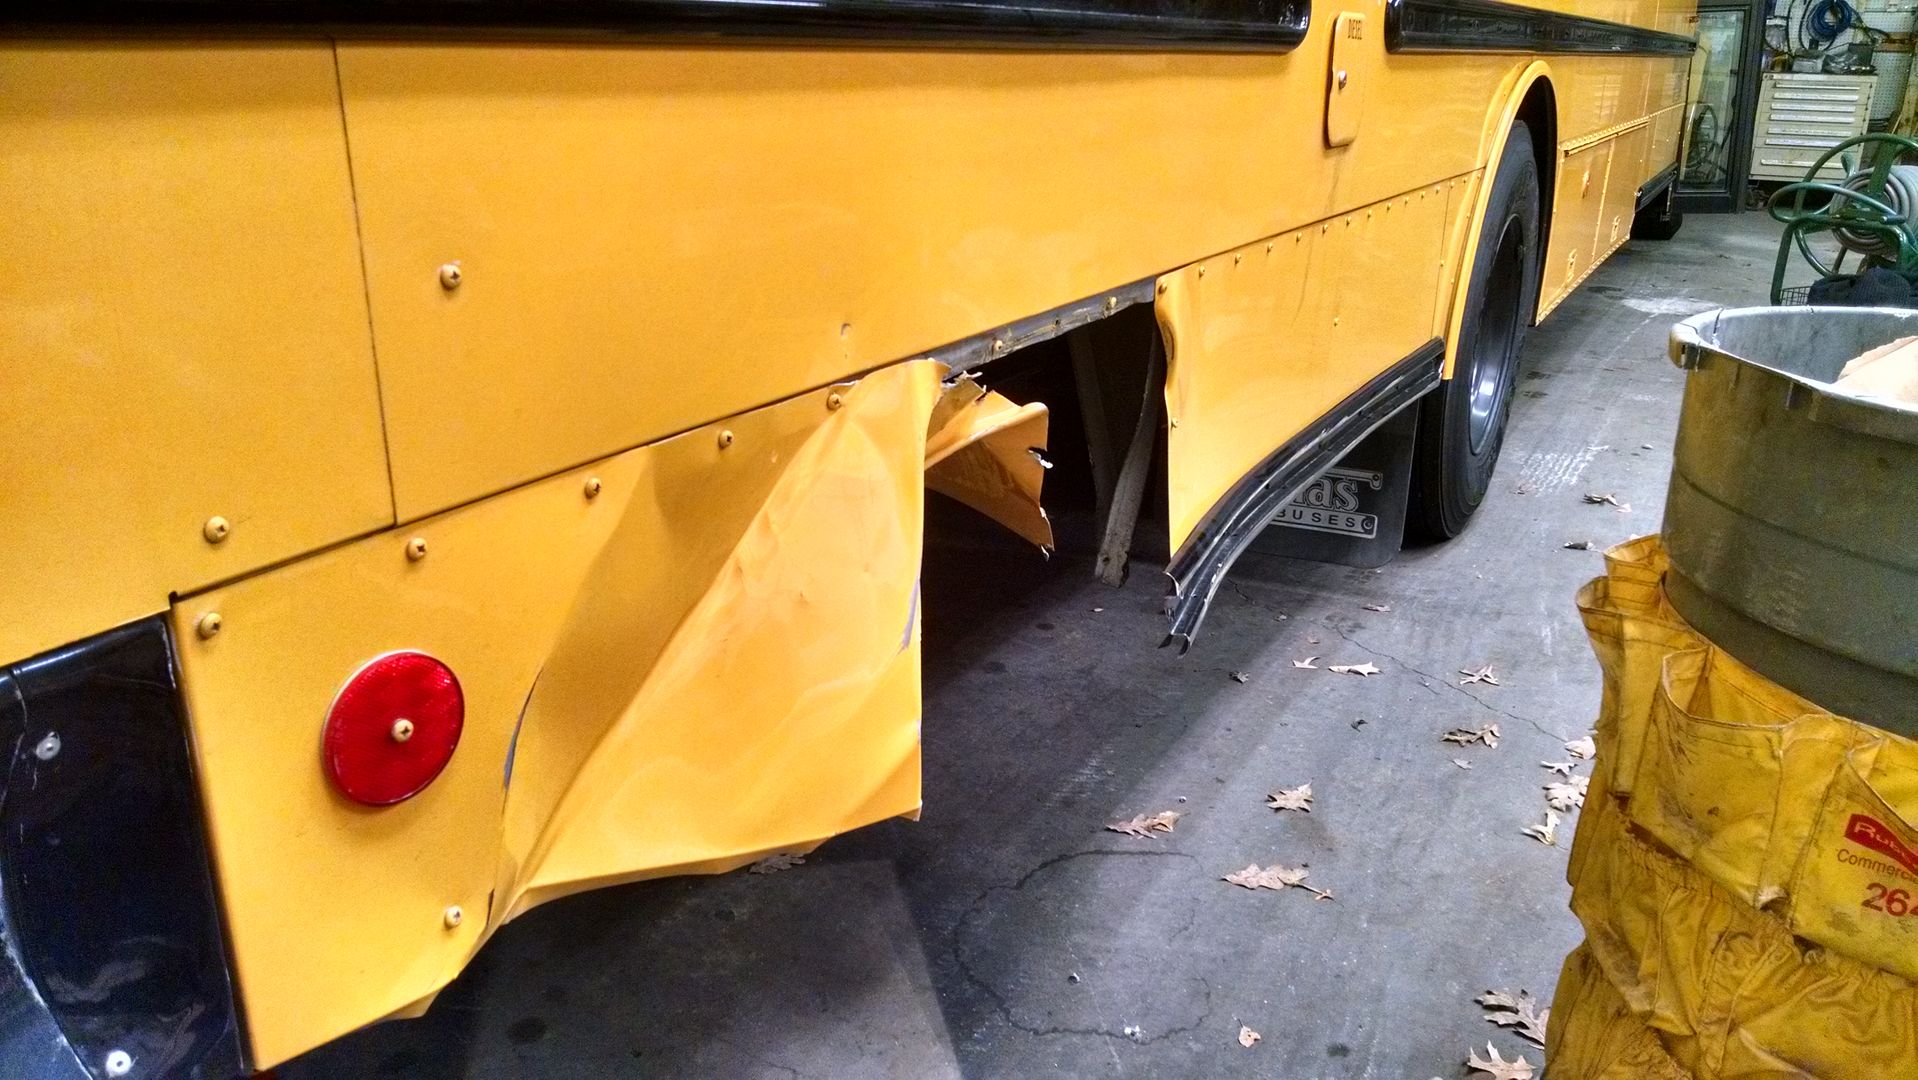 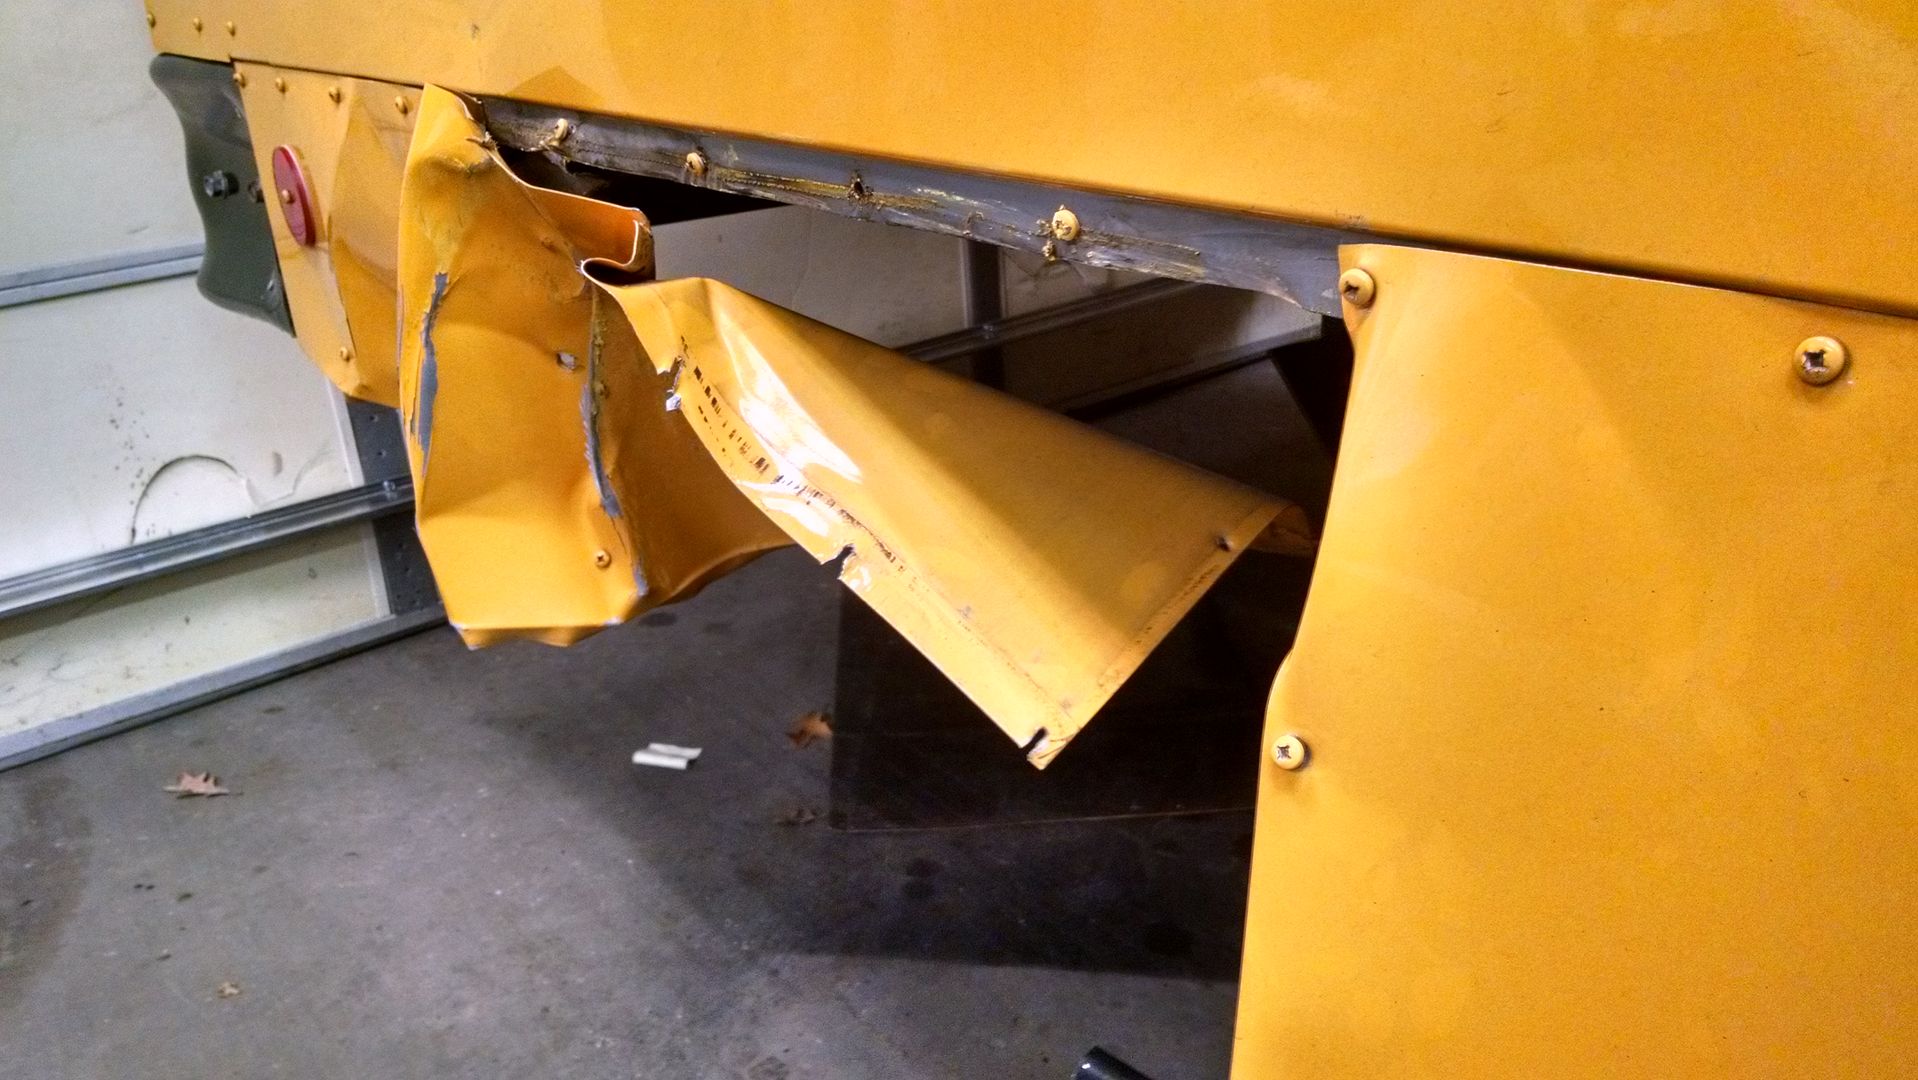  Picked up some stainless #12 screws and Kyle media blasted the heads for adhesion for paint... 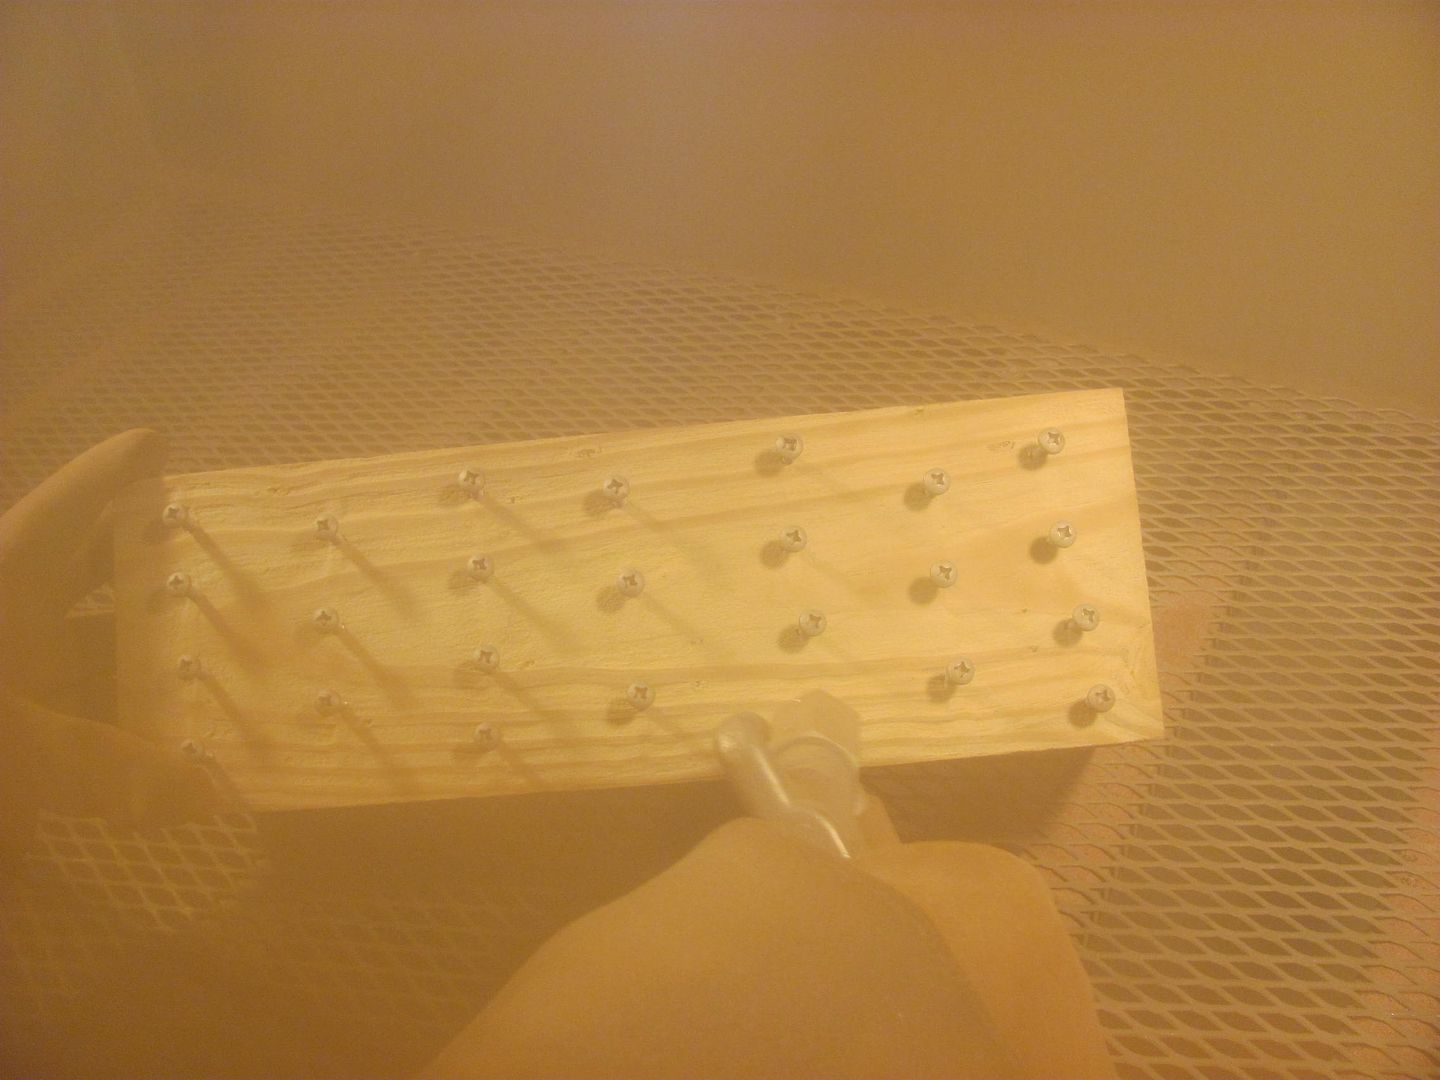 SPI Epoxy primer mixed as sealer...  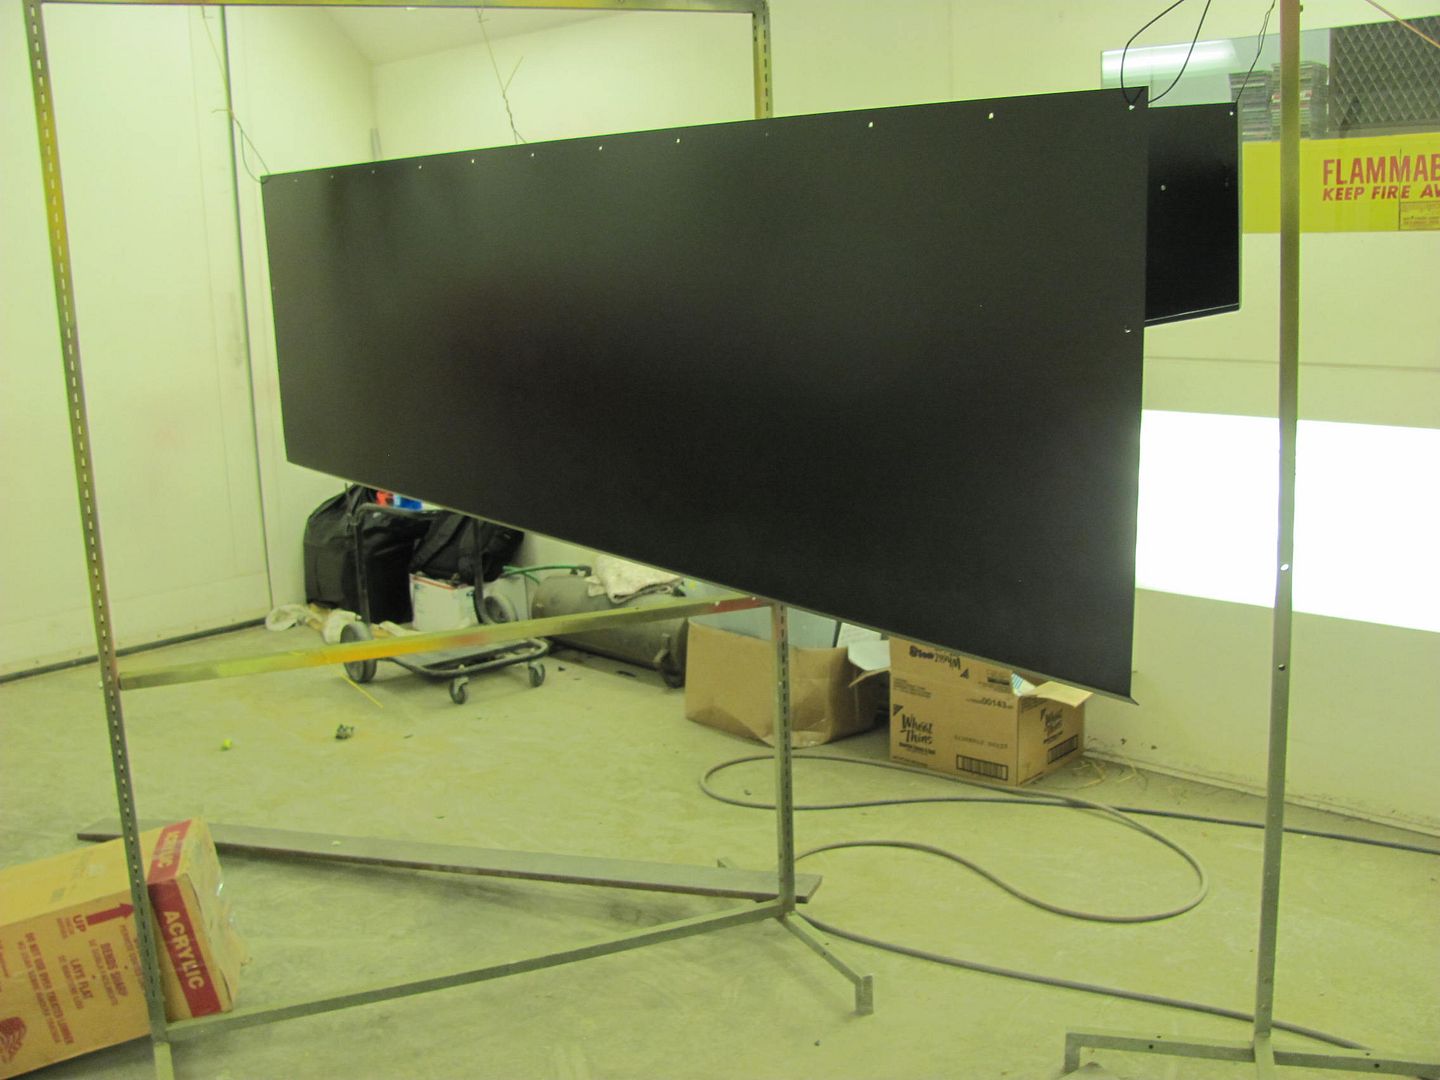 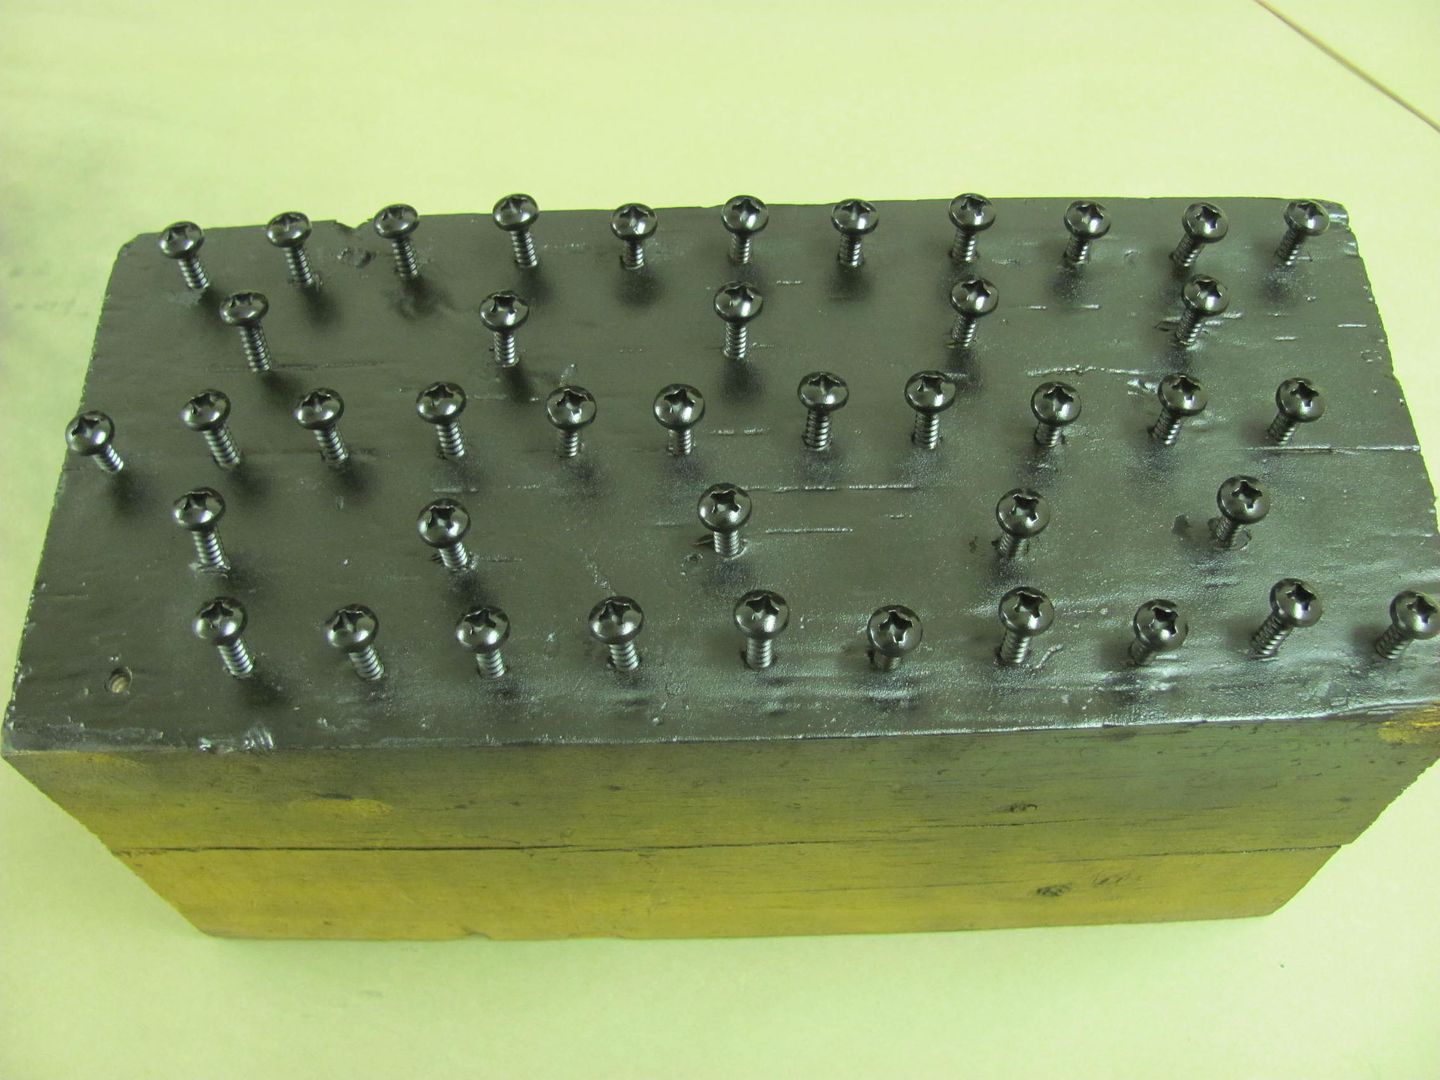 Some BASF Urethane applied... 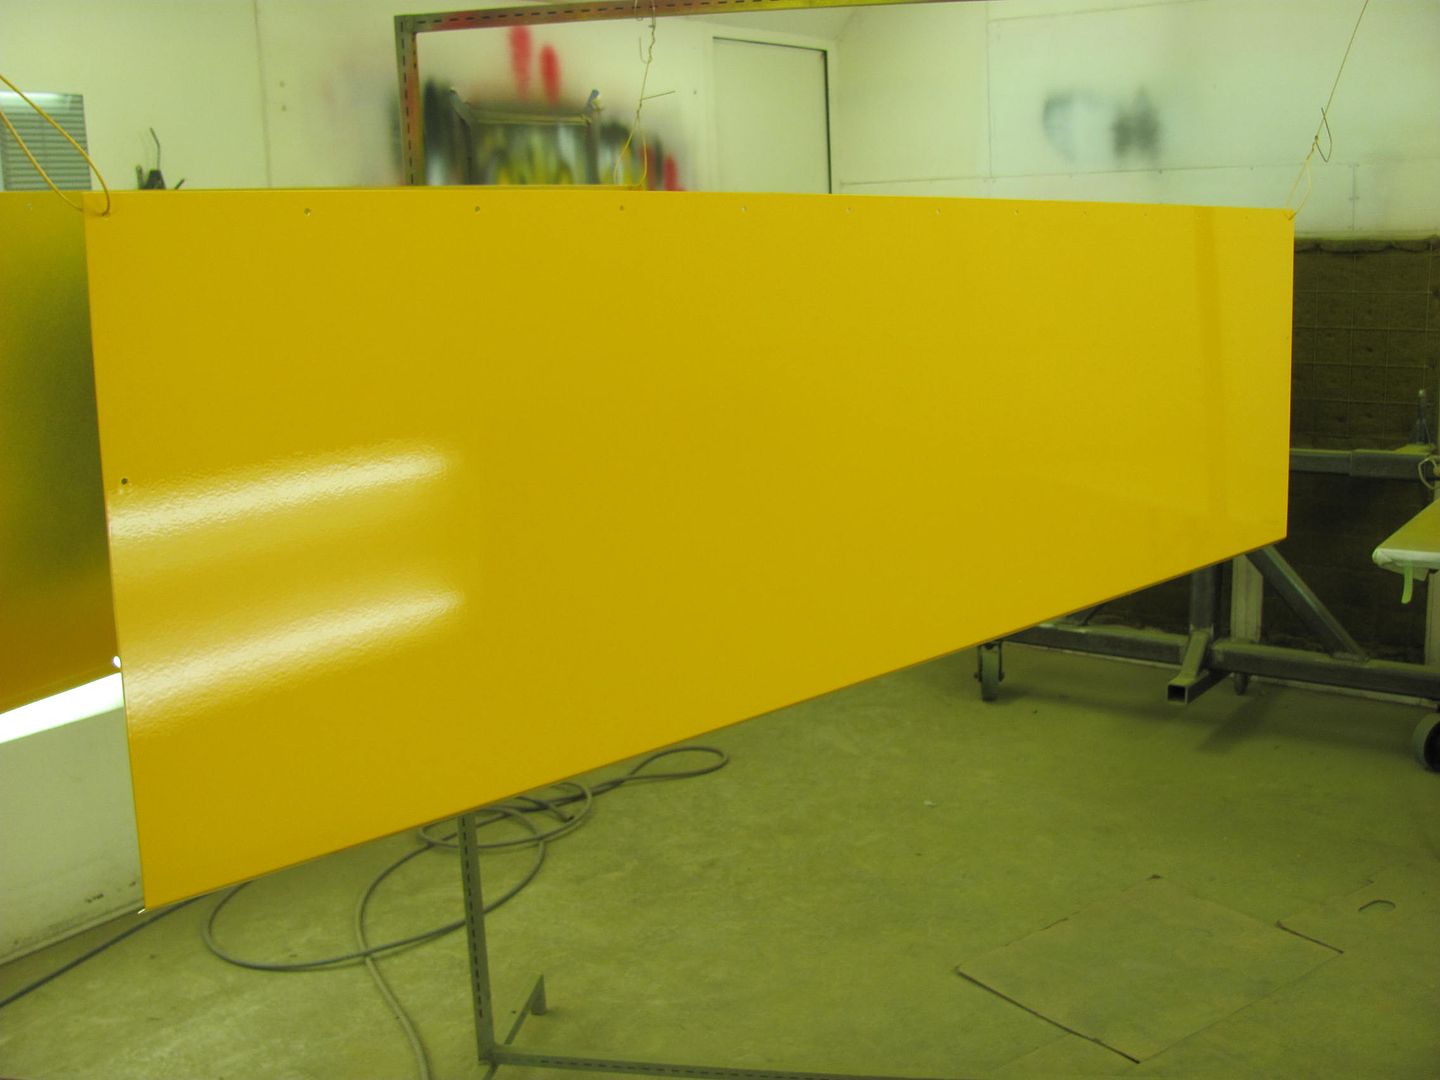 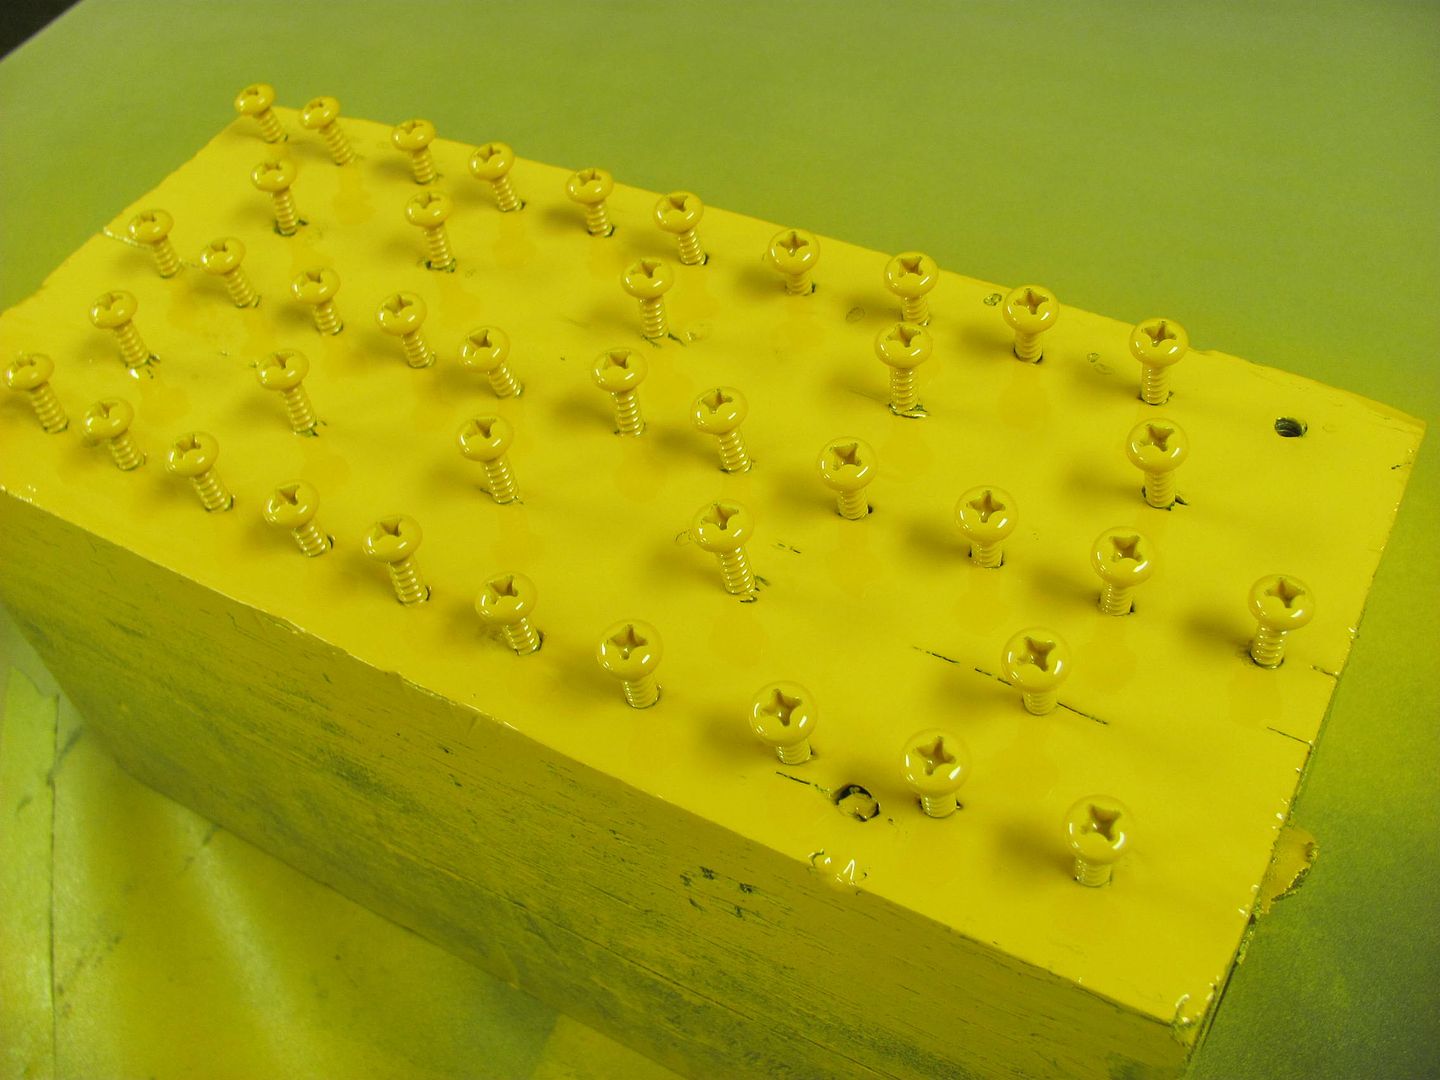 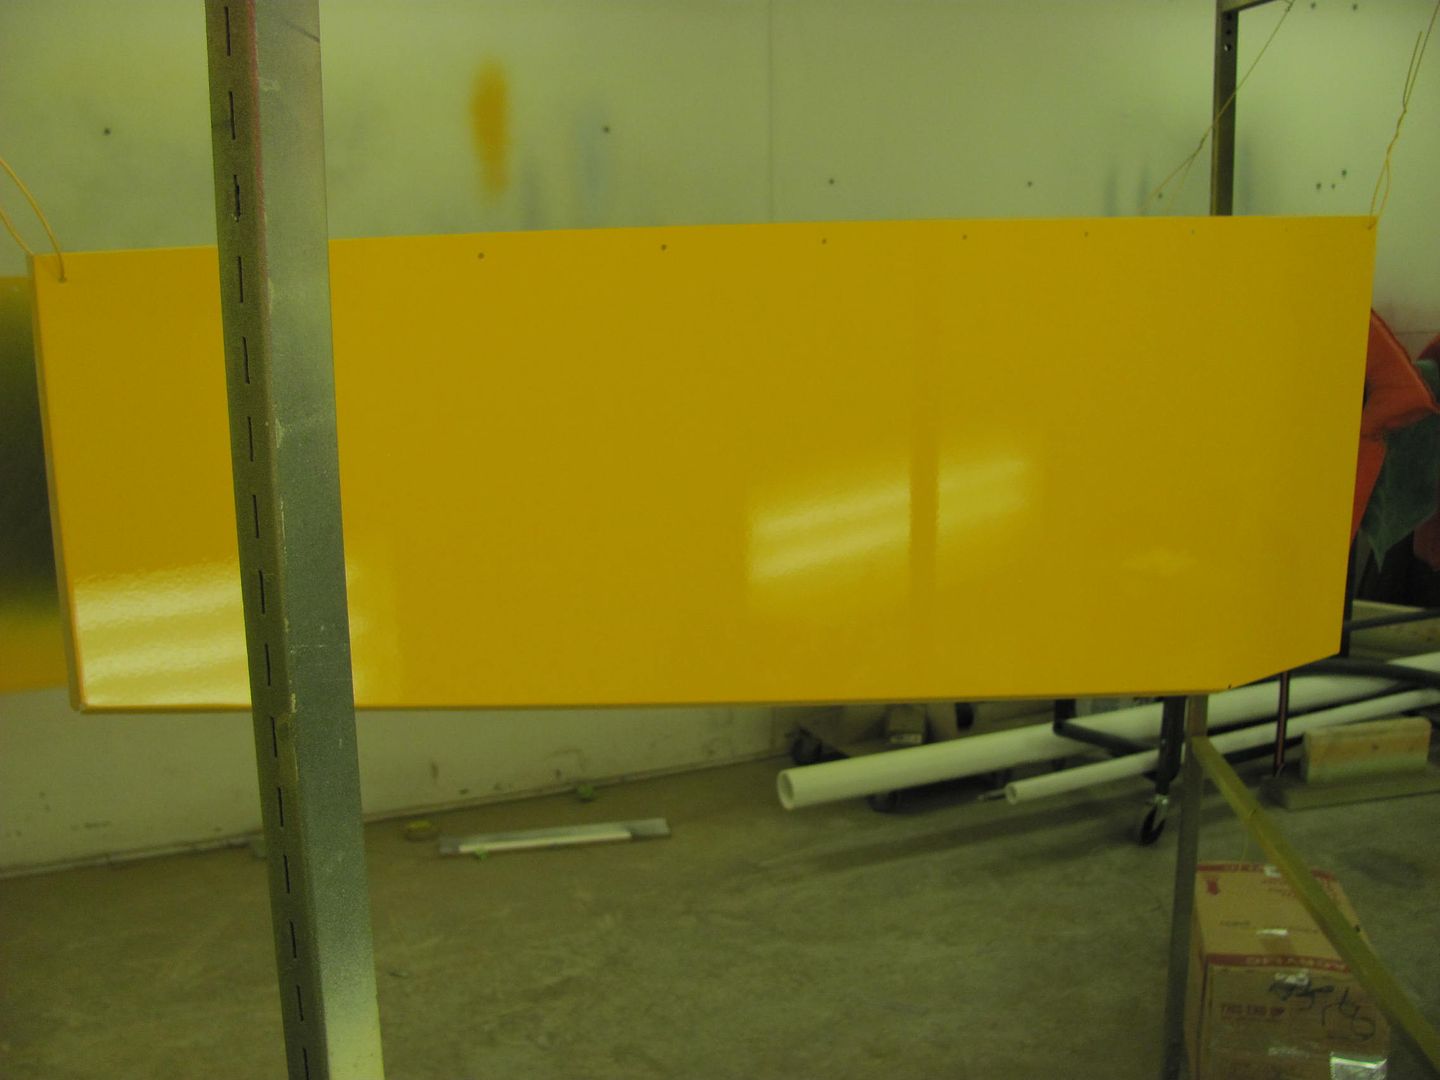 The rub strip at the bottom of the skirt panel was pretty mangled as well, the new comes in a stock 10' length, so it was cut to size and drilled per the original. (had to straighten it a bit to transfer the holes) We also have a brace behind the skirt that was pushed back a ways, it will need to be pulled out and re-welded. Here's the SPI epoxy:  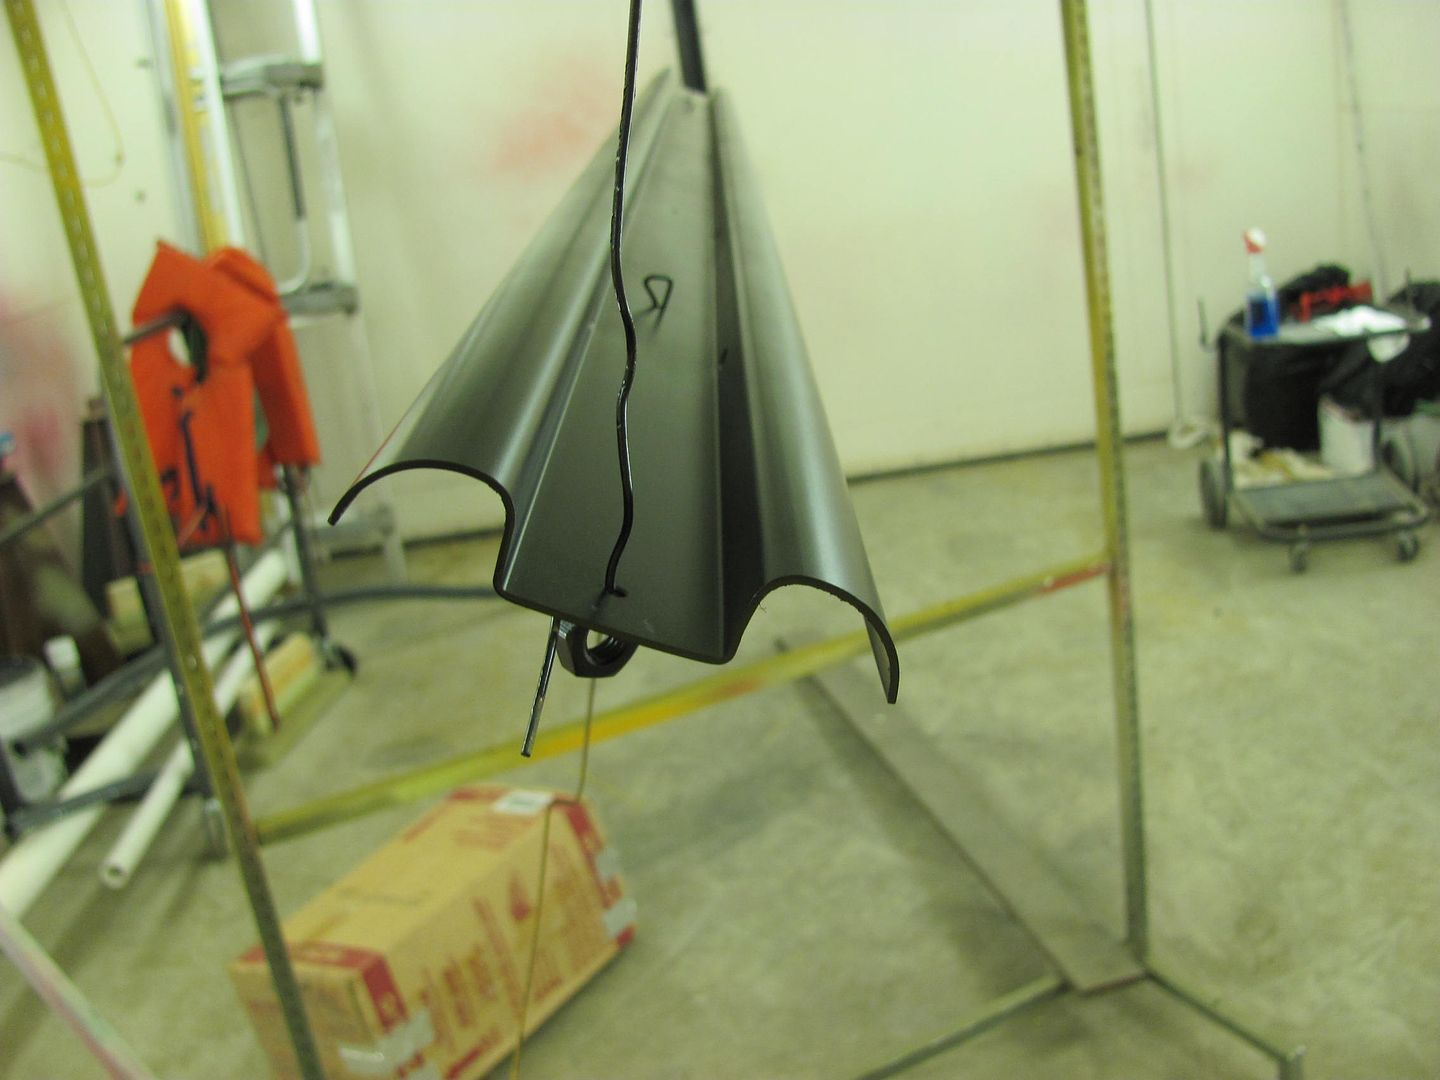 ....and the black urethane.. 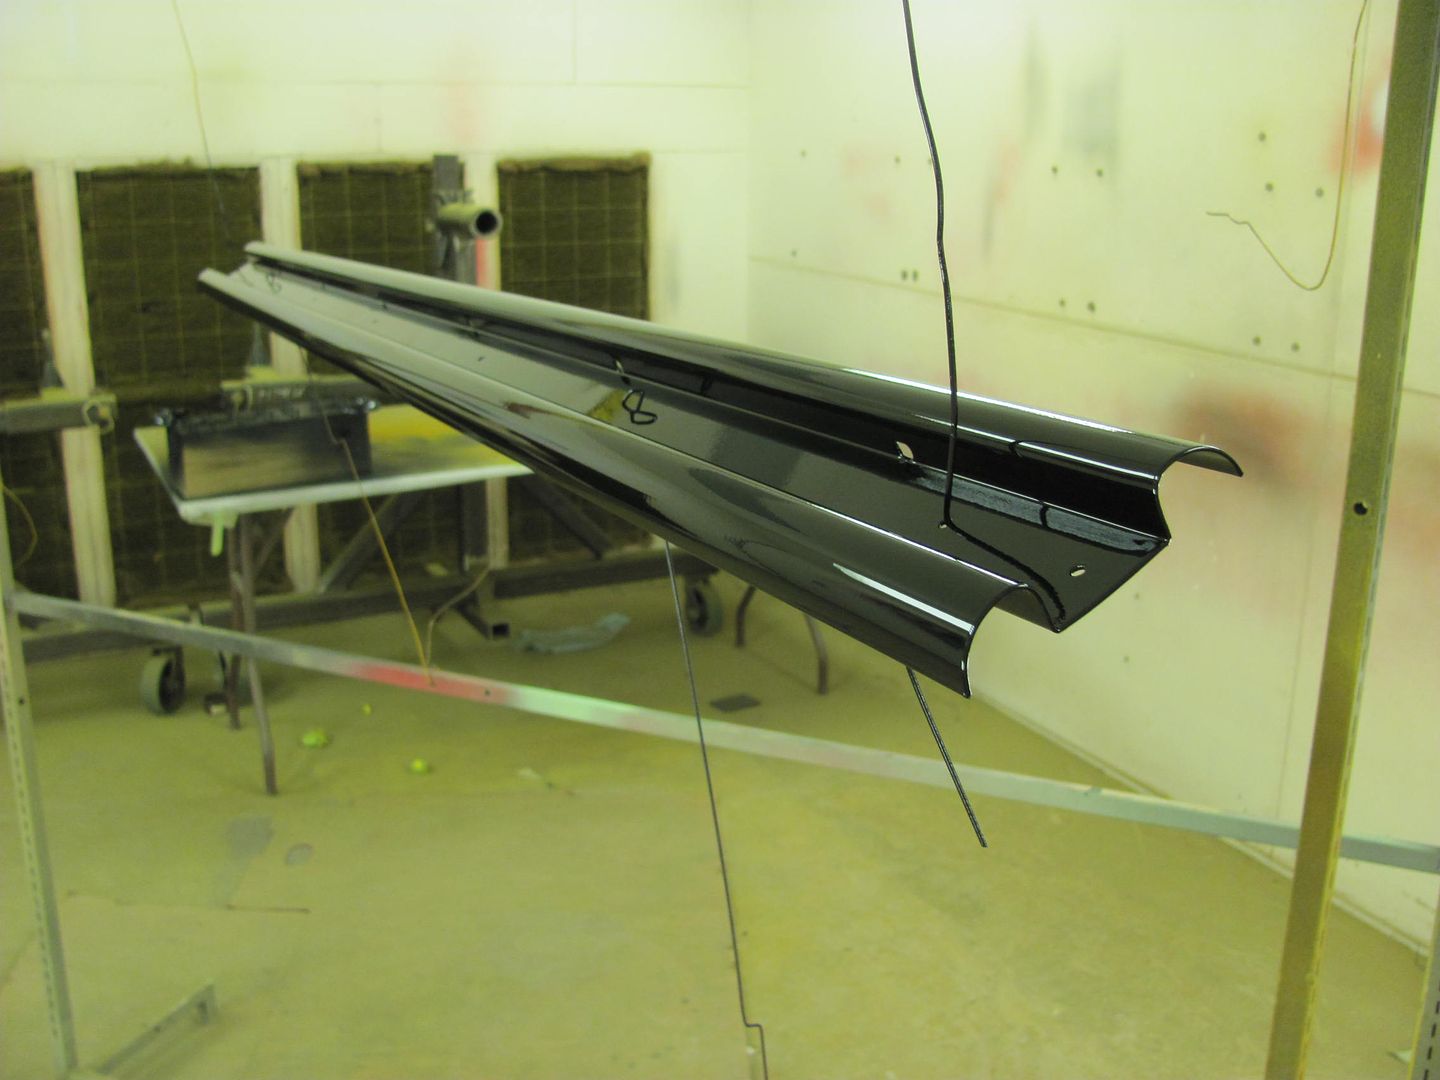 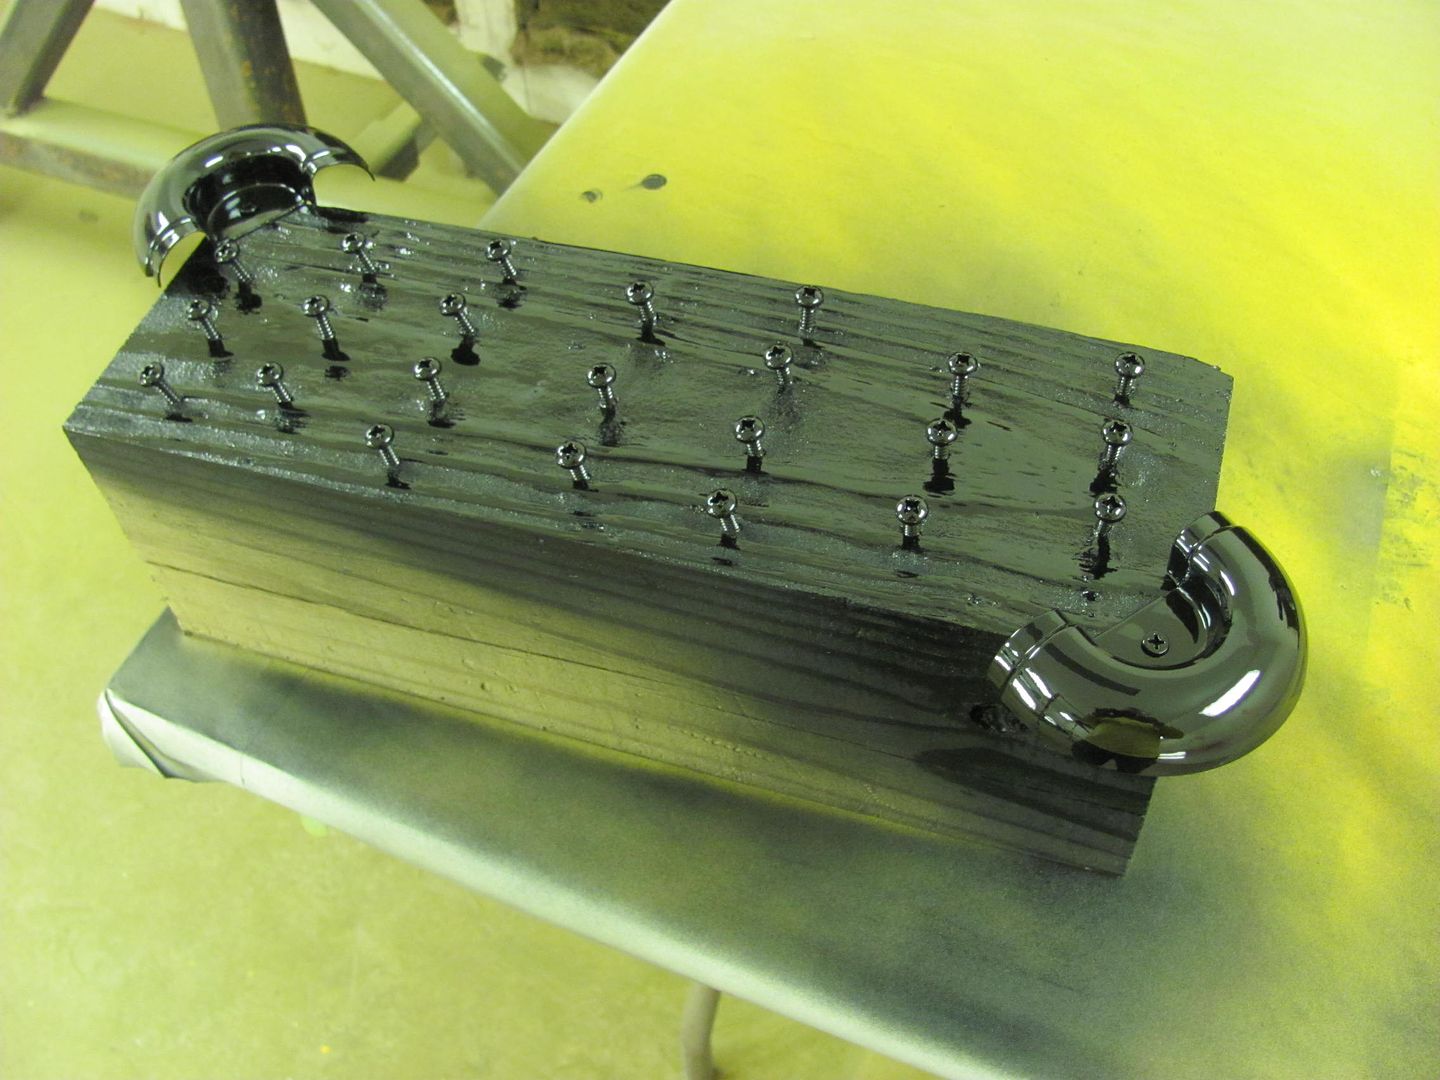 Should get all the parts put back together tomorrow, all ready for inspection..
__________________
Robert |
|
|
|
|
|
11-30-2014, 02:40 PM
|
#282 |
|
Registered User
Join Date: Jan 2013
Location: Leonardtown, MD
Posts: 1,633
|
Re: 55 Wagon Progress
Parts all re-assembled, ready for inspection..
__________________
Robert |
|
|
|
|
11-30-2014, 09:37 PM
|
#283 |
|
Registered User
Join Date: May 2007
Location: Deale Md
Posts: 4,663
|
Re: 55 Wagon Progress
it's definitely yellow
__________________
James 63 GMC V6 4speed carryall 65 chevy swb bbw V8 auto 68 K20 327/4 speed, buddy buckets 2002 GMC CC Dually Duramax 64 GMC lwb 3/4 V6 4speed SOLD 66 GMC swb bbw buddy buckets SOLD IG duallyjams The only thing that stays the same is constant change! |
|
|
|
|
12-03-2014, 11:45 PM
|
#284 |
|
Registered User
Join Date: Jan 2013
Location: Leonardtown, MD
Posts: 1,633
|
Re: 55 Wagon Progress
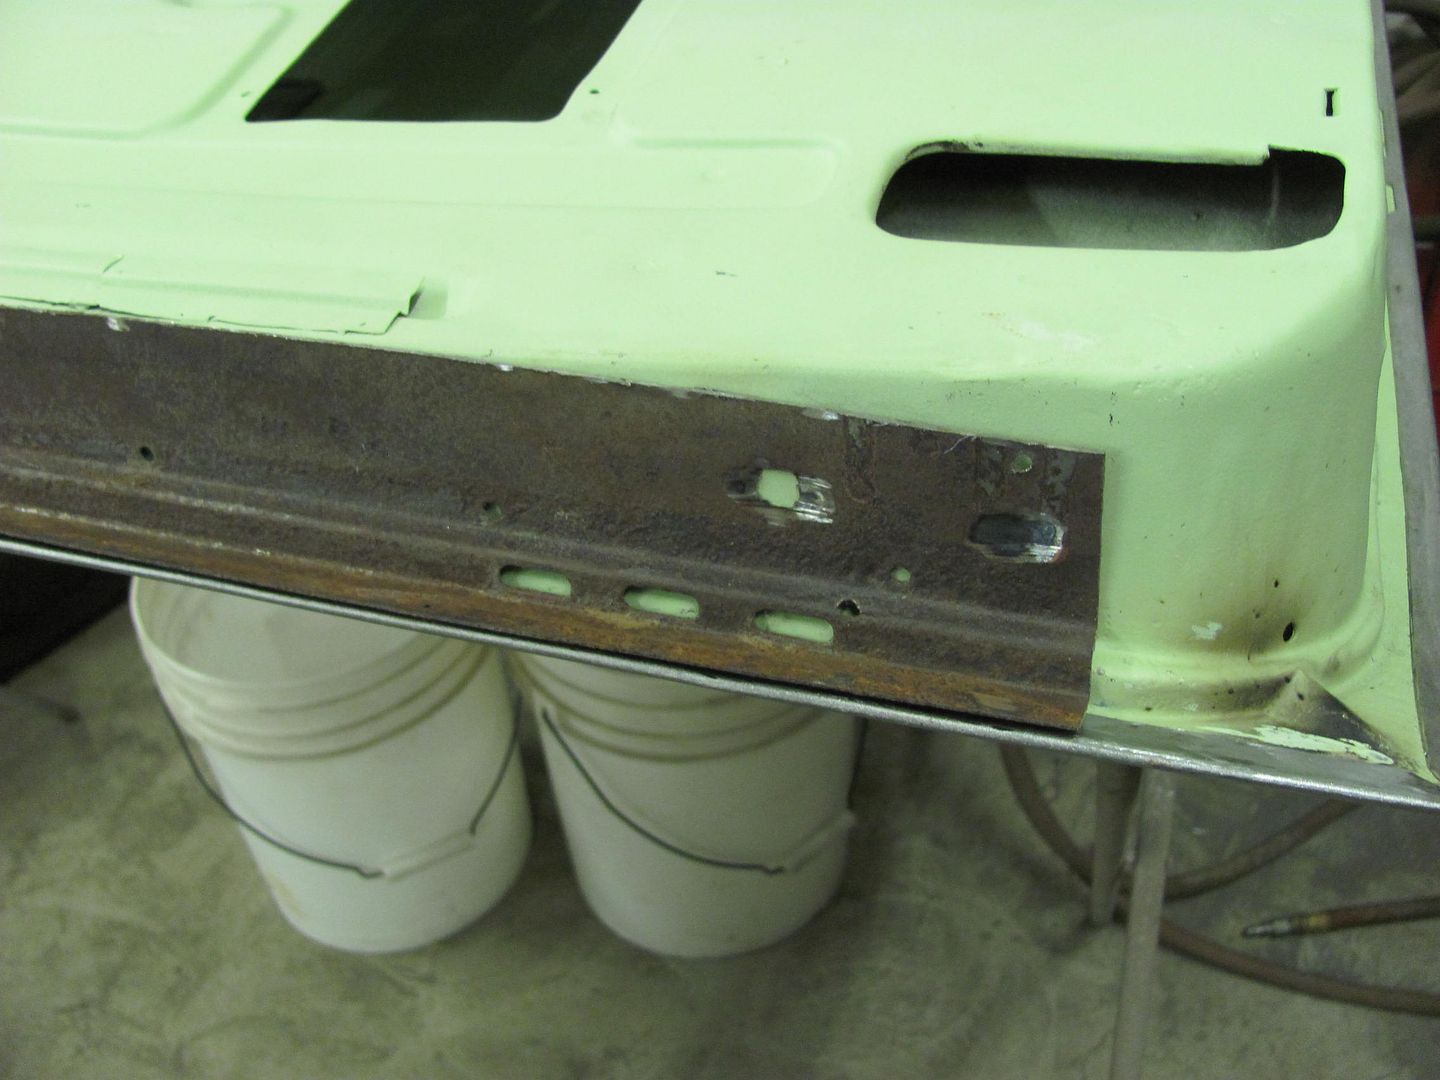
Now that the bus parts have left the building, tonight we worked on getting the front fenders ready for epoxy primer, just a few more items to cross off the list. An earlier repair to resolve some rust on the top of the fenders.........
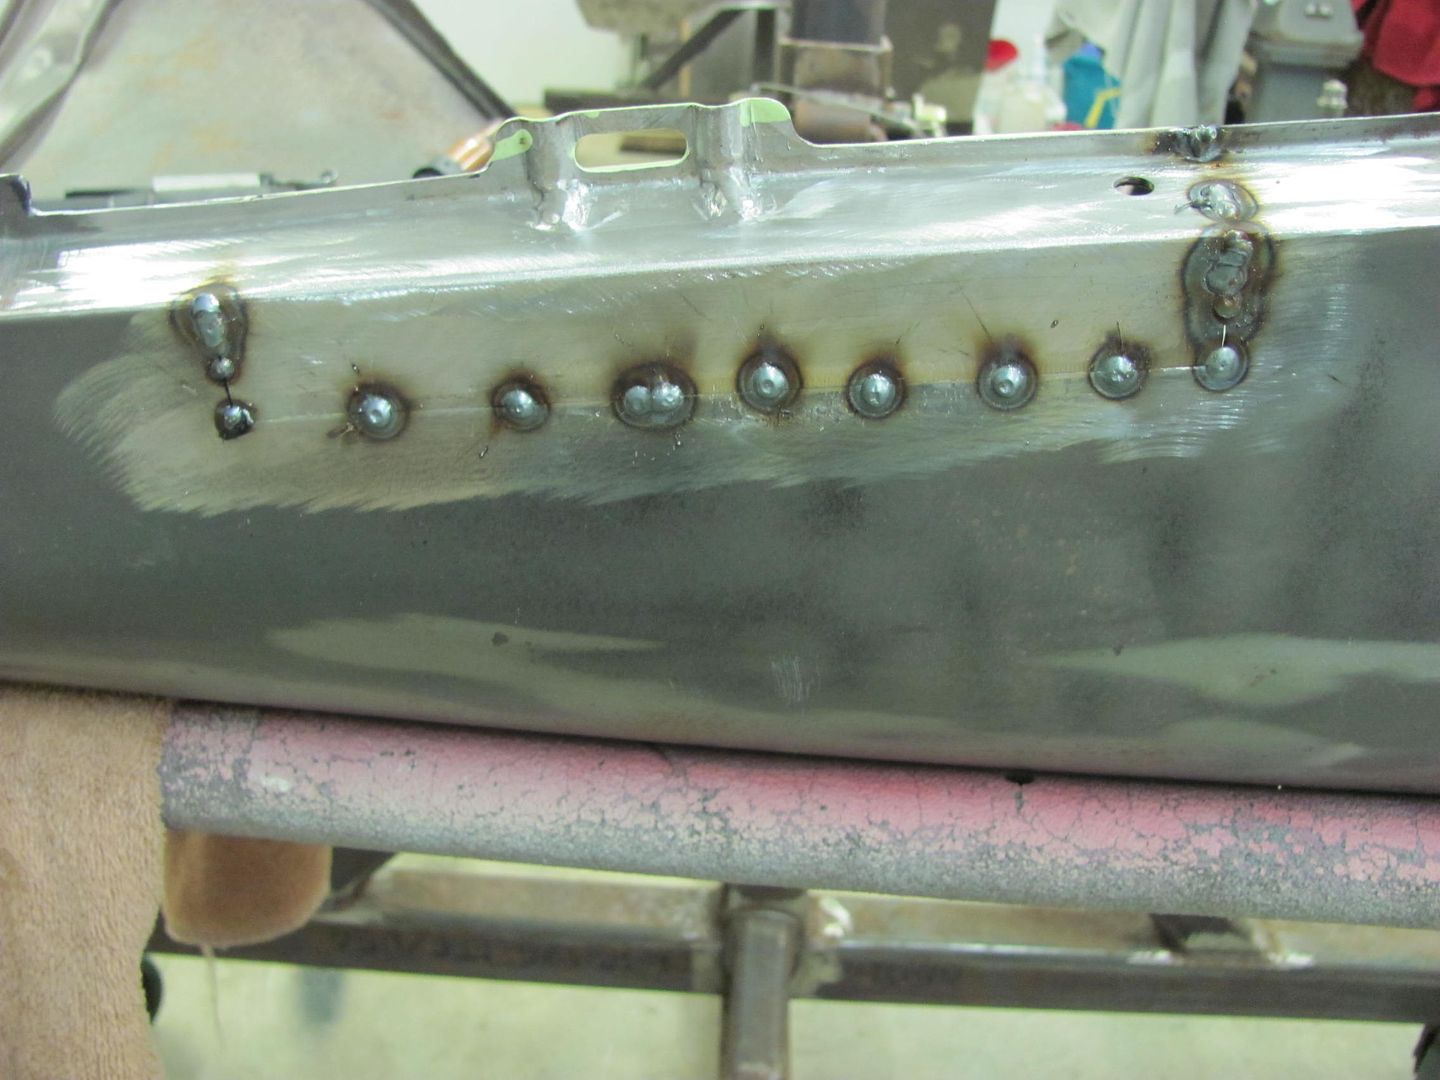 .........when checking the gap to the hood recently we noticed it was slightly wide at these spots where the weld had pulled. Shown here with the straight edge....  Time to make a tool that will reach between the inner fender brace for a bit of bumping... 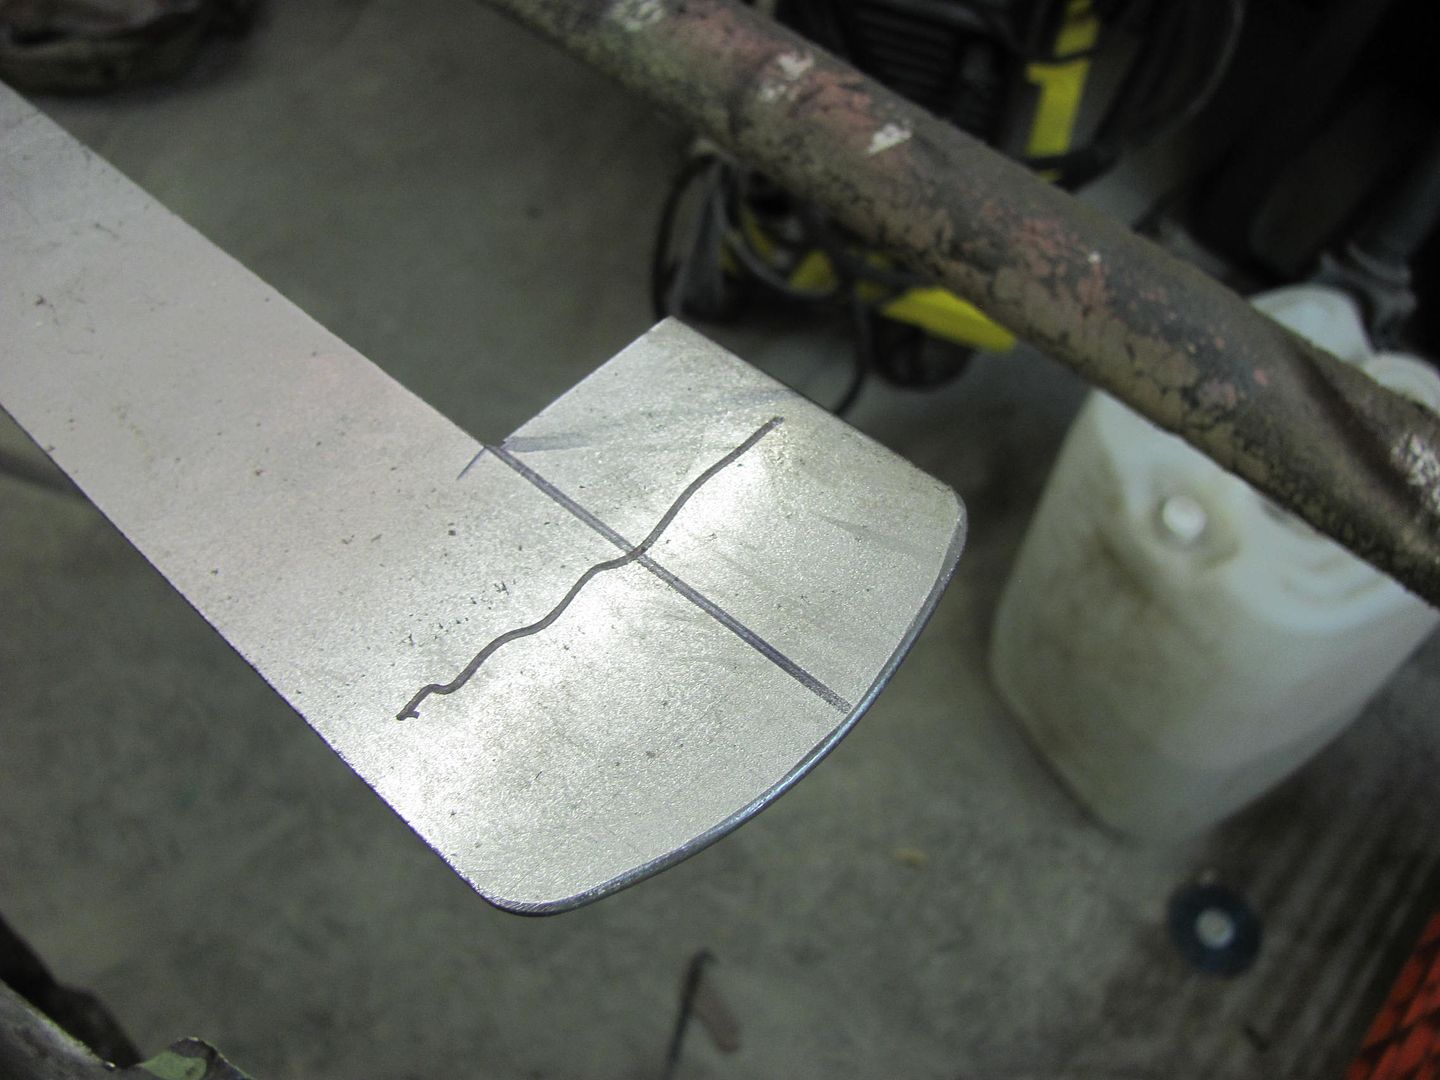 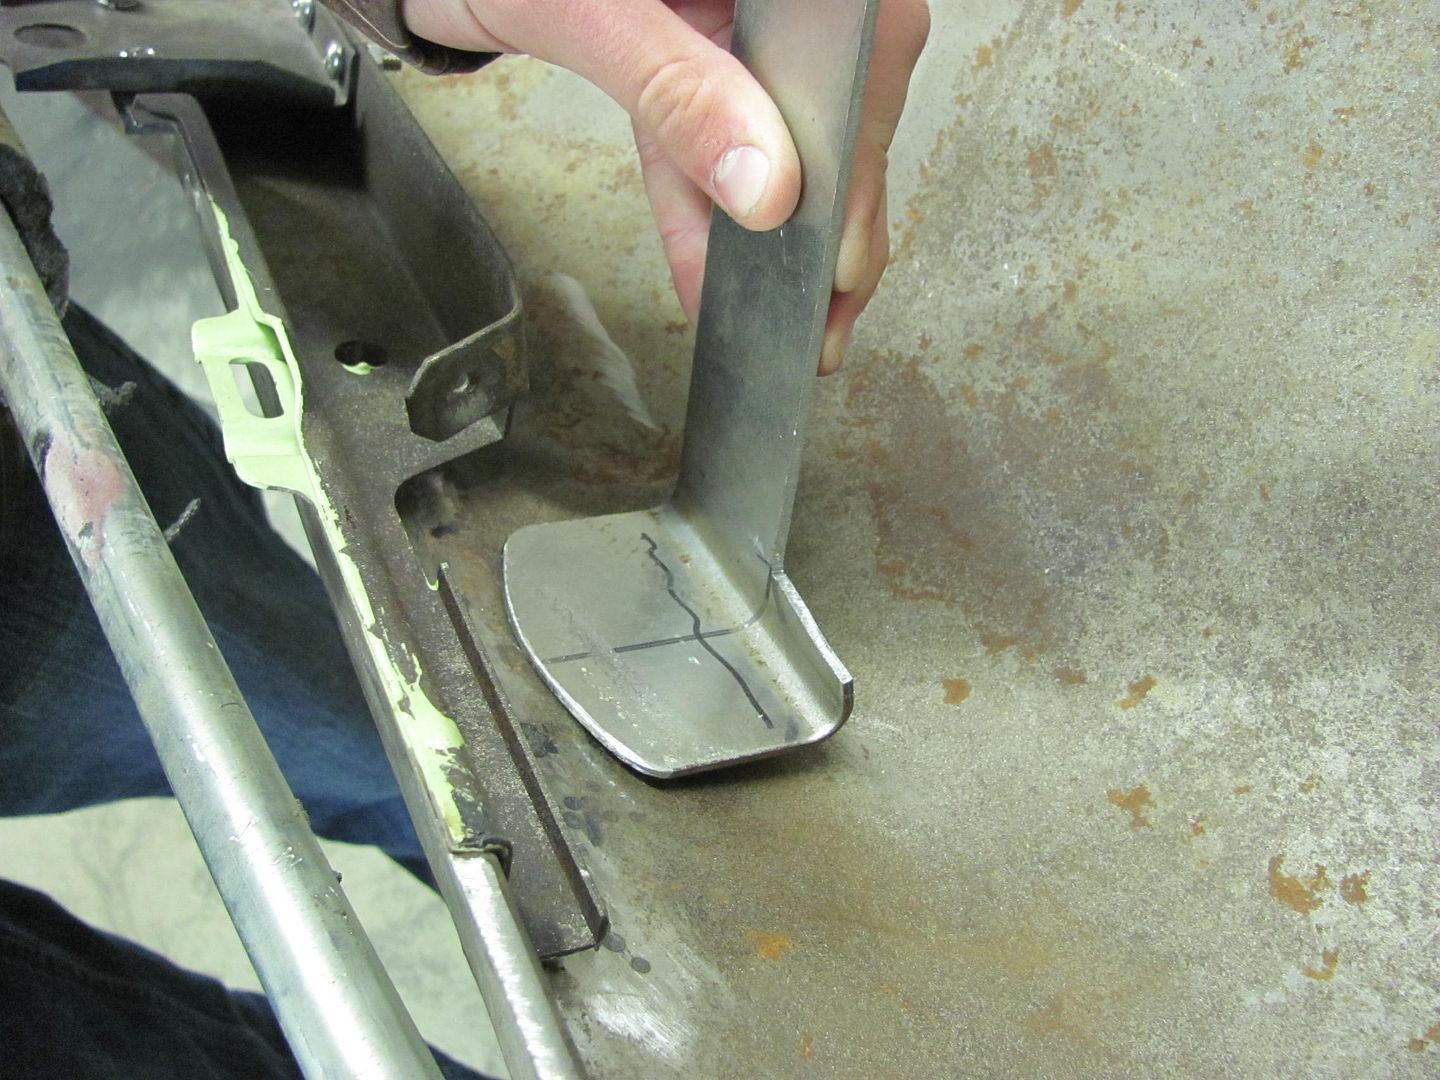 The shortened hammer comes in handy again... 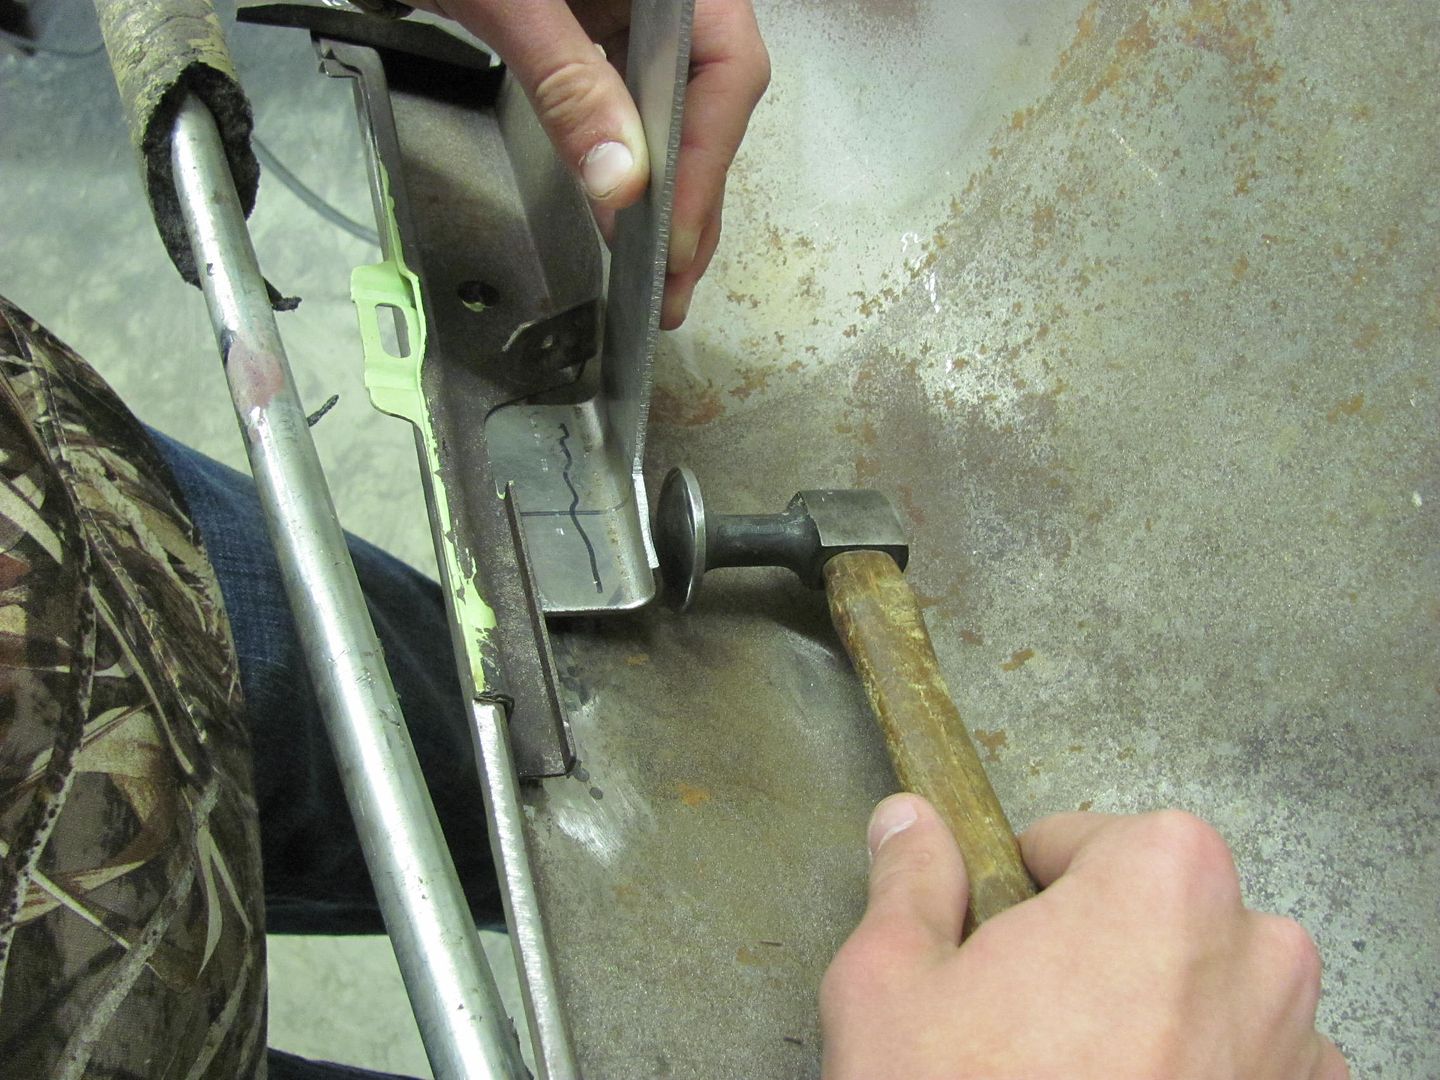 A few good raps along the area brought it out nicely. Next, we have some early model fender emblems to install on the front fenders, so we needed to fill the old holes... 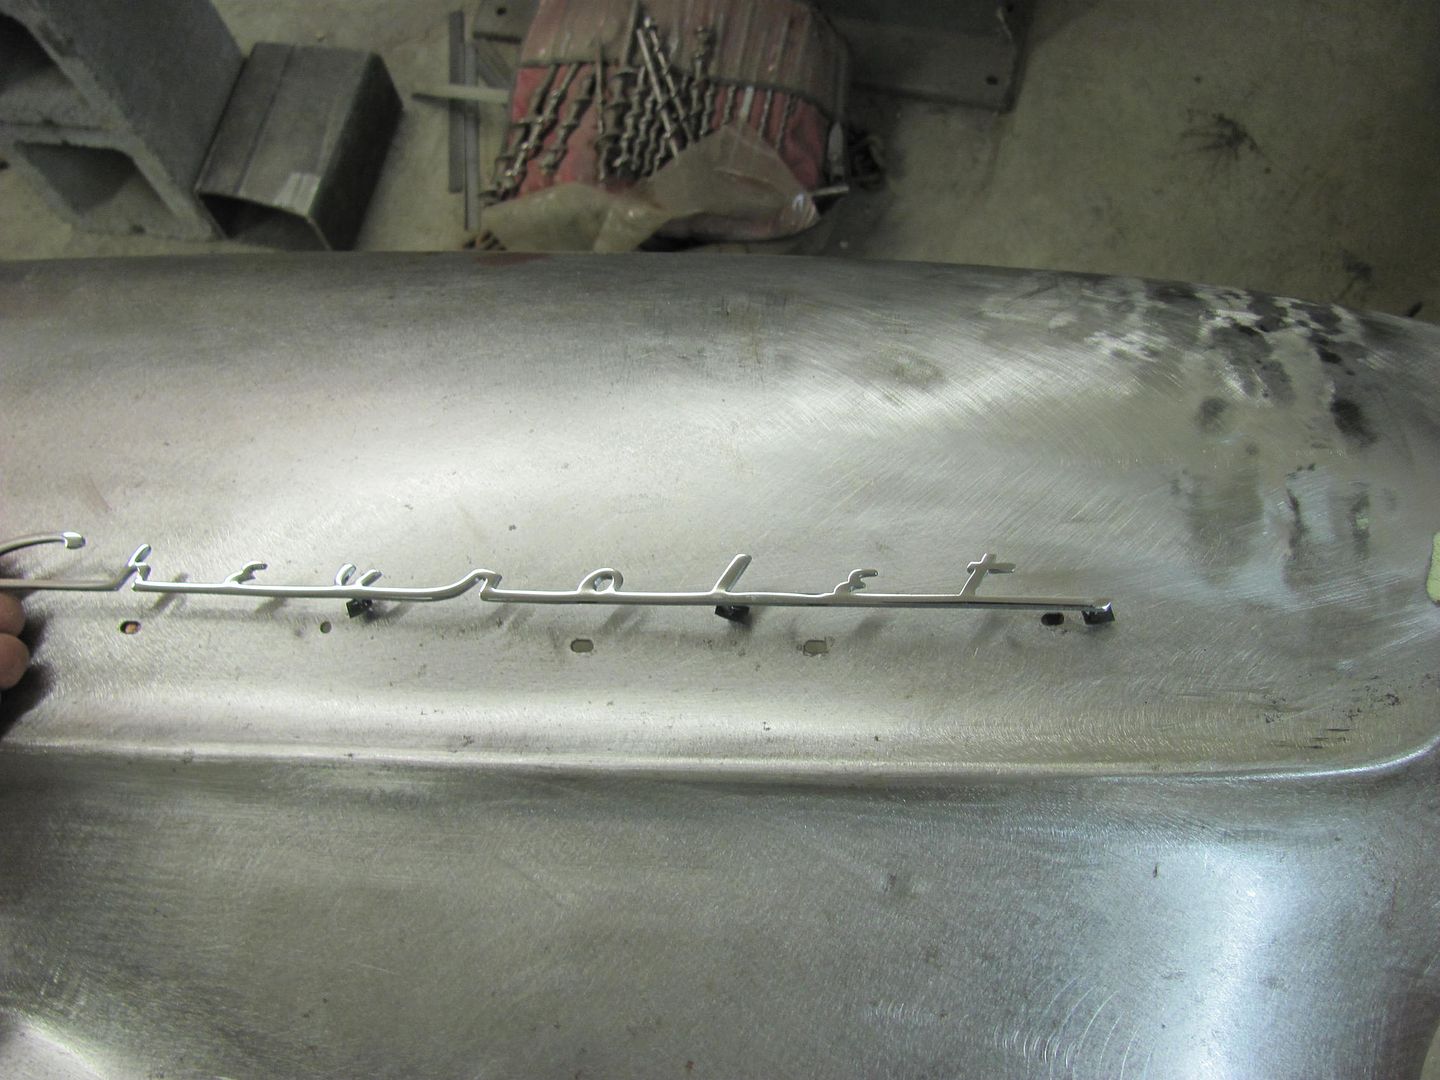 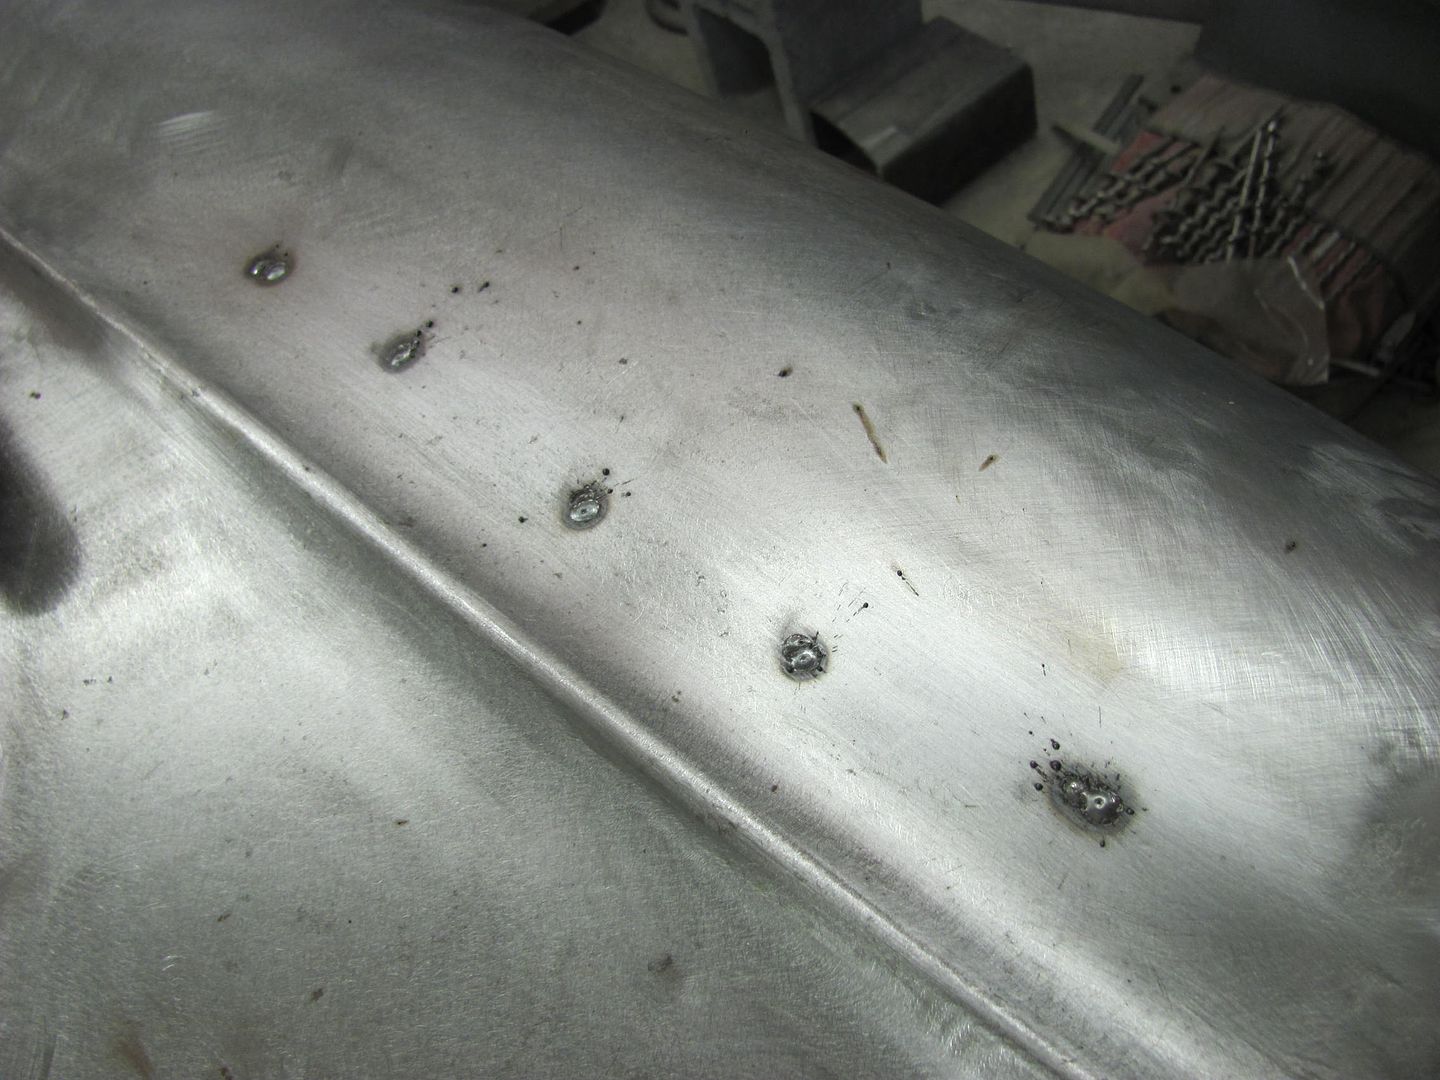 Three separate quick zaps were used (about a minute in between) to minimize the heat introduced into the panel for filling the slotted holes. Note minimal HAZ.. 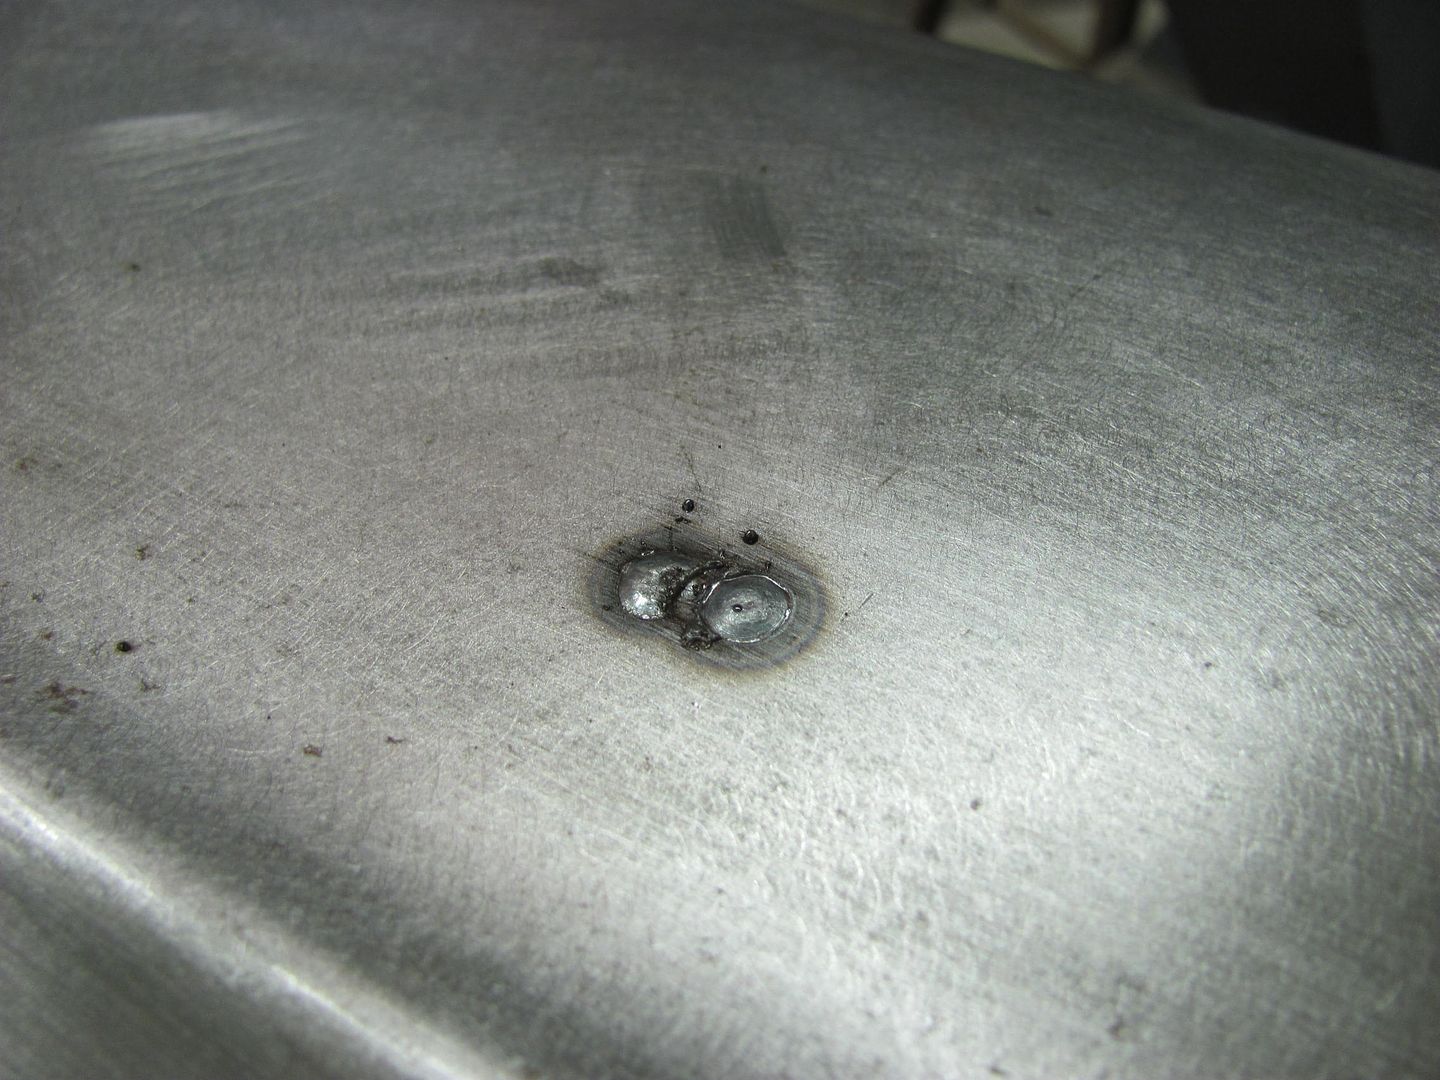 Holes laid out and drilled for the new emblem... 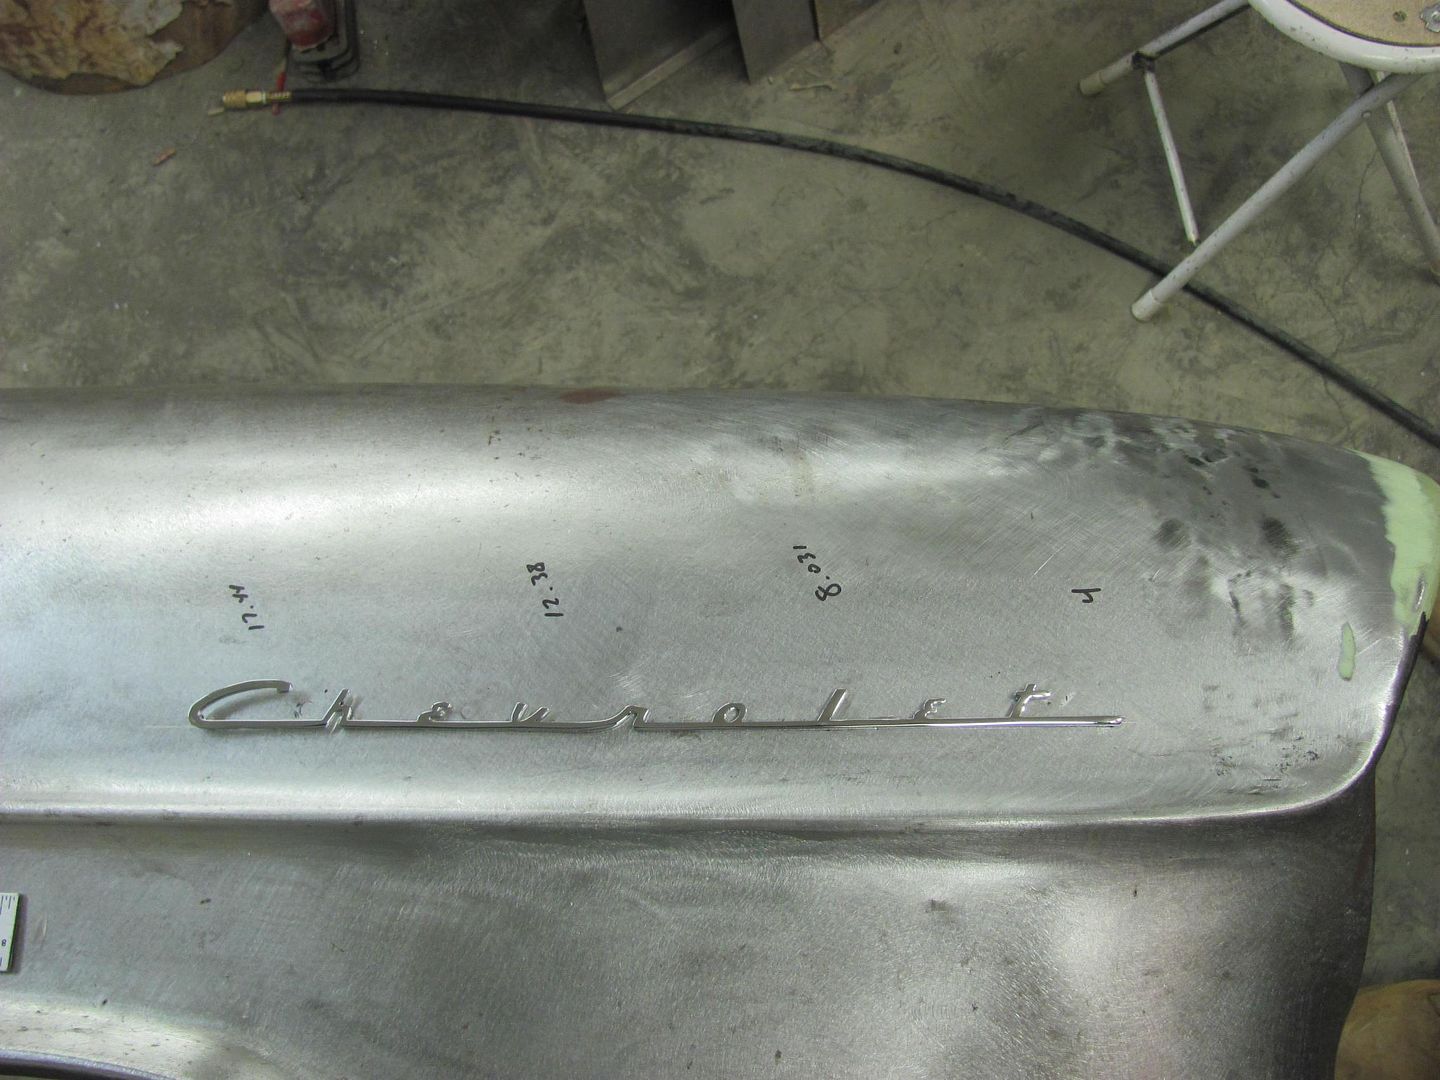 Other fender... 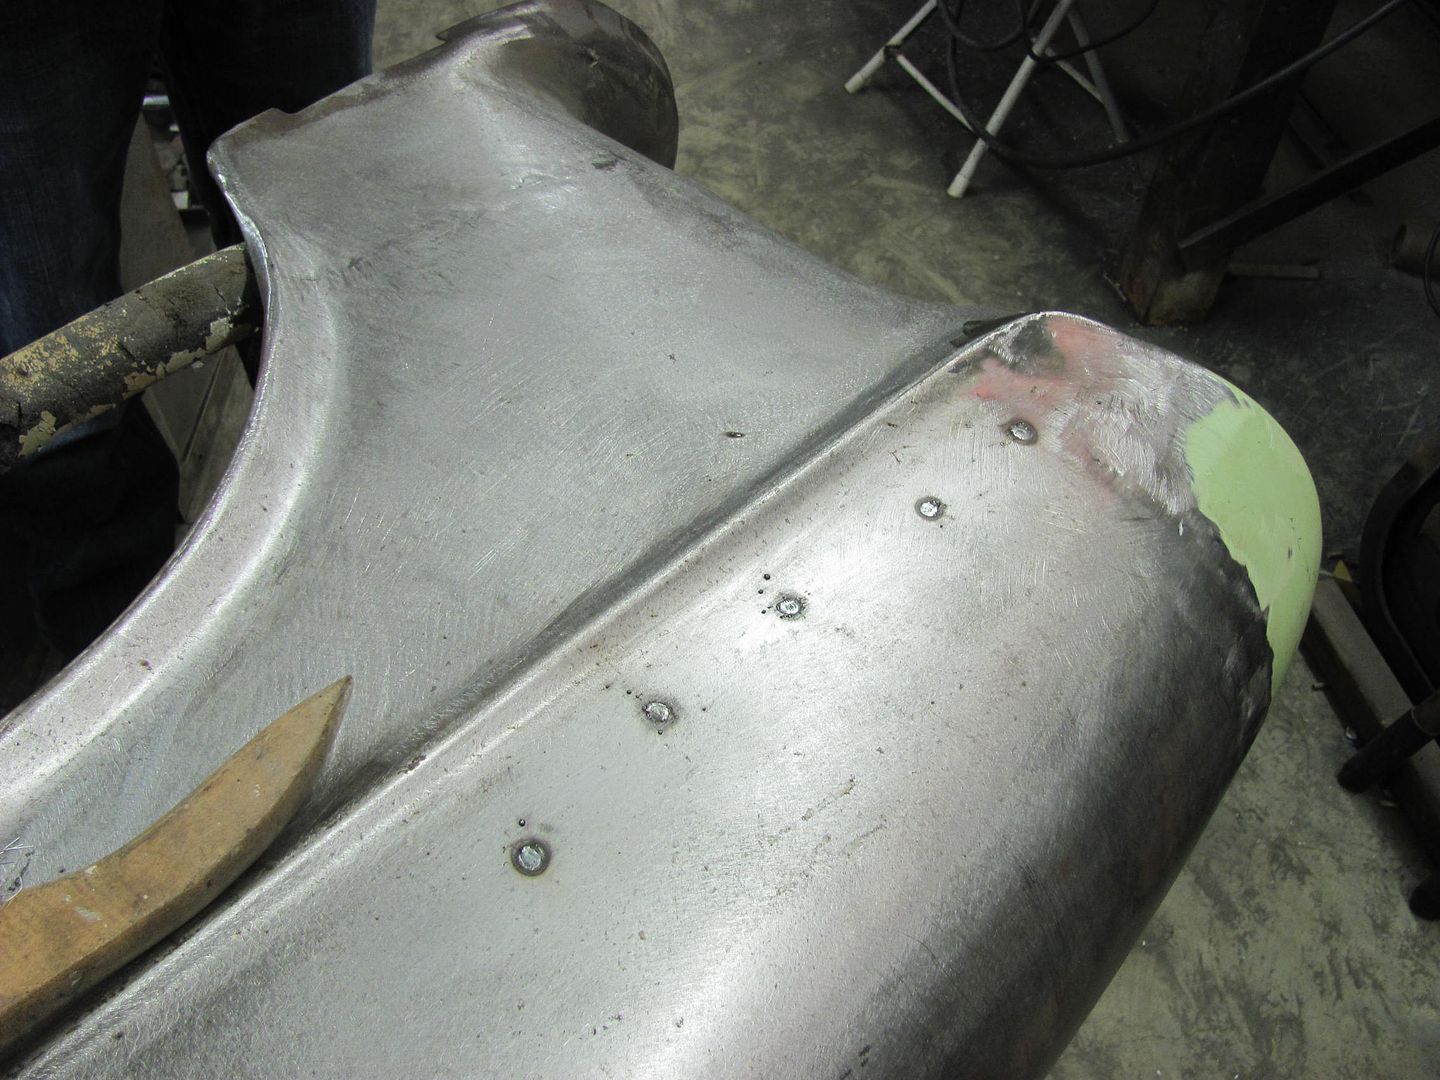 Note minimal weld bead height using EZ Grind..  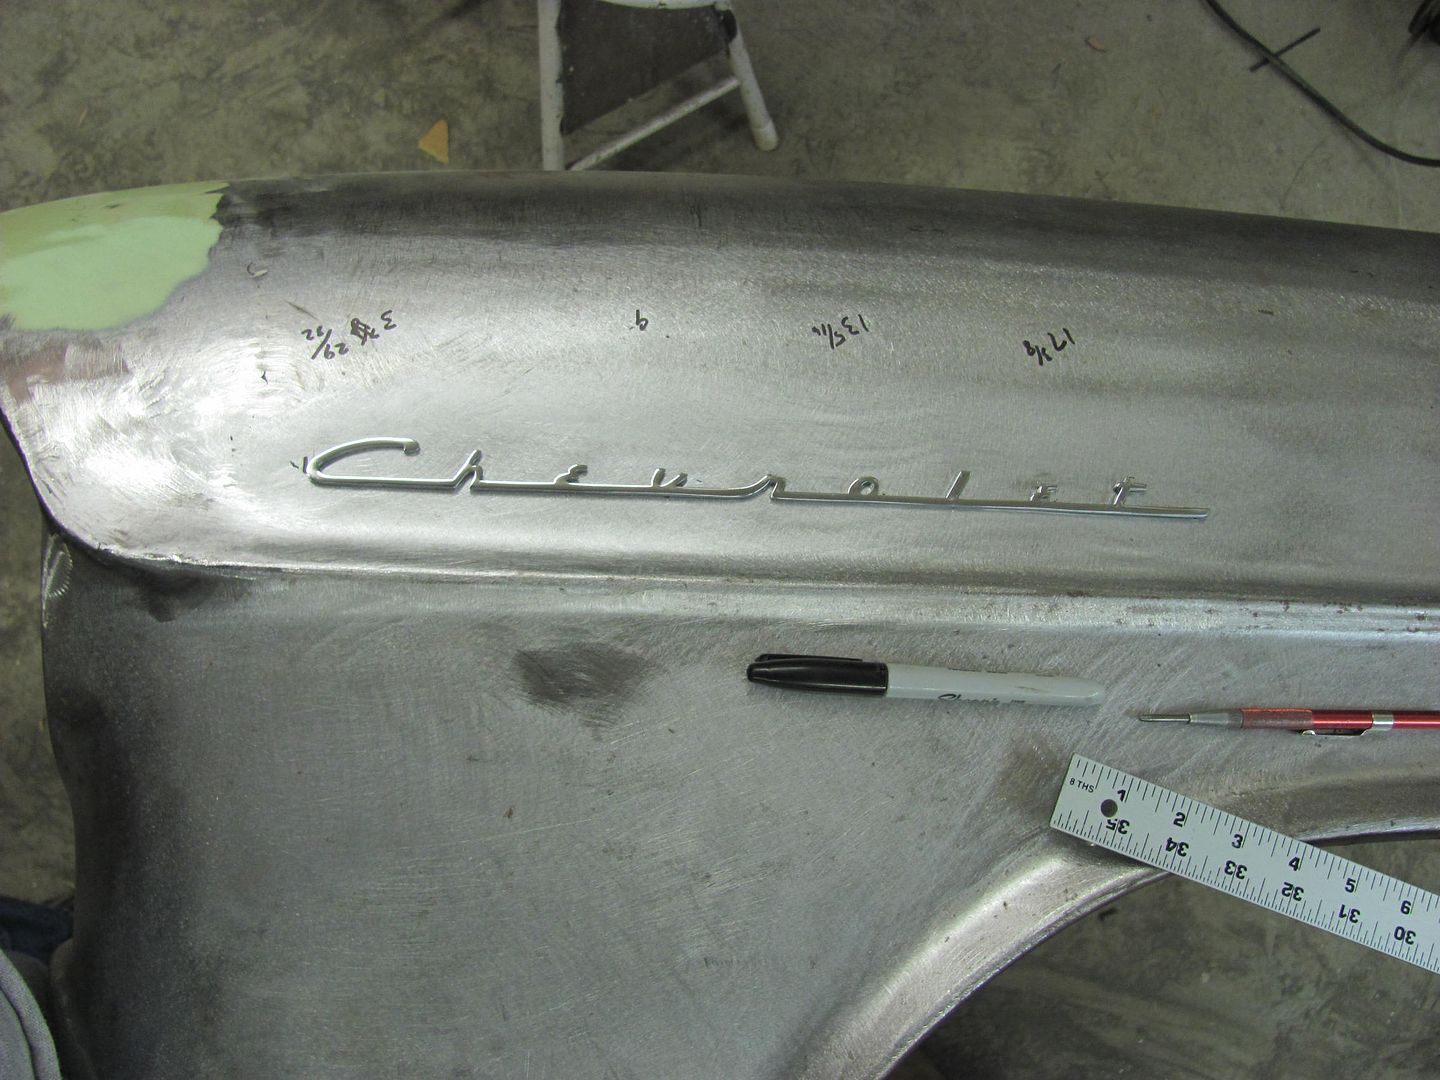 Next, we had one more minor adjustment to do to the driver door lower corner. It was tweaked inward slightly and needed some adjustment. I recently noticed one of my hole punches was broken, and it looks like it will work for what we need, in conjunction with the vise grip dent puller... 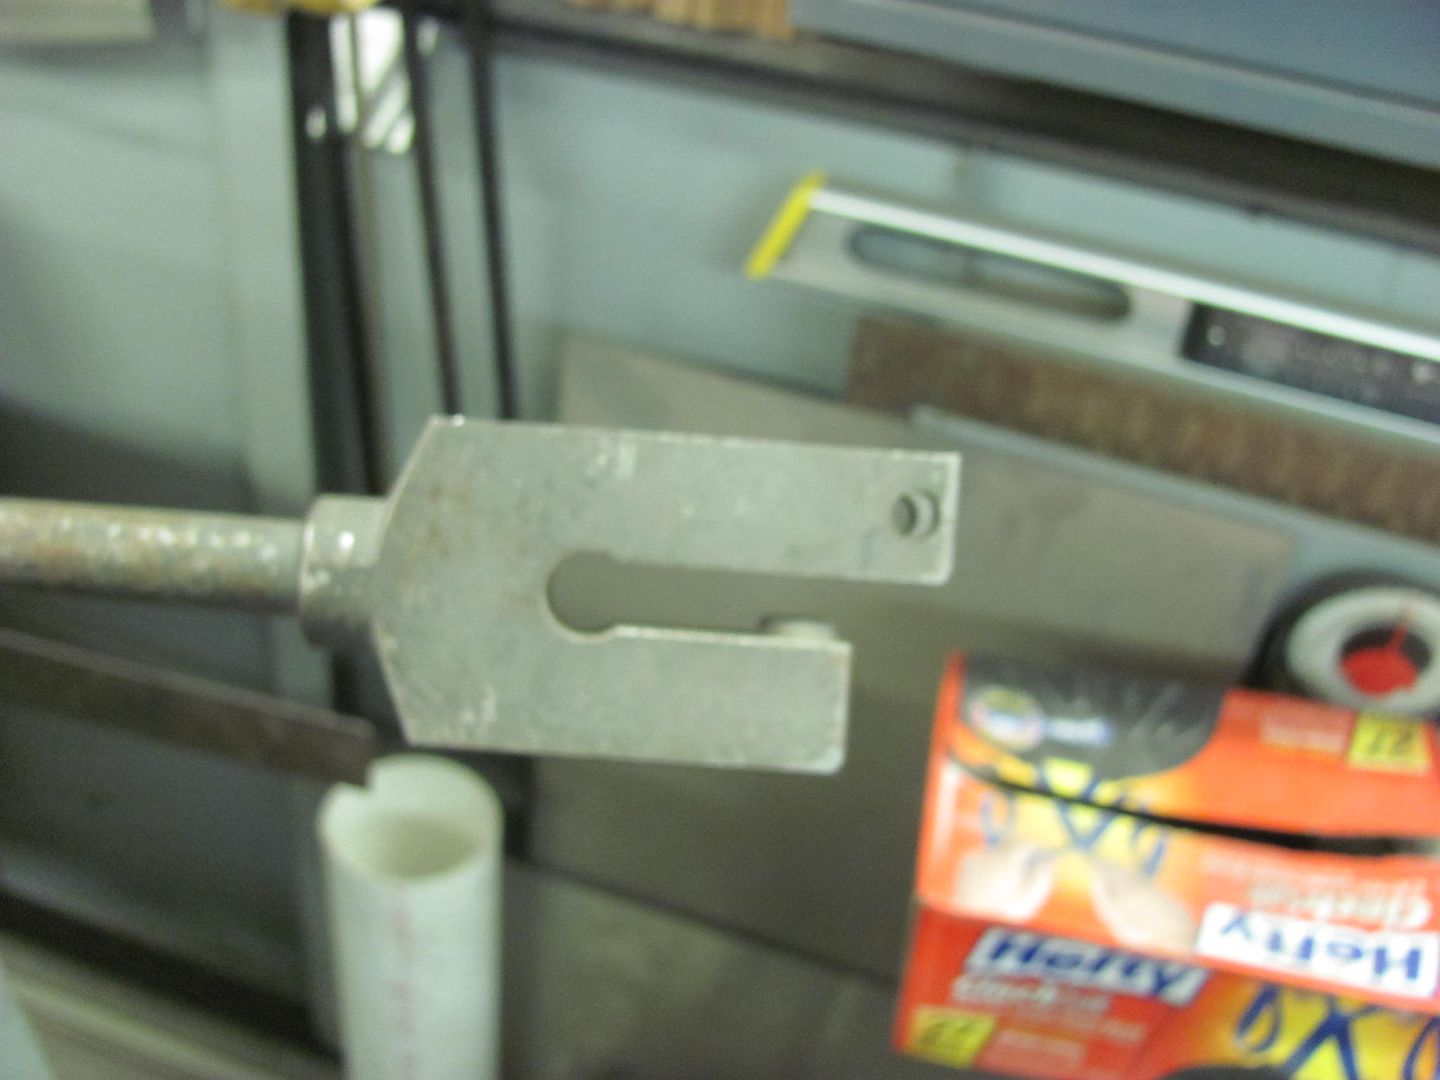 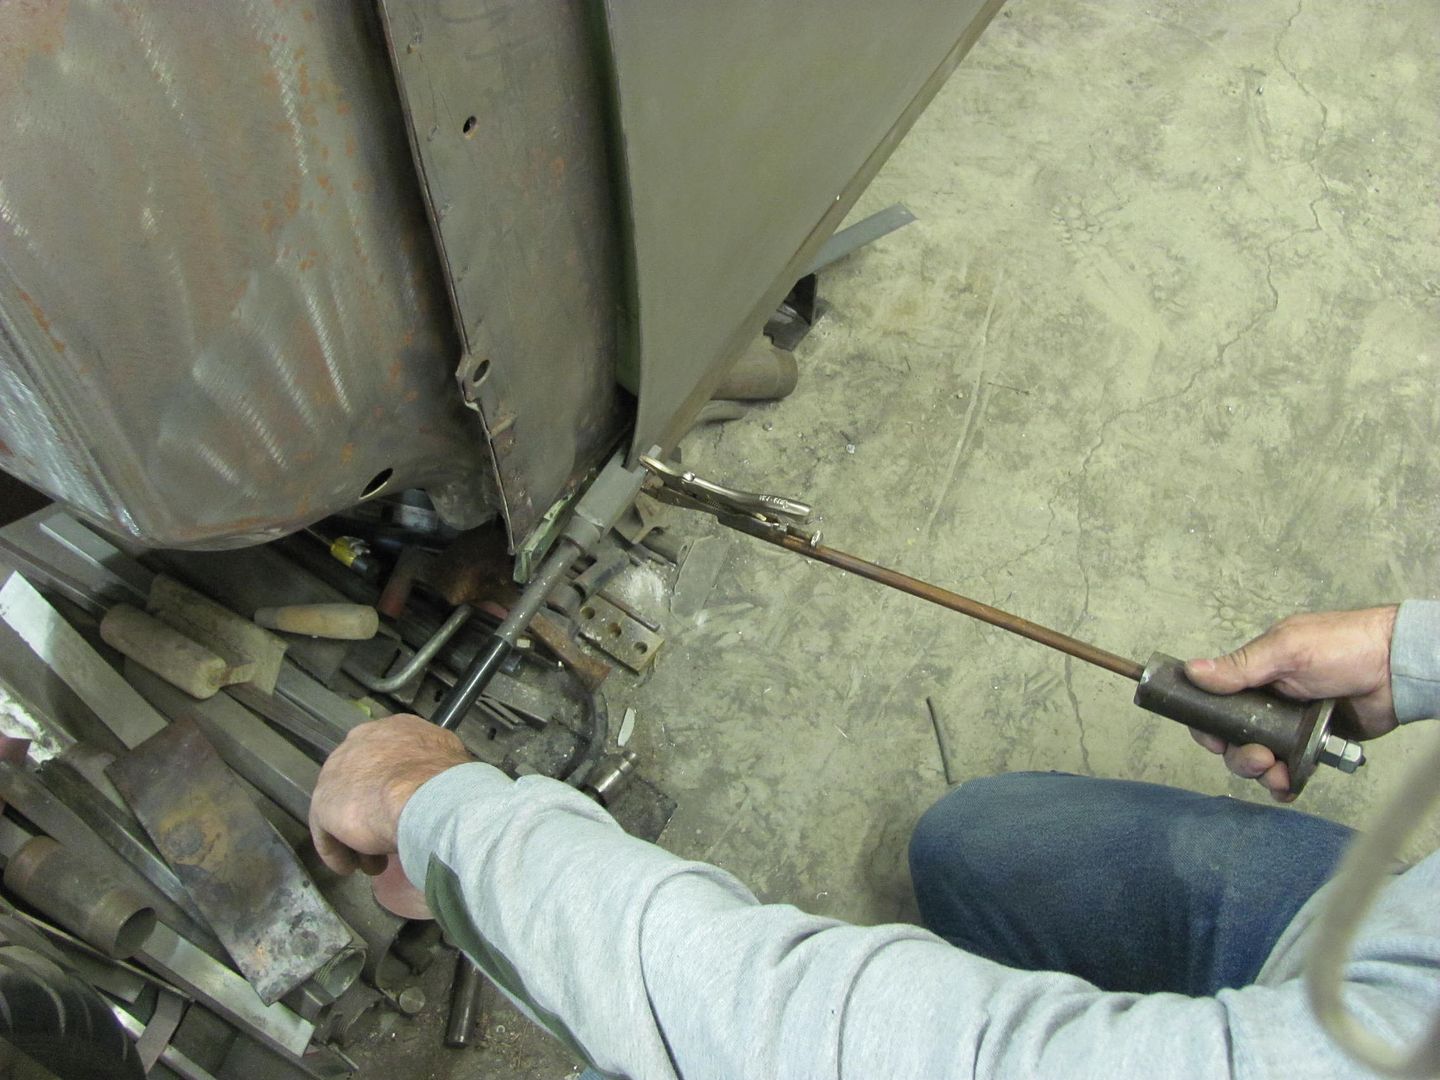 Kyle started media blasting the inside of the driver's fender.... A bit of a squeeze in a 58" wide blast cabinet..  Rather tight to the door!  Until next time.....
__________________
Robert |
|
|
|
|
12-07-2014, 01:04 AM
|
#285 |
|
Registered User
Join Date: Jan 2013
Location: Leonardtown, MD
Posts: 1,633
|
Re: 55 Wagon Progress
While I was doing the family thing today at an FLL robotics competition, Kyle worked some more on prepping the front fenders for priming..
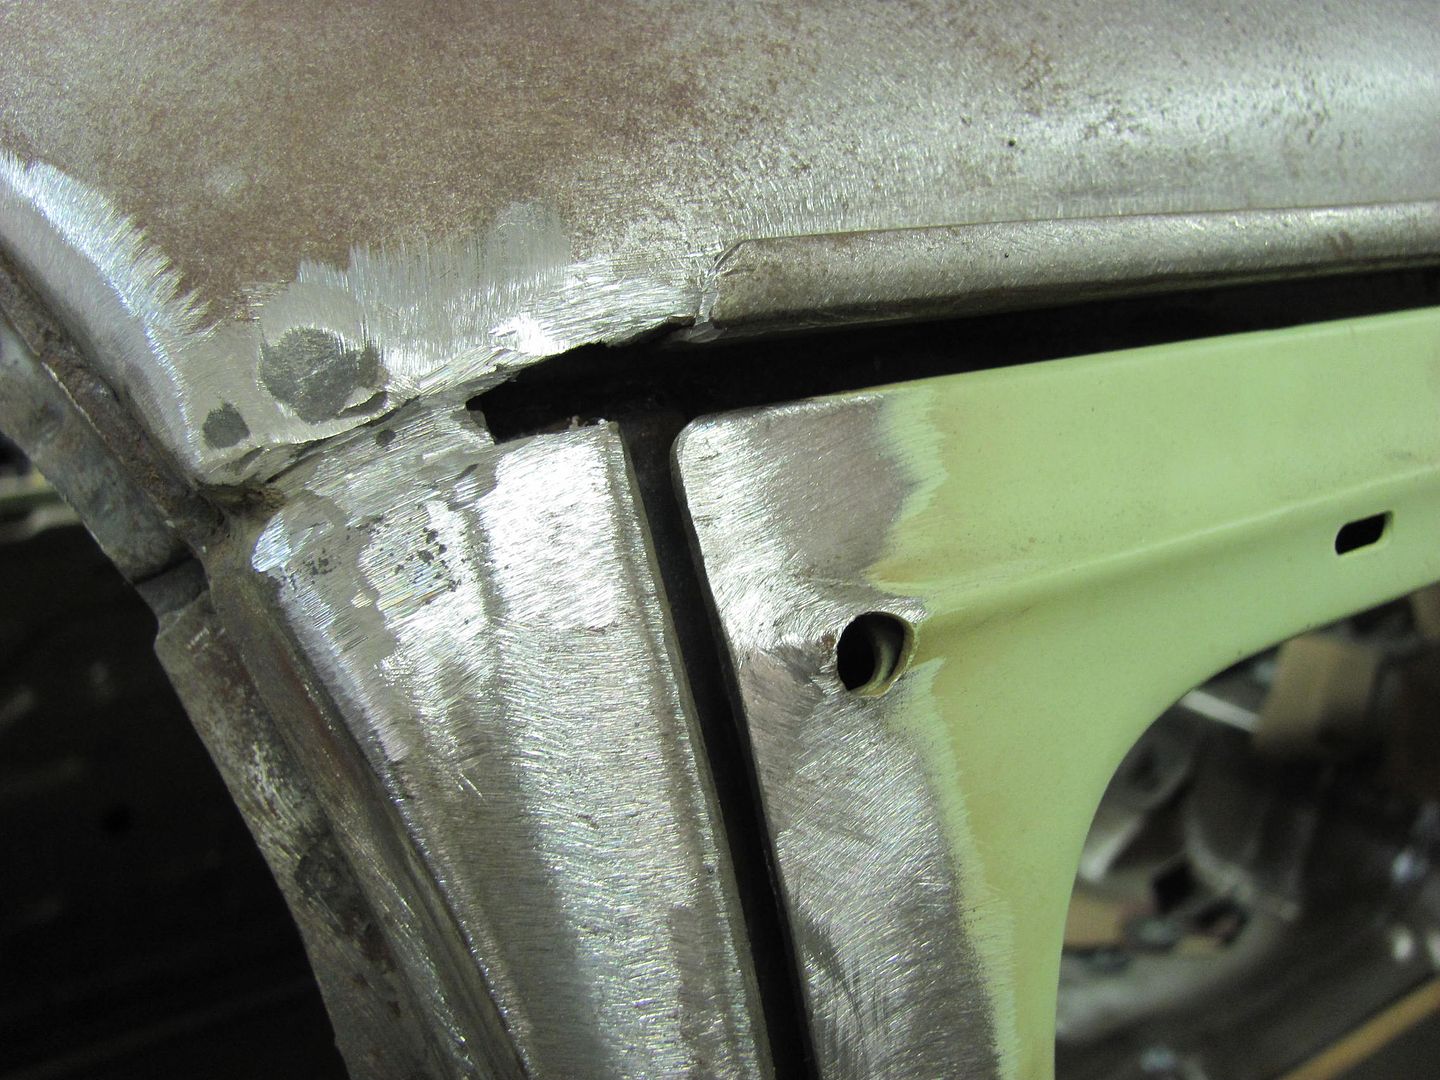
One down...... 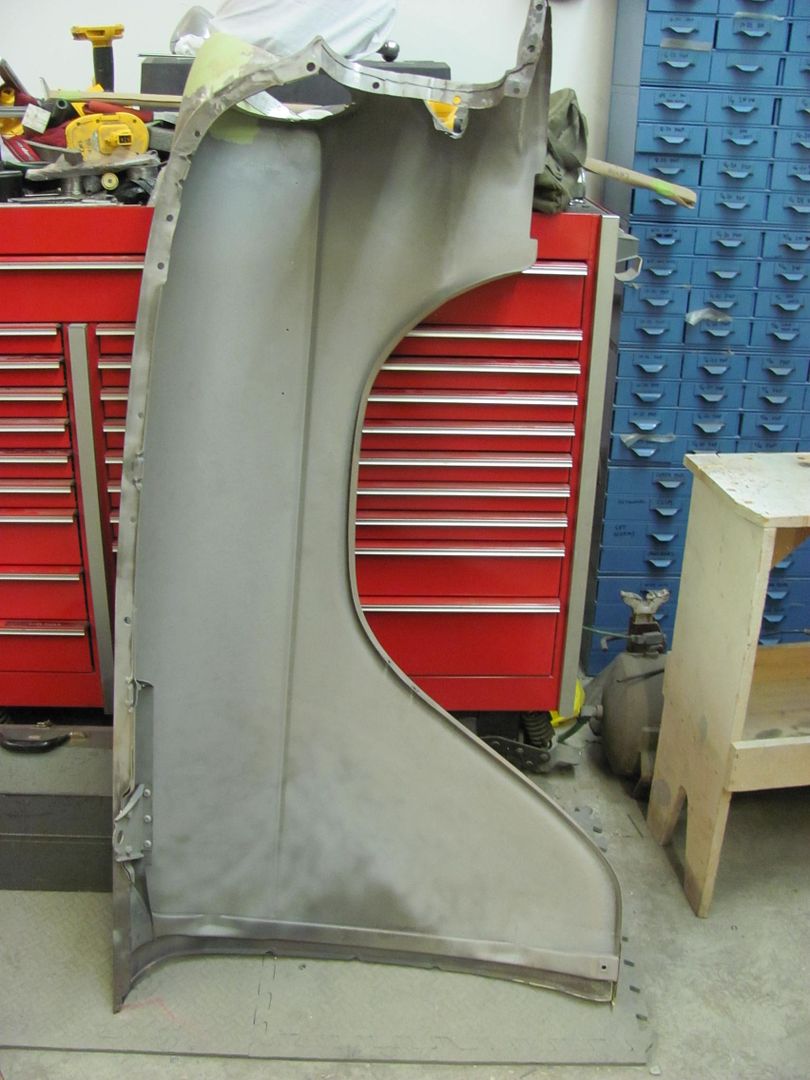 One to go.... 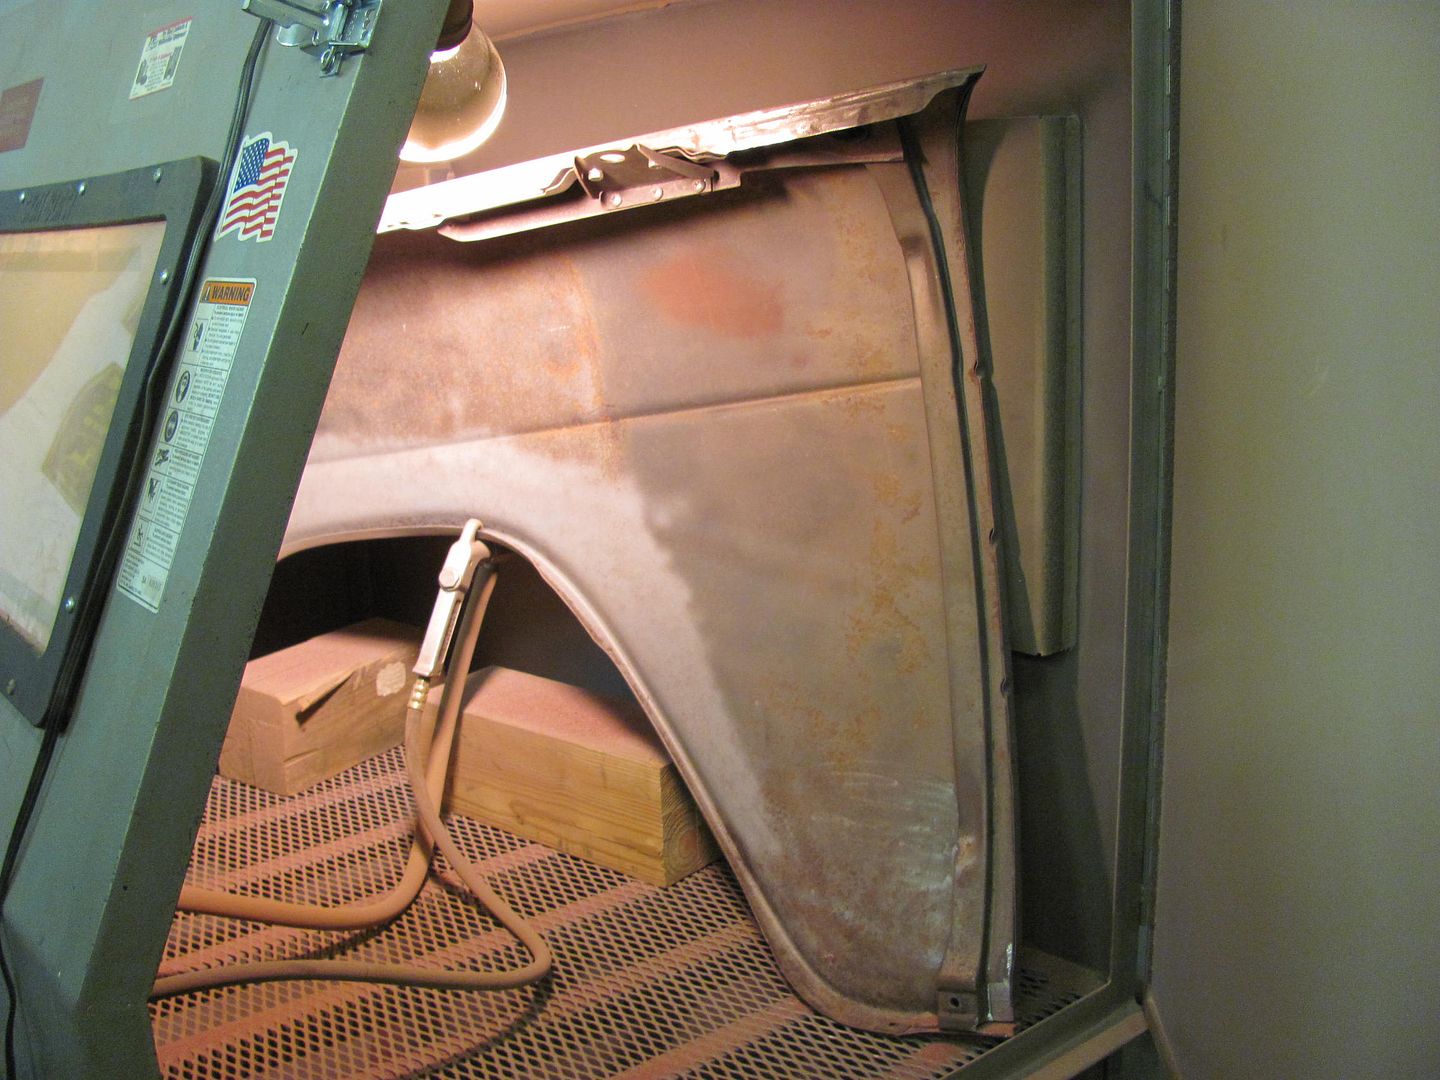 Another issue that plagues most of the trifive Chevrolets is cracking at the leaded joint at the top of the A pillar. 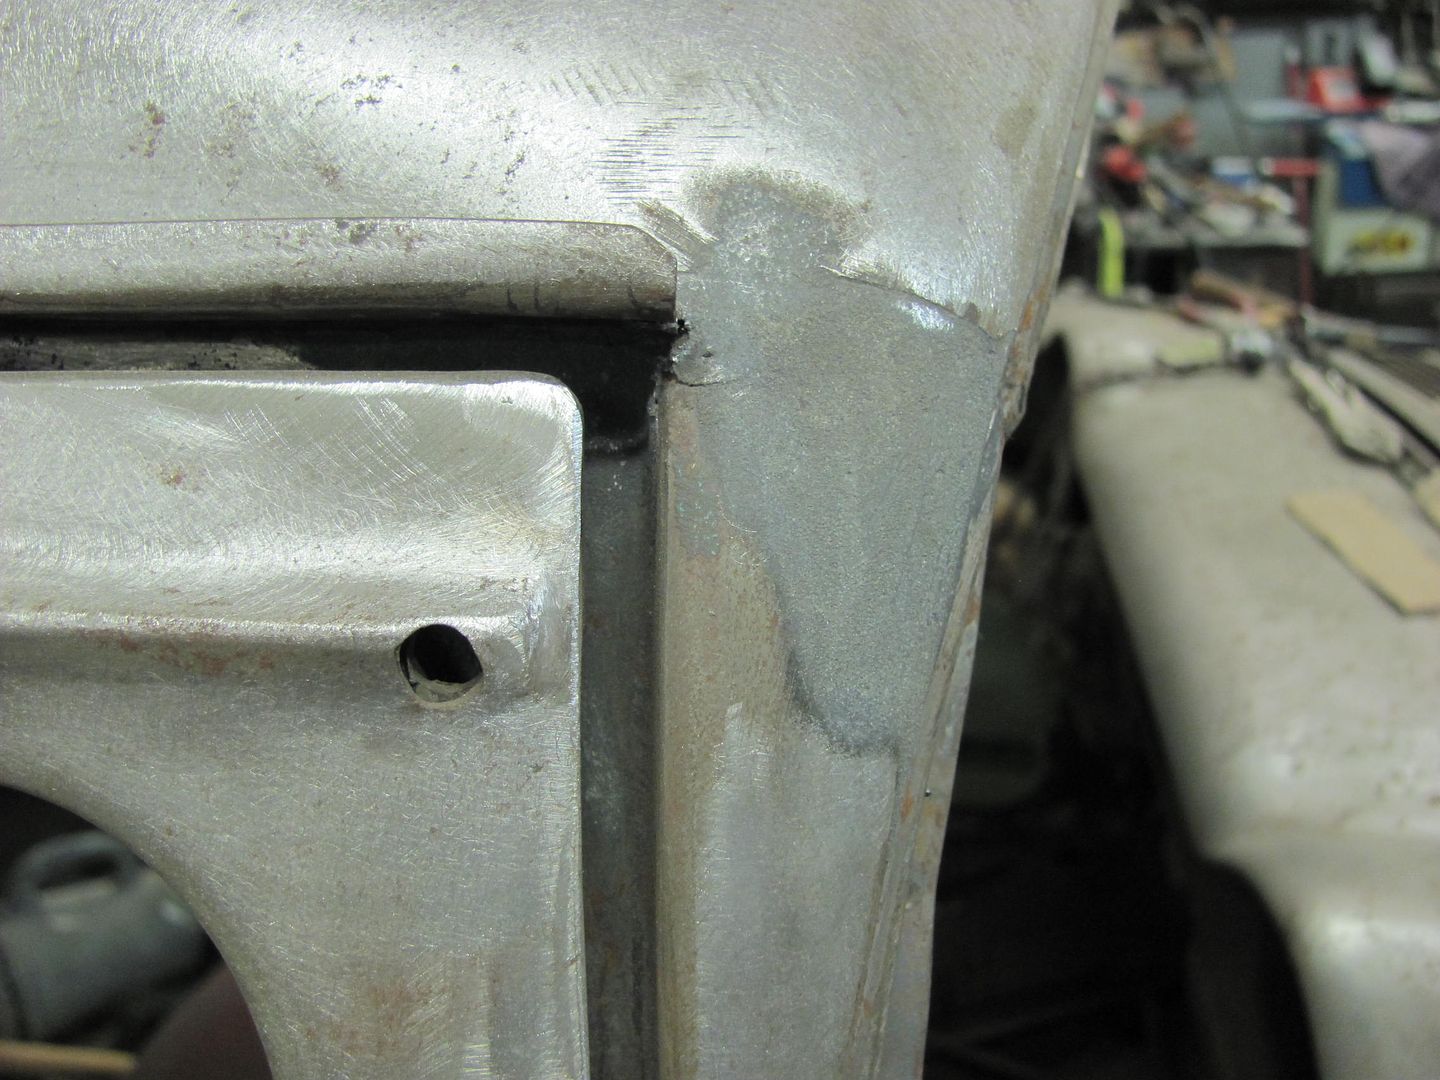 A look at the other side shows a gap that is quite a stretch to expect a good permanent repair regardless of the filler used.. 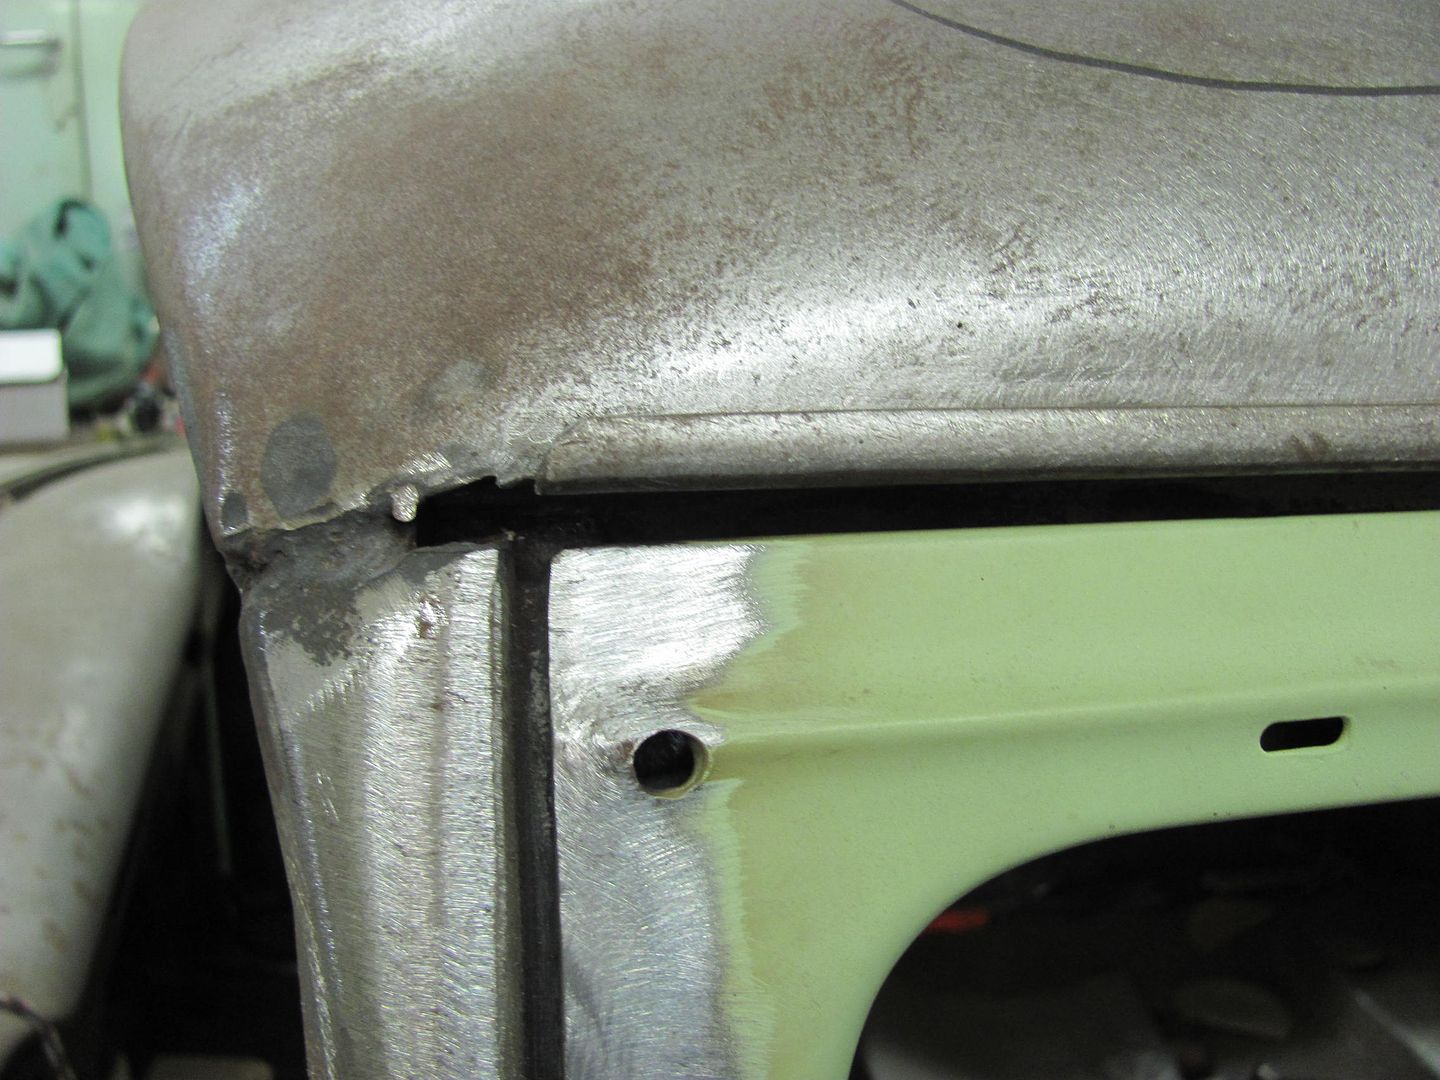 At over 1/4" wide, something we will need to address... 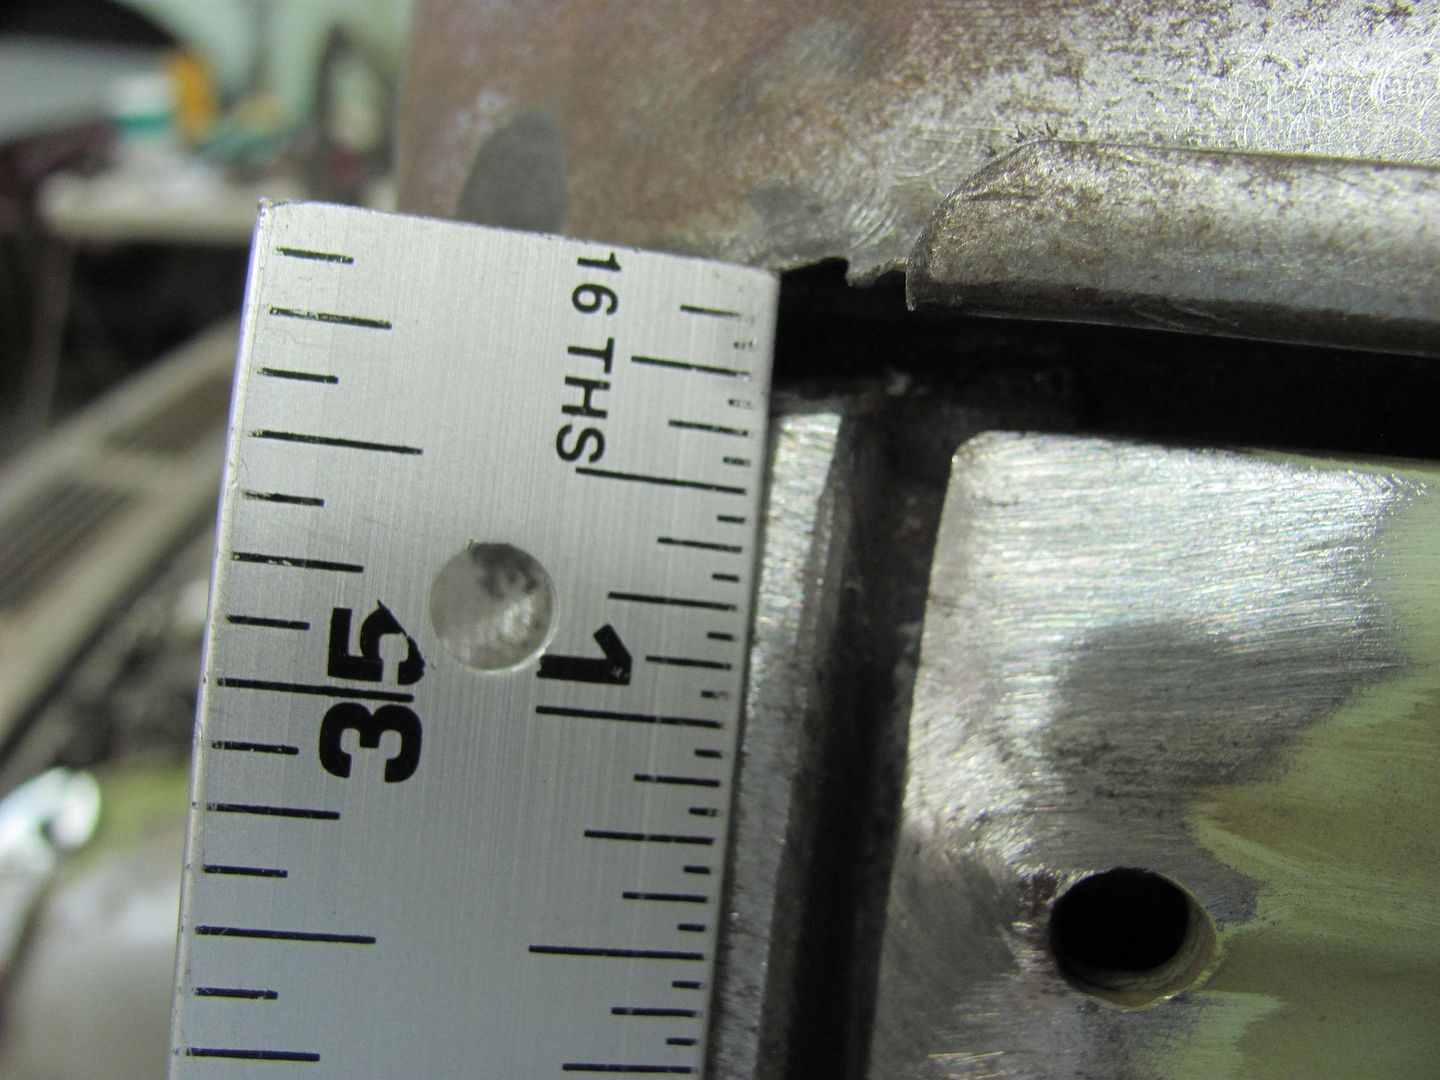  So we'll attempt a repair similar to the radius-ing that was done on the rear tailgate, using STEEL.. 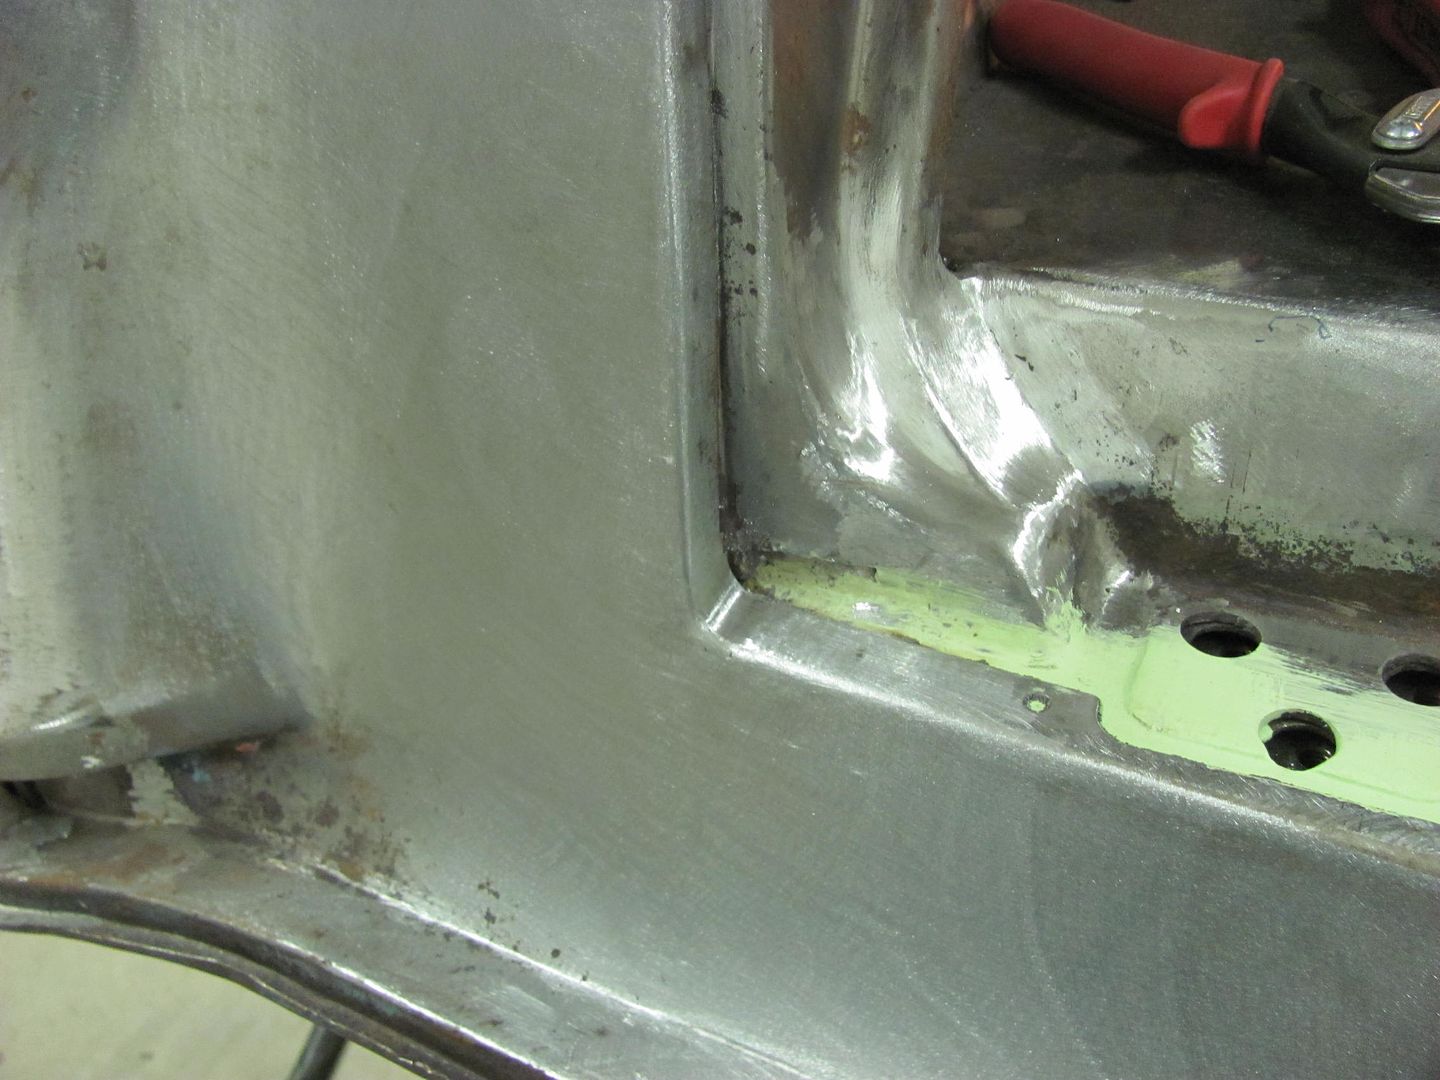 Until next time....
__________________
Robert |
|
|
|
|
12-07-2014, 04:12 AM
|
#286 |
|
6>8 Plugless........
 Join Date: Sep 2007
Location: Prairie City, Ia
Posts: 17,135
|
Re: 55 Wagon Progress
Great work, it is lining up really nice. I'm curious on the lead cracking repair. I've seen guys grind it out and fill it with a panel glue covered by tiger hair. I've seen others cut out the area and we'd a patch in place of the lead seam. Luckily I haven't gotten into one needing repairs. Keep up the great work!
__________________
Ryan 1972 Chevy Longhorn K30 Cheyenne Super, 359 Inline 6 cylinder, Auto Trans, Tilt, Diesel Tach/Vach, Buckets, Rare Rear 4-link and air ride option Build Thread 1972 GMC Sierra Grande Longhorn 4x4 1972 Chevy Cheyenne Super K20 Long Step side tilt, tach, tow hooks, AC, 350 4 speed 1972 C10 Suburban Custom Deluxe 1969 Chevy milk truck 1971 Camaro RS 5.3 BTR STG3 Cam Super T10 1940 Ford 354 Hemi 46RH Ford 9" on air ride huge project Tired of spark plugs? Check this out. |
|
|
|
|
12-13-2014, 07:27 PM
|
#287 |
|
Registered User
Join Date: Jan 2013
Location: Leonardtown, MD
Posts: 1,633
|
Re: 55 Wagon Progress
While Kyle continued media blasting fenders, I worked on closed up a gaping hole....
 A couple weak spots dictated a bigger hole. Here the radius was added from the A pillar to beneath the drip rail.. 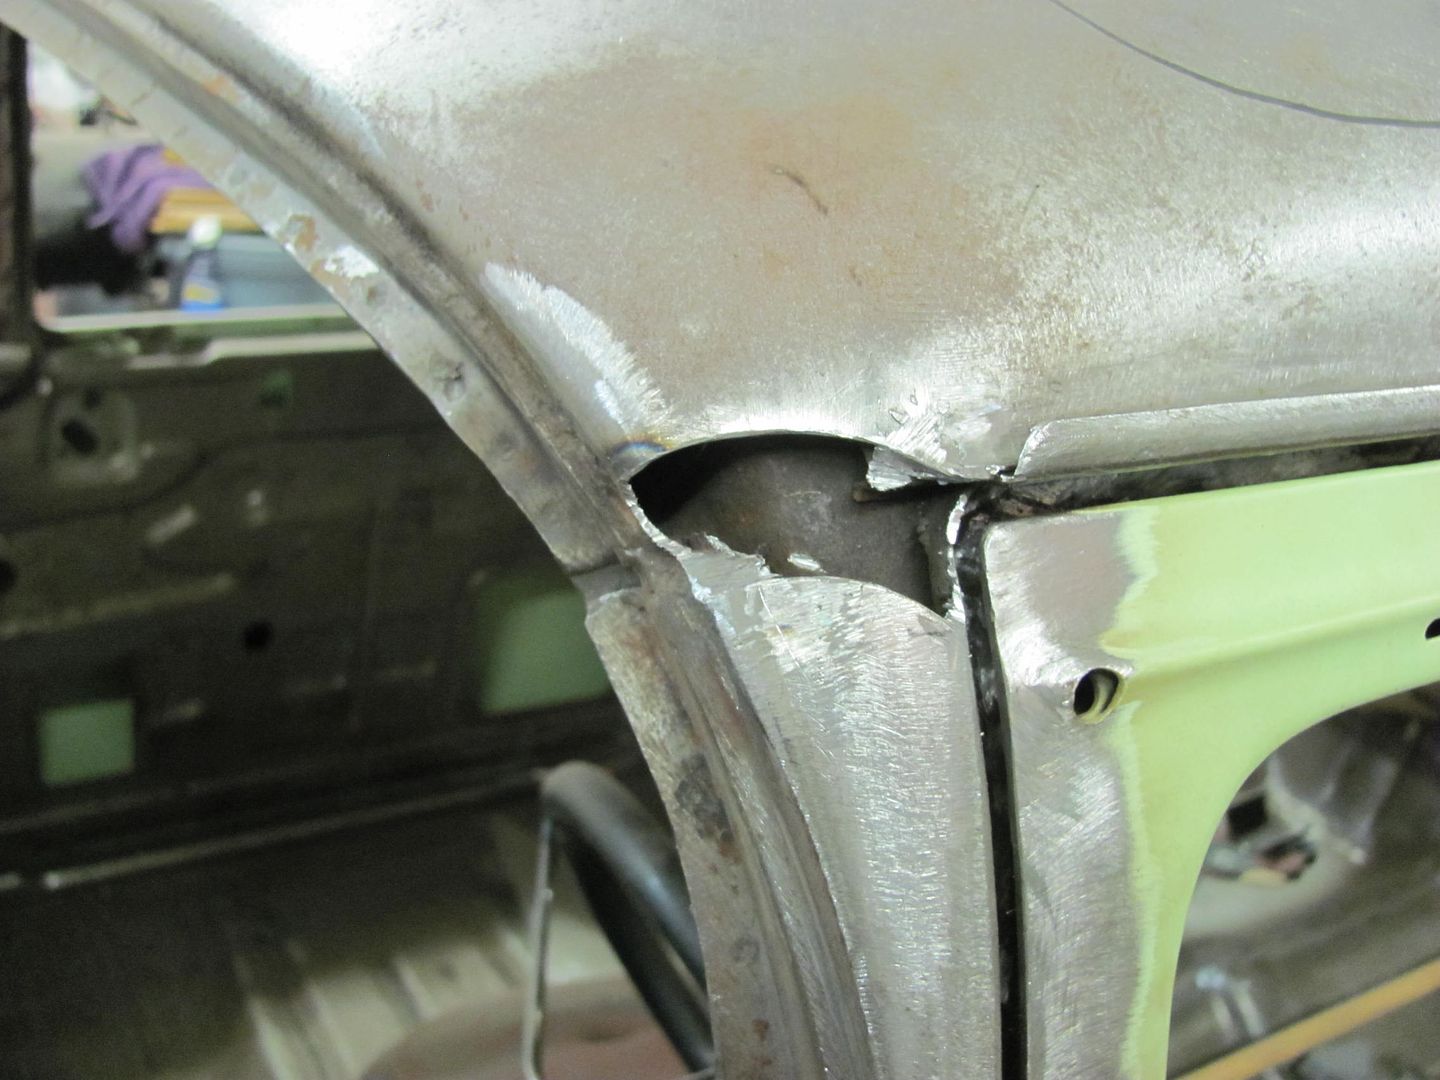 Test fit 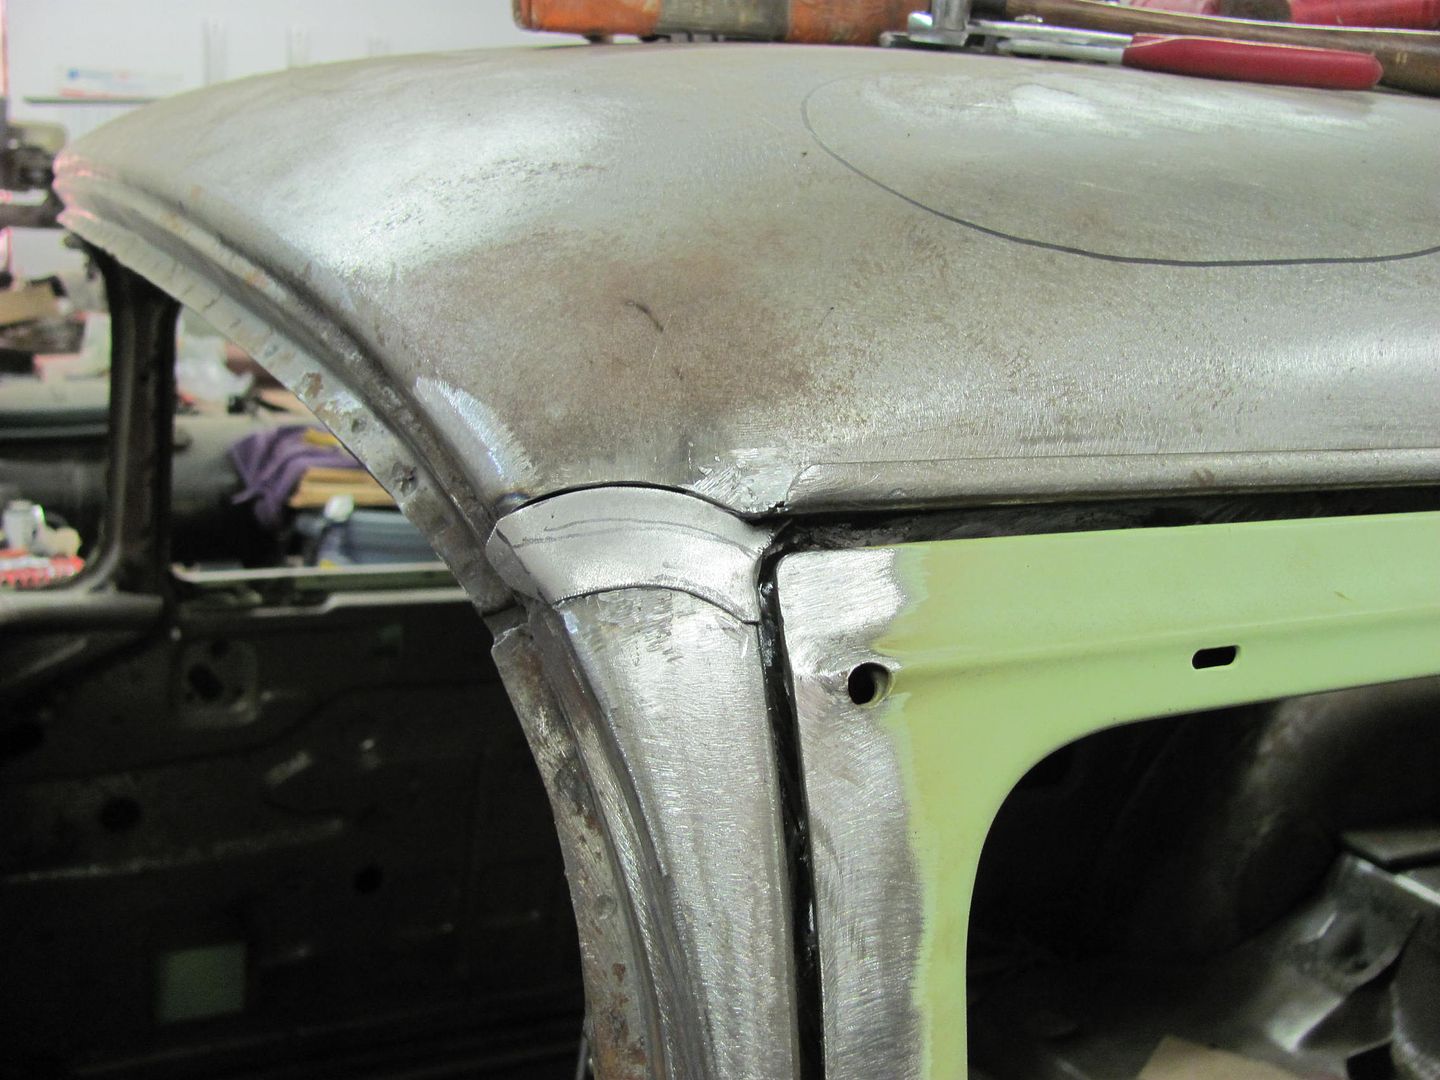 Welded in place.....  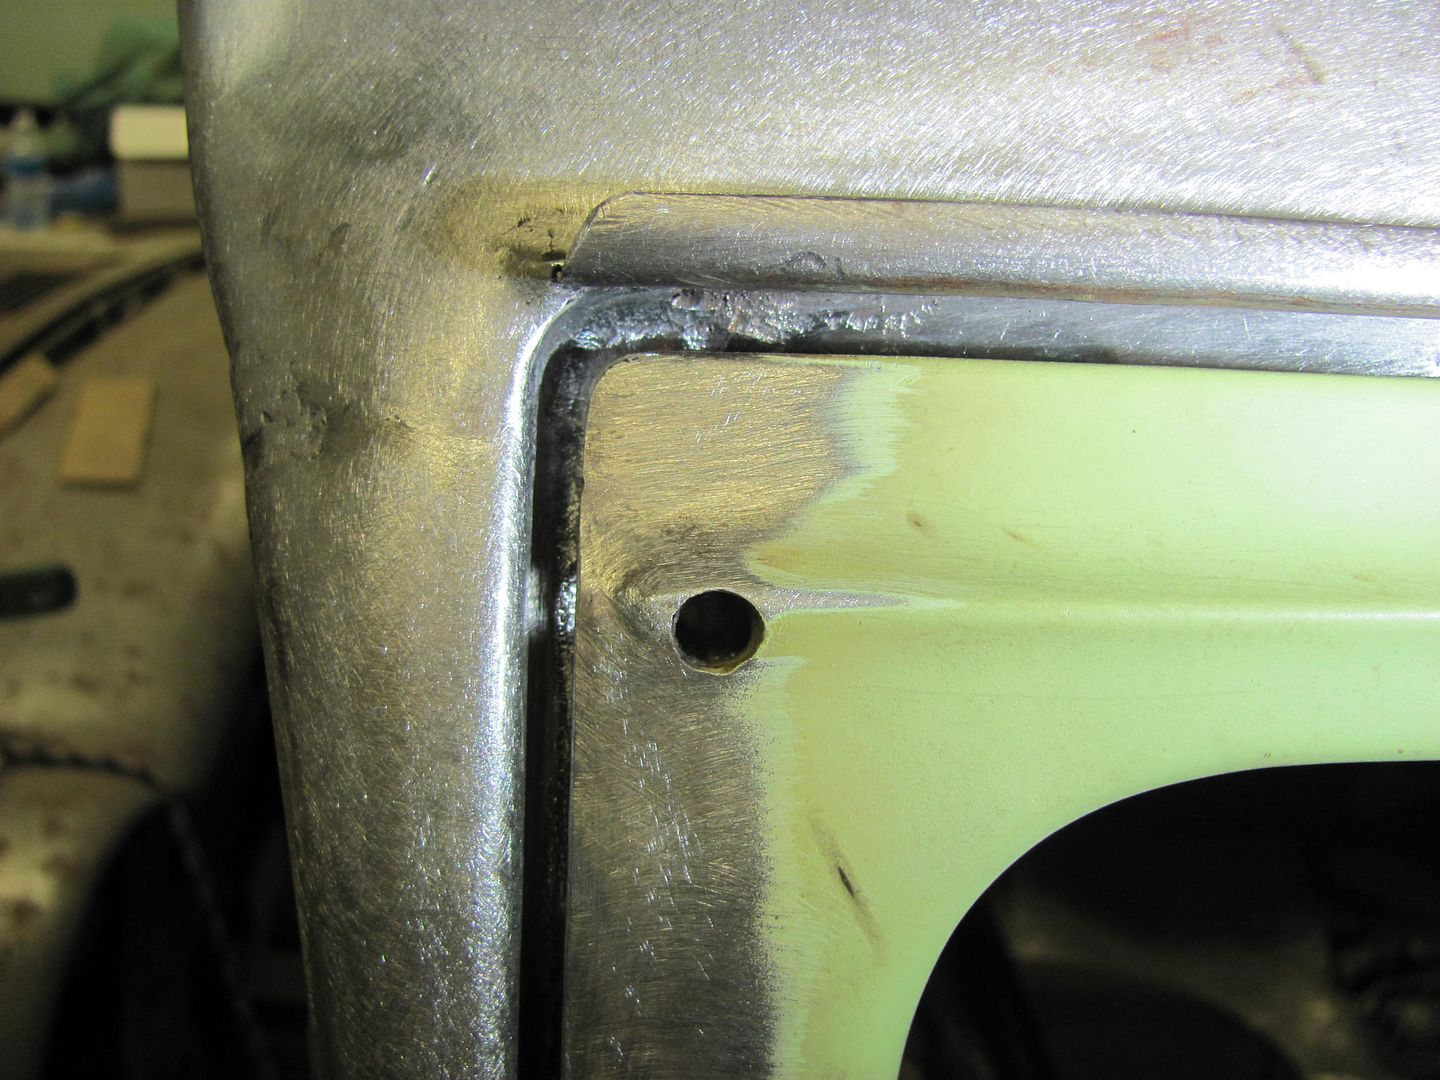 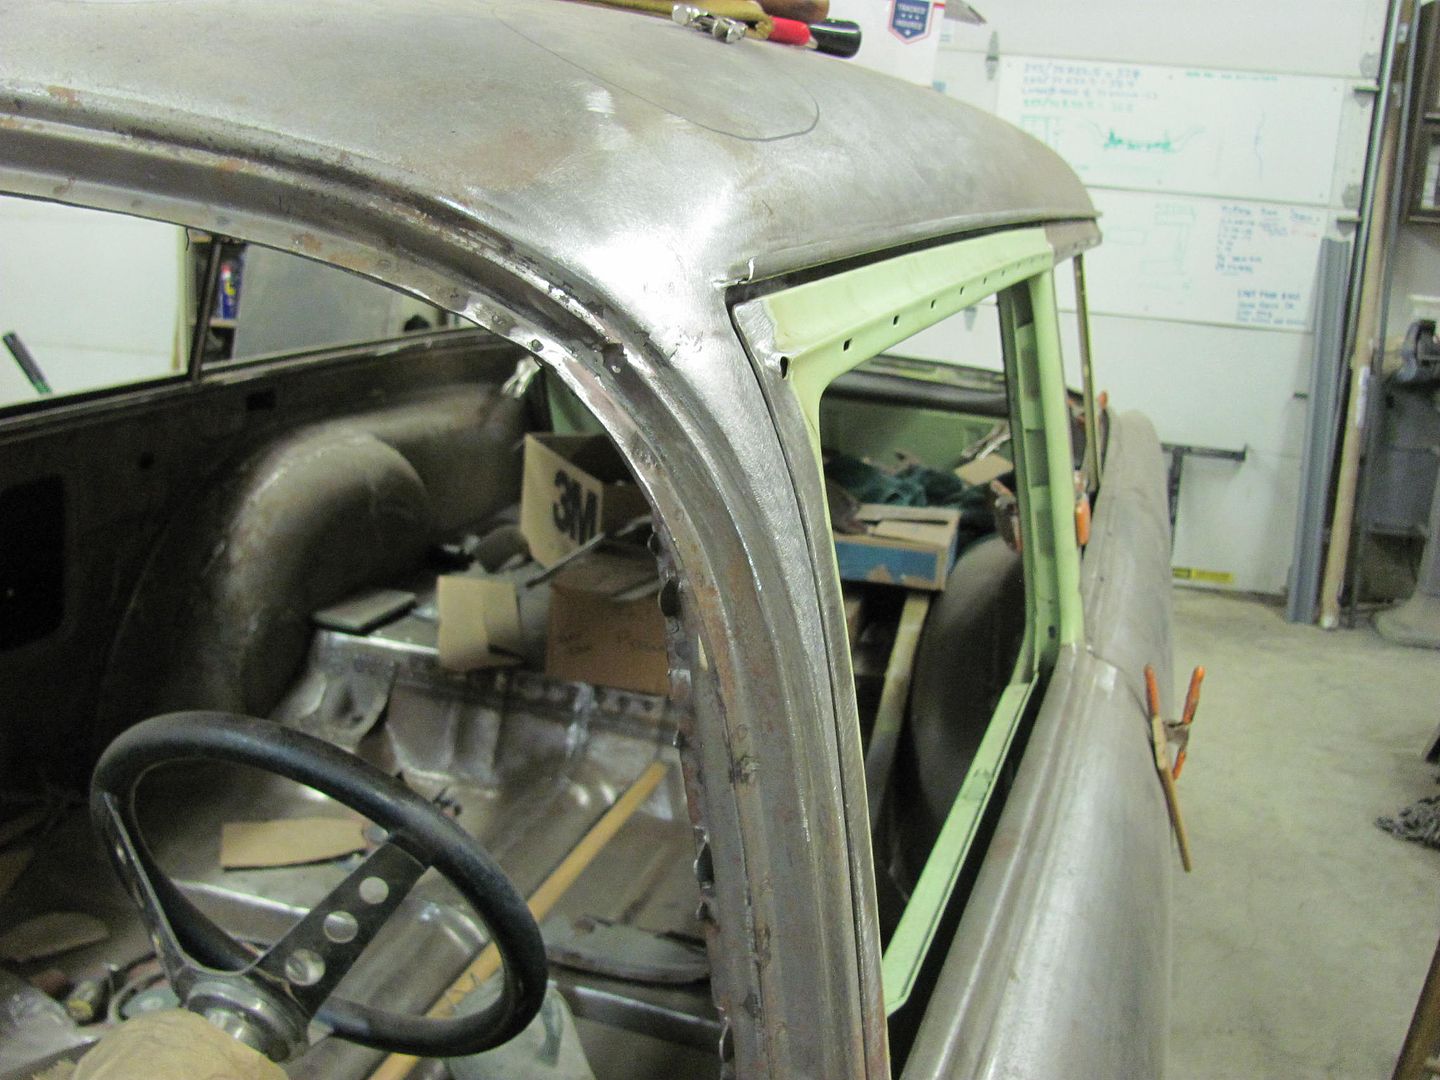 Used a torch and wire brush to clean off the other side, looks like this gap was a factory deal, and we have another radius to install.. 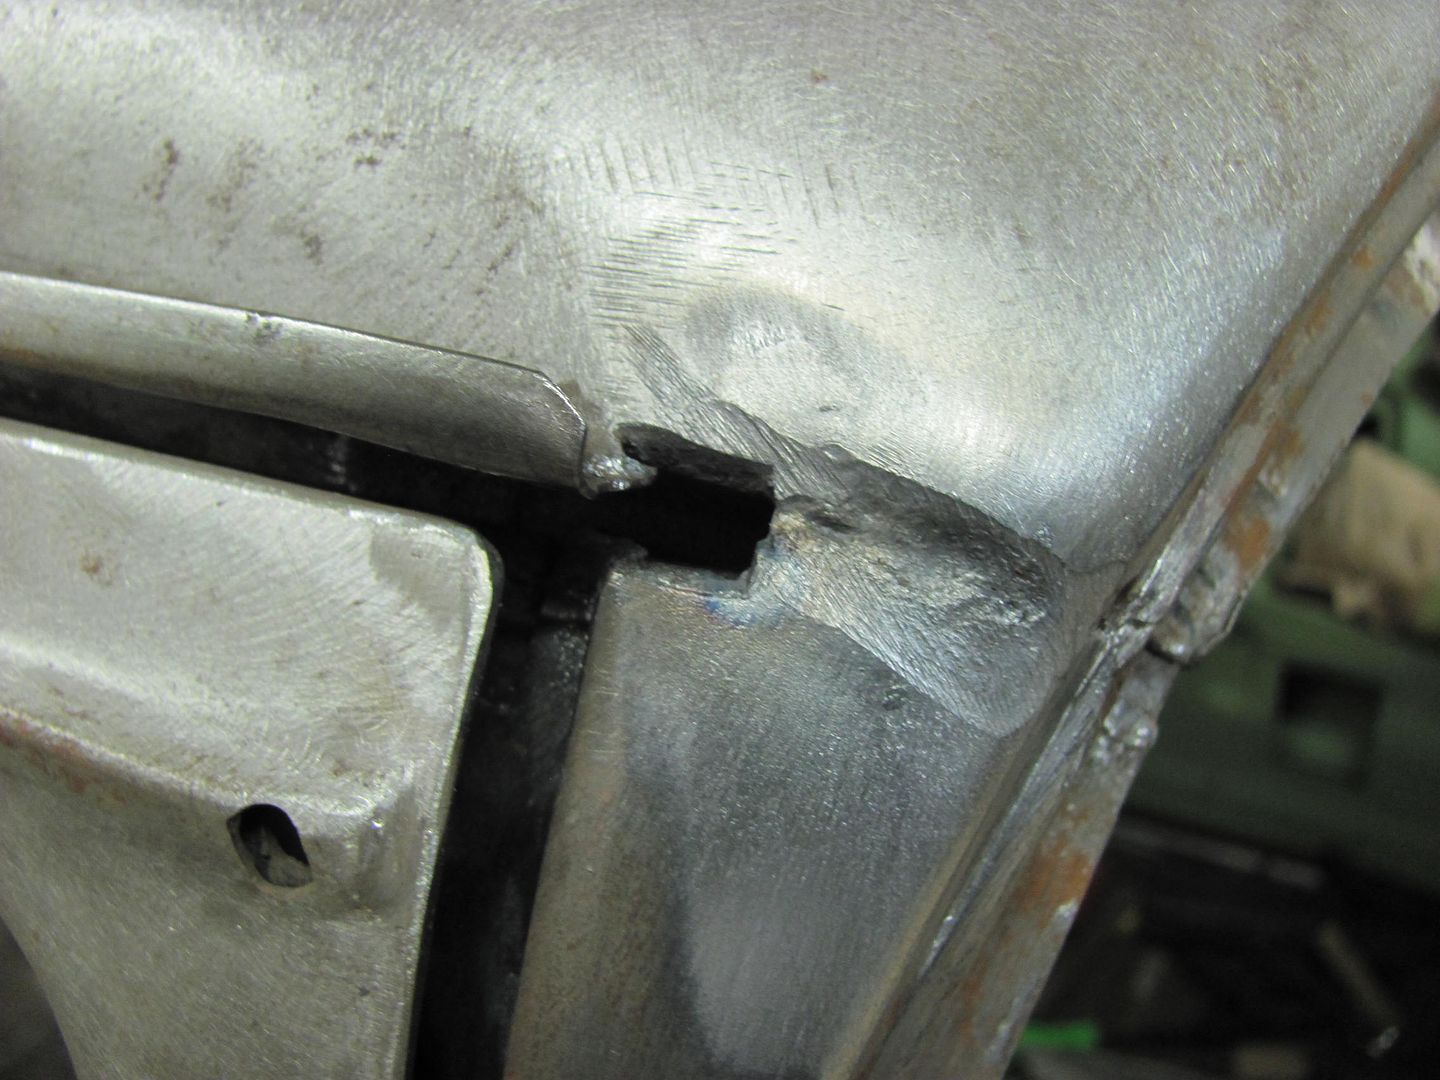 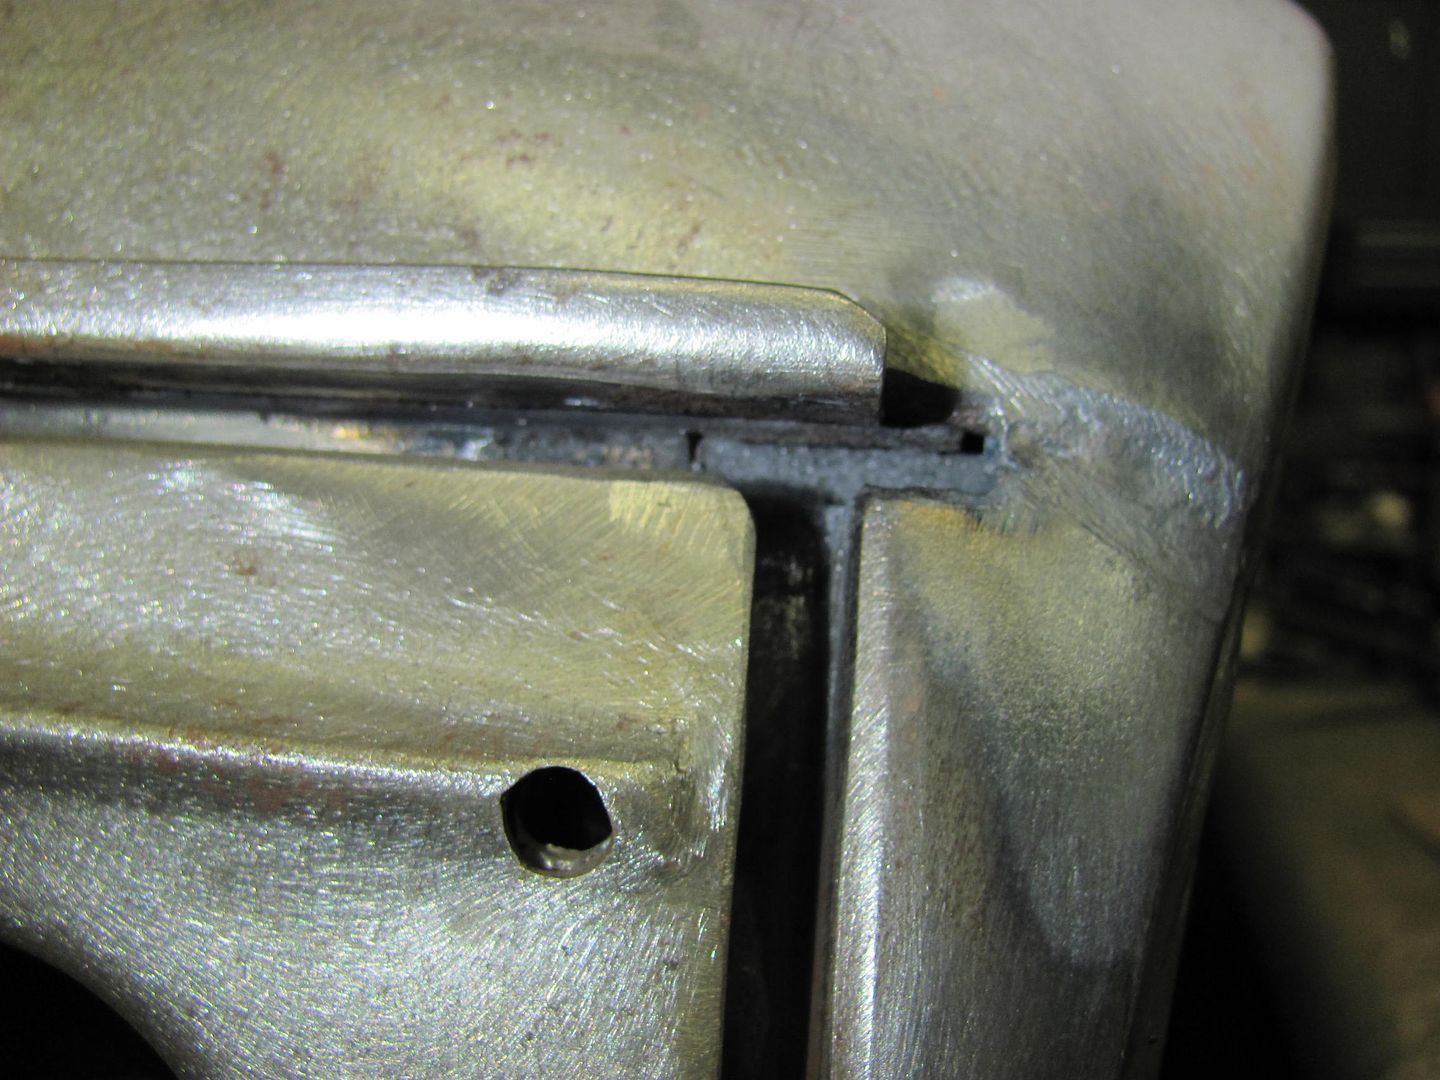
__________________
Robert |
|
|
|
|
12-14-2014, 10:56 AM
|
#288 |
|
Senior Member
Join Date: Jul 2012
Location: Oblong, Illinois
Posts: 7,017
|
Re: 55 Wagon Progress
That came out very nice. Really like the creative building and use of tools.
|
|
|
|
|
12-18-2014, 08:33 AM
|
#289 |
|
Registered User
Join Date: Jan 2013
Location: Leonardtown, MD
Posts: 1,633
|
Re: 55 Wagon Progress
More progress, although it doesn't appear like much, progress just the same...
Door skins had been left "loose" on the inner door to allow twisting/tweaking for fitment within the door opening. Drilled some 3/16 holes from flange into inner door and plug welded. I've had many people ask how well the epoxy primer holds up to the heat of plug welds, here is a good indicator. It shows discoloration at the surface, but note the nice green primer underneath where the grinding wheel went through the paint.. 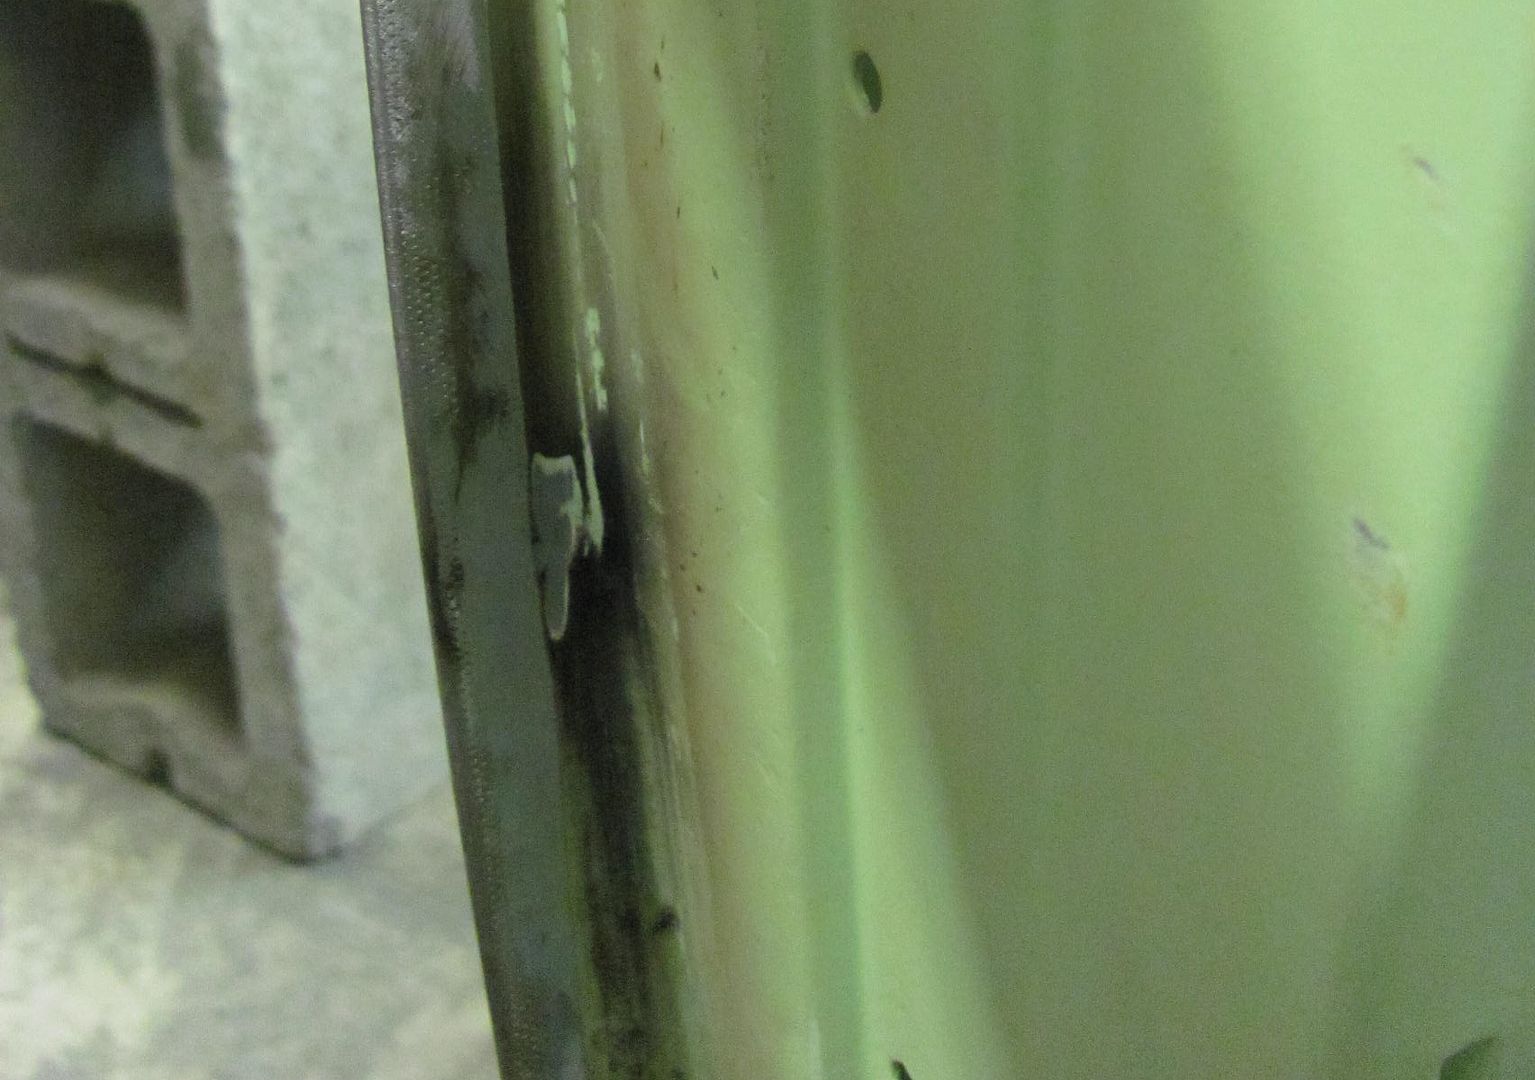 Parts ready for epoxy primer.. 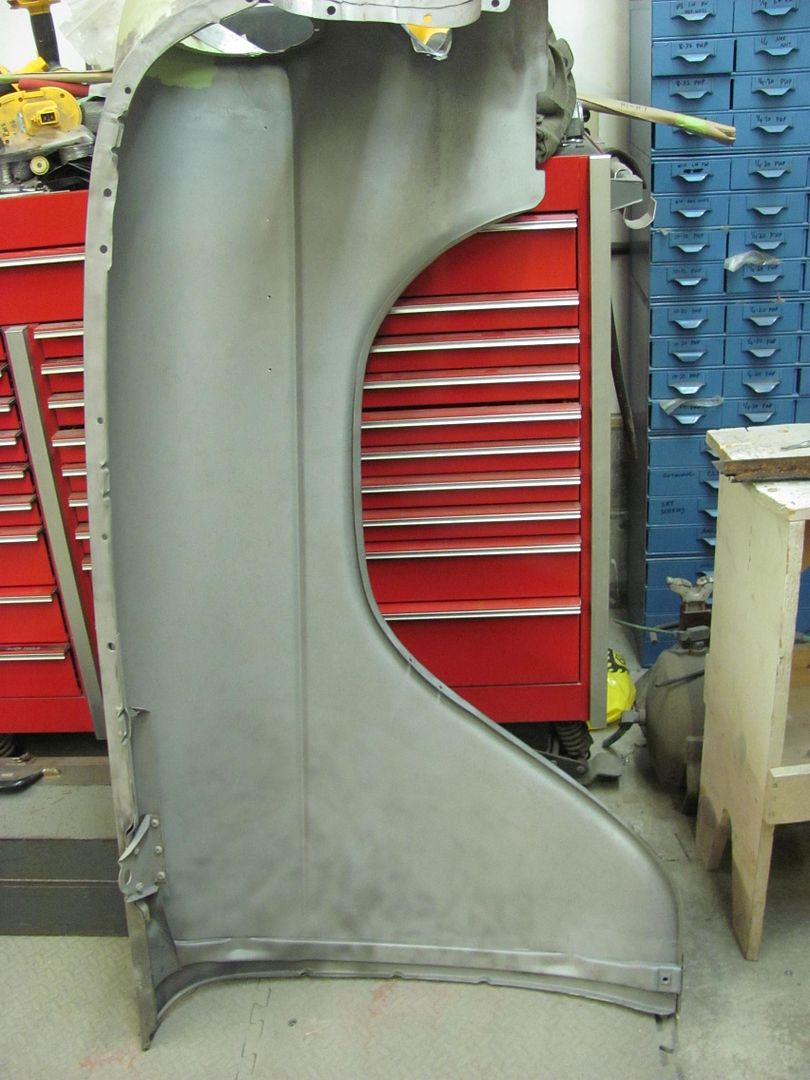 These are the stiffeners for inside the door skin that go behind the door handle. The inside of the door will be sprayed, as well as these parts, and allowed to flash. Then another application on both and they'll get bolted in place, letting the epoxy primer act as an adhesive to hold in place and seal to the door skin. Once door handles are bolted on they will be there for good.. 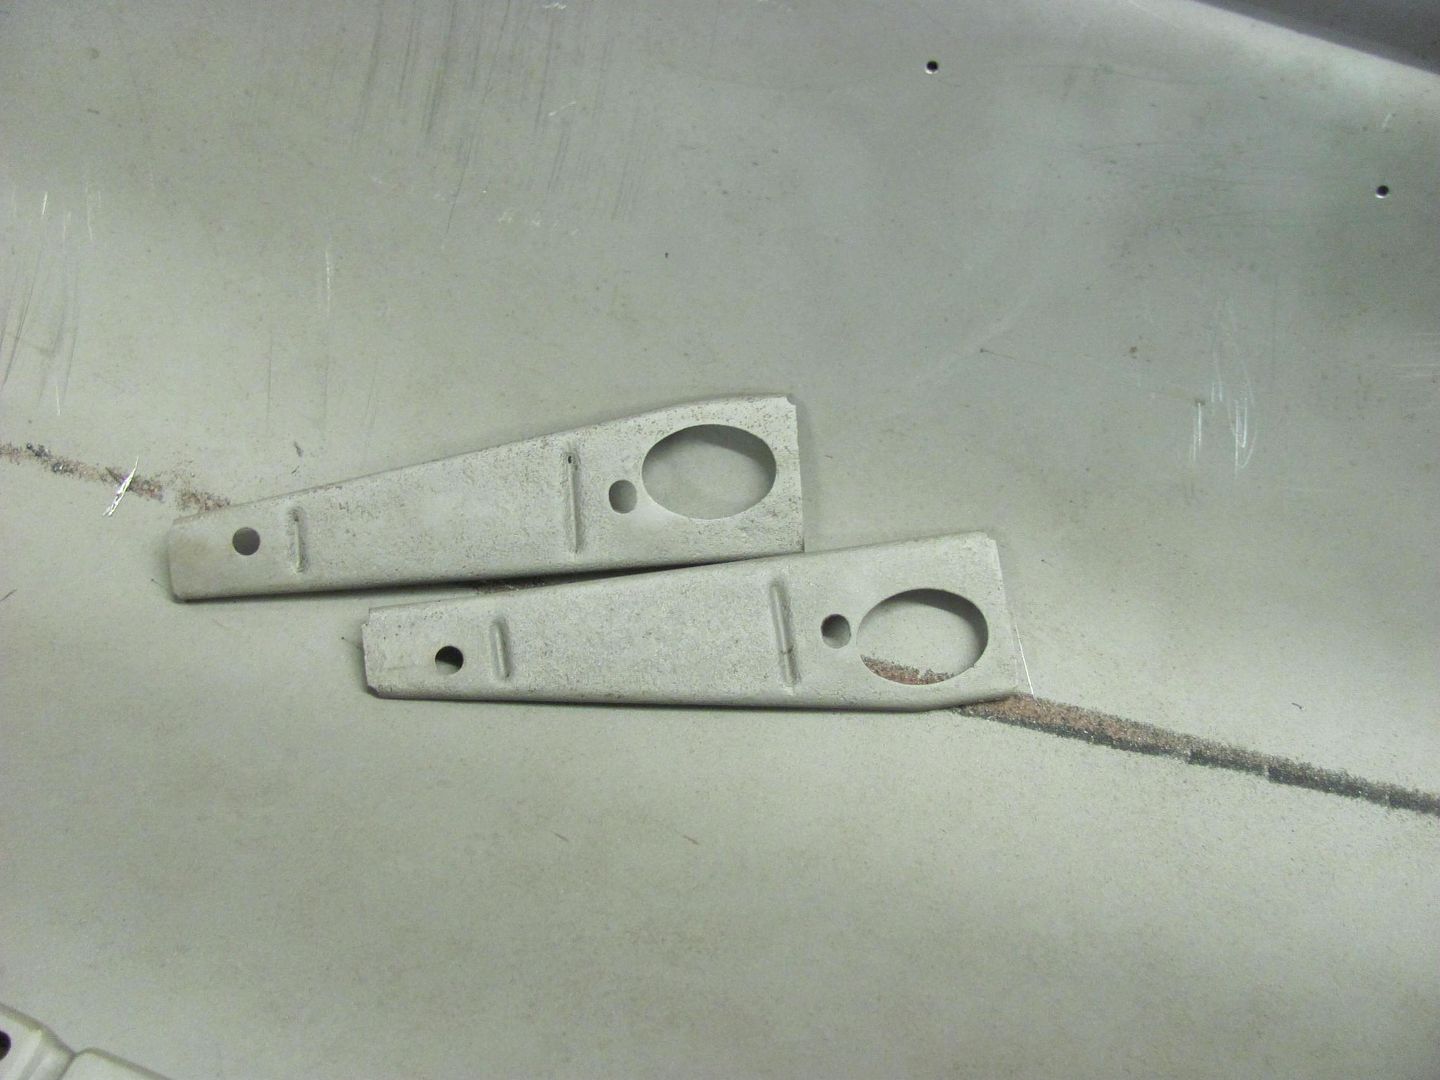 This car has belt line trim that goes around the perimeter at the bottom of the windows, which needed to be added to the new door skins. I had saved a piece from the old door skins to get the locations correct. Here's the layout of the slots for the stainless attaching hardware, we'll get that finished next time.. 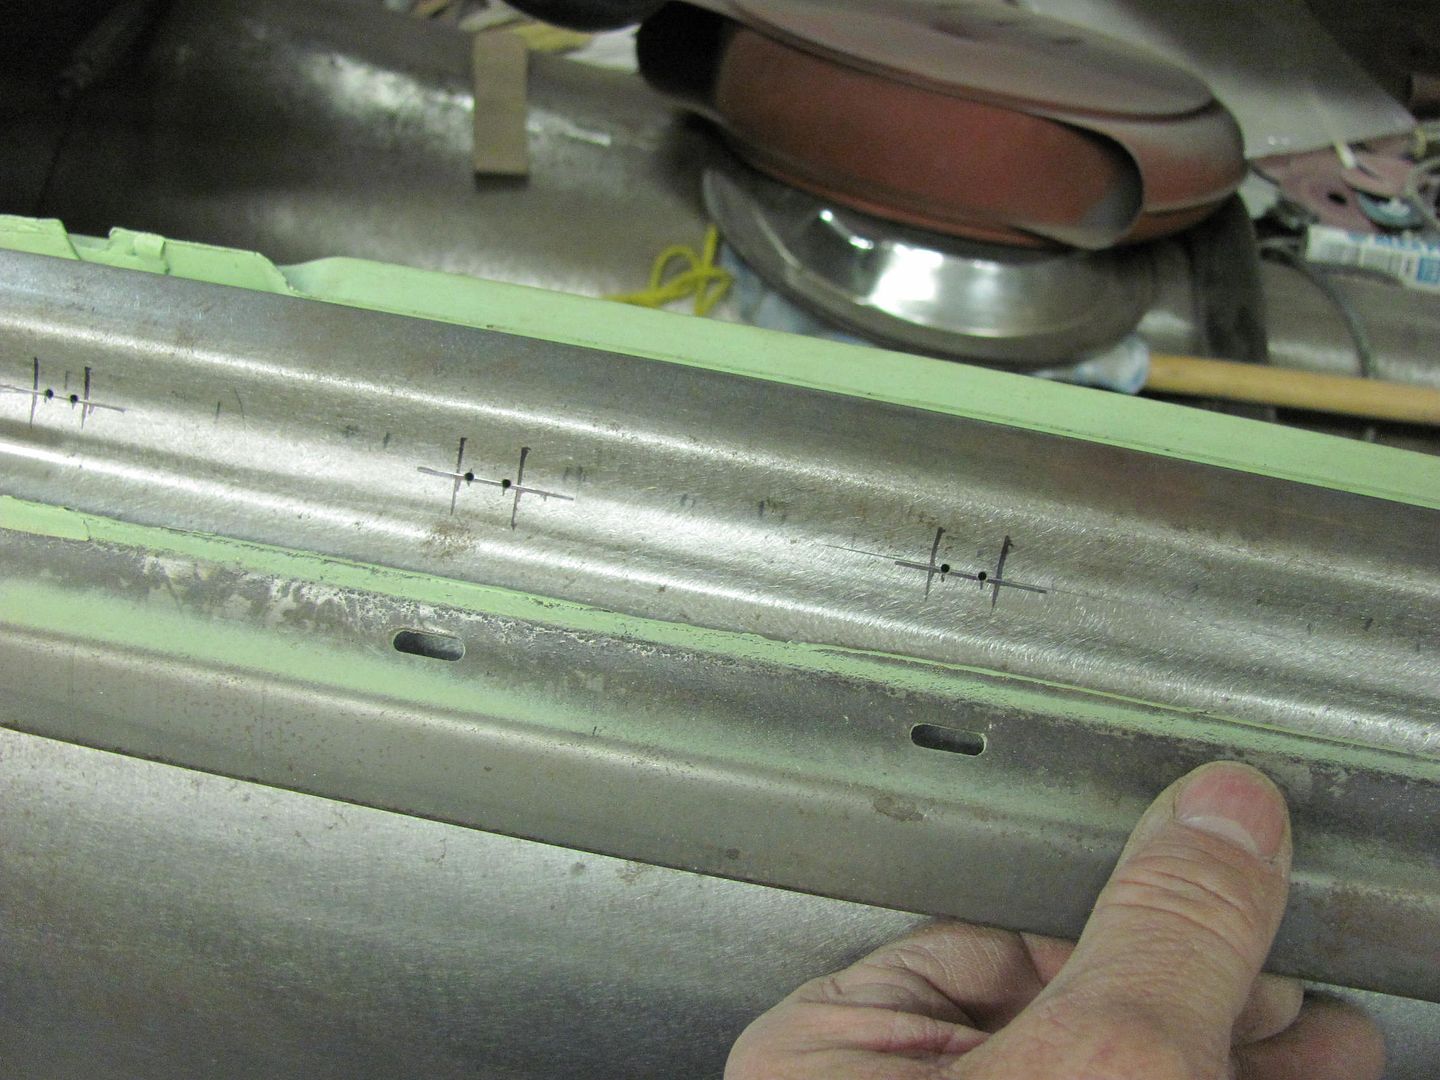
__________________
Robert |
|
|
|
|
12-21-2014, 02:55 PM
|
#290 |
|
Registered User
Join Date: Jan 2013
Location: Leonardtown, MD
Posts: 1,633
|
Re: 55 Wagon Progress
Why is it when you're getting ready to mix primer you find other issues to fix?? More minor tweaks so that hopefully we can spray this afternoon...
A crack that looks to be from some previous body damage. 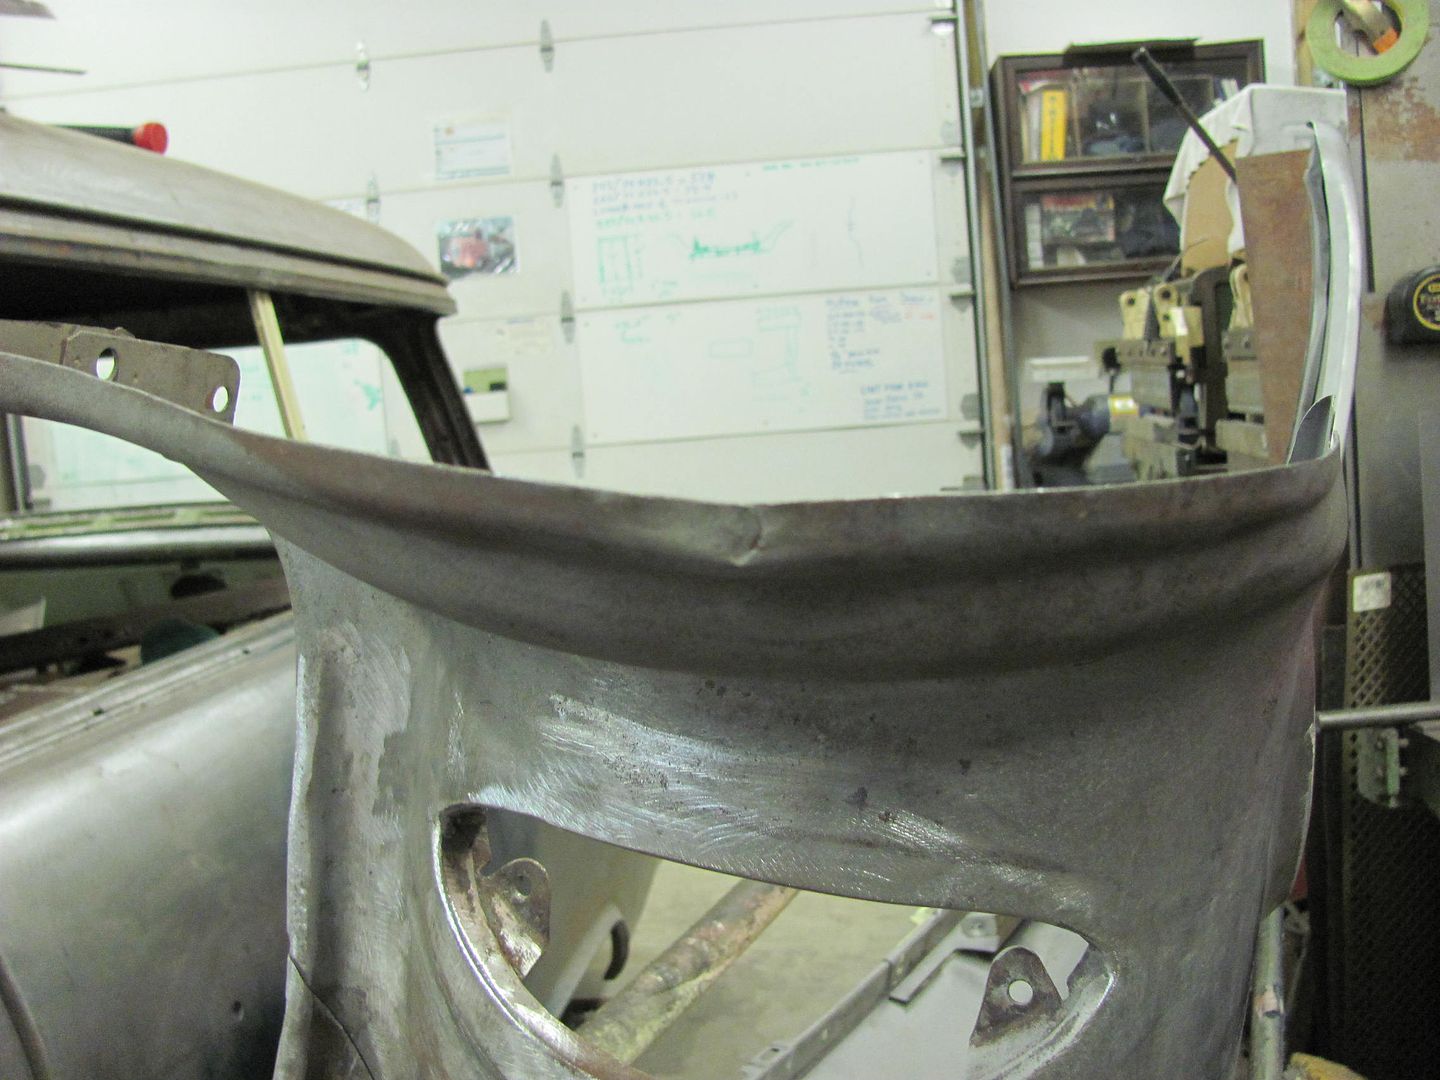 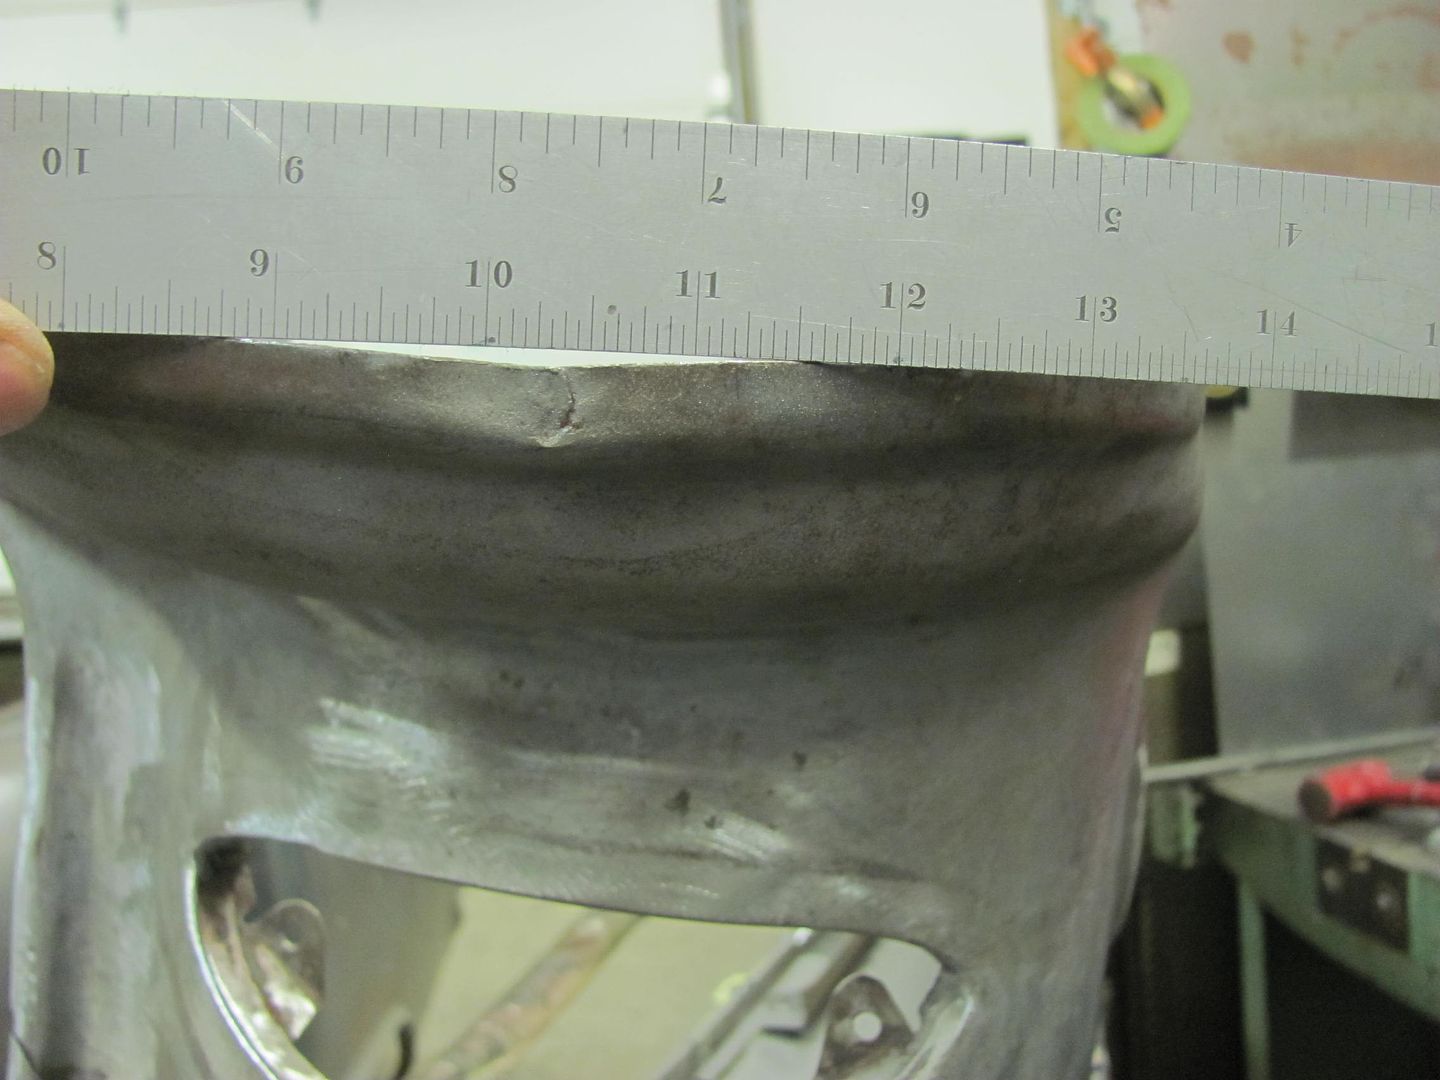 A post dolly is used to provide an off dolly effect, and the body hammer is struck on the "high" spot. 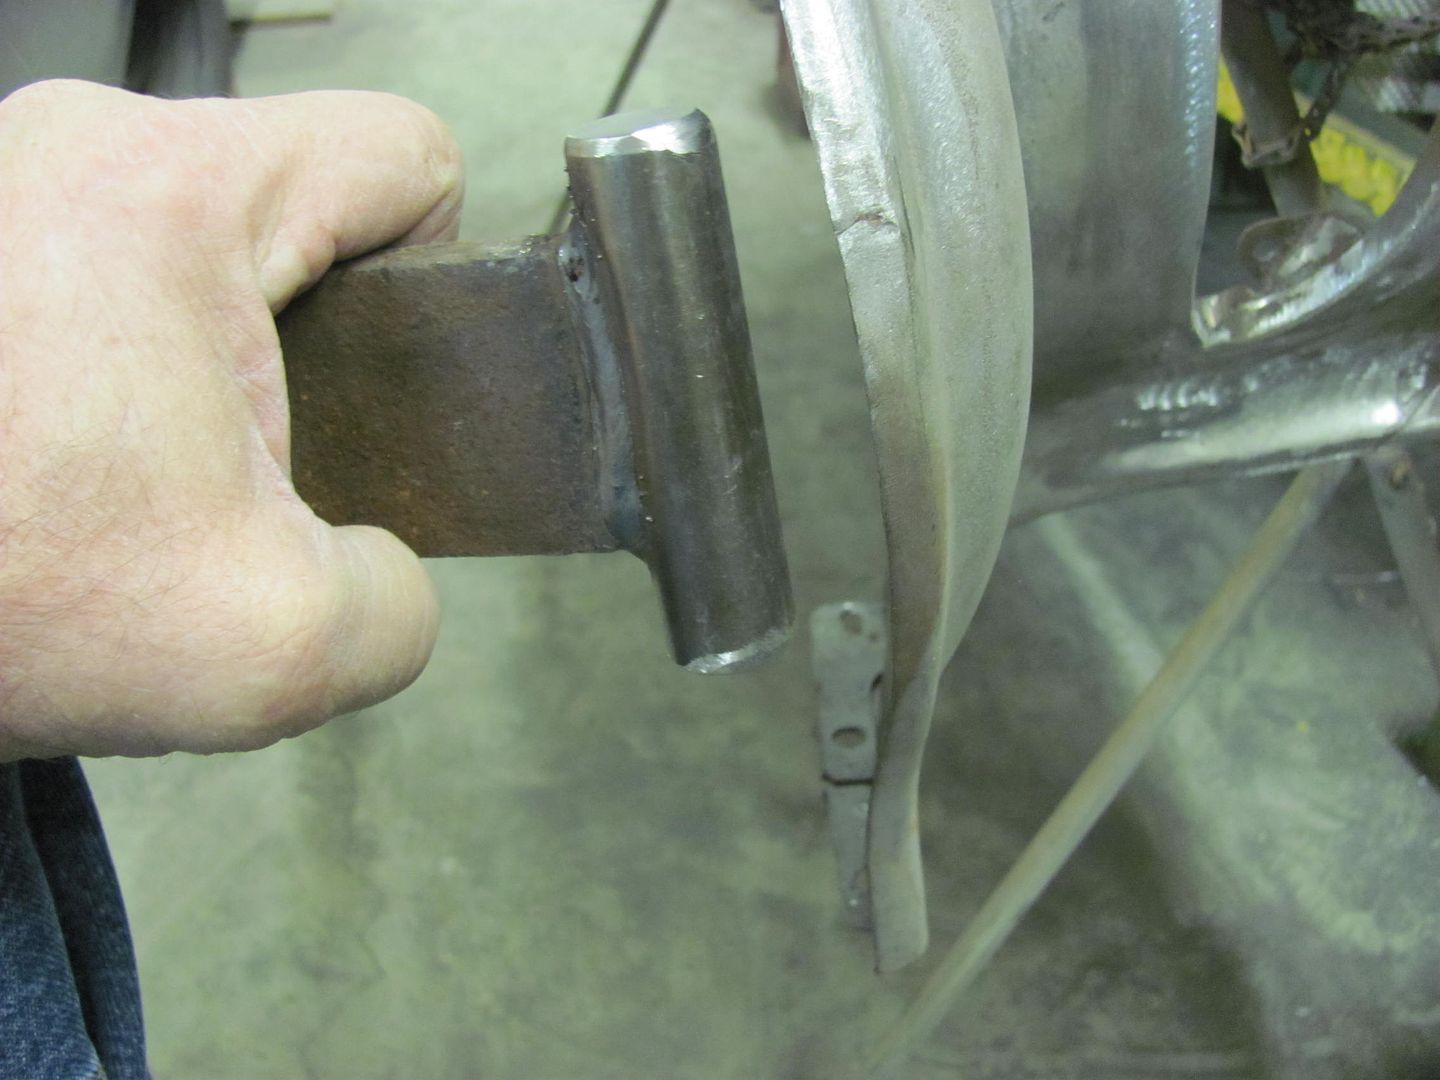 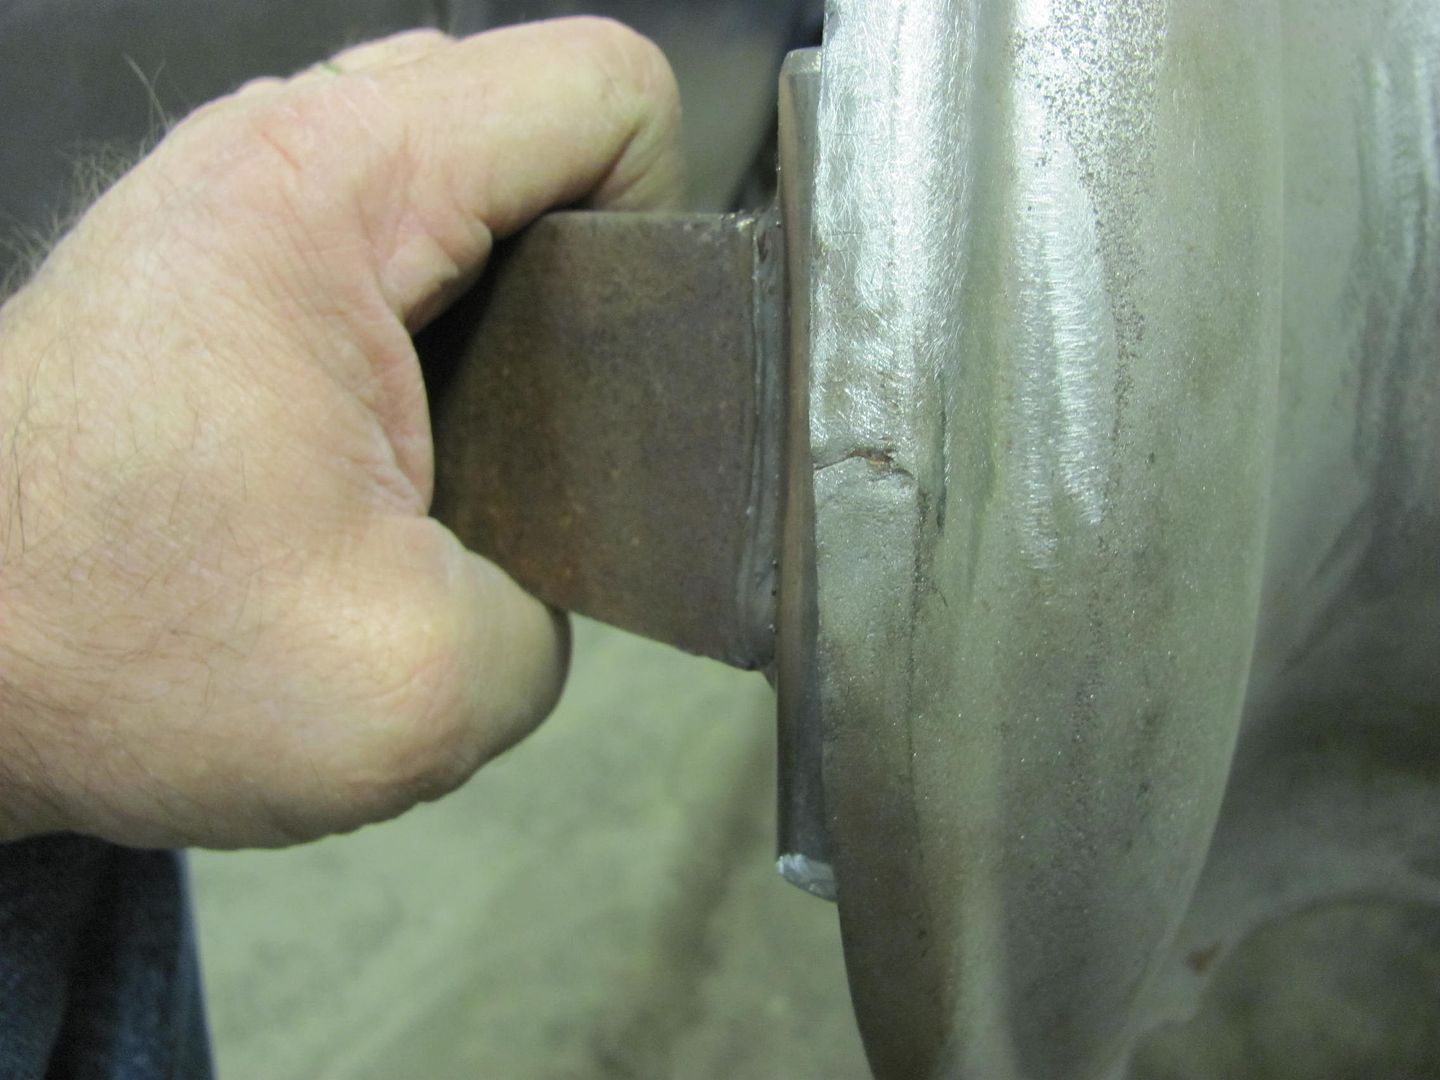 Used a copper backing since we're so close to the edge and the metal has been fatigued. Filled the crack and dressed the weld... 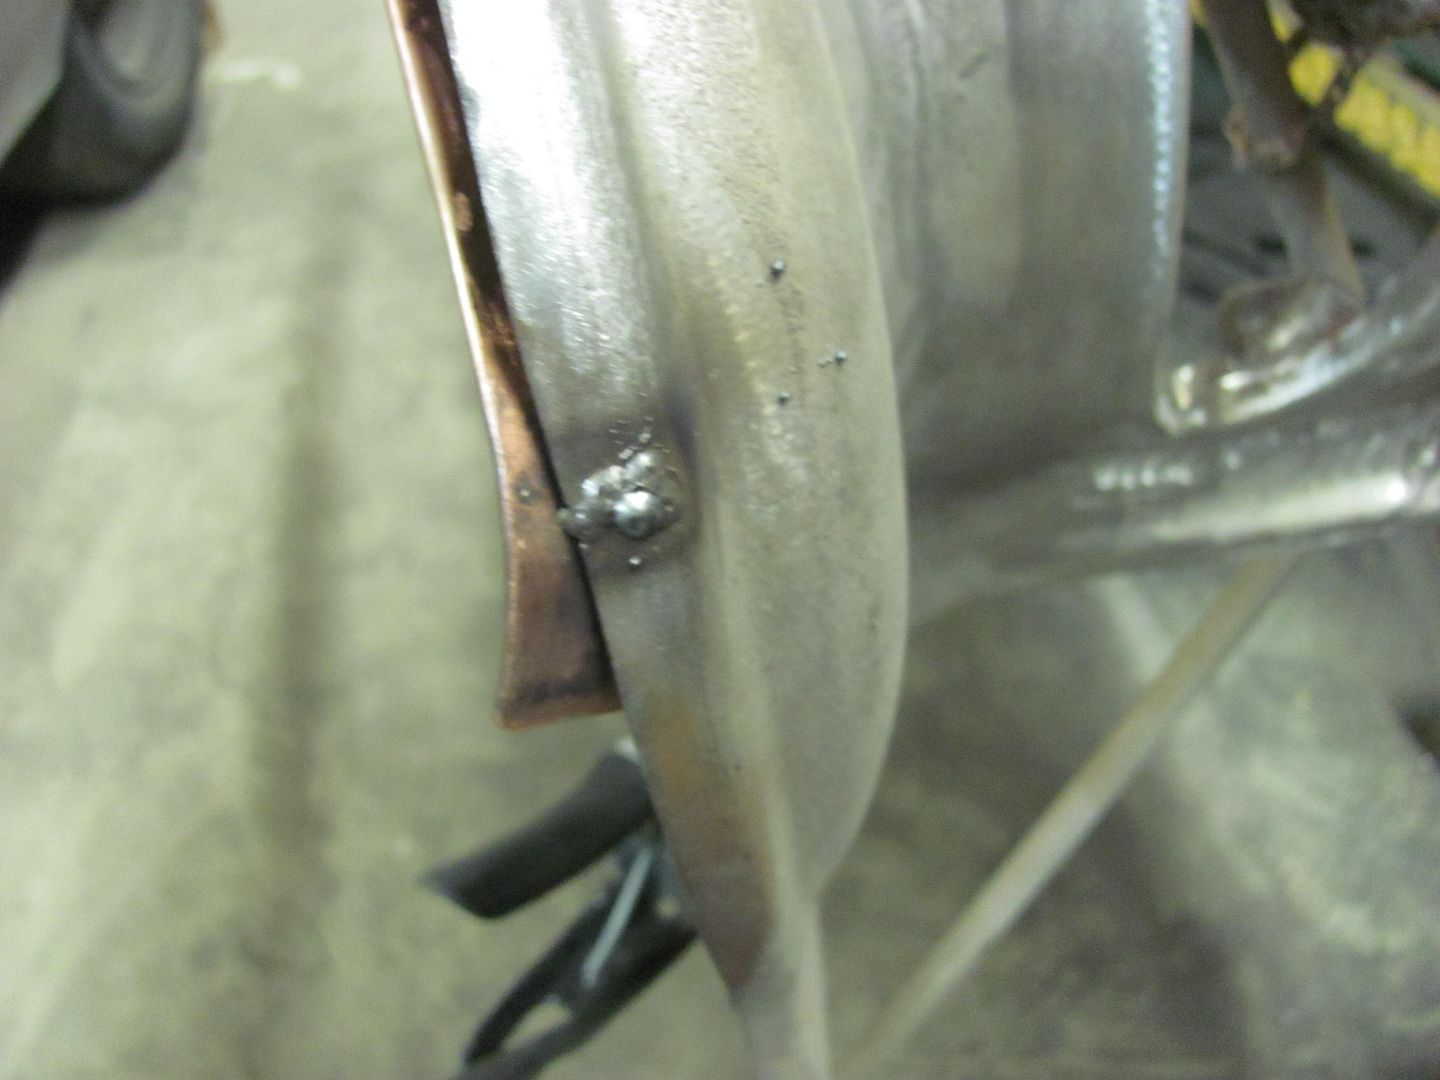 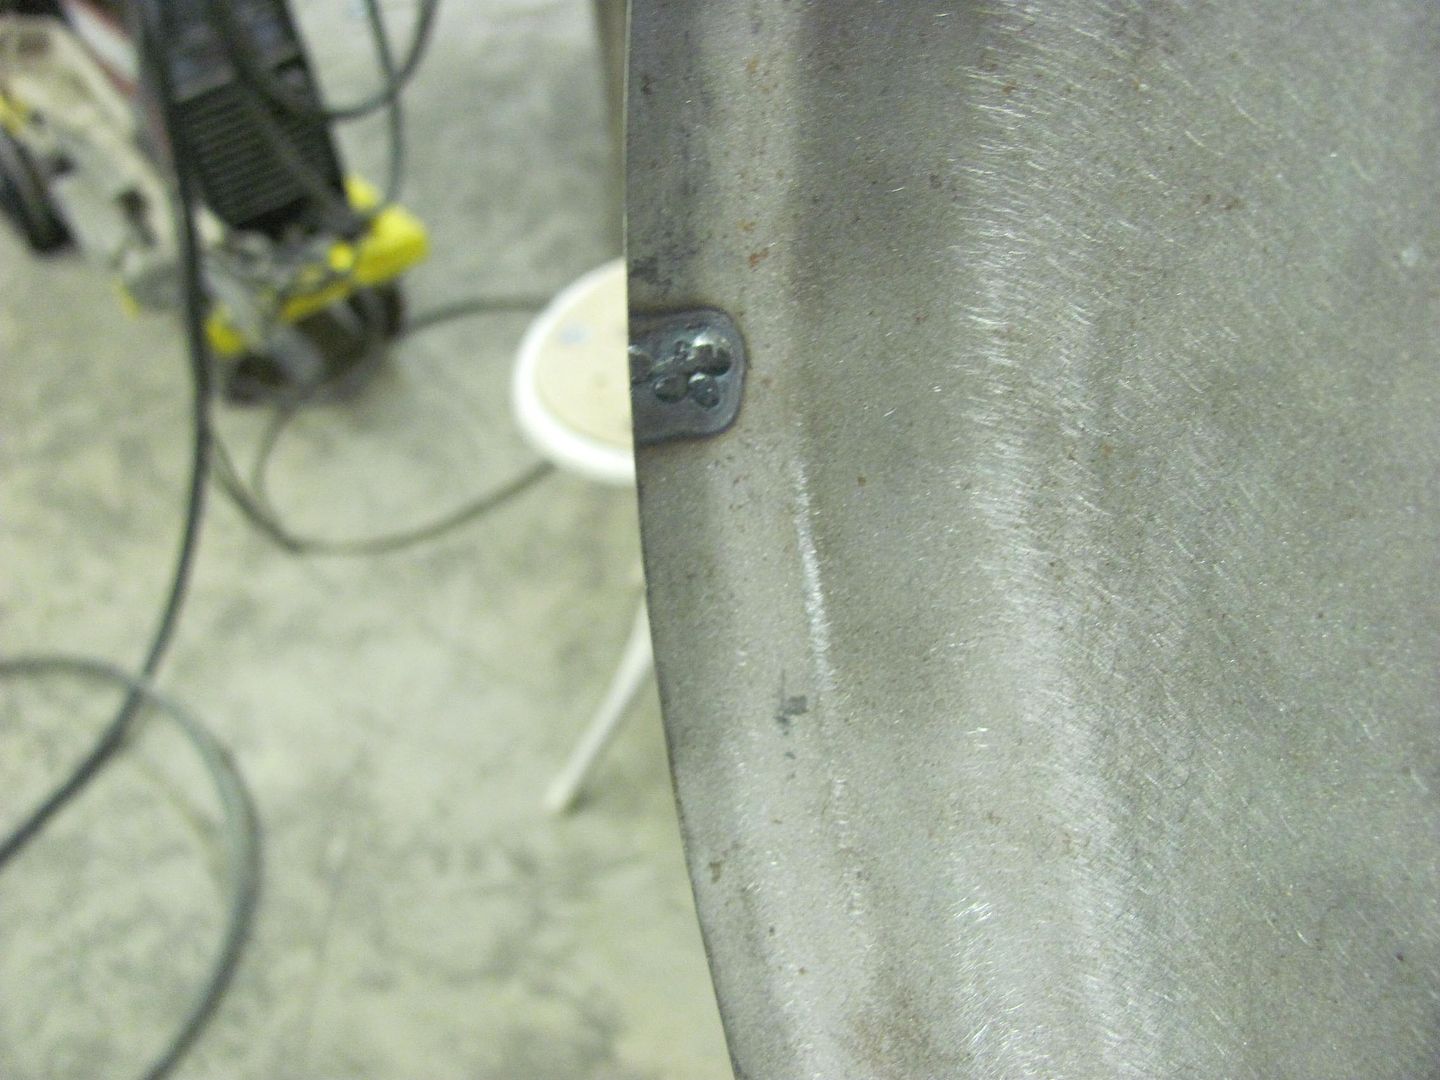   Then I noticed a low spot on the fender's bodyline crease... 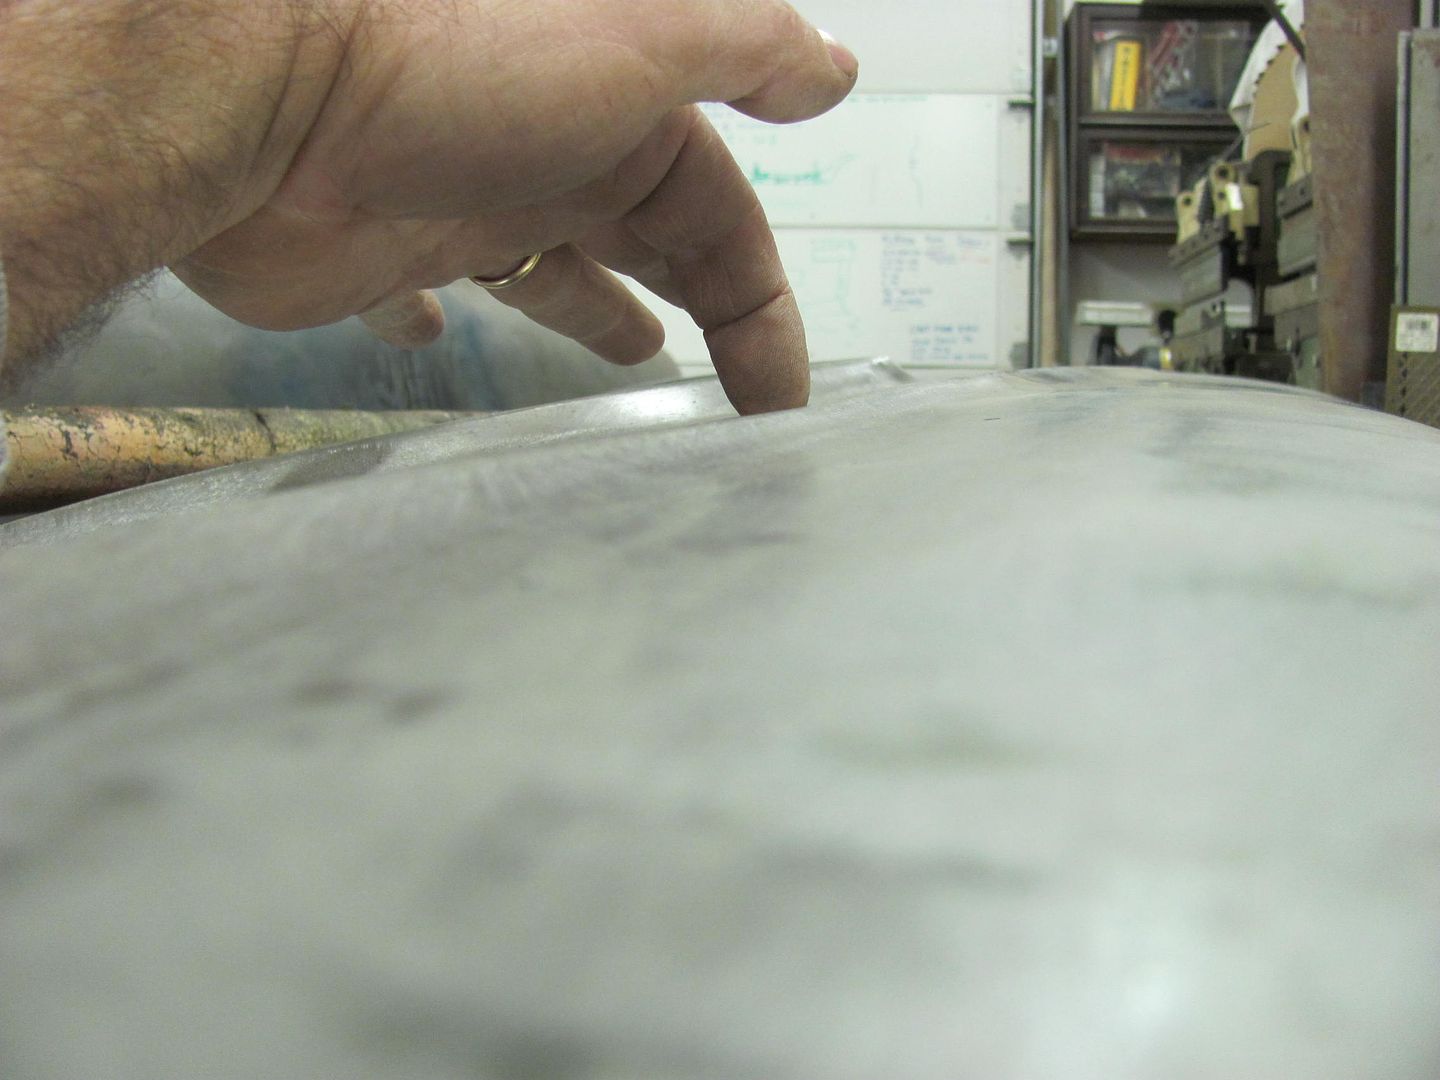 Time to lose another Craftsman chisel to become a body tool... 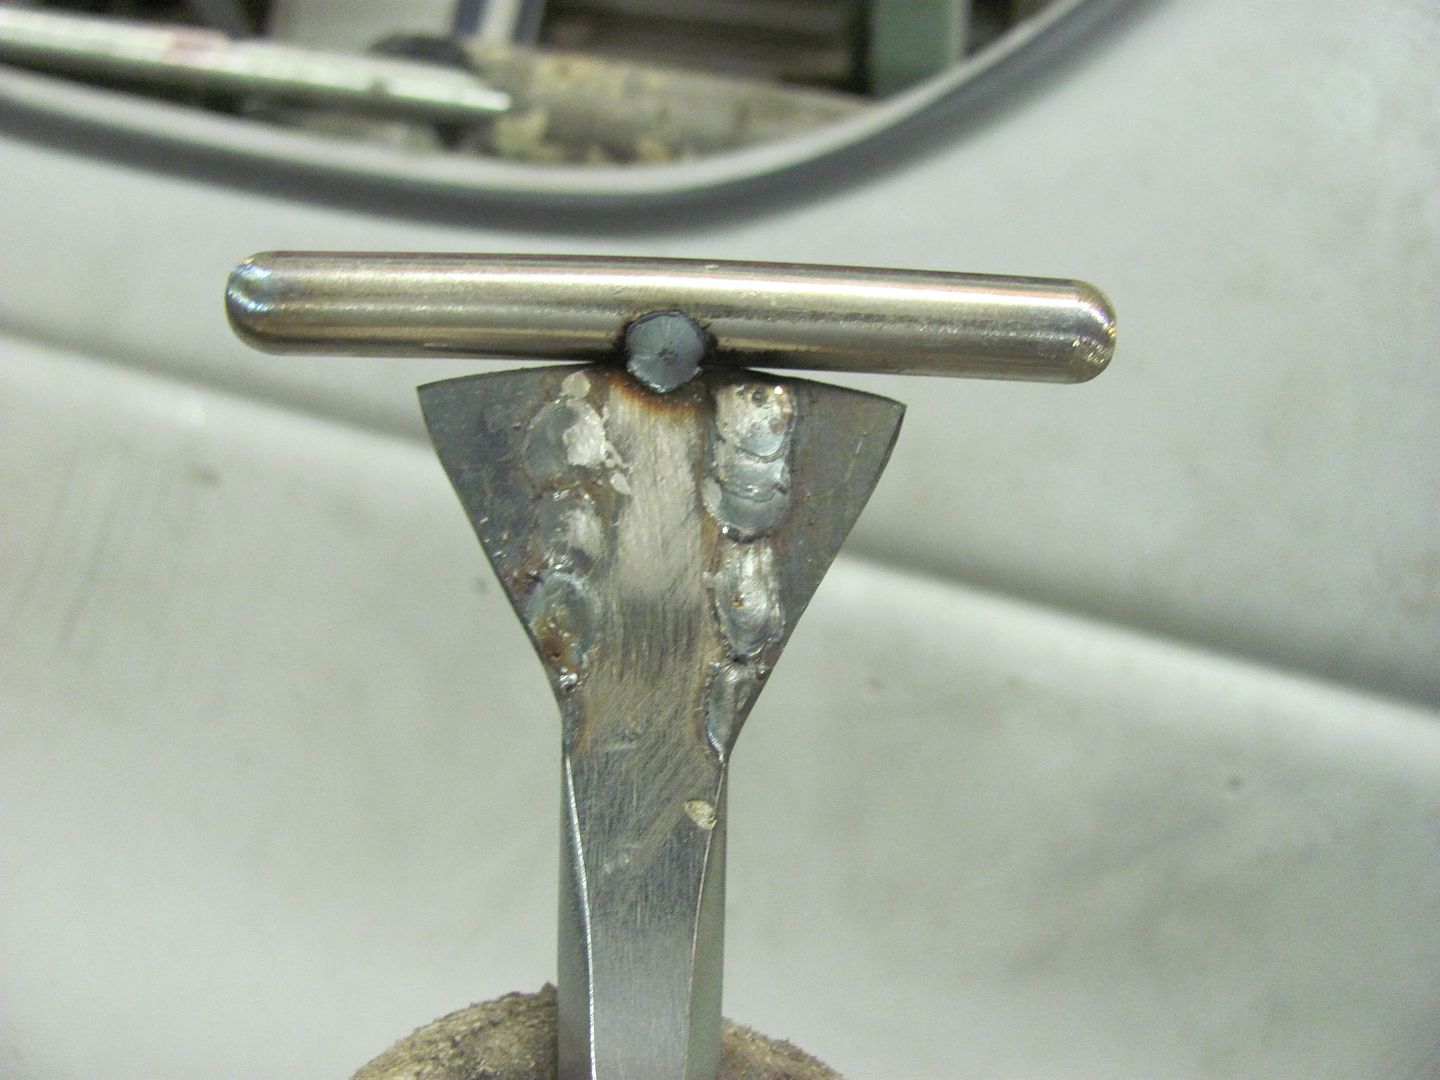 ....the rod was heated and bent around, then finished welding. 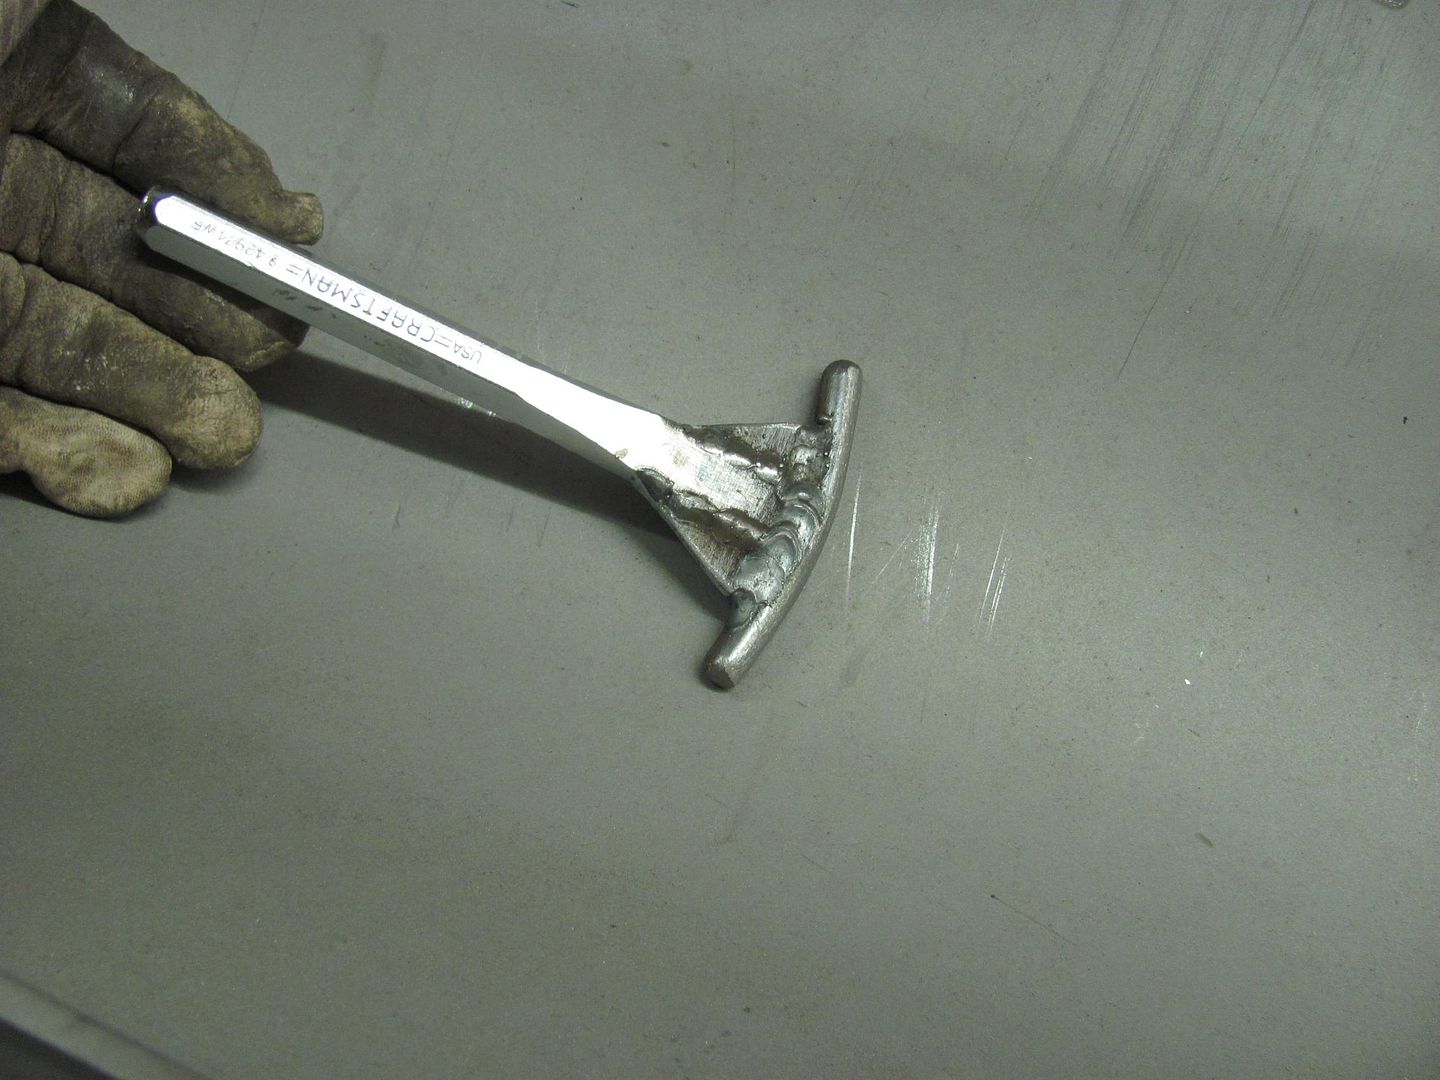 Placed the fender on the large shot bag and used the dead blow hammer to apply the persuasive force... 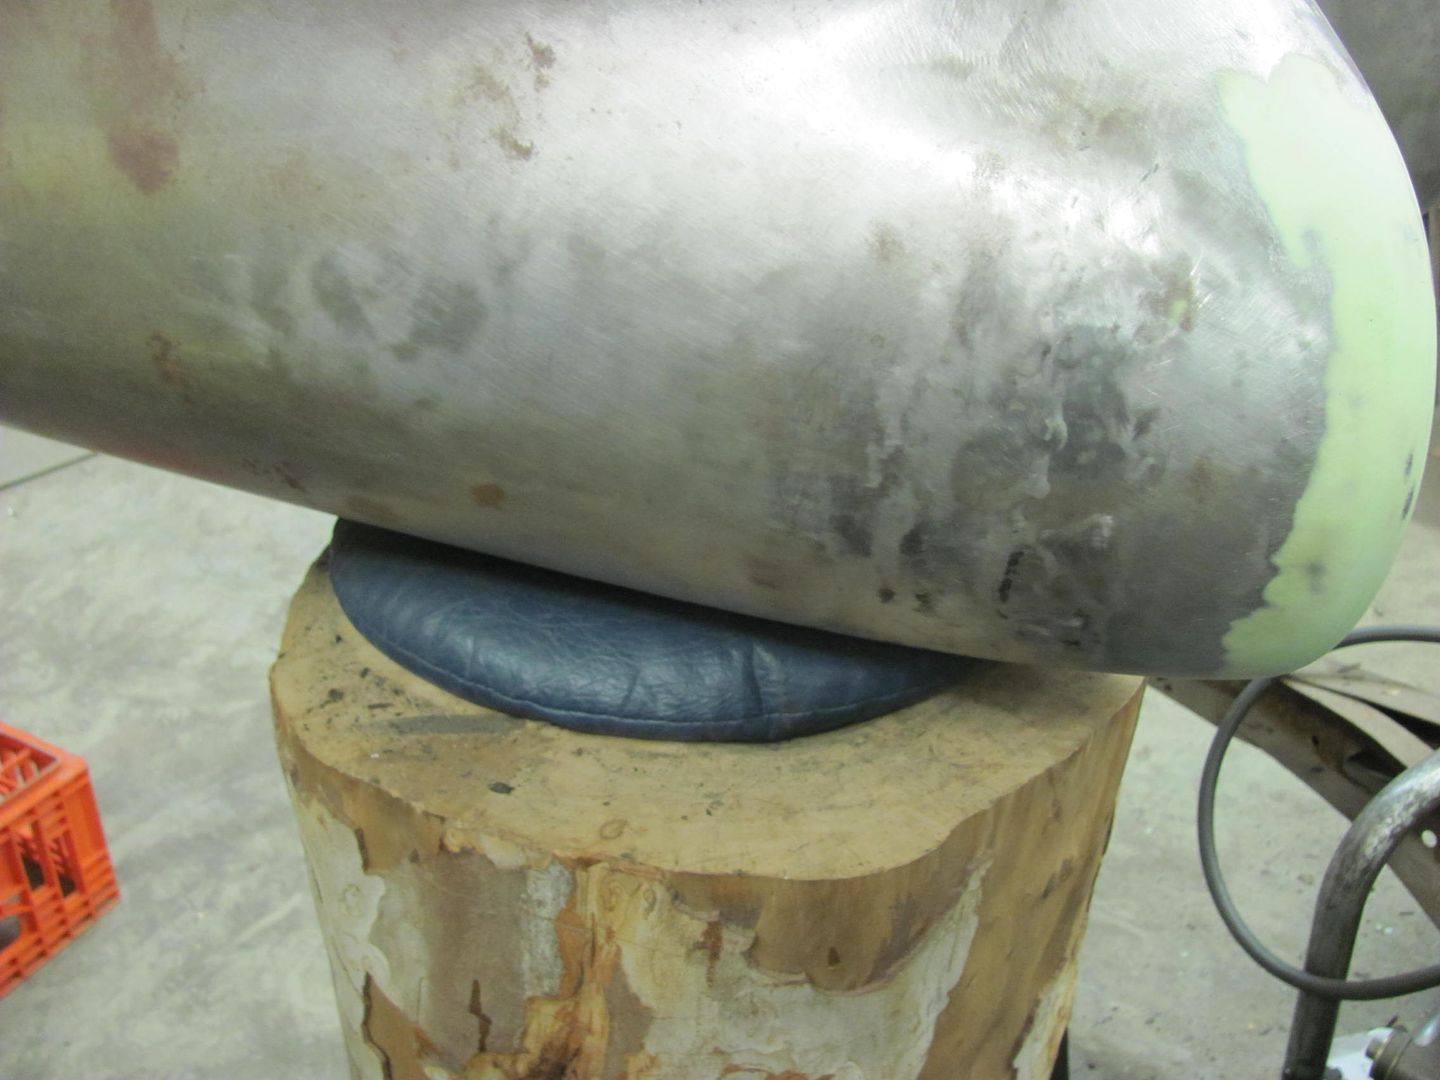 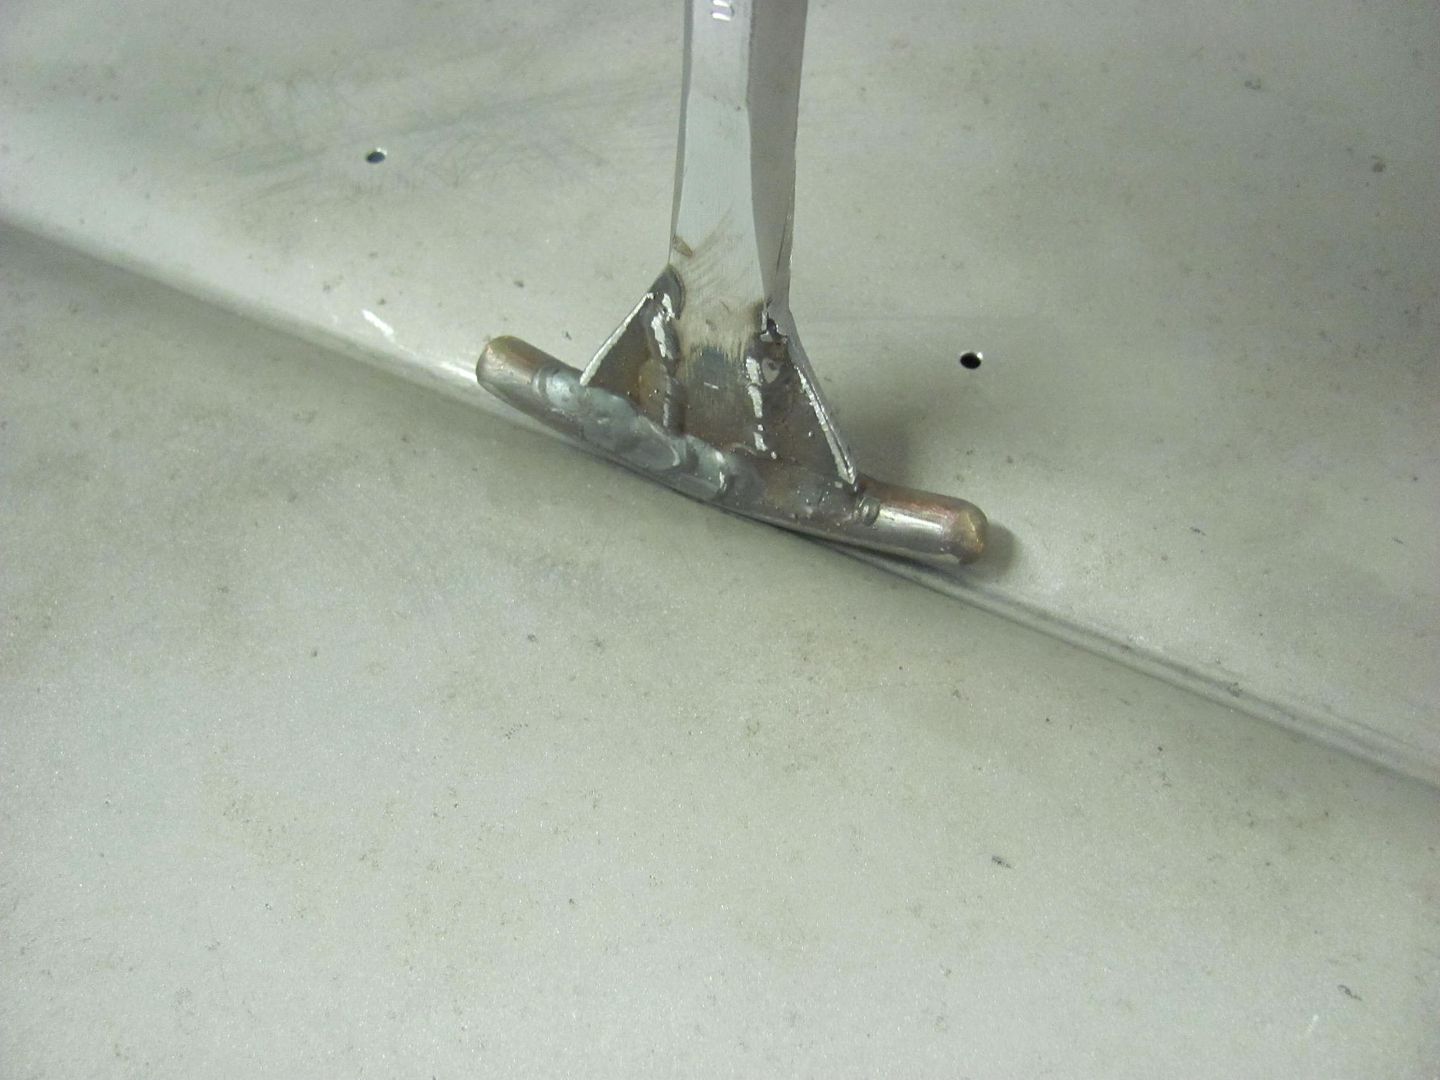 Much better with a more consistent crown across the fender.. 
__________________
Robert |
|
|
|
|
12-21-2014, 08:44 PM
|
#291 |
|
Registered User
Join Date: Jan 2013
Location: Leonardtown, MD
Posts: 1,633
|
Re: 55 Wagon Progress
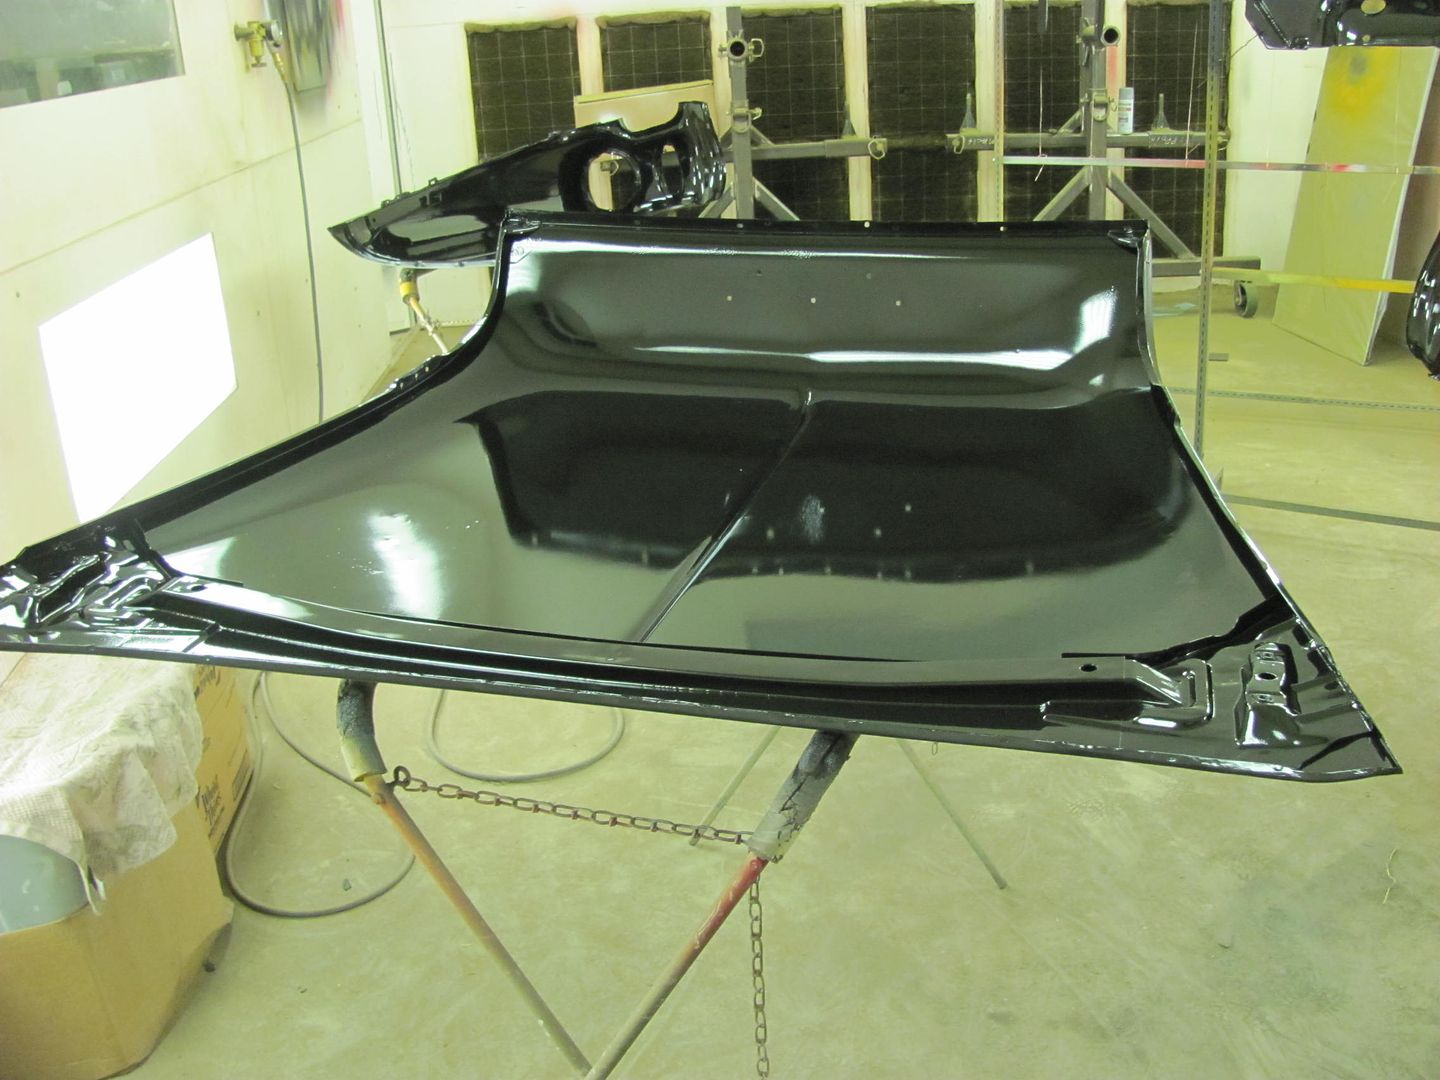
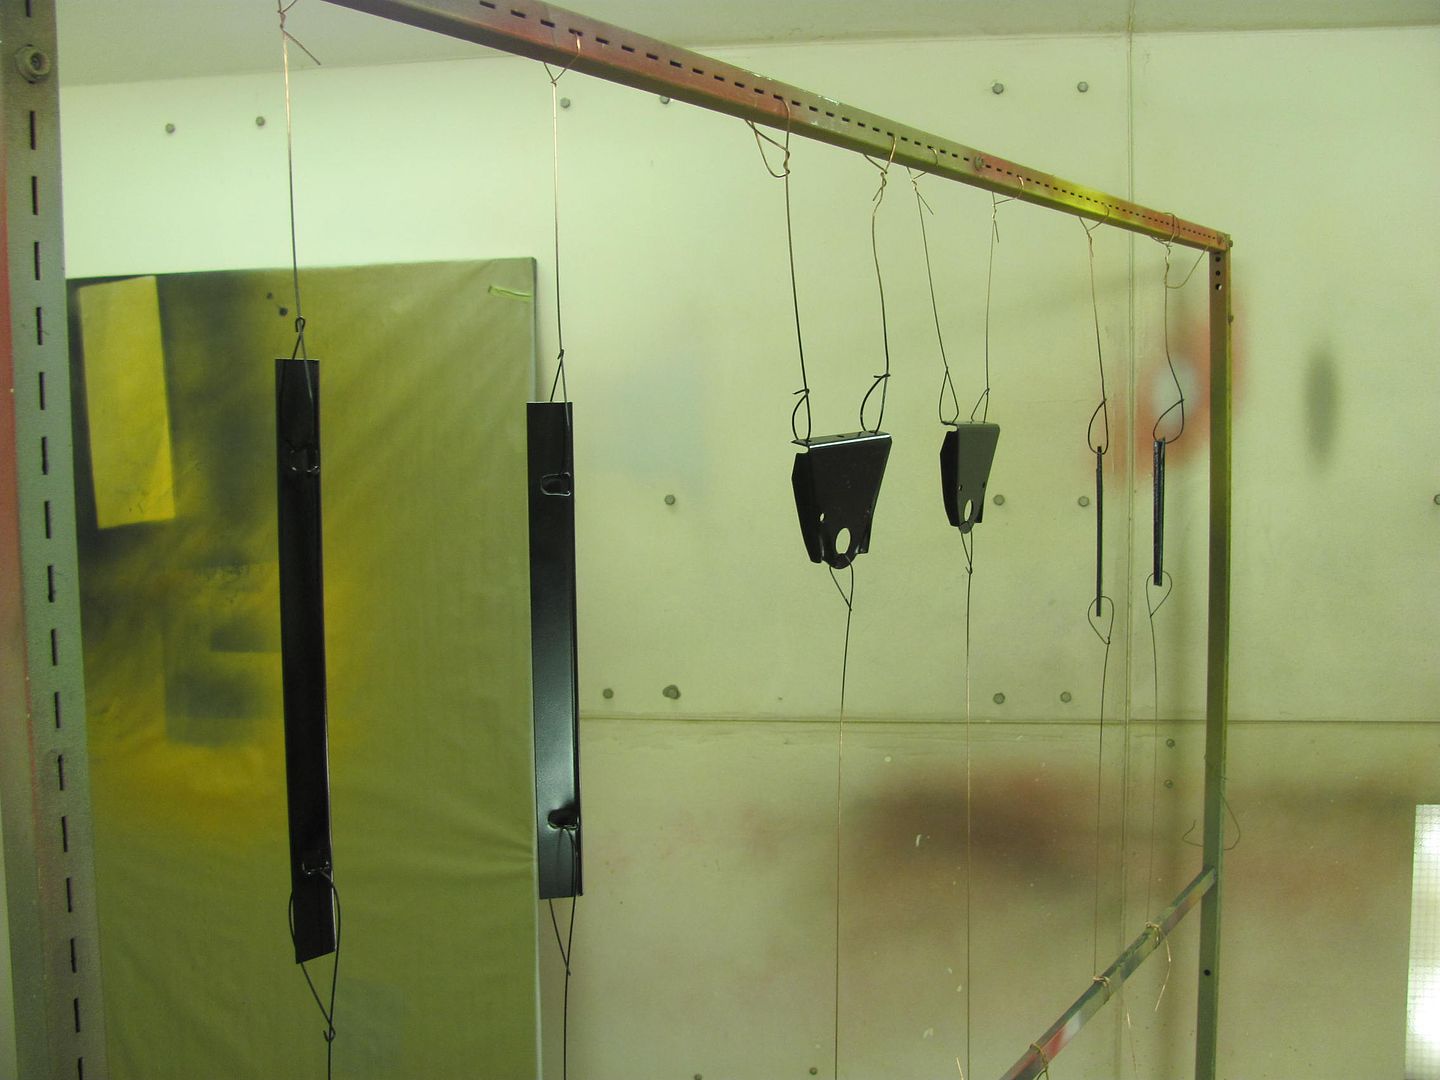
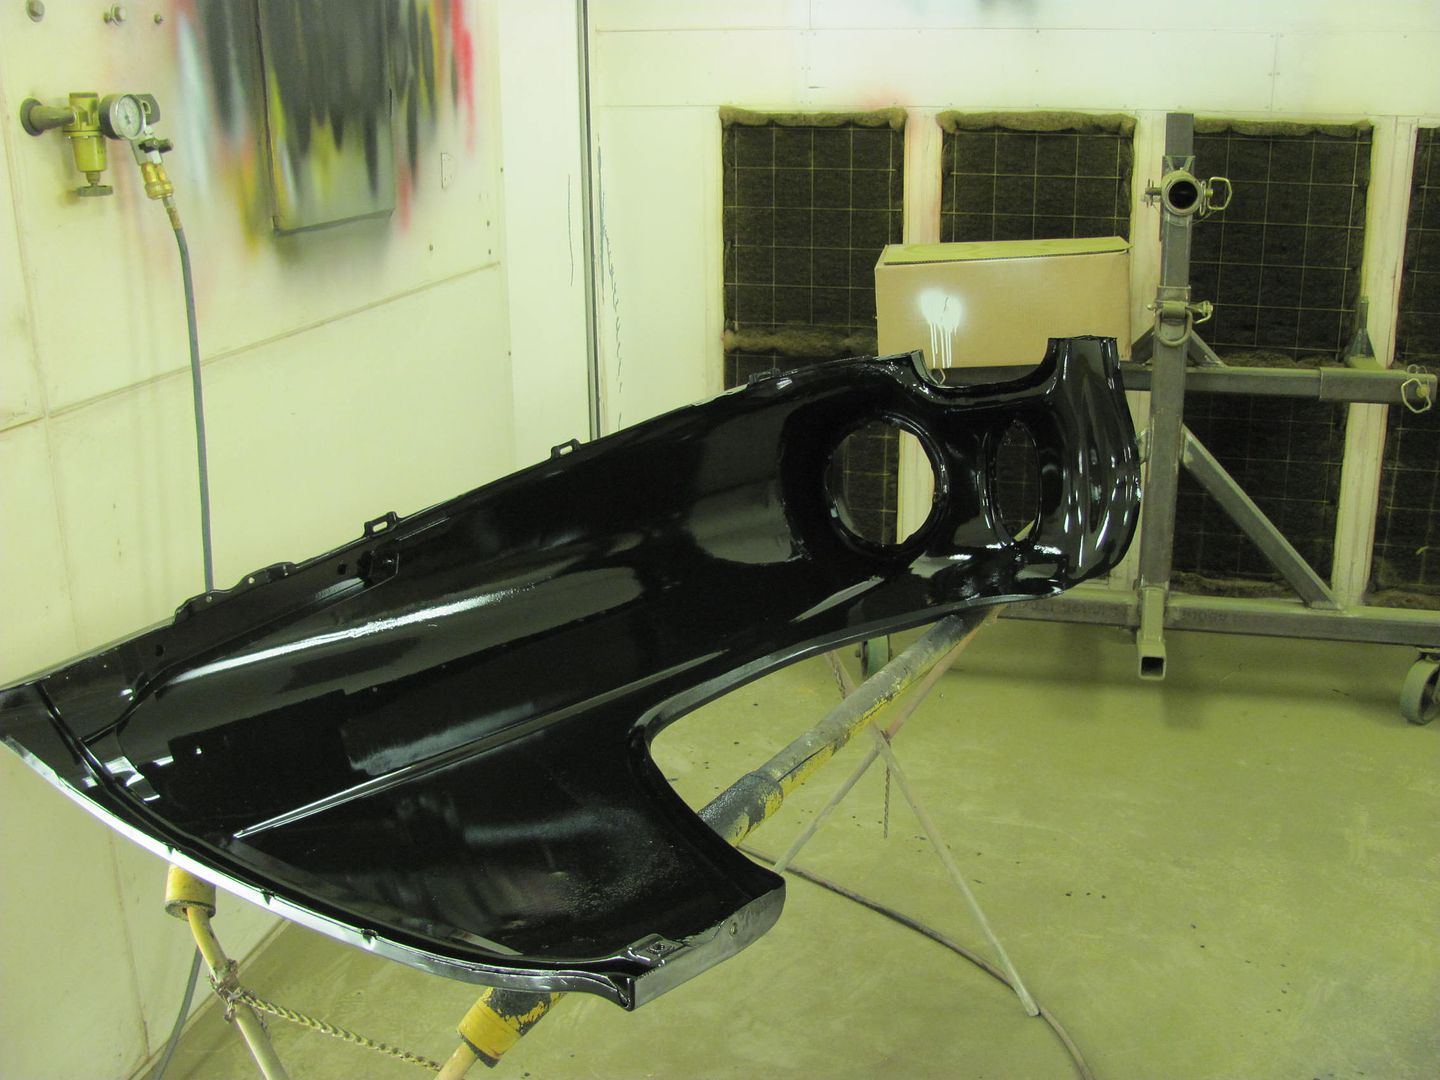
We have primer! Sprayed the SPI epoxy tonight, later this week we'll spray the doors and outside of the fenders and hood. Then we can assemble the front end and block across the adjacent panels..
__________________
Robert |
|
|
|
|
12-21-2014, 09:15 PM
|
#292 |
|
Senior Member
Join Date: Jul 2012
Location: Oblong, Illinois
Posts: 7,017
|
Re: 55 Wagon Progress
Continued nice metal work! Looking forward to seeing the paint work too.
|
|
|
|
|
12-21-2014, 11:38 PM
|
#293 |
|
Registered User
Join Date: Oct 2007
Location: Spanaway
Posts: 8,451
|
Re: 55 Wagon Progress
^x2!
__________________
Mike. Swamp Rat build thread : http://67-72chevytrucks.com/vboard/s...d.php?t=595019 72 3/4T 4X4 4" BDS Lift 33" BFG's |
|
|
|
|
12-23-2014, 12:27 PM
|
#294 |
|
Registered User
Join Date: Apr 2011
Location: .
Posts: 3,104
|
Re: 55 Wagon Progress
What size of round rod are you using on the end of that chisel?
Bodywork and paint look great. |
|
|
|
|
12-23-2014, 10:32 PM
|
#295 |
|
Registered User
Join Date: Jan 2013
Location: Leonardtown, MD
Posts: 1,633
|
Re: 55 Wagon Progress
3/8 diameter, thanks!
__________________
Robert |
|
|
|
|
12-23-2014, 11:48 PM
|
#296 |
|
Registered User
Join Date: Jan 2013
Location: Leonardtown, MD
Posts: 1,633
|
Re: 55 Wagon Progress
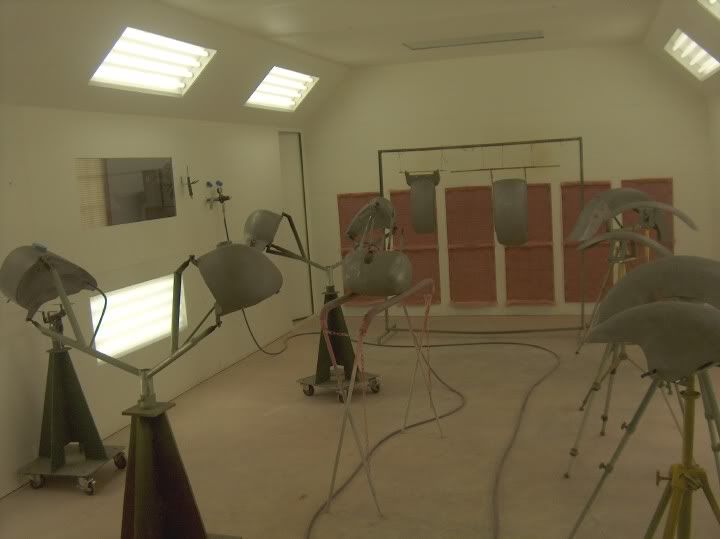
One of our projects for tonight was to make a stand to hold the doors for painting. I have some heavy duty "tripods" on casters that have a 2" ID pipe on top with a setscrew, which works well for changing out various fixtures for painting, as shown below on the left....
 My thoughts were to make a similar "tree" to hold the doors, using the hinge mounts. Here's the prototype design... 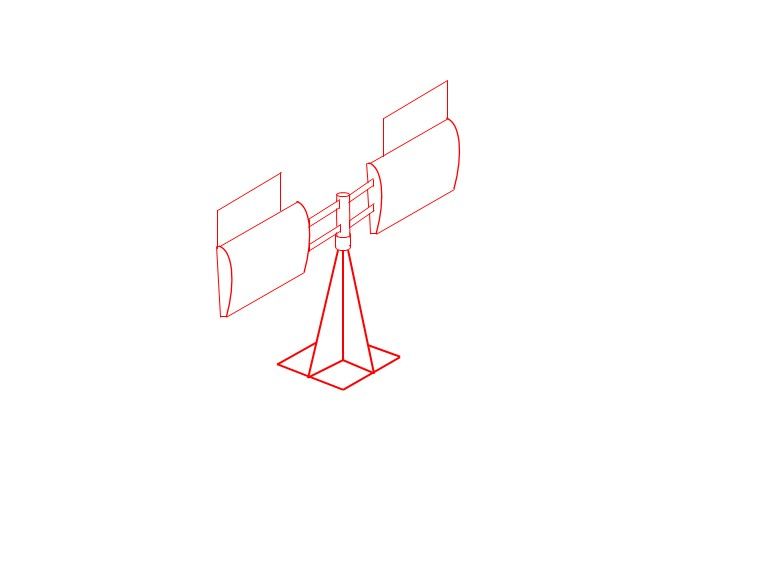 Here's our CAD layout this evening (cardboard aided design). As the flat bar is a bit cheaper than the pipe, we altered the pattern slightly... 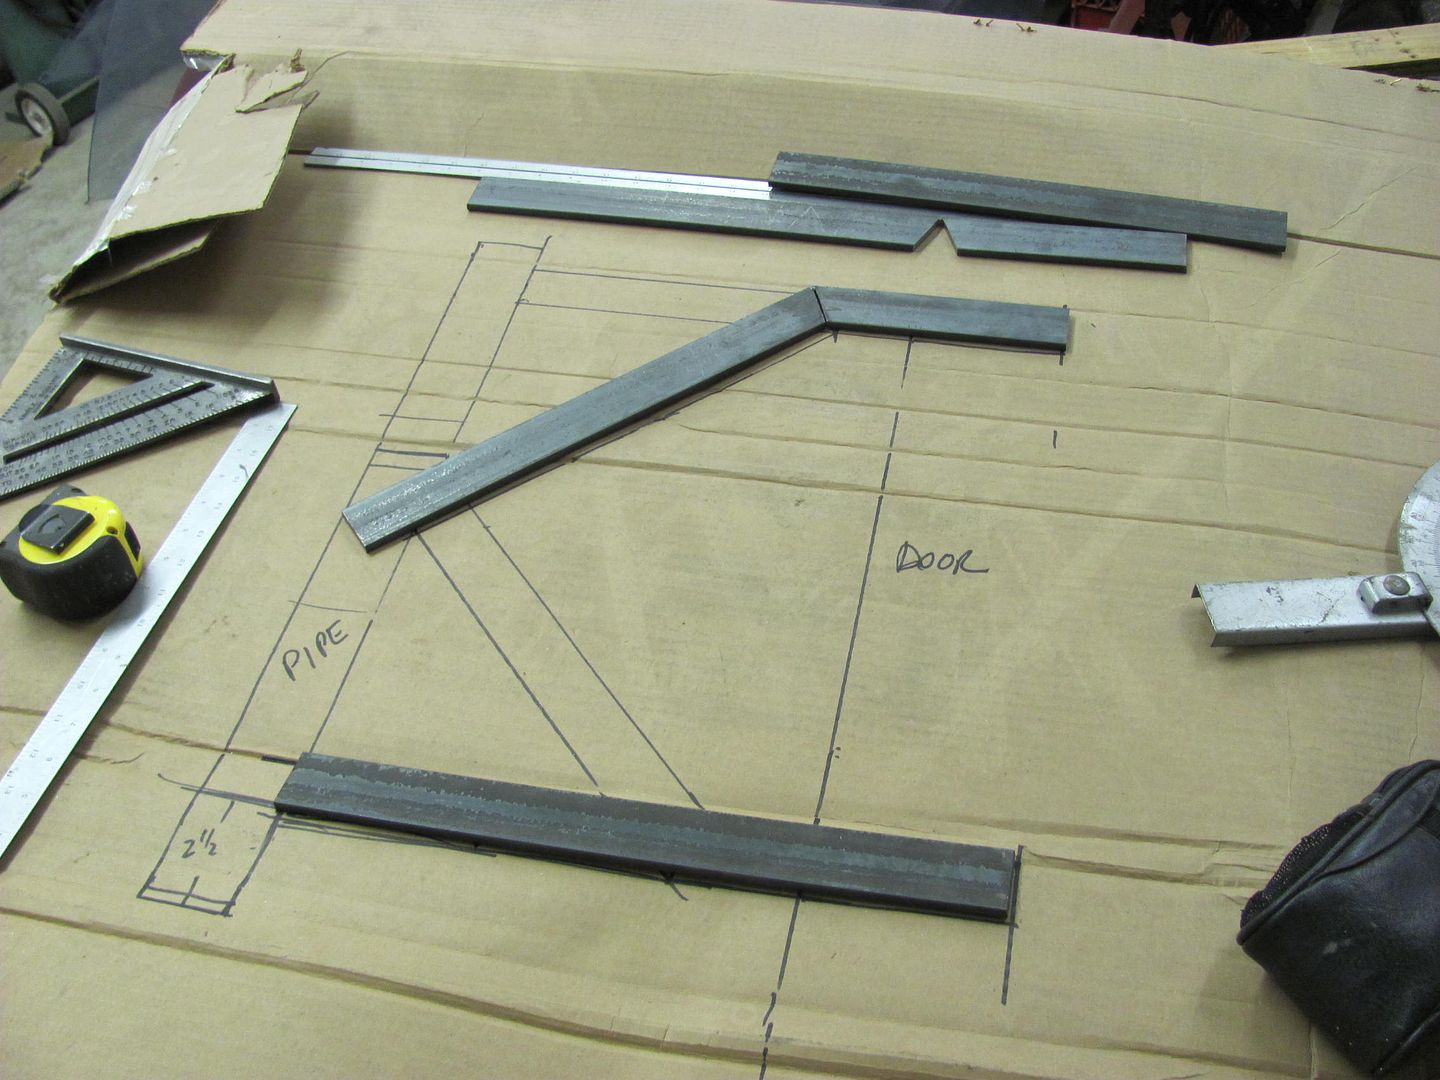 While Kyle was working on the parts for the door "tree", I turned my attention to one of the doors that still needed some finesse. One of the problem areas on the 55 wagon is that apparently GM did not have sufficient quantity of passenger doors specific to the wagon for the assembly line, so the quick fix was to install doors from the 2 door sedan. The downside was that the rear of the door tapers off where the sedans roof starts to drop off to the back window. With the belt line trim details aligned, note what appears to be a sagging rear edge with a widening gap to the upper door opening.... Most people don't notice this detail.. 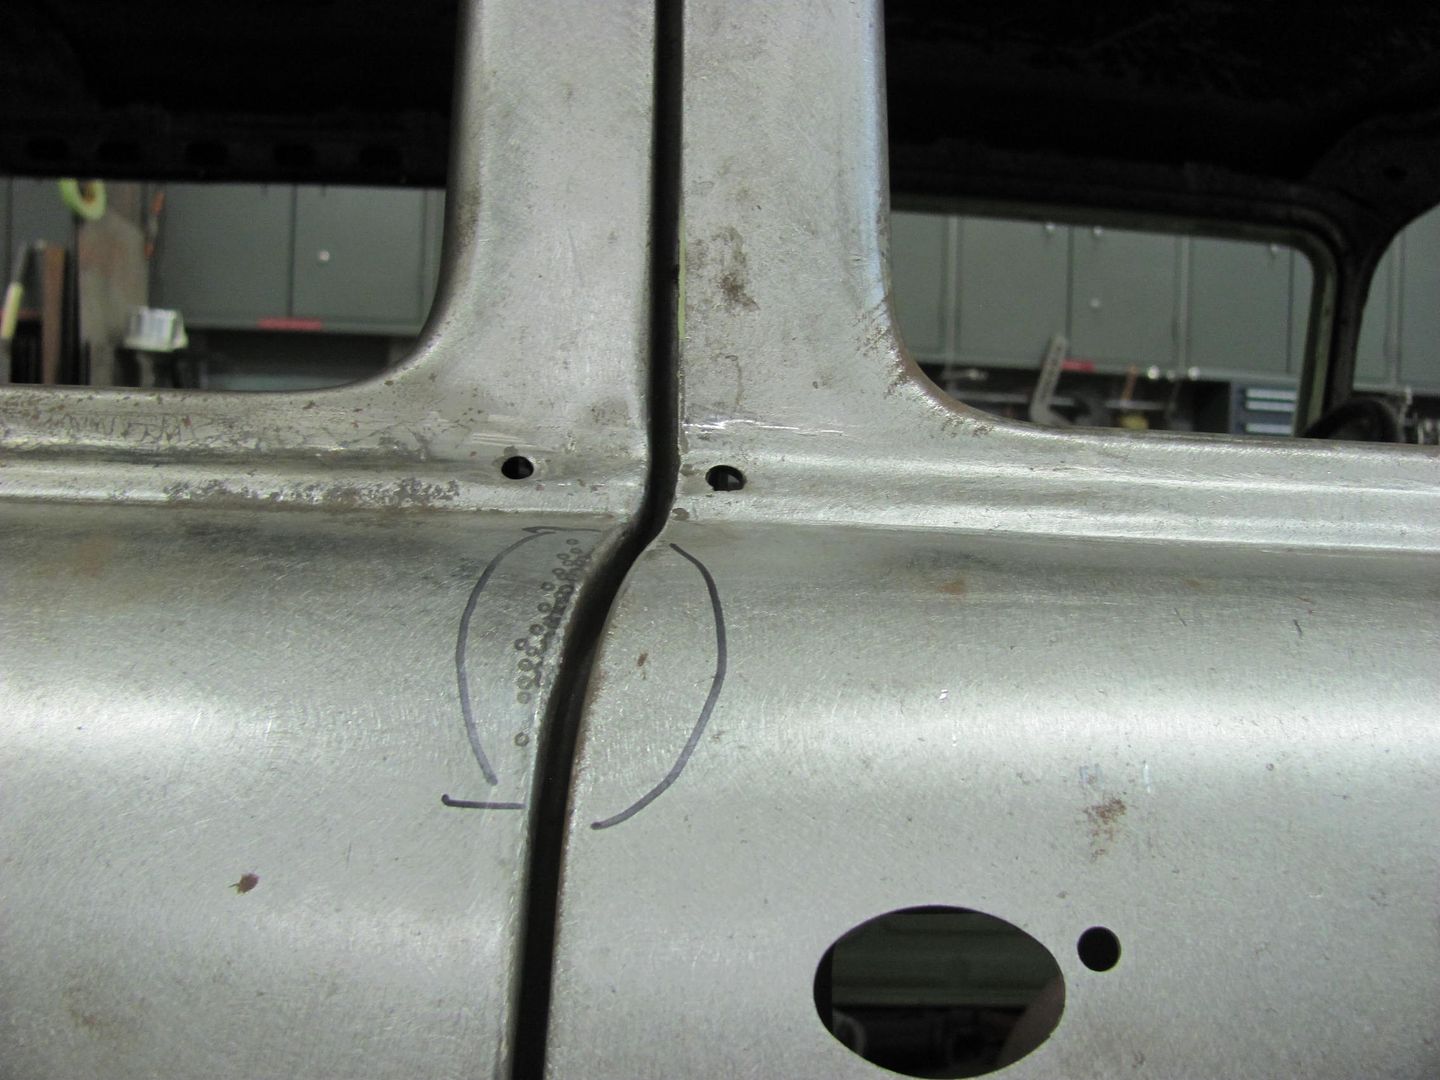 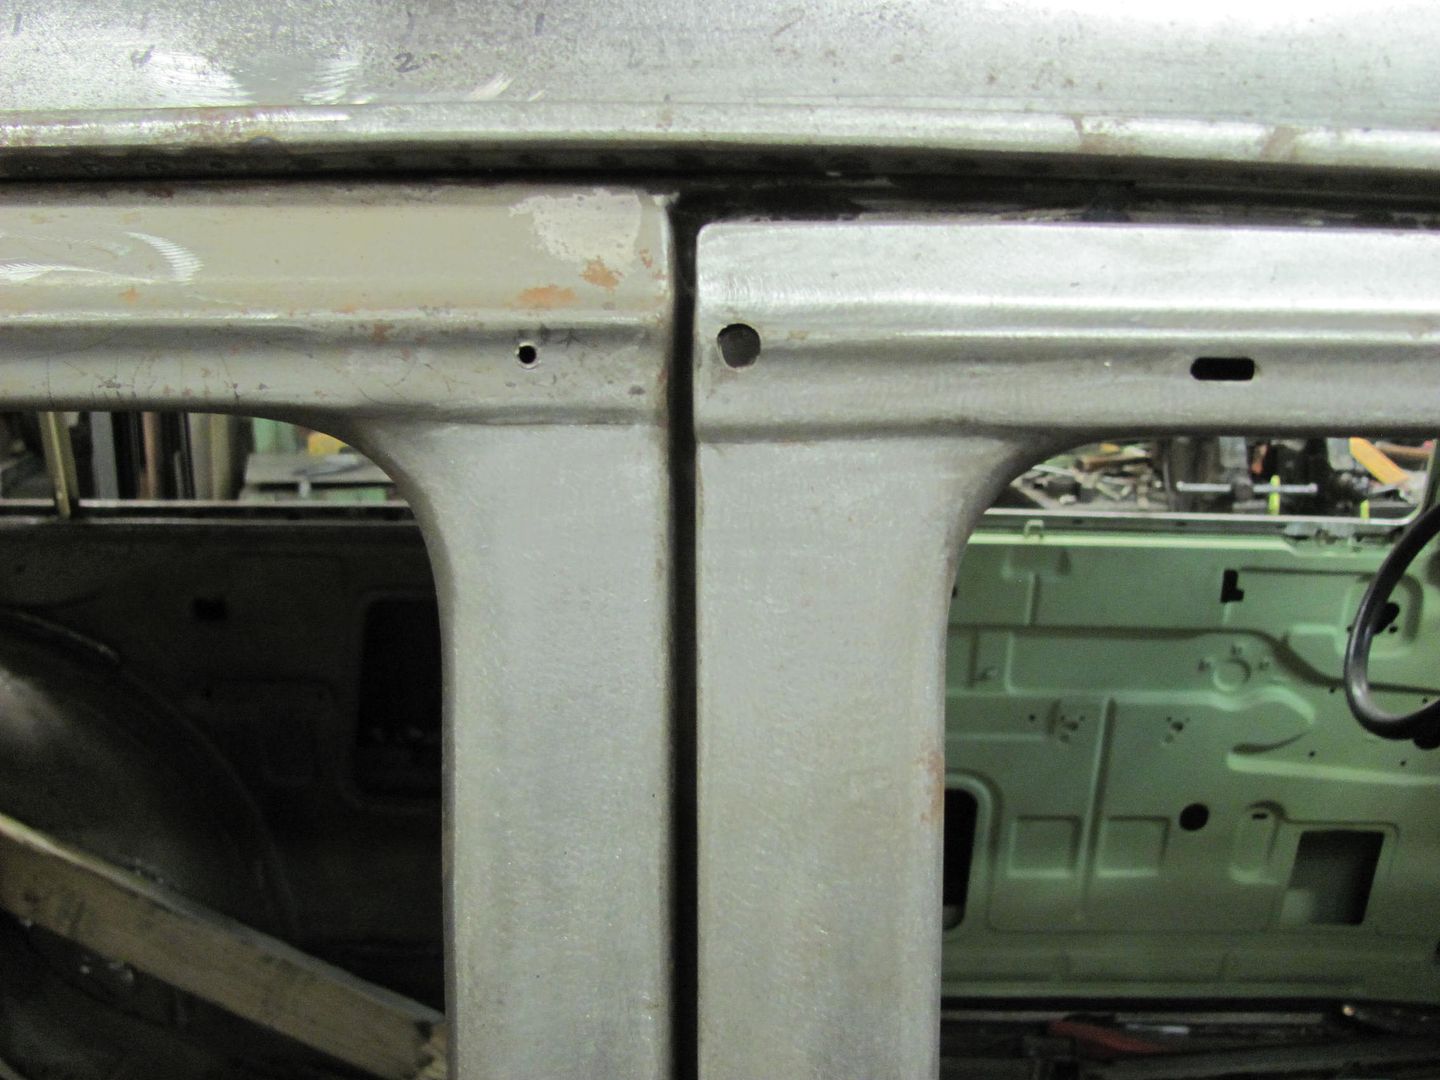 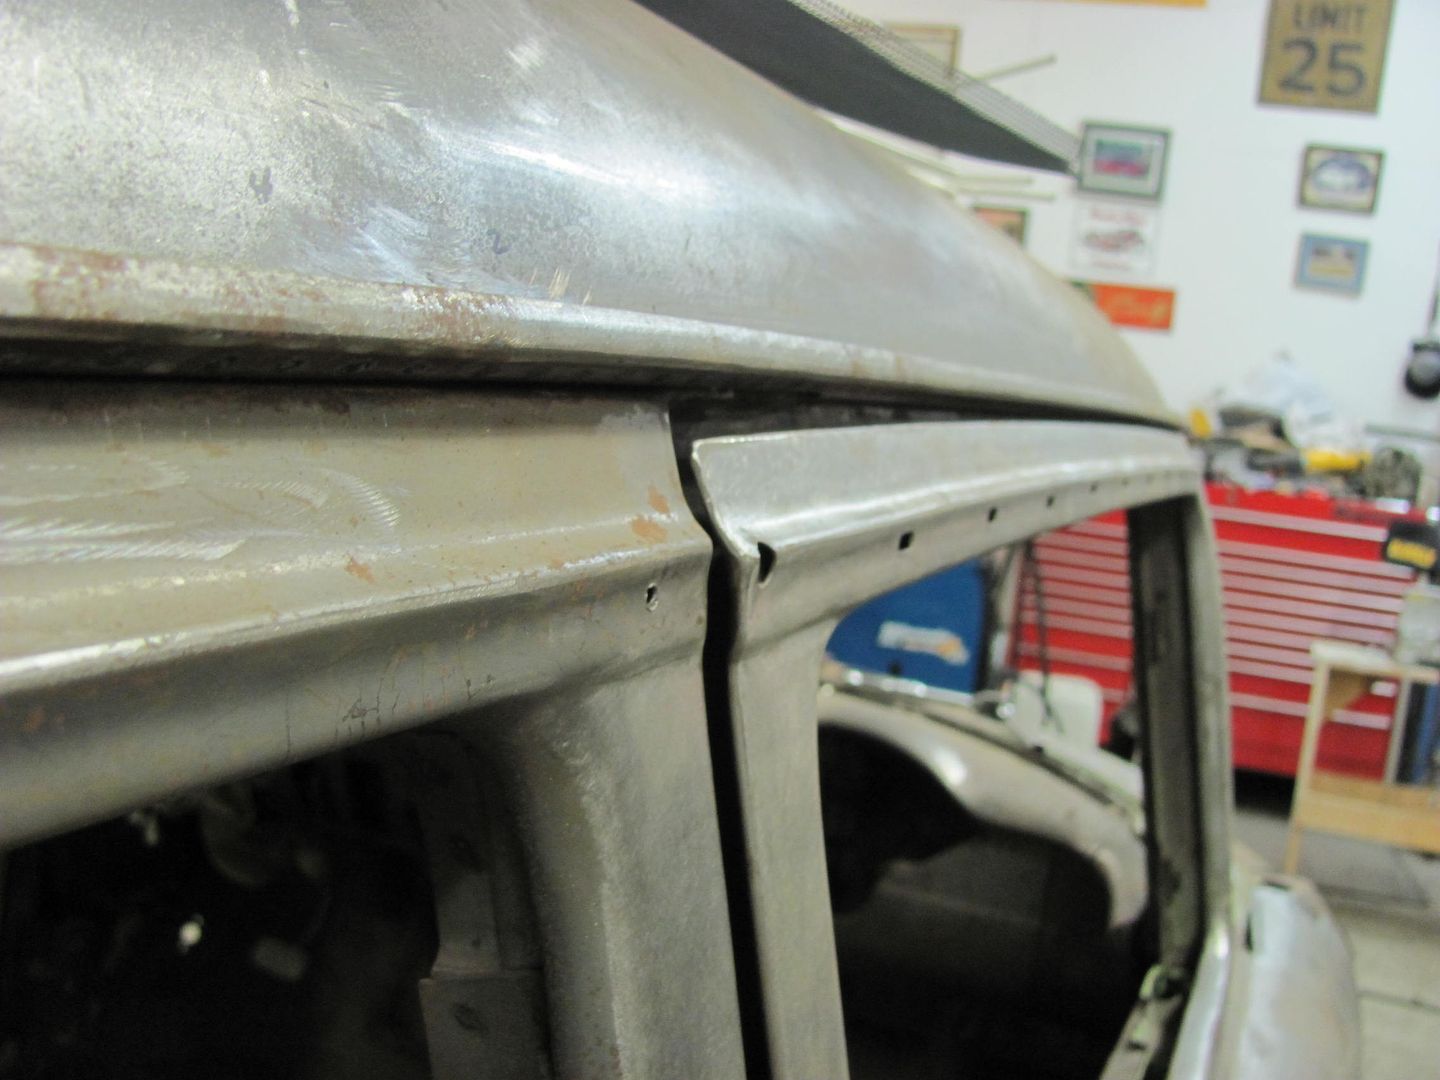 For comparison, the driver's door aligns well to the trim lines... 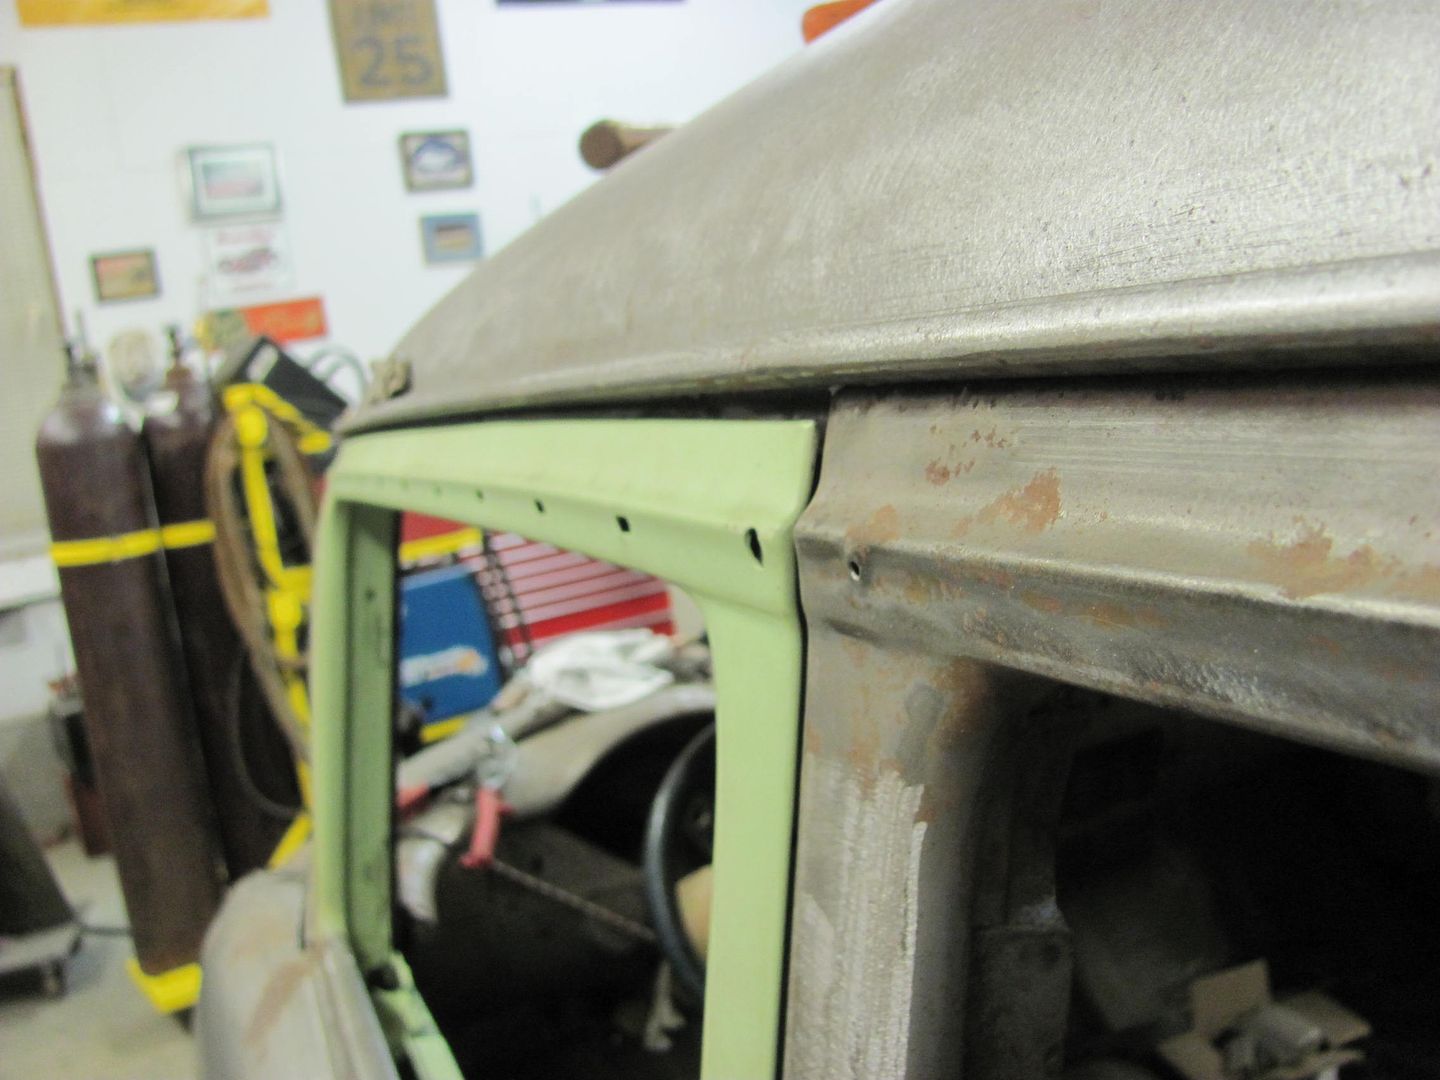 To fix the passenger door, we plan on a sectioning and a lift kit, adding a wider patch in the B post of the door to make up the difference. 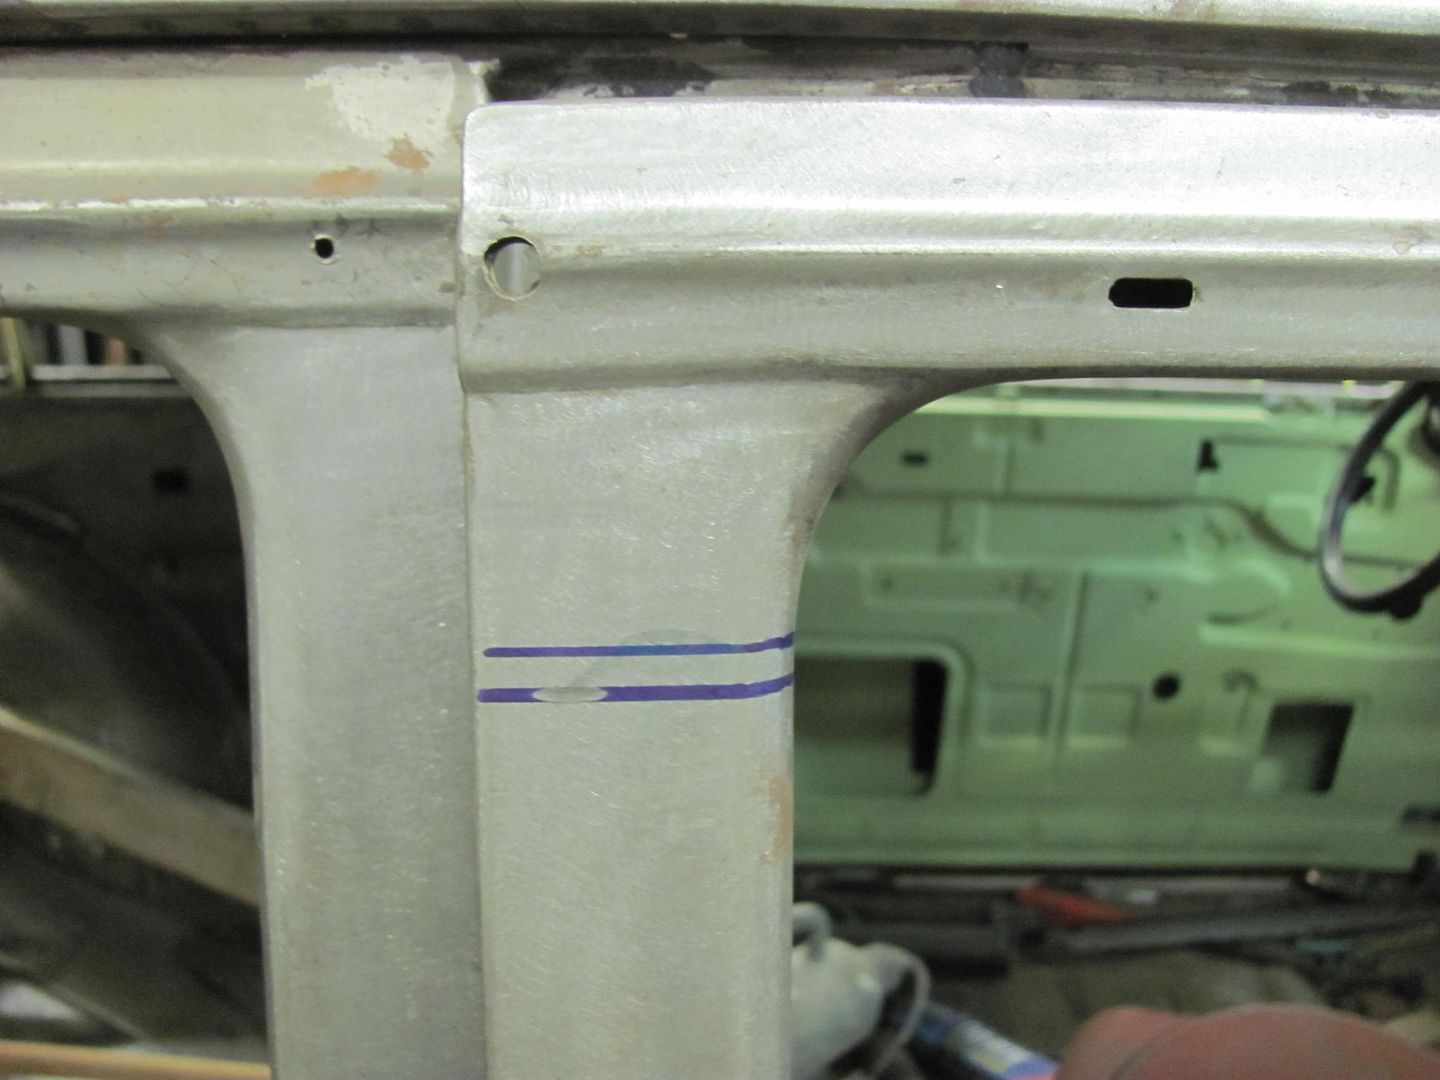 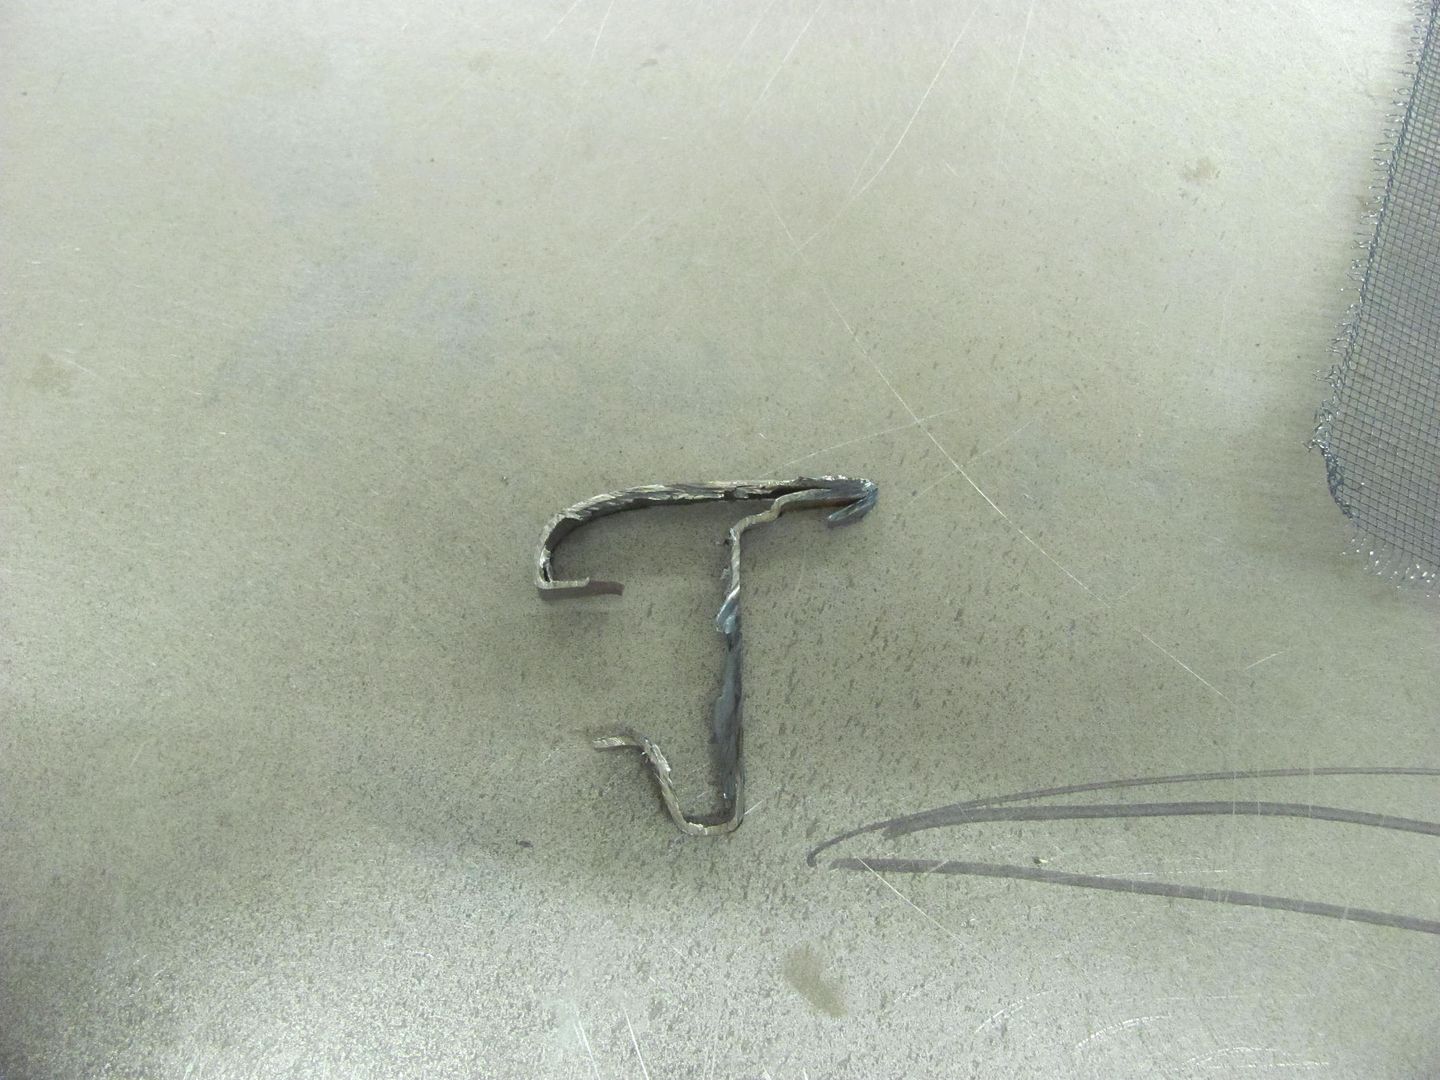 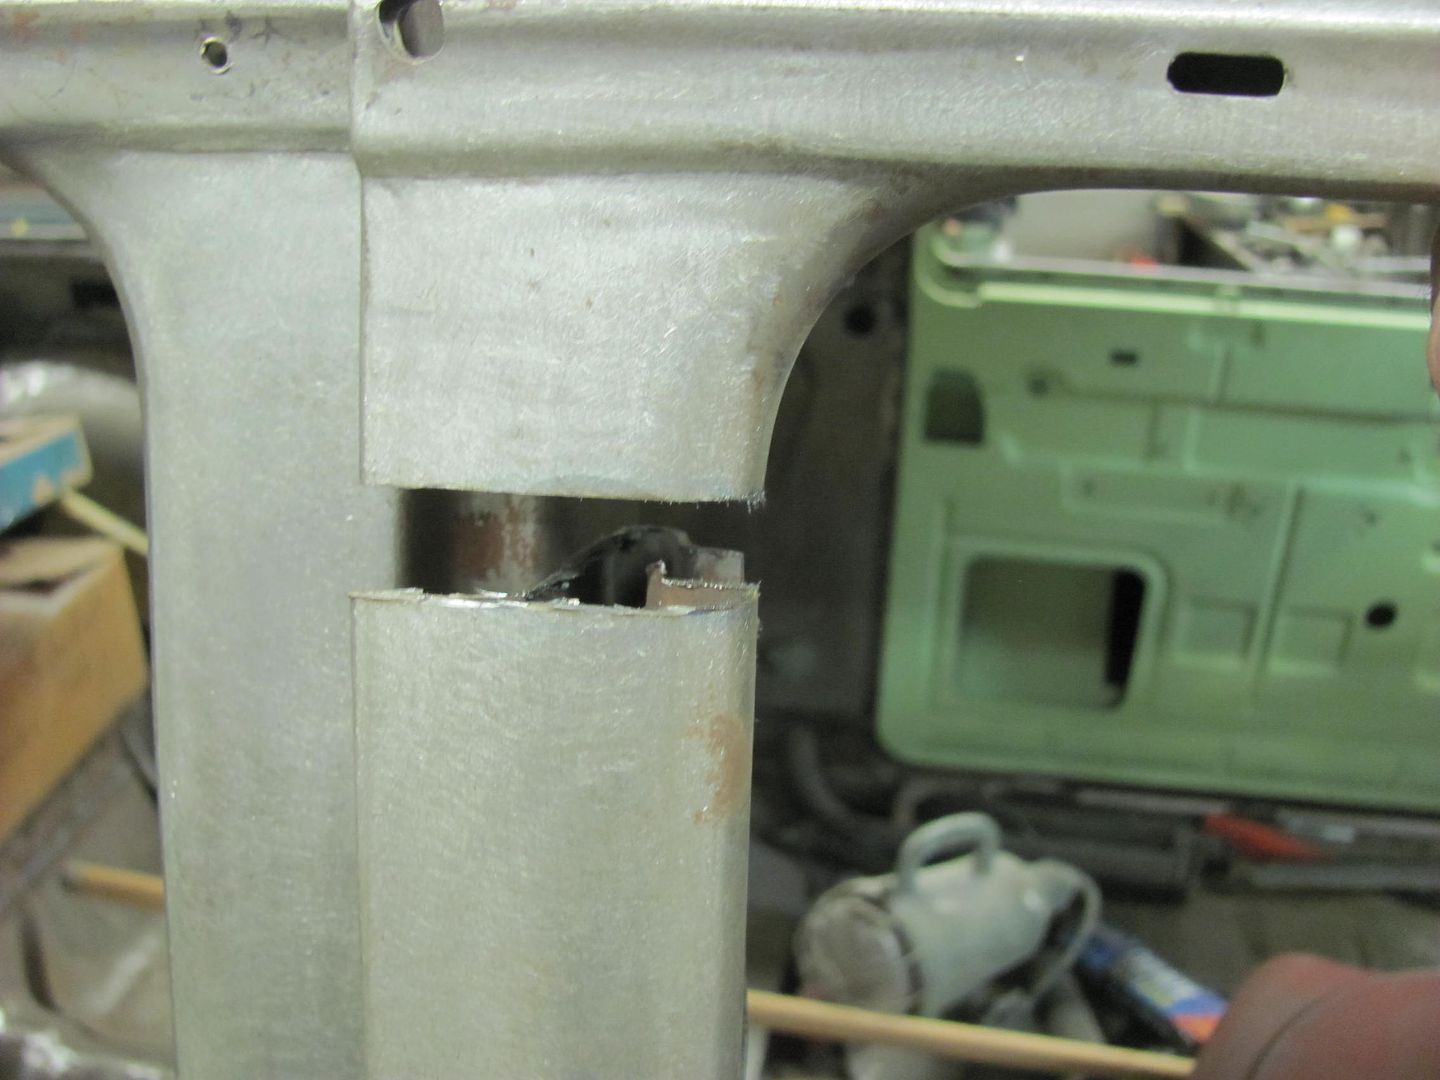 This may just work yet.. Hope so, there's a big gap there.. 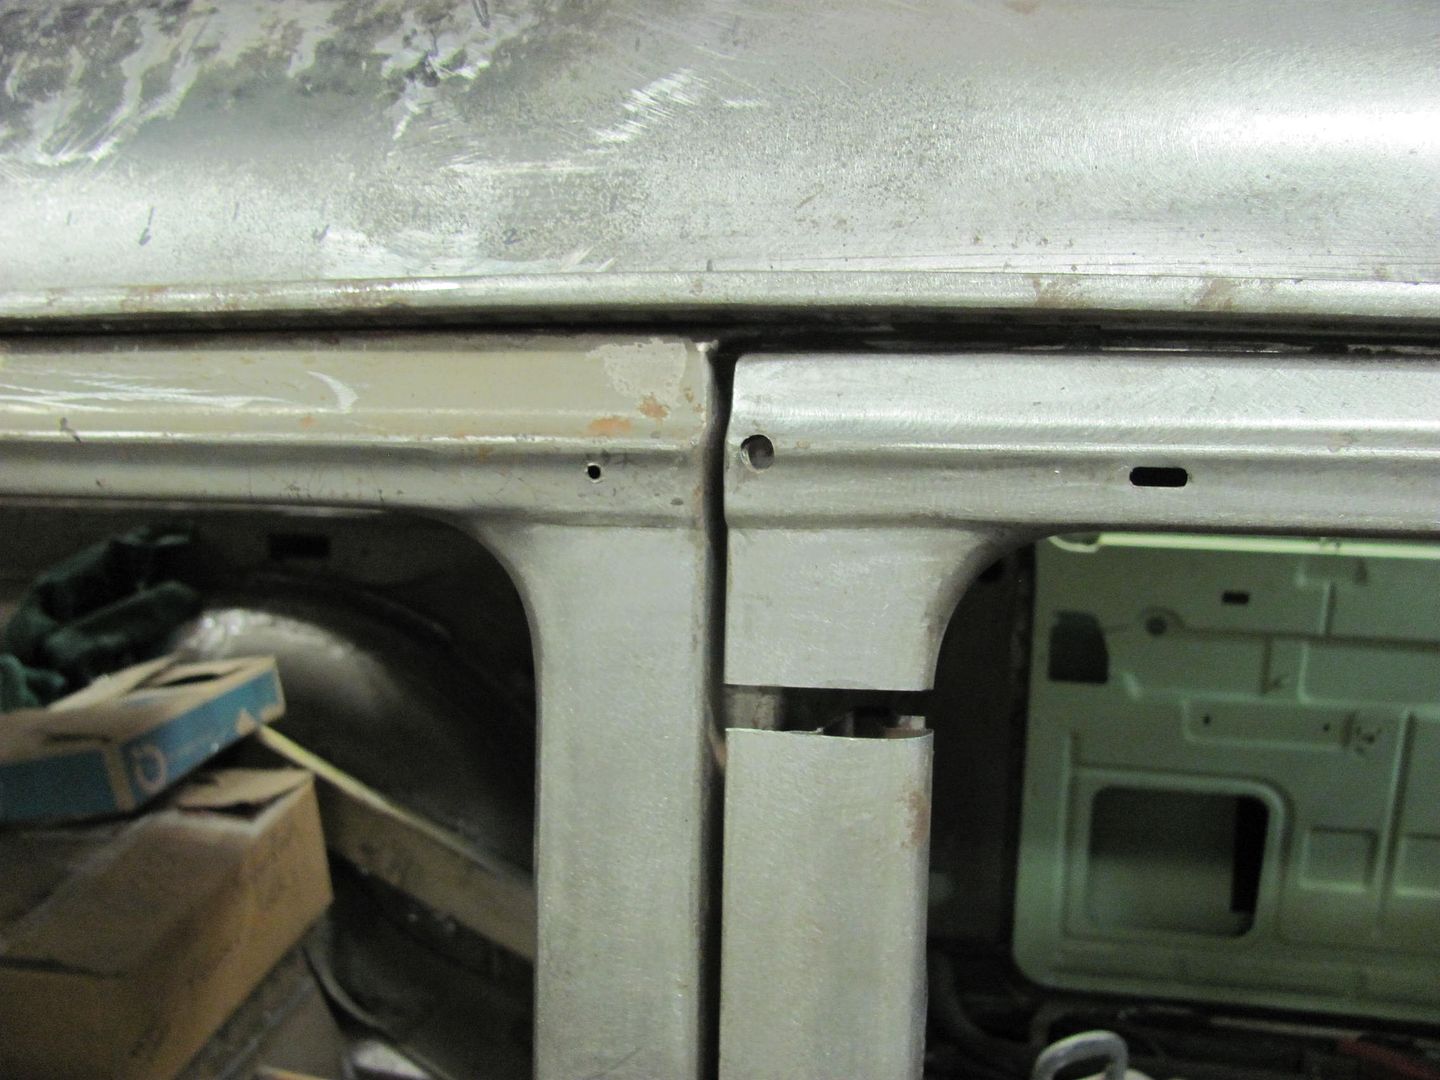 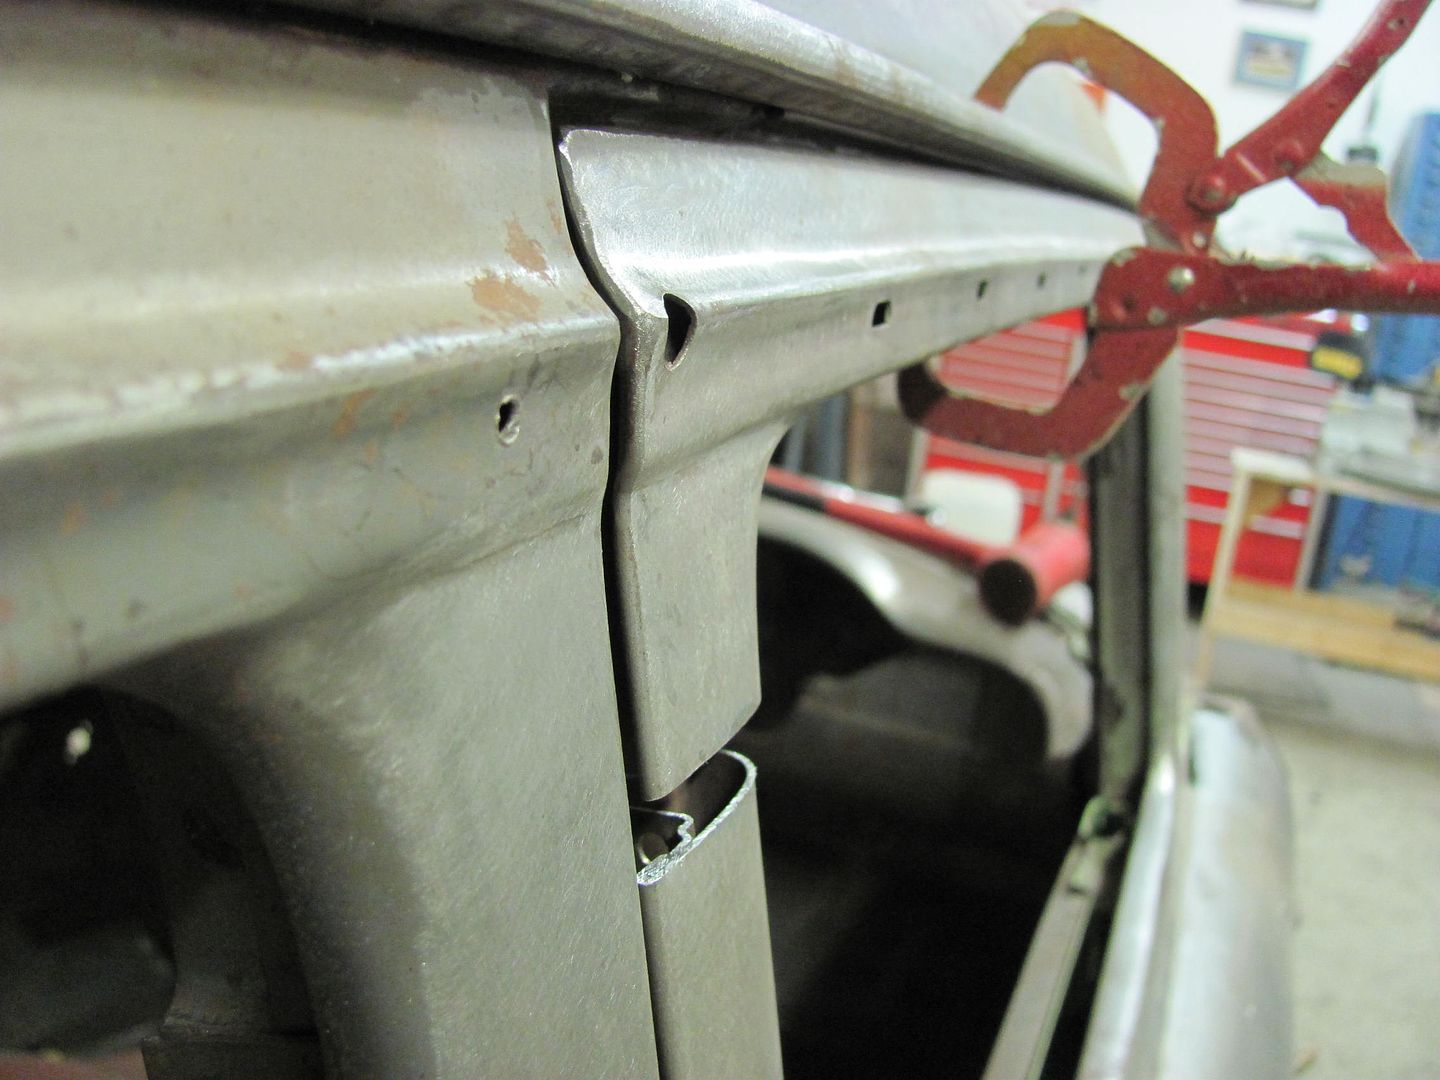 New section fabbed and fitted... 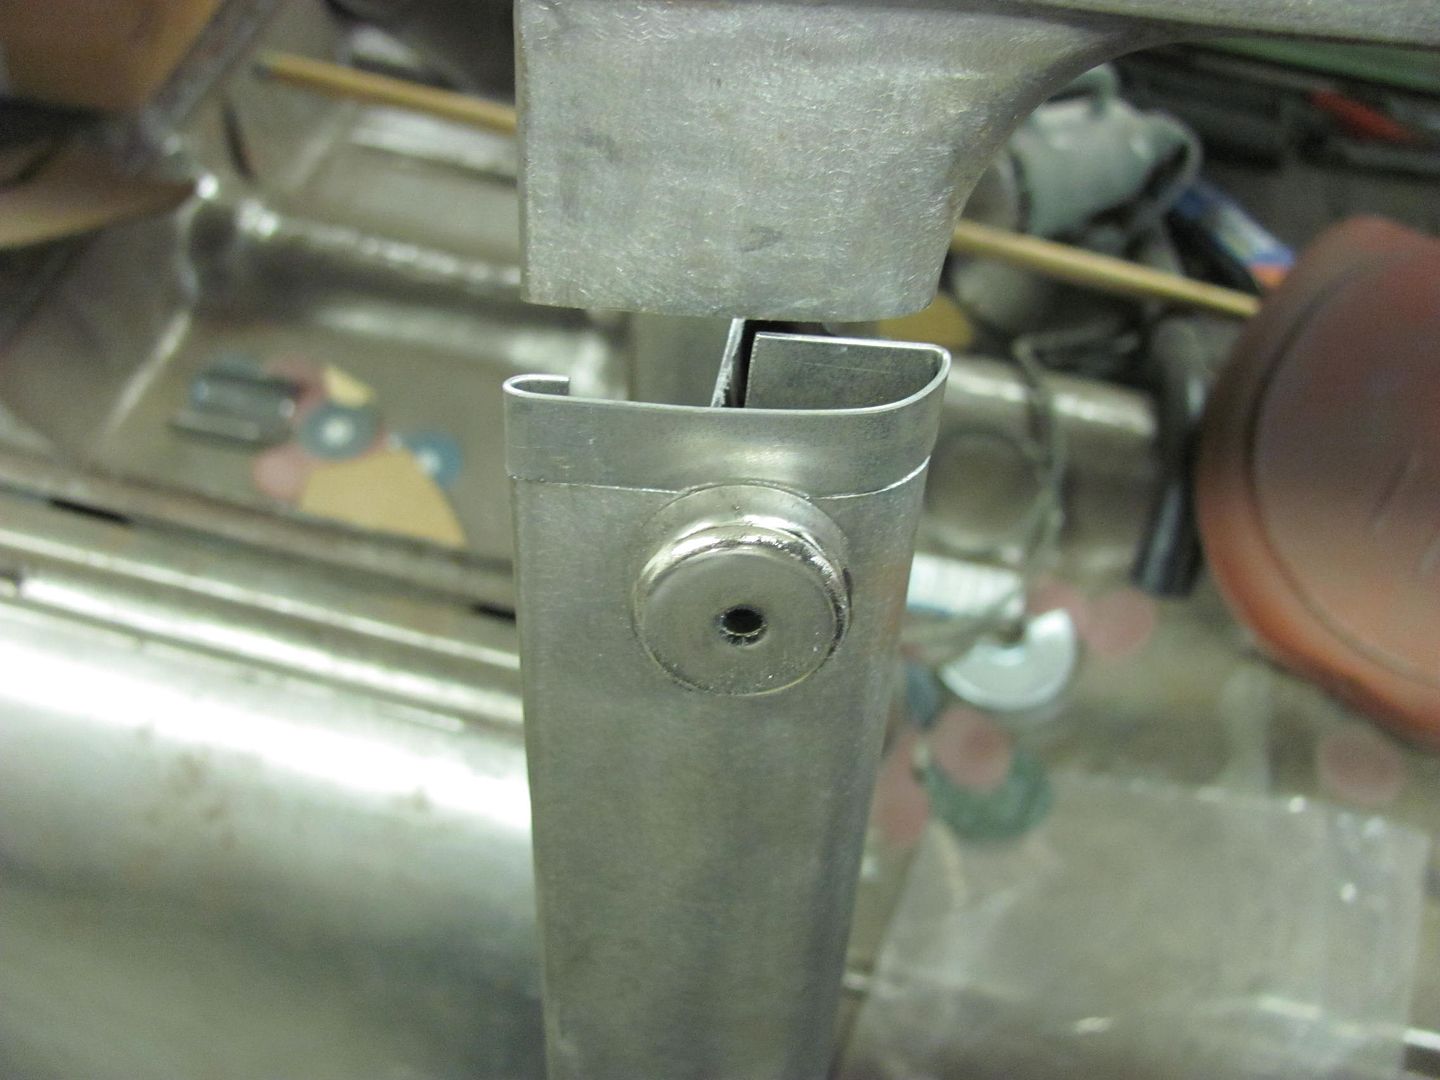 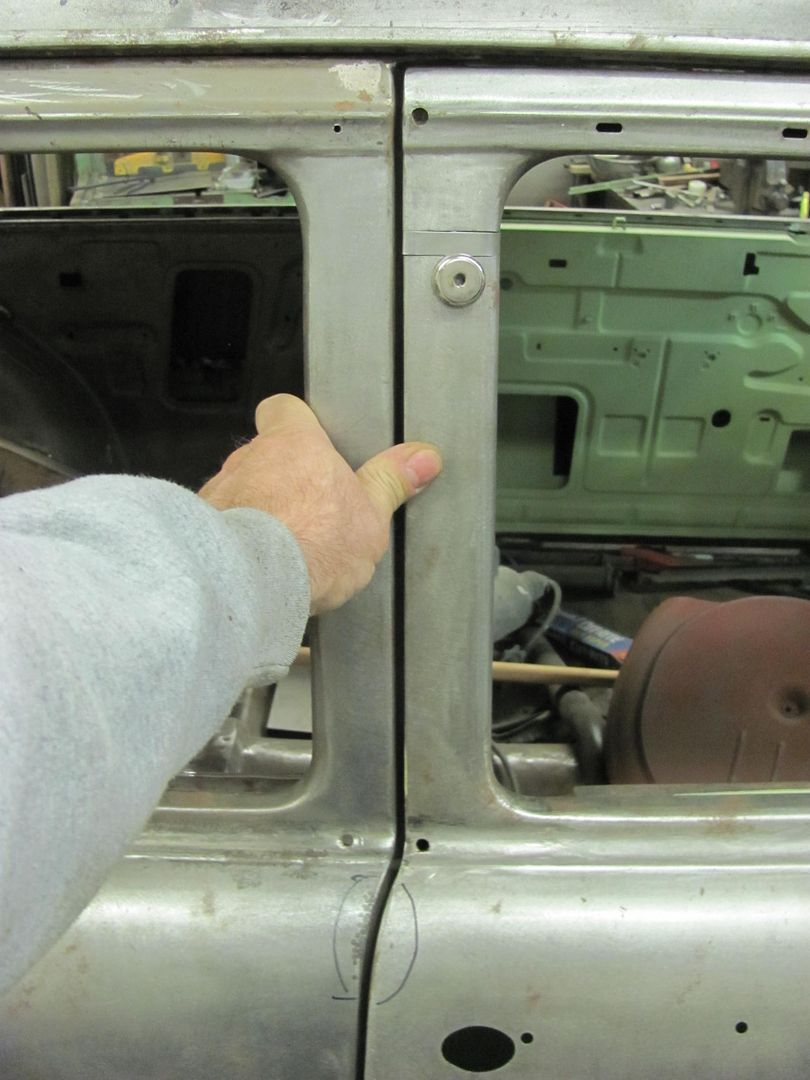  Bottom seam welded in place... 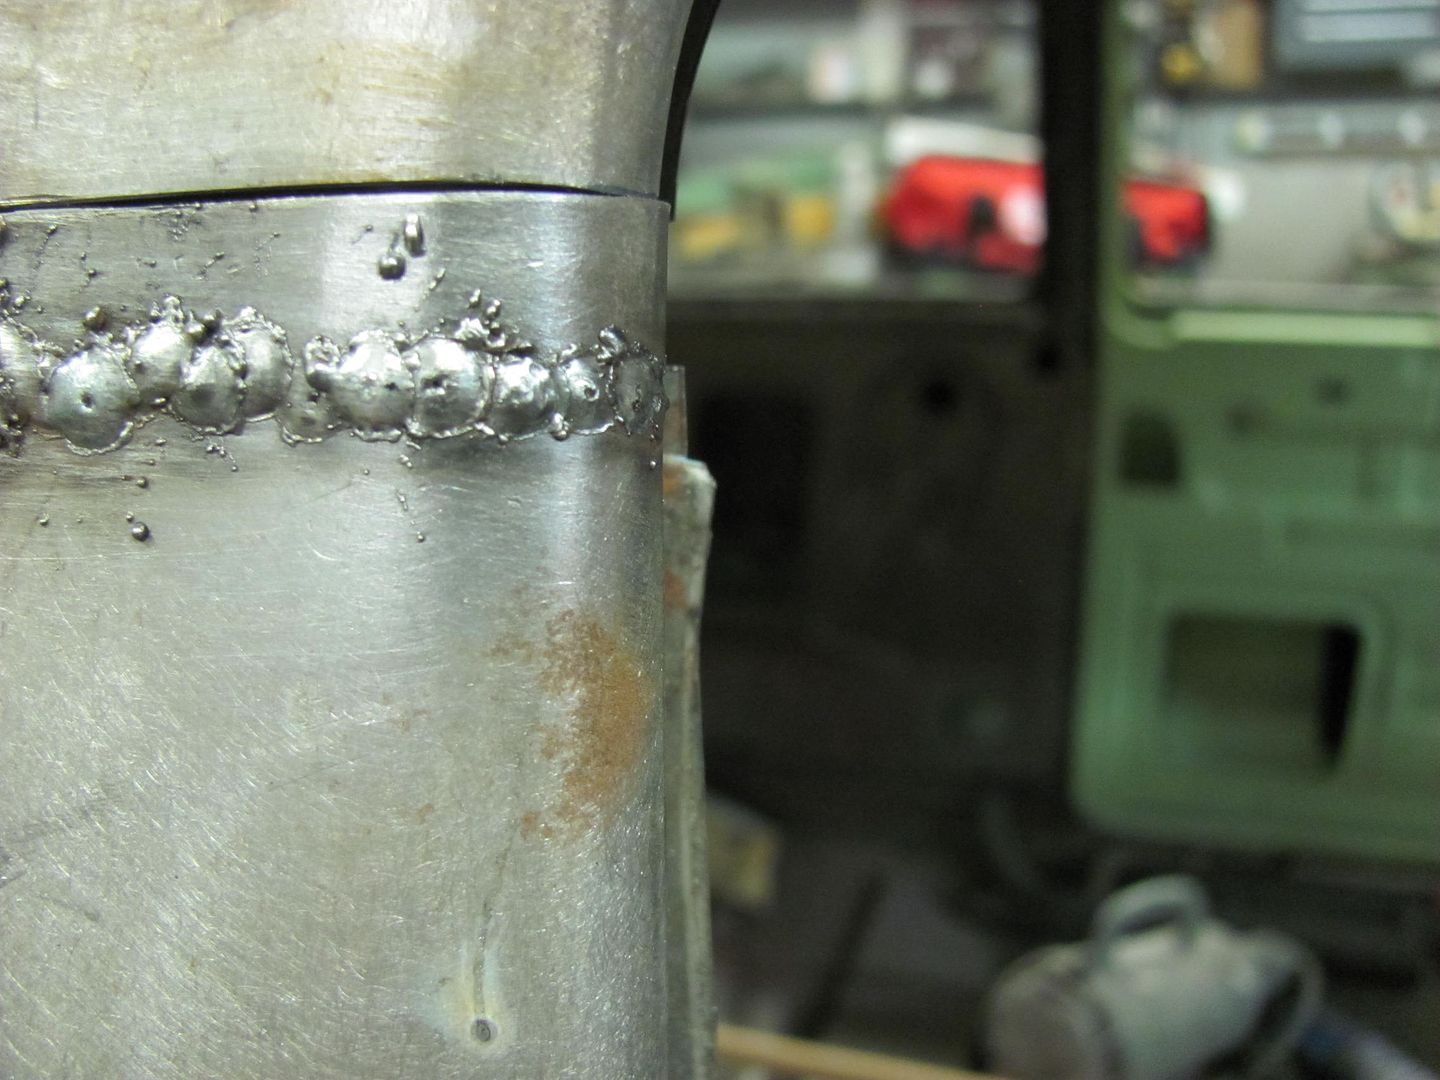 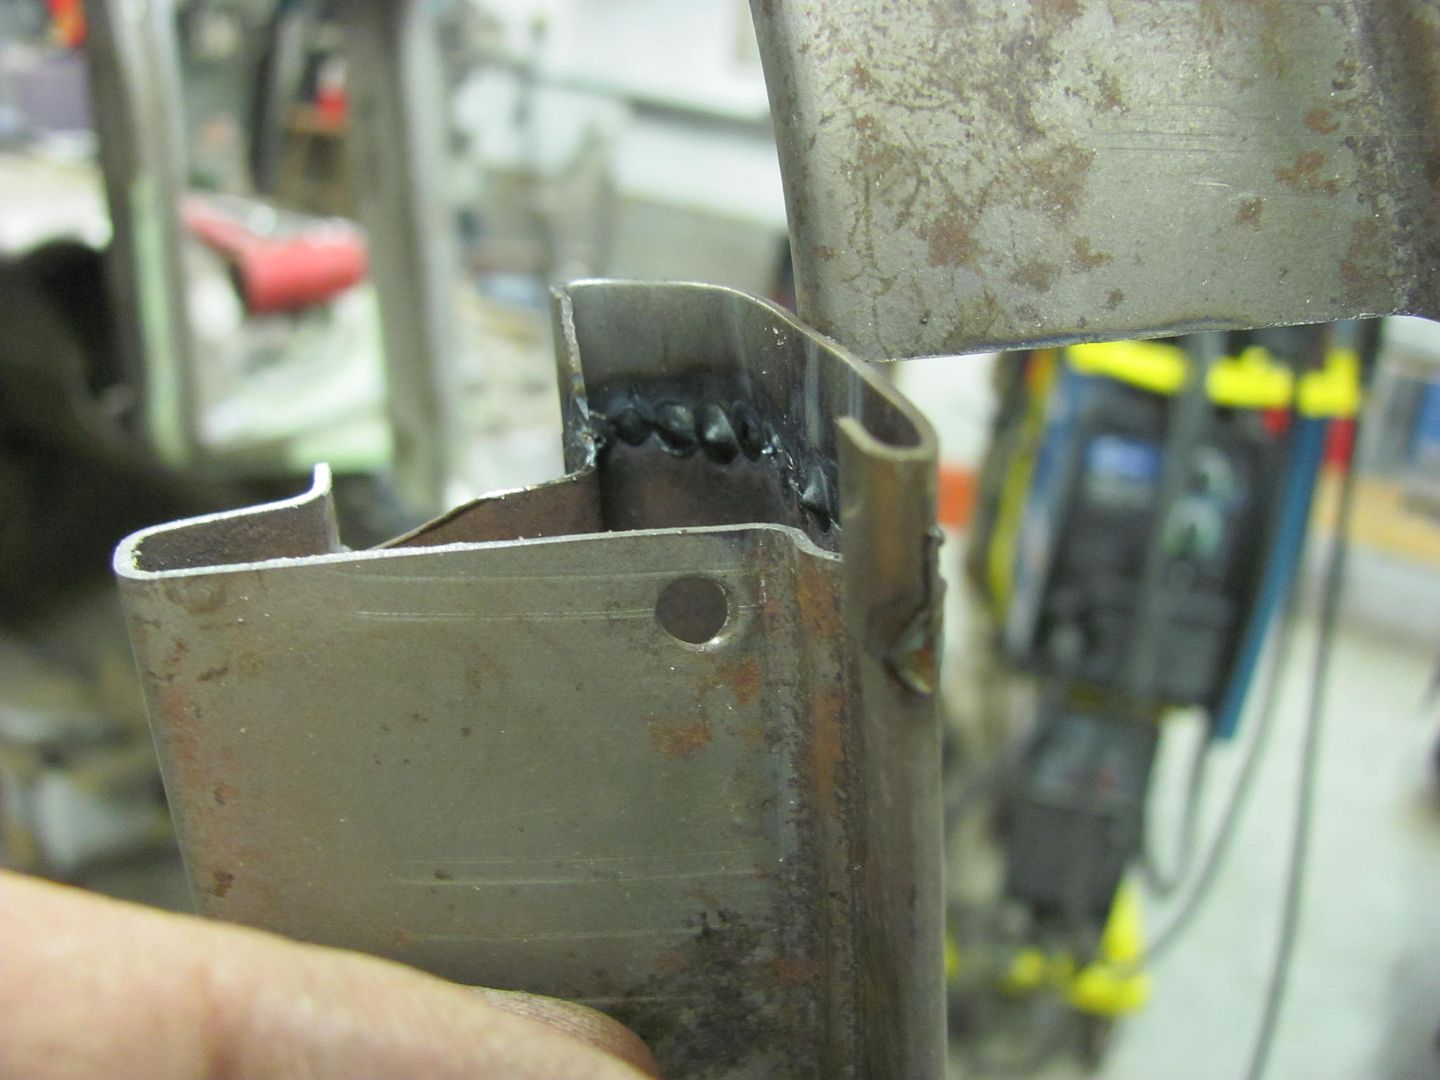 Yeah, this will be much better... 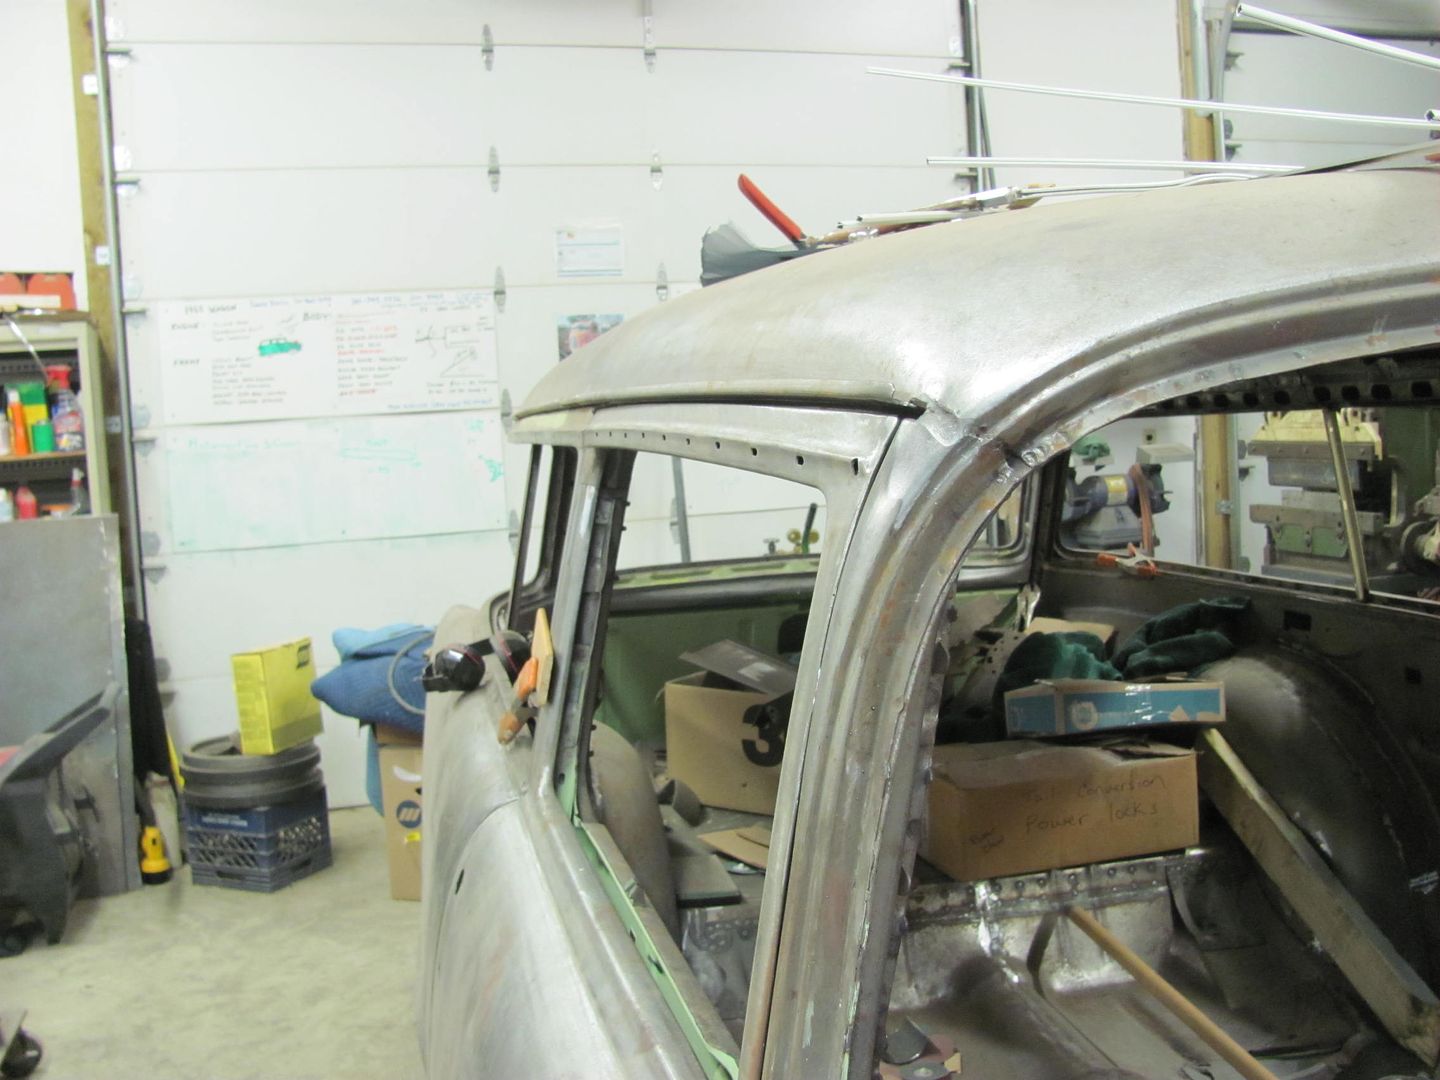 One seam down, one to go...  ....and Kyle tackled his first welding project this evening.. 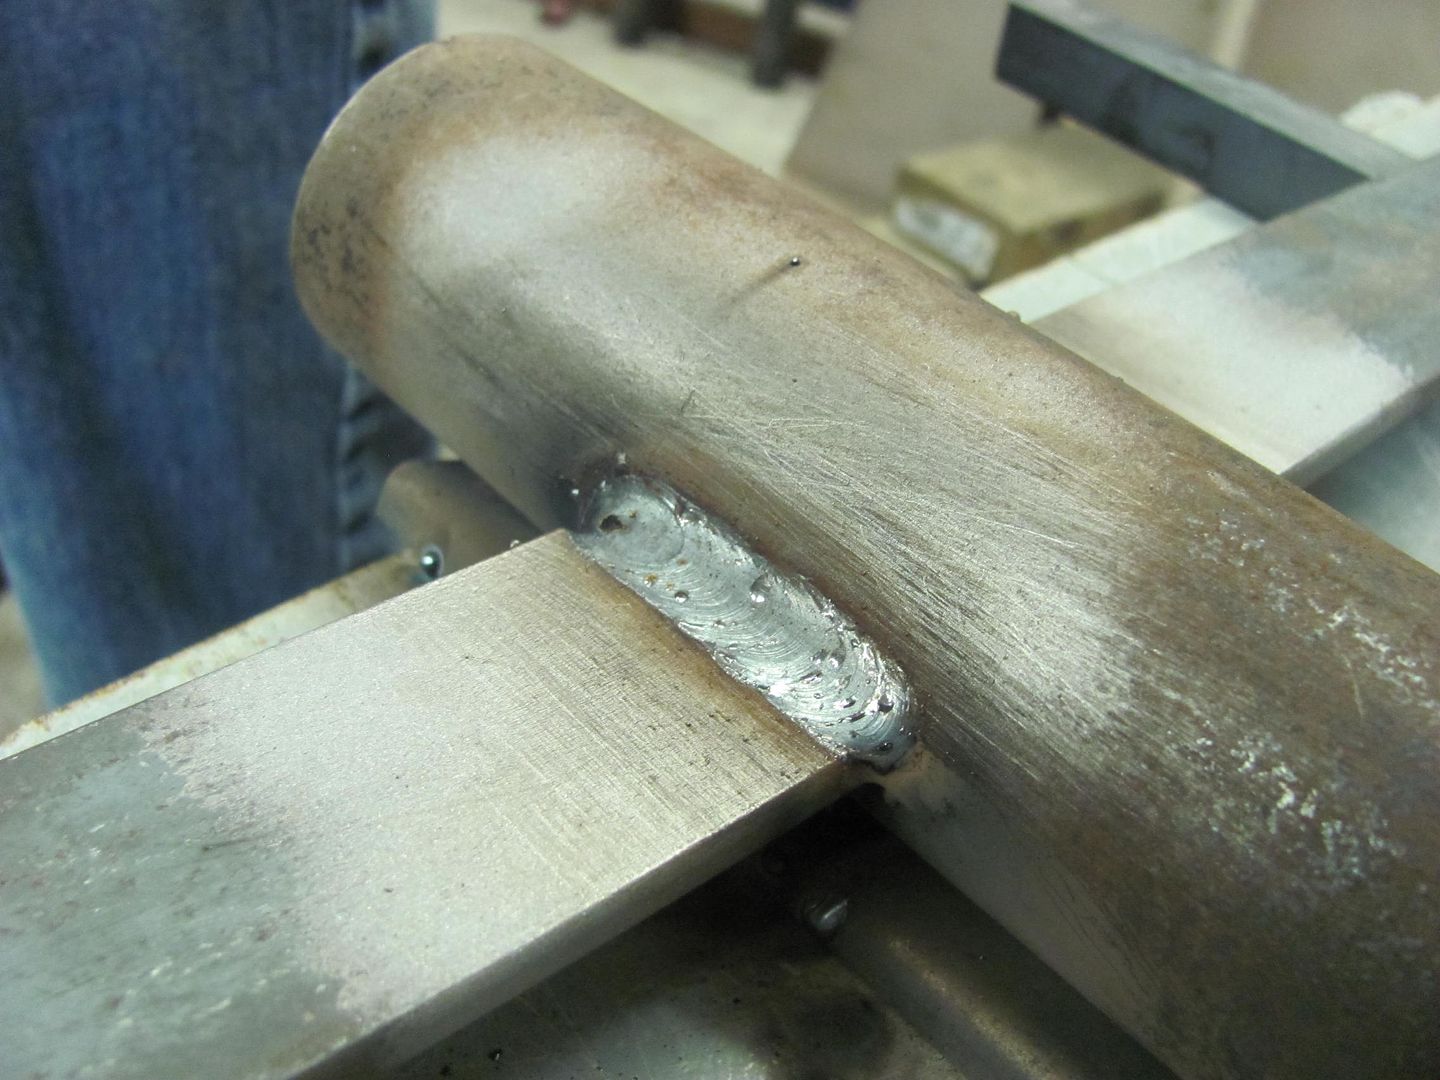 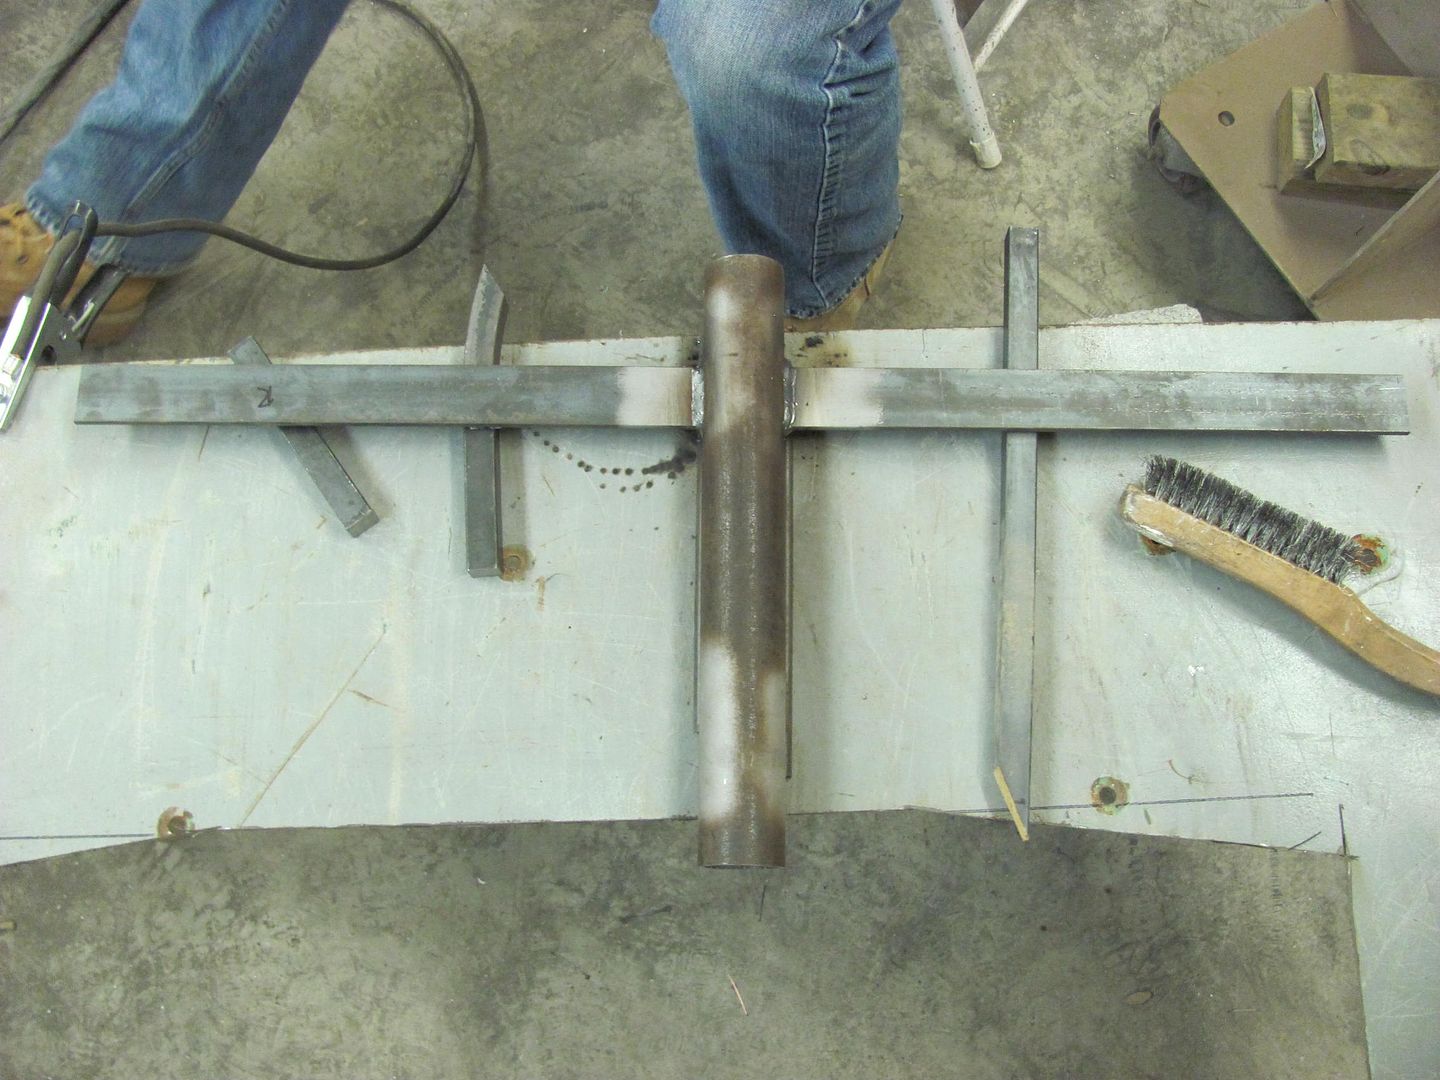 until next time, Merry Christmas to all!
__________________
Robert |
|
|
|
|
12-24-2014, 06:16 PM
|
#297 |
|
6>8 Plugless........
Join Date: Sep 2007
Location: Prairie City, Ia
Posts: 17,135
|
Re: 55 Wagon Progress
Very nice work, and I hope you and your family have a very Merry Christmas as well!
__________________
Ryan 1972 Chevy Longhorn K30 Cheyenne Super, 359 Inline 6 cylinder, Auto Trans, Tilt, Diesel Tach/Vach, Buckets, Rare Rear 4-link and air ride option Build Thread 1972 GMC Sierra Grande Longhorn 4x4 1972 Chevy Cheyenne Super K20 Long Step side tilt, tach, tow hooks, AC, 350 4 speed 1972 C10 Suburban Custom Deluxe 1969 Chevy milk truck 1971 Camaro RS 5.3 BTR STG3 Cam Super T10 1940 Ford 354 Hemi 46RH Ford 9" on air ride huge project Tired of spark plugs? Check this out. |
|
|
|
|
12-27-2014, 12:00 AM
|
#298 |
|
Registered User
Join Date: Jan 2013
Location: Leonardtown, MD
Posts: 1,633
|
Re: 55 Wagon Progress
Thanks!
Had some time this evening so worked a bit more on the wagon.. Finished up the door paint fixture.. will be adding some ballast to the base.. 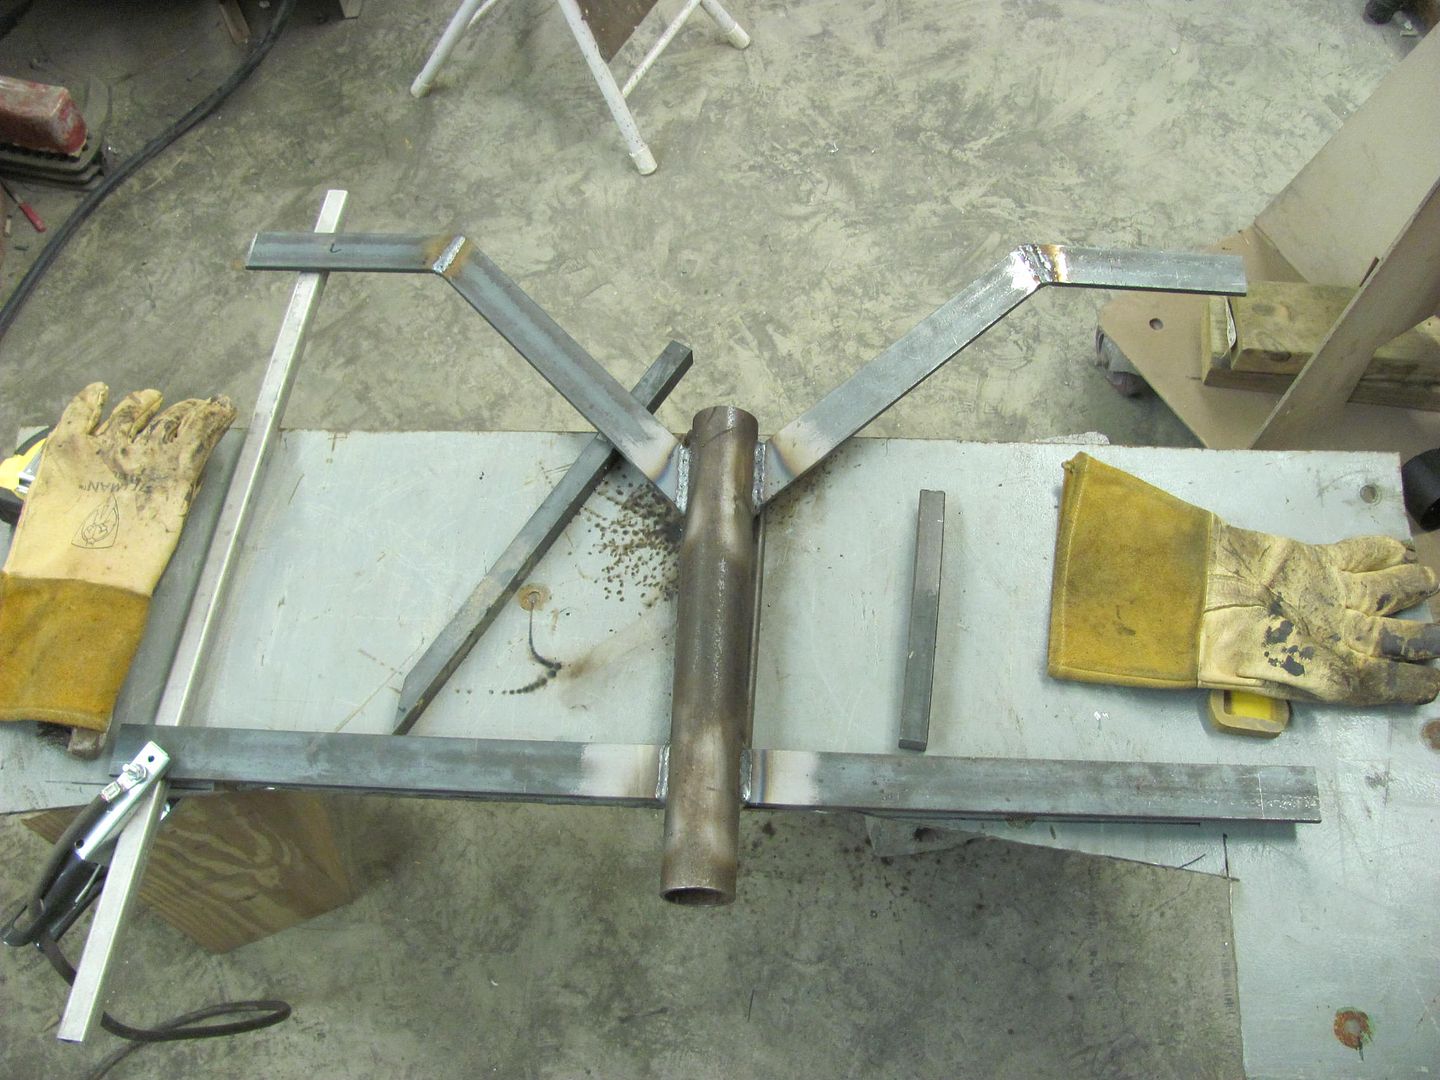 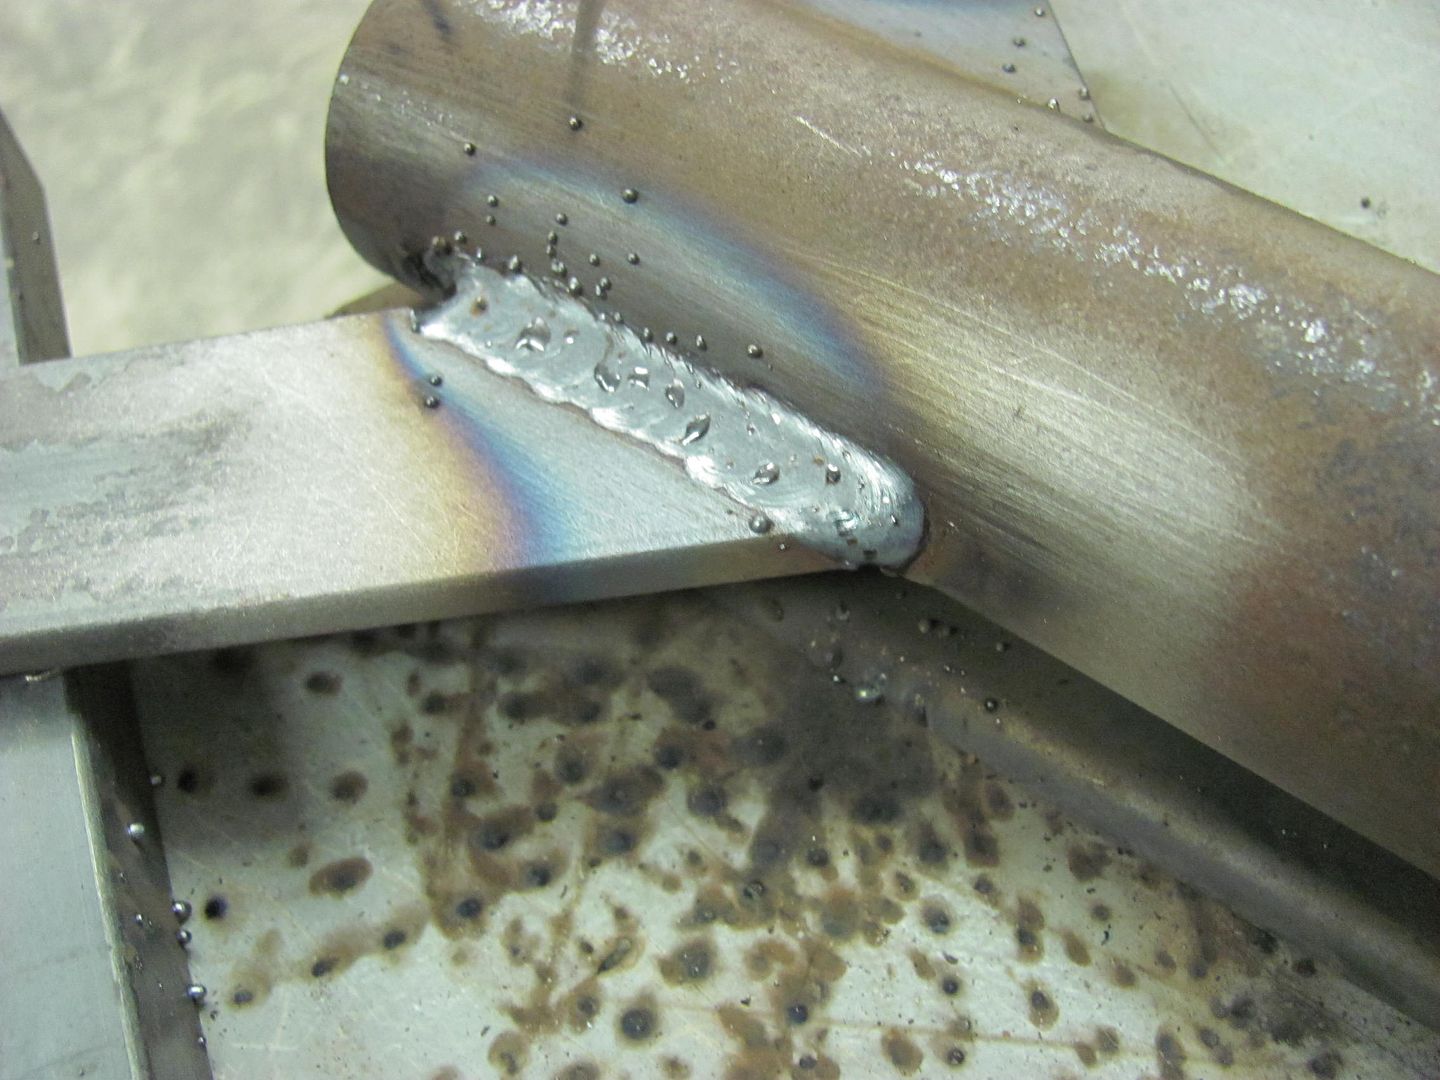 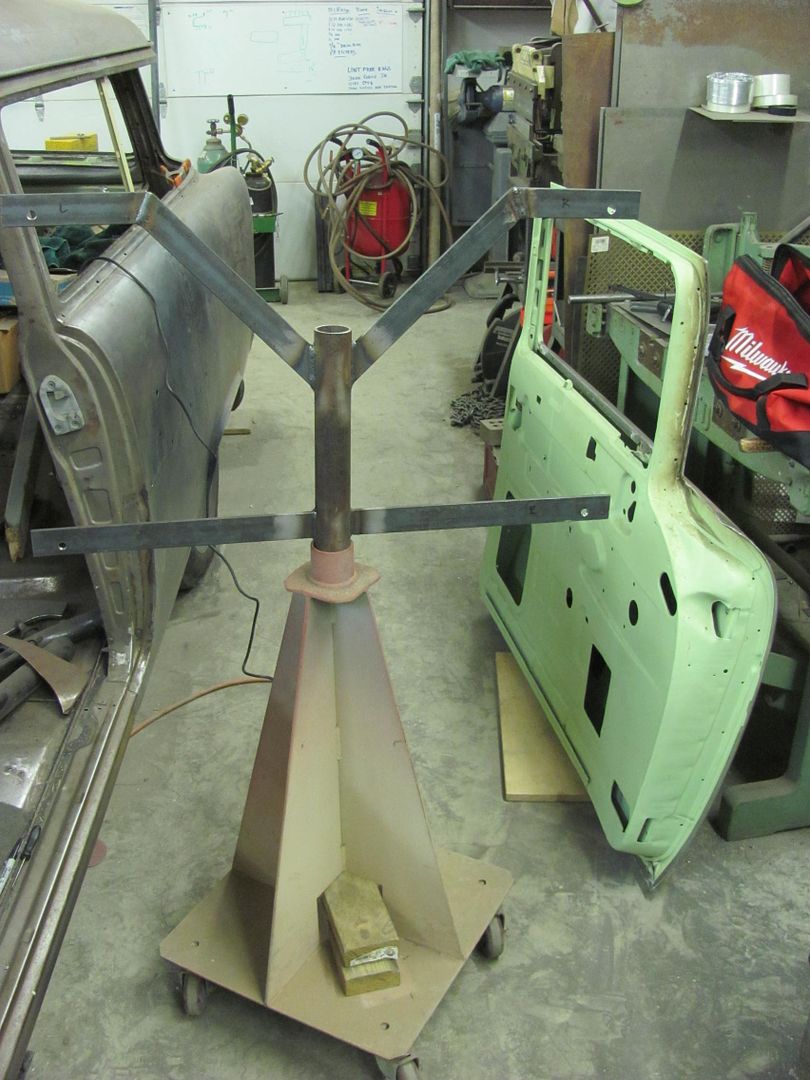 Just to compare the driver's door and fitment / body line alignment to what we had to modify on the passenger side: 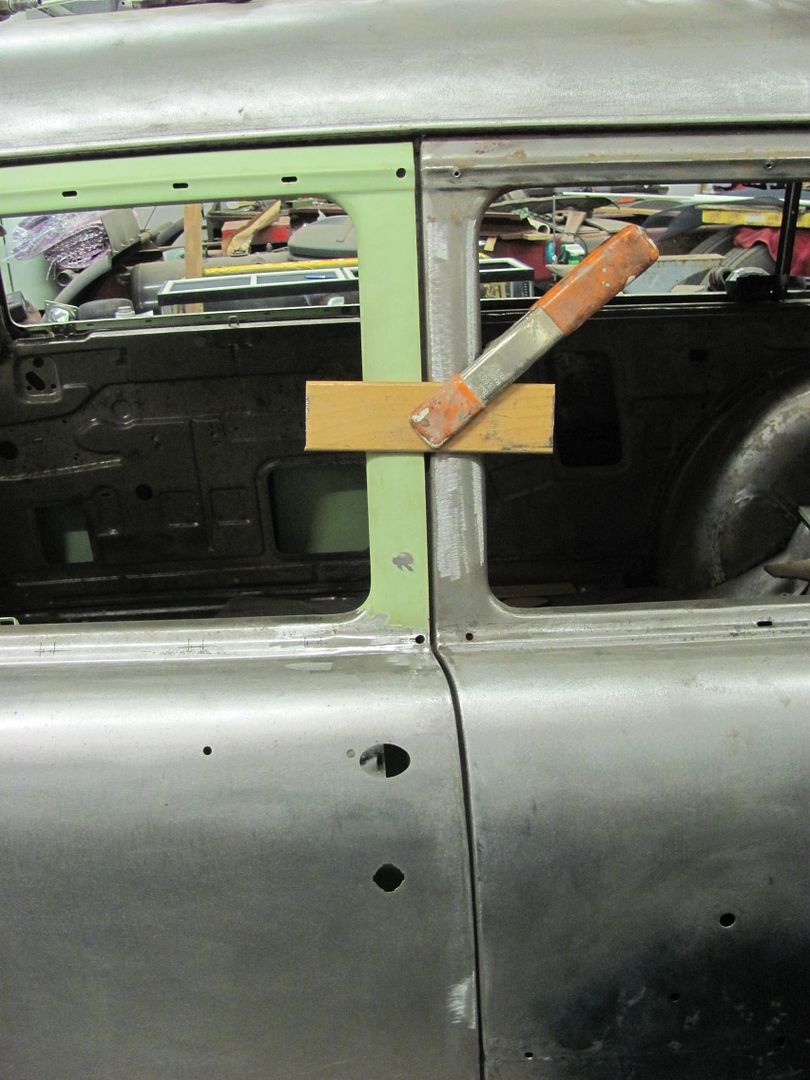 Paint stick gap width at the top rear, all body lines straight across, about as close as you can get to what should be there. 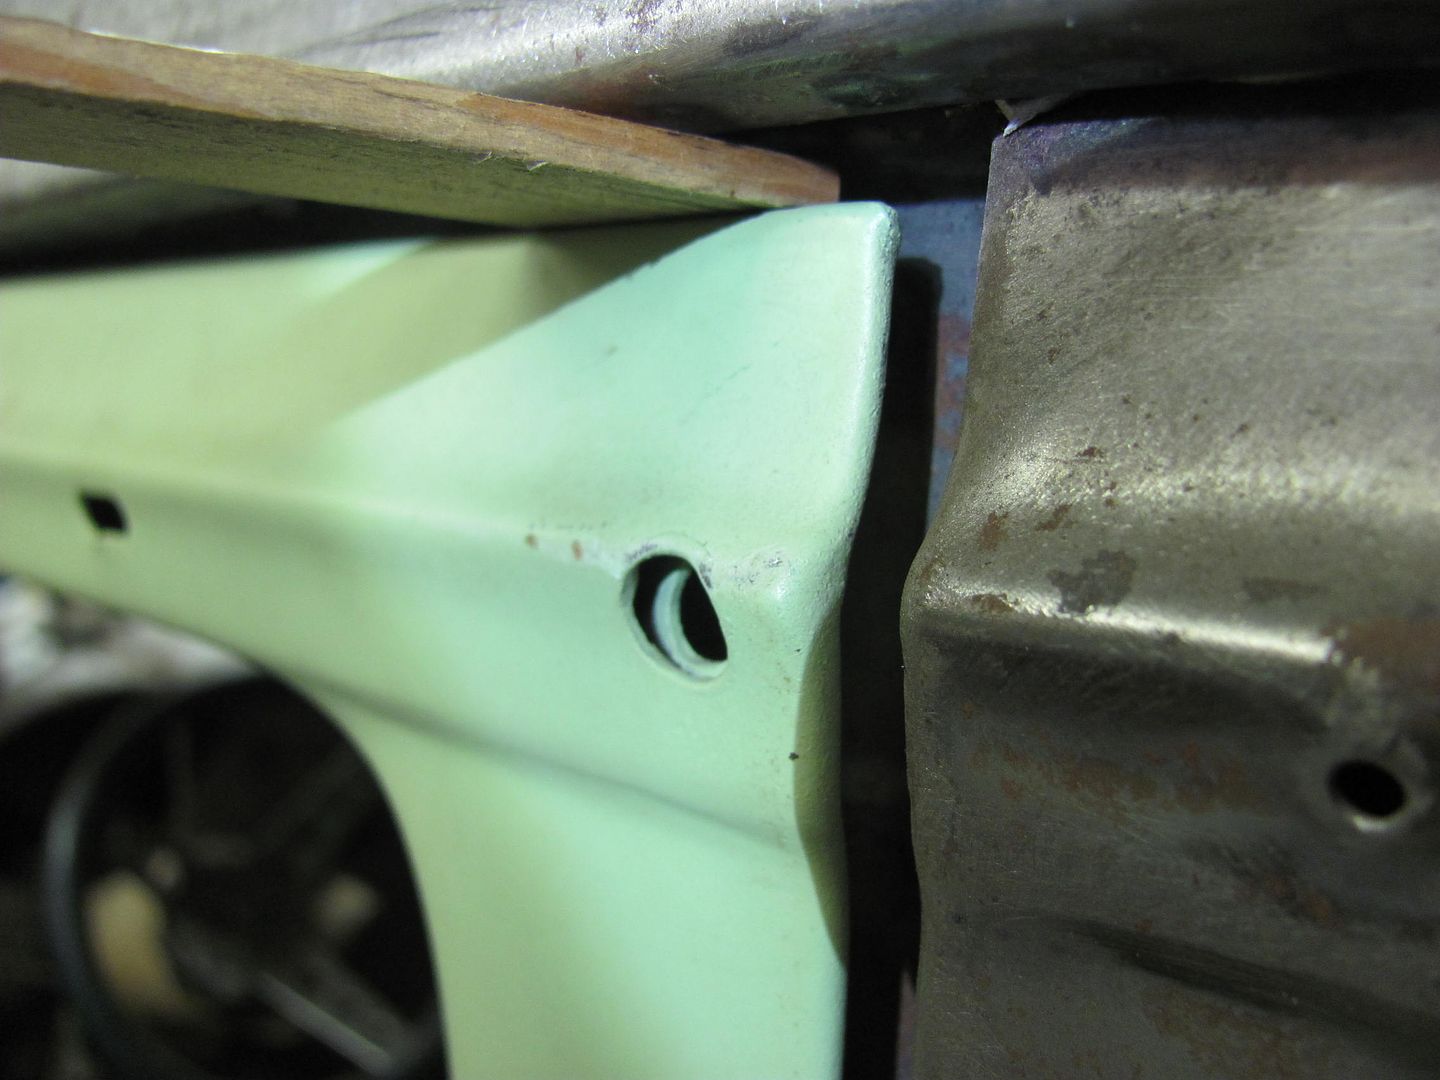 Also needed to finish the slotted holes for the trim under the door's window. 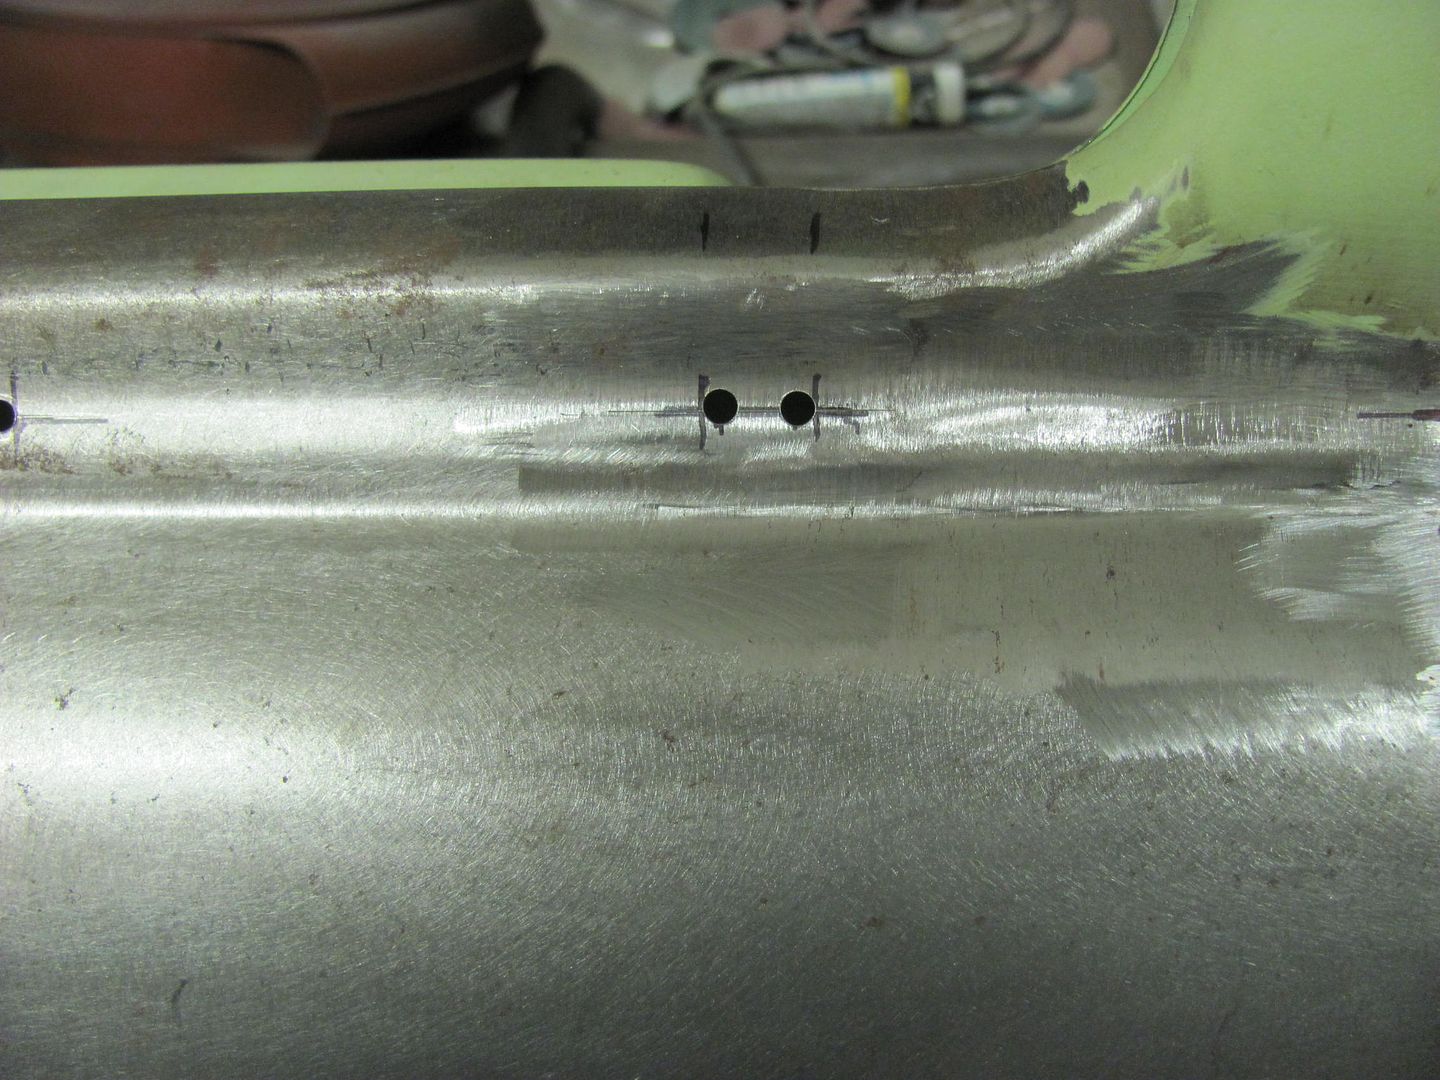 We'll use a carbide ball nose in the Dremel... 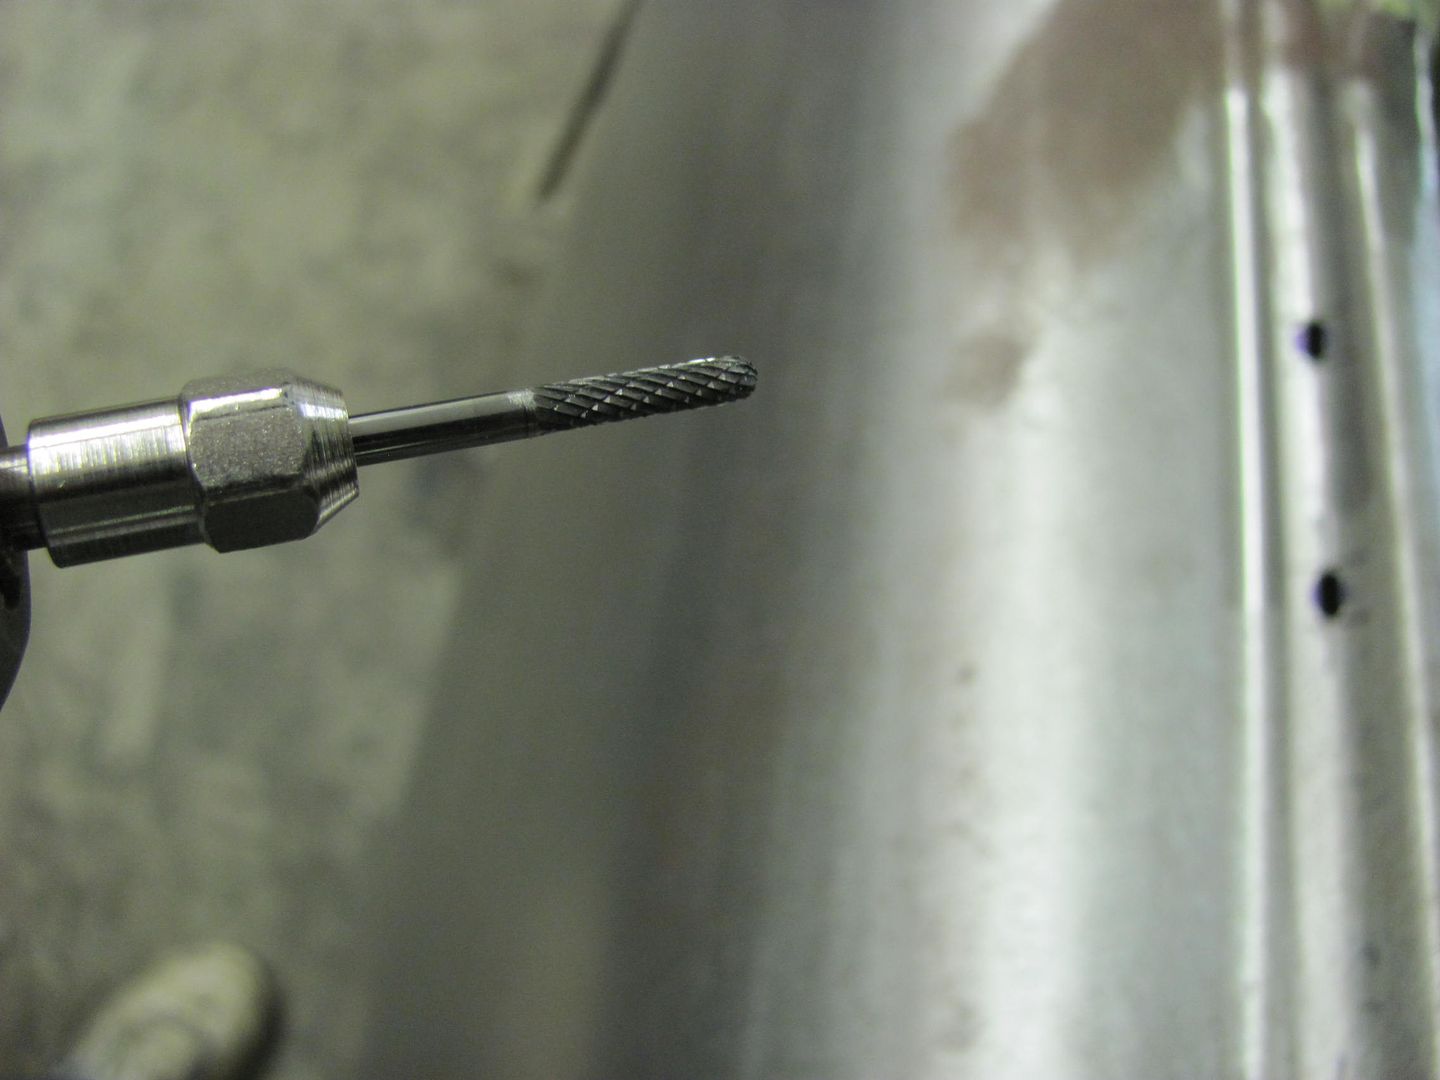 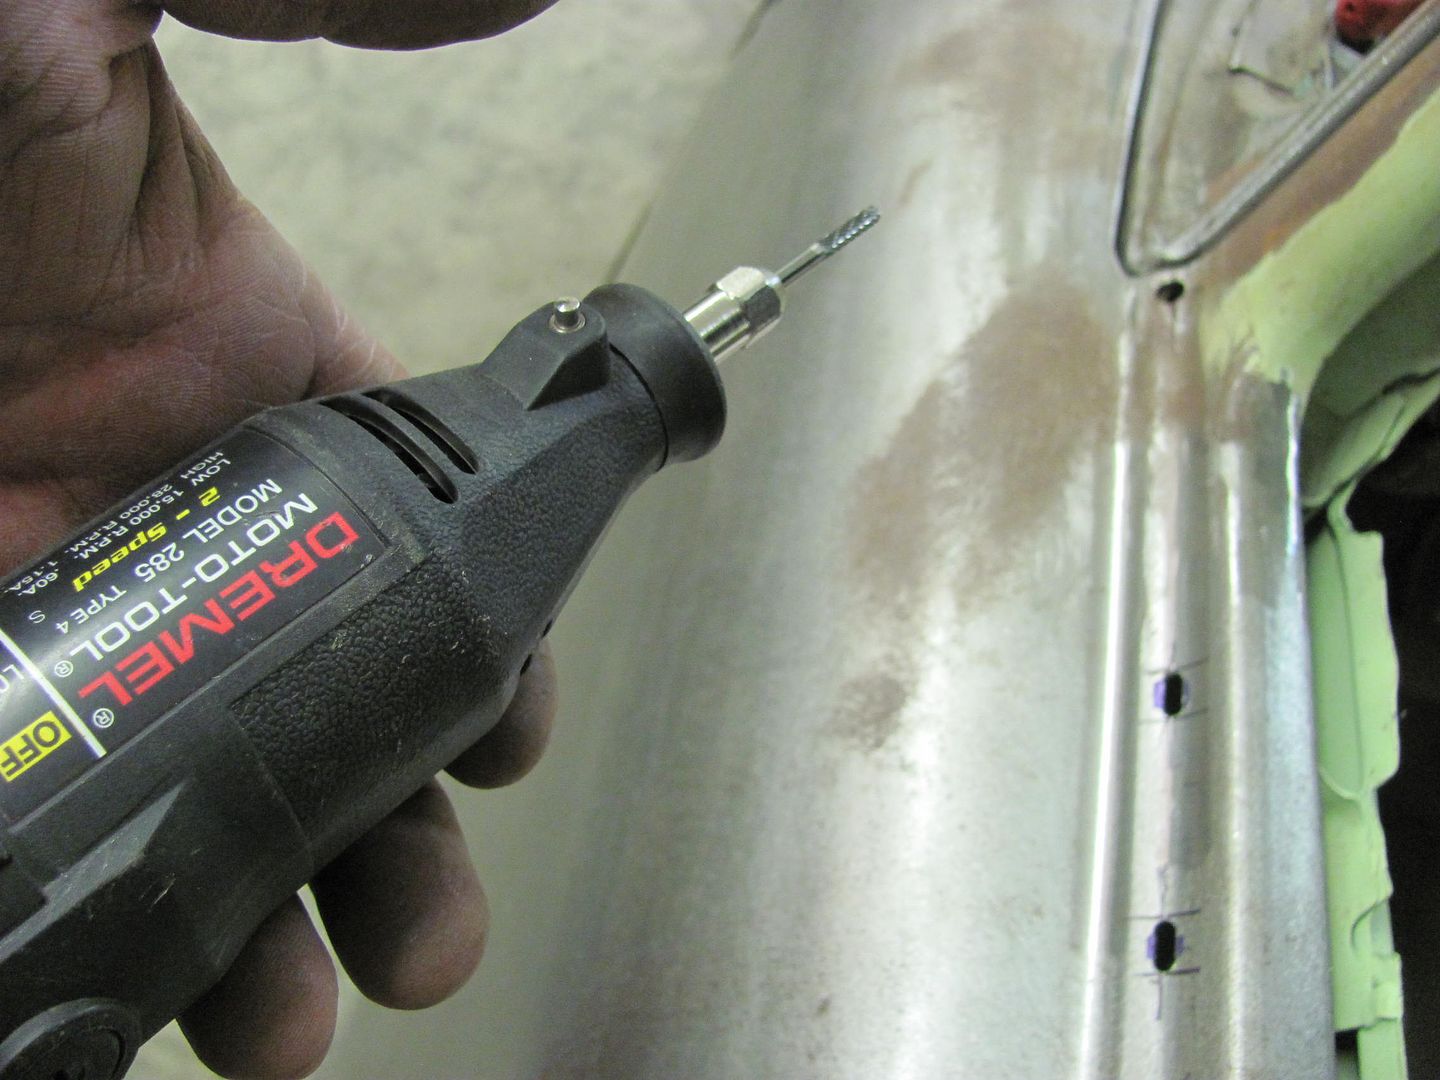 Straightedge spanned across two slots for a more precise scribed line..  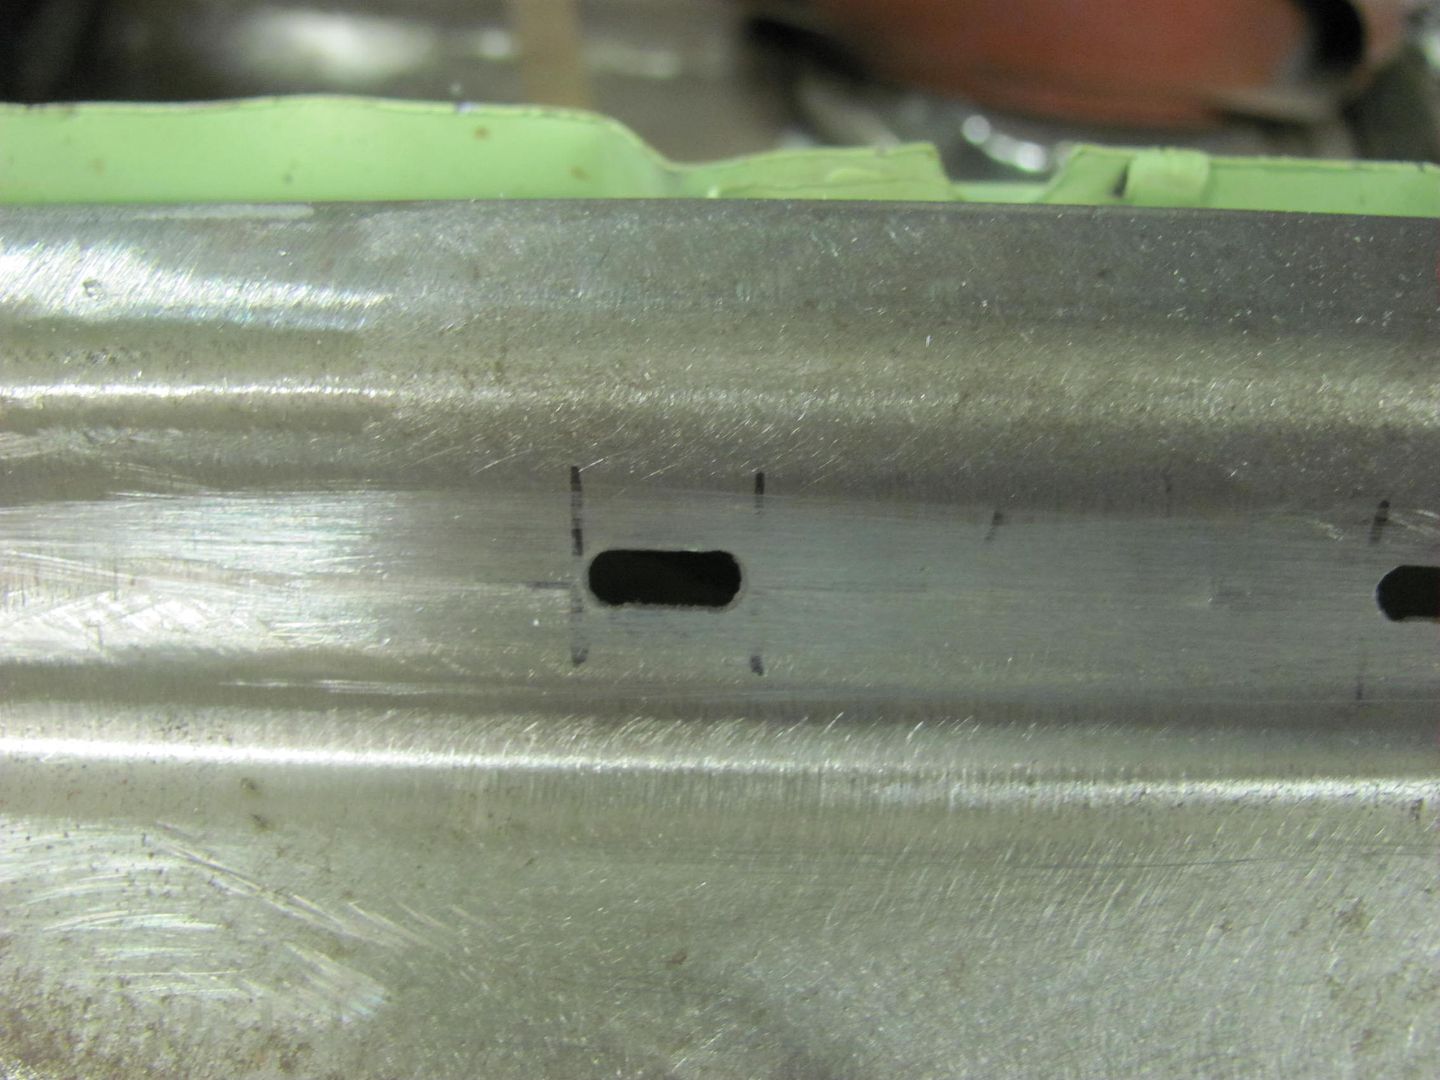 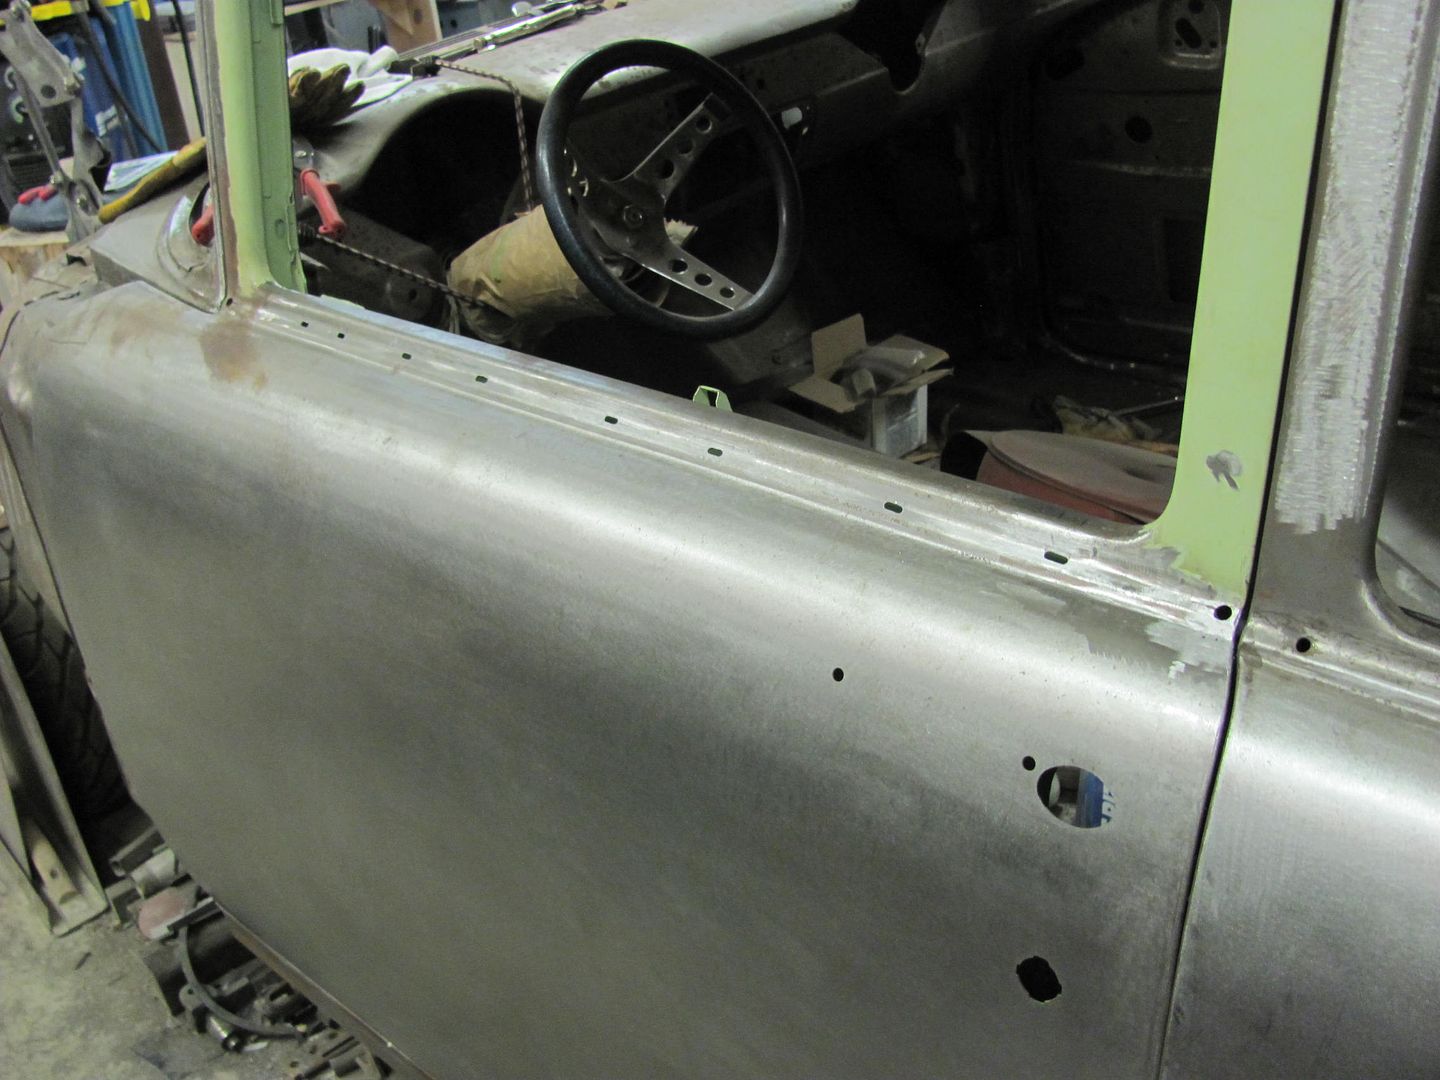
__________________
Robert |
|
|
|
|
12-28-2014, 07:04 PM
|
#299 |
|
Registered User
Join Date: Jan 2013
Location: Leonardtown, MD
Posts: 1,633
|
Re: 55 Wagon Progress
Today Kyle worked on another paint fixture for the wagon, one to hold the front fenders, while I started on adding the weatherstrip and drain holes in the bottom of the driver's door. I had made new bottoms and hadn't gotten around to these holes just yet. I did save the old bottoms to use as patterns.
 The old was merely laid over the new and traced to get the horizontal alignment of the drain holes and weatherstrip holes. Then a more accurate measurement located the vertical dimension of the drain holes... 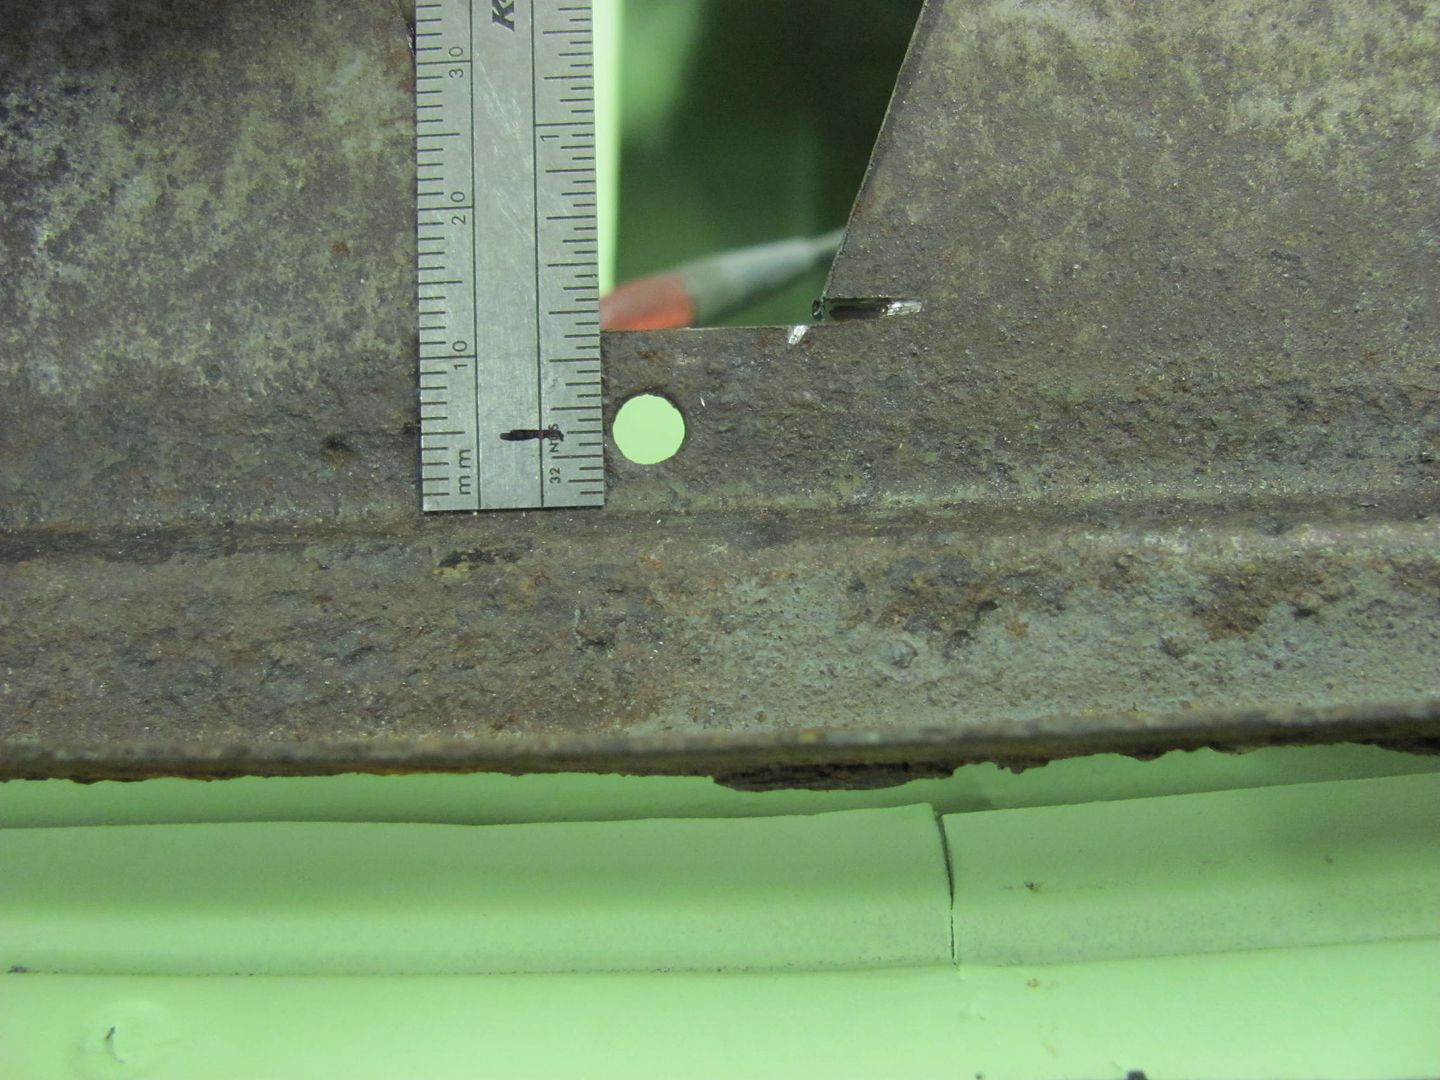 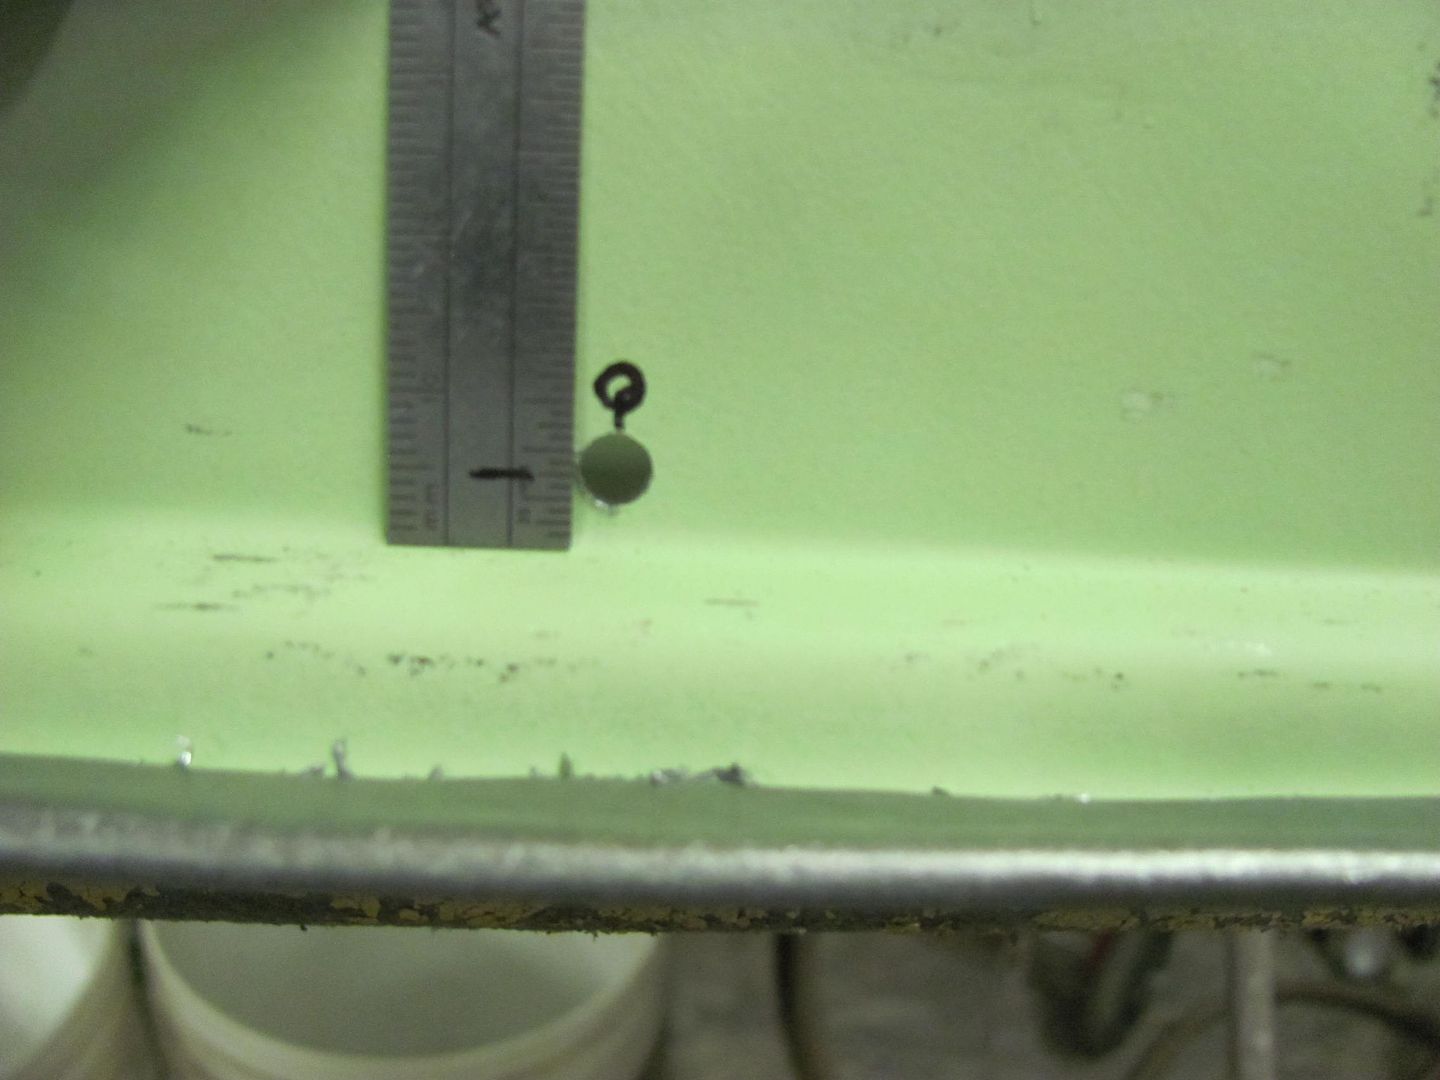 After drilling, a couple of twirls by hand of a 3/8 bit worked nicely to de-bur the holes, inside and out.. 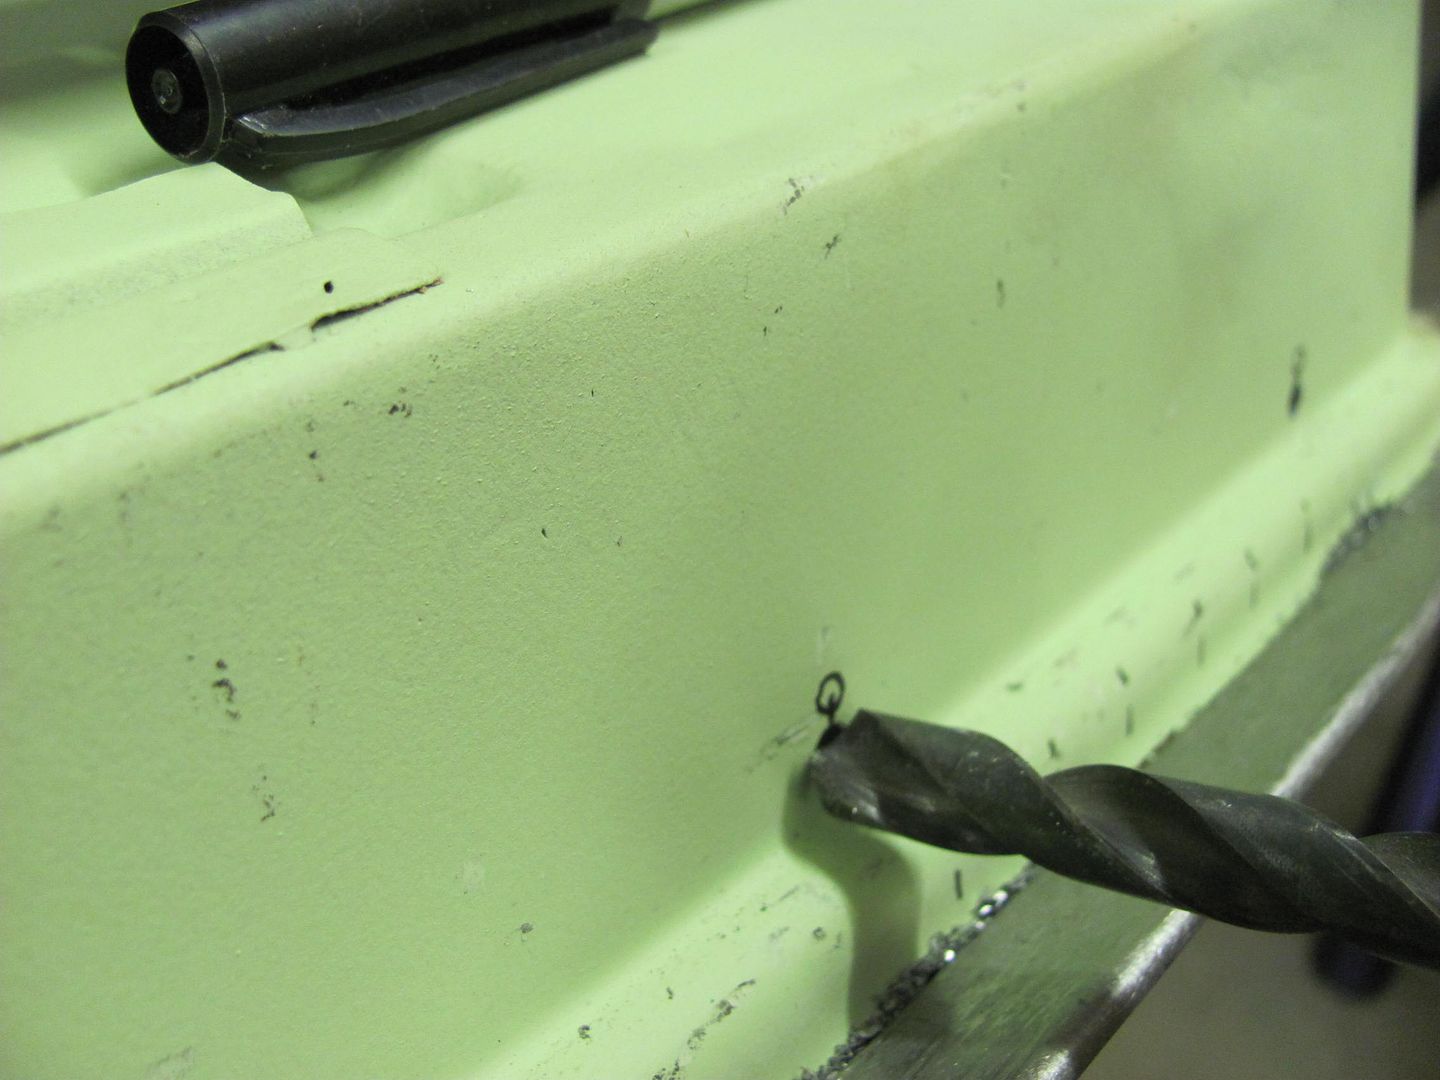 The end of the old section was cut out and trimmed to be able to use it as a scribing template.. 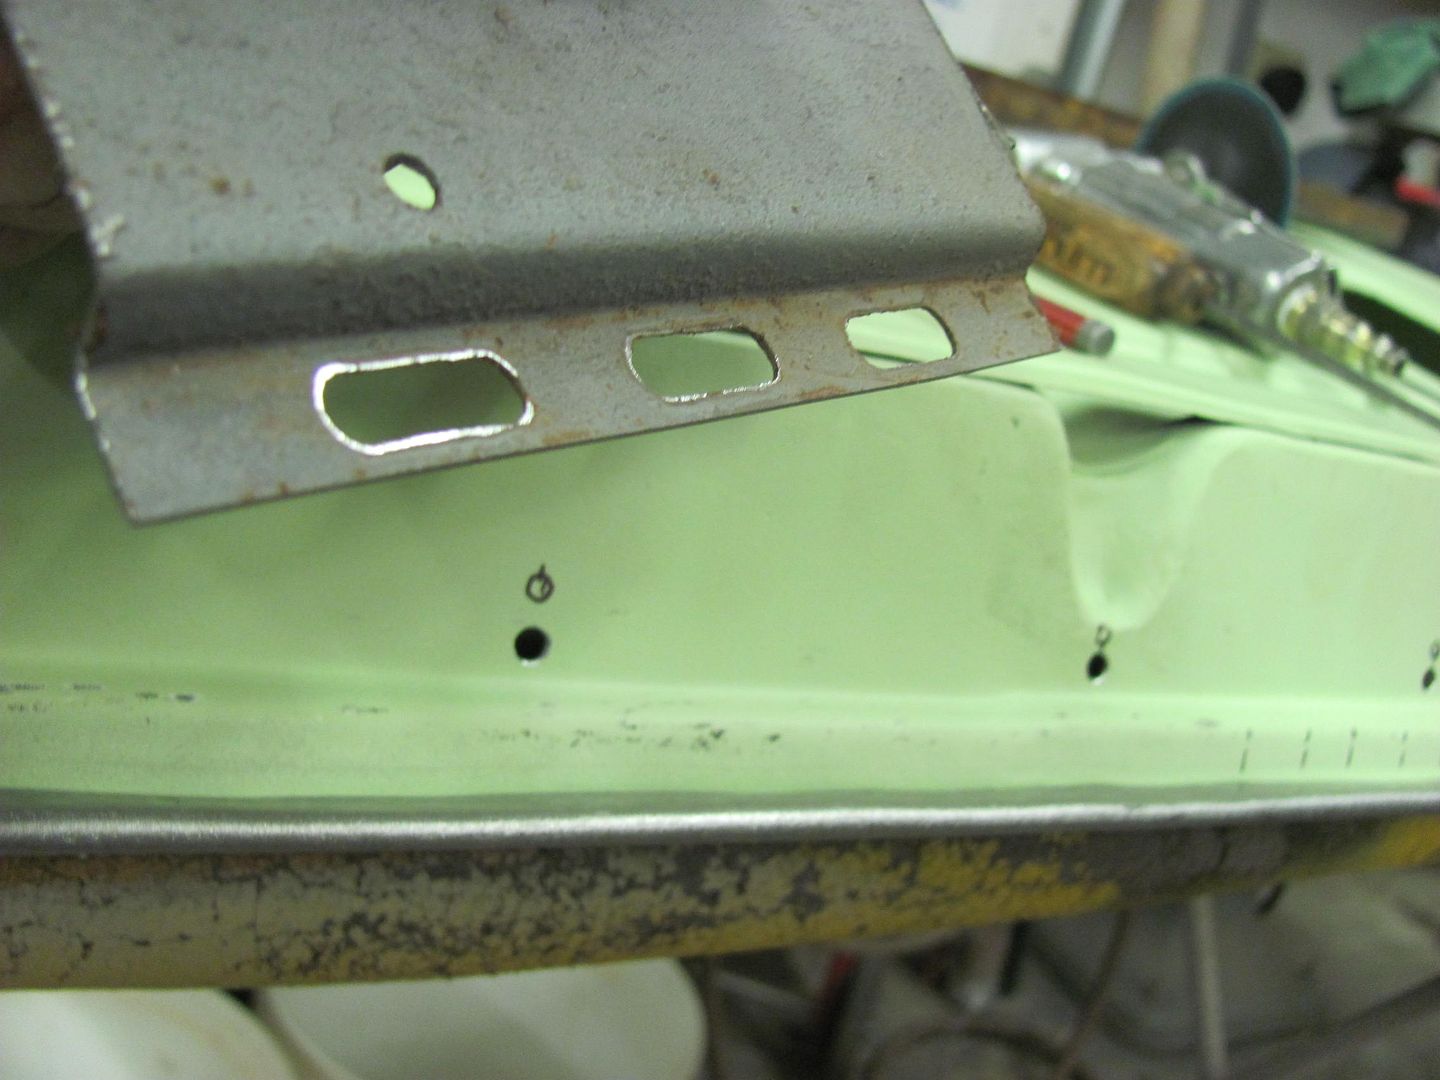 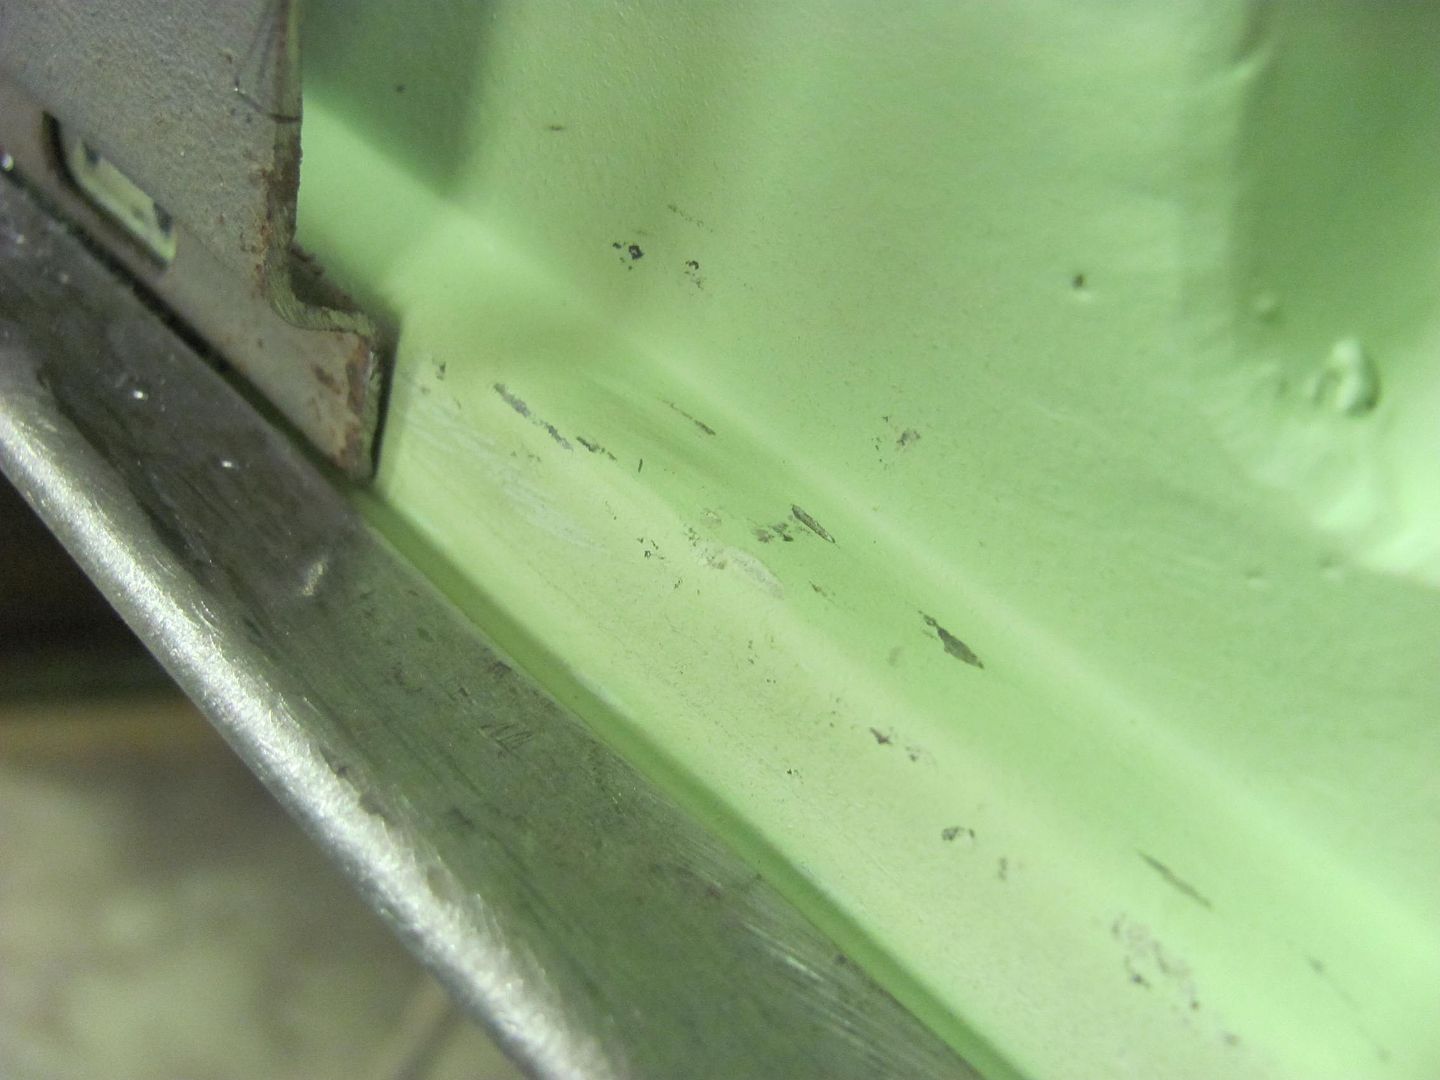 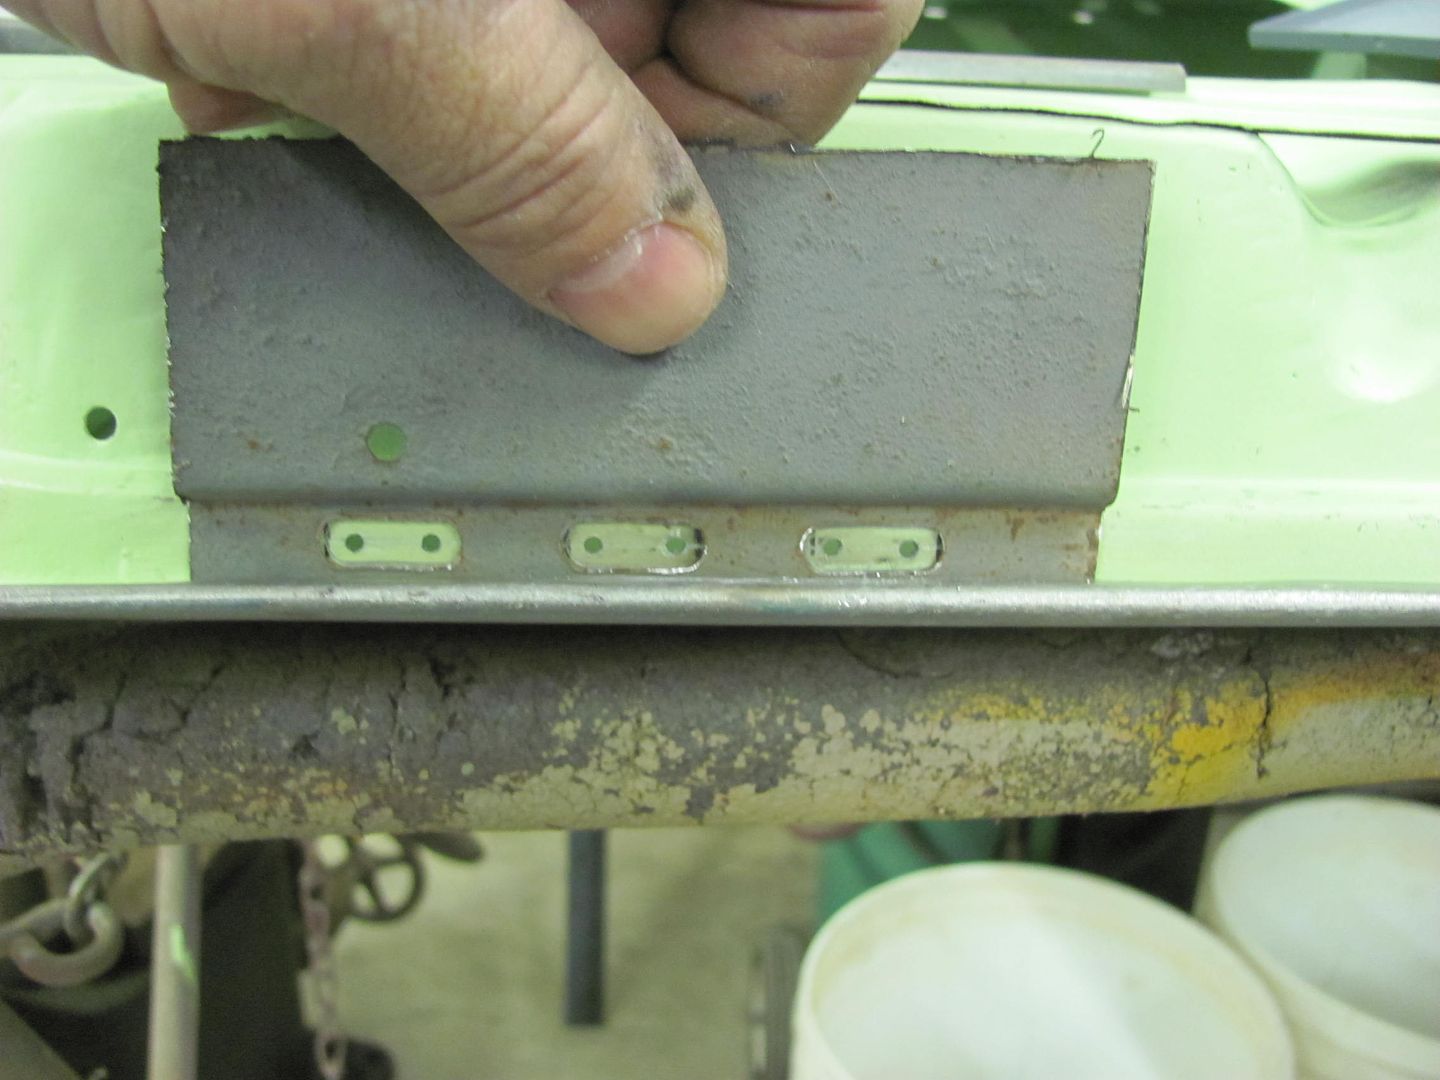 Using our same Dremel set up from the top slots..... 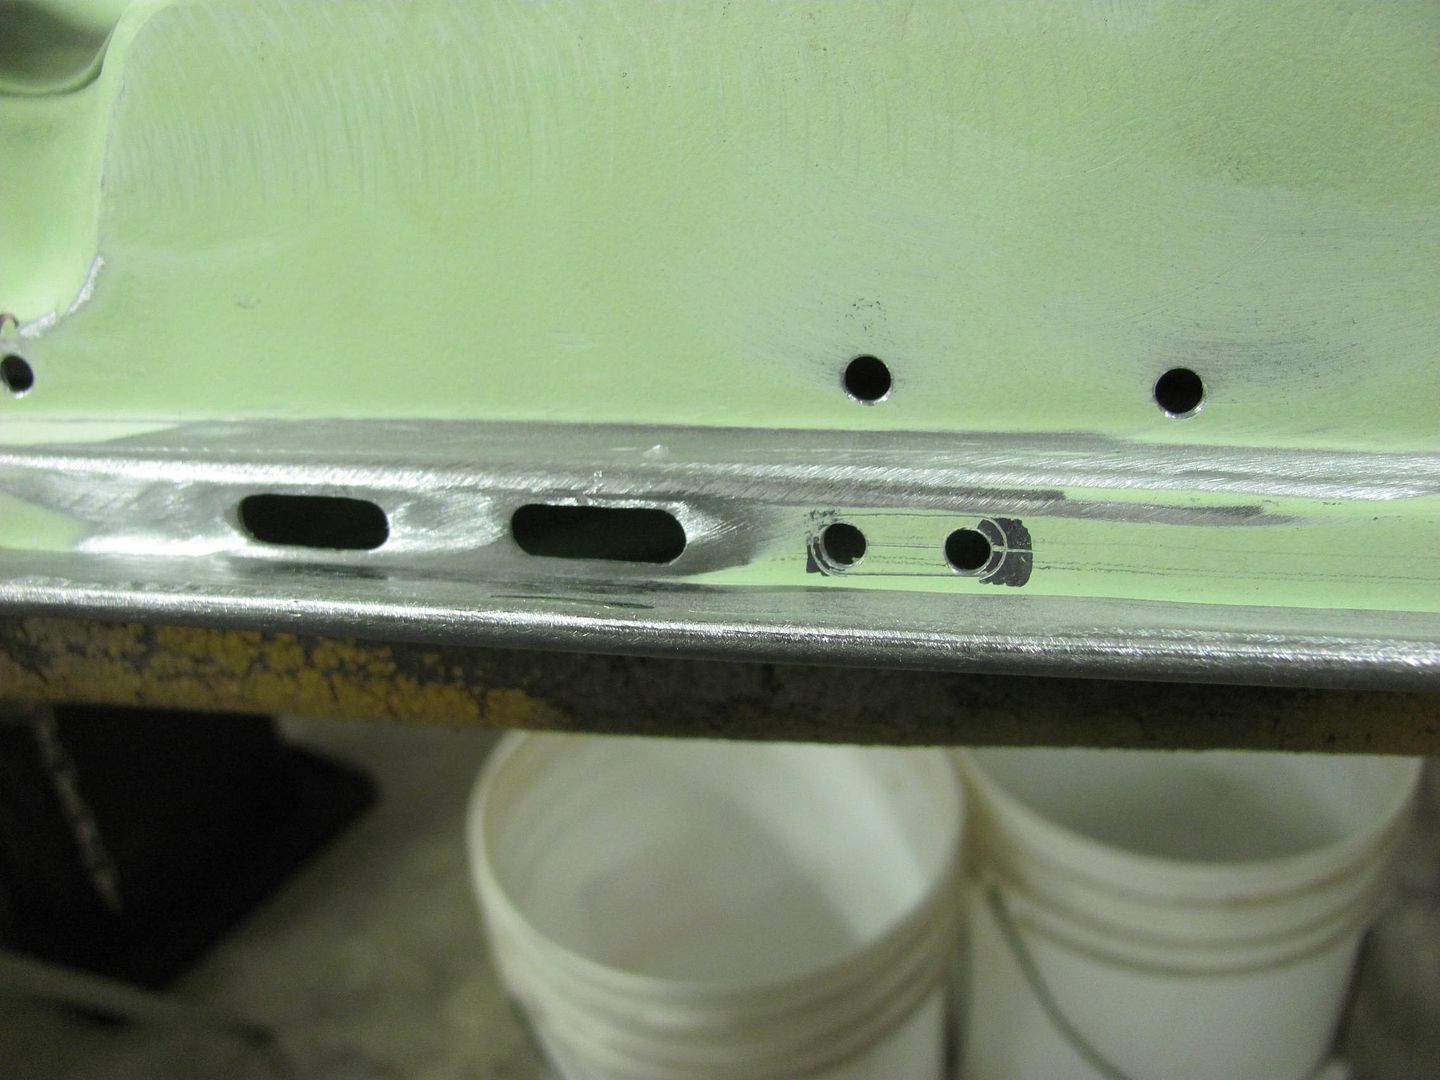 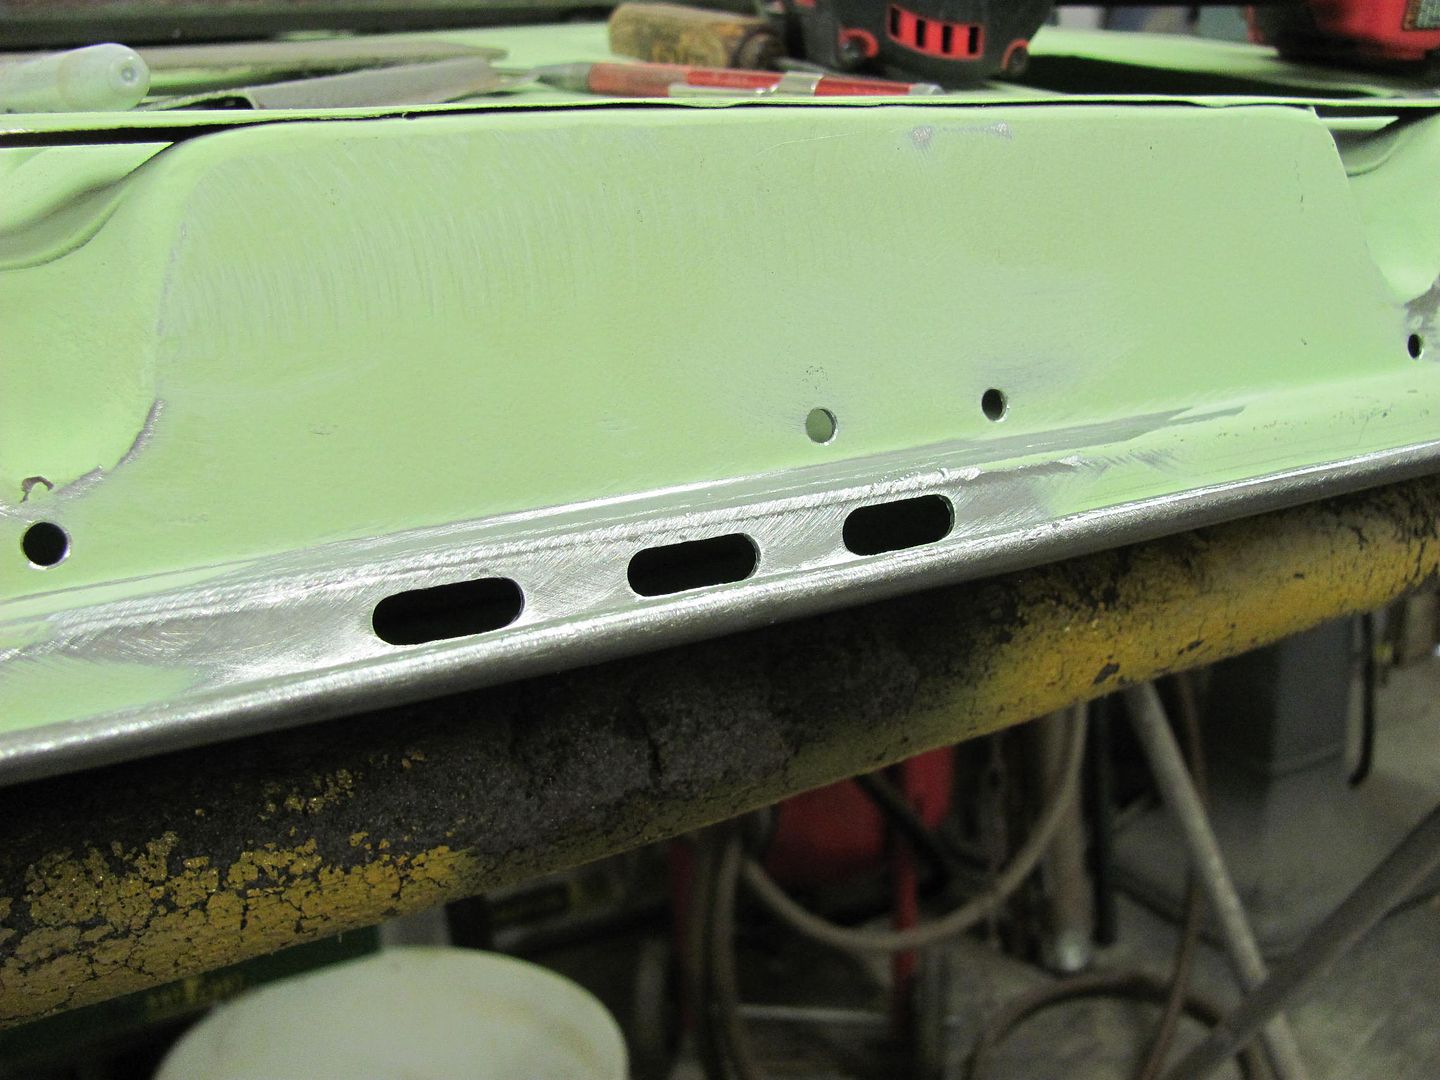 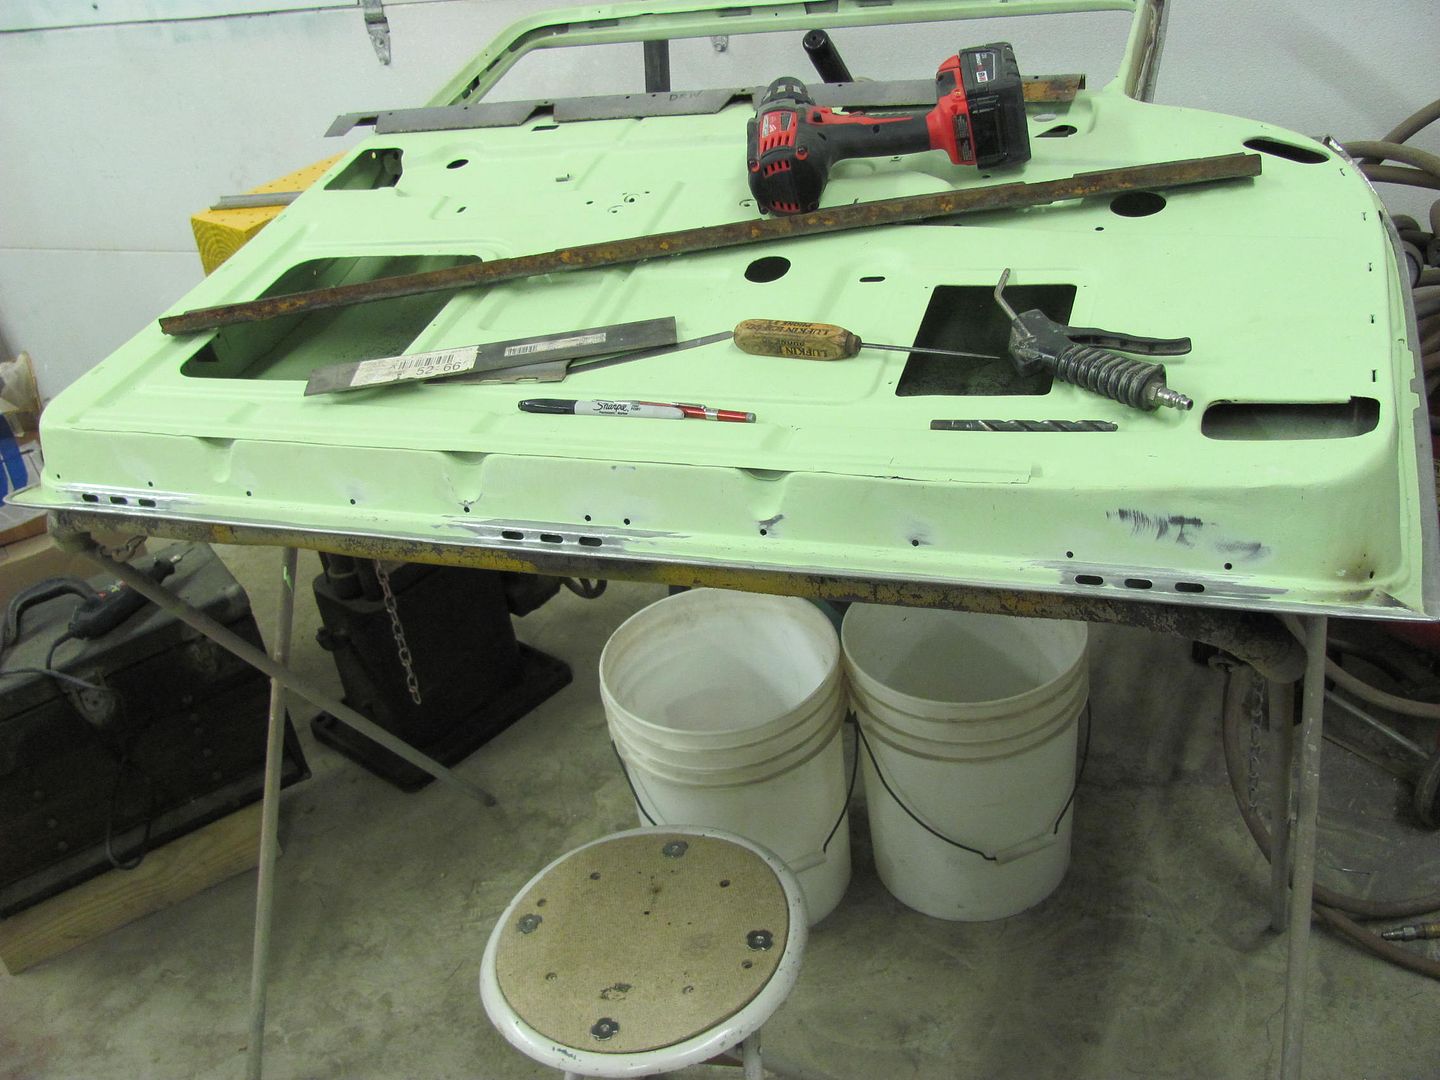 Kyle is getting the hang of this welding stuff..... 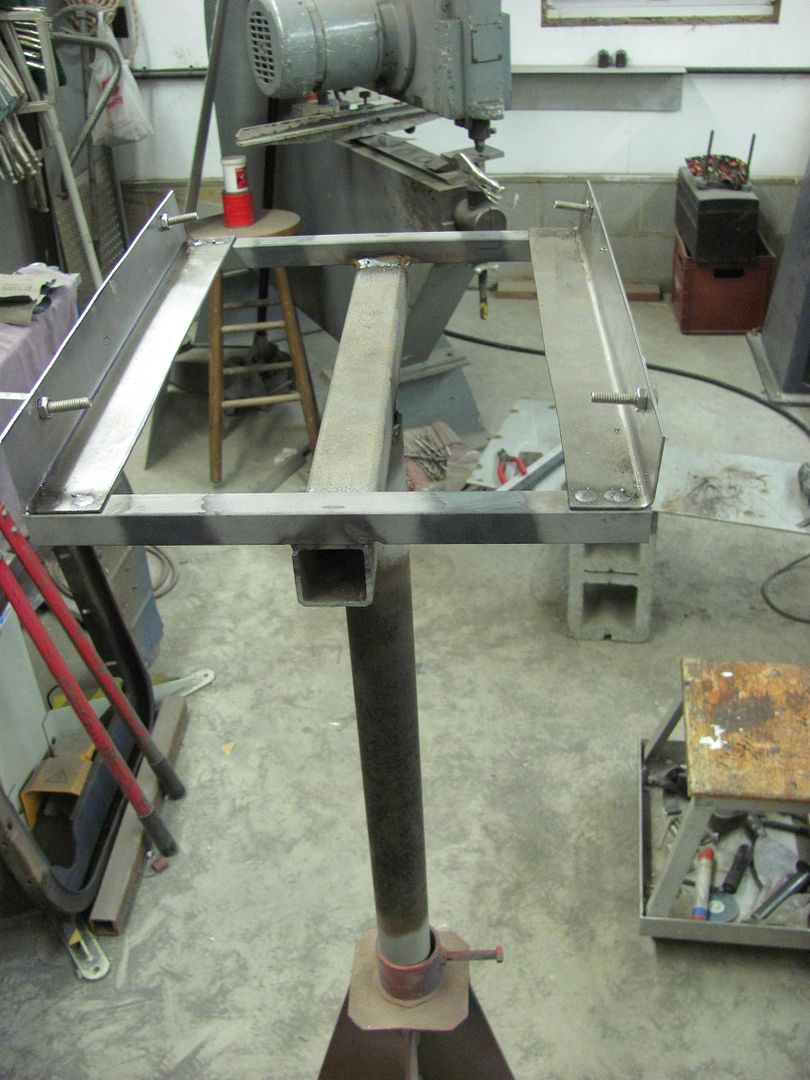 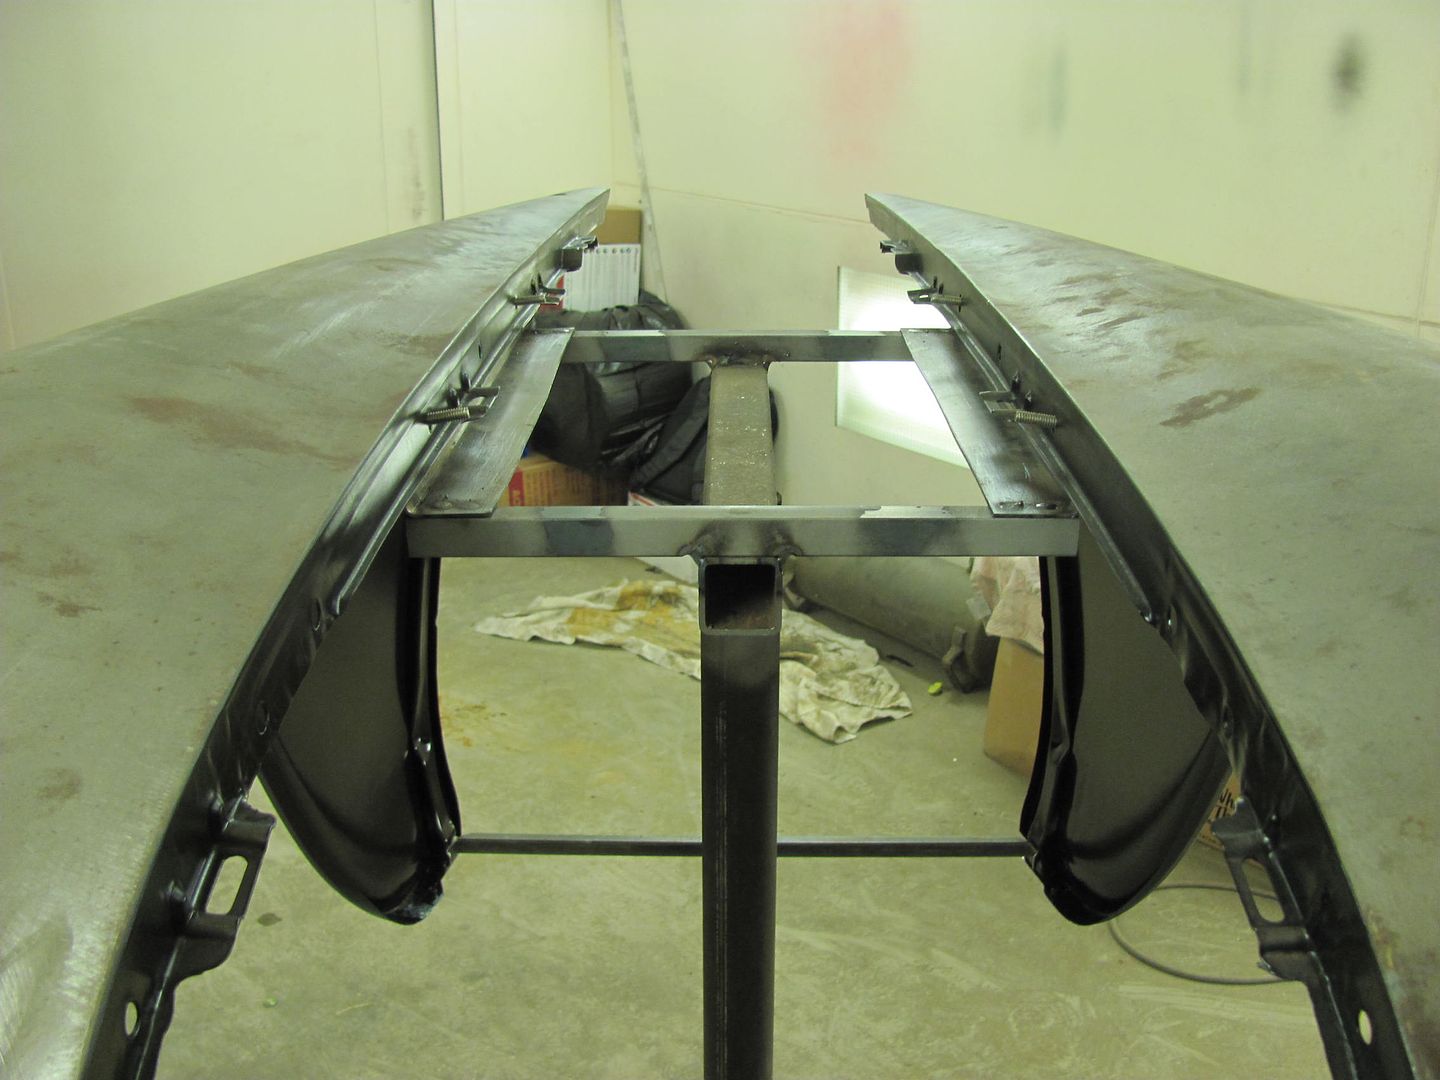 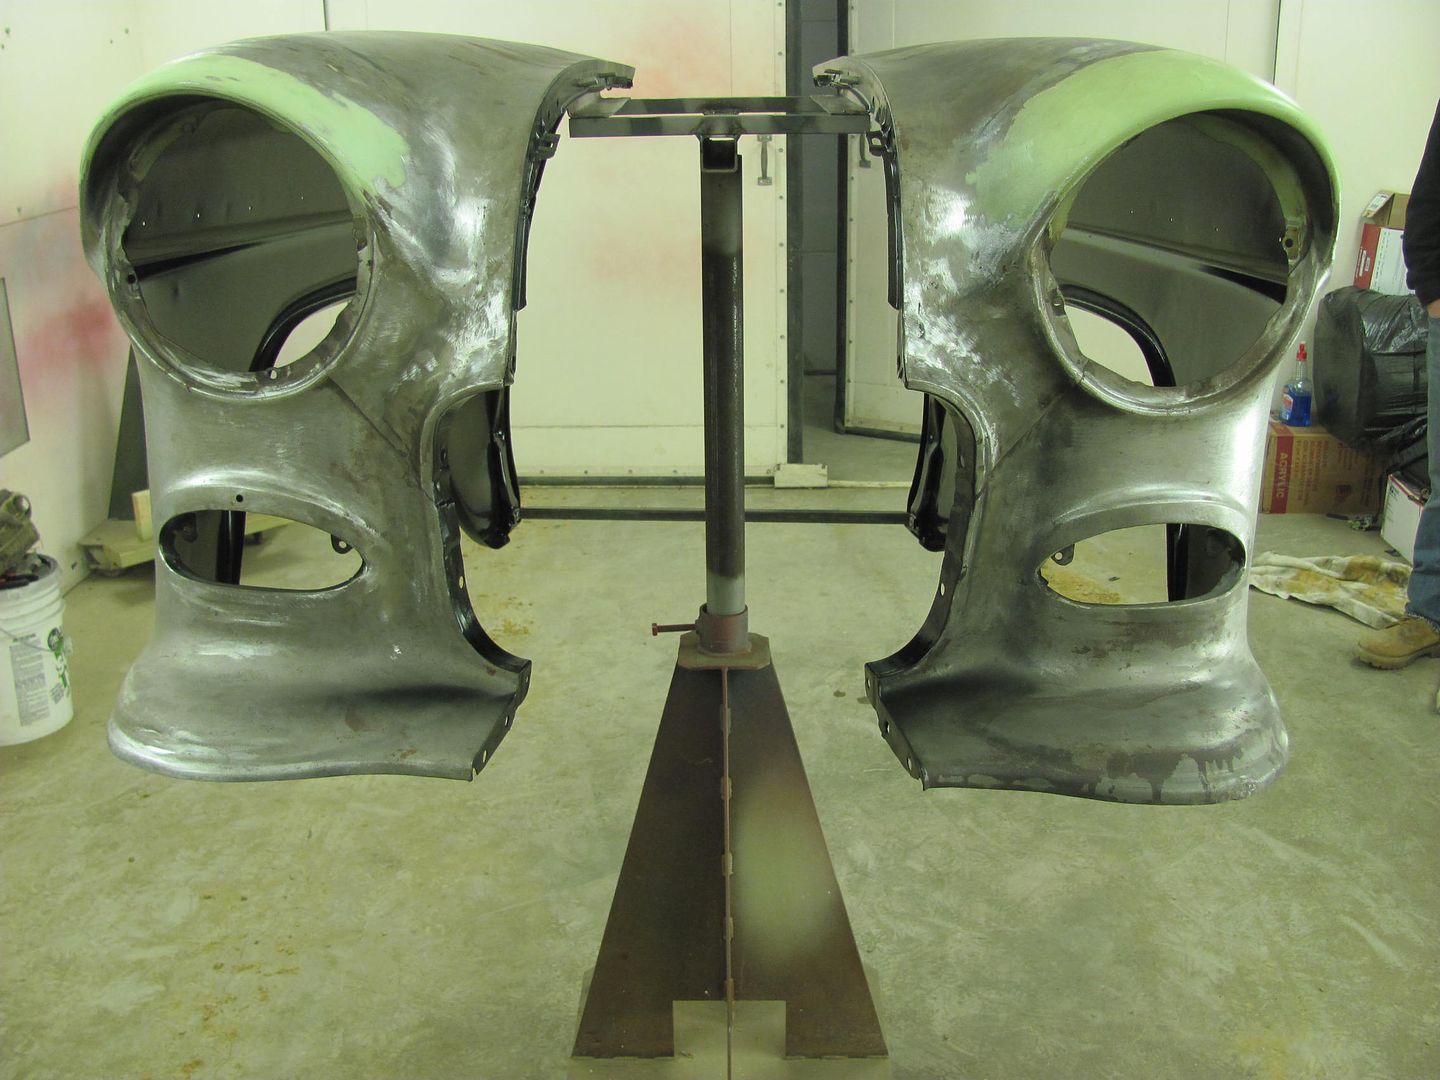 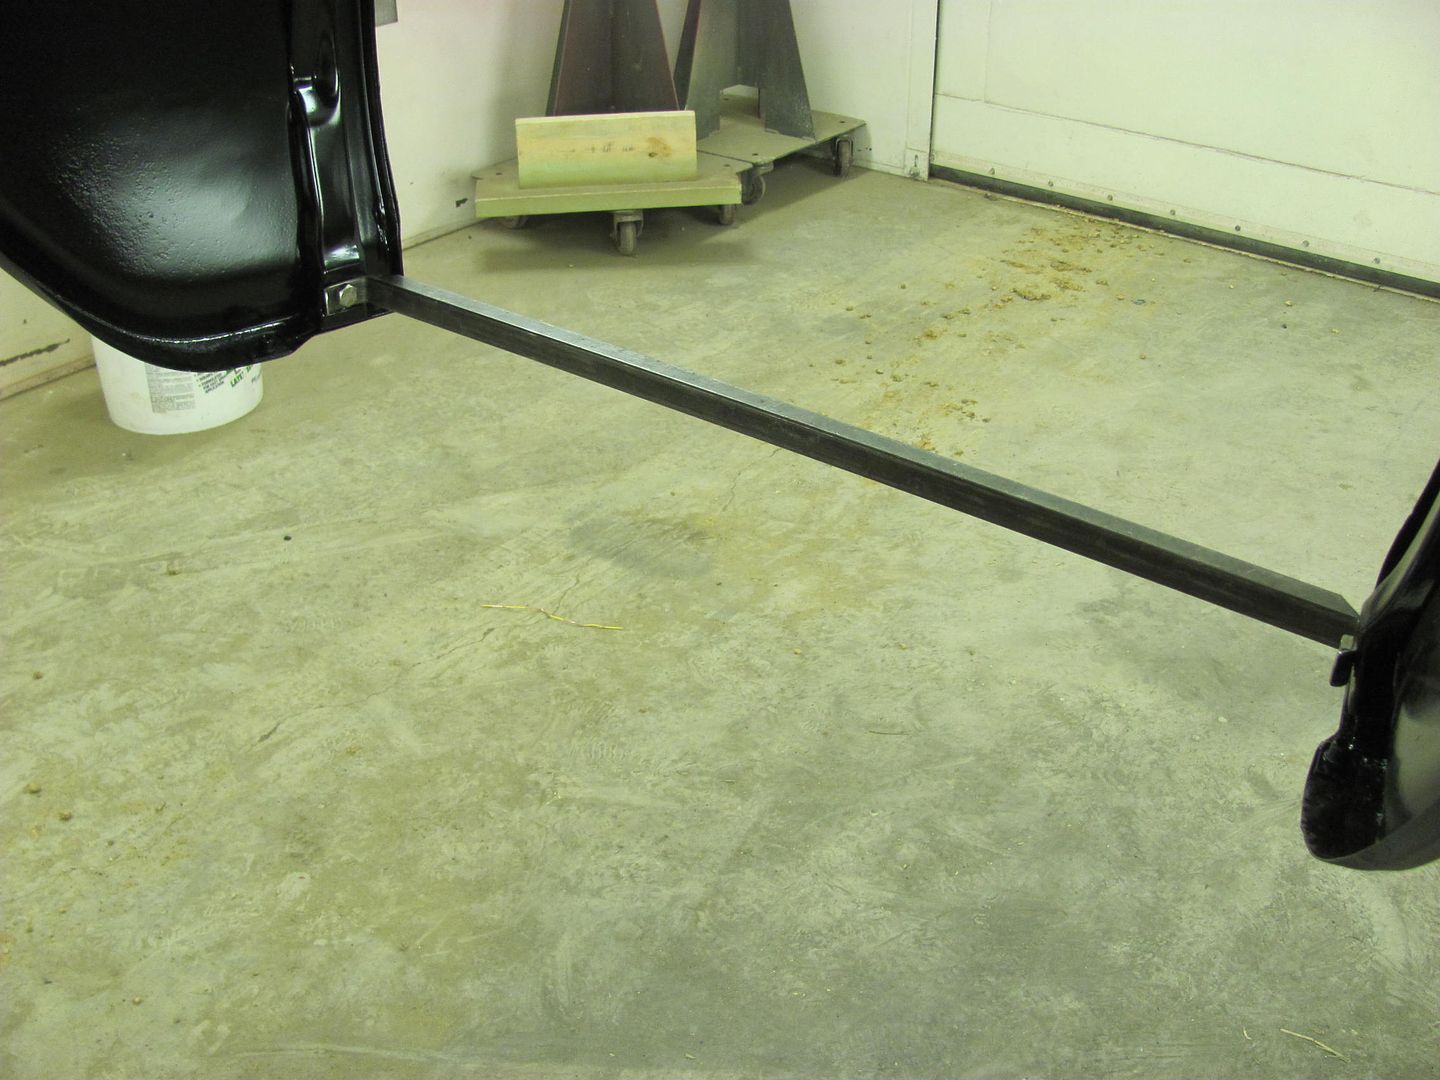 While he started media blasting the core support, I finished up the passenger door's "un-chop" 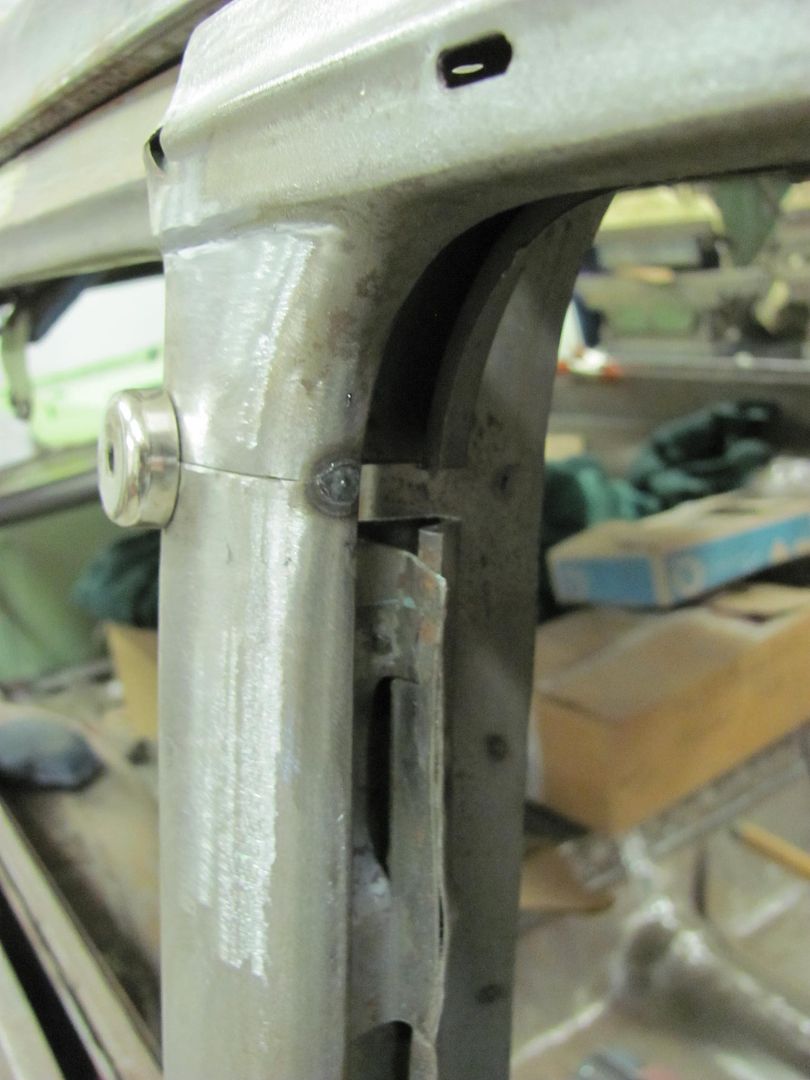 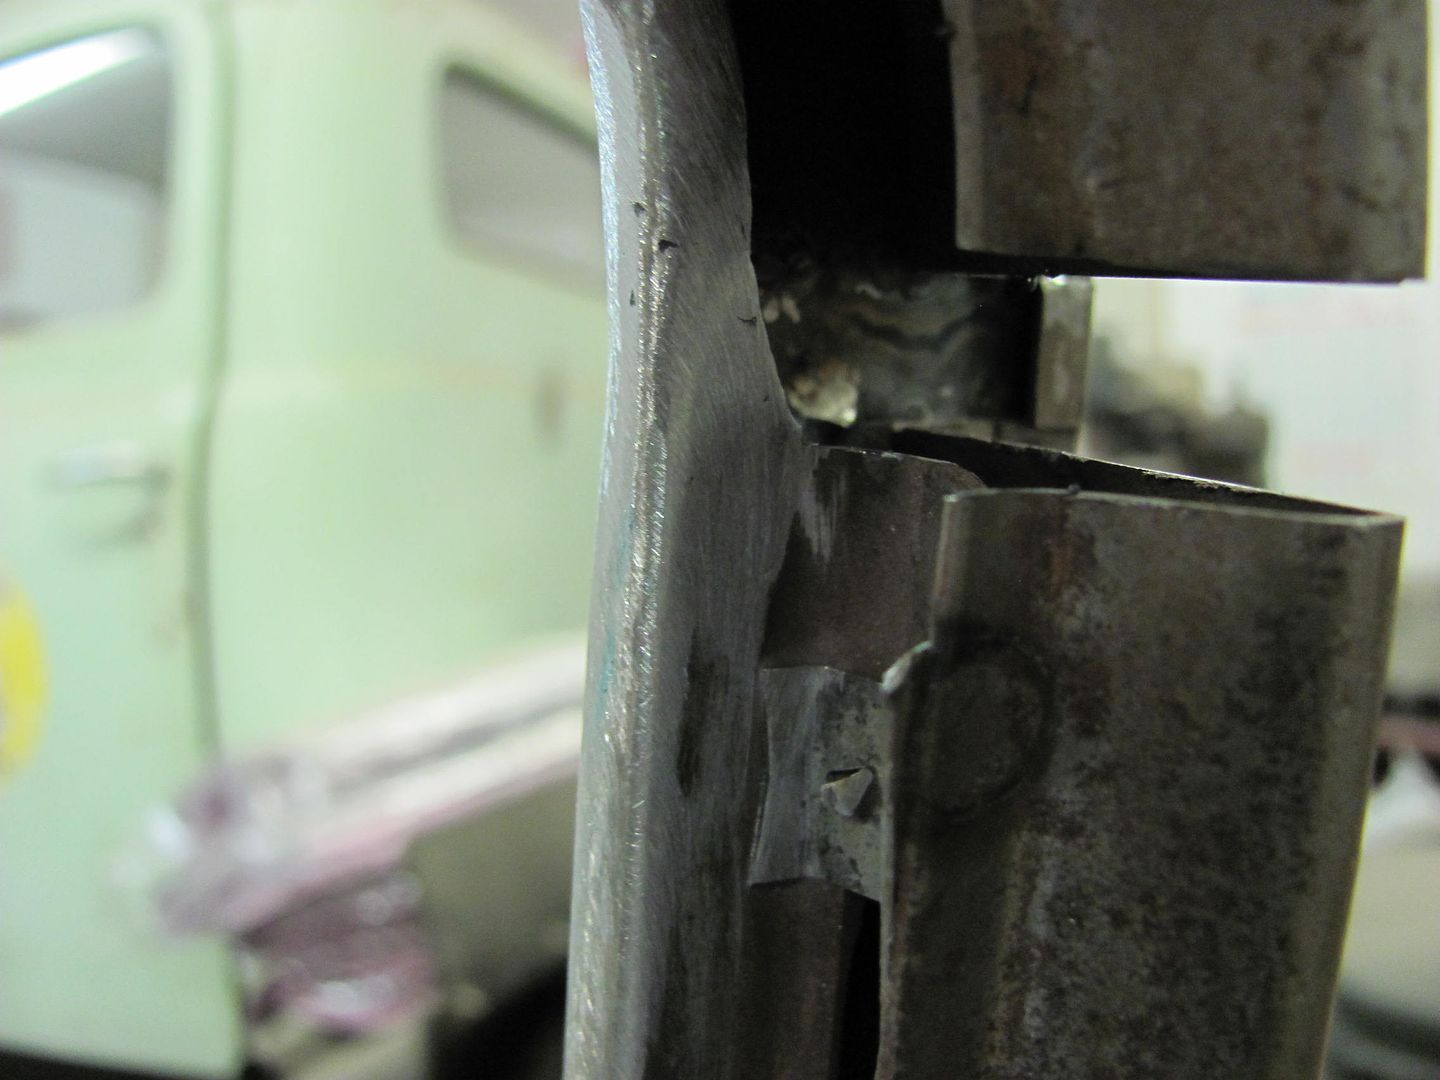 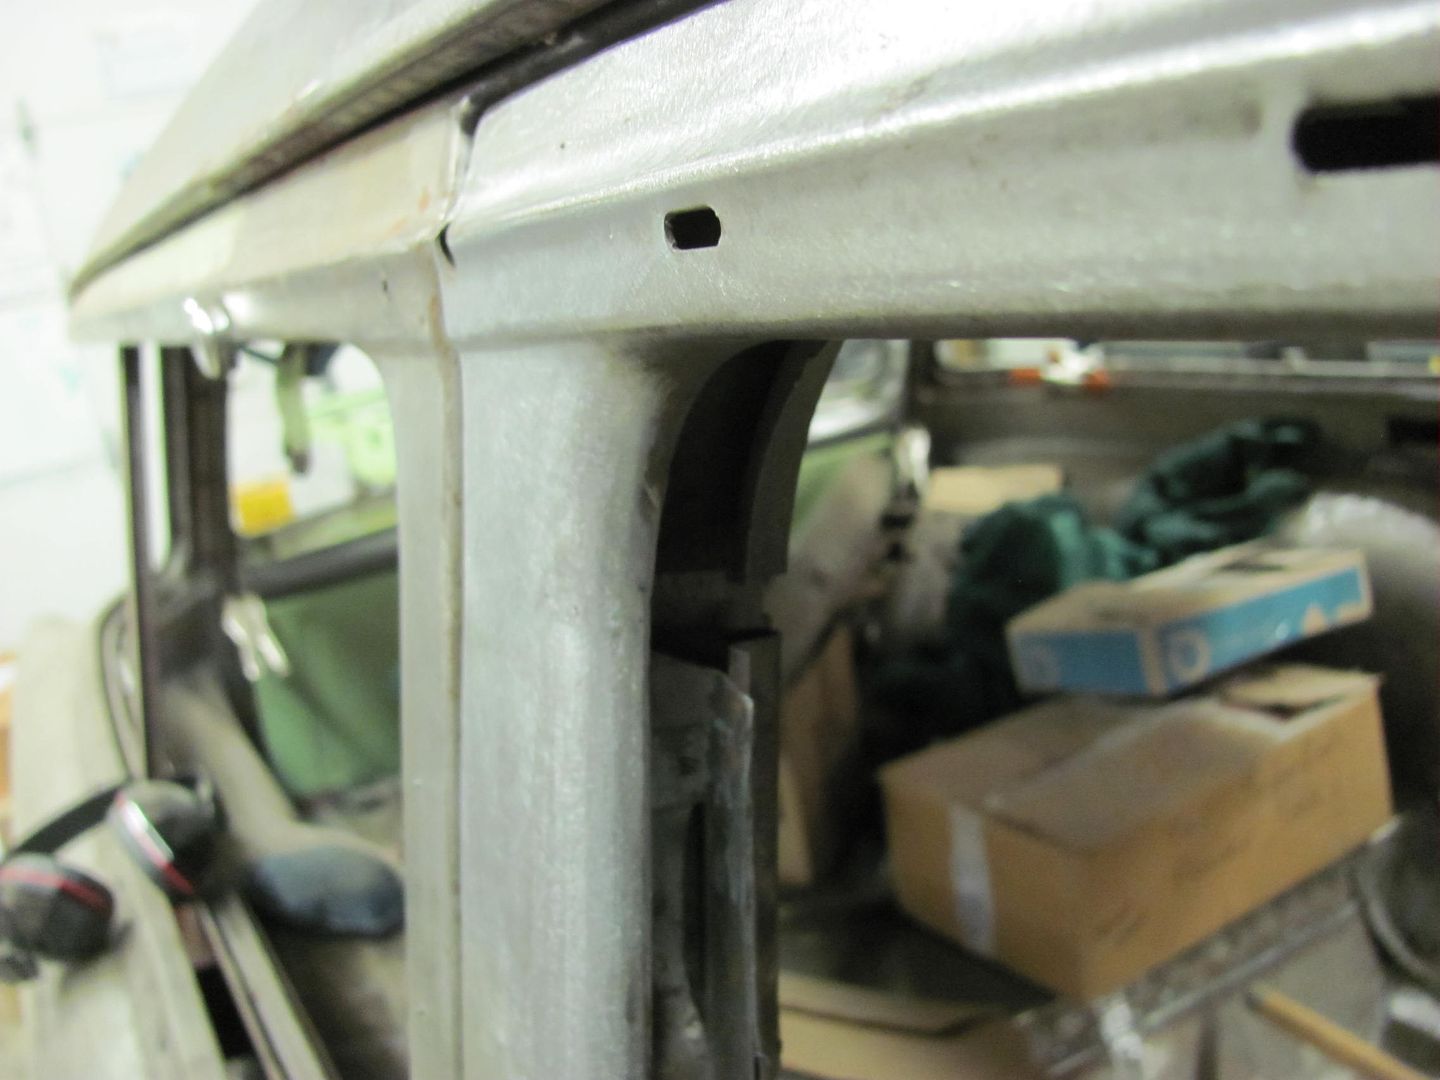 Outside done, now for the inside piece... 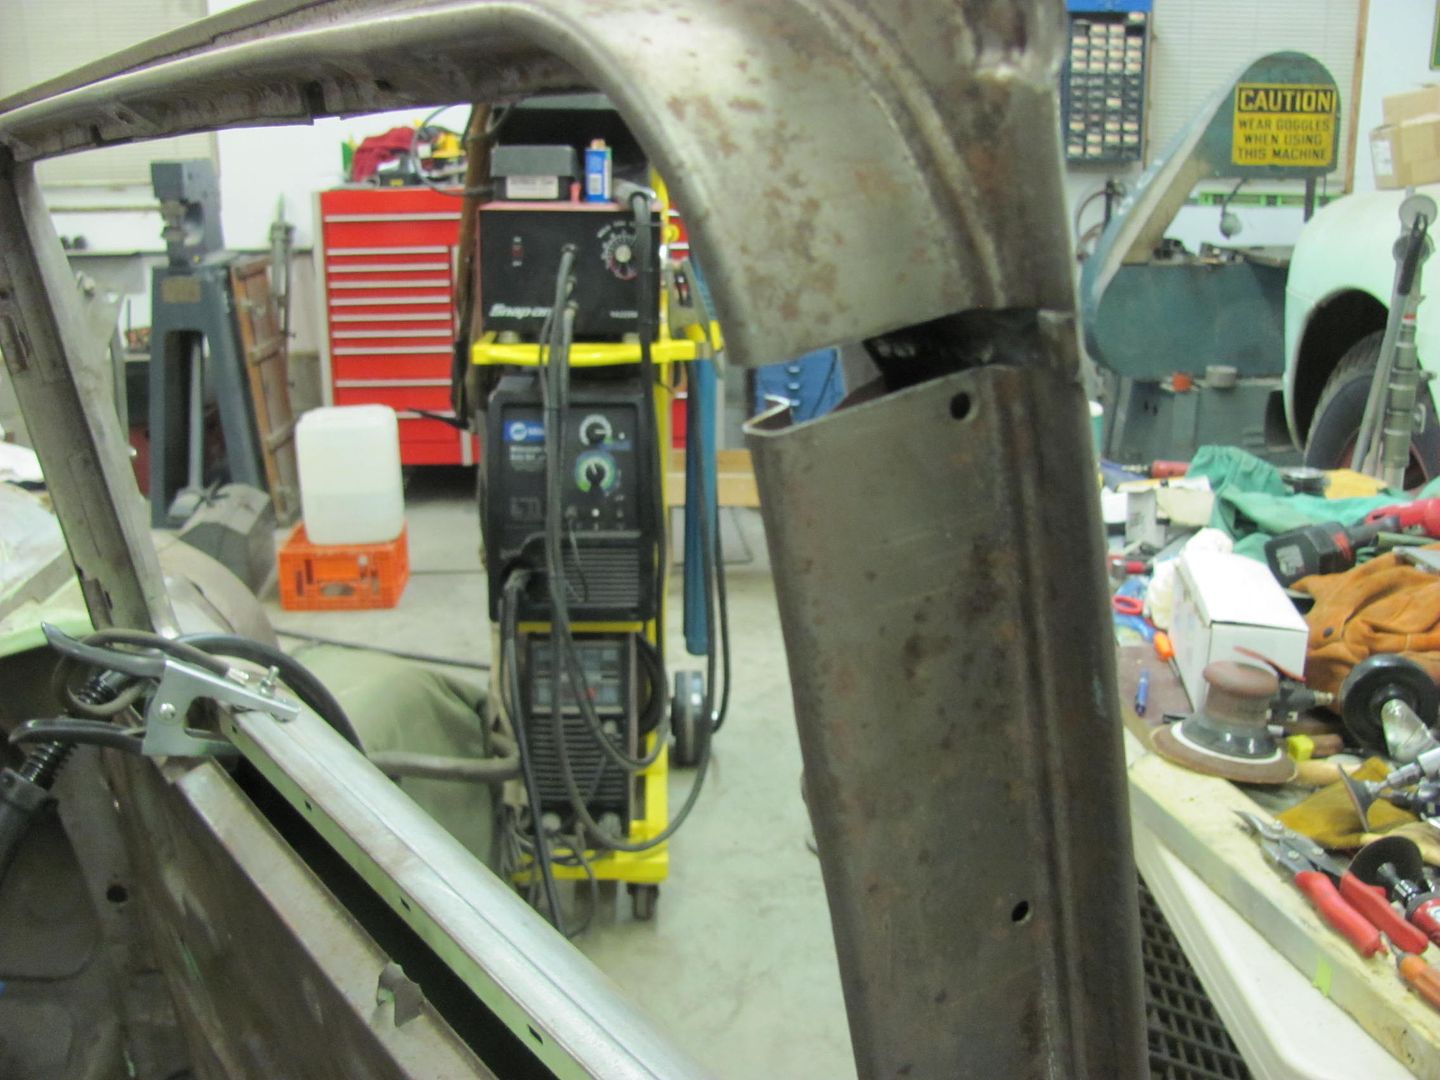 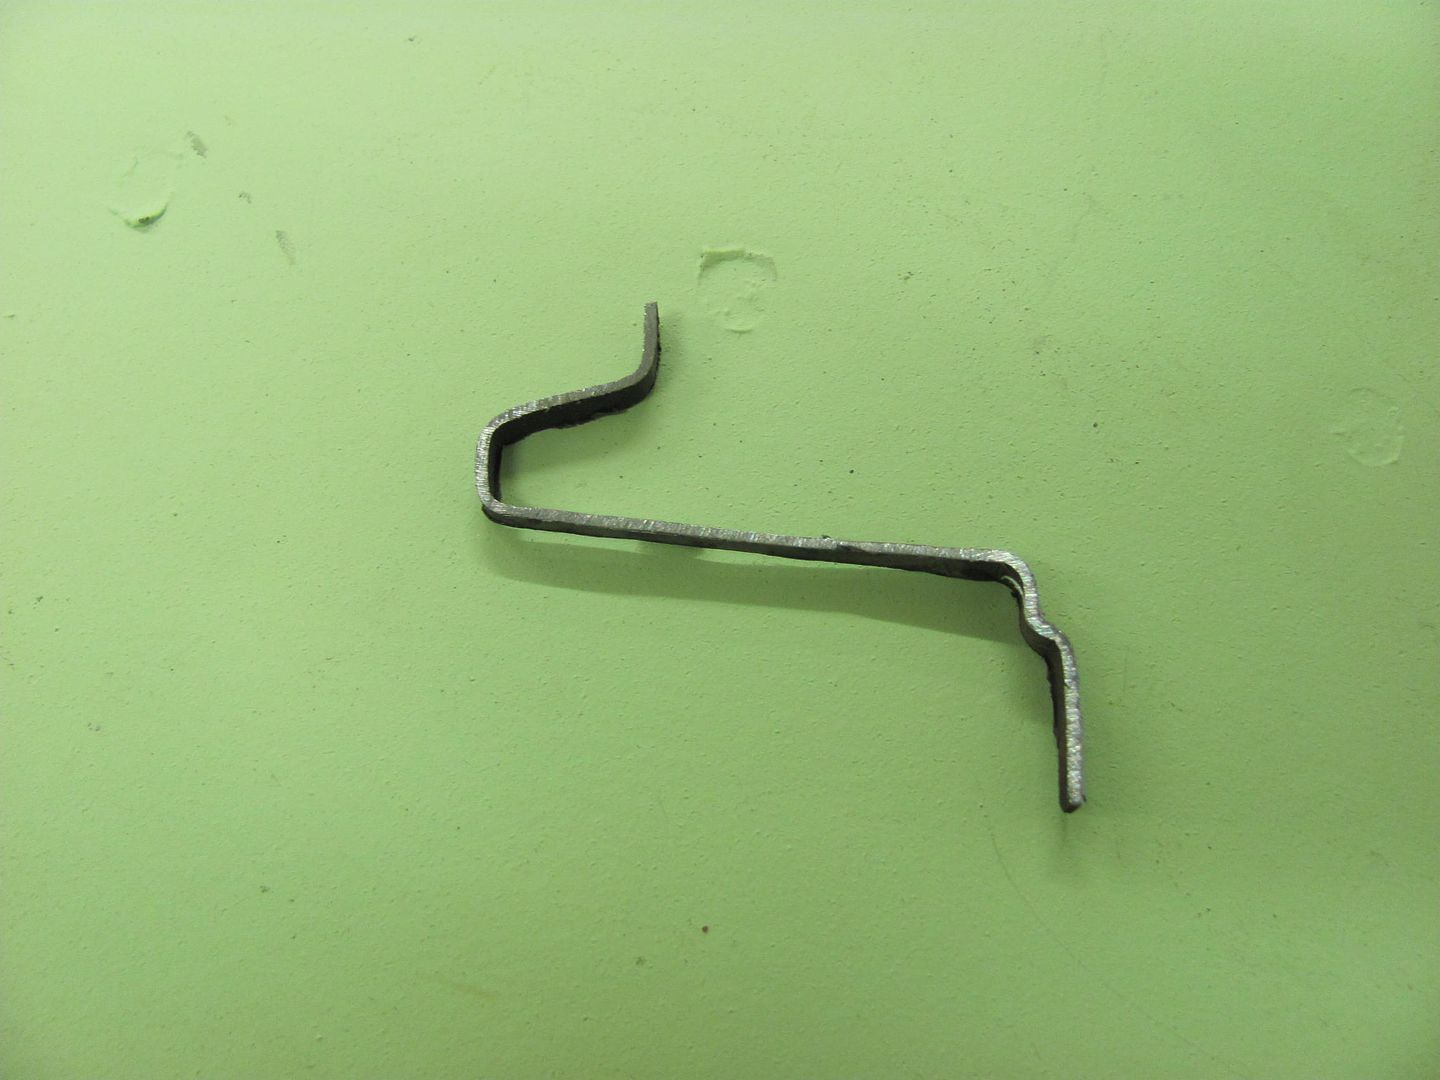 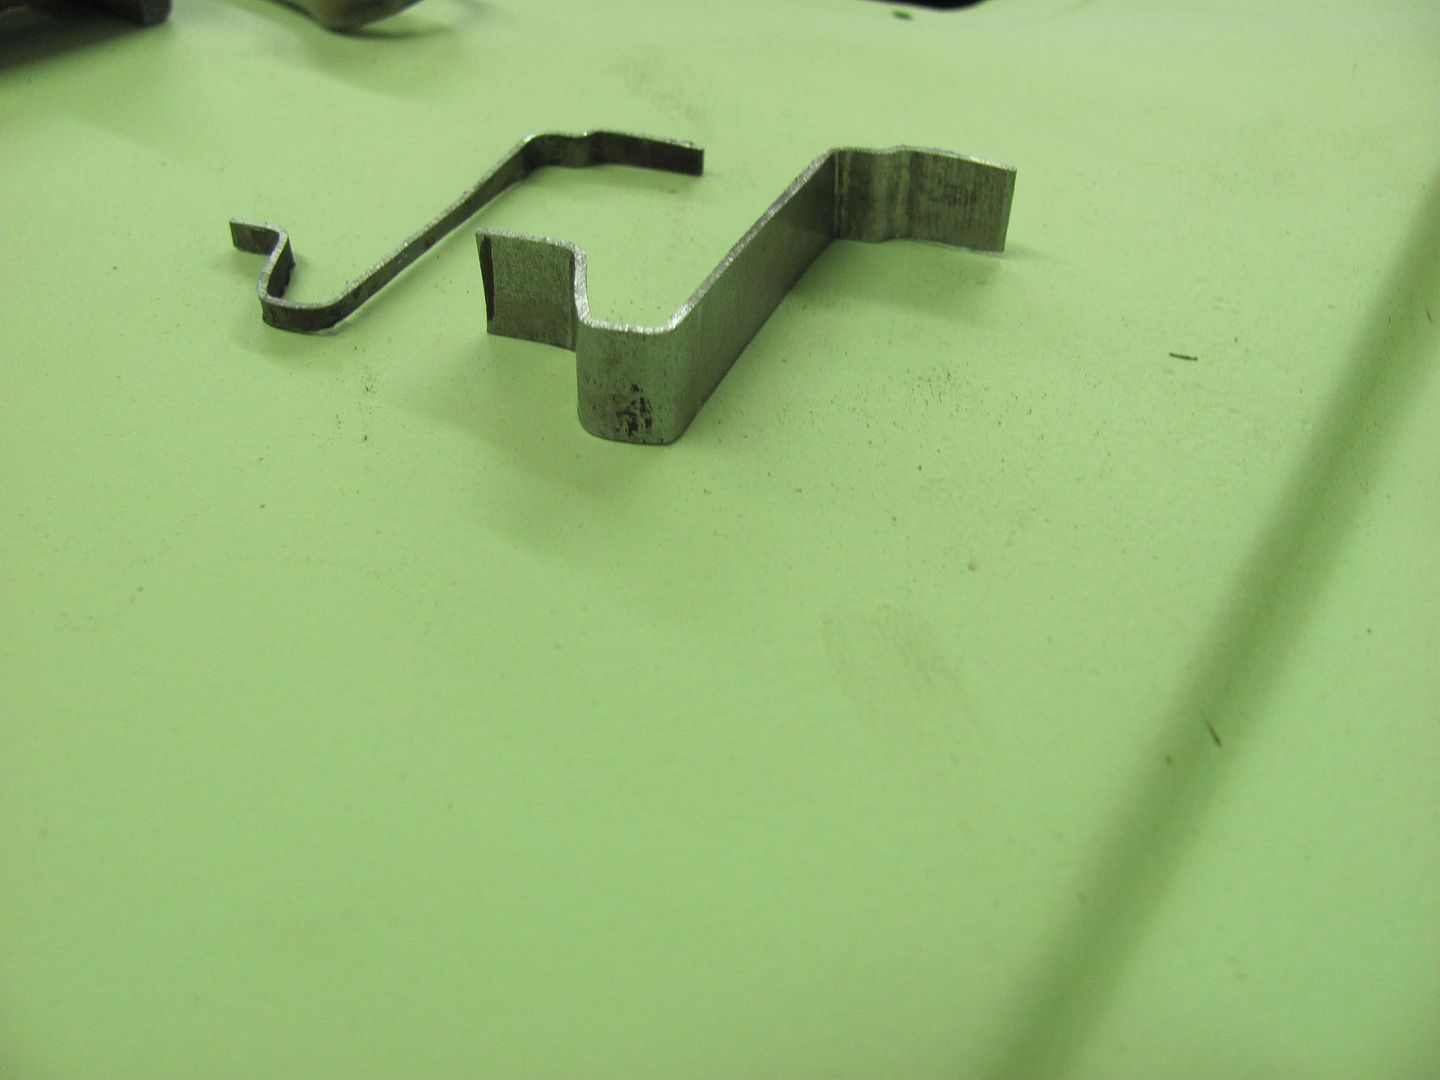 Fitted: 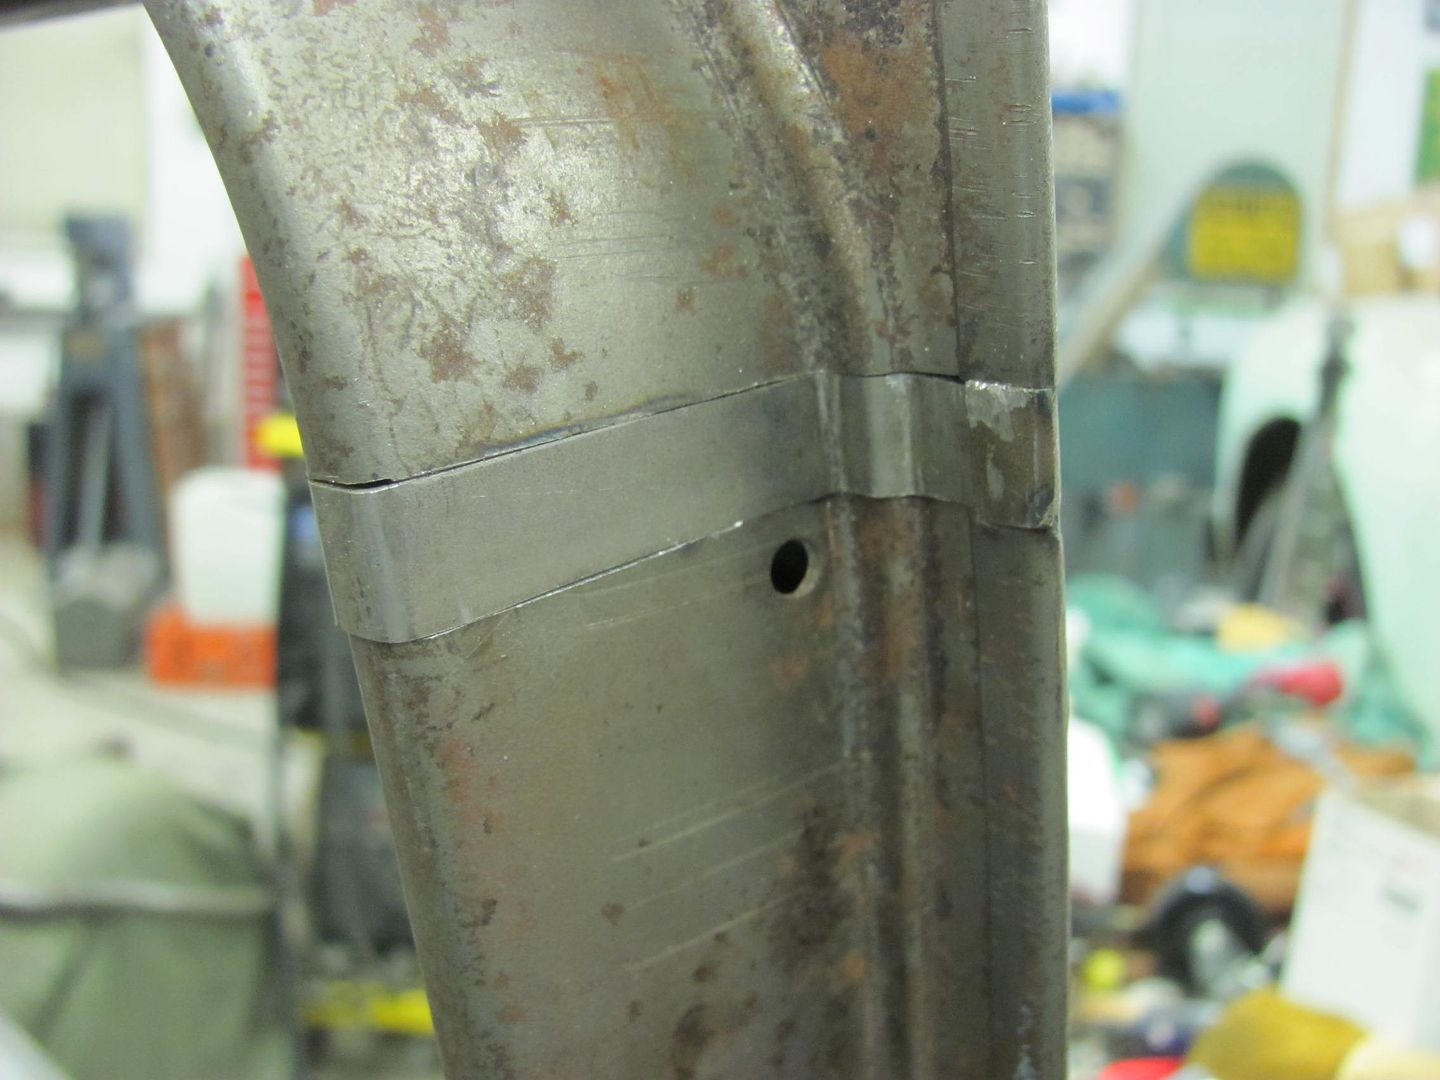 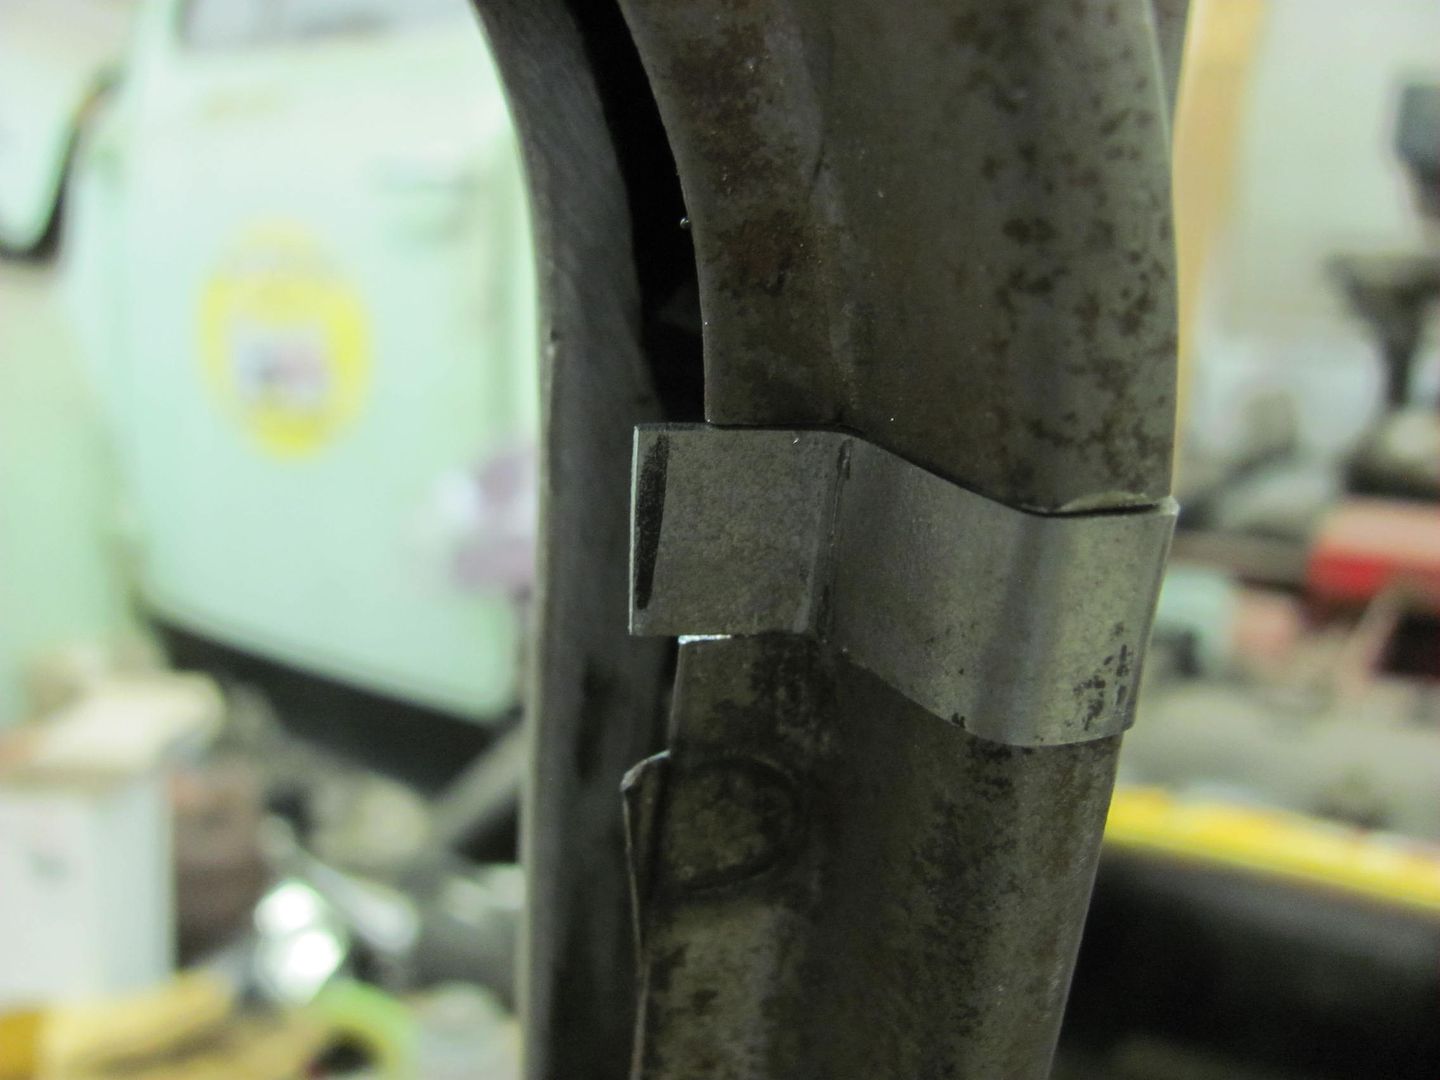 And that will do it for today....
__________________
Robert |
|
|
|
|
12-29-2014, 12:55 AM
|
#300 |
|
Senior Member
Join Date: Jul 2012
Location: Oblong, Illinois
Posts: 7,017
|
Re: 55 Wagon Progress
Nice detail work. Did the carbide ball nose come from Dremel?
Body stands look good. CAD (cardboard aided design) worked well! |
|
|
|
 |
| Bookmarks |
|
|


 Linear Mode

