
|
 11-30-2009, 03:15 PM
|
#351 | |
|
Senior Member
Join Date: Aug 2002
Location: Valley Center KS
Posts: 3,525
|
Re: Ackattack's Pro touring restoration thread
Quote:
You could definatly use the original harness. You would just use some of the wires that went to the starter/ignition and hook to the fuse block. |
|

|

|
|
11-30-2009, 06:59 PM
|
#352 |
|
Registered User
Join Date: Oct 2006
Location: Huntsville, AL
Posts: 172
|
Re: Ackattack's Pro touring restoration thread
ok, now I'm totally lost. So, you are saying that we dont have to buy an aftermarket harness?
|
|
|
|
|
11-30-2009, 08:14 PM
|
#353 | |
|
Senior Member
Join Date: Aug 2002
Location: Valley Center KS
Posts: 3,525
|
Re: Ackattack's Pro touring restoration thread
Quote:
Then, you need an engine wiring harness. I'm using an engine wiring harness from a 2004 silverado. I re-worked it myself to make it work without the unneccessary wiring. Then, you need to get power to the engine wiring harness. This is where I used the SA-001 fuse block from current performance. It kinda ties the engine wiring harness together with the truck wiring harness. This isn't completely necessary, but makes for a cleaner, more reliable, and easier installation. Otherwise you will need to track down a few relays and figure out the fuses. Anyway you slice it you will be staring at some wiring diagrams for awhile 
|
|
|
|
|
|
12-01-2009, 12:50 AM
|
#354 |
|
Still Learning
Join Date: Jul 2009
Location: Central Oklahoma
Posts: 10,108
|
Re: Ackattack's Pro touring restoration thread
I like the way you put that Ack! no pun intended I'm sure.
Pics please |
|
|
|
|
12-01-2009, 02:31 AM
|
#355 |
|
Senior Member
Join Date: Aug 2002
Location: Valley Center KS
Posts: 3,525
|
Re: Ackattack's Pro touring restoration thread
So here is the wires coming through the firewall from the EZ wiring harness
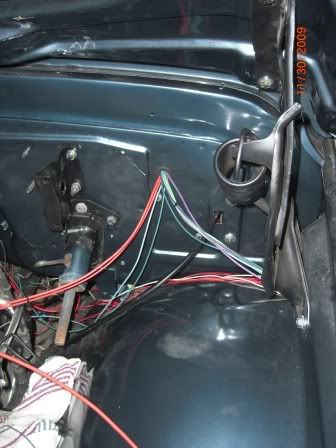 The SA-001 mounted on the back of the core support 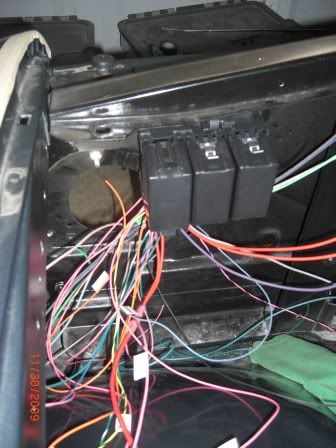 Drivers side of engine 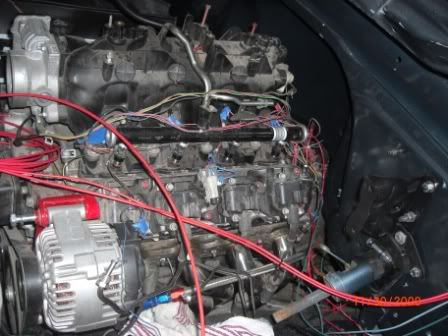 Gauges in place 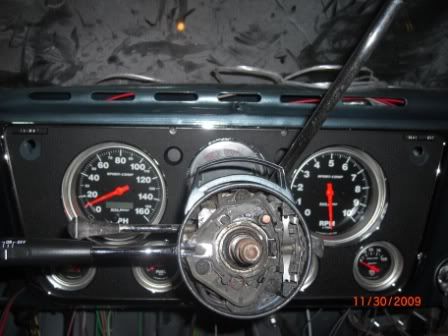 ECM and TAC module mounted up......I need to do a little more trimming on the mount and then paint it. 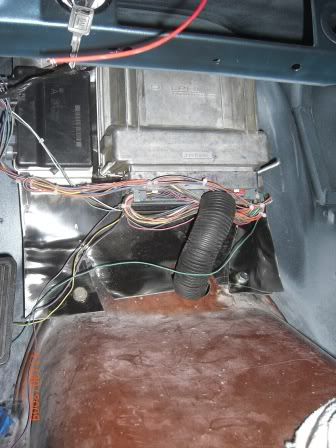 EZ wiring fuse block 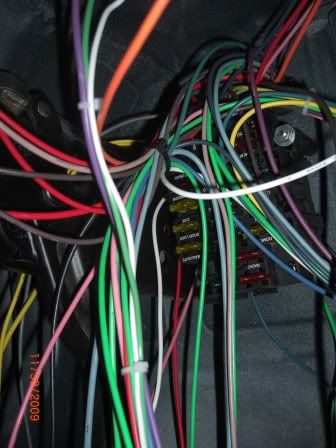 Upclose of ECM 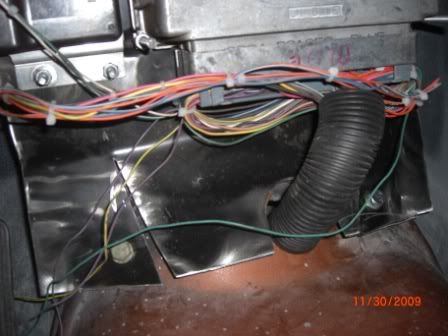 Back of engine 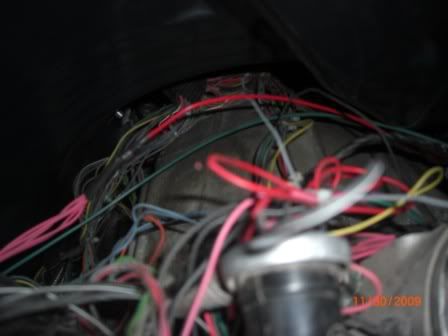 Passenger side of engine. The injectors are rotated around backwards and all of the wires are stuck between the fuel rail and the manifold. This cleans it up a little, but I'll be switching to a LS6 intake shortly after I get this up and running (already have it) 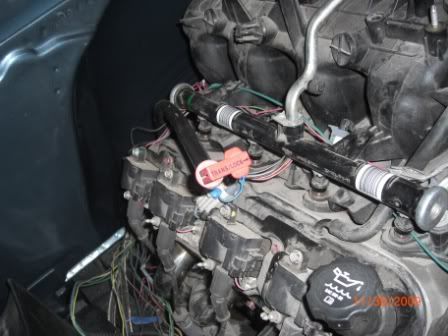 Obviously I have some bundling and cleaning up to do |
|
|
|
|
12-01-2009, 02:57 AM
|
#356 | |
|
Senior Member
Join Date: Aug 2002
Location: Valley Center KS
Posts: 3,525
|
Re: Ackattack's Pro touring restoration thread
Quote:
Sorry, no pics of the frame without the tank I haven't actually wired up the tank, but I did play around with it a little when I was pressure testing my fuel lines. Anyways, I looked at the wiring diagram for the T/A I got it from. I'll be doing the actuall wiring on Tues. or Wednesday and I'll take some notes. |
|
|
|
|
|
12-01-2009, 03:21 AM
|
#357 |
|
Senior Member
Join Date: Jul 2005
Location: Winters Ca. 95694
Posts: 4,843
|
Re: Ackattack's Pro touring restoration thread
What is the TAC module? Sounds familiar but it is escaping me right now.
Kevin LFD Inc. |
|
|
|
|
12-01-2009, 08:34 AM
|
#358 |
|
Senior Member
Join Date: Jun 2007
Location: Pine Ridge Florida
Posts: 4,126
|
Re: Ackattack's Pro touring restoration thread
Small black box the pedal and harness both plug into (if you have drive by wire) TAC = Throttle Actuator Control or something like that.
|
|
|
|
|
12-01-2009, 11:05 AM
|
#359 |
|
Senior Member
Join Date: Jul 2005
Location: Winters Ca. 95694
Posts: 4,843
|
Re: Ackattack's Pro touring restoration thread
Thanks I will have to check my box of parts and make sure I have that part. Mine is an 05 DBW!
Kevin LFD Inc. |
|
|
|
|
12-01-2009, 11:11 AM
|
#360 |
|
Registered User
Join Date: Apr 2009
Location: Saskatchewan, Canada
Posts: 236
|
Re: Ackattack's Pro touring restoration thread
Thanks
That will help out a lot !!
__________________
Rolled the dice and lost!!  Check Out my 71 build http://67-72chevytrucks.com/vboard/s...d.php?t=375158 |
|
|
|
|
12-01-2009, 12:18 PM
|
#361 |
|
Still Learning
Join Date: Jul 2009
Location: Central Oklahoma
Posts: 10,108
|
Re: Ackattack's Pro touring restoration thread
Ack,
Great progress on the wiring. Is that an electrically controlled speedo? Who makes it? Dang, it looks super cool and expensive! I assume you are going to get a speed signal from the pcm? Just, out of curiosity why did you mount the SA-001 panel on the core support and not inside with the other components? I guess they can handle moisture? You making a shield to go over it? Thanks, Mike |
|
|
|
|
12-01-2009, 02:57 PM
|
#362 | |
|
Senior Member
Join Date: Aug 2002
Location: Valley Center KS
Posts: 3,525
|
Re: Ackattack's Pro touring restoration thread
Quote:
The speedo is an Autometer sport comp. electric speedo ~$200 Good question about the SA-001.....I mounted it there cause I was originally going to mount the ECM on the inner fender.....I guess it never dawned on me to move it inside too. I wasn't planning on making a shield for it, since it already has covers over the fuses and relays. |
|
|
|
|
|
12-01-2009, 07:52 PM
|
#363 |
|
Registered User
Join Date: Sep 2008
Location: WI
Posts: 1,243
|
Re: Ackattack's Pro touring restoration thread
How do you like the ez-wiring kit?
__________________
"The way it is" truck build http://67-72chevytrucks.com/vboard/s...d.php?t=359200 
|
|
|
|
|
12-01-2009, 11:04 PM
|
#364 | |
|
Still Learning
Join Date: Jul 2009
Location: Central Oklahoma
Posts: 10,108
|
Re: Ackattack's Pro touring restoration thread
Quote:
T/A pontiac tank? would this be the same as a camaro? what vintage? Looks like it fits pretty good.
__________________
Mike "69 Short Wide" My Project 86 Silverado Landen's Project Instagram: @mcbassin My Website C/10 Club Oklahoma Facebook Group Last edited by mcbassin; 12-01-2009 at 11:05 PM. |
|
|
|
|
|
12-02-2009, 03:31 AM
|
#365 | |
|
Senior Member
Join Date: Aug 2002
Location: Valley Center KS
Posts: 3,525
|
Re: Ackattack's Pro touring restoration thread
Quote:
|
|
|
|
|
|
12-02-2009, 03:40 AM
|
#366 |
|
Senior Member
Join Date: Aug 2002
Location: Valley Center KS
Posts: 3,525
|
Re: Ackattack's Pro touring restoration thread
Kept plugging away at the wiring tonight.
I drilled and tapped the frame for ground wires. Since my battery is in the bed, and the entire frame was painted with POR15, I figure this is the best way to ensure I get a good ground. I need to get a few connectors tomorrow to hook up the ground wires. So tomorrow I hope to get it running. I have a few things to do: Wire up the ALDL to I can flash the ECM. Get some bolts for the headers to fully install them Wire up a few more wires. Hook up the power steering lines Go over everything one last time to make sure it "should" all work. So hopefully if all goes well I'll post a video of Bruiser running. |
|
|
|
|
12-02-2009, 10:53 AM
|
#367 |
|
Registered User
Join Date: Jan 2009
Location: orangevale, ca
Posts: 3,626
|
Re: Ackattack's Pro touring restoration thread
 bet your ready to hear him run man! its been a long journey! bet your ready to hear him run man! its been a long journey!
__________________
"Dennis the Menace" 1978 Silverado (2wd, 1/2 ton, short bed)complete nut & bolt frame off restomod LQ9/4L80E MY LS SWAP/FRAME OFF BUILD BOOK 2006 TBSS way too much to list
|
|
|
|
|
12-02-2009, 07:11 PM
|
#368 |
|
Senior Member
Join Date: Aug 2002
Location: Valley Center KS
Posts: 3,525
|
Re: Ackattack's Pro touring restoration thread
No running today. I ran out of time, but I'm very very close.
I realized I need some newer gas. The gas that is in the tank is ~year old (when I did the plumbing for the tank) and then I need a 2 guage lug for the battery cable. Then I have just a few more wires to hook up. The fuel pump and sending unit, the MAF switched wire, and some more ground wires. If we weren't going out tonight it would be running tonight...... |
|
|
|
|
12-02-2009, 08:47 PM
|
#369 | |
|
Still Learning
Join Date: Jul 2009
Location: Central Oklahoma
Posts: 10,108
|
Re: Ackattack's Pro touring restoration thread
Quote:
 Hey, what engine mount adapter plates did you use to mount your 5.3? Did you use the original a/c compressor? Relocate it? thanks, Hey, what engine mount adapter plates did you use to mount your 5.3? Did you use the original a/c compressor? Relocate it? thanks,Mike |
|
|
|
|
|
12-02-2009, 09:17 PM
|
#370 |
|
Senior Member
Join Date: Jun 2007
Location: Pine Ridge Florida
Posts: 4,126
|
Re: Ackattack's Pro touring restoration thread
How did you mount your PCM? I didn't see any bracket?
|
|
|
|
|
12-02-2009, 09:49 PM
|
#371 | |
|
Still Learning
Join Date: Jul 2009
Location: Central Oklahoma
Posts: 10,108
|
Re: Ackattack's Pro touring restoration thread
Quote:
|
|
|
|
|
|
12-03-2009, 11:08 AM
|
#372 | |
|
Senior Member
Join Date: Aug 2002
Location: Valley Center KS
Posts: 3,525
|
Re: Ackattack's Pro touring restoration thread
Quote:
|
|
|
|
|
|
12-03-2009, 11:10 AM
|
#373 | |
|
Senior Member
Join Date: Aug 2002
Location: Valley Center KS
Posts: 3,525
|
Re: Ackattack's Pro touring restoration thread
Quote:
The A/C compressor is an F-body compressor using corvette accessory brackets. |
|
|
|
|
|
12-04-2009, 01:21 PM
|
#374 | |
|
Senior Member
Join Date: Jun 2007
Location: Pine Ridge Florida
Posts: 4,126
|
Re: Ackattack's Pro touring restoration thread
Quote:
|
|
|
|
|
|
12-04-2009, 07:30 PM
|
#375 | |
|
Senior Member
Join Date: Aug 2002
Location: Valley Center KS
Posts: 3,525
|
Re: Ackattack's Pro touring restoration thread
Quote:
Don't know. I could pretty easily add some rubber washers if it's a problem or concern. I have to remove the ECM and stuff at some point to paint my mount. |
|
|
|
|
 |
| Bookmarks |
|
|


 Linear Mode

