
|
 08-02-2023, 09:55 PM
|
#276 | |
|
Registered User
Join Date: Jan 2022
Location: Conn.
Posts: 184
|
Re: Long Time Coming......
Quote:
__________________
Glenn 1951 3100, Area51 1955 BelAir, 4EVER17 1987 R10, Ethel Copper Hill Rod & Custom http://67-72chevytrucks.com/vboard/s...d.php?t=829856 |
|

|

|
|
08-03-2023, 08:17 AM
|
#277 | |
|
Senior Member
  Join Date: Oct 2014
Location: Eagle, ID
Posts: 2,945
|
Re: Long Time Coming......
Quote:
|
|
|
|
|
|
08-03-2023, 09:30 AM
|
#278 | |
|
Registered User
Join Date: Jan 2022
Location: Conn.
Posts: 184
|
Re: Long Time Coming......
Quote:
__________________
Glenn 1951 3100, Area51 1955 BelAir, 4EVER17 1987 R10, Ethel Copper Hill Rod & Custom http://67-72chevytrucks.com/vboard/s...d.php?t=829856 |
|
|
|
|
|
08-03-2023, 08:22 PM
|
#279 | |
|
Registered User
Join Date: Jan 2013
Location: roseville
Posts: 823
|
Re: Long Time Coming......
Quote:
 Someone's opinion of you is their problem, and none of your business.
__________________
My Current Trucks: 1958 Apache BBW 4.8LS/4l60 "Lucky" Built By Me 1958 GMC BBW LS1/4l60 "The Kraken" Built By Delmo |
|
|
|
|
|
08-04-2023, 08:19 AM
|
#280 | |
|
Senior Member
Join Date: Oct 2014
Location: Eagle, ID
Posts: 2,945
|
Re: Long Time Coming......
Quote:
|
|
|
|
|
|
08-04-2023, 11:31 AM
|
#281 |
|
Registered User
Join Date: Nov 2010
Location: calgary alberta
Posts: 7,844
|
Re: Long Time Coming......
it does, however, mean you are now the go-to guy for ANY paint related questions. haha
good for you on the trophies. i won't tell anybody. lol. |
|
|
|
|
08-04-2023, 09:35 PM
|
#282 |
|
Registered User
Join Date: Oct 2015
Location: Costa Mesa, CA
Posts: 190
|
Re: Long Time Coming......
Man that does look nice. Since you are tightening up all the contact point/gaps on the body, I have seen someone create a panel, well more like a winglet to close the cap between the front panel of the bed and the rear od the cab. Sort of where the bolts that attach the bed side to the front panel are. They contoured a flat panel that followed the edge of the cab, with about an 1/8-1/4 inch gap to the cab. It was subtle but got rid of that gap you can see from the side.
|
|
|
|
|
08-16-2023, 02:55 PM
|
#283 | |||
|
Registered User
Join Date: Jan 2022
Location: Conn.
Posts: 184
|
Re: Long Time Coming......
Quote:
Quote:
Quote:
.
__________________
Glenn 1951 3100, Area51 1955 BelAir, 4EVER17 1987 R10, Ethel Copper Hill Rod & Custom http://67-72chevytrucks.com/vboard/s...d.php?t=829856 |
|||
|
|
|
|
08-16-2023, 03:10 PM
|
#284 |
|
Registered User
Join Date: Jan 2022
Location: Conn.
Posts: 184
|
Re: Long Time Coming......
It has been a couple weeks since my last post. I've been working on the truck here and there and also getting things done at home before going back to work next week.
In this update you will see how I installed the pop up fuel car and made a filler tube that connects to the tank. Here are all the items used to do this. The pop up cap, a band clamp, a 2.25" mandrel bend, and some 2.25" fuel hose. 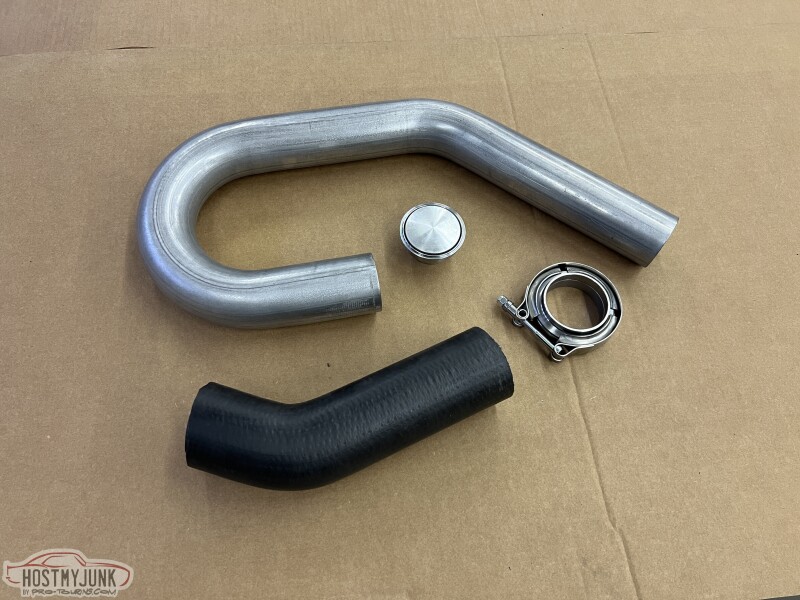 I had to cut this access for the fuel hose, and then installed the hose. 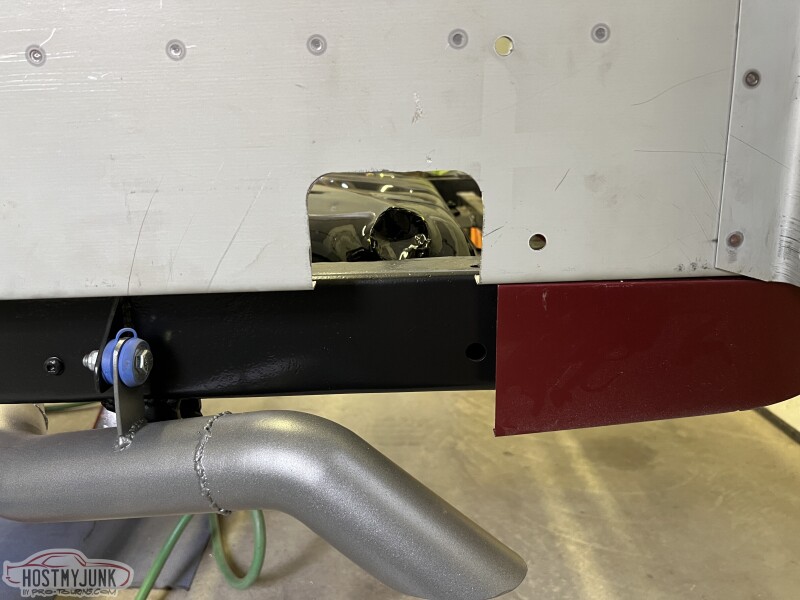 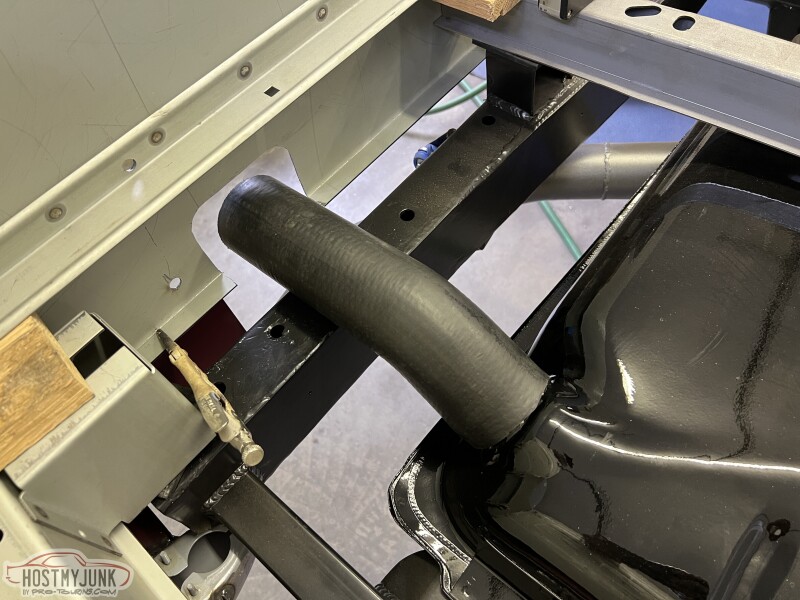 I made this little template of the contour of the cap to find the best location to weld it in the fender. 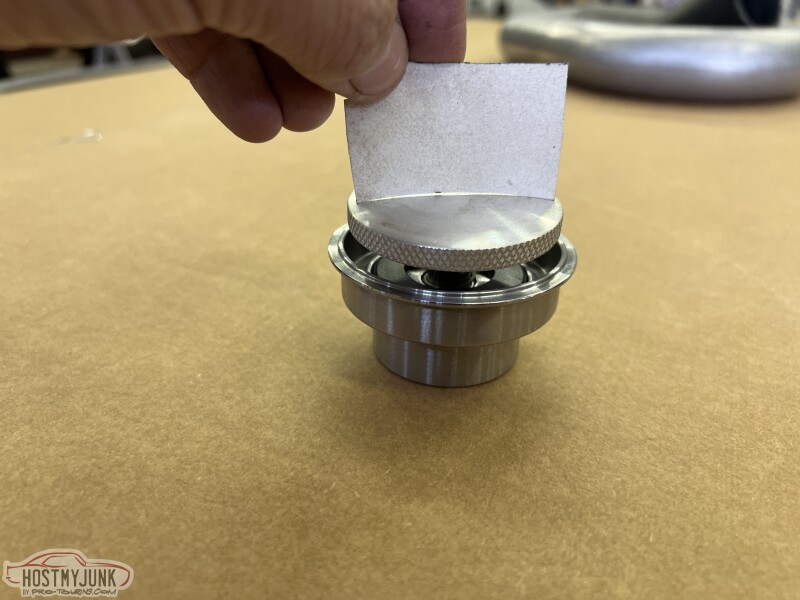  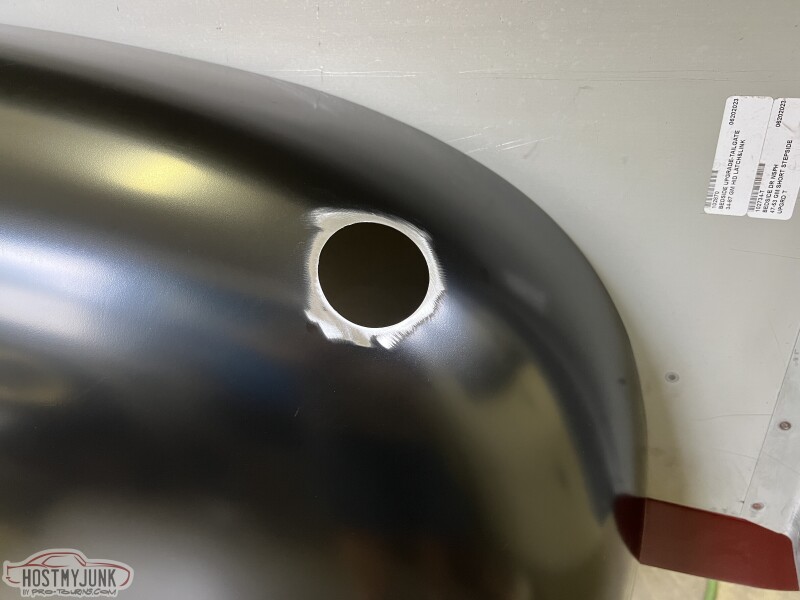 The reason for the band clamp is so I have an easy way to service the tank or remove the fender and not have that long of a tube and its weight hanging on the fender. 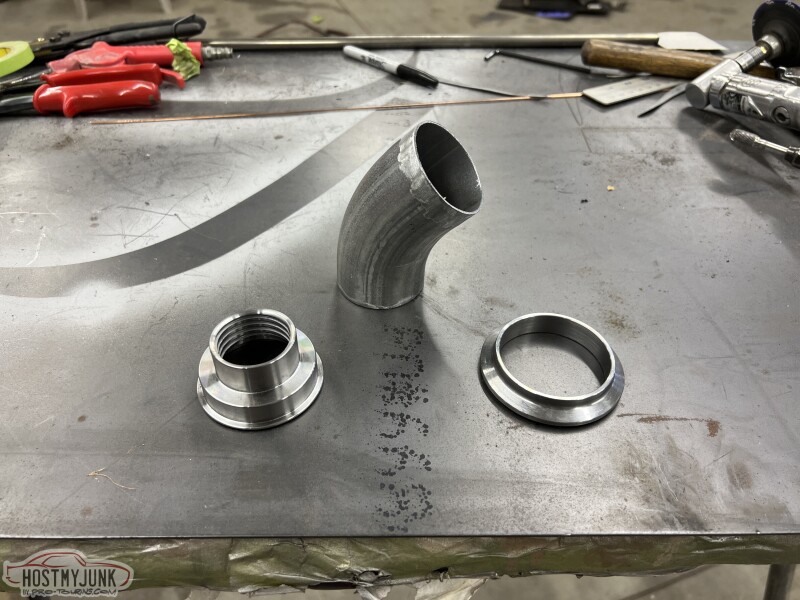 At first I just tacked them together. 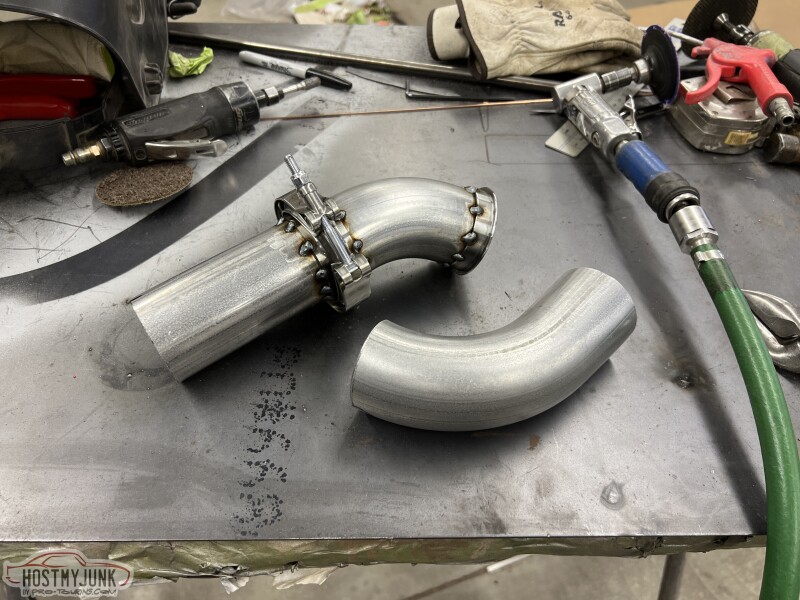 Once I got the full tube routed as need the pieces were all tacked for a trial fit. 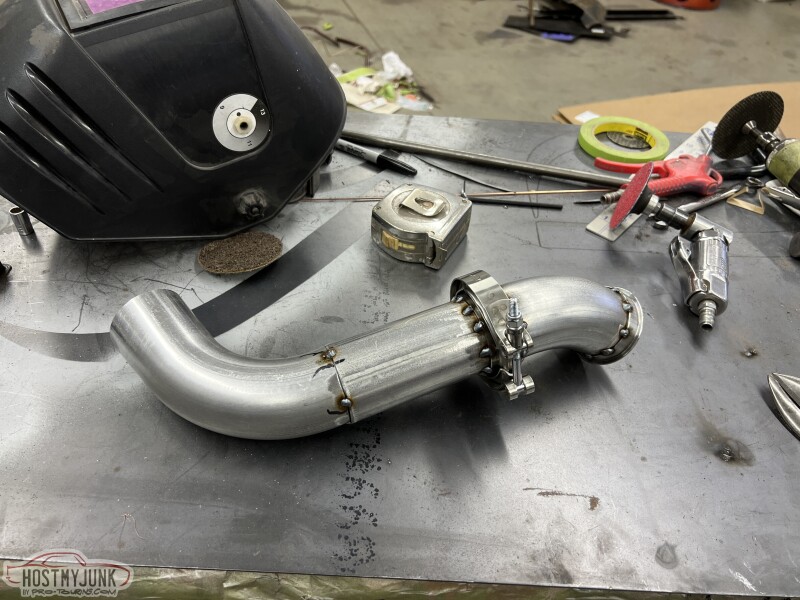 Happy with it I final welded the pirces together. Had to make sure everything was sealed with weld so no leaks. 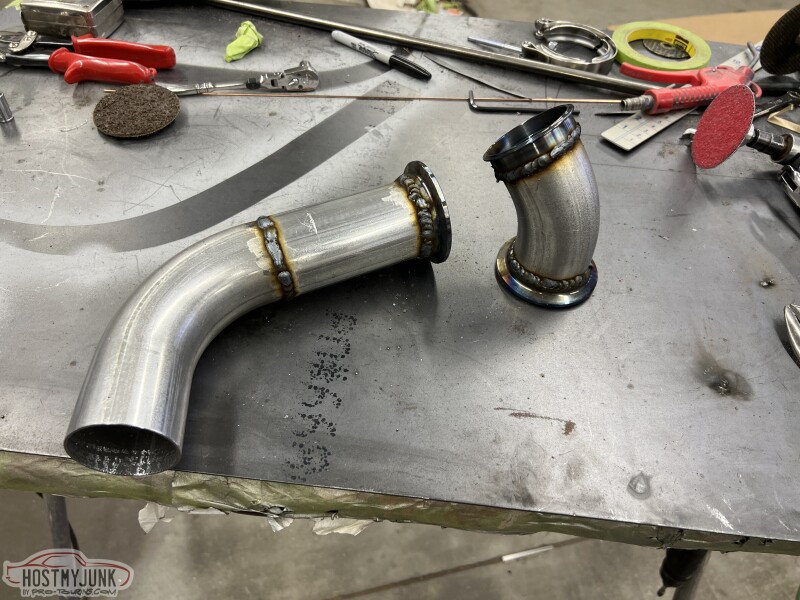 Looking up you can see where things need to connect. I then tack welded the filler to the fender from the top also. 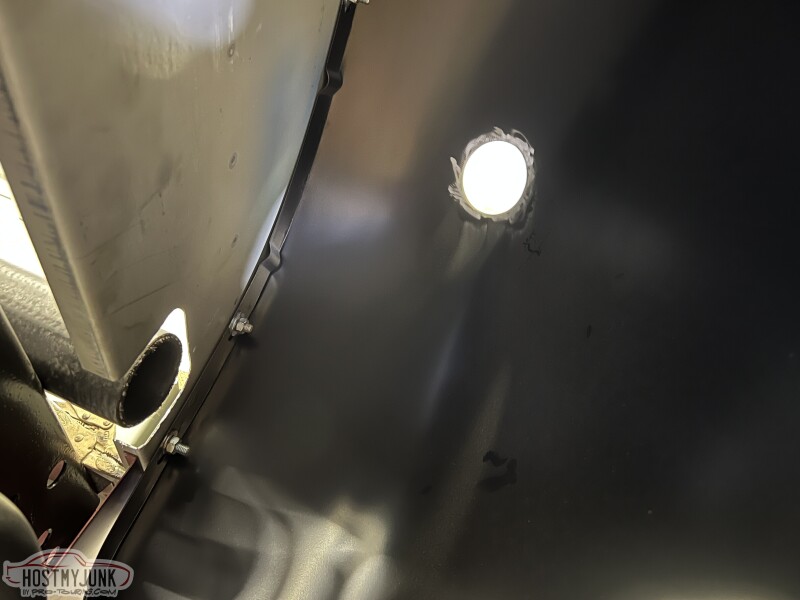 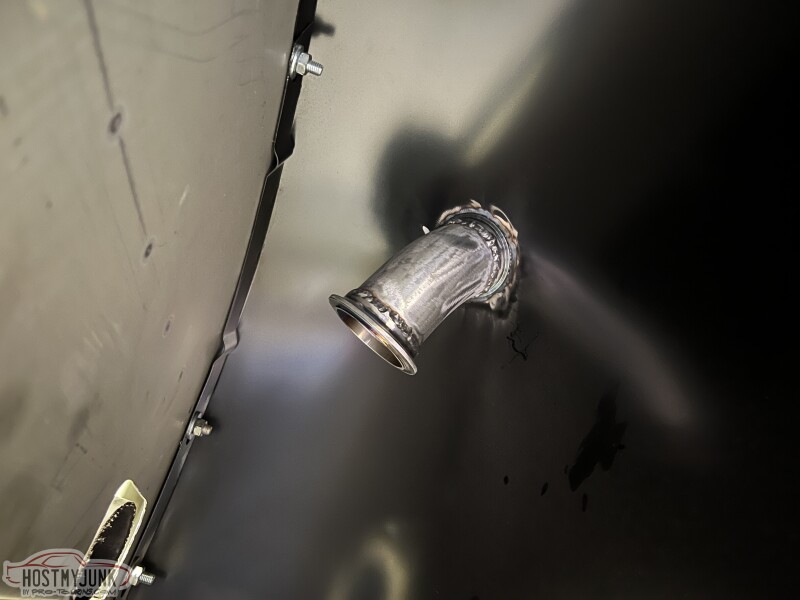 I then bolts everything together using the V band clamp prior to final welding. Once happy I finished welding the filler to the fender on the top side. 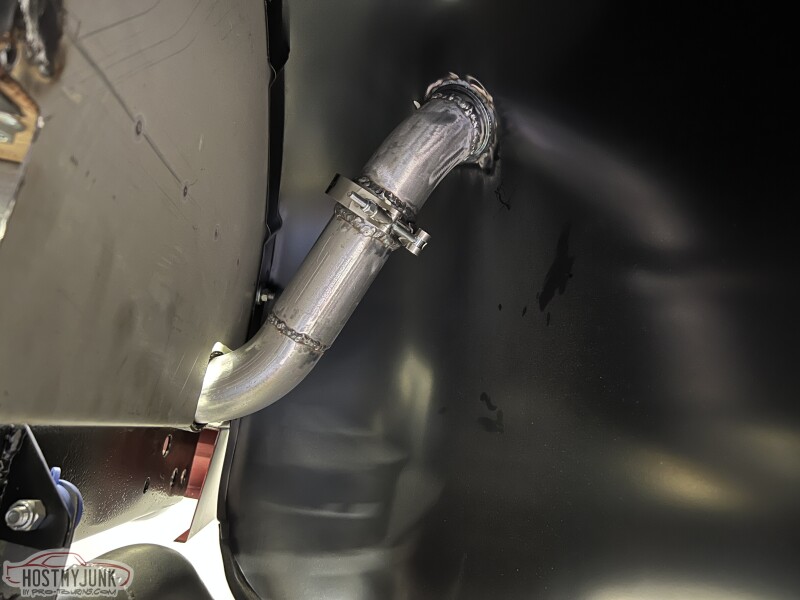 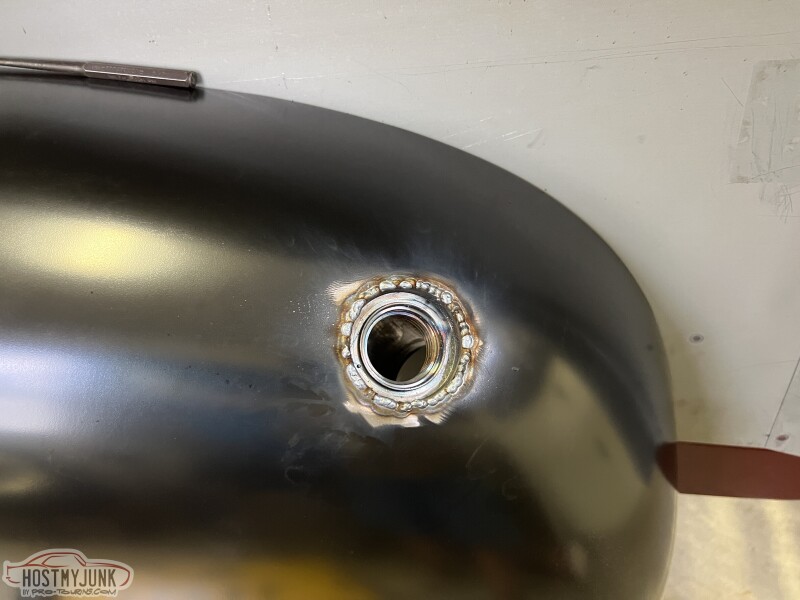 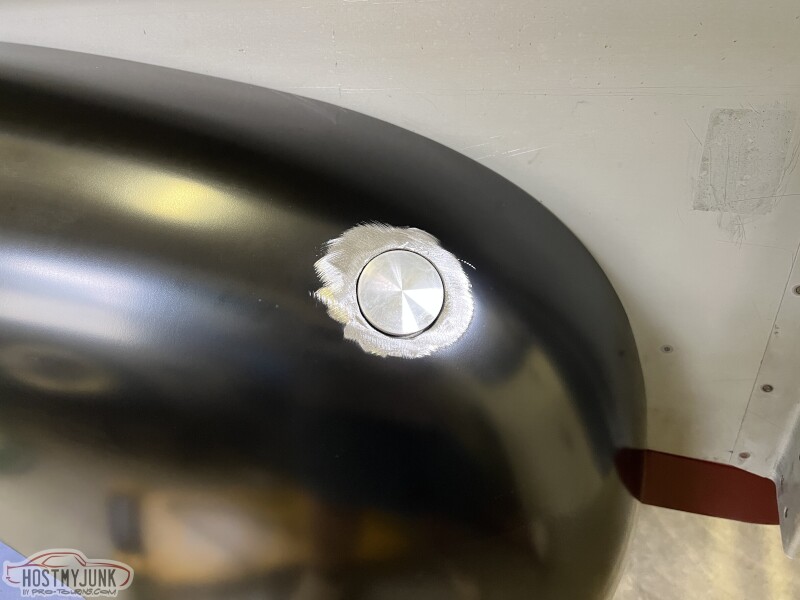 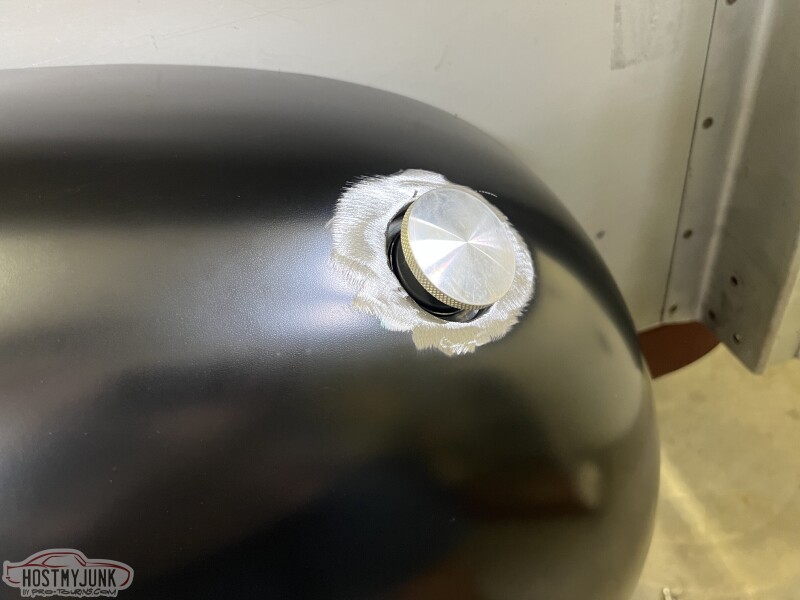
__________________
Glenn 1951 3100, Area51 1955 BelAir, 4EVER17 1987 R10, Ethel Copper Hill Rod & Custom http://67-72chevytrucks.com/vboard/s...d.php?t=829856 |
|
|
|
|
08-16-2023, 03:24 PM
|
#285 |
|
Registered User
Join Date: Jan 2022
Location: Conn.
Posts: 184
|
Re: Long Time Coming......
I spent some time working on the gap between the cab and bed. I am only closing this as much as the top is from my earlier project. While it is only an inch I think it made a significant change.
Before.... 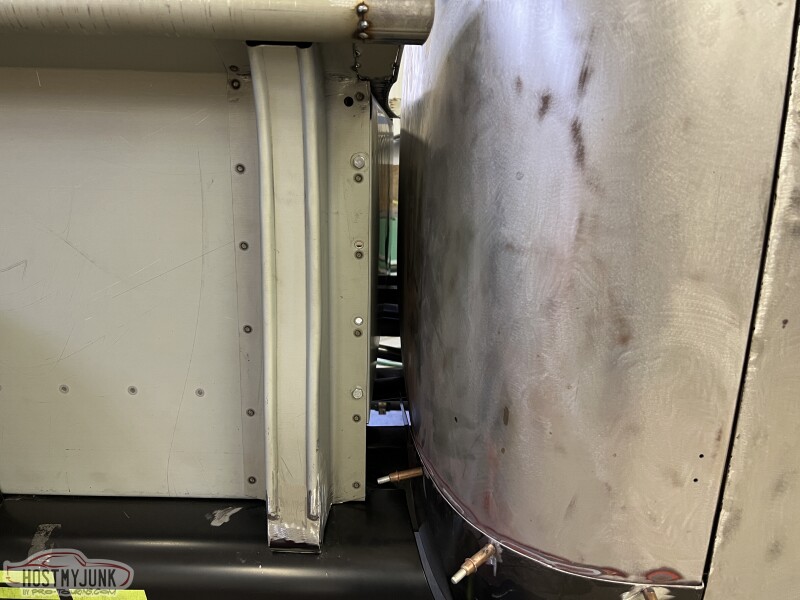 I am using the same 1/8" rod as I did previously, here I am just mocking it up to get an idea of how it will look. In doing this I decided to heat up and then bend the bottm end to meet up with the filler panel. 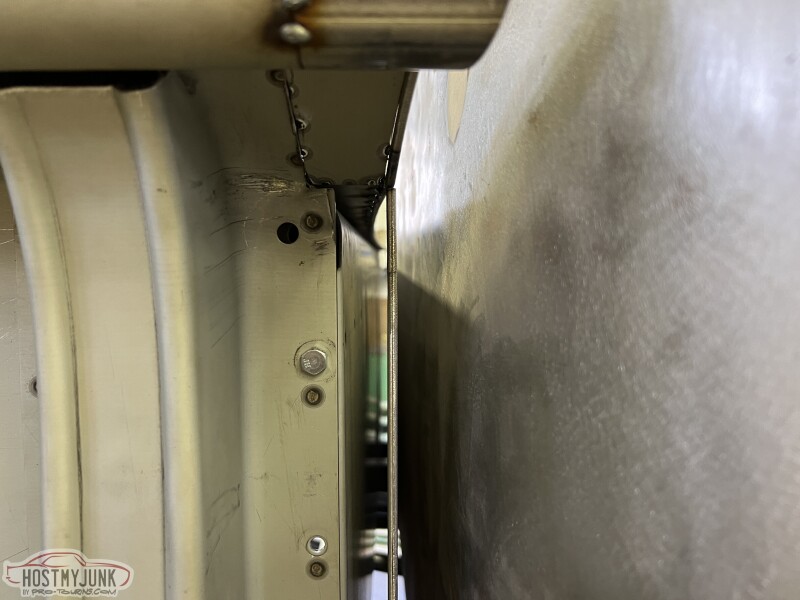 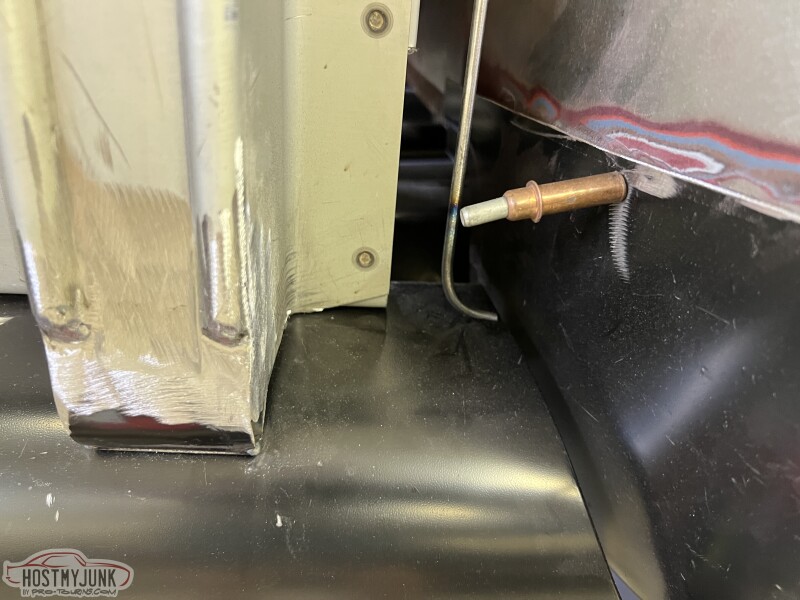 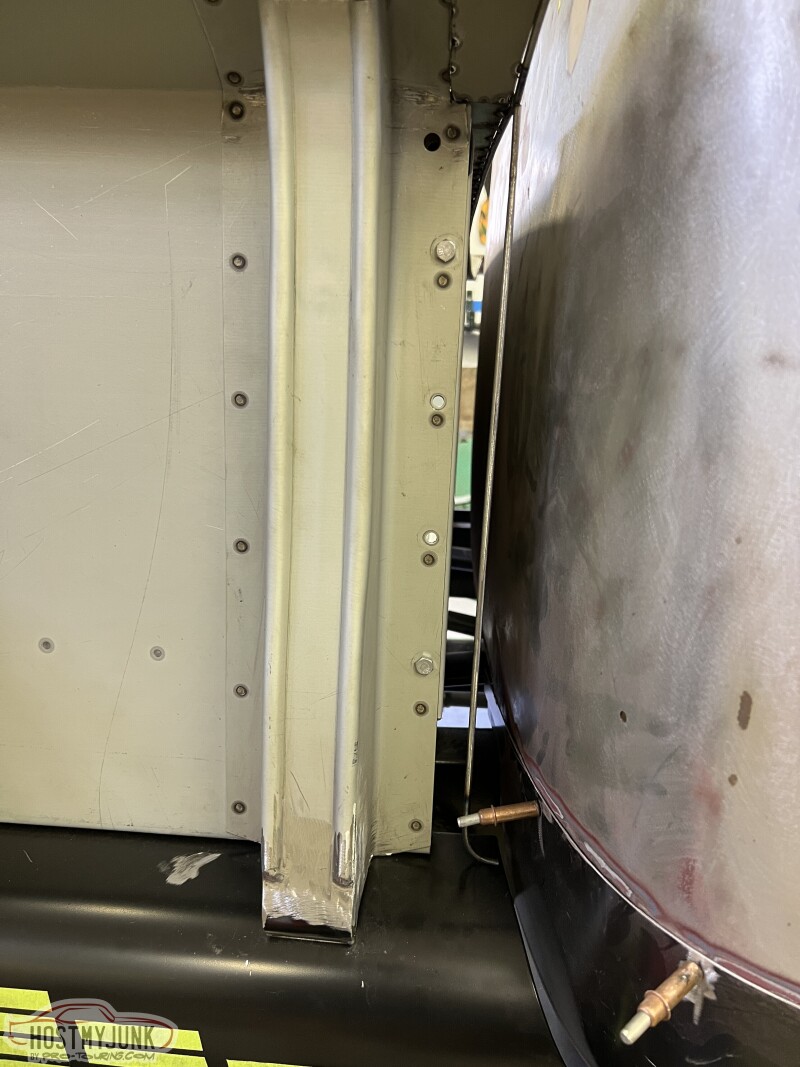 This is what I ended up making. It is 1" wide. I welded the round stock to the leading edge as I did on the other panels at the top of the bed. 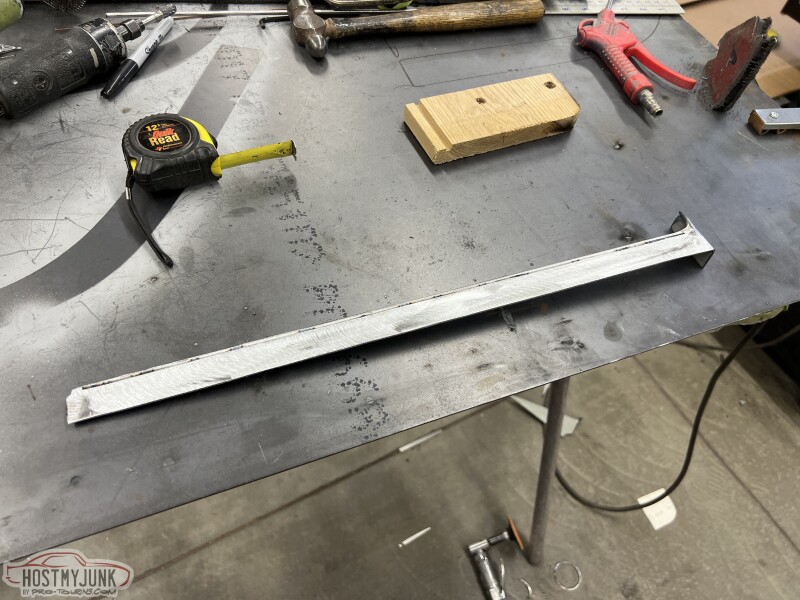 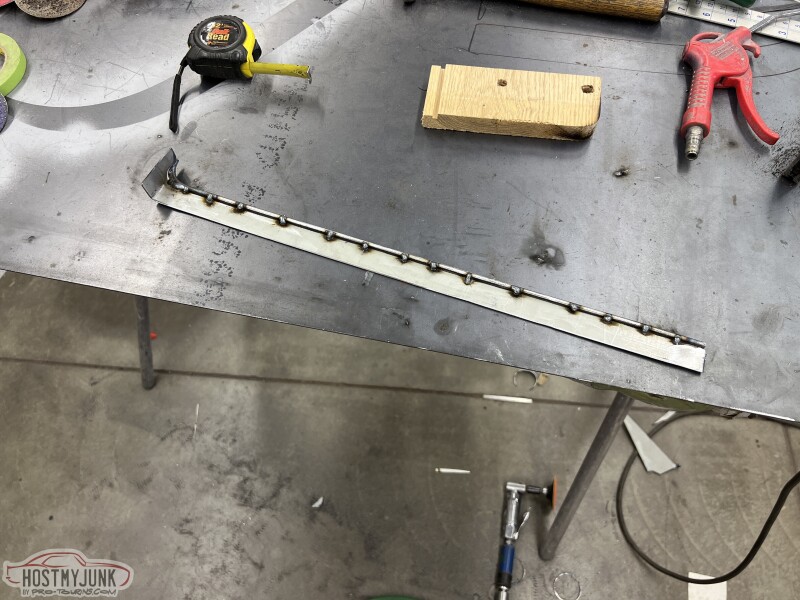 And here it is tacked into place. 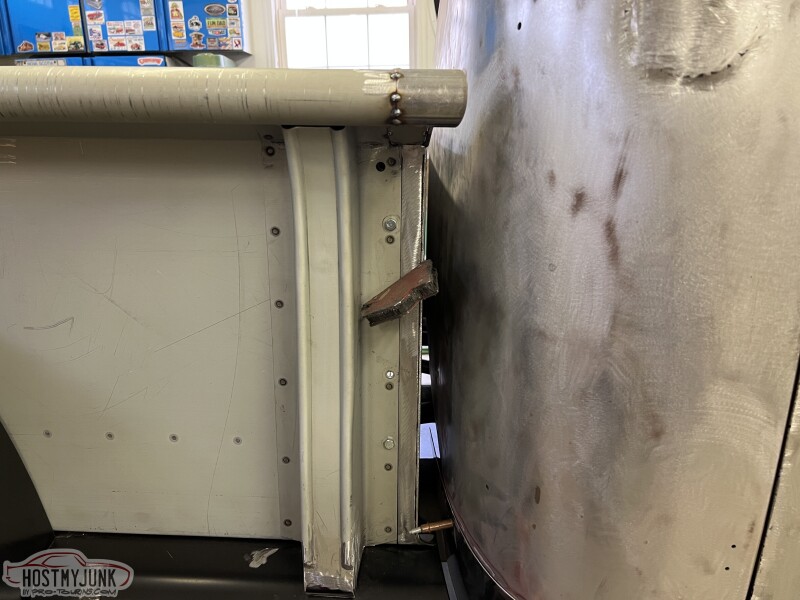 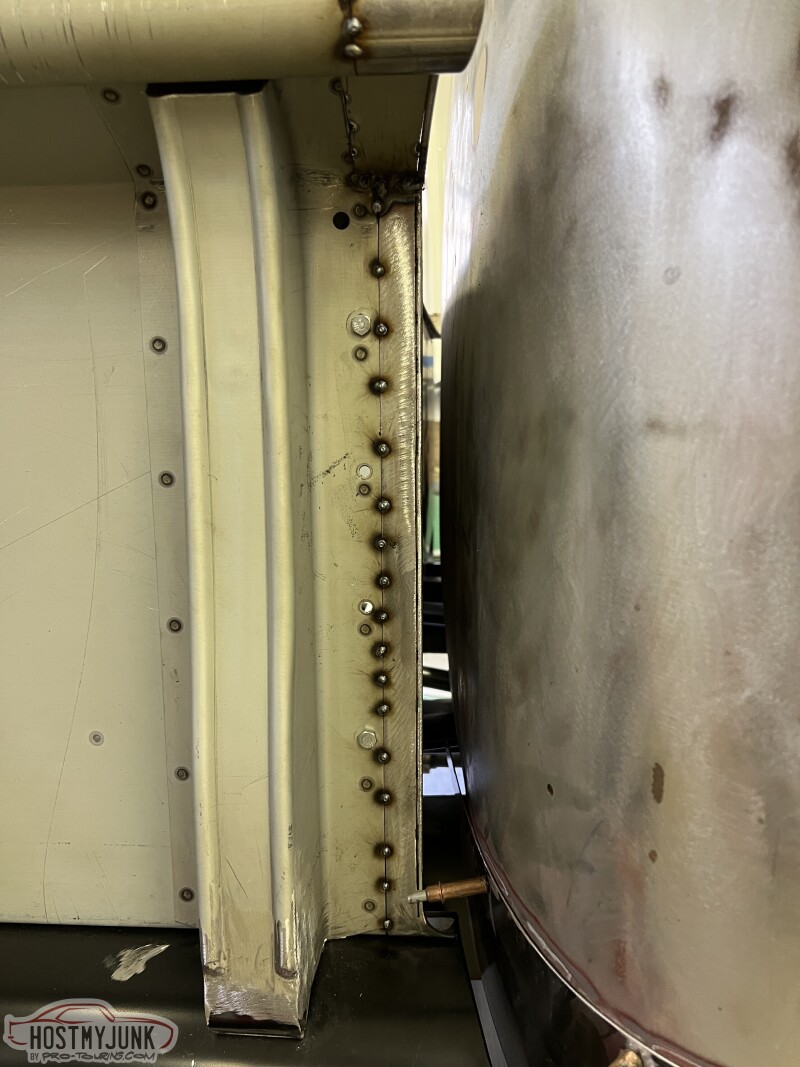 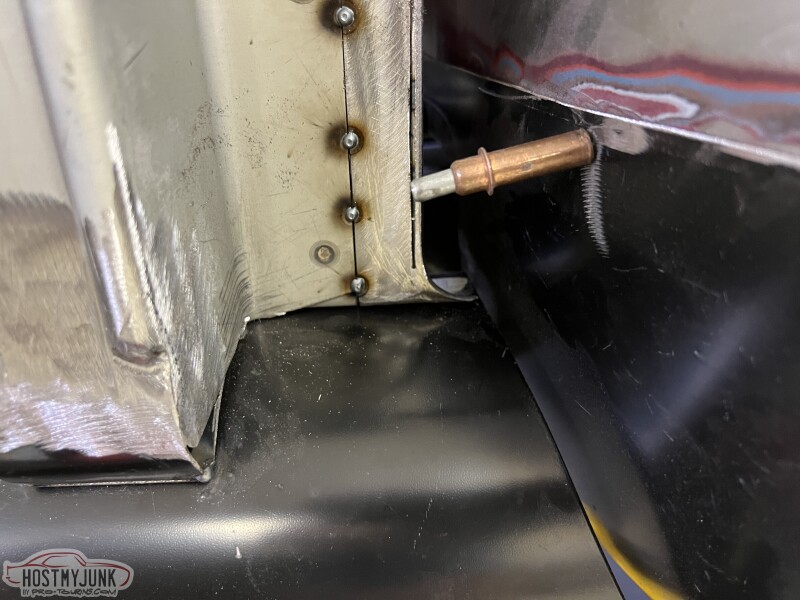 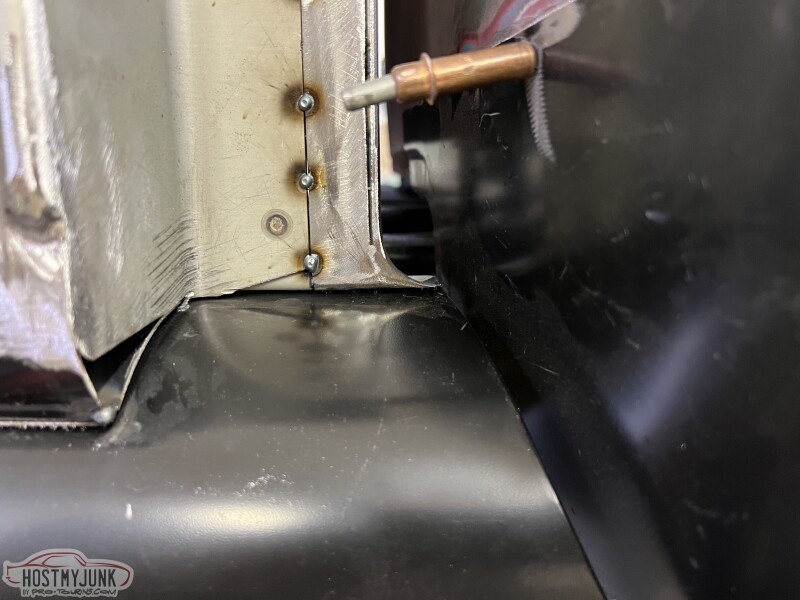 Over all I really like how it cleaned up that gap. It's not drastic, but I think it is a big improvement overall. I still have to make the other side and get it tacked in place. Everything will get final welded when the bed comes off and is on a stand for easy access. New labor subtotal. 7.17 hrs 502.55 total .
__________________
Glenn 1951 3100, Area51 1955 BelAir, 4EVER17 1987 R10, Ethel Copper Hill Rod & Custom http://67-72chevytrucks.com/vboard/s...d.php?t=829856 |
|
|
|
|
08-16-2023, 03:35 PM
|
#286 |
|
Registered User
Join Date: Oct 2020
Location: CHURCHVILLE NY
Posts: 444
|
Re: Long Time Coming......
It looks really nice with the fuel filler where you put it. Lots of time fitting everything up. Steve
__________________
My 57 Fleetside C4 build. http://67-72chevytrucks.com/vboard/s...d.php?t=817054 |
|
|
|
|
08-16-2023, 07:38 PM
|
#287 |
|
Registered User
Join Date: Mar 2017
Location: Western Colorado
Posts: 30
|
Re: Long Time Coming......
You make it all look so easy!
|
|
|
|
|
08-18-2023, 04:11 PM
|
#288 | ||
|
Registered User
Join Date: Jan 2022
Location: Conn.
Posts: 184
|
Re: Long Time Coming......
Quote:
Quote:
__________________
Glenn 1951 3100, Area51 1955 BelAir, 4EVER17 1987 R10, Ethel Copper Hill Rod & Custom http://67-72chevytrucks.com/vboard/s...d.php?t=829856 |
||
|
|
|
|
08-18-2023, 04:25 PM
|
#289 |
|
Registered User
Join Date: Jan 2022
Location: Conn.
Posts: 184
|
Re: Long Time Coming......
Todays project was to fix the filler panel between the running board and bed. I cut a slice in it and pushed the metal where I needed it. I then put a tack weld on to hold the shape. I then took it off and final welded the gap.
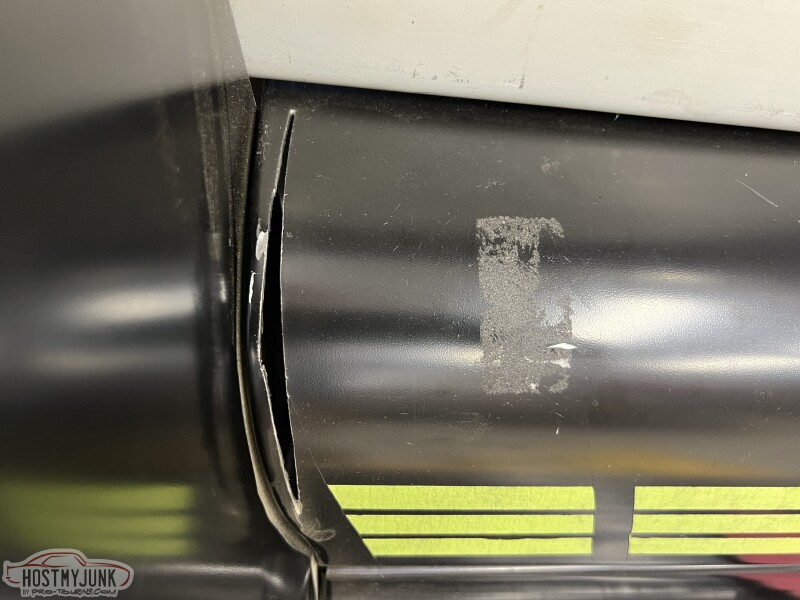 This shows it with welds ground. It is a tighter gap then appears, but also not pushed as far back against the fender as it could be. 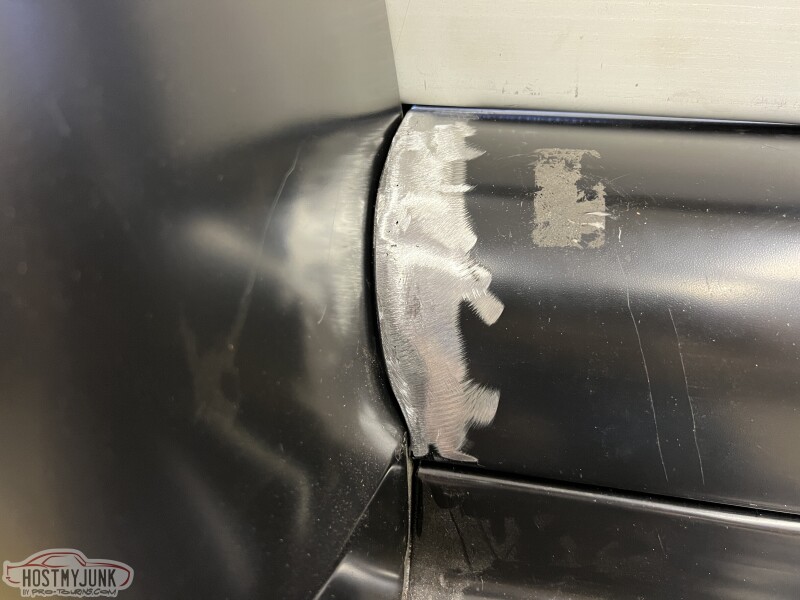 While I had it off the truck I formed a piece of metal and extended the leading edge for a better flow. 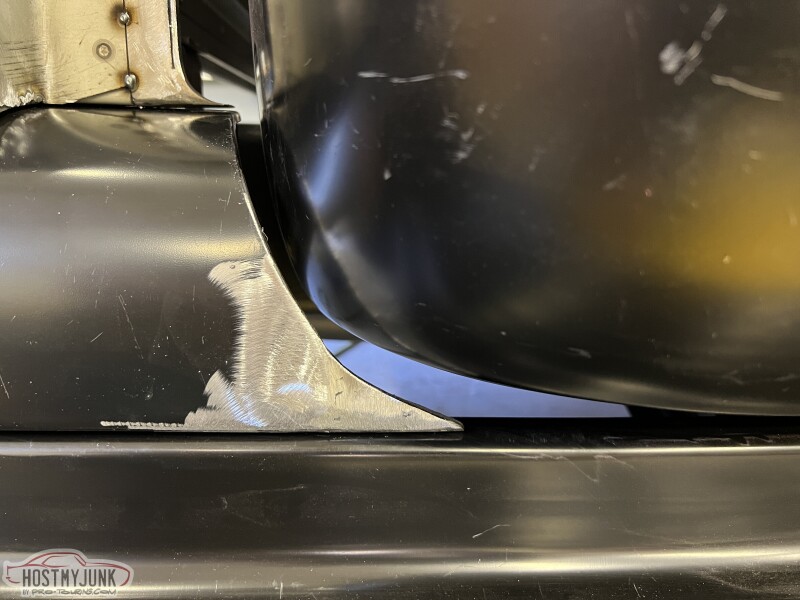 And since I was in the area I finished what I started last week, that being the stake pocket. I'm not a fan of the way they just stop. So I extended it and rolled it in towards the filler panel. The question then became what to do about the two half round reveals (body lines). Do I continue them? If so how? Or do I just stop them? I've seen where people have done this modification before, and every time other than once, people have extended the lines. So me being me and wanting to be mildly different I measured from the top to the bottom and made a cut line. When I formed the extension pieces and welded them in I then welded closed the two hald round reveals. I then ground the welds rounding the bottom off as well. At the end of the day I like it, it's different. And for me that works. 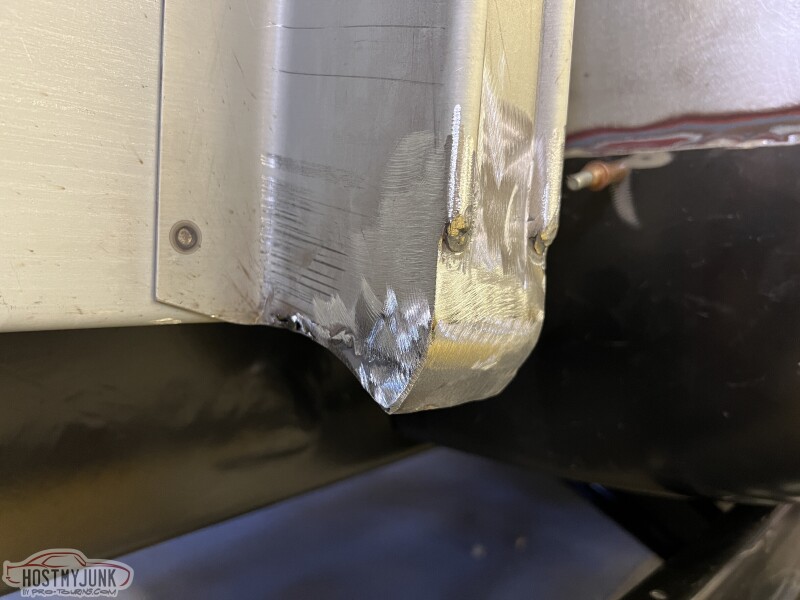 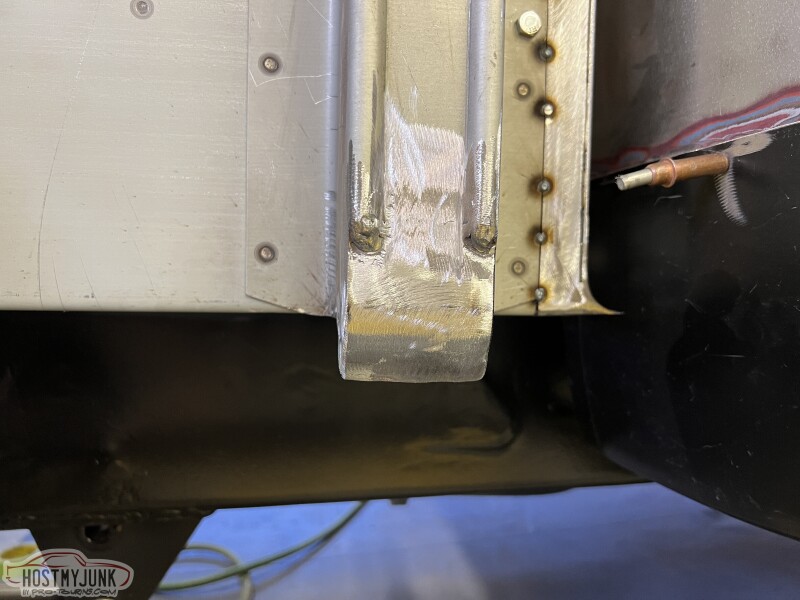 And with the filler panel installed... 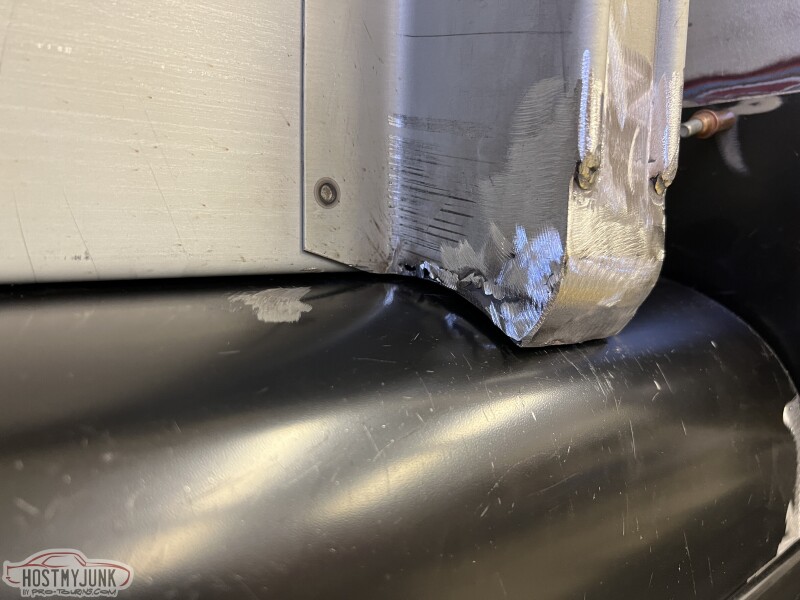  4.37 hrs today 507.17 hrs subtotal .
__________________
Glenn 1951 3100, Area51 1955 BelAir, 4EVER17 1987 R10, Ethel Copper Hill Rod & Custom http://67-72chevytrucks.com/vboard/s...d.php?t=829856 |
|
|
|
|
08-22-2023, 07:37 AM
|
#290 |
|
Registered User
Join Date: Jan 2022
Location: Conn.
Posts: 184
|
Re: Long Time Coming......
Still working away on the running board. This time the fitment to the front fender. I have always wondered why the factory didn't connect the leading edge of the running board to the fender and instead thought this huge gap looked right. Most other year body styles and manufacturers connected the dots. So me being me decided I wanted to make them connect.
As it fit before I started... 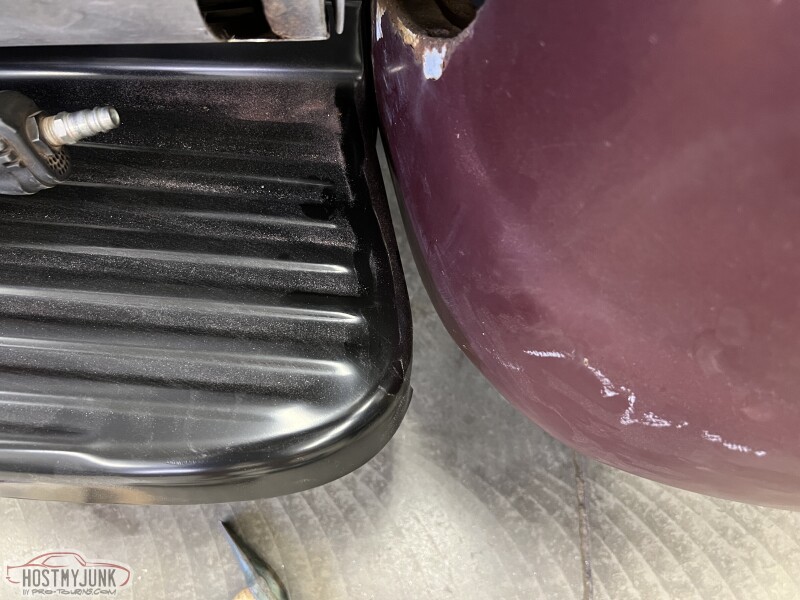 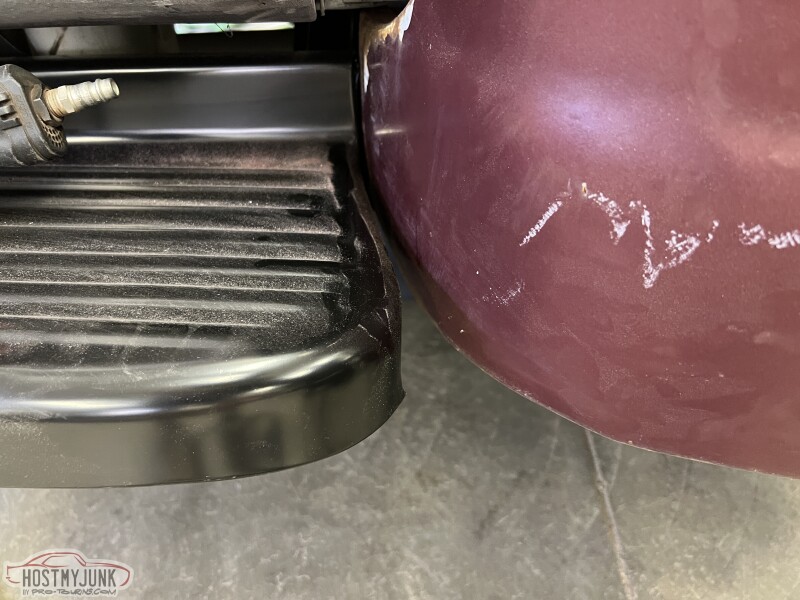 I then cut a slice on the leading edge of the board and pulled it forward until it touched the fender. I also drilled a hole and bolted them together but used a washer in between to create a slight gap. I also welded on a piece to extend the area some. 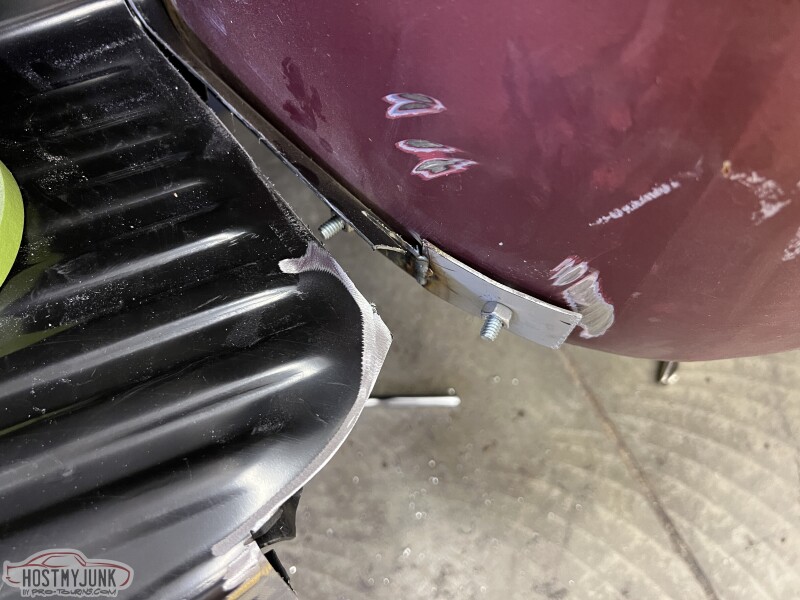 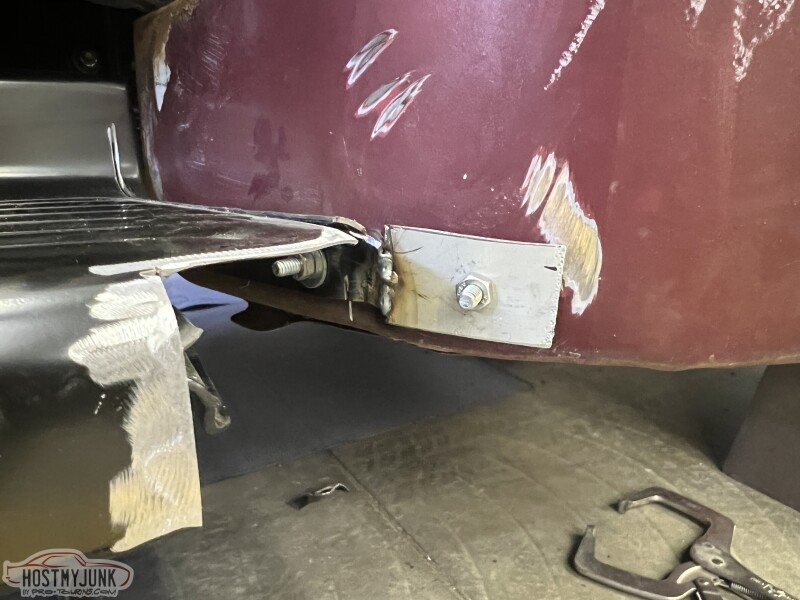 I decided this would be much easier to do if I made the filler pieces in multiple steps. 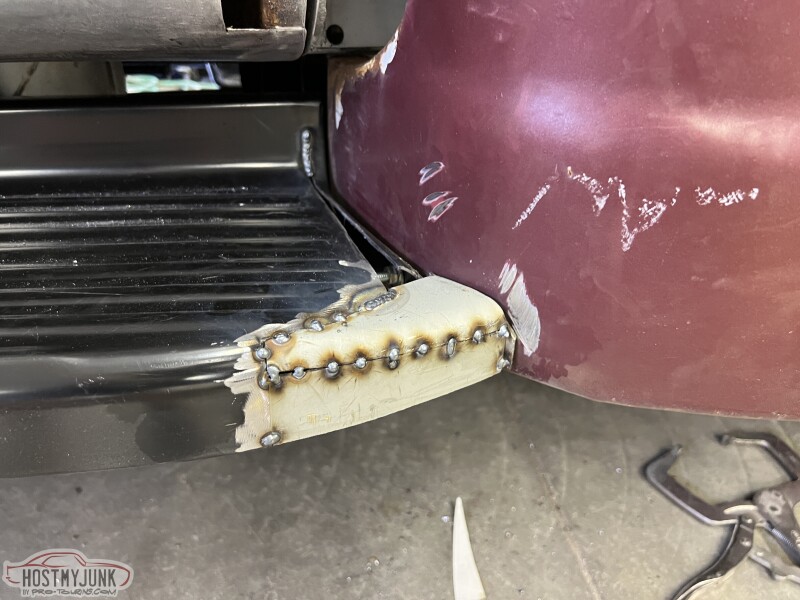 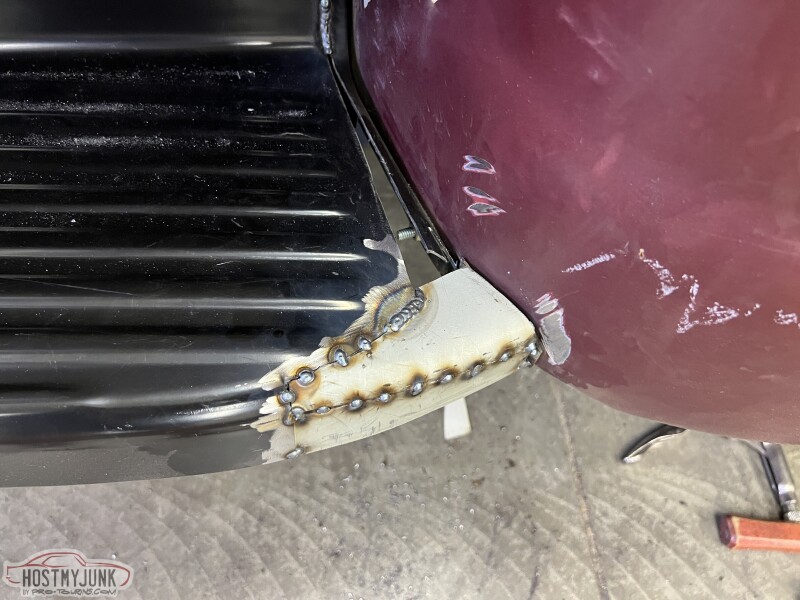 At that point ai took the running board off the truck and put it on my welding table. I made the remailning filler pieces and welded everything solid. I wish now that i took some pics at this point, but I got so wrapped up in what I was doing i forgot. This is now bolted back in place with all the welds ground. This is just roughed in and still needs some finesse work, but you get the idea. 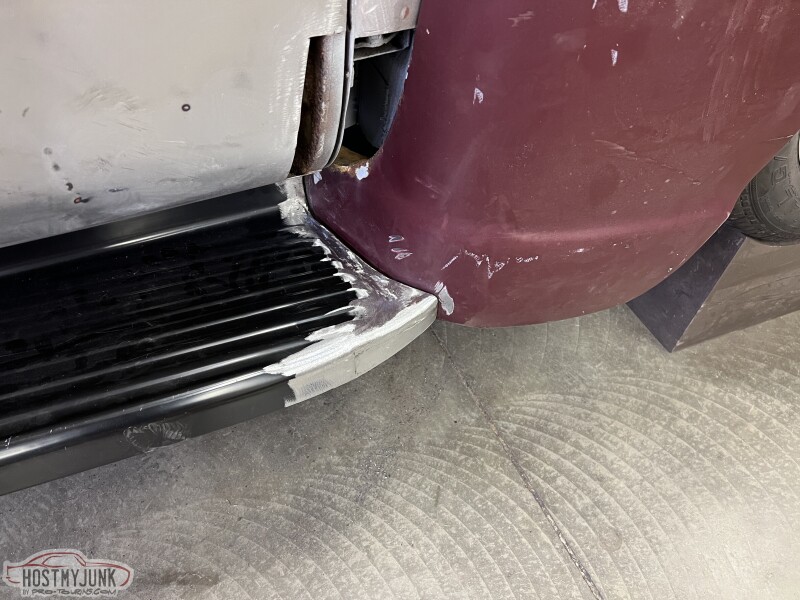 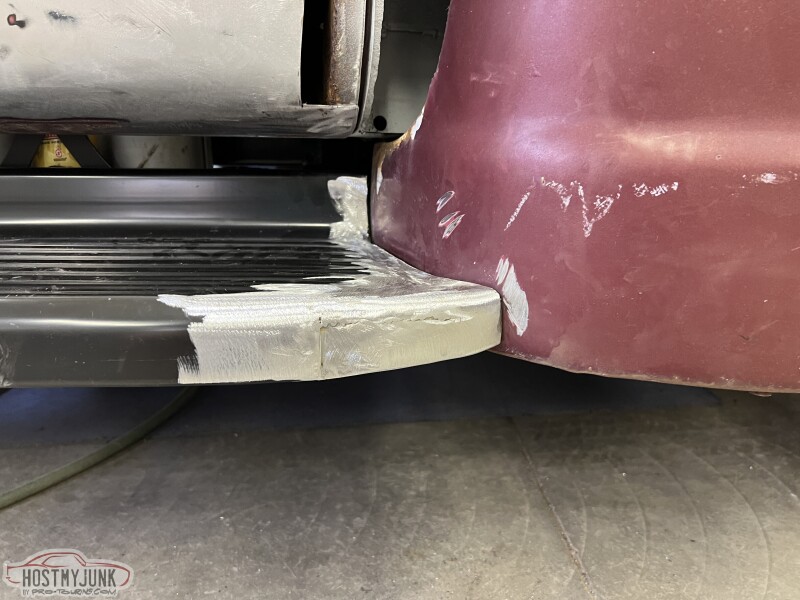 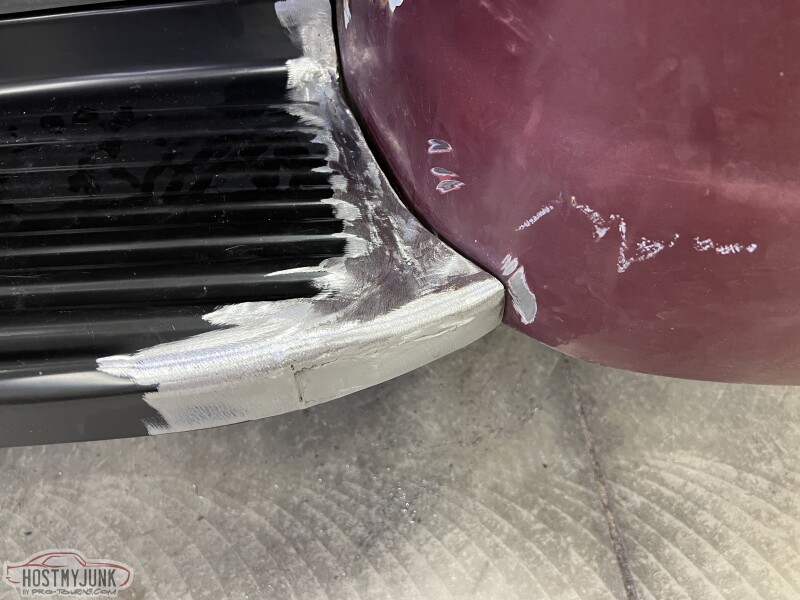 Time for this job, 3.6hrs New subtotal, 510.77 hrs At $50 per hour, that would be $25,538.33 .
__________________
Glenn 1951 3100, Area51 1955 BelAir, 4EVER17 1987 R10, Ethel Copper Hill Rod & Custom http://67-72chevytrucks.com/vboard/s...d.php?t=829856 |
|
|
|
|
08-22-2023, 08:00 AM
|
#291 |
|
Registered User
Join Date: Nov 2014
Location: somewhere, PA
Posts: 1,030
|
Re: Long Time Coming......
damn dude, the attention to detail on the fit is amazing
|

|
|
|
08-22-2023, 09:24 AM
|
#292 |
|
Registered User
Join Date: Nov 2010
Location: calgary alberta
Posts: 7,844
|
Re: Long Time Coming......
great job. you're right, those parts should have been connected at the factory for a more blended look.
|
|
|
|
|
08-26-2023, 08:02 PM
|
#293 | ||
|
Registered User
Join Date: Jan 2022
Location: Conn.
Posts: 184
|
Re: Long Time Coming......
Quote:
Quote:
Thanks guys. I love doing this stuff! I've been having so much fun out in the shop this summer. Play time is now over, I start back to school Monday. Now back to slower progress.
__________________
Glenn 1951 3100, Area51 1955 BelAir, 4EVER17 1987 R10, Ethel Copper Hill Rod & Custom http://67-72chevytrucks.com/vboard/s...d.php?t=829856 |
||
|
|
|
|
08-26-2023, 08:17 PM
|
#294 |
|
Registered User
Join Date: Jan 2022
Location: Conn.
Posts: 184
|
Re: Long Time Coming......
Every once in a while I have those days where it feels like nothing got accomplished. Today was definitely not one of those days. I got so much done, some of which I didn;t take pics of though.
I started and finished the the front left stake pocket as I had previously done on the right side. I also took the filler panel off and extended the front leading edge as also done on the other side. While at it I made the filler piece and rod that goes from the top of the bed to that filler panel to match what was done on the other side. This was to fill that unsightly gap between the bed and cab. You've seen pics of all that already from the right side, no sense on posting more pics covering the same mods. Once all that was done I turned my attention to the two rear stake pocket bottom ends. I measured and figured out where I wanted to end and then start the roll inwards. I made a template out of posterboard and marked front and back of both stake pockets for the radius I wanted it to be trimmed to. 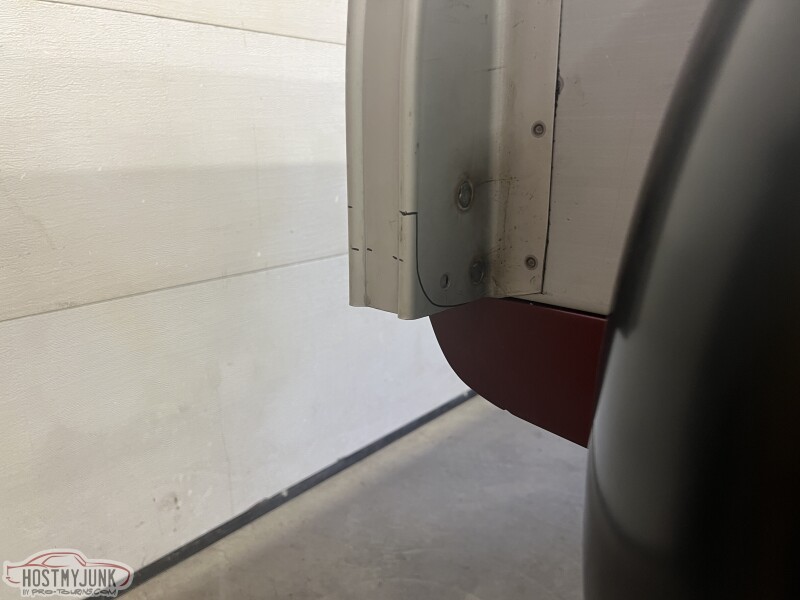 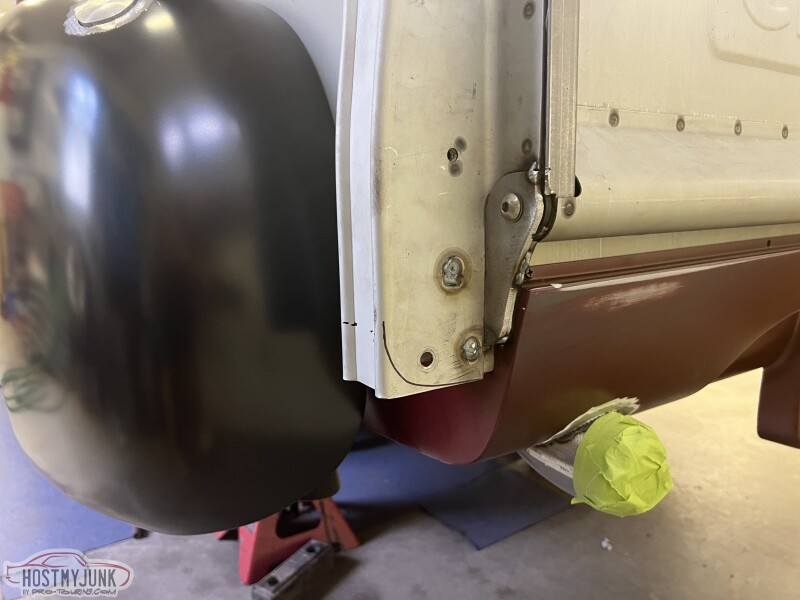 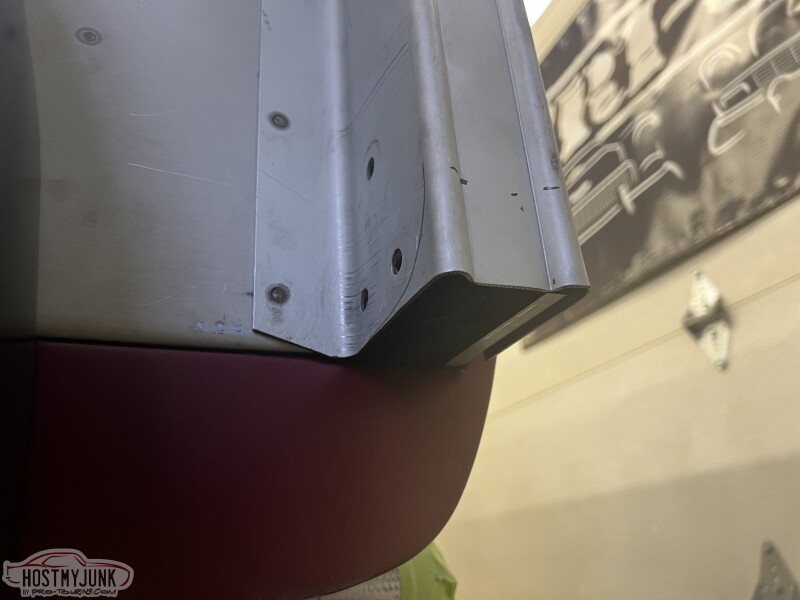 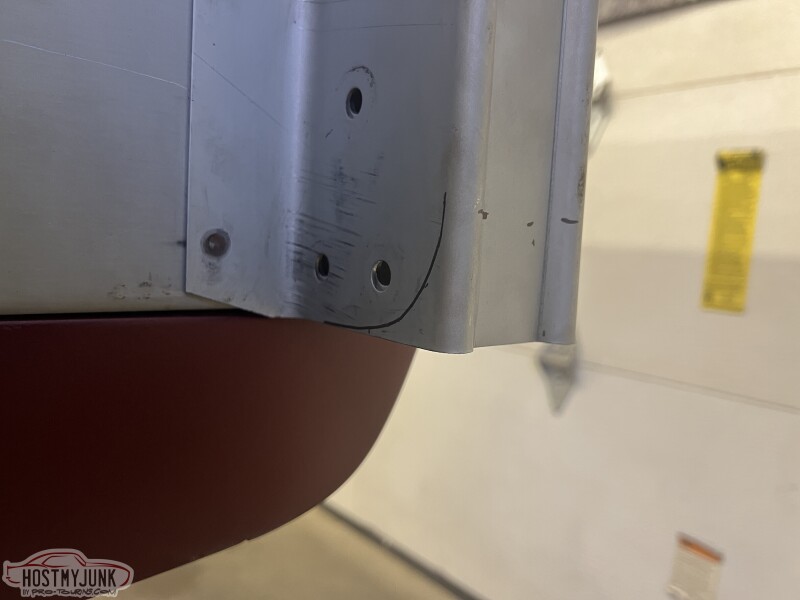 I then cut across at the line I had already determined and then trimmed the bottom edges to match the radius. 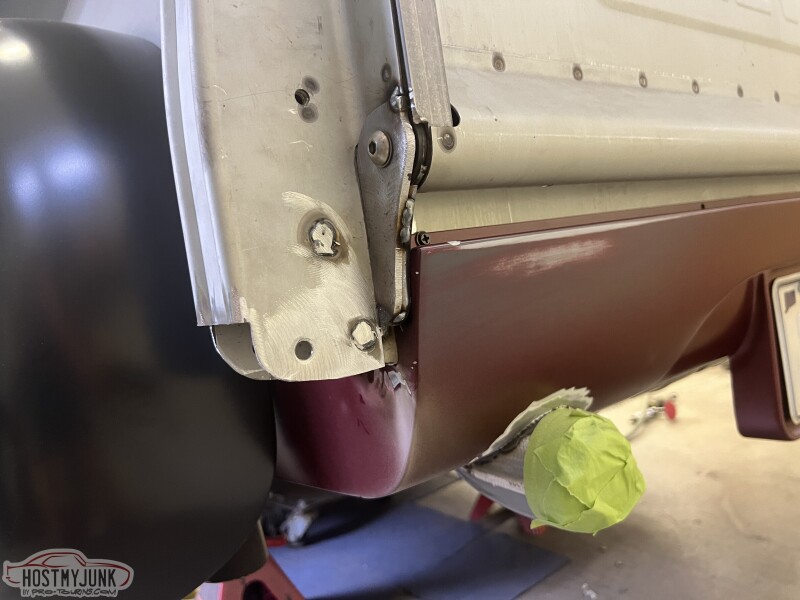 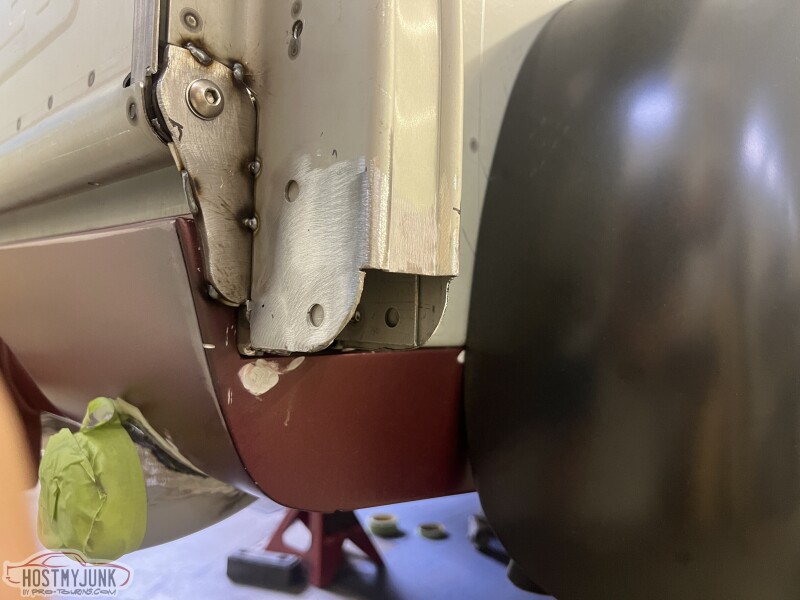 At this point I got so busy doing things I didn't take pics as I was working. Here however is the pieces with all the welds ground. This still needs some finessing. You might also notice that I plug welded the holes where all the bed parts normally bolt together. I am welding this solid into one piece. 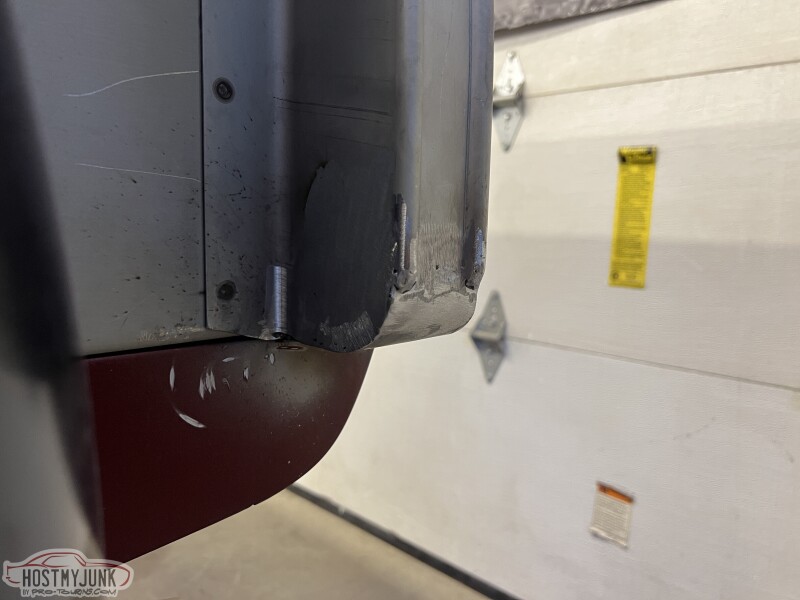 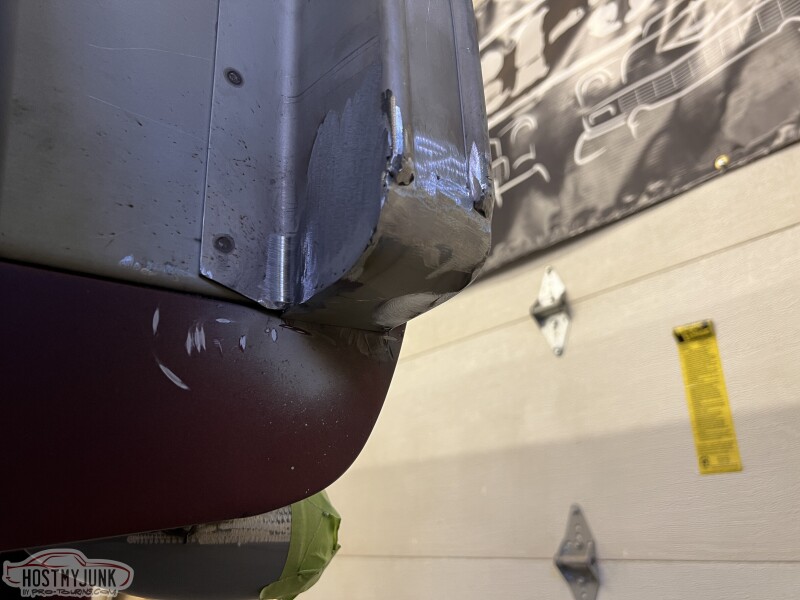 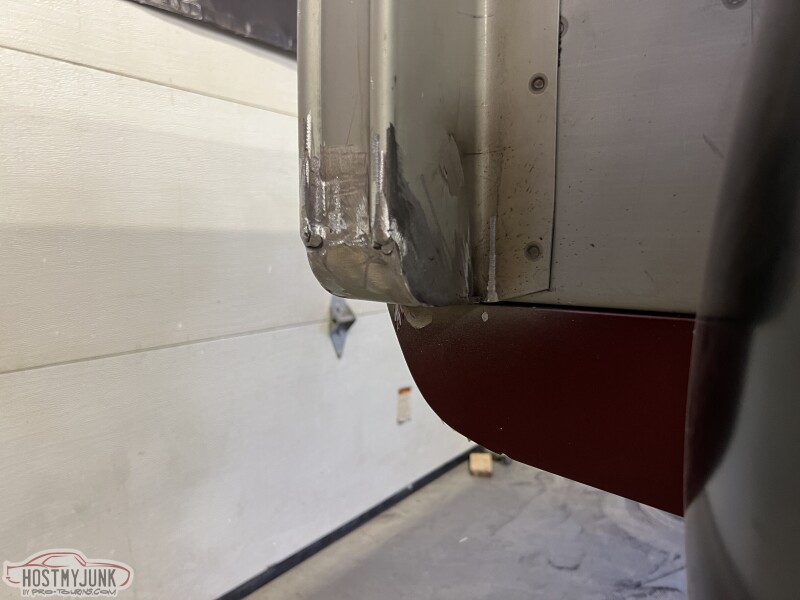 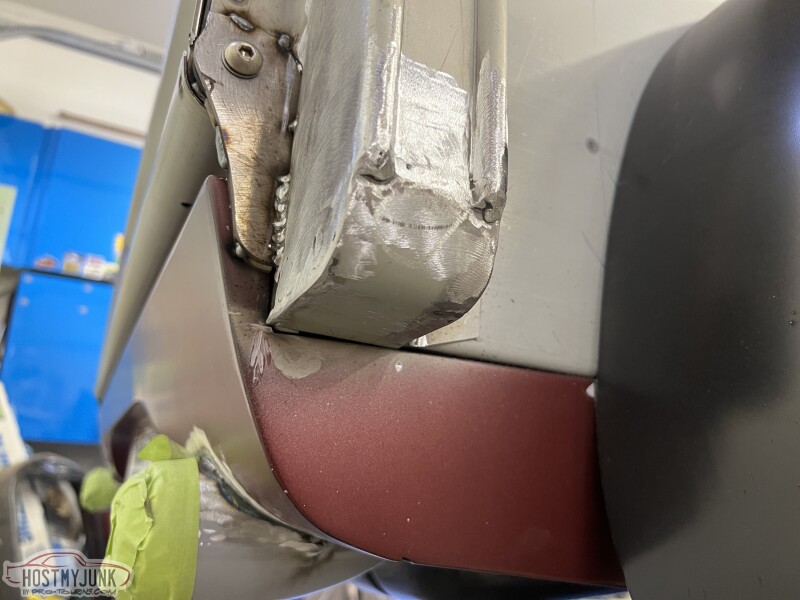 Time today, 5.57 hrs Subtotal, 516.33hrs .
__________________
Glenn 1951 3100, Area51 1955 BelAir, 4EVER17 1987 R10, Ethel Copper Hill Rod & Custom http://67-72chevytrucks.com/vboard/s...d.php?t=829856 |
|
|
|
|
08-27-2023, 10:20 AM
|
#295 |
|
Senior Member
Join Date: Oct 2014
Location: Eagle, ID
Posts: 2,945
|
Re: Long Time Coming......
Very nice! One question, will there ever be a possibility of moisture getting in there? Would it be worthwhile to add a small hole for drainage purposes?
|
|
|
|
|
08-27-2023, 04:00 PM
|
#296 | |
|
Registered User
Join Date: Jan 2022
Location: Conn.
Posts: 184
|
Re: Long Time Coming......
Quote:
I definitely plan on drilling a coupole small drain holes on the bottom once I remove the bed.
__________________
Glenn 1951 3100, Area51 1955 BelAir, 4EVER17 1987 R10, Ethel Copper Hill Rod & Custom http://67-72chevytrucks.com/vboard/s...d.php?t=829856 |
|
|
|
|
|
08-27-2023, 04:12 PM
|
#297 |
|
Registered User
Join Date: Nov 2010
Location: calgary alberta
Posts: 7,844
|
Re: Long Time Coming......
What about if you cut a small groove on the edge that fits against the box wall. That small divot would leave a gap that would look sorta natural and also be a drain that would pass water, tree needles, etc. I would recommend shooting some weld through primer into the void to prevent rust. High zinc.
|
|
|
|
|
08-27-2023, 04:20 PM
|
#298 | |
|
Registered User
Join Date: Jan 2022
Location: Conn.
Posts: 184
|
Re: Long Time Coming......
Quote:
__________________
Glenn 1951 3100, Area51 1955 BelAir, 4EVER17 1987 R10, Ethel Copper Hill Rod & Custom http://67-72chevytrucks.com/vboard/s...d.php?t=829856 |
|
|
|
|
|
08-27-2023, 09:06 PM
|
#299 |
|
Registered User
Join Date: Nov 2010
Location: calgary alberta
Posts: 7,844
|
Re: Long Time Coming......
if you were to extend the lower flap of steel so it goes inside the edge of the lower valance, and provide enough of a hole for water to drain through into that area, the drainage would all happen behind the valance so the hole could be large enough to do the job but would be un noticed. just a thought, dunno what you have for room back there.
|
|
|
|
|
08-28-2023, 01:32 PM
|
#300 |
|
Registered User
Join Date: Feb 2021
Location: WestCentral MN,
Posts: 35
|
Re: Long Time Coming......
I hope you don't regret solidly mounting the runningboard on both ends. Same goes for the tight gaps between the cab and filler. Unless your frame is EXTREMELY stiff and rigid you could get rubs, squeaks and cracks.
|
|
|
|
 |
| Bookmarks |
|
|


 Linear Mode

