
|
 09-19-2012, 03:58 PM
|
#76 |
|
Registered User
Join Date: Aug 2012
Location: Salem Mo
Posts: 647
|
Re: 1957 Chevy truck re-rebuild
No, no, those of us who like to work on vehicles shouldn't get lightning bolts, we should be getting Grade 8 bolts. yeah, I like that....
|

|

|
|
09-19-2012, 11:24 PM
|
#77 |
|
Registered User
Join Date: Aug 2012
Location: Salem Mo
Posts: 647
|
Re: 1957 Chevy truck re-rebuild
Once I got the fender emblem figured out, I was on the look out for another project.
I had the engine in place, the headers were in place, it was time to run the plug wires. I knew first off there were not going to go over the top of the valve covers. They had to go behind the valve covers, then follow the bottom of the valve cover, then turn off to each plug among the way. I looked through the catalogs, I just didn't see what I was looking for, am I that fussy, maybe so, I just didn't want a bunch of adjustable screw brackets ect. I also wanted hide the small bit of cast iron that always burns the paint between the vave cover and the exhaust port on the big block chevys. After many measurements I made a design that covers the cast ion and will hold each plug wire in perfect alighnment to the plug it is going to. I'm cutting stainless steel, it's expensive, my best choice is to print the design on paper, then cut the pattern out of paper to check all my measurments. The paper mock up. 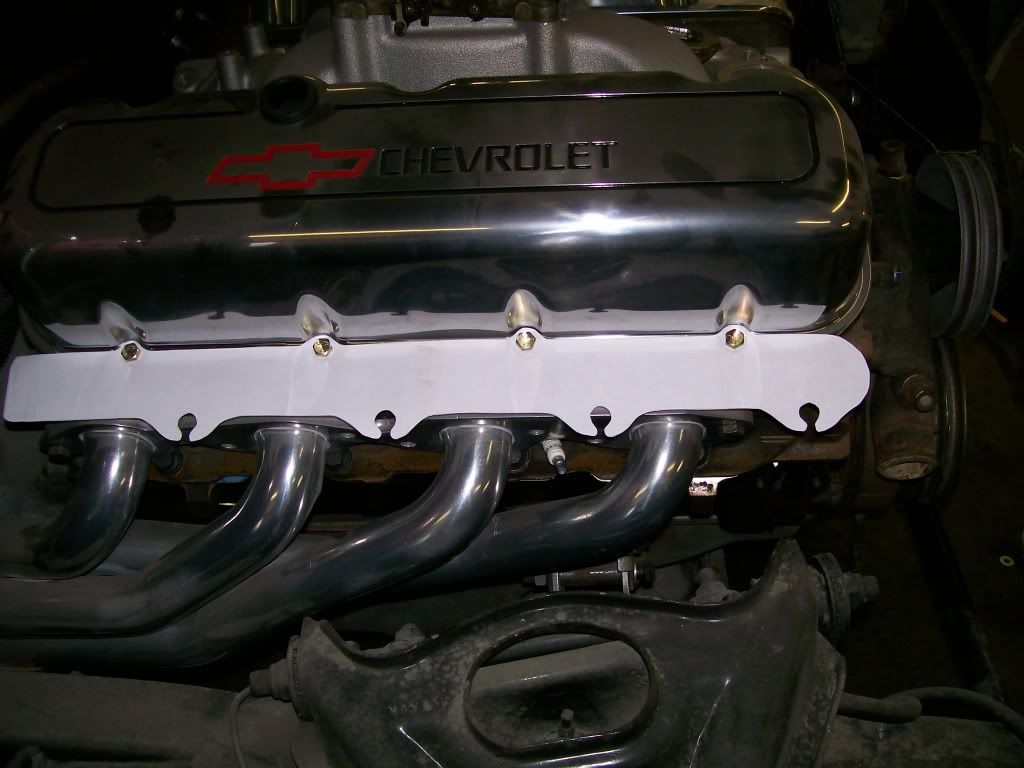 After the paper one fit I cleaned up a few angles and cut the stainless steel. The rust mark on the stainless is from an other hung of steel laying on it. 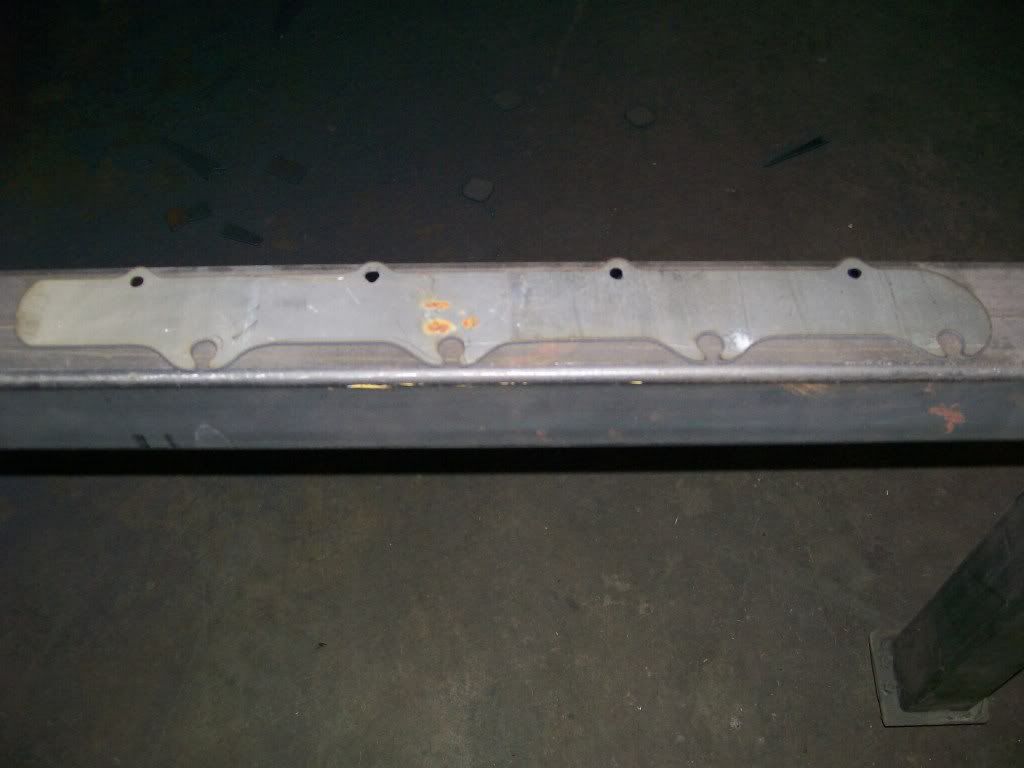 More to follow... |
|
|
|
|
09-20-2012, 12:18 AM
|
#78 |
|
Registered User
Join Date: Aug 2007
Location: Corona, California
Posts: 7,998
|
Re: 1957 Chevy truck re-rebuild
O.K. now you're just showing off.
 Looks real nice. Kim |
|
|
|
|
09-20-2012, 01:50 AM
|
#79 | |
|
Registered User
Join Date: Nov 2011
Location: Langley, BC
Posts: 702
|
Re: 1957 Chevy truck re-rebuild
Quote:
__________________
56 Chevy PU http://67-72chevytrucks.com/vboard/s...d.php?t=531955 Question: Know how to sell your truck for $50,000? Answer: Spend $100,000 building it. |
|
|
|
|
|
09-21-2012, 10:28 PM
|
#80 |
|
Registered User
Join Date: Aug 2012
Location: Salem Mo
Posts: 647
|
Re: 1957 Chevy truck re-rebuild
Getting to the end of the plug wire holders....
I have to holes drilled for mounting, and the rubber grommets fit into their slots. 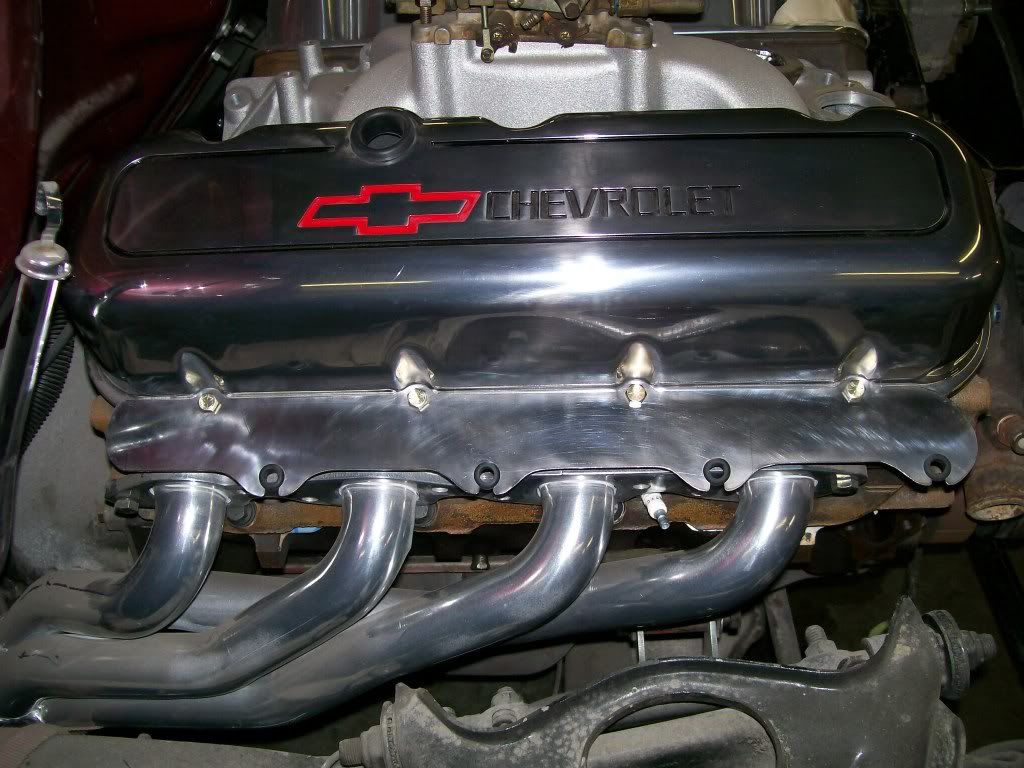 I bought some wire separaters to keep the wires in order but I would like to attach the separaters to the stainless covers. 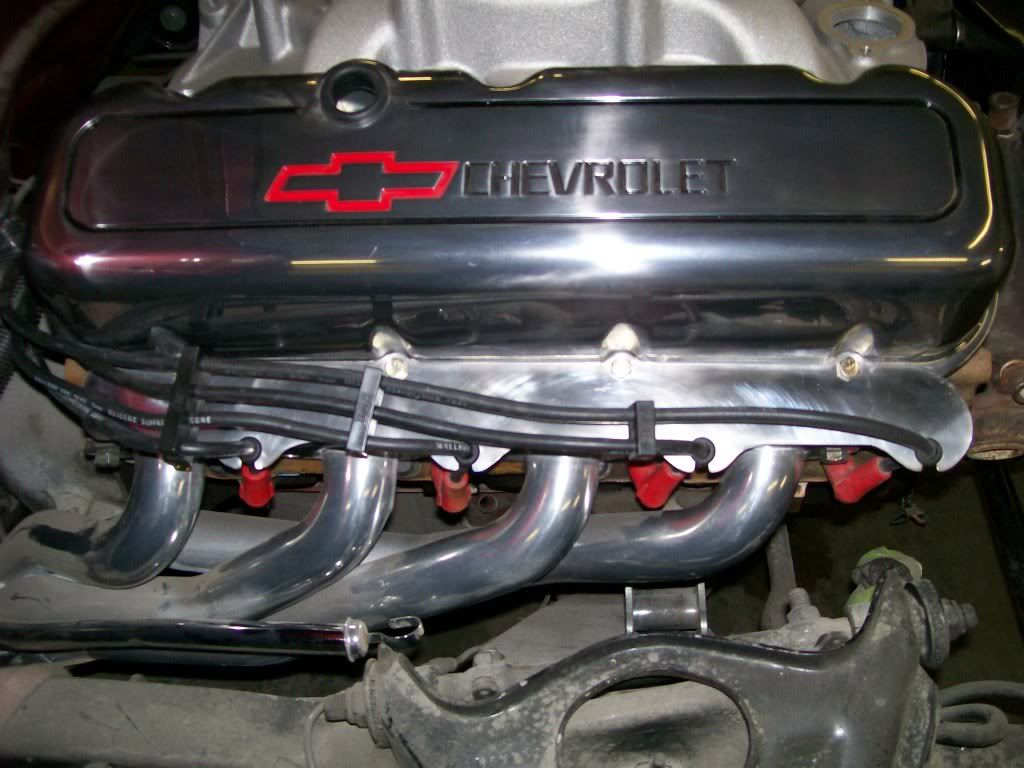 I drilled the cover and mounted the wires directly to them but it wasn't what I was looking for. 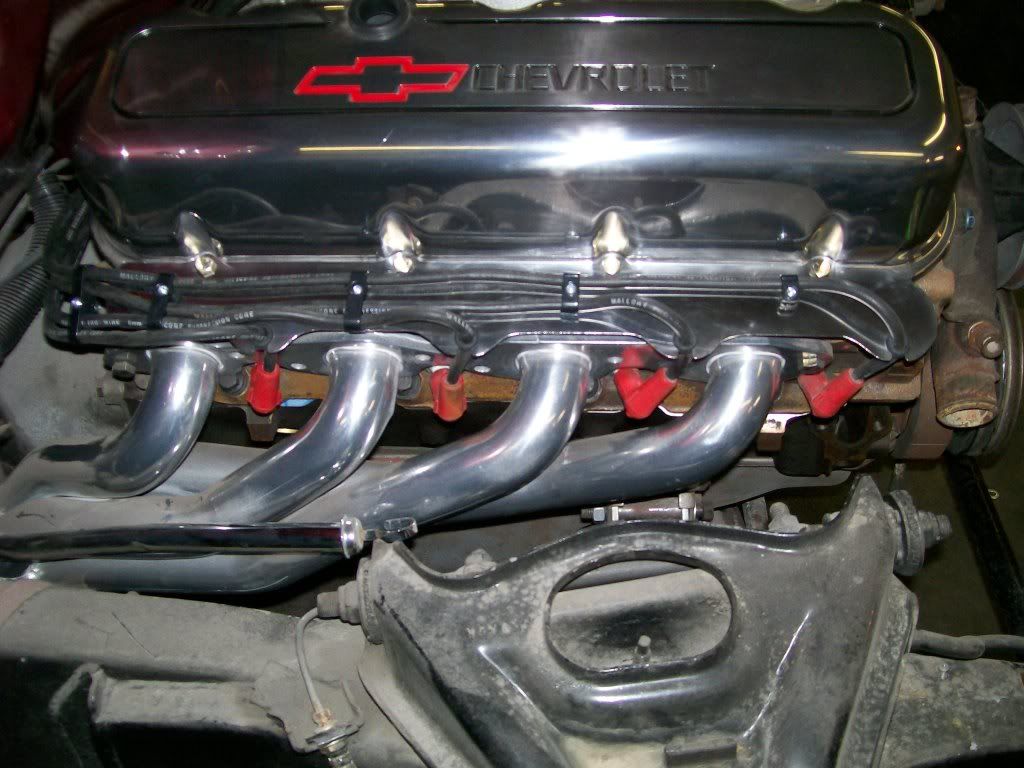 After a while I had a plan. I decided the wires had to be held obove the covers. I designed risers that gave a depth to the appearance. 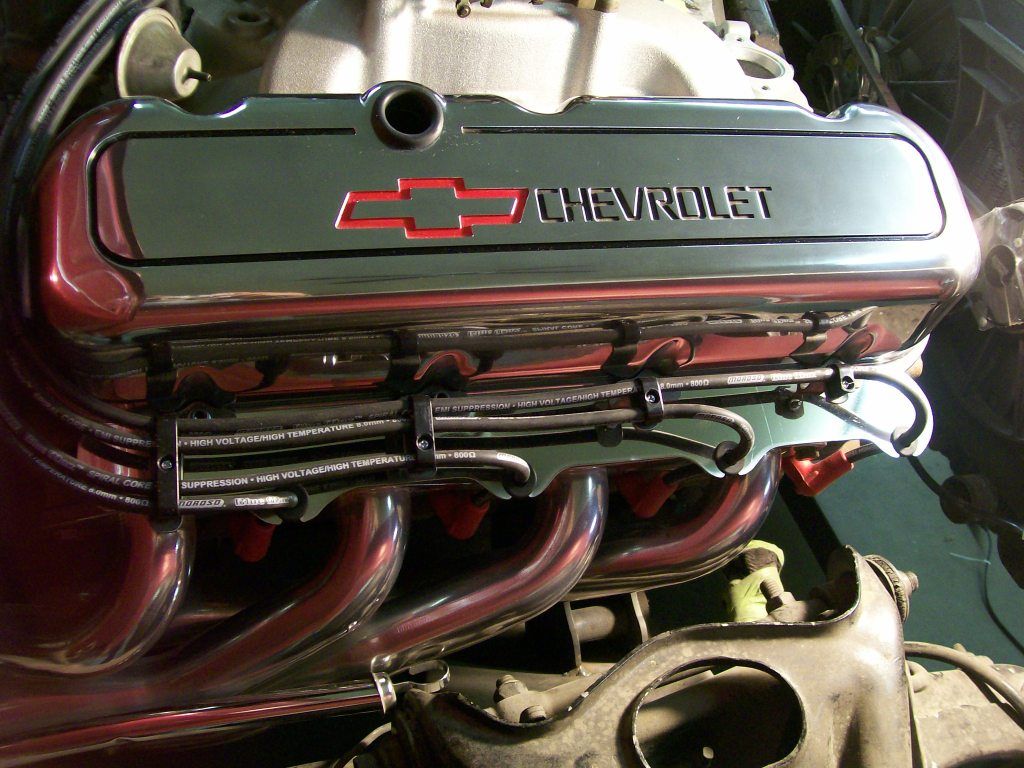 A bonus by doing the risers is the extra refection. I haven't decided to paint the risers black or have them chromed. 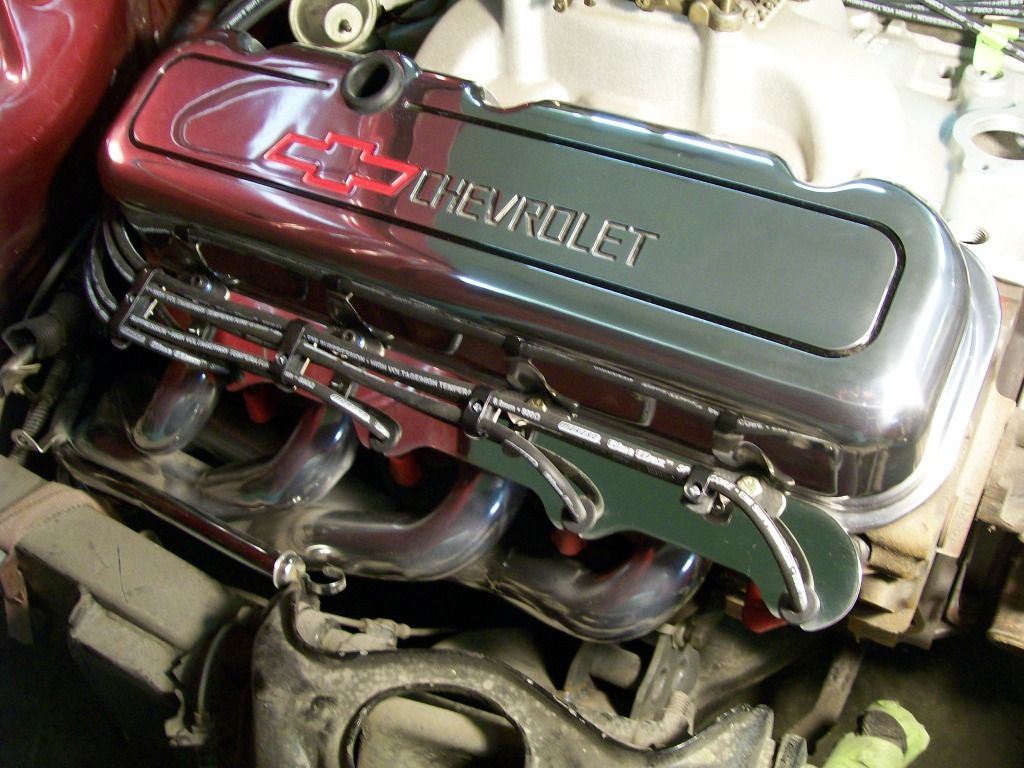 A view from the front. 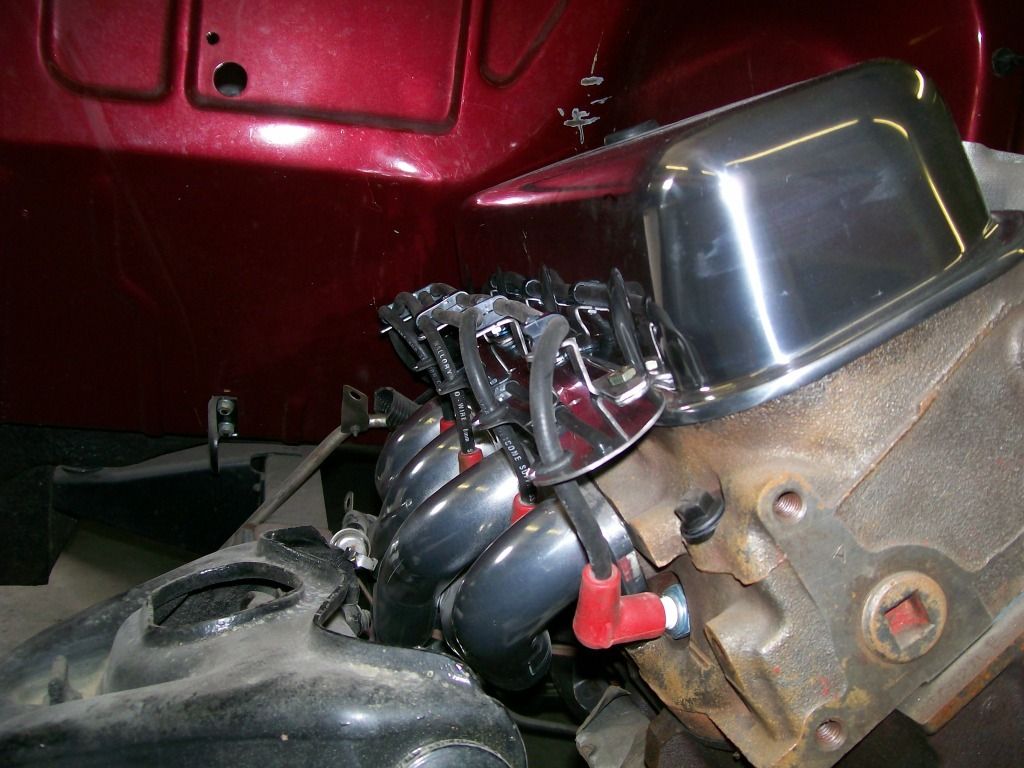 And view from a distance. 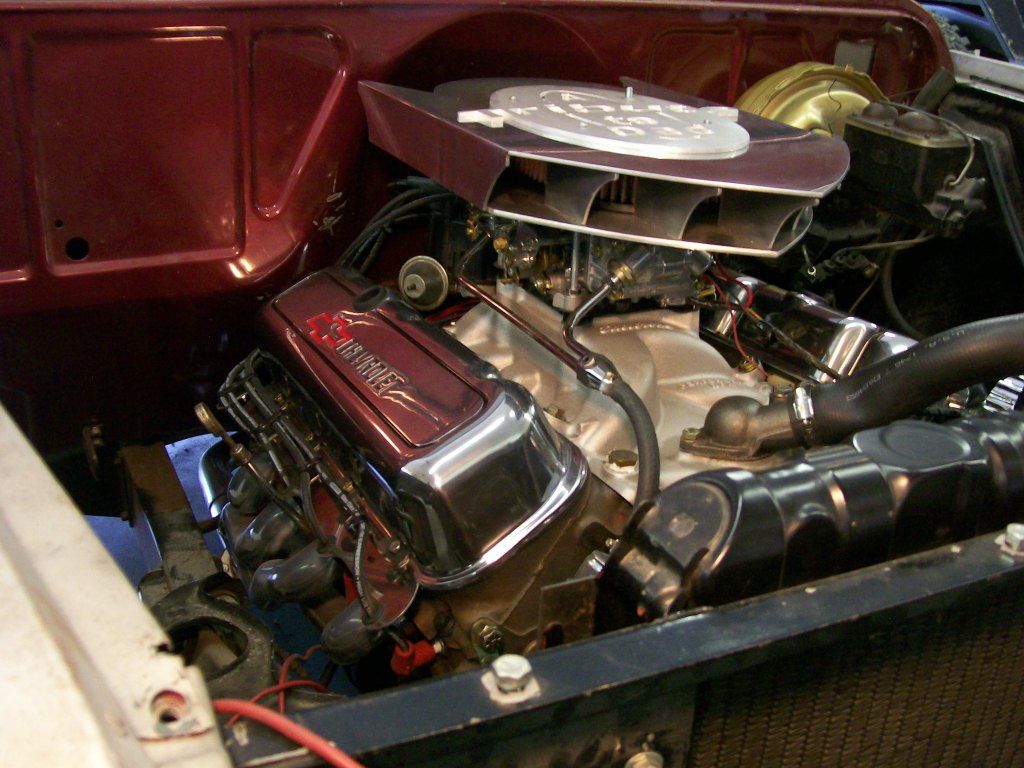 Kleenex dispenser..... can I have it electrically eject each kleenex?
|
|
|
|
|
09-21-2012, 11:56 PM
|
#81 |
|
Registered User
Join Date: Aug 2007
Location: Corona, California
Posts: 7,998
|
Re: 1957 Chevy truck re-rebuild
There's a house up the street from me for sale. I think you should buy it and move there with all your tools so you can make stuff for my build.
Looks real nice. Kim |
|
|
|
|
09-22-2012, 12:47 PM
|
#82 |
|
Registered User
Join Date: Apr 2012
Location: Fayetteville, AR
Posts: 105
|
Re: 1957 Chevy truck re-rebuild
Great work
Posted via Mobile Device |
|
|
|
|
10-08-2012, 08:52 PM
|
#83 |
|
Registered User
Join Date: Aug 2012
Location: Salem Mo
Posts: 647
|
Re: 1957 Chevy truck re-rebuild
Kim57, what a great idea. Can you imagine the stuff you'd be thinking of building. Your talents of suspension and frame work and my kleenex box building, the sky is the limit, or as Tom Petty said.. the future's wide open.
 Now that the engine is running and all the accessories such as the exhaust, belt pulleys ect, I'm ready to get back to the body work. I'd rather take the engine back out to keep all the dust and over spray getting on it. Since it's on the engine stand I figured it would be good to get it painted. I know my choice of color isn't right for everybody but it feels good getting having a painted engine. Using some old valve covers and beginning the taping off of ports and other places I don't want painted. 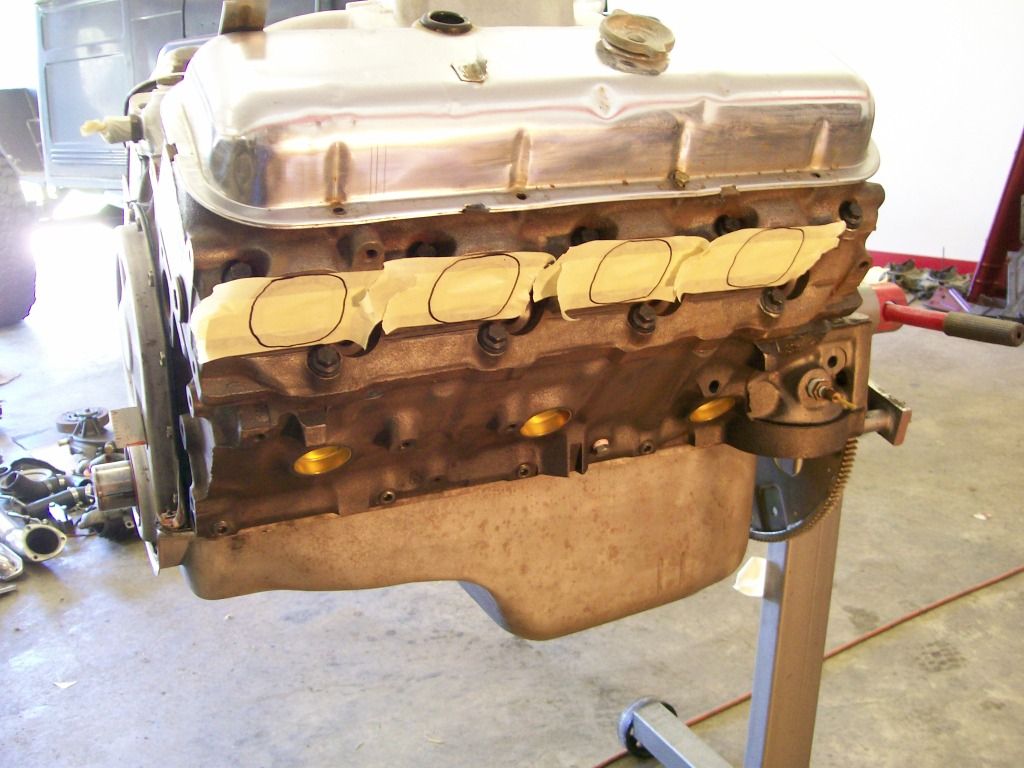 After primer and paint. Now I feel this project is starting to move forward.  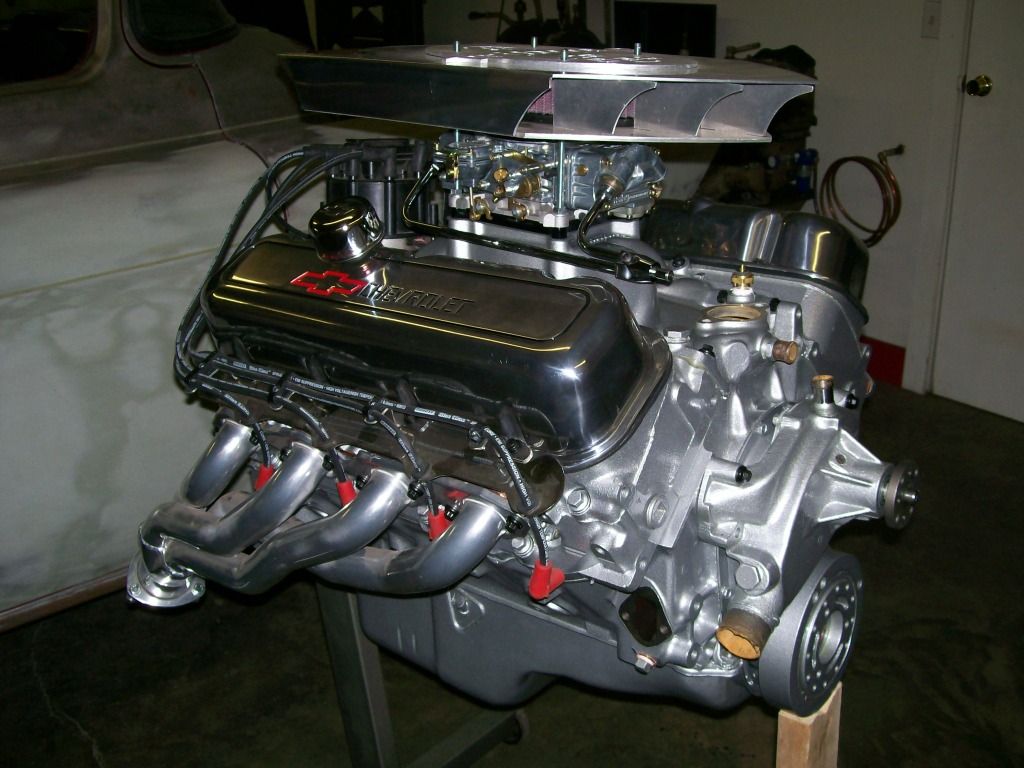
|
|
|
|
|
10-08-2012, 08:55 PM
|
#84 |
|
Registered User
Join Date: Mar 2012
Location: Vail AZ.
Posts: 104
|
Re: 1957 Chevy truck re-rebuild
Wow I think that engine looks awesome!
__________________
http://67-72chevytrucks.com/vboard/s...74#post5272074 http://67-72chevytrucks.com/vboard/s...03#post6183103 I would rather spend 2 hours making a part than spend $2.00 buying one |
|
|
|
|
10-08-2012, 11:04 PM
|
#85 | |
|
Registered User
Join Date: Mar 2012
Location: Vail AZ.
Posts: 104
|
Re: 1957 Chevy truck re-rebuild
Quote:
__________________
http://67-72chevytrucks.com/vboard/s...74#post5272074 http://67-72chevytrucks.com/vboard/s...03#post6183103 I would rather spend 2 hours making a part than spend $2.00 buying one |
|
|
|
|
|
10-08-2012, 11:30 PM
|
#86 |
|
Registered User
Join Date: Jun 2012
Location: edmonton alberta
Posts: 422
|
Re: 1957 Chevy truck re-rebuild
that air cleaner is amazing!
__________________
Tyler ------------------------------------------------------ 1980 2wd blazer 1985 k10 diesel truckhttp://67-72chevytrucks.com/vboard/s...d.php?t=652276 1987 wrangler 4x4 build-http://67-72chevytrucks.com/vboard/s...d.php?t=663784 |
|
|
|
|
10-09-2012, 12:17 AM
|
#87 |
|
Registered User
Join Date: Aug 2007
Location: Corona, California
Posts: 7,998
|
Re: 1957 Chevy truck re-rebuild
The engine looks great. I love the color.
Kim |
|
|
|
|
10-09-2012, 11:13 PM
|
#88 |
|
Registered User
Join Date: Aug 2012
Location: Salem Mo
Posts: 647
|
Re: 1957 Chevy truck re-rebuild
Madd Doc, thanks for the offer. The more I look at them, the more I'm leaning towards having them chromed. With the black bolts, black wires and the black wire holders, I think the chrome would stand out.
By the way....... you can probably tell this about me already but, I totally agree with your quote of building your own stuff vs buying. Thanks Kim, it makes a nice color base for just about any accents. ol'blazer, I'm glad you like it. I went through catalogs and web sites looking for an air filter housing that didn't expose the filter element. I understand the open element helps air flow, but I decided looking at the element gets old. I drew out a couple ideas on cardboard and came up with this. Here's a look inside. 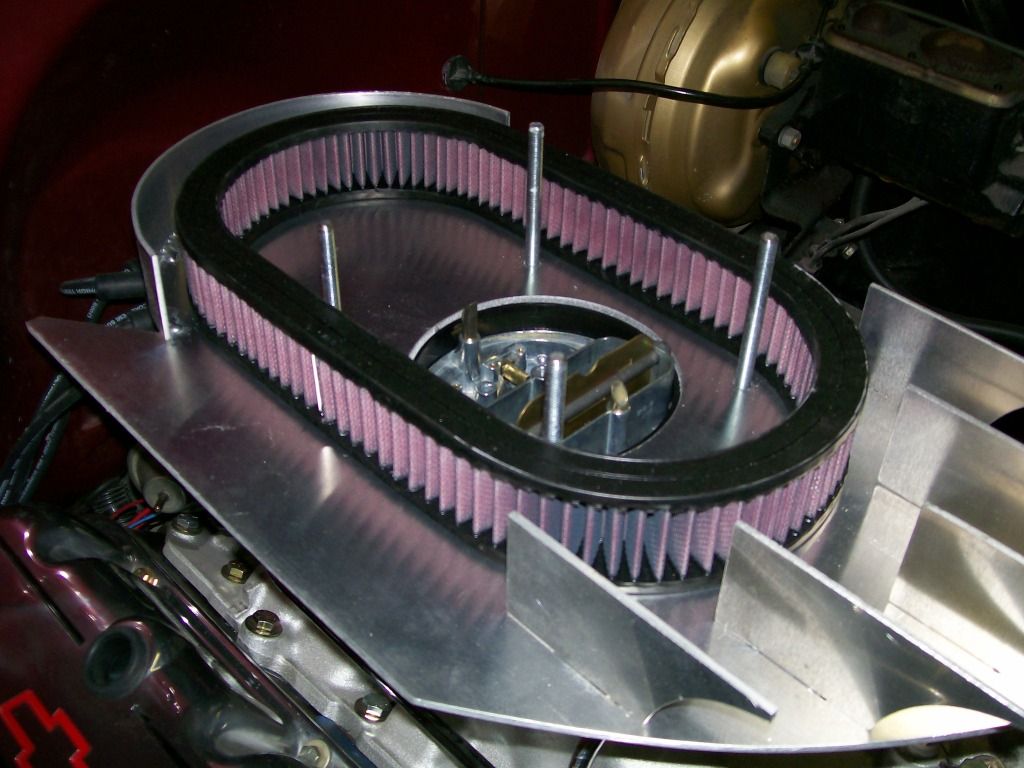 Still working on the kleenex holder ............. |
|
|
|
|
10-14-2012, 01:23 PM
|
#89 |
|
Registered User
Join Date: Aug 2012
Location: Salem Mo
Posts: 647
|
Re: 1957 Chevy truck re-rebuild
Although I like the idea of moving the gas tank out of the cab, for now I want to run the truck with the tank in the original place, in the cab.
One issue I have is the size of the fuel line use in the original sending unit. It is a 5/16" fuel line, along with this size line there are a couple very tight bends and a brass fitting attached that brings it's inside diameter down to a 1/4". I'm sure this is not enough flow to support the needs of the engine. There are a couple ways to do this fix and being me, I'd chose the more time consuming way of doing it, so here goes. Here's an idea of the original sitting along side of most of the pieces used to make the new one. 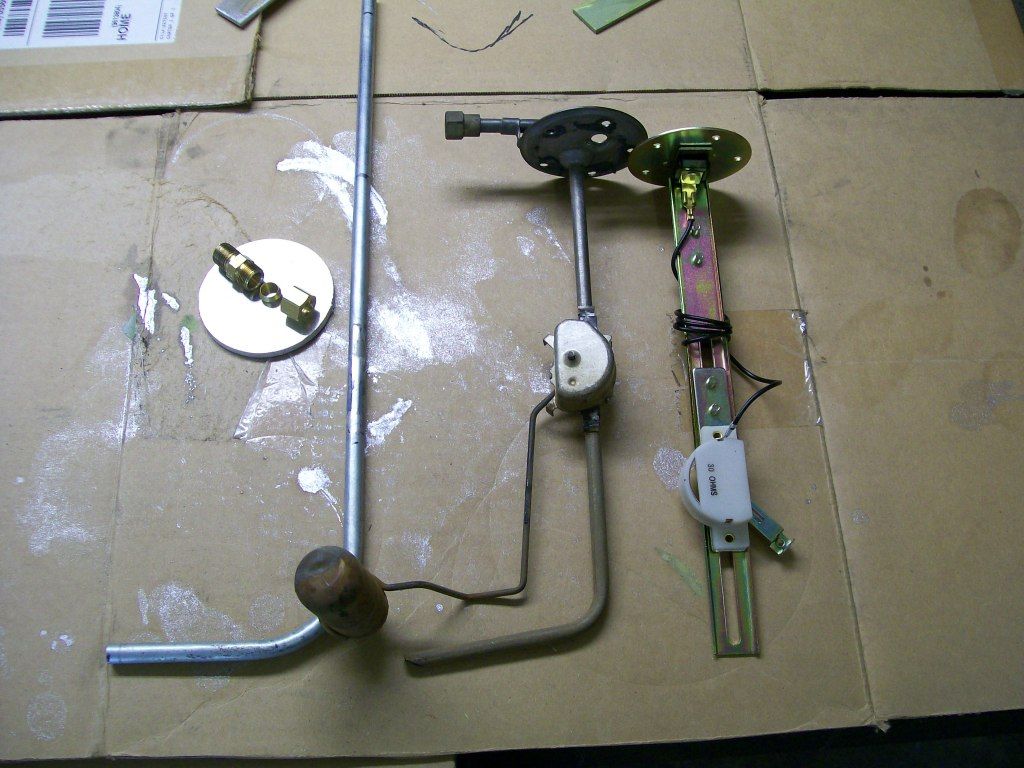 Once finished I had a new 30 ohm sending unit and a 3/8" fuel line with no down sized fittings along the way. I could install a 90 degree fitting as the line leaves the tank but since there is nothing in the way above the tank, I'll leave the line with a smooth bend. 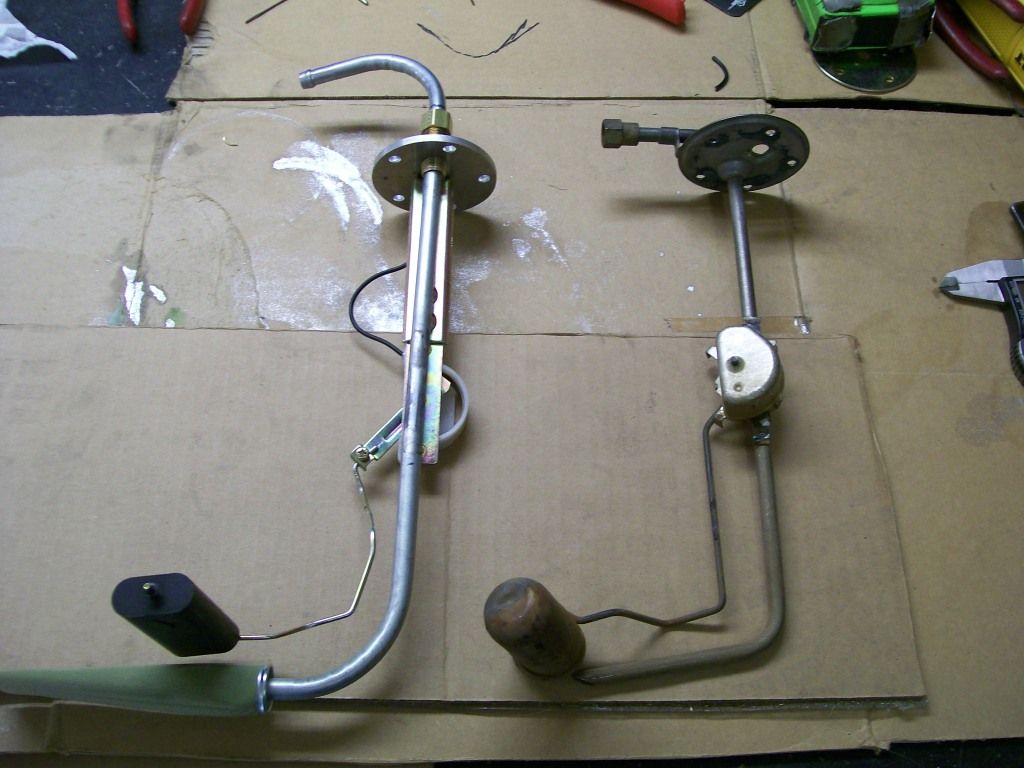 Once the unit was finished I used a 12 battery to test the guage and sending unit together. 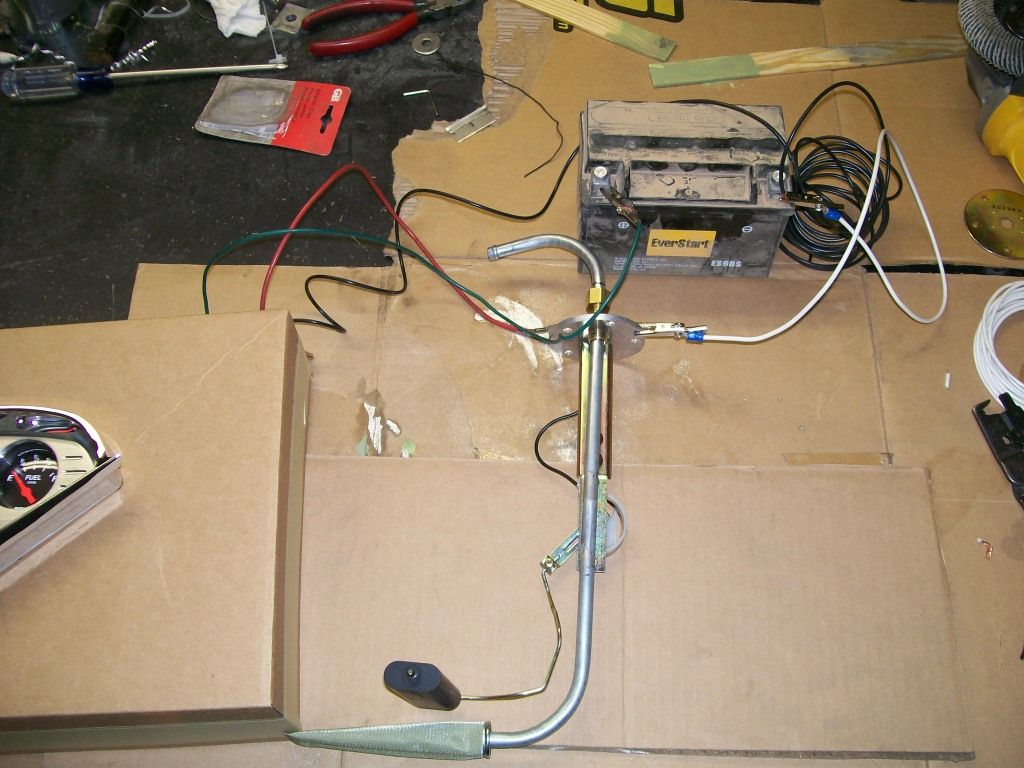 From empty to full............ 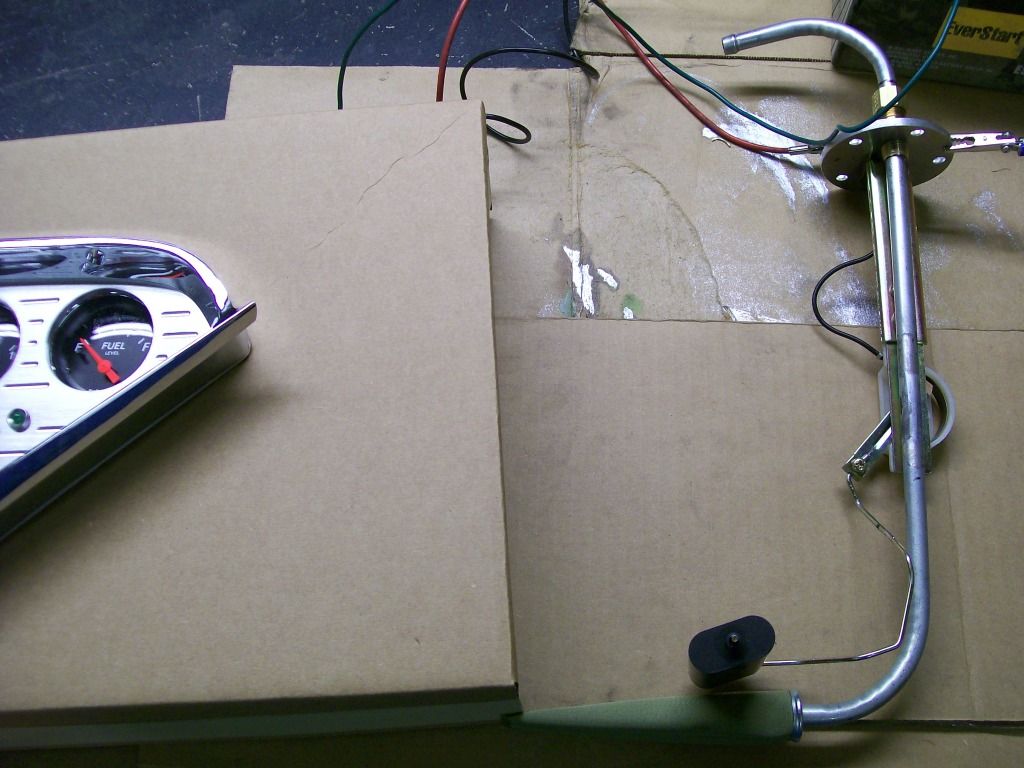 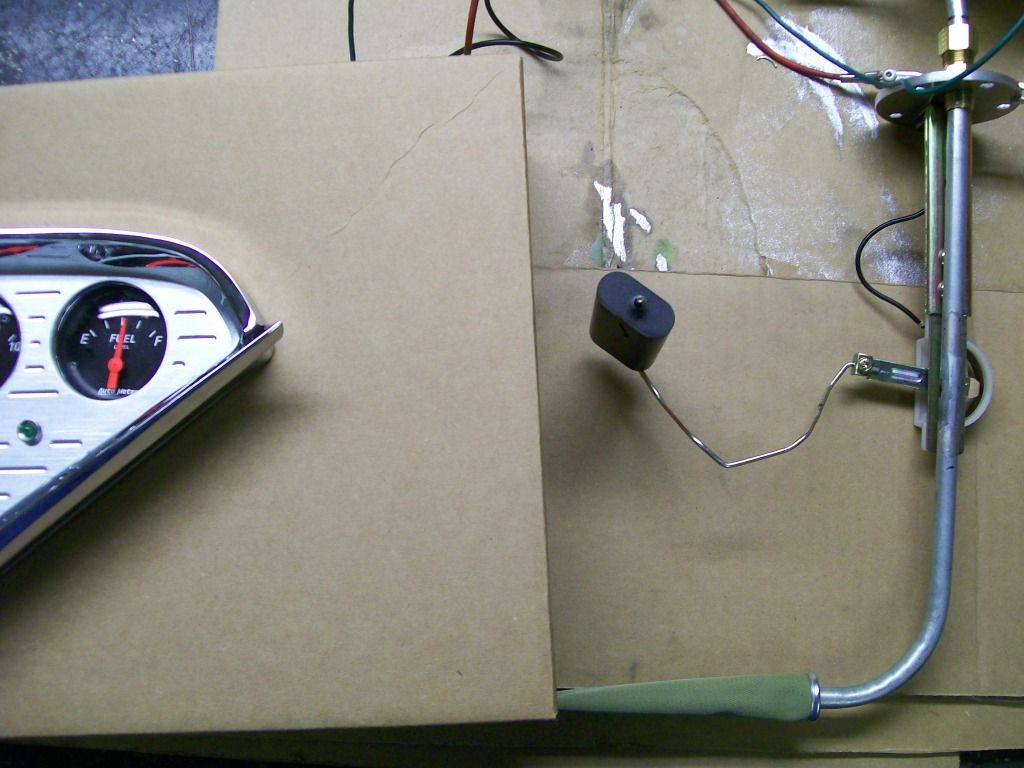 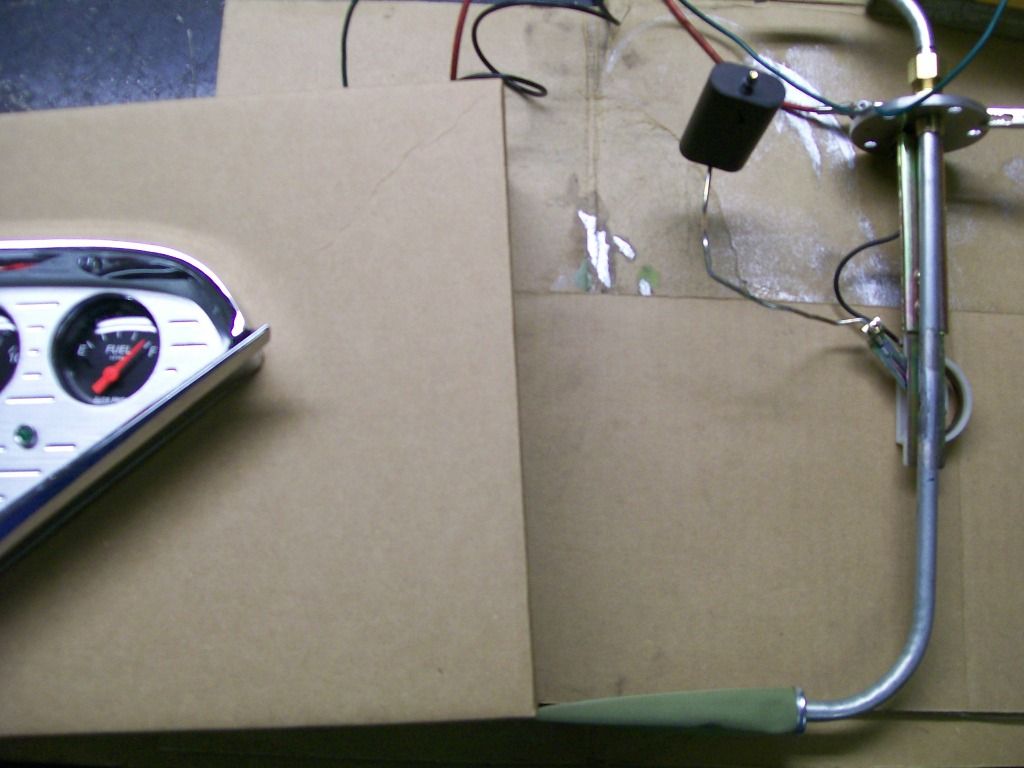
|
|
|
|
|
10-14-2012, 03:04 PM
|
#90 |
|
Registered User
Join Date: Aug 2007
Location: Corona, California
Posts: 7,998
|
Re: 1957 Chevy truck re-rebuild
Nice fix on the fuel delivery.
Kim |
|
|
|
|
11-03-2012, 08:24 PM
|
#91 |
|
'57 Rosa
 Join Date: Sep 2009
Location: Fitzgerald,GA
Posts: 162
|
Re: 1957 Chevy truck re-rebuild
Awesome build Jim. You have some mad skills. Keep the pics and ideas coming. Great job.

__________________
My '57 Truck Build "Rosa" (Current Project) http://67-72chevytrucks.com/vboard/s...21#post4118721 2003 Dodge Dakota 4X4 (Daily Driver) Only two defining forces have ever died for us: CHRIST died for our salvation and VETERANS died for our freedoms. Glorify CHRIST and thank VETERANs  Dru~ USN Retired Dru~ USN Retired
|
|
|
|
|
11-04-2012, 10:28 PM
|
#92 | |
|
Registered User
Join Date: Aug 2012
Location: Salem Mo
Posts: 647
|
Re: 1957 Chevy truck re-rebuild
Quote:
I've got pics of the air filter housing loaded, let's play this out. I got the idea of using the construction paper from Paul jr., It gives a realistic idea of the size and dimesions before cutting metal, or in this case, aluminum. 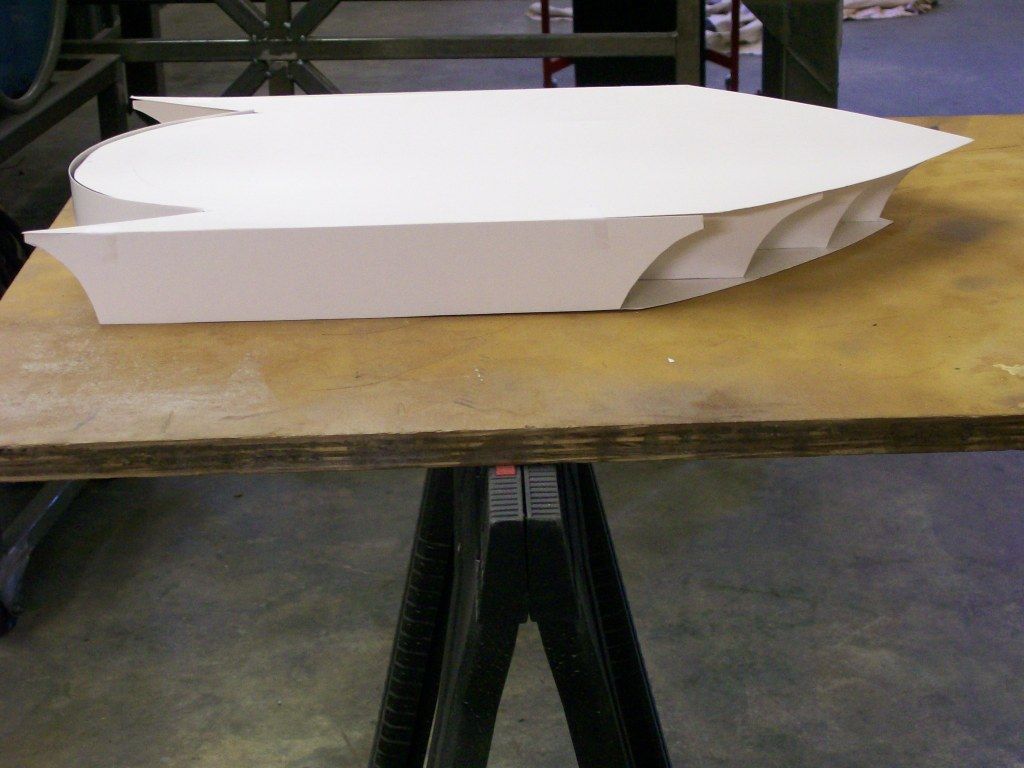 Once I cut the bottom plate I cut the upward fins. Thinking ahead I cut the slots in the bottom plate to match the interlocking tabs on the fins. Then using clamps and using angle iron I held the fins securely in place. The razor blade was placed there so the clamp wouldn't leave a mark in the softer aluminum. 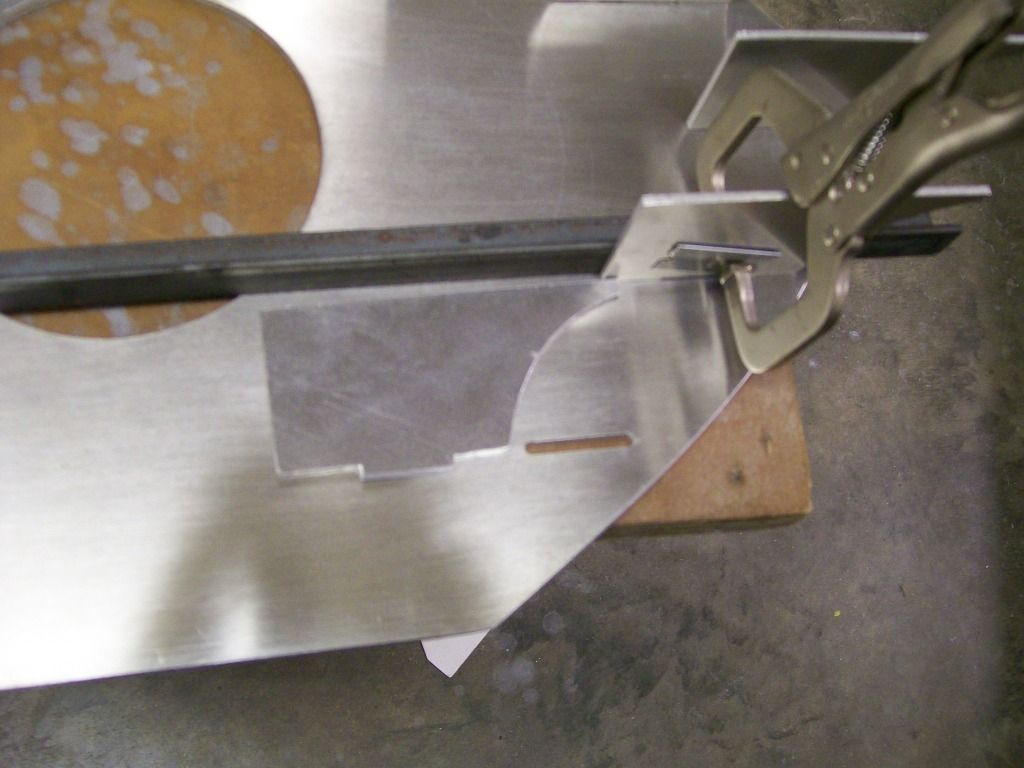 My Tig welder took a crapper so I had to use a Mig spool gun. The propane torch I use to throw some heat to the welding area. The aluminum accepts and spreads the heat so fast when cold, I found by preheating the area the Mig welder is more consistant. 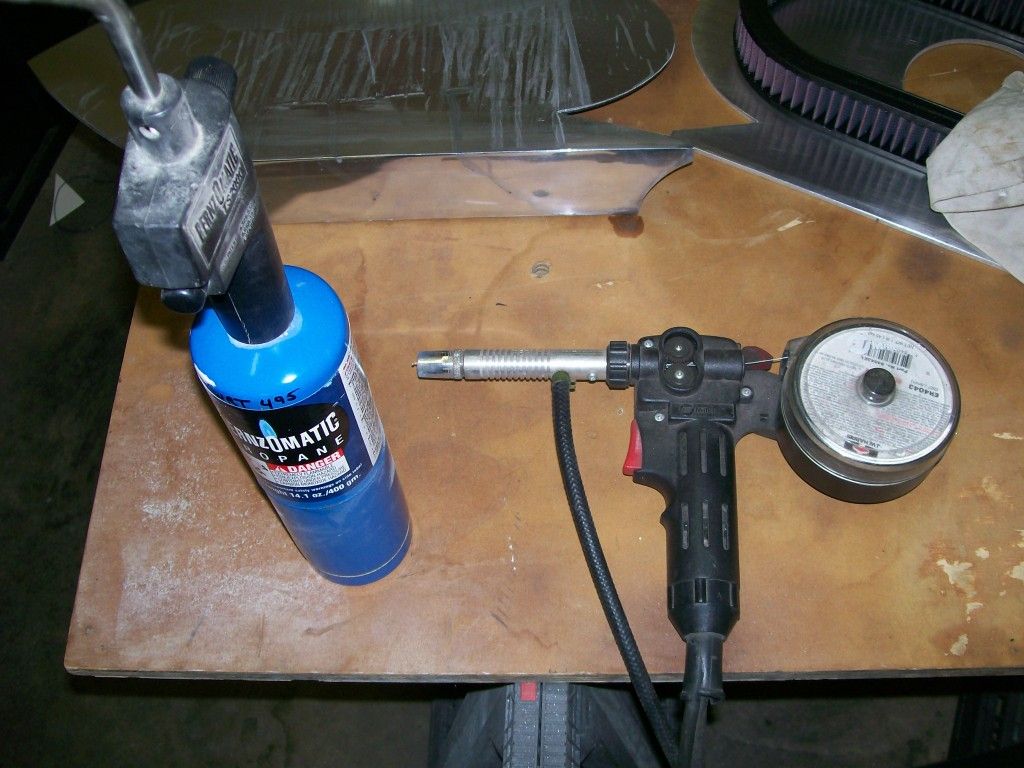 After fitting the fins to the bottom plate I was able to weld the fins from the bottom, now there is no weld to be seen when finished. 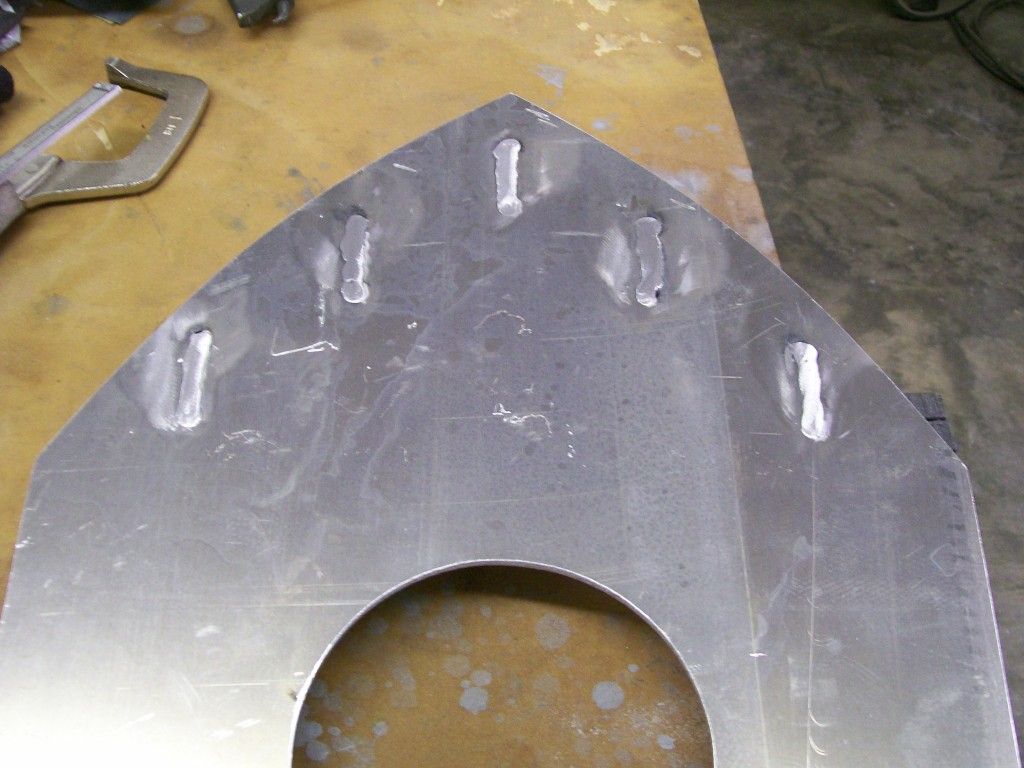 More to follow... |
|
|
|
|
|
11-07-2012, 12:15 AM
|
#93 |
|
Registered User
Join Date: Aug 2012
Location: Salem Mo
Posts: 647
|
Re: 1957 Chevy truck re-rebuild
Next project was to make the top and the sides. They started as three pieces, now I want them as one piece. Now I know I could have cut the whole thing as one piece then used the press to bend over the sides. If I was to make multiple air filter housings, that would be the way to go, I'm making one so I'm going at it the long way.
I started by clamping the pieces in place. I then did a couple of short welds. The idea is by doing these welds I can remove the clamps and I can weld the bottom side. By welding the bottom side I can go back to doing the full welding on the outside without much distortion. 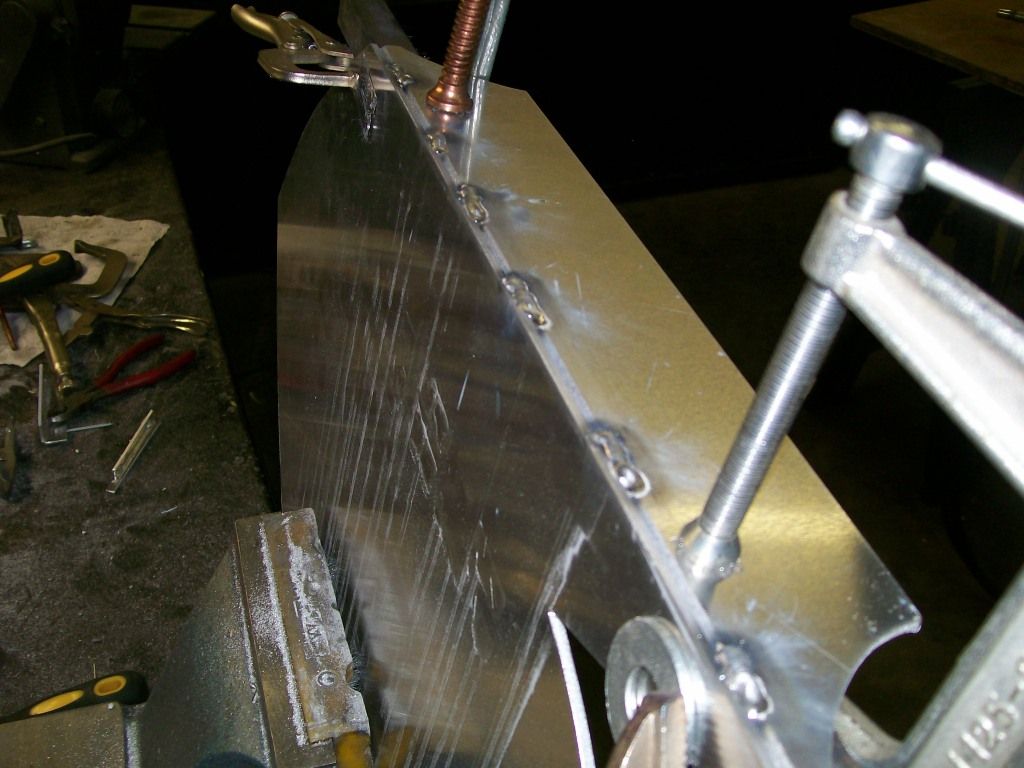 The couple of underside welds. 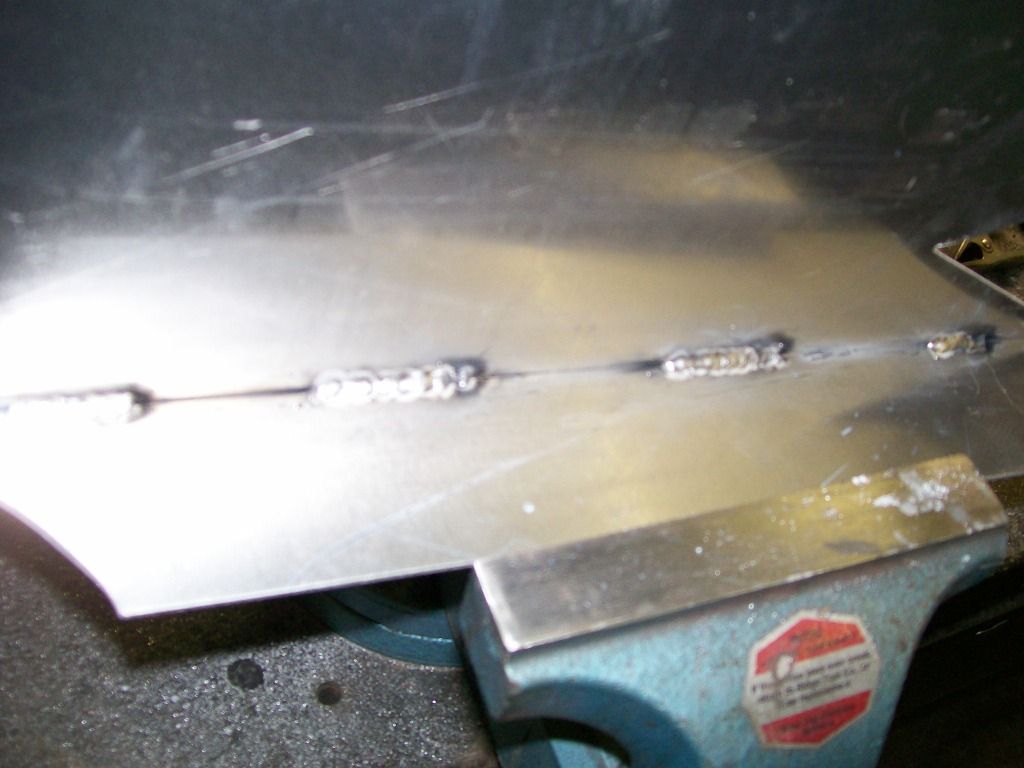 As I mentioned, the tig welder is not working right. No big deal, my main concern is to attach and fill. Since I'm gonna grind anyway, the mig weld will do the job. 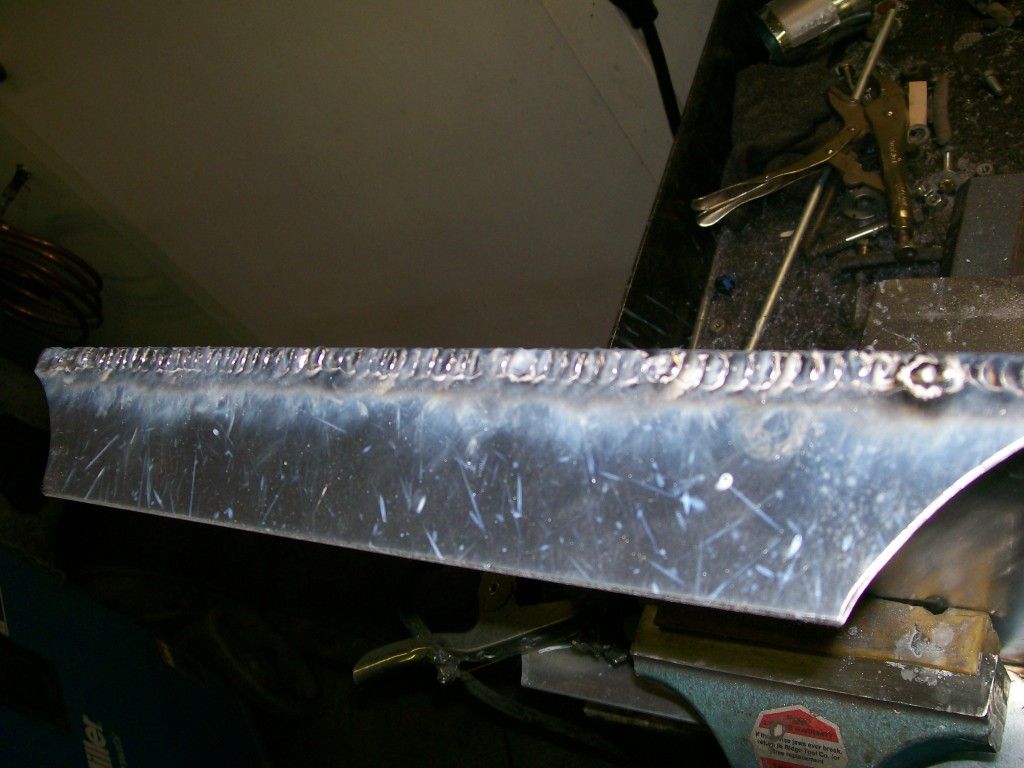 Once the welding was done I very carefully used the grinder to smooth the weld. 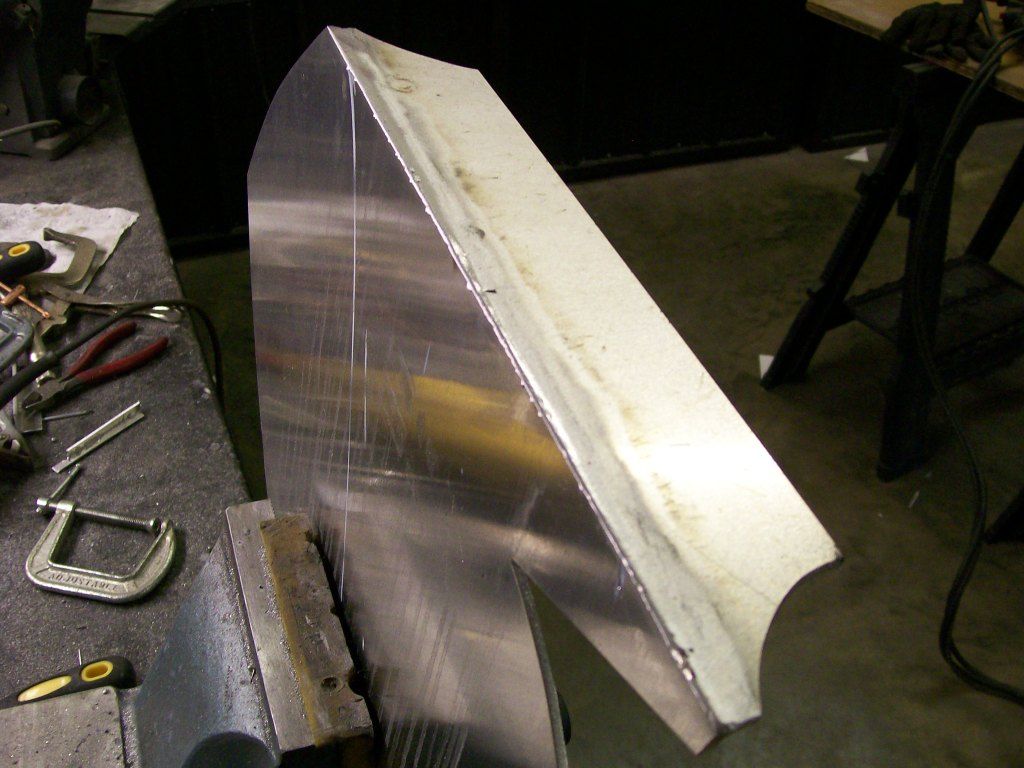 After the grinding was done I used 320 grit wet sand paper and block sanded the weld area. This left a nice level surface. 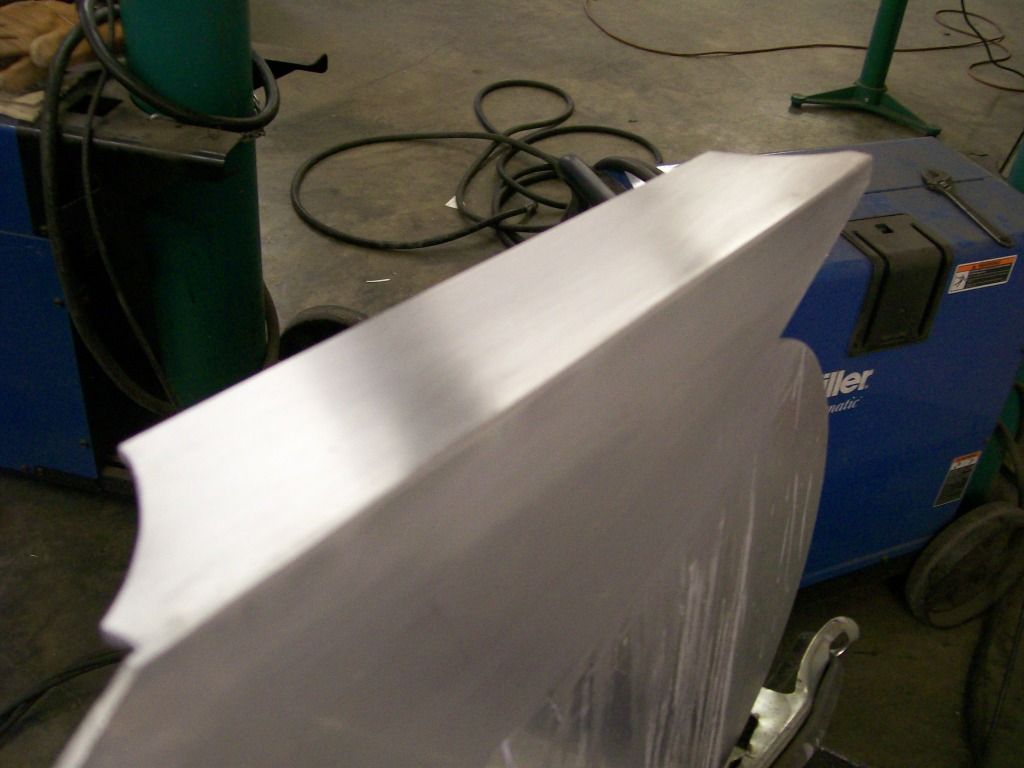 I then went to 1200 grit paper and a test polishing. I have a little more finishing to do but it's looking coming along nicely. 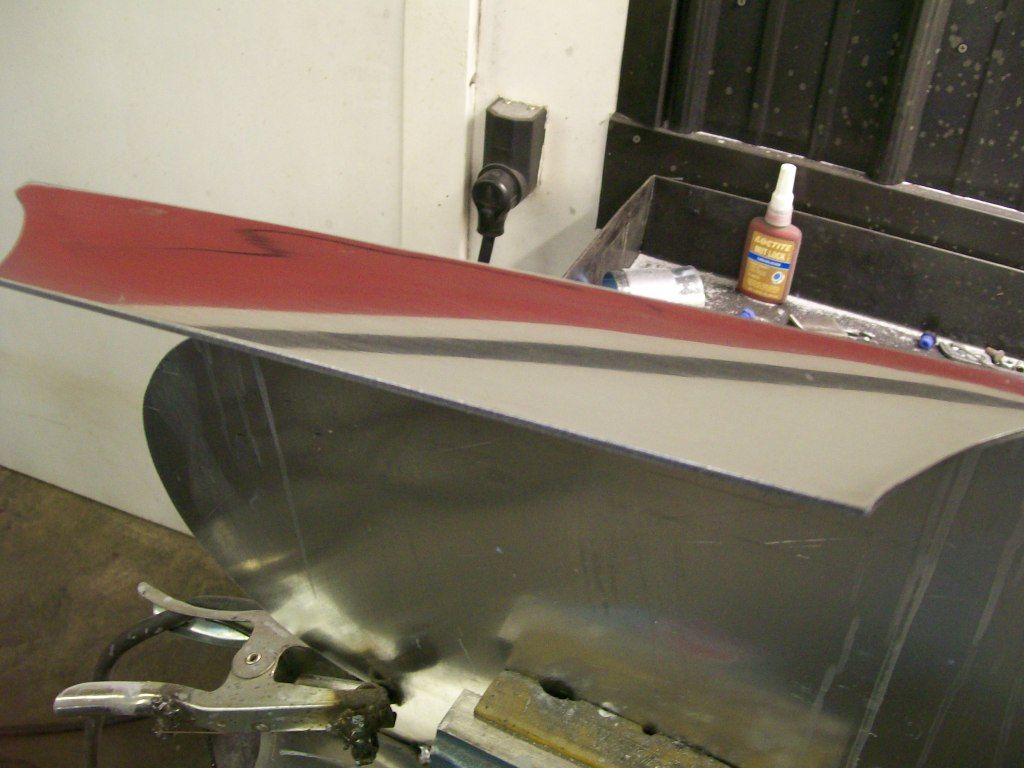 More to follow. |
|
|
|
|
11-07-2012, 01:06 PM
|
#94 |
|
Registered User
Join Date: Jan 2012
Location: Motown
Posts: 7,667
|
Re: 1957 Chevy truck re-rebuild
wow. nice fab work

__________________
cool, an ogre smiley Ogre's 58 Truk buildhow to put your truck year and build thread into your signature shop air compressor timer |
|
|
|
|
11-07-2012, 04:48 PM
|
#95 |
|
Registered User
Join Date: Jul 2010
Location: Spokane, WA
Posts: 21
|
Re: 1957 Chevy truck re-rebuild
Is that instrument cluster your own creation?
|
|
|
|
|
11-07-2012, 06:14 PM
|
#96 |
|
Registered User
Join Date: Mar 2011
Location: Sydney AUS
Posts: 160
|
Re: 1957 Chevy truck re-rebuild
The lead holder looks great. Wouldn't mind attempting one myself.
__________________
Blake. Sydney Aus 56 Chev 3100 build - http://67-72chevytrucks.com/vboard/s...d.php?t=480363 LOW n LOUD
|
|
|
|
|
11-07-2012, 09:19 PM
|
#97 | |
|
Registered User
Join Date: Aug 2012
Location: Salem Mo
Posts: 647
|
Re: 1957 Chevy truck re-rebuild
Quote:
I threw away the tape measure, grabbed the computer and ordered this cluster. It is everything I wanted in a cluster plus the turn signal indicators. 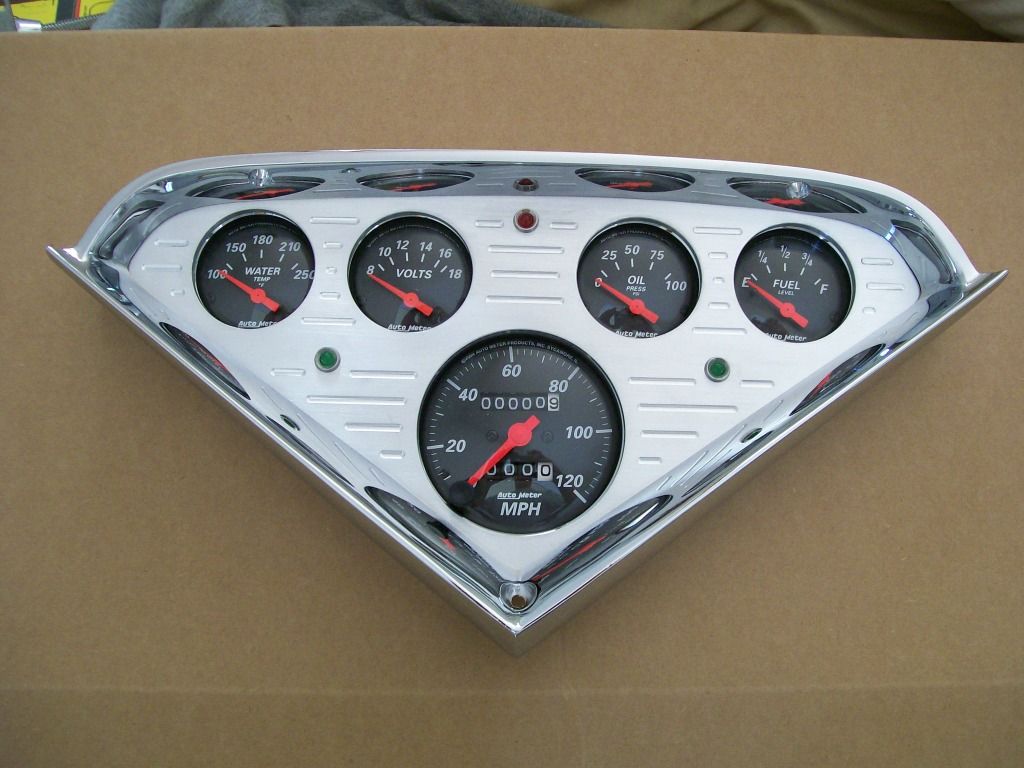
|
|
|
|
|
|
11-07-2012, 09:44 PM
|
#98 |
|
Registered User
Join Date: Aug 2012
Location: Salem Mo
Posts: 647
|
Re: 1957 Chevy truck re-rebuild
_Ogre, how are you doing, I'm still working on pictures as you requested.
fat56, the term "lead" has me confused a bit. Are you referring to the fuel tank sending unit.? If so, it's one of those projects I get half way into and look at the clock and say, what, 4 hours into this project!!! I think it'll be worth the effort when all is back together again. It was about 8 hours cutting and fitting. Moving forward on the air filter housing...The aluminum plate had a machined look to the surface, this machined look was not what I wanted when done, I'm going for a polished finish. You can see the difference in this next picture.  I think started with 400 grit wet sand paper and used mineral spirits for the wet/ lubricant while sanding. By time I was done I finished with 1500 grit. Then a very aggressive buffing compound finishing with mothers aluminum polish. 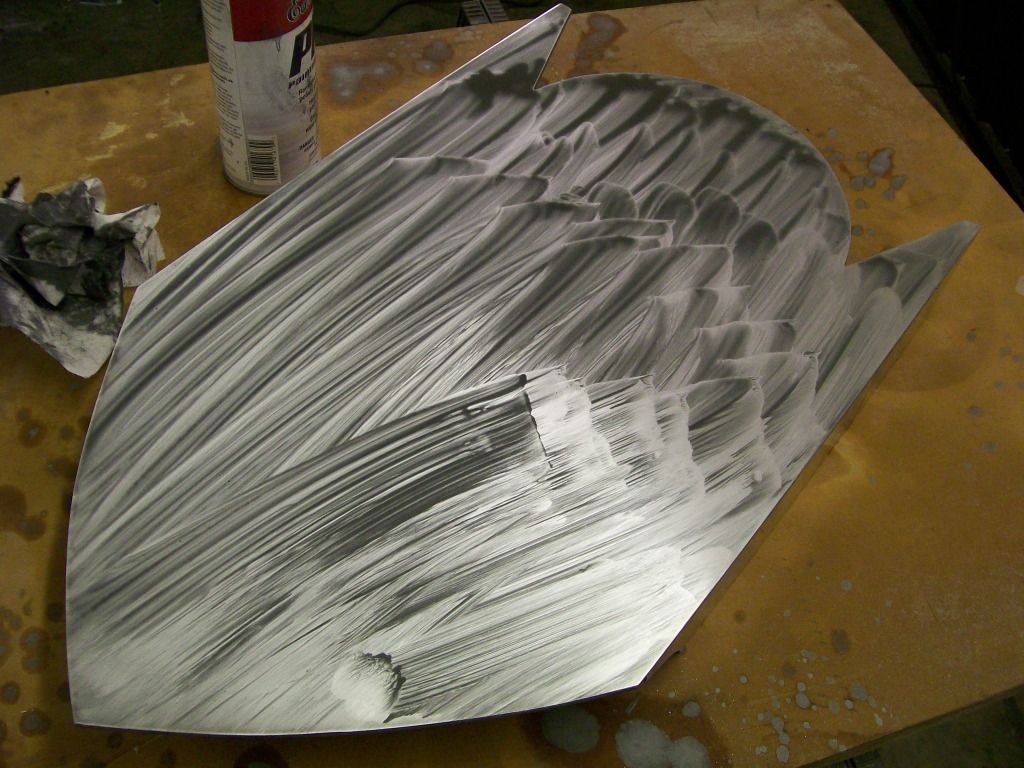 Getting close to the finish I'm looking for. 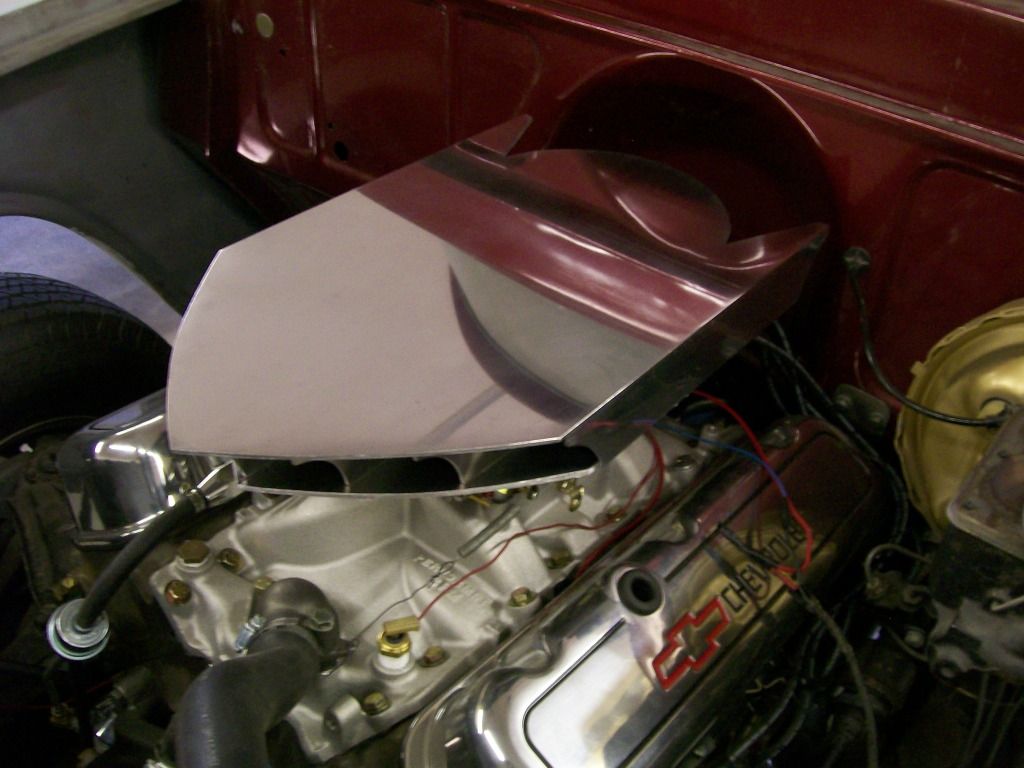 This truck is a memorial build for my dad so I figured I would use the space on top of the air filter for a tribute. It took some time on the computer to get this right, but well worth the effort when done.  Everything in place. Once done there will be two more fake holes one at the top and one at the bottom, making it look like 6 mounting fasteners. I'm probably going to use black anadized 12 point bolts on the top plate. 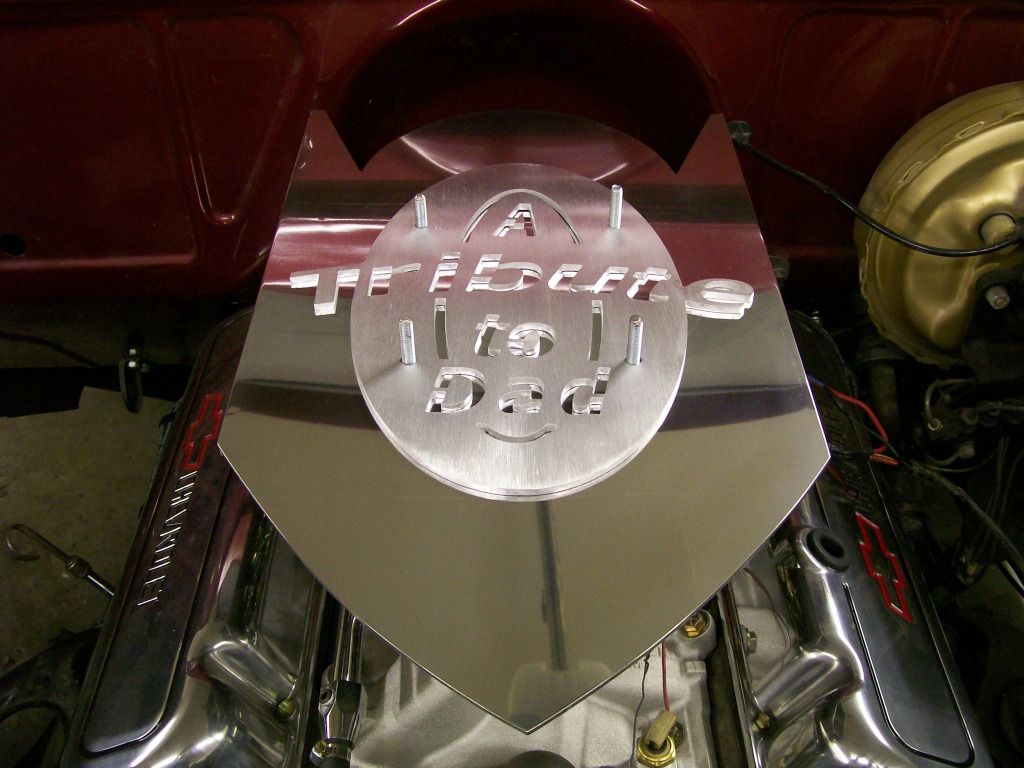
|
|
|
|
|
11-07-2012, 11:39 PM
|
#99 |
|
Registered User
Join Date: Aug 2007
Location: Corona, California
Posts: 7,998
|
Re: 1957 Chevy truck re-rebuild
The air cleaner housing is real nice.
Kim |
|
|
|
|
11-22-2012, 10:24 AM
|
#100 | |
|
Registered User
Join Date: Aug 2012
Location: Salem Mo
Posts: 647
|
Re: 1957 Chevy truck re-rebuild
Quote:
 Thanks Kim....more homemade stuff on the way. Thanks Kim....more homemade stuff on the way.As many know, along with swapping engines comes the need to convert cables and linkage. Before I started working on this truck the accelerator was converted to a cable. I wasn't able to use, nor did I want to adapt the bracketry that was on it when I got it, so the fabrication begins..... After making the paper mock up I cut the beginning of the accelerator cable mount. 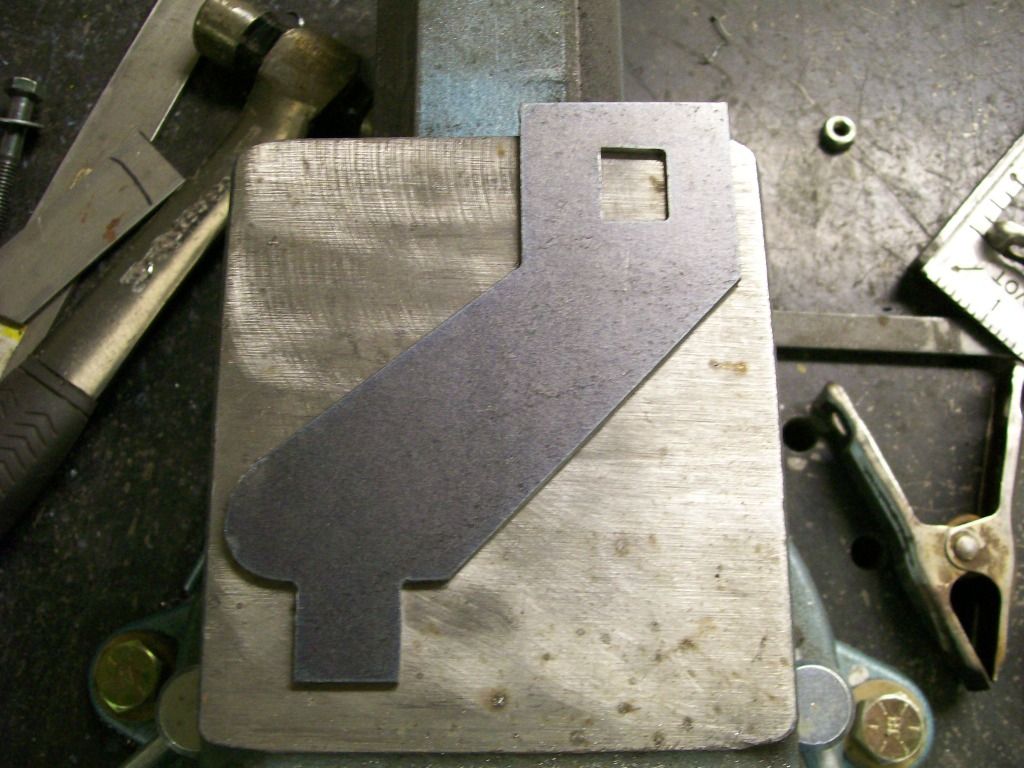 After bending and shaping. 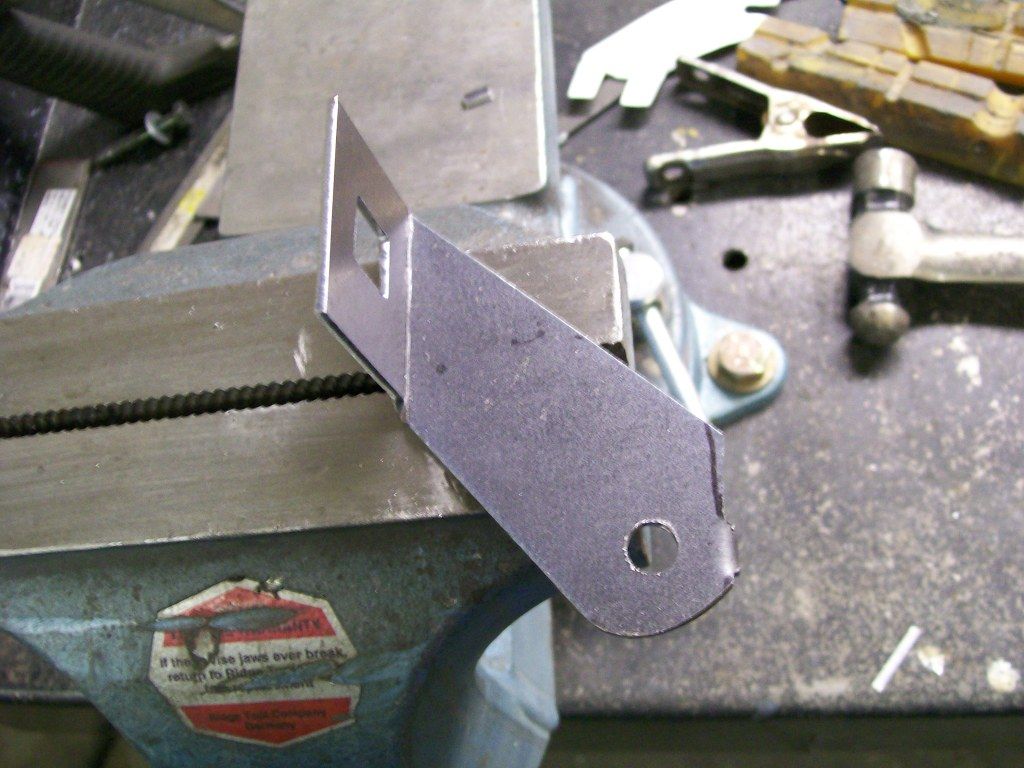 Starting to fit in place. 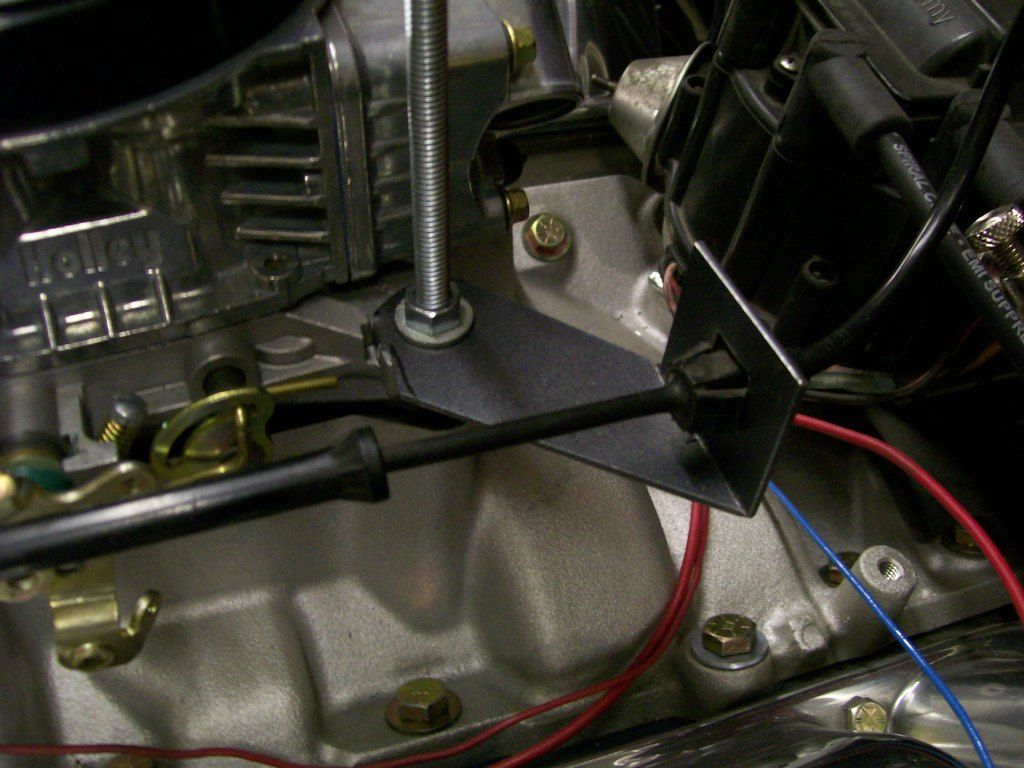 Added a 90 degree gusset for strength. Interesting how cutting the inside of the gusset changes to look here vs if I left the gusset as a solid piece. 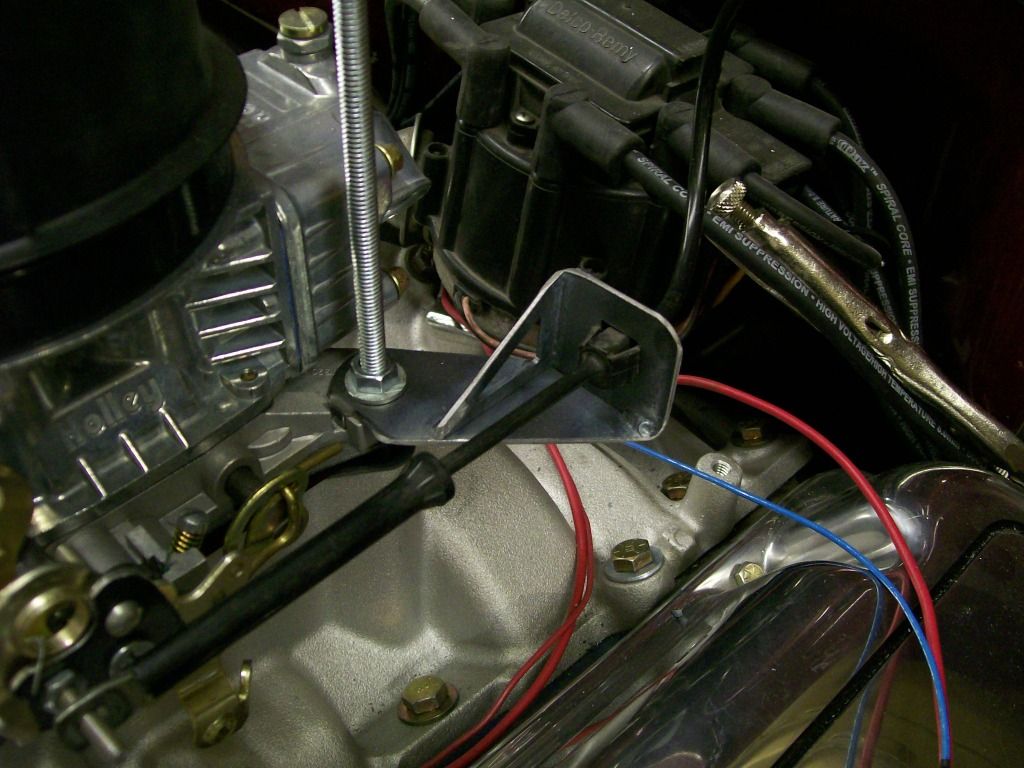 Now for the transmission kick down bracket. There is gonna be a long flat area when done. I've found be adding something such as the Chevy bow tie will busy the eye ball and the flat area won't stand out. 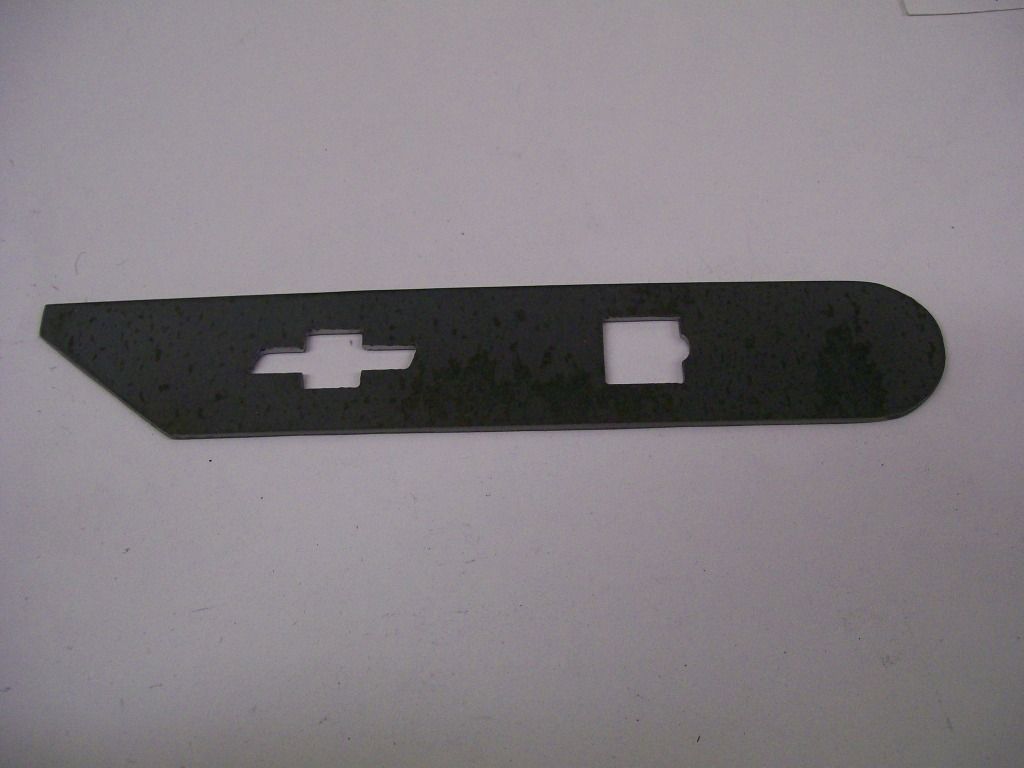 I've been trying to figure a nice clean mountig for the return springs. Once again I have to build in a gusset for strength. As I was making the gusset I added a leg for the spring mount. I made it long enough to drill extra holes for options of spring tension. 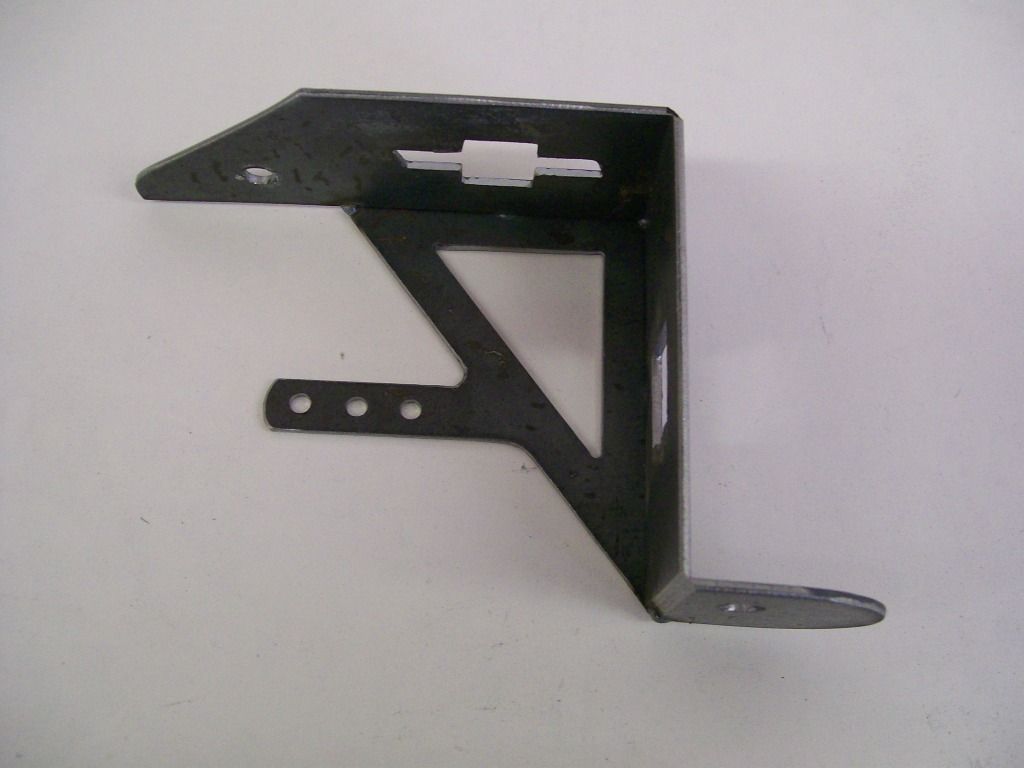 Once assembled everything has it's place now and secure also. 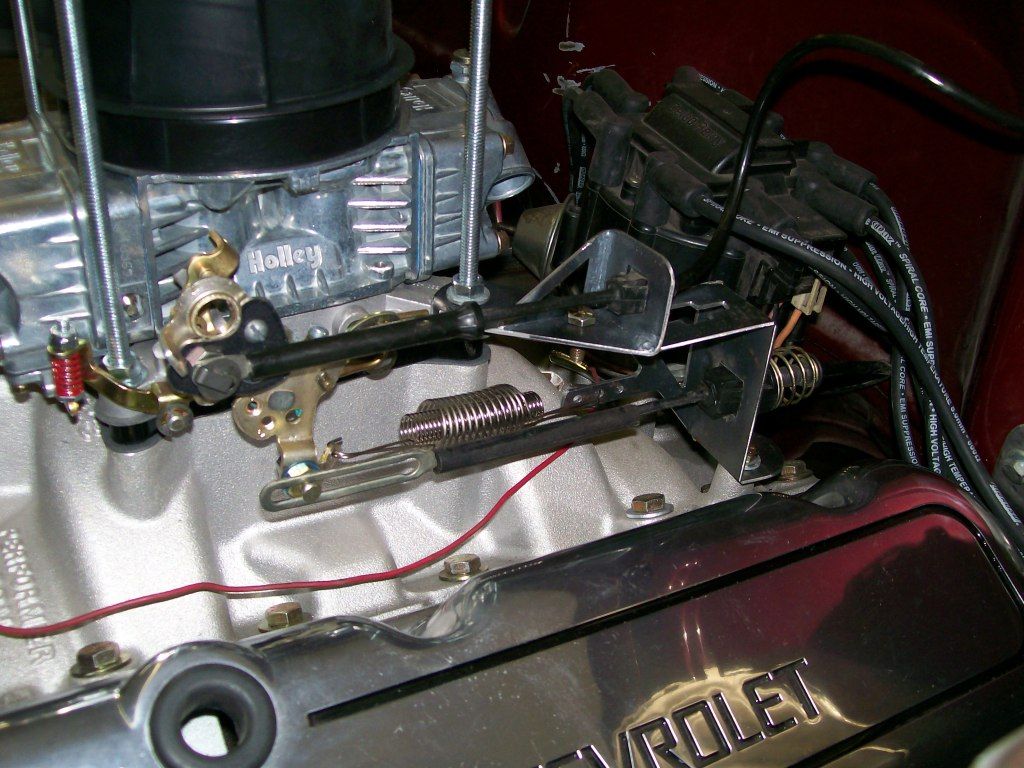
|
|
|
|
|
 |
| Bookmarks |
|
|


 Linear Mode

