
|
 06-24-2011, 02:41 PM
|
#1 |
|
Registered User
Join Date: Feb 2011
Location: Vegas
Posts: 71
|
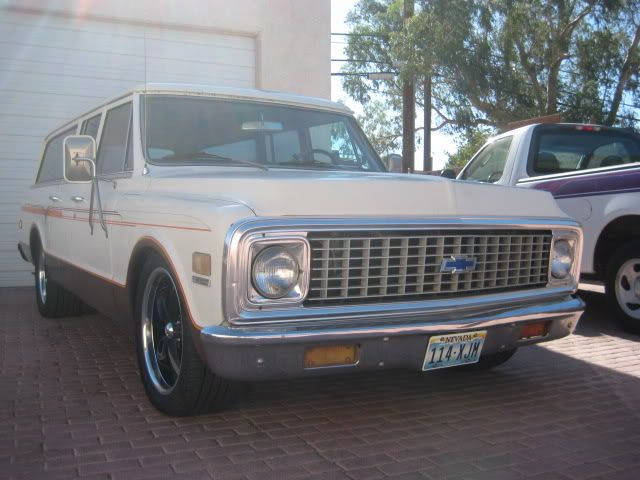
Bagged My 71 Suburban
Im a total newby when it comes to air bags and IFS suspension, my other builds and vehicles are all straight axels. With all the great references and threads to be found on this Forum I tackled this project with a bit of confidence.
First off Ill be using the Suburban for towing and hauling gear, so the drop is pretty mild compared to others that I have seen on this site. I also decided I would try this with individual shrader valves for each bag, to begin with. If I decide on an air system down the road it can be added. Finding the parts needed took some investigating, searching, e-mails and IMs, price was a big factor but support and communication with the supplier was just as important to me. I ended up getting most everything from a fellow Forum member way2low (Boris) He has been great to deal with and answered all my stupid questions through IMs, I cant thank him enough for all the help! Unfortunately as kits go you could have all kinds of combination of parts and no instructions with any of them. So I hope this thread may help others that are contemplating bagging there ride. FRONT SUSPENSION Parts! 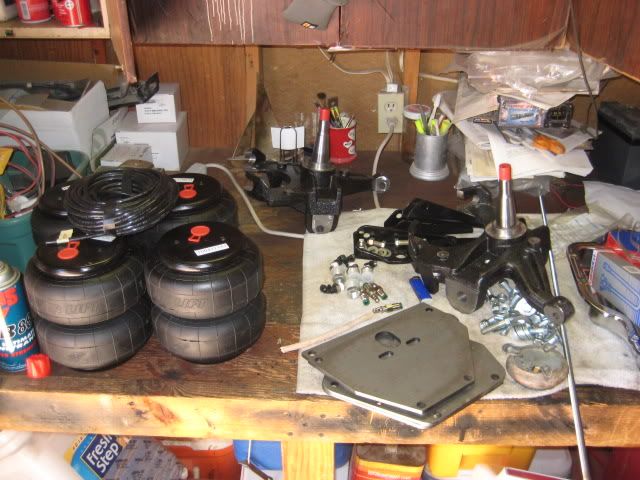 Disassemble front end, the first unplanned bump in the road is the removal of the bump/turn stop perch on the lower arm that is attached with a series of tack welds that is in the way of the lower mounting plate. I drilled the tack welds and cold chiseled the perch off. PITA 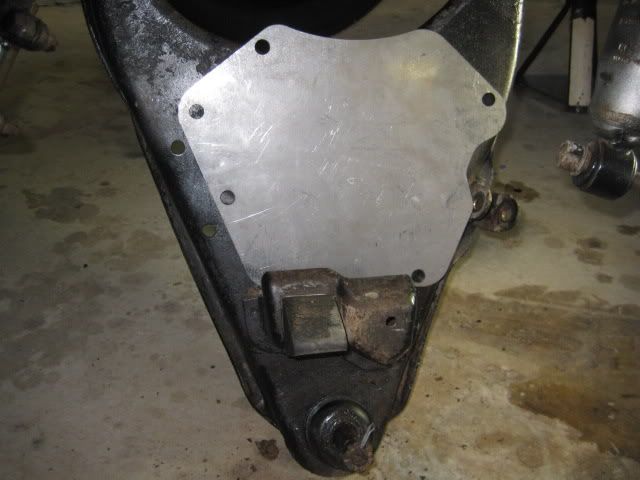 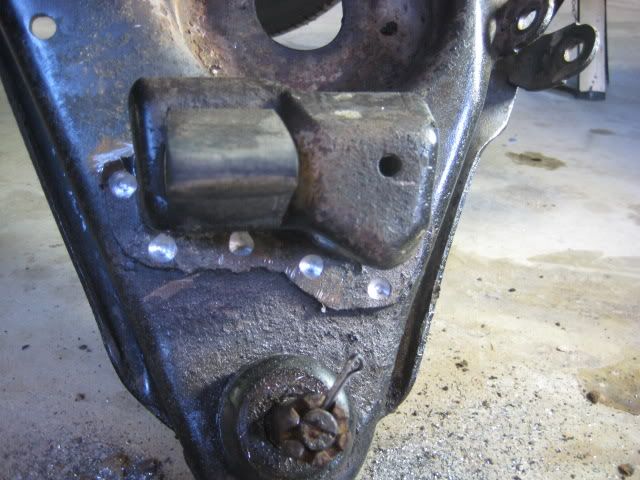 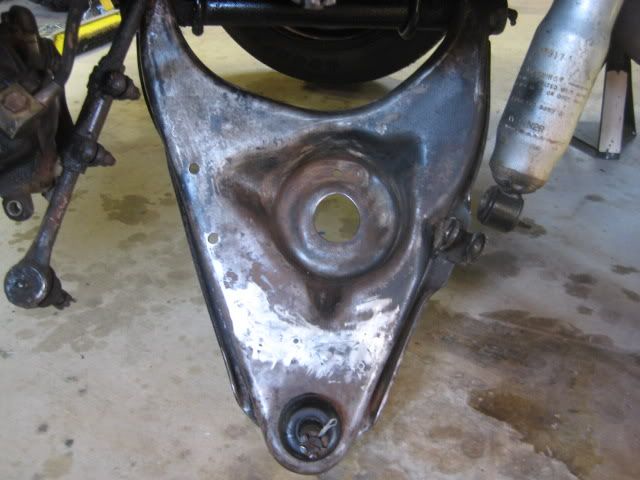 Use the mounting plate as a template and drill holes for the mounting bolts. Do yourself a favor and buy two cobalt drill bits, one for a pilot hole the other for final size, youll thank me later  Drilling these holes under the vehicle is another PITA I am stiff in places I did not even know I had! Drilling these holes under the vehicle is another PITA I am stiff in places I did not even know I had!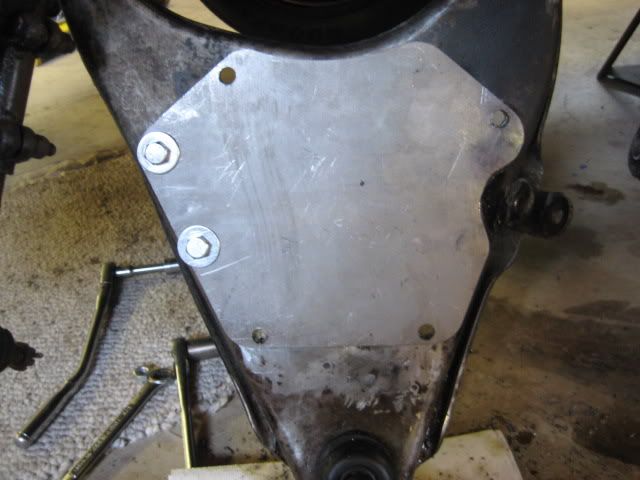 Do the upper spring perch the same. 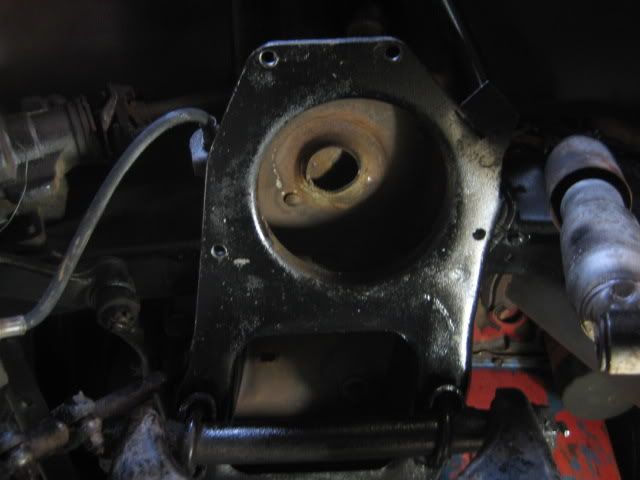 I bought a length of threaded rod, washers and nylock nuts to use for the air bag bolts, I cut the threaded rod to 1.75 ea. Bolt the air bag to the top mounting plate and bolt the plate to the upper spring perch and lower plate to the lower arm, (Do not bolt the lower plate on yet, like I did, again youll thank me later) also install your air fitting and length of hose you will need. I asked Boris what his shop used to seal the air fitting threads and he recommended The Right Stuff by Permatex for a "hopefully" leak proof install! 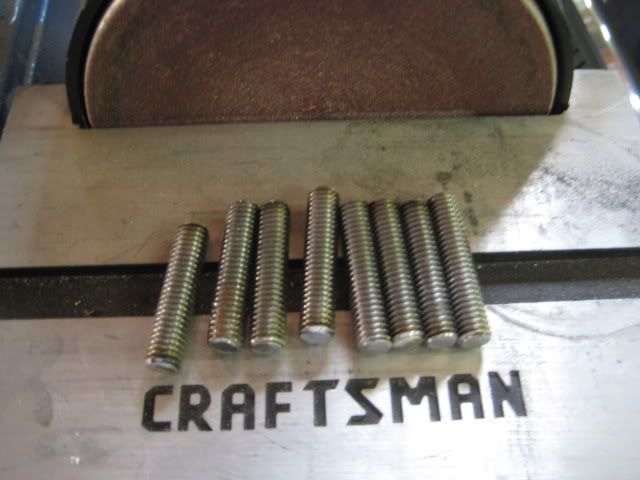 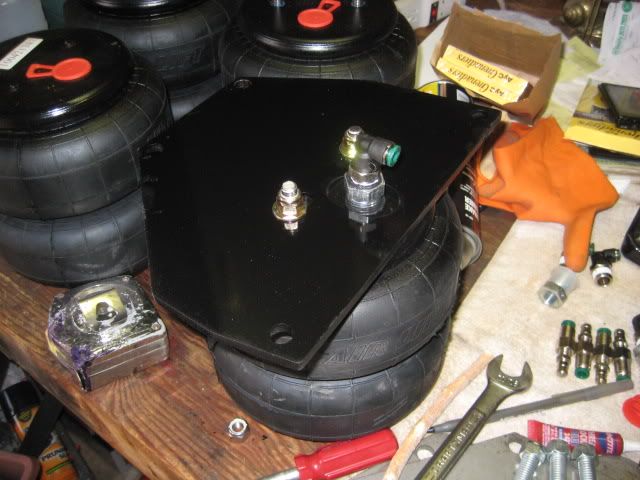 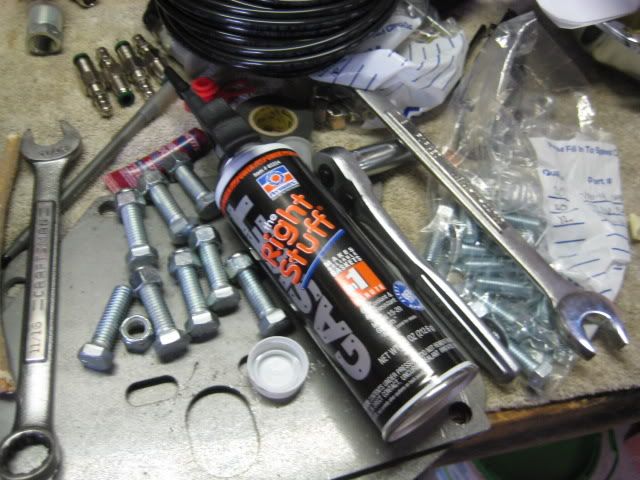 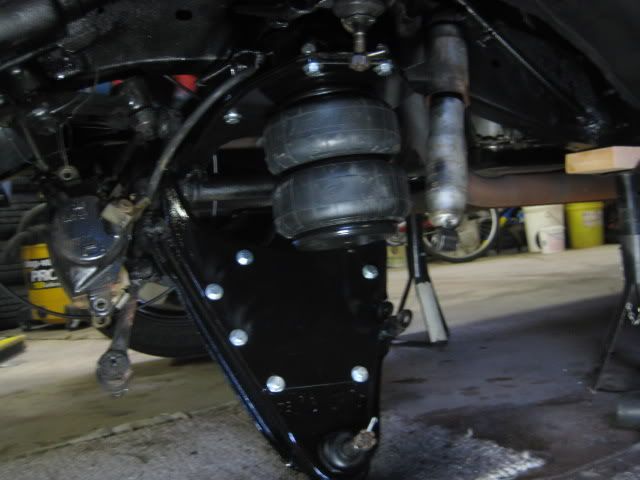 I looked everywhere to find an easily accessible shrader valve location, to fill the bags at, I came up with a neat location, the front and back license plate bolt holes! Had to drill them and the license plate to size. I plan to find acorn nut styled shrader caps and matching acorns for the lower license plate bolts that I added, to camouflage them even more. 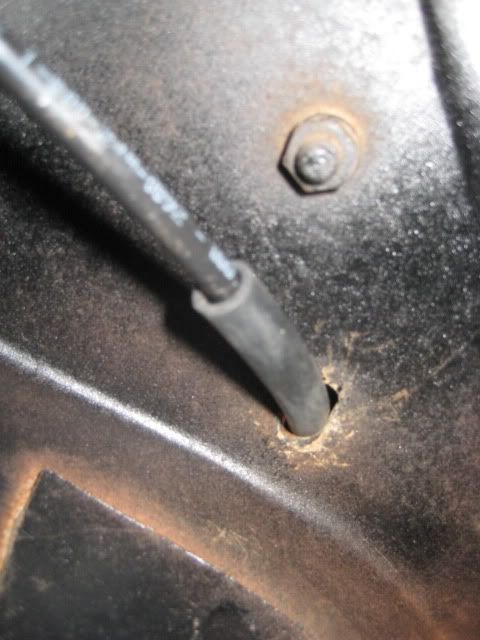 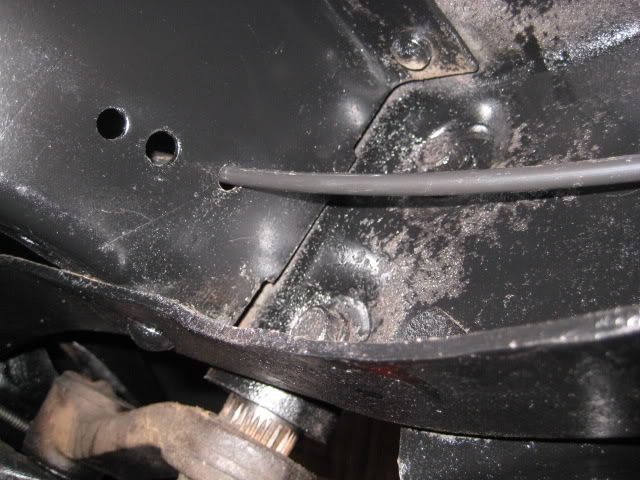 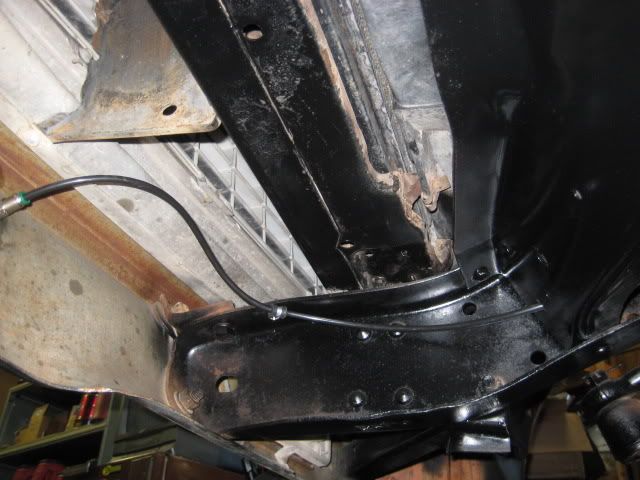 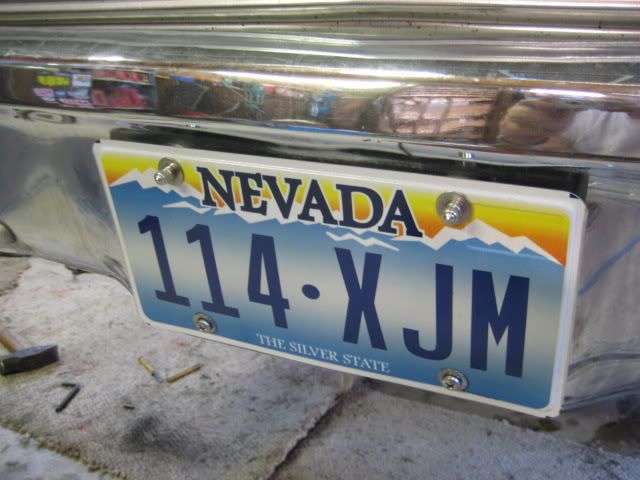 I had a lot of trouble with the next step, so pay attention The lower plate needs to be drilled with one hole to anchor the bottom of the air bag to it. The best way to do this that I found and believe me I tried a few! Is an old trick I have used in the past, powdered chalk! Put a little in the threaded holes in the bottom of the air bag, shake any loose chalk out so a film of chalk is coated in the holes (We will get back to this) First make sure the bottom plate is in place only using the bolts to hold it there, do not bolt it down with the nuts! (Go ahead ask me how I know) I installed my new 2.5 drop spindles and raised the spindle with a jack to level the a-arms as close as possible, slide the bottom of the air bag around on the bottom plate to find the sweet spot to anchor it at, Eye ball it level, front to back and side to side. Once your happy with the location go under the truck with a small hammer and punch and tap the bottom of the bottom plate below the air bag, this will knock the powdered chalk loose leaving the exact location to drill on the plate. Now let all the air out of the bags at the shrader valve and lower youre a-arms back down, the empty bags will be above the plate now and you should see your hole marks, you only need to anchor the center hole, I put chalk in all three just to be sure I marked it correctly. Now take your lower mounting plate off and drill it, bolt it all back together and the front bags are done!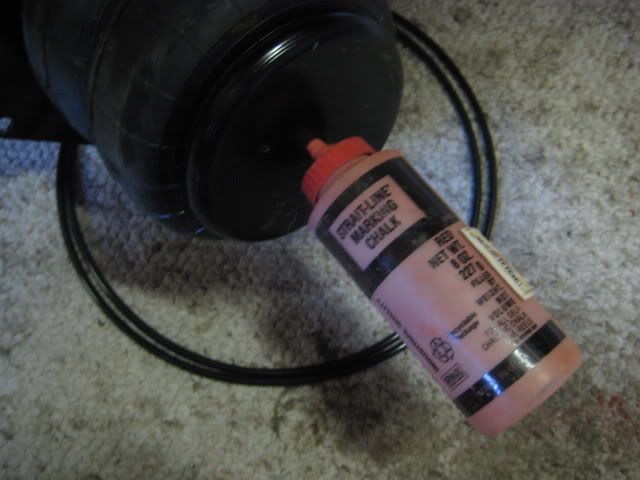 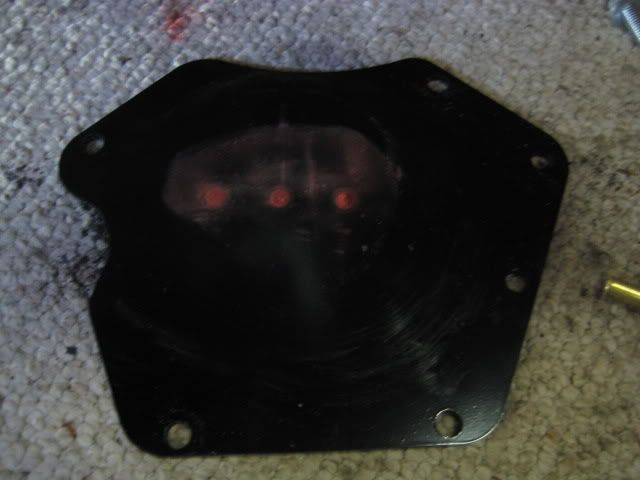 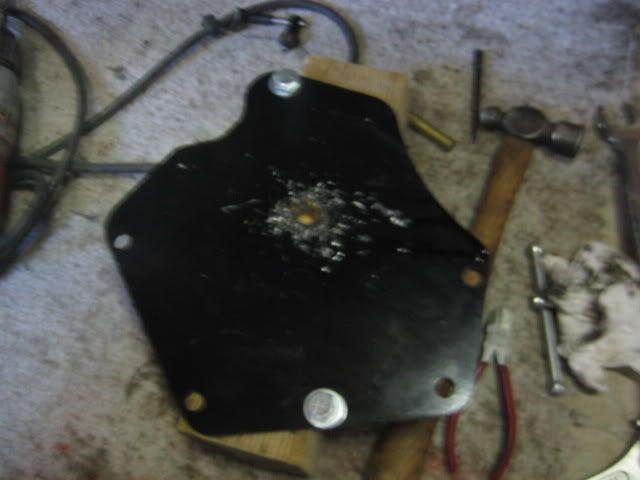 Want Drop! 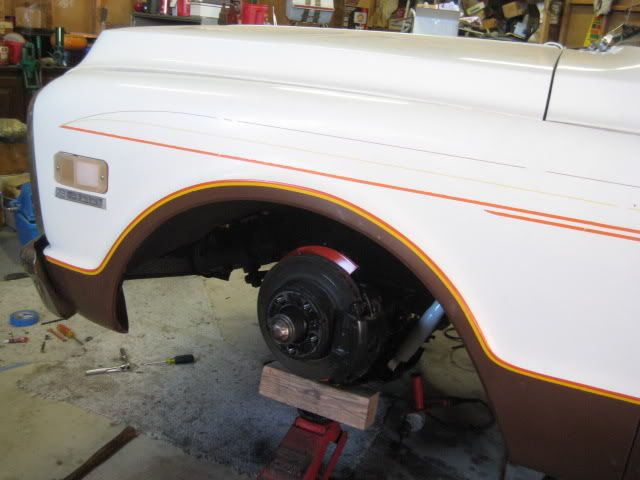 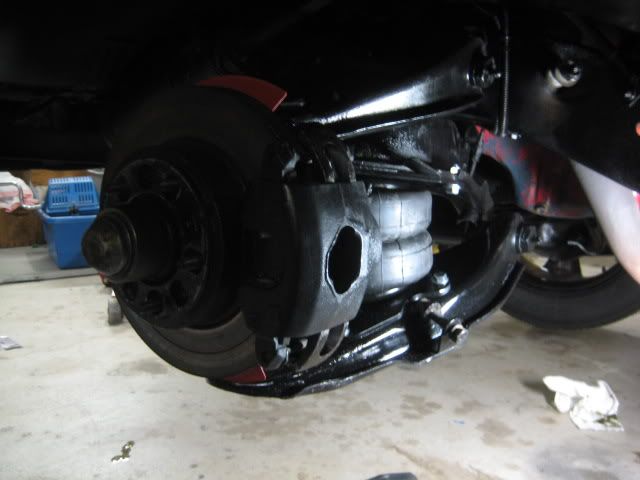 I decided I wanted anti sway bars also, CPP had a heavy Duty Front & Back kit, here is the front kit. Please pay attention again, if you do you will only need to install it once, unlike me! Since the sway bar mounts on the lower a-arms will be ¼ higher than designed since it will be setting on the lower bag plate you will need to shorten the 1 spacer to ¾ to make up the difference of lower plate thickness. Other than that you can follow the instructions that come with the kit. 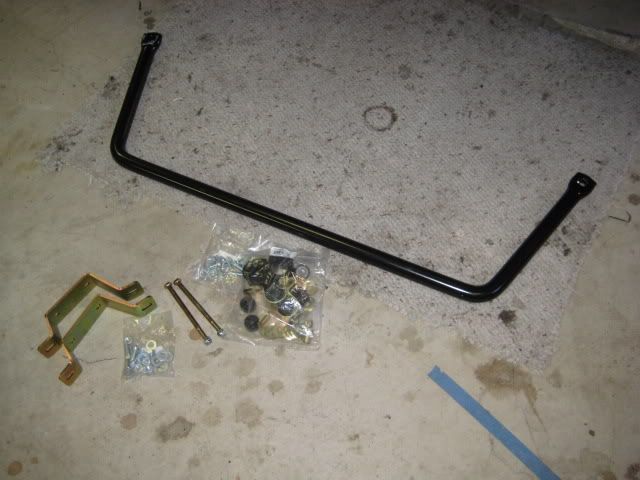 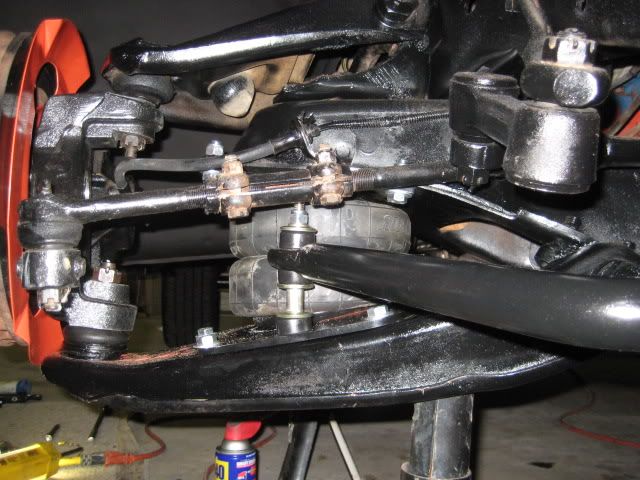 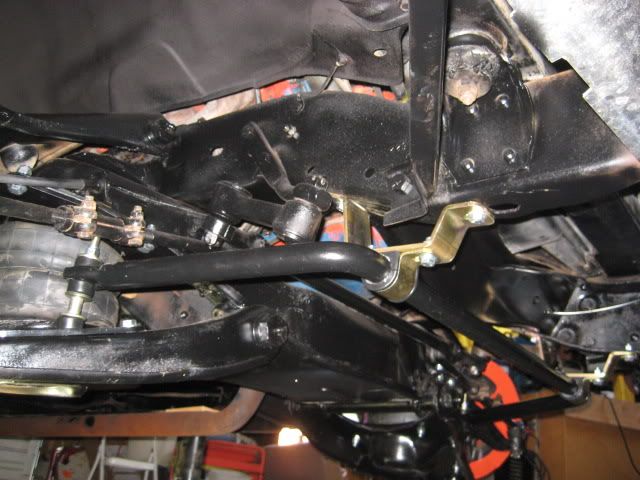 Might as well install new Timken wheel bearings while youre at it! Dang it was hard to find USA made bearings, plus they were a little less $ than the China crap all the auto parts stores are selling, really Ts me off, I get so tired pulling good old American made parts only to install China Crap! (Thanks, I feel better now) 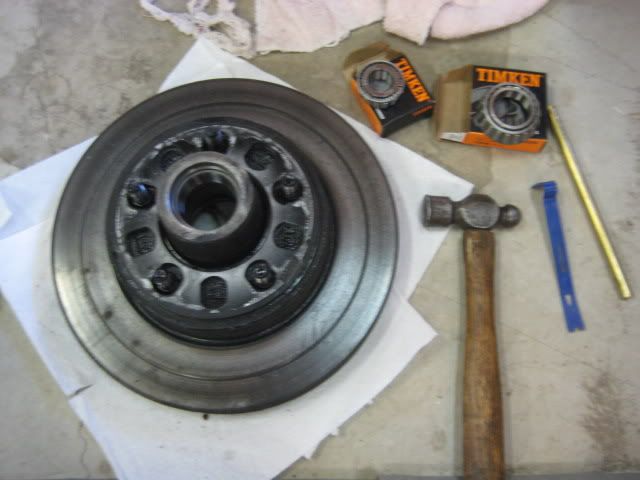 Ill be starting on the rear this weekend and will update this post once completed!
__________________
Scott S 54 Chevy Pick-Up 71 Chevy Suburban 76 FJ40 LandCruiser - 454, TH350, NP205, Ford 9" 98 Dodge Ram 2500 4X4 Cummins |

|

|
|
06-24-2011, 04:09 PM
|
#2 |
|
Registered User
Join Date: Sep 2006
Location: Covington, WA
Posts: 770
|
Re: Bagged My 71 Suburban
That looks great! Bags are a lot of fun to have and you won't regret the decision. Did you ever put grommets where the lines go through the frame? It wouldn't hurt to put grommets there just for safety, wouldn't be much fun if you blew a line.
|
|
|
|
|
06-24-2011, 04:58 PM
|
#3 |
|
Registered User
Join Date: Oct 2009
Location: chilliwack, BC
Posts: 136
|
Re: Bagged My 71 Suburban
awesome! thanks for this! i subscribed so i could find it again this winter, my next winter project is bagging my 71 pickup and this will help a lot! also sweet idea with the schraeder valves in the license plate bolts! haha "what are you doing?!?" "oh just pumpin up my license plate no big deal... you never do this? you should! keeps your car healthy!"
__________________
'71 GMC pickup; "Ashley," 
|
|
|
|
|
06-24-2011, 05:14 PM
|
#4 |
|
Registered User
Join Date: Feb 2011
Location: Vegas
Posts: 71
|
Re: Bagged My 71 Suburban
I have a grommet assortment but nothing that would fit. Ended up using hose sleaves and silicone. I'll keep an eye on them. Thanks!
Posted via Mobile Device
__________________
Scott S 54 Chevy Pick-Up 71 Chevy Suburban 76 FJ40 LandCruiser - 454, TH350, NP205, Ford 9" 98 Dodge Ram 2500 4X4 Cummins |
|
|
|
|
06-24-2011, 05:37 PM
|
#5 |
|
Registered User
Join Date: May 2005
Location: Beaverton, OR
Posts: 3,728
|
Re: Bagged My 71 Suburban
Looks great. As long as the silicone is heavy enough and the hose is centered in the hole, you should be fine. Keeping an eye on your air ride should be common practice, anyway.
I used to make grommets out of silicone when I ran wire harnesses that were too big for a rubber grommet.
__________________
New Project: 1966 LWB C20 Plans: 1/2 ton conversion Dropmember front Dropmember rear Corvette discs Restored raised bed http://67-72chevytrucks.com/vboard/s....php?p=4295210 |
|
|
|
|
06-24-2011, 07:16 PM
|
#6 | |
|
Registered User
Join Date: Apr 2001
Location: DALLAS,TX
Posts: 21,910
|
Re: Bagged My 71 Suburban
Quote:
__________________
67SWB-B.B.RetroRod 64SWB-Recycle 89CCDually-Driver/Tow Truck 99CCSWB Driver All Fleetsides @rattlecankustoms in IG Building a small, high rpm engine with the perfect bore, stroke and rod ratio is very impressive. It's like a highly skilled Morrocan sword fighter with a Damascus Steel Scimitar..... Cubic inches is like Indiana Jones with a cheap pistol. |
|
|
|
|
|
06-25-2011, 08:46 AM
|
#7 |
|
Registered User
Join Date: Feb 2011
Location: Portland, Or
Posts: 90
|
Re: Bagged My 71 Suburban
Nice work Salvo! I used the same hose trick when wiring my gasser, and slid pieces over the wiring wherever it ran through mounts or frame. I didn't silicone them on the wiring because I wanted to be able to pull a wire out or add one if needed later.
__________________
1969 C10 Suburban 350 1963 Falcon gasser 464 BBC 1946 Austin 327 SBC gasser |
|
|
|
|
06-25-2011, 10:46 AM
|
#8 |
|
Happy to be here
 Join Date: Mar 2000
Location: Cypress, TX
Posts: 39,023
|
Re: Bagged My 71 Suburban
Excellent write up. Thanks for sharing...

__________________
Follow me on Facebook and Instagram @N2trux.com Articles- "Jake" the 84 to 74 crewcab "Elwood" the77_Remix 85 GMC Sierra "Scarlett" "Refining Sierra" |
|
|
|
|
06-25-2011, 10:49 AM
|
#9 |
|
Registered User
Join Date: Feb 2011
Location: Vegas
Posts: 71
|
Re: Bagged My 71 Suburban
Thanks!
Drinking a bit of coffee then it's to the garage to start the rear. SCOTI thats a great idea, I noticed CPP sold the brackets for lowered vehicles, then I read on CPP web site that the low brackets do not work with lowered vehicles using air bags. Here is the link. http://www.classicperform.com/Store/...ck/6372LSB.htm I have no idea why not? So I just installed the standard bracket. Should have asked here first!
__________________
Scott S 54 Chevy Pick-Up 71 Chevy Suburban 76 FJ40 LandCruiser - 454, TH350, NP205, Ford 9" 98 Dodge Ram 2500 4X4 Cummins |
|
|
|
|
06-25-2011, 11:02 AM
|
#10 |
|
Registered User
Join Date: Feb 2011
Location: Vegas
Posts: 71
|
Re: Bagged My 71 Suburban
I do have a question, do you guys that have similar set ups install any type of bump stops and turn stops? I'm not looking to drop this to the ground and would like to rig something to limit the drop in case I loose air.
__________________
Scott S 54 Chevy Pick-Up 71 Chevy Suburban 76 FJ40 LandCruiser - 454, TH350, NP205, Ford 9" 98 Dodge Ram 2500 4X4 Cummins |
|
|
|
|
06-26-2011, 10:01 PM
|
#11 |
|
Registered User
Join Date: Feb 2011
Location: Vegas
Posts: 71
|
Re: Bagged My 71 Suburban
Got the rear finished, another long weekend in the garage! I was able to do all the front suspension work by myself but the rear work I needed another set of hands and enlisted a friends help, all went fairly smooth other than a few stubborn nuts & bolts. I will also need to go by the muffler shop and have the rear section hump over the axle reworked, Im unable to get much drop without contacting the exhaust pipe!
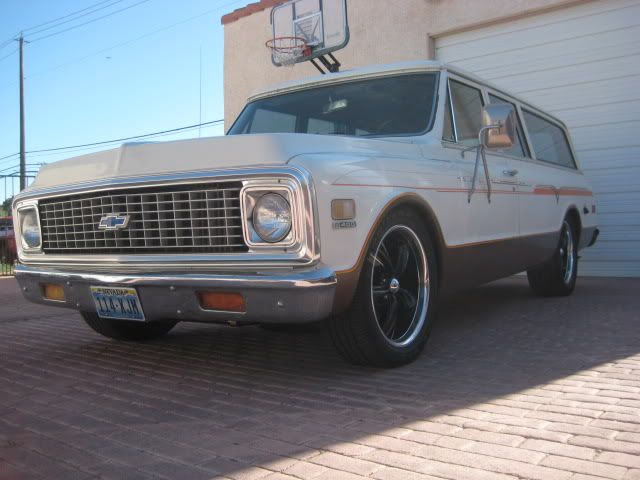
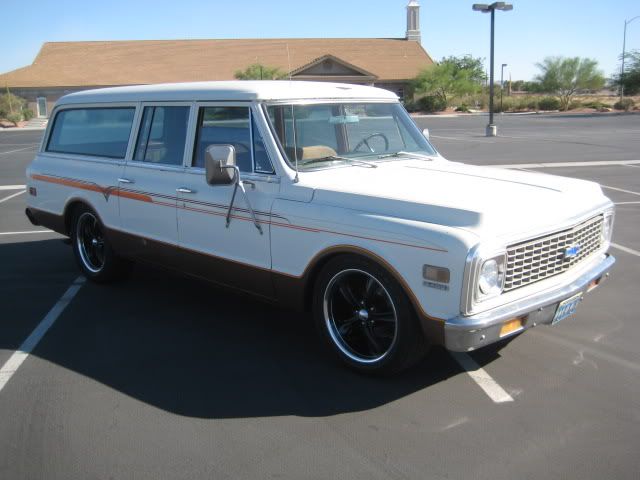
I didnt take a lot of pictures, its all pretty straight forward. Did one side at a time, pulled the trailing arm off, replaced the trailing arm bushings, lower and upper shock perches and drilled the frame for the air bag. Removal of the old trailing arm bushing was pretty easy, the instructions called for burning them out of the sleeve, we just used a small spike/ice pick and pried the old dried up bushing out in small pieces. The upper shock perch has two rivets each that we cut off with a grinding wheel and knocked out. For the holes to mount the bag I copied the hole locations and used that as a template to punch mark the frame plate for drilling. 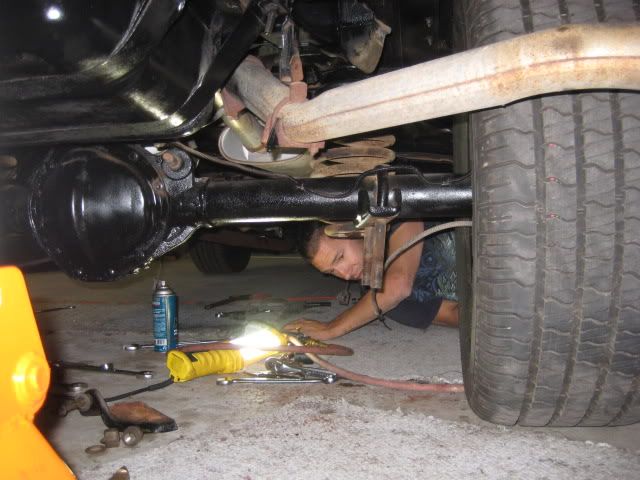 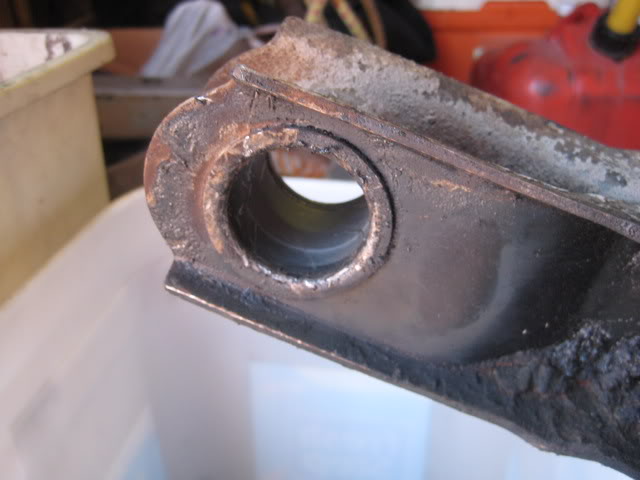 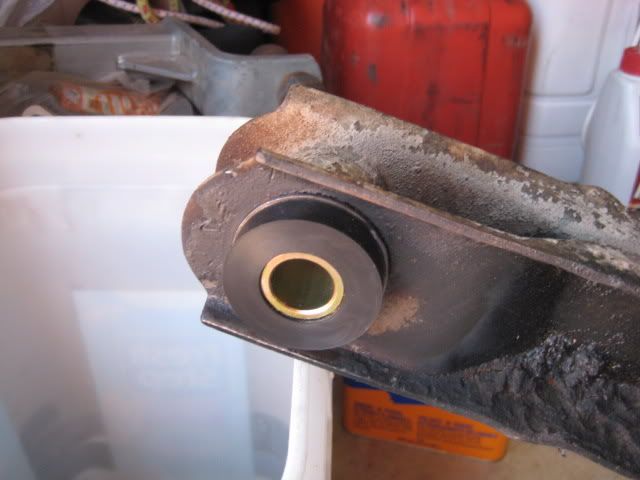 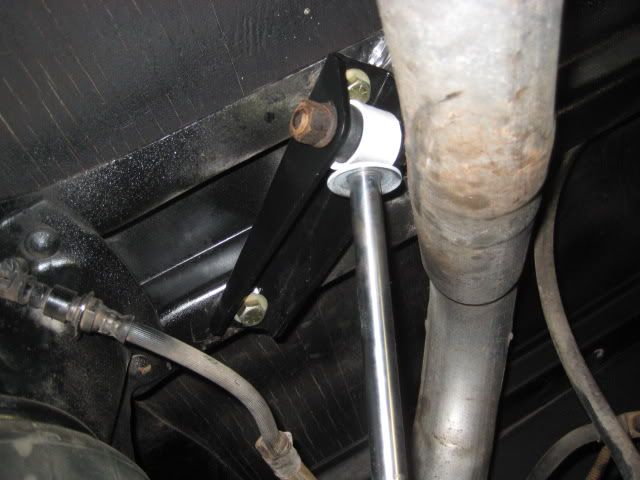 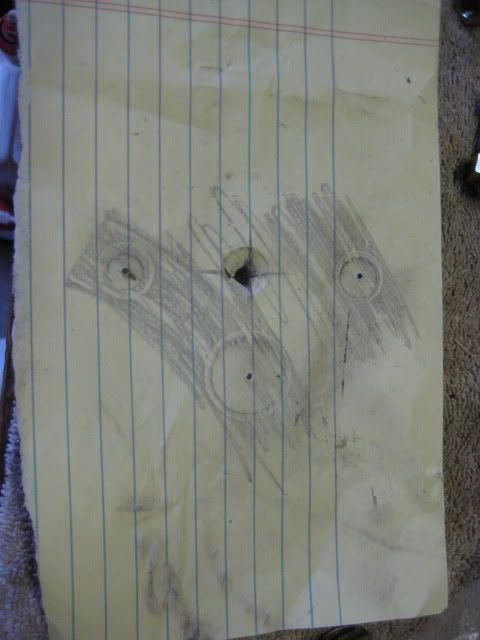 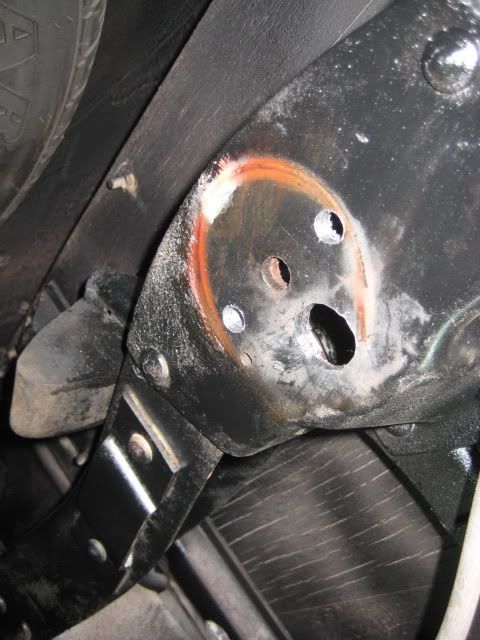 Mounted every thing up and ran the air line along the frame to the rear license frame. I ran the line inside some fuel line I had to protect it, especially between the area were the fuel tank is mounted since I could not anchor it in that section, it is well protected! I also mounted the rear sway bar, not sure if I did it 100% correct or not, the instructions said that the spacer tube may need to be shortened for dropped vehicles. I took an inch off just to keep it somewhat out of the way of speed bumps, may need to buy shorter bolts and shorten it more, with the threads that were on the supplied bolts, 1 shorter was the most that would work with them. ANY BODY KNOW? 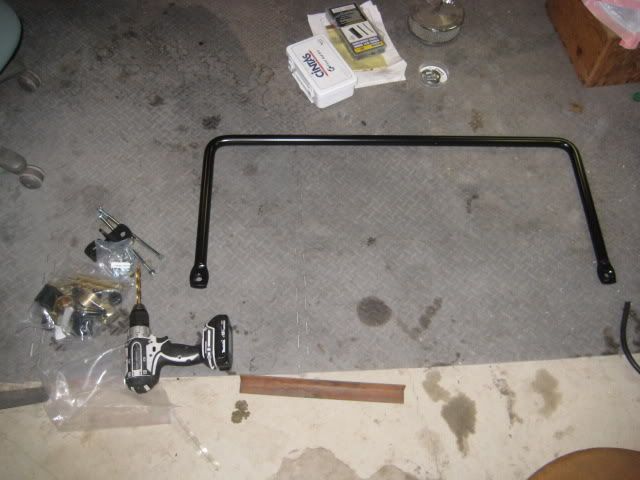 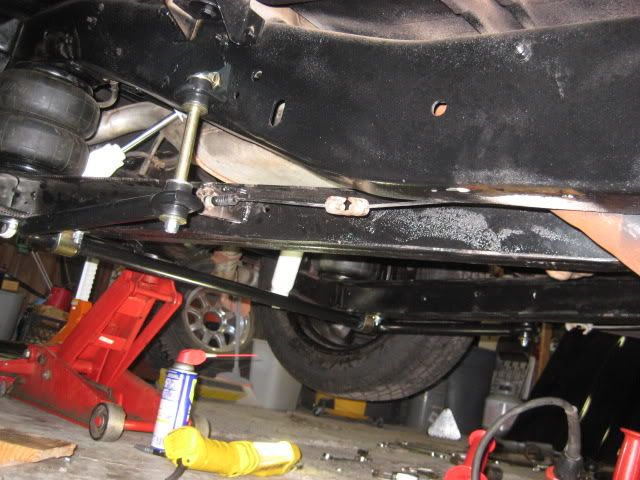 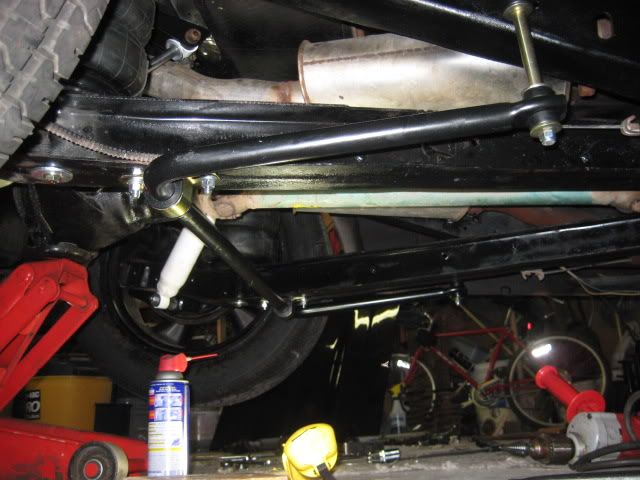 Even though I am unable to drop the rear where I want it (due to the exhaust pipe needing to be reworked) with the air bags I was able to set a stance that looks pretty good, handles like a race car and is as smooth as a Cadillac! The difference is just plain amazing! I took it on about an hour-long drive and hit the freeway too, 85 MPH it was rock solid, let go of the steering wheel straight. The steering response, ride and no body roll makes all the work more than worth it! 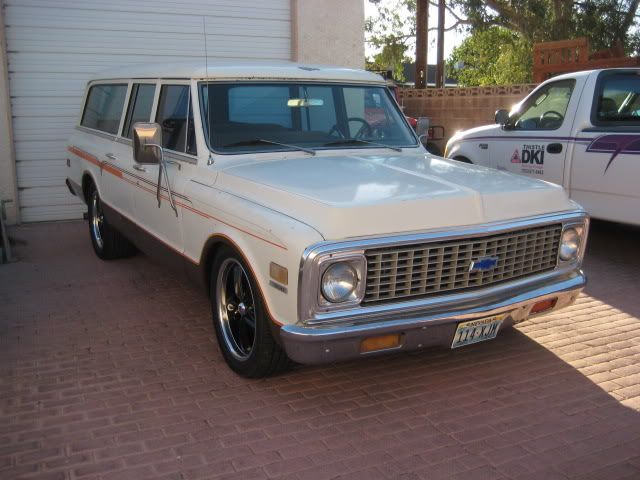 Ill take another picture once I get it to the muffler shop.
__________________
Scott S 54 Chevy Pick-Up 71 Chevy Suburban 76 FJ40 LandCruiser - 454, TH350, NP205, Ford 9" 98 Dodge Ram 2500 4X4 Cummins |
|
|
|
|
06-26-2011, 11:03 PM
|
#12 | |
|
Happy to be here
Join Date: Mar 2000
Location: Cypress, TX
Posts: 39,023
|
Re: Bagged My 71 Suburban
Quote:
Regarding bump stops, I removed the stock stop and tower and had one built to allow the truck to roll when aired out.
__________________
Follow me on Facebook and Instagram @N2trux.com Articles- "Jake" the 84 to 74 crewcab "Elwood" the77_Remix 85 GMC Sierra "Scarlett" "Refining Sierra" Last edited by N2TRUX; 06-26-2011 at 11:05 PM. |
|
|
|
|
|
06-26-2011, 11:03 PM
|
#13 |
|
67-72 parts collector,
 Join Date: Nov 2002
Location: Mid-MO
Posts: 22,682
|
Re: Bagged My 71 Suburban
Great work.
I think your upper shock mount may be installed backwards. Your rear shocks look really layed over. The shock relocators are used to help "stand up" the shocks, so they work better.
__________________
Keith Convert to disc brakes. http://67-72chevytrucks.com/vboard/s...d.php?t=444823 |
|
|
|
|
06-26-2011, 11:16 PM
|
#14 |
|
VA72C10
 Join Date: Mar 2008
Location: Midlothian, VA
Posts: 25,269
|
Re: Bagged My 71 Suburban
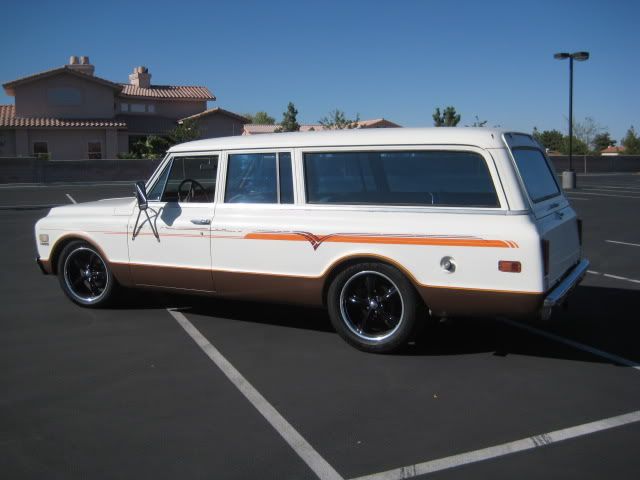
Nice work and writeup. Burb looks good. Would love to see some side profile shots...
__________________
Looking for a 67-72 swb or blazer project in or around VA. 
|
|
|
|
|
06-26-2011, 11:25 PM
|
#15 | |
|
Registered User
Join Date: Feb 2011
Location: Vegas
Posts: 71
|
Re: Bagged My 71 Suburban
Quote:
Posted via Mobile Device
__________________
Scott S 54 Chevy Pick-Up 71 Chevy Suburban 76 FJ40 LandCruiser - 454, TH350, NP205, Ford 9" 98 Dodge Ram 2500 4X4 Cummins |
|
|
|
|
|
06-26-2011, 11:28 PM
|
#16 |
|
67-72 parts collector,
Join Date: Nov 2002
Location: Mid-MO
Posts: 22,682
|
Re: Bagged My 71 Suburban
The "shock end" of the upper bracket should be towards the rear of the truck.
Get out the sawzall and cut off that tailpipe! Again,... great looking 'burb.
__________________
Keith Convert to disc brakes. http://67-72chevytrucks.com/vboard/s...d.php?t=444823 |
|
|
|
|
06-26-2011, 11:28 PM
|
#17 | |
|
Registered User
Join Date: Feb 2011
Location: Vegas
Posts: 71
|
Re: Bagged My 71 Suburban
Quote:
Posted via Mobile Device
__________________
Scott S 54 Chevy Pick-Up 71 Chevy Suburban 76 FJ40 LandCruiser - 454, TH350, NP205, Ford 9" 98 Dodge Ram 2500 4X4 Cummins |
|
|
|
|
|
06-27-2011, 12:46 AM
|
#18 | |
|
Registered User
Join Date: Feb 2011
Location: Vegas
Posts: 71
|
Re: Bagged My 71 Suburban
Quote:

__________________
Scott S 54 Chevy Pick-Up 71 Chevy Suburban 76 FJ40 LandCruiser - 454, TH350, NP205, Ford 9" 98 Dodge Ram 2500 4X4 Cummins |
|
|
|
|
|
06-27-2011, 12:50 AM
|
#19 | |
|
Registered User
Join Date: Feb 2011
Location: Vegas
Posts: 71
|
Re: Bagged My 71 Suburban
Quote:
Do you have any pictures of your fabricated bump stop?
__________________
Scott S 54 Chevy Pick-Up 71 Chevy Suburban 76 FJ40 LandCruiser - 454, TH350, NP205, Ford 9" 98 Dodge Ram 2500 4X4 Cummins |
|
|
|
|
|
06-27-2011, 07:17 PM
|
#20 | |
|
needs more $$$
Join Date: Mar 2004
Location: Sacramento
Posts: 1,936
|
Re: Bagged My 71 Suburban
Quote:
Great job on the install and nice write up too! I'm going to have to look into that rear sway now...thanks for making my project budget increase...haha
__________________
1970 2wd Blazer |
|
|
|
|
|
06-27-2011, 08:34 PM
|
#21 |
|
Registered User
Join Date: Feb 2011
Location: Vegas
Posts: 71
|
Re: Bagged My 71 Suburban
Got those shock brackets flipped, much better fit!
No problem tubbedII, I think were all here just to help each other spend money and get our hands dirty.
__________________
Scott S 54 Chevy Pick-Up 71 Chevy Suburban 76 FJ40 LandCruiser - 454, TH350, NP205, Ford 9" 98 Dodge Ram 2500 4X4 Cummins |
|
|
|
|
06-28-2011, 07:06 PM
|
#22 |
|
A guy with a truck
Join Date: Sep 2005
Location: Germany, for now
Posts: 5,920
|
Re: Bagged My 71 Suburban
Nice write up

__________________
-Chris Instagram _elgringoloco_ '70 Short-Wide How to: Ruin a perfectly good C10 70 Blazer ConversionHow To: Ruin a Perfectly Good 4wd '72 Highlander How To: Ruin a Perfectly Good K/5 (SOLD) '72 Blazer 2WD How to: Ruin a perfectly good Blazer (SOLD) '05 Yukon Daily Driven (not so stock) Yukon (SOLD) 07 Yukon Denali (daily) Members met list: SCOTI, darkhorse970, 67cheby, 67cheby'sGirl, klmore, porterbuilt, n2billet, Fastrucken, classicchev, Col Clank, GSFMECH, HuggerCST, Spray-Bomb, BACKYARD88, 5150, fine69, fatbass, smbrouss70, 65StreetCruiser, GAc10boy |
|
|
|
|
06-30-2011, 01:36 AM
|
#23 | |
|
Registered User
Join Date: Feb 2011
Location: Vegas
Posts: 71
|
Re: Bagged My 71 Suburban
Quote:
__________________
Scott S 54 Chevy Pick-Up 71 Chevy Suburban 76 FJ40 LandCruiser - 454, TH350, NP205, Ford 9" 98 Dodge Ram 2500 4X4 Cummins |
|
|
|
|
|
06-30-2011, 02:13 AM
|
#24 |
|
VA72C10
Join Date: Mar 2008
Location: Midlothian, VA
Posts: 25,269
|
Re: Bagged My 71 Suburban
Very nice!!!
__________________
Looking for a 67-72 swb or blazer project in or around VA.
|
|
|
|
|
06-30-2011, 08:06 PM
|
#25 |
|
Registered User
Join Date: Oct 2009
Location: chilliwack, BC
Posts: 136
|
Re: Bagged My 71 Suburban
man this has got to be one of my favorite paint jobs ever!
__________________
'71 GMC pickup; "Ashley,"
|
|
|
|
 |
| Bookmarks |
|
|


 Linear Mode

