
|
|
|
 04-24-2014, 12:50 PM
|
#1 |
|
Registered User
Join Date: Nov 2010
Location: Los Angeles, CA
Posts: 1,018
|
Re: Project Madera: A Jimmy GT
So I'm going through a renewed push on this project after a long stall, so some updates. The frame is at the fabricators on the fabrication table some issues there which I'm not going to get into here, but with a roller in sight I'm getting ready to stage the rest of it all.
Engine/Trans: The Weber DCOE pattern Jenvey throttle bodies are on their way from England. The Oil pan has been cut and the Fiat 500 sump has been ordered from Italy. My machinist is making up a new bottom plate for the cut pan with a machined in flange for the bolt on Fiat sump. Will still need to modify a pickup but that is a matter of just using an inline 5 cyl pickup and extending it 100mm since it's basically the same engine with a cyl missing, but setup for a rear sump. Need to check with my transmission guy, about progress on the sliced 4L80E case, if nothing there, at this point I'll just order a pre sliced case from TCI with their pump plate adapter ring and just have it machined to fit my 4L60E bellhousing. Will be ordering the PCS controller and 6 speed valve body kit, maybe even this week, along with the re-ratioed 1st and 2nd planetaries from PATC. I'm still considering ordering their tail shaft and housing as well that shrinks the 4L80E overall length and spline to the same as a 4L60E so in the future, in a pinch, I could throw in a 4L60/65/70E without changing anything. Seems kind of expensive for what it is though at $600 for a tailshaft and a casting, is the insurance of swapability worth that? Still need to make a final determination on the AEM ECU, I will be going with a Series 2 intended as a drop in for a Honda V6 as it has the most features and is actually as cheap or cheaper than most of the alternatives. Will do 6 smart coils, 12 injectors, VVT, launch control, ping sensors, and lots and lots of General Purpose I/O. Very programmable. Will be ordering a Kooks stainless header today intended for the Trailblazer the engine was originally installed in and an X-Force Varex electronically controllable muffler (all 3" from collector back) which I plan on controlling from one of the I/O leads of the ECU along with a switch to an alternate fuel map for the open exhaust mode. May hold off just a bit on the muffler, as it is available as a round or oval pattern, and with all that is going on in the suspension with trailing arms I'm not sure which fits better and where. I'm doing side exit exhaust so muffler needs to happen before the rear axle, tricky. I've also gotten a design from Ron Davis for the radiator which is backwards from they typical small block radiator with high sides and low sides reversed left and right. They gave me a design for an aluminum radiator with shrouds and shallow electric fans that looks really nice and is a drop in to the 67-72 core support. To go with it I'll be doing an aluminum cross flow evaporator for the AC which I may anodize black to give me depth behind the lights in the grill, the evaporator not the radiator. Control: I also decided to just go for it on the paddle shifter and ordered up a Twist Machine Shrifter, what a pretty piece that is, along with a Nardi steering wheel. I'm getting it black anodised. Once I have wheel and shifter in hand and brackets under the seats I can determine what tilt column length to order from Flaming River. I'll be using a B&M Quick Silver on the floor for P-R-N-D-L(s) for basic auto gear select, more for the solid feel of it, I probably really only need a Lokar to do the job but when I've seen the Lokar it just doesn't have that same feeling to it, kinda weak even with new detents in the trans. The B&M feels more like big machiney. Been looking for a good hand brake lever, something not so minimalist as the Lokar. Both the shifter and brake will get leather wrapped pieces to continue the feel with the wheel and seats. What I'm leaning to at this point is a lever from a late model Jeep Wrangler which seems generic and adaptable enough and is just simply a lever, mount and indicator switch and not some thing so built into it's surroundings that it makes it difficult to adapt. Surpisingly the nicest of the aftermarket hand levers are hydraulic, never even considered such a thing, obviously a drifters thing I guess. Body work: Looking for a panel beater to finish up my body work, I think I found one, I've used him before, he did the wheel well stretch on my '91 Suburban years ago. I've gotten all my dimple dies and punches to prep the rockers, which I'm going to perferate so when they powdercoat the body it gets coated inside the rockers. Will probably do door bottoms, and A and B pillars as well. Grill; I will likely be selling off my '67 painted and '70 chrome grill as I've decided the '71-72 grill may fit my needs more. I plan on cutting out the horizonal bars for my crazy lighting and the early grills are difficult to do that with because the vertical bars and horizonal bars are in the same plane and form a center point where they meet in the center. The '71-72 grills have the horizonals recessed from center so I can cut them out and patch where they were. It also has a bit of a Pontiac look to it once done, Here is a Photoshop concept I did of it using a pic of a members truck as a donor image: Attachment 1245976 Also note the sectioned and stretched '67 Camaro bumpers to hide the seam between the chromed grill and the painted roll pan. Roll pan will also be punched and dimpled to direct airflow from the air dam. The grill will be powder coated over the chrome in the recesses. Will also order pans this week, probably Mar-K, and a smooth cowl panel from Scotts. I have soem '69 Grand Prix door handle cutouts I'll be using in the doors to smooth the handles in the doors, and already have reproduction handles to go with them. The Grand Prix handles are flush and you press on the end to pop them out. Again more Pontiac touches, hey I figure GMCs were sold along side Poniacs on the same lot most of the time. I will also be frenching in Shelby Cobra aluminum popup gas fillers, and decided I may as well just put one on either side for balance, that way I never have to remember which side my filler is on.  With my side exit exhaust I'm planing on doing a full width tank in the back that extends past the frame rails, I'm figuring I could get somewhere between 32 and 38 gallons back there and still keep good ground clearence. Since the frame is there the top of the tank will be essentiall split into 3 cavities and I will need to run some sort of breather system between them so that filling from either side cavity will fill all 3. With my side exit exhaust I'm planing on doing a full width tank in the back that extends past the frame rails, I'm figuring I could get somewhere between 32 and 38 gallons back there and still keep good ground clearence. Since the frame is there the top of the tank will be essentiall split into 3 cavities and I will need to run some sort of breather system between them so that filling from either side cavity will fill all 3. Bed will be lined with aircraft seat grid (also known as L-rail) and leveled out with sheet HDPE (the stuff they make from recylced milk jugs and use as a substitute for wood in park benches and decking), it's available in colors, I'll just be using black. The aircraft seat grid will let me snap in various "stuff" like bed cross bracing, the rear seats, a bulk head, a retractable hard tonneau cover mechanism, chocks for the bikes, tie downs, etc, etc, etc. It'll also give the bed a planked look, but sort of a high tech version in black and black powdercoated track. Electrical-electronics: I'm leaning towards an all breaker marine type system for the electrical buried into a dash to bed center console along with all the controllers and electronics housed in there and of course the e-brake and floor shifter. I'll be doing a custom gauge pod, which is a whole other thing unto itself, with custom faced gauges from Speedhut. I don't really care for any of the aftermarket indicator options I've found or the cheesey LCD odometers in most of the aftermarket electronic speedometers so I'll be using a small Dakota Digital all in one dealy that is intended for motorcycles that provides a vacuum flourecent odometer along with turn signal indicators, high beam, digital speed, graphical tach, caluclated gear position based on RPM vs MPH, trip odometer and some idiot lights. This will be positioned into the cluster along with a bevy of traditional analog gauges, with kind of Ford GT40 inspired faces. There will also be a small color LCD panel in the middle. To get things going, the Dakota Digital motorcycle panel does enough to function as the work in progress cluster. The rest will come later when I do the finishing in the interior. Like I said it's a whole project unto itself. The seats have little compressors in them for lumbar bladder inflation, they're 30 years old and one is dead and the other weak, so I'm planning on bypassing them and just running a small frame mounted compressor to do the job for both seats as well as hopefully provide on board air for tire inflation and just not carry a spare, since there is no real place to put one that isn't in the way. Just carry a plug kit instead. There is aftermarket wireless tire pressure sensors, and as much as I hate to break beads on tires that have never even hit the road yet, I'll probably go ahead and get those installed. Anyway, probably more than enough for now, I'll post parts pics as they come in, and frame and panel progress pics as it gets done. |

|

|
|
04-30-2014, 11:50 PM
|
#2 |
|
Registered User
Join Date: Sep 2008
Location: phoenix, AZ
Posts: 54
|
We'll looks like you have a plan set. Looking forward to what you are going to do to your truck!
|
|
|
|
|
05-01-2014, 06:51 AM
|
#3 |
|
Collector of Projects
Join Date: Apr 2003
Location: Las Vegas
Posts: 3,106
|
Re: Project Madera: A Jimmy GT
The attachement for the 71/72 grille doesn't seem to work. I would be interested to see what your plans are.... "crazy lighting"
|
|
|
|
|
05-01-2014, 11:14 AM
|
#4 |
|
Registered User
Join Date: Nov 2010
Location: Los Angeles, CA
Posts: 1,018
|
Re: Project Madera: A Jimmy GT
I wouldn't let me edit my original post, but this is my concept render:
|
|
|
|
|
05-01-2014, 12:41 PM
|
#5 |
|
Registered User
Join Date: Jun 2011
Location: Spokane, WA
Posts: 2,367
|
Re: Project Madera: A Jimmy GT
That's a lot of figgerin out you've done! This is going to be a fun build to watch. Keep the updates coming!
__________________
'77 K30 3+3 - "The Crummy" http://67-72chevytrucks.com/vboard/s...d.php?t=640134 '67 C10 L/SWB - Soon to be daily driver! http://67-72chevytrucks.com/vboard/s...d.php?t=471776 
|
|
|
|
|
05-01-2014, 01:28 PM
|
#6 |
|
Registered User
Join Date: Nov 2010
Location: Los Angeles, CA
Posts: 1,018
|
Re: Project Madera: A Jimmy GT
So as crazy as some of this stuff may seem the one part that still gives me pause is the ECU. After reading and reading and reading, then calling and finding out I've totally misunderstood what I was reading, now I'm looking at an ECU that seems to actually do what the docs seem to indicate it does. I was planning on using the AEM Series II, then the AEM Infinity 6h, then maybe the full featured Infinity 8, but they are closed up and I can't do what I want with any of them, Holley Dominator and FAST xfi 2.0 were the same. So I started looking at some higher end stuff, the problem is the price tag, it's a holy crap moment.
 So I'm now considering going with a MoTeC M600, it's a whole other thing. Open definable message logging and message output over CAN, you can add expanders to increase I/O, is very oriented towards the type of induction limitations I have (no MAP or MAF or stable vacuum source) and can do most of it's air/fuel adjustment based on closed loop Lambda monitoring of the exhaust. I can't even bring myself to say what this magic box costs in a public forum, but lets just say if you bought 2 of the top of the line boxes from Holley or AEM or FAST it would cost you less than an M600 and if you wanted the M800 (the 8 cyl box) you could buy all 3. The MoTeC is a pretty special animal though, not that it does it out of the box, but it can be made to do some stuff that really makes you re-evaluate what you thought you knew about ECUs. They have hooks for GPS mapping and can adjust your engine management to change as you go around a track, they have add ons to manage power so you can essentially eliminate your fuse block and regulate, limit and manage power via software, they have out of vehicle remote monitoring that allows a crew to tweek your vehicle as you are driving it, way out there stuff, really expensive stuff. There also seems to be no deals on the MoTeC, pretty much the same cost no matter where you go. The unterminated harness cost is just silly, so I'll have to build my own from scratch, which is OK. Even though you can define the CAN message format, what the gauges I was going to use understand is apparently *not* standard CAN but some variation of CAN used by OEM ECUs that is typically sent over ODBII, not really CAN. This means I'll probably need double senders for almost everything I have a gauge for, what a PITA. Also a hindsight moment, apparently if I had ordered my Moser axles with the lobes for antilock brakes, with the sensors the MoTeC can use those for launch control, may re-address that sometime down the road, we'll see. |
|
|
|
|
05-01-2014, 05:43 PM
|
#7 |
|
Collector of Projects
Join Date: Apr 2003
Location: Las Vegas
Posts: 3,106
|
Re: Project Madera: A Jimmy GT
Have you considered LED bars from companies such a Rigid Industries and Vision X. You could fill the factory grille slats without needing to slice and dice it.
Also, at least one company is making LED headlights in the 5.75" size needed for your quad headlights. ORACLE headlights function as both hi/low beam... Last edited by mcmlxix; 05-02-2014 at 01:09 AM. |
|
|
|
|
05-01-2014, 06:41 PM
|
#8 |
|
Registered User
Join Date: Nov 2010
Location: Los Angeles, CA
Posts: 1,018
|
Re: Project Madera: A Jimmy GT
Well no I haven't and really wouldn't.
First off it'll be a tech vehicle under the covers, but there is a certain somewhat crude vintage racing look I'm going for, big LED arrays don't fit that look at all. I'm even trying to figure out how to disguise the LEDs I would like to use like marker lights and such, I'd like the reliability but don't want the array look. Second those Marchals will throw a focused beam over a mile and a half, no current LED can do that at least not for a few more years. Even some of the huge LED arrays that are dimensionally bigger, are super expensive, and draw even more power can't do that. I kind of like the horizonalless grill, it has a sort of Pontiac look to it which I think goes with the Trans Am extractors I'm putting in the fenders and Grand Prix door handles, and you know the GMCs were sold on the same lot alongside Pontiacs most of the time. Very well funded World Rally Championship teams and Paris-Dakar teams are still using these long out of production Marchals and Cibie Super Oscars in preference to any LED or HID technologies. The same is true in the 24 hour races the vast majority of forward lighting is halogen, while LEDs are starting to creap in, I don't think any of the cars are using LEDs exclusively. HIDs have pretty much come and gone already, virtually absent from high dollar night racing. I do think the LED stuff will eventually take over, but it's just not there yet and I don't think it'll ever look vintagey well not until it actually is. |
|
|
|
|
05-15-2014, 04:10 AM
|
#9 |
|
Collector of Projects
Join Date: Apr 2003
Location: Las Vegas
Posts: 3,106
|
Re: Project Madera: A Jimmy GT
Now I understand that it's the vintage look you're going for, I understand why the LED lights wouldn't work...
Have you picked up the oil pan yet? I am really interested in the Vortec 4200 motor now as I was thinking about using it for a future project. I understand the factory 07+ ECM will control the motor and 4L60e as well as simple a simple turbo set up... Where did you get your motor and what was your cost? |
|
|
|
|
05-15-2014, 06:11 AM
|
#10 |
|
Registered User
Join Date: Nov 2010
Location: Los Angeles, CA
Posts: 1,018
|
Re: Project Madera: A Jimmy GT
The other issue is that the high output LED stuff is still in it's infancy, most if not all automotive LED lighting is constructed from off the shelf components no intentionally designed as automotive lighting which makes the current products essentially arrays of tactical flashlights. If you happen to have one of these tactiacl lights like a Fenix or similar, at full output they are glare monsters, shine one on a printed page full on and it's practically illegable, for me anyway, I have to crank it down and it all comes into focus, but at that output it's not all that impressive as far as light output. Unfortuanatly at this point most of the LED stuff is doing it the easy way and there isn't really the focused development on making pre-patterned automotive arrays yet with a tight pattern and ditch the reflector since LEDs don't ned them, it's just to make it look like something familiar. Their day will come and when it does everything else will be an antique.
Sorry for the rant... Anyway, yes, I am in posession of the Lavazza Fiat 500 pan now, looks like it will work out well, and is really a very very nice piece. My one complaint is that the bottom plate did not come with a gasket and suggests it be attached with silicone sealant (as near as I can figure the instructions are in Italian). I think I'll be making a gasket for it. I've been trying to get some time to go do the tour, Machinist has my 4200 pan and it's been sliced but he needs my input on what to cut out internally around where the front drive shaft re-enforcing ribs were. There is quite a bit of random structure there. He's also going to be doing the new bottom and flange for the Fiat pan to bolt on to (with a relocated dip stick hole), and my fabricator will be welding it together. Then the Fiat pan just becomes a removable sump on the bottom of the 4200 pan. My engine came from a yard in Louisville, Ky out of a totaled 2008 Trailblazer with 10K miles on it. Apparently it was lost in the inventory and sat on a shelf for 5 years, forgotten. Anything that wan't the motor however was hacked, they basically sawzalled it out of the truck, cutting through the harness and several of the sensors, oh and one of the motor mount purches. The 2008 and 2009 engines (and maybe '07) use the 58X crank triggers like the LS motors and can use the, and I hope I get the number right here, E67 PCM which is also capable of controlling a 6L80/90 trans, which is damn interesting. They are capable of being tweeked for turbos, google "limeswap" he's a guy doing turbo reprograms specifically for the 4200s. I believe he has even done a variable vane turbo setup. Doesn't help me though, OEM PCMs require MAP which requires some sort of stable vacuum source which with me going with ITBs I won't have. Basically factory ECUs need a common plenum, common throttle body, and drive by wire to work, I will have none of the 3. My engine cost me $1200 and another $400 for freight to a dock. Original pan was cracked in a couple of places where the front axle got tweeked in it from the accident it was in, it was covered in either lime stone or gypsum dust, and the above mentioned demolition style removal method but other than that it was in really really nice condition. In SoCal it would have cost me triple that, so I view it as a steal. There are early (2005) complete crate engines floating around, though they are probably getting more scarce and have the composite valve cover vs the cast aluminum one. Oh and the heads are different between the plastic and aluminum cover versions and covers do not interchange, also early motors have much smaller exhaust ports. Be warned the 2006-2009 engines are mechanically similar but the harnesses have different connectors, GM was concerned that they may lose Delphi as a source at the time and changed over all the connectors to some Bosch, Metri-pack and Weather-Pack randomness with some Delphi leftovers in the later years. So if you plan on using an OEM PCM get an engine with all the electronics still intact or know the specific year. Stupid things like AC compressors, alternators and sensors are interchangable mechanically but have different connectors. Oh and know that AC compressors and alternators are specific to 4200s (or actually Atlas motors) and bolt directly to the block. These engines are (within a few mm either way) very similar bore and stroke wise to the 4.2 litre Jaguar XKE engines and where as the XKE engines take quite a bit of tuning and mods to get to 300hp, that is about where the 4200s start out. I really am hoping that by sort of treating it similarly (tri-Y headers, and individualised intake) I can get the sort of sound that a high hp Jag motor can have, almost like an angry V12 with a pop-pop-pop when you let off on the throttle and defenatly a sound that sounds like it's from another era. Like this Jag: 300 bhp Jaguar E-type 4.2 Litre built by Lex Classics Last edited by skorpioskorpio; 05-15-2014 at 06:26 AM. |
|
|
|
|
05-15-2014, 09:36 AM
|
#11 |
|
Collector of Projects
Join Date: Apr 2003
Location: Las Vegas
Posts: 3,106
|
Re: Project Madera: A Jimmy GT
Thanks<
I found Limeswap on one of the other forums and a few other sources for info. I also found a cast rear sump pan that looks sub par in quality based on some pics. I just found another pan that has a billet flange and the rest fabricated... If any of my plan comes together(getting the car I have my eye on), it will have a NA 4200; then maybe upgraded to FI later... So now lets see some progress pics... even if it's just some cool new parts... |
|
|
|
|
05-15-2014, 03:58 PM
|
#12 |
|
Registered User
Join Date: Nov 2010
Location: Los Angeles, CA
Posts: 1,018
|
Re: Project Madera: A Jimmy GT
quote=mcmlxix;6674394]Thanks<
I found Limeswap on one of the other forums and a few other sources for info. I also found a cast rear sump pan that looks sub par in quality based on some pics. I just found another pan that has a billet flange and the rest fabricated... If any of my plan comes together(getting the car I have my eye on), it will have a NA 4200; then maybe upgraded to FI later... So now lets see some progress pics... even if it's just some cool new parts...[/quote] hmmm, you are likely talking about the pans on the Vortec4200 forum, there is 3, all vaporware. The cast pan, the guy who did that one had to find another foundry after he made the first one (he may have made a few, but I've talked to most of the guys in that forum and no one has ever seen one in person), I was supposed to get the first one from the new foundry, after a few months of back and forth, they apparently blew out his mold. The Billet flange pan with the fabricated bottom, that guy had to sell all his machinery, so that pan is gone. Also that pan did not have the bosses for the lower bolts for the AC compressor if that matters to you. The "bolt on" rear sump pan is a one off, never made again. There is also a mid sump pan made by a guy in Ohio for swaping a 4200 in to vintage Rolls Royces, it exists but is super expensive and really buys you nothing for a 67-72 swap. Believe me if there was an off the shelf pan, I never would have gone down the Fiat pan path. However, the Fiat pan path can be done on many levels there is probably 8-10 different aftermarket pans for that old Fiat 2 cylinder with varying capacities. You only need the top 2 inches of the original pan, plus the transmission dirt skirt. You do however need to be able to get to the inspection hole in the skirt to put the torque converter bolts on, so the removable Fiat sump solves that problem. I've been told that if you had to, you could bolt up the torque converter through the starter hole. Here is a pic of the Fiat 500 pan gasket laid over my broken pan to give you an idea of scale: ..and this is the Lavazza pan laid over that gasket in the position it would be, remember that the entire bottom of the pan will be milled off and replaced with a new bottom: So, when you say NA and FI later, are you talking carbs? That maybe more difficult than you think. There are no aftermarket intakes for the 4200, only the factory composite (plastic) one. Also the injectors are in the head not the intake so if you plug those for carbs you may make doing fuel injection difficult later. After I posted my respose late last night I was on the phone with Jenvey in England (4am LA time) discussing my fuel injection plans, they suggested I would get better performance by moving the injectors out away from the head and into the throttle bodies. I guess I always assumed squirting directly into the port was the optimal position, Jenvey was telling me that that is done for emmisions and cold starting and that fuel injection atomises better and is more responsive if you inject at the furthest point in the individual runner not the nearest, and these guys are kind of the guys in that market so I tend to give a lot of credit to what they say. Anyway this new info may make me reconsider the plan, since the OEM fuel rail and especially the injector plugs are really in the way for a good clean manifold design and if moving all that out to the throttle bodies gets them out of the way and actually improves performance, well that maybe the solution. Since the throttle bodies already have all the spots for the fuel rail and injectors in them already, the same style injectors, it's just a fuel rail and Jenvey will make one to order with whatever spacing I need for about $100. So back to the subject of carbs, I will be doing my manifold (and chose the injectors I did) so that if I ever wanted to I *could* run DCOE weber carbs instead of Fuel Injection, not that I see that happening, but the option would be there if I ever decided to go all non-electronic. Here is the throttle bodies from Jenvey, they sent me 2 rights and a left for a 4 cylinder, instead of a left a right and a center for a 6, so this is why the interlink linkages don't seem to work all the way through. They are sending me the parts to fix that as well as a left and right hall TPS and a batch of injector plugs I can use to cap either the injector bosses in the head or the throttle bodies: Also new are the flanges for the stacks to mount an air filter which I've ordered from ITG, also in England: 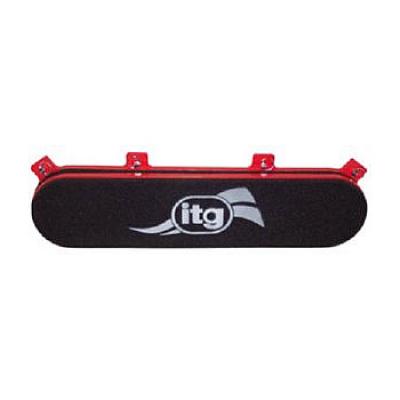 I'm getting a taller one than that, not that you can really tell how tall it is from the pic. Oh and mine is being made with the logo upside down so the screw flanges are hidden on the bottom. A lot of stuff is ordered and in transit, my paddle shifter is at the anodizers apparently, and the steering wheel, I dunno maybe being stitched up by Luigi in Italy. My short tail shaft for the 4L80E (so that the 4l80 is size interchangable with a 4l60 should that ever be a thing I need to do) is on order along with the trans controller, apparently waiting on the shaft itself from the mill. I did recieve what I'll be using for the floor P-N-R-D-L Floor selector, a B&M Quicksilver, nice piece and probably overkill for just selecting drive, but I want things to feel solid in the truck, and it certainly does. I'm probably only going to use the mechanism so the knob, floor housing and cover (which are the cheesy parts) won't be used. Oh and I got the last pieces to make my '69 Grand Prix door handles work, this one you have to use your imagination on a little: The cutouts get welded into the doors and the stamped pieces are the backing plates. The handles are recessed so you basically push the ribbed part to pop the handle out. Cool old Pontiac parts. |
|
|
|
|
06-02-2014, 06:11 PM
|
#13 |
|
Registered User
Join Date: Sep 2008
Location: phoenix, AZ
Posts: 54
|
Re: Project Madera: A Jimmy GT
Those Pontiac handles are pimp!
My best friend has a 71 GP and always loved the door handles. Oh and the aircraft carrier sized hood!! |
|
|
|
|
06-03-2014, 01:21 PM
|
#14 | |
|
Registered User
Join Date: Nov 2010
Location: Los Angeles, CA
Posts: 1,018
|
Re: Project Madera: A Jimmy GT
Quote:
I haven't decided yet whether I'm going to leave them chrome or take them apart and powder coat them body color or maybe semi-gloss black. |
|
|
|
|
|
06-03-2014, 03:45 PM
|
#15 |
|
Registered User
Join Date: Sep 2008
Location: phoenix, AZ
Posts: 54
|
Re: Project Madera: A Jimmy GT
+1 for the semi gloss. Don't remember are you going w flat black paint?
|
|
|
|
|
06-03-2014, 04:37 PM
|
#16 | |
|
Registered User
Join Date: Nov 2010
Location: Los Angeles, CA
Posts: 1,018
|
Re: Project Madera: A Jimmy GT
Quote:
The bikes have black and like a dark mauve accent stiping on them that I plan on kind of mocking in the truck paint. So like a wide black stripe from roll pan to roll pan with the mauve as a heavy pinstripe accent. There is pictures of the bikes earlier in the thread. |
|
|
|
|
|
05-15-2014, 06:32 PM
|
#18 |
|
Registered User
Join Date: Nov 2010
Location: Los Angeles, CA
Posts: 1,018
|
Re: Project Madera: A Jimmy GT
I just figured FI was fuel injection, so I was thinking NA must be...
 These engines do boost well, real well, 500hp on stock internals with an OEM PCM is doable, and 700hp on a built engine has been done... It's tempting believe me. I just always loved the look of a Weber carbed straight 6, especially one with a cross flow head. This all started because I was origionally thinking about doing a Northstar and came across one some guy adapted Hayabusa throttle bodies to, sounded wicked. The Nothstar was really to expensive and complicated (the best of the Northstars were made for front wheel drive cars and took a lot to make them work in a north-south orientation), so then I came across the 4200, but that ITB seed was already stuck. I know this sounds crazy, but I really wanted the engine in my project to sound right... um, but wrong, if you know what I mean. I am kinda bored with the sound of loppy pushrod 8s and if I'd done one it would have been some giant aluminum Merlin block whose displacement was measured in gallons that I couldn't afford to feed.
|
|
|
|
|
05-15-2014, 06:39 PM
|
#19 |
|
Collector of Projects
Join Date: Apr 2003
Location: Las Vegas
Posts: 3,106
|
Re: Project Madera: A Jimmy GT
If it sounds like that Jag, it will be awesome... very vintage racer ...
I'm working on picking up a 1962 Rambler American that came with an I6... no room for a V8 without major surgery... so the LL8 will be perfect... |
|
|
|
|
05-15-2014, 06:53 PM
|
#20 | |
|
Registered User
Join Date: Nov 2010
Location: Los Angeles, CA
Posts: 1,018
|
Re: Project Madera: A Jimmy GT
Quote:
|
|
|
|
|
|
06-25-2014, 08:51 AM
|
#21 |
|
Registered User
Join Date: Jun 2011
Location: Spokane, WA
Posts: 2,367
|
Re: Project Madera: A Jimmy GT
Pretty damn cool!
__________________
'77 K30 3+3 - "The Crummy" http://67-72chevytrucks.com/vboard/s...d.php?t=640134 '67 C10 L/SWB - Soon to be daily driver! http://67-72chevytrucks.com/vboard/s...d.php?t=471776
|
|
|
|
|
06-25-2014, 05:10 PM
|
#23 | |
|
Registered User
Join Date: Nov 2010
Location: Los Angeles, CA
Posts: 1,018
|
Re: Project Madera: A Jimmy GT
Quote:
|
|
|
|
|
|
07-08-2014, 11:36 AM
|
#24 |
|
Registered User
 Join Date: Oct 2012
Location: Newhall CA
Posts: 1,195
|
Re: Project Madera: A Jimmy GT
NICE BUILD.....

__________________
69 SWB 780hp Hellcat powered, manual 6 speed, currie 9 |
|
|
|
|
07-08-2014, 12:59 PM
|
#25 |
|
Registered User
Join Date: Sep 2008
Location: phoenix, AZ
Posts: 54
|
Re: Project Madera: A Jimmy GT
I kinda agree w spray bomb But I'm sure you will make it tasteful like the rest of your selections! You sure do have some Gucci parts on this thing!
Last edited by jimbug; 07-08-2014 at 01:00 PM. Reason: Spelling |
|
|
|
 |
| Bookmarks |
|
|


 Hybrid Mode
