
|
 09-03-2012, 11:50 PM
|
#1 |
|
Registered User
Join Date: Mar 2010
Location: Red Bud, IL (Home) Newton, IL (Shop)
Posts: 301
|
1968 GMC "Camillian"
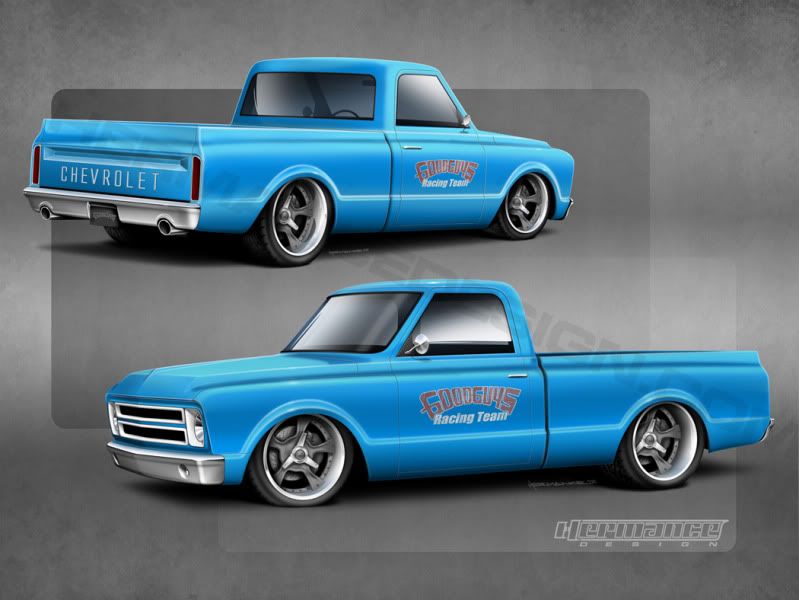
Several years ago I wasn't as knowledgeable or as skilled when I built my '67. It looks good on the outside but It has its share of problems that have bee pop rivited and slathered with bondo. I had always planned on fixing it correctly, but never got around to it. So then I bought a minimally rusted '68 GMC longbed for the right price. The wife really likes the '67 and I had initially planned on rebuilding the same truck, however, I think the plan has changed. I am drawing from several renderings of trucks that I like. Mainly from Ben Hermance and Problem Child Kustoms.
 And of course before pictures: Last edited by 78bronzechariot; 07-12-2015 at 11:44 AM. |

|

|
|
09-03-2012, 11:54 PM
|
#2 |
|
Registered User
Join Date: Mar 2010
Location: Red Bud, IL (Home) Newton, IL (Shop)
Posts: 301
|
Re: 1968 GMC "Camillian"
first order of business: Shorten the bed and add a rake to the tailgate. Kinda like a Cameo, hence the first part of the trucks name "Camillian":
|
|
|
|
|
09-04-2012, 12:39 AM
|
#3 |
|
Registered User
Join Date: Mar 2012
Location: Leanna, TN
Posts: 2,061
|
Re: 1968 GMC "Camillian"
Man, that's crazy! Can't wait to see what you end up with. it's cool to see someone make a truck their own like that.
__________________
=MATTHEW 69 Stepper...Stroked & Bagged  GONE BUT NOT FORGOTTEN GONE BUT NOT FORGOTTEN2003 Chevrolet Z71 Ext. Cab 1995 Cavalier gas saver! |
|
|
|
|
09-04-2012, 12:51 AM
|
#4 | |
|
Registered User
Join Date: Mar 2010
Location: Red Bud, IL (Home) Newton, IL (Shop)
Posts: 301
|
Re: 1968 GMC "Camillian"
Quote:
|
|
|
|
|
|
09-04-2012, 01:58 AM
|
#5 |
|
VA72C10
 Join Date: Mar 2008
Location: Midlothian, VA
Posts: 25,269
|
Re: 1968 GMC "Camillian"
Looking forward to this build! Cool ideas!
__________________
Looking for a 67-72 swb or blazer project in or around VA.
|
|
|
|
|
09-04-2012, 02:28 AM
|
#6 |
|
Registered User
 Join Date: Jul 2010
Location: memphis
Posts: 2,537
|
Re: 1968 GMC "Camillian"
I like tha idea of tha raked tailgate
__________________
1981 C-10 (Pop's) 1978 Camaro 2006 Lacrosse |
|
|
|
|
10-07-2012, 01:16 PM
|
#7 |
|
67-72 parts collector,
Join Date: Nov 2002
Location: Mid-MO
Posts: 22,682
|
Re: 1968 GMC "Camillian"
Any updates?
__________________
Keith Convert to disc brakes. http://67-72chevytrucks.com/vboard/s...d.php?t=444823 |
|
|
|
|
10-27-2012, 11:44 PM
|
#8 |
|
Registered User
Join Date: Mar 2010
Location: Red Bud, IL (Home) Newton, IL (Shop)
Posts: 301
|
Re: 1968 GMC "Camillian"
Nothing picture worthy, vintage air boxes showed up and a lot of welding on the bed, unfrotunately, I havent had a whole lot of time to work on it. Some maintenace on my daily driver (heater core) and work has kept me from it. I should be getting to it next weeekend.
|
|
|
|
|
11-04-2012, 11:32 PM
|
#9 |
|
Registered User
Join Date: Mar 2010
Location: Red Bud, IL (Home) Newton, IL (Shop)
Posts: 301
|
Re: 1968 GMC "Camillian"
Finally had some time to work on the truck this weekend. This weekend's task was the hidden fuel filler behind the brake light. The truck came with a Suburban gas tank and filler neck. After I had gotten the bedside where I wanted it, I cut the side of it out so i could see what I was doing. I modified the filler neck and bed pillar so the neck would fit and I made it a structural part of the pillar. Then I took a couple pieces of tube, bar stock, an old glove box hinge, an old throttle return spring, and old piece of throttle cable for my rendition of the flip down light. I mounted two pieces of tube parallel to each other the outside of the pillar. On the light, I welded part of an old glove box hinge and to the hinge I welded a piece of bar stock all at the height to match the lower tube in the bed pillar. I also welded a shorter piece of bar stock to the top of the light that would line up with the upper tube. I attached the piece of throttle cable to the light side of the hinge and then the other end to a spring which is attached to the rear wheel splash shield under the bed. The purpose of the spring is to hold the light in and hold it in the "open" position.
Basically to operate it, you pull the light out, flip it down and rotate it. The spring and throttle cable pull it back to keep it out of the way during fill up. Then when I am finished filling up, I Pull it back out, rotate it, flip it up and slide it back in. Once again the spring and throttle cable pull it in and hold it tight. |
|
|
|
|
11-26-2012, 12:13 AM
|
#10 |
|
Registered User
Join Date: Mar 2010
Location: Red Bud, IL (Home) Newton, IL (Shop)
Posts: 301
|
Re: 1968 GMC "Camillian"
4 day holiday weekend netted 1 and half days of work on the Camillian. Unfortunately on the way to Thanksgiving Dinner with family I blew the 3-4 clutch out of the 4L60E transmission in the red '67. So that will be on the list before I can get back to the GMC.
Anyway on the Camillian, I got the drive's side of the bed stitched back together. That was a bit more of a challenge than I had expected. To get the sweeping body line right, I had to do quite a bit of finesse to the bed side. In all there are 4 pieces of the original bedside with a bunch of hammer/dolly work and some relief cuts to get the right shape. This would have been a great time to own an English wheel, but sometimes you just have to make do with what you have. After I had the shape as close as I could get it in metal, it got a coat of filler. It looks like quite a bit on there, but I want to make sure that this looks like nothing ever happened, so eventually the entire bed side with have a thin layer on it to ensure it is straighter than it would have been if GM did it originally. This is a typical technique to get a panel "laser straight" |
|
|
|
|
11-26-2012, 12:20 AM
|
#11 |
|
Registered User
Join Date: Mar 2010
Location: Red Bud, IL (Home) Newton, IL (Shop)
Posts: 301
|
Re: 1968 GMC "Camillian"
More pics...
Last edited by 78bronzechariot; 11-26-2012 at 12:28 AM. |
|
|
|
|
12-09-2012, 10:42 PM
|
#12 |
|
Registered User
Join Date: Mar 2010
Location: Red Bud, IL (Home) Newton, IL (Shop)
Posts: 301
|
Re: 1968 GMC "Camillian"
"New" used trans went in the 67, and it promptly left me stranded, in the rain, 115 miles from home, on a Sunday while getting parts for the Camillian... A tow truck ride and some really good guys at a Pep Boys (of all places!) got me back on the road and back home. Of course that ruined last weekend and I got nothing else done.
|
|
|
|
|
12-09-2012, 10:49 PM
|
#13 |
|
Registered User
Join Date: Mar 2010
Location: Red Bud, IL (Home) Newton, IL (Shop)
Posts: 301
|
Re: 1968 GMC "Camillian"
Since the 67 is now fixed and took me to work all week, I got to do some work on the Camillian.
Now that I have the shape of the bed figured out, I figured it was time to pull the body off the frame so that I can shorten it. While I was at it, I made some budget body carts. For the bed, I got casters at the local home improvement store and some 2x4s. I made a simple frame and set two saw horses on top. For the cab, I used a stack of four pallets (free!),two 2x4s screwed to the top to make the top the correct width for the body mounts. On the bottom I used four more casters. Total investment $55 since I already owned the sawhorses. Lastly Since the bed was off, I went to fix the front bed panel. Apparently someone who owned this truck in the past didn't believe in tying anything down and making alot of panic stops. Pictures don't show it well, but 6 relief cuts, big hammers and dollies and a bunch of welding, It is back to the correct shape. Now that the truck is completely down to its major components I think I need a bigger shop! Apologize for some of the pics, only had my ancient phone with me. |
|
|
|
|
12-17-2012, 12:24 AM
|
#14 |
|
Registered User
Join Date: Mar 2010
Location: Red Bud, IL (Home) Newton, IL (Shop)
Posts: 301
|
Re: 1968 GMC "Camillian"
It's officially a shortbed! I followed glock35ipsc's how to shorted a lwb frame from the faq section. I do want thank glock35ipsc for the well written how to.
http://67-72chevytrucks.com/vboard/s...d.php?t=123624 I don't want to rehash glock35ipsc's entire thread since I did exactly what he outlined. So in a sentence: Cut a step notch in the frame to remove 12" under the cab and welded it back together with appropriate reinforcements. The hardest part was getting the frame clamped back together to weld it, mainly the procedure just takes time and patience. Don't want to rush this part. Just a couple process pics, then I set the body back on to see what it looked like. |
|
|
|
|
12-17-2012, 01:52 AM
|
#15 |
|
Registered User
Join Date: Sep 2010
Location: Austell, Ga
Posts: 151
|
Re: 1968 GMC "Camillian"
nice work...anytime you want to switch shops PLEASE let me know..you just have to account for the weather and the neighbors about the noise and to much stuff in your driveway..loll
True |
|
|
|
|
01-01-2013, 11:45 PM
|
#16 |
|
Registered User
Join Date: Mar 2010
Location: Red Bud, IL (Home) Newton, IL (Shop)
Posts: 301
|
Re: 1968 GMC "Camillian"
I had a bunch of time over the holidays to get a larger part of sanding done! drivers side of the bed has been skimmed front to back, blocked out and shot with epoxy primer! Things I didn't take picture of was final welding the entire bed floor and final welding passenger side bed skin to prep for bodywork on that side.
|
|
|
|
|
01-02-2013, 10:48 AM
|
#17 |
|
67cheby
 Join Date: Sep 2008
Location: siloam springs ar 72761
Posts: 17,890
|
Re: 1968 GMC "Camillian"
great looking project !
|
|
|
|
|
01-02-2013, 10:57 AM
|
#18 |
|
Registered User
Join Date: Mar 2012
Location: Knoxville, TN
Posts: 5,381
|
Re: 1968 GMC "Camillian"
Wow! Nice work!
__________________
-Rus |
|
|
|
|
01-02-2013, 03:12 PM
|
#19 |
|
Registered User
Join Date: Dec 2009
Location: Atlanta, Ga.
Posts: 1,050
|
Re: 1968 GMC "Camillian"
Gonna haft to climb aboard on this one, looking good.
__________________
I don't think we get smarter as we get older. We just run out of Stupid things to do. |
|
|
|
|
01-07-2013, 12:21 AM
|
#20 |
|
Registered User
Join Date: Mar 2010
Location: Red Bud, IL (Home) Newton, IL (Shop)
Posts: 301
|
Re: 1968 GMC "Camillian"
Doesn't look like much, but on the drivers bedside, I sanded out a couple runs in the epoxy sealer and added some filler in a couple of small spots with pinholes or large scratches I missed. Then I layed a coat of High build primer on it and blocked it out again. I think it is straight enough to seal one last time and put color down. I may seal it to protect it, because it will probably be a little while before I should paint the final color on it.
|
|
|
|
|
02-11-2013, 12:45 AM
|
#21 |
|
Registered User
Join Date: Mar 2010
Location: Red Bud, IL (Home) Newton, IL (Shop)
Posts: 301
|
Re: 1968 GMC "Camillian"
Been busy with work because spring is approaching and everyone wants their car back. We also had a guy quit on us so we have been putting in some overtime. I finally got the passenger bed side stripped and started doing bodywork on it. I also stripped the suspension off the frame, except for the drivers rear spring is being stubborn. Planning on getting the frame ready for paint soon.
|
|
|
|
|
02-11-2013, 08:51 AM
|
#22 |
|
Registered User
Join Date: Mar 2012
Location: Knoxville, TN
Posts: 5,381
|
Re: 1968 GMC "Camillian"
Looking good friend!
__________________
-Rus |
|
|
|
|
02-13-2013, 12:03 AM
|
#23 | |
|
Registered User
Join Date: Mar 2010
Location: Red Bud, IL (Home) Newton, IL (Shop)
Posts: 301
|
Re: 1968 GMC "Camillian"
Quote:
|
|
|
|
|
|
02-13-2013, 12:10 AM
|
#24 |
|
Senior Member
Join Date: Nov 2003
Location: Brookings, SD
Posts: 10,497
|
Re: 1968 GMC "Camillian"
I really like how the way you pitched the back of the bed sides is so subtle.
Are you removing the middle stake pockets?
__________________
Some people are like slinkies, they aren't good for anything, but you can't help but smile when you see one tumble down the stairs. |
|
|
|
|
02-13-2013, 12:57 AM
|
#25 | |
|
Registered User
Join Date: Mar 2010
Location: Red Bud, IL (Home) Newton, IL (Shop)
Posts: 301
|
Re: 1968 GMC "Camillian"
Quote:
I actually filled all the stake pockets on top of the rails for a smooth look when it gets the tonneau cover. I am leaving the inside portion of the pockets so there are still places to tie cargo down since I plan on using the truck. I will also be adding D ring tie downs in the lower corners of the bed like late model trucks have. |
|
|
|
|
 |
| Bookmarks |
|
|


 Linear Mode

