
|
 02-20-2013, 05:42 PM
|
#176 |
|
Registered User
Join Date: May 2011
Location: Anderson SC
Posts: 3,868
|
Re: '55 International Metal/Body/Paint Work
Once the front of the bed sides were straightened and squared I fitted the header panel, primed it, and drilled holes for the plug welds.
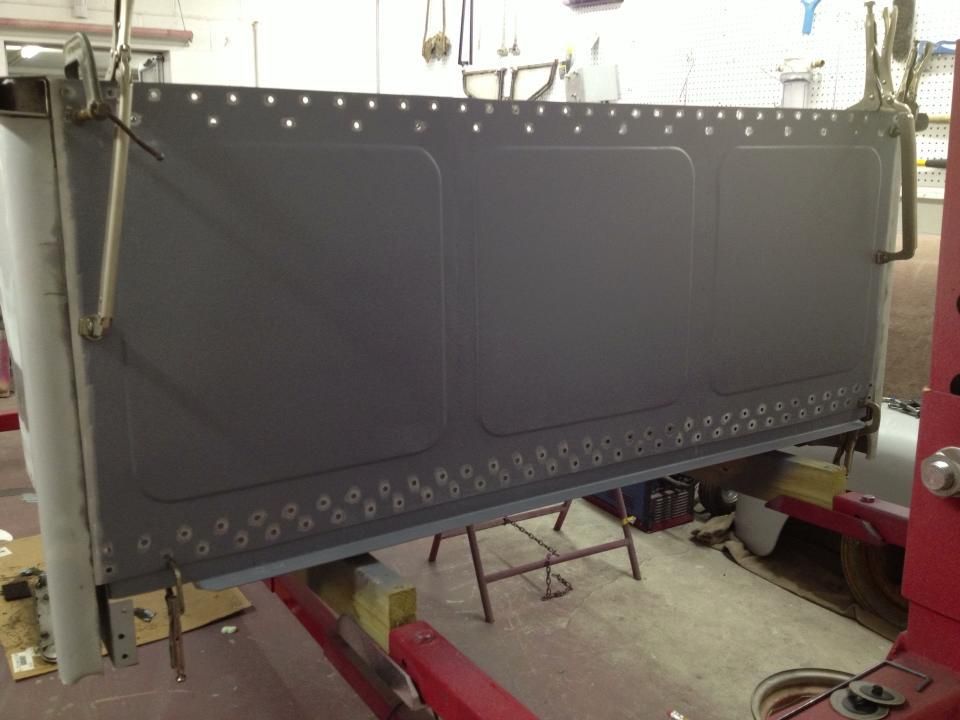 The original header panel had extended bottom corners that I needed to replicate. 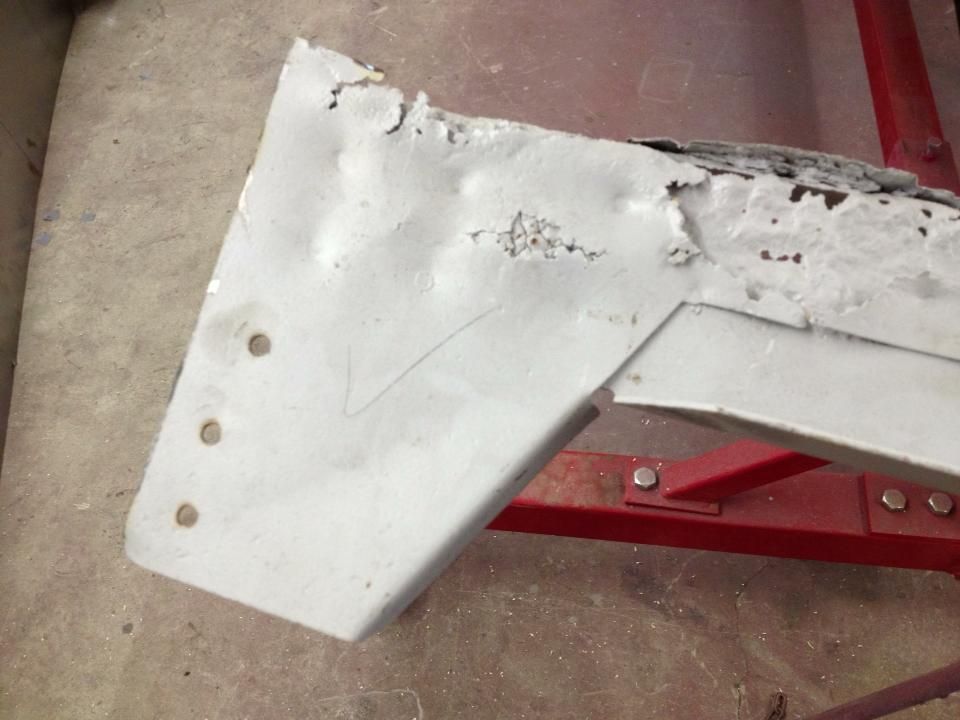 The corners fill in these gaps on either end of the header. 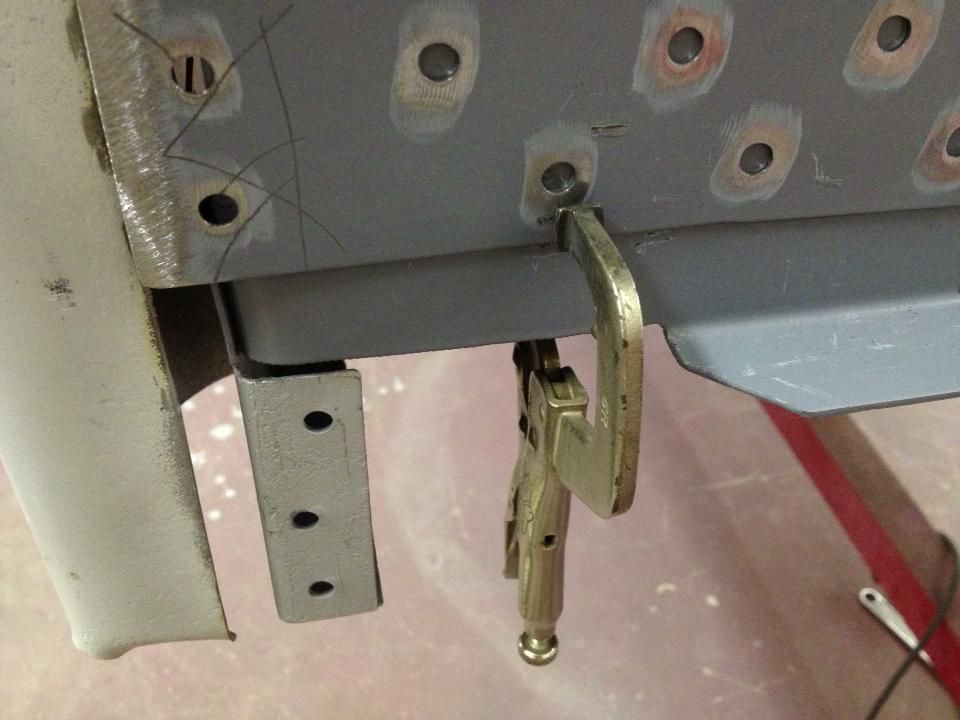 New pieces welded on.  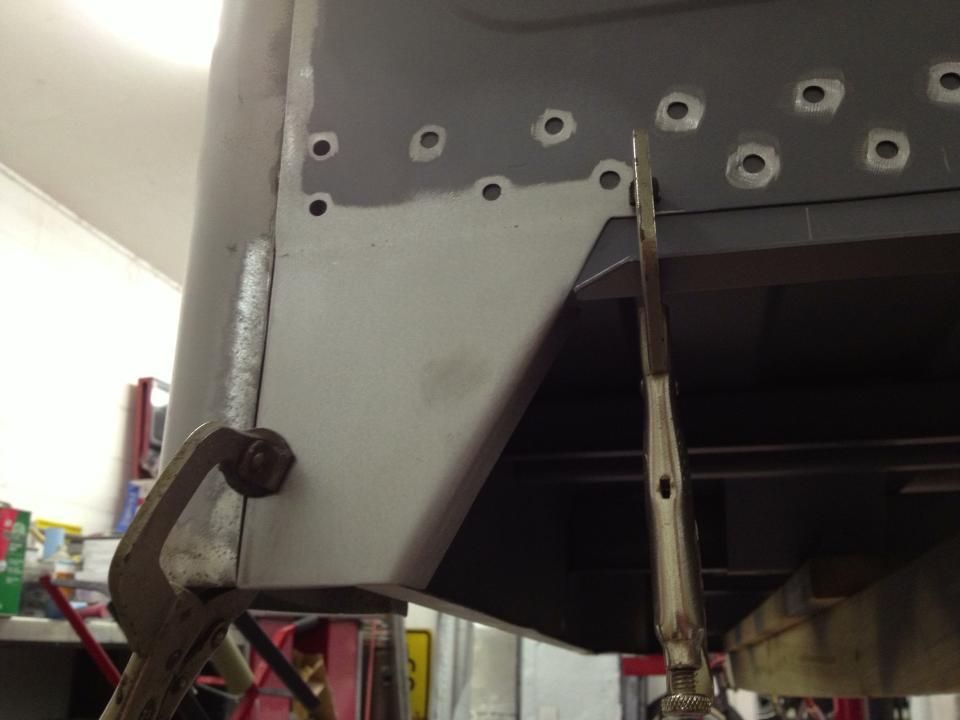 With the bottom corners finished it was time to weld the header in place. I started from the bottom center and worked outward, keeping clamps on either side of each plug weld spot while welding. 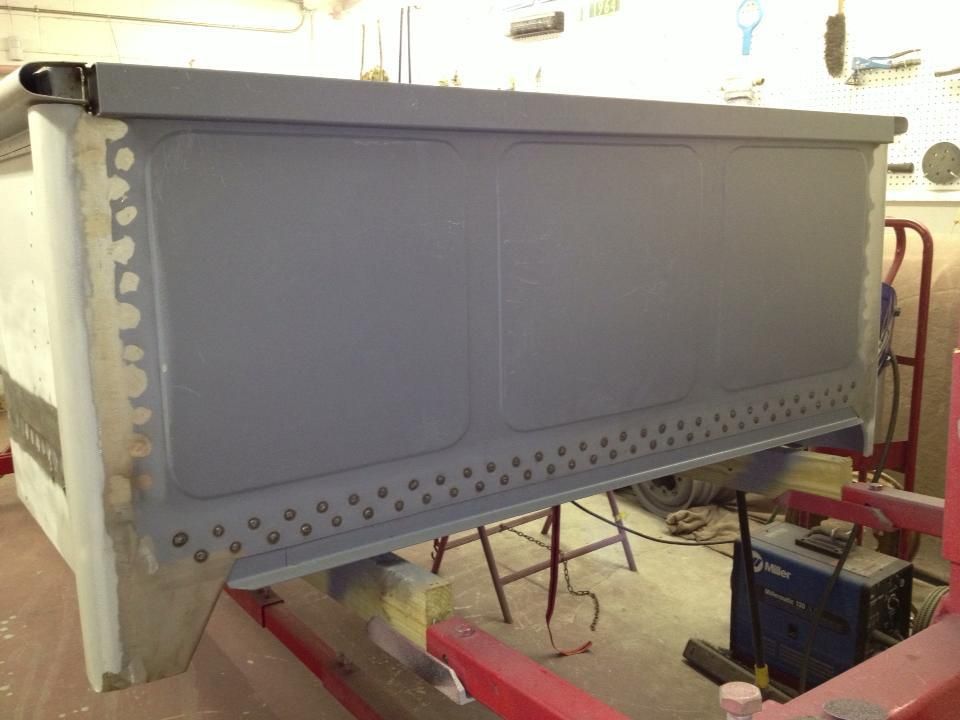 The sides were butt welded to the bed corners.  And a tube was welded across the top to replicate the boxed section on the original header. The gap between the floor and header will be seam sealed just like the bed sides were. . 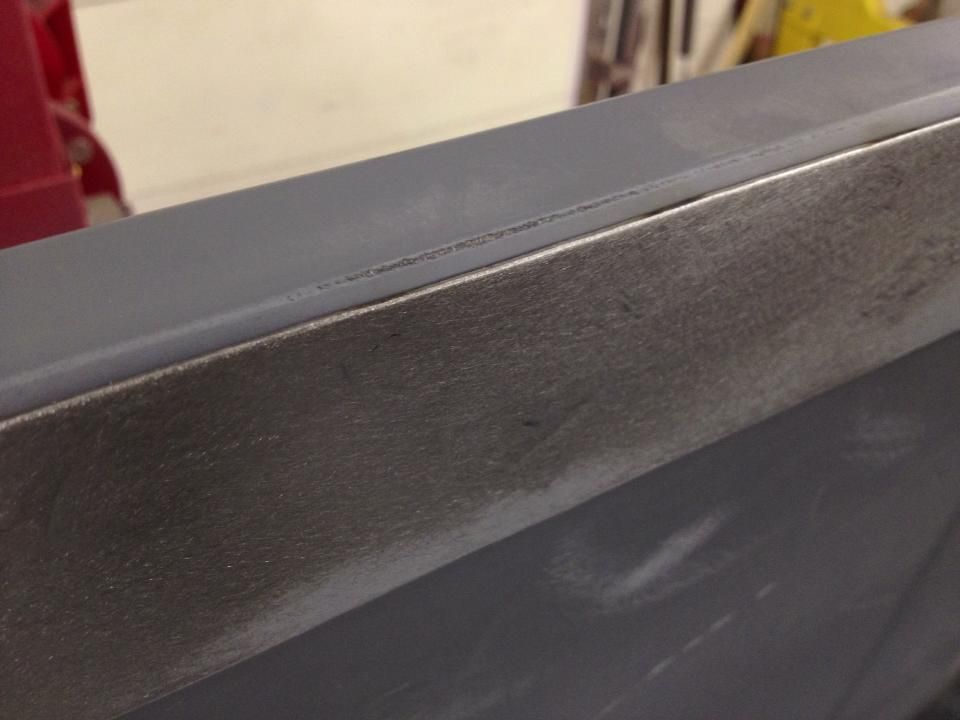 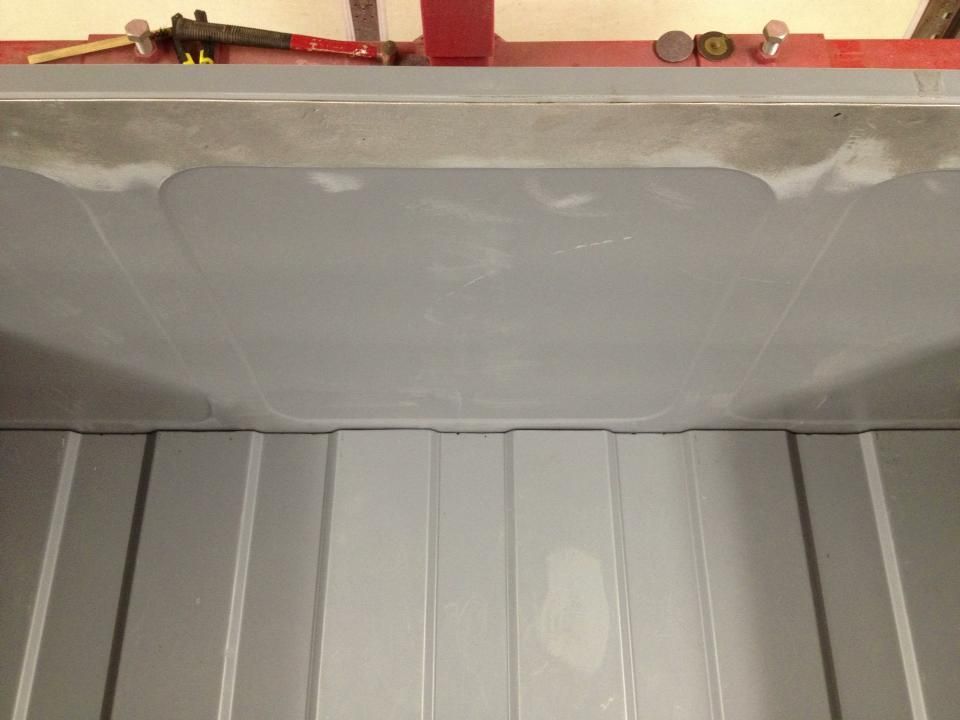
__________________
Project Goldilocks '66 C10 Short Fleet BBW Build '65 C10 Highly Detailed Stock Restoration Thread '78 Camaro Targa Roof Build '55 International Metal/Body/Paint Work '66 F100 Full Rotisserie Restoration '40 Packard 120 Convertible Coupe Restoration How To Restore and Detail an Original Gauge Cluster How To Detail Sand Body Panels, Edges, Corners, Etc |

|

|
|
02-20-2013, 05:51 PM
|
#177 |
|
Registered User
Join Date: Feb 2010
Location: Hartselle, Al.
Posts: 466
|
Re: '55 International Metal/Body/Paint Work
Excellent work!
What brand of seam sealer do you use? Steven
__________________
Life is and will ever remain an equation incapable of solution, but it contains certain known factors. - Nikola Tesla Matt. 6:27 "Who of you by worrying can add a single hour to his life? http://www.67-72chevytrucks.com/vboa...=507266&page=2 |
|
|
|
|
02-20-2013, 09:55 PM
|
#178 | |
|
Registered User
Join Date: May 2011
Location: Anderson SC
Posts: 3,868
|
Re: '55 International Metal/Body/Paint Work
Quote:
__________________
Project Goldilocks '66 C10 Short Fleet BBW Build '65 C10 Highly Detailed Stock Restoration Thread '78 Camaro Targa Roof Build '55 International Metal/Body/Paint Work '66 F100 Full Rotisserie Restoration '40 Packard 120 Convertible Coupe Restoration How To Restore and Detail an Original Gauge Cluster How To Detail Sand Body Panels, Edges, Corners, Etc |
|
|
|
|
|
02-20-2013, 10:22 PM
|
#179 |
|
Registered User
 Join Date: May 2007
Location: Deale Md
Posts: 4,663
|
Re: '55 International Metal/Body/Paint Work
I think you really have a calling to become a teacher.
__________________
James 63 GMC V6 4speed carryall 65 chevy swb bbw V8 auto 68 K20 327/4 speed, buddy buckets 2002 GMC CC Dually Duramax 64 GMC lwb 3/4 V6 4speed SOLD 66 GMC swb bbw buddy buckets SOLD IG duallyjams The only thing that stays the same is constant change! |
|
|
|
|
02-21-2013, 12:47 AM
|
#180 | |
|
Registered User
Join Date: May 2011
Location: Anderson SC
Posts: 3,868
|
Re: '55 International Metal/Body/Paint Work
Quote:
Posted via Mobile Device
__________________
Project Goldilocks '66 C10 Short Fleet BBW Build '65 C10 Highly Detailed Stock Restoration Thread '78 Camaro Targa Roof Build '55 International Metal/Body/Paint Work '66 F100 Full Rotisserie Restoration '40 Packard 120 Convertible Coupe Restoration How To Restore and Detail an Original Gauge Cluster How To Detail Sand Body Panels, Edges, Corners, Etc |
|
|
|
|
|
02-26-2013, 10:17 AM
|
#181 |
|
Registered User
Join Date: May 2011
Location: Anderson SC
Posts: 3,868
|
Re: '55 International Metal/Body/Paint Work
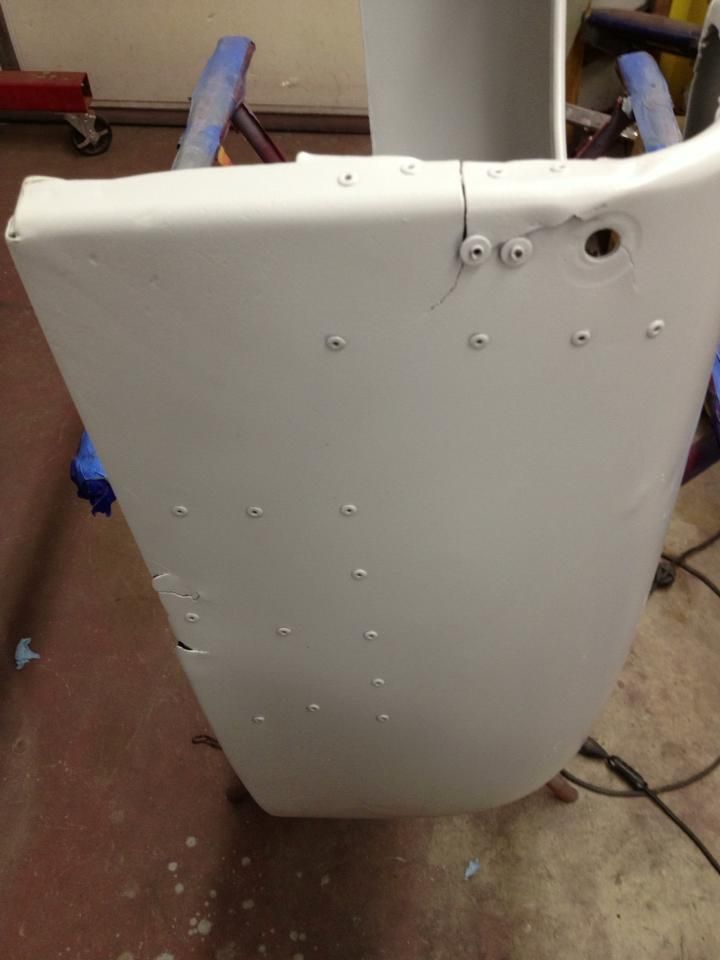
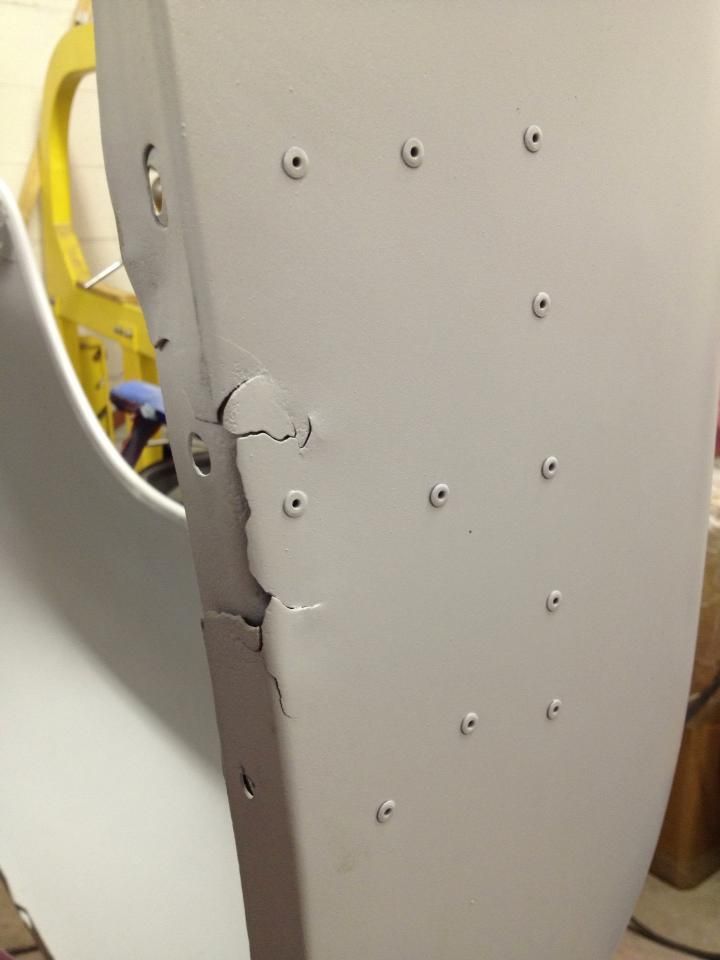
Since the metalwork on the bed is mostly finished up I moved to the fenders.
The left fender had a few cracked areas that I cut out and replaced. I also had to drill out the brace and fix it.  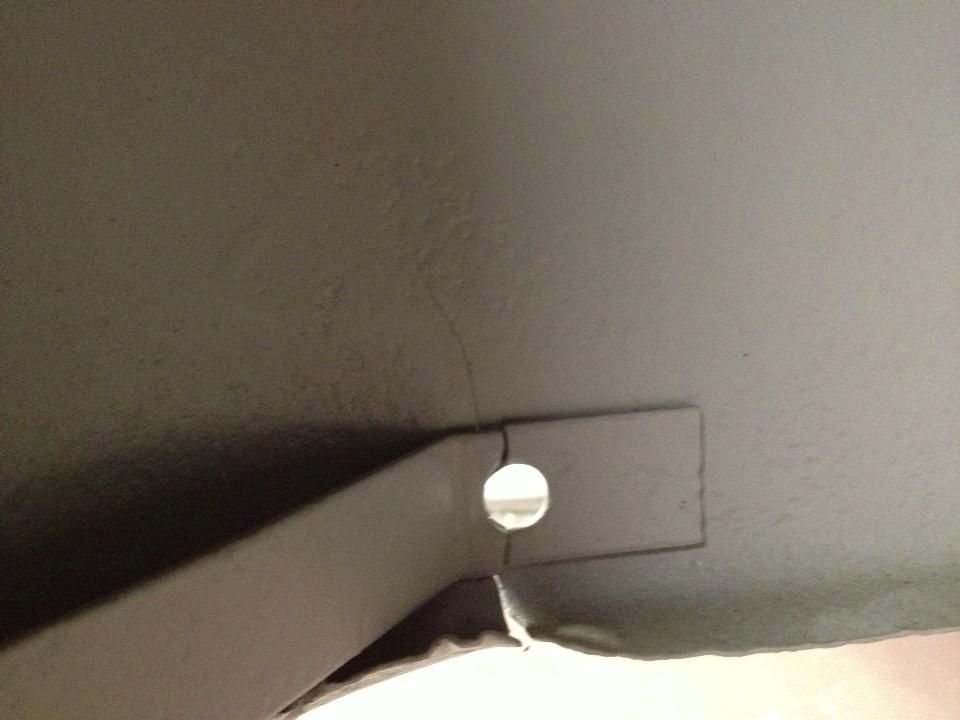 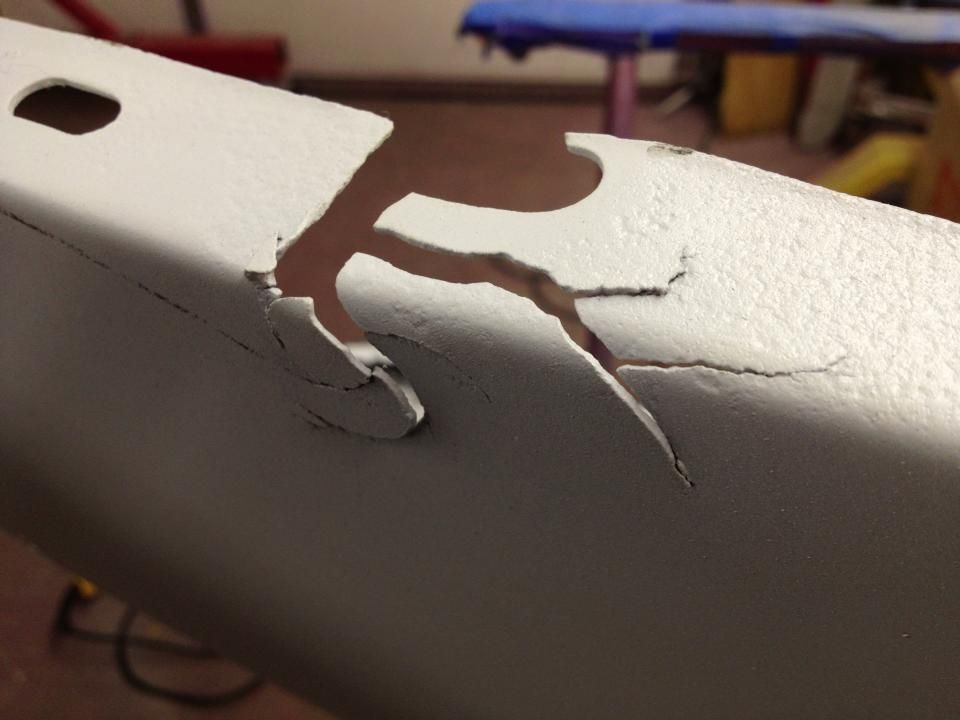 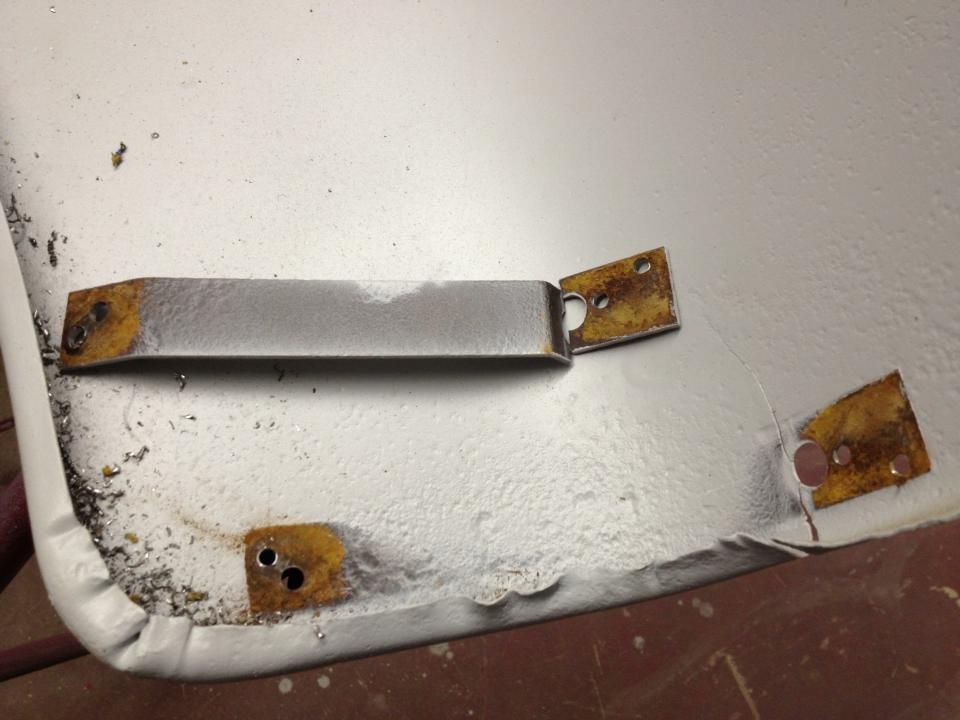 Old metal cut out, new metal ready to be welded in. 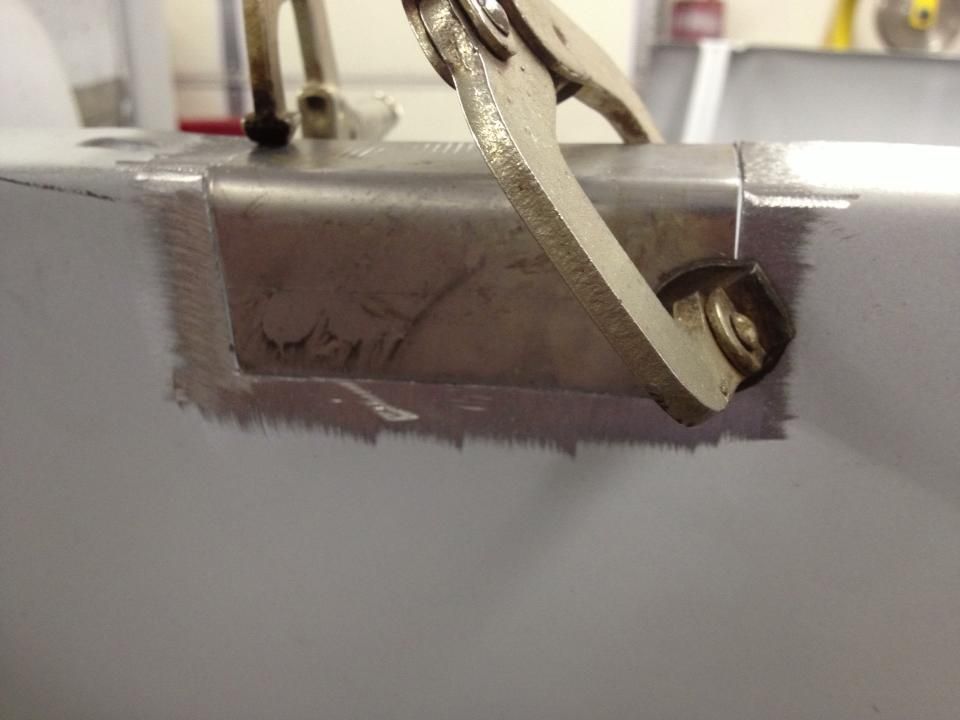 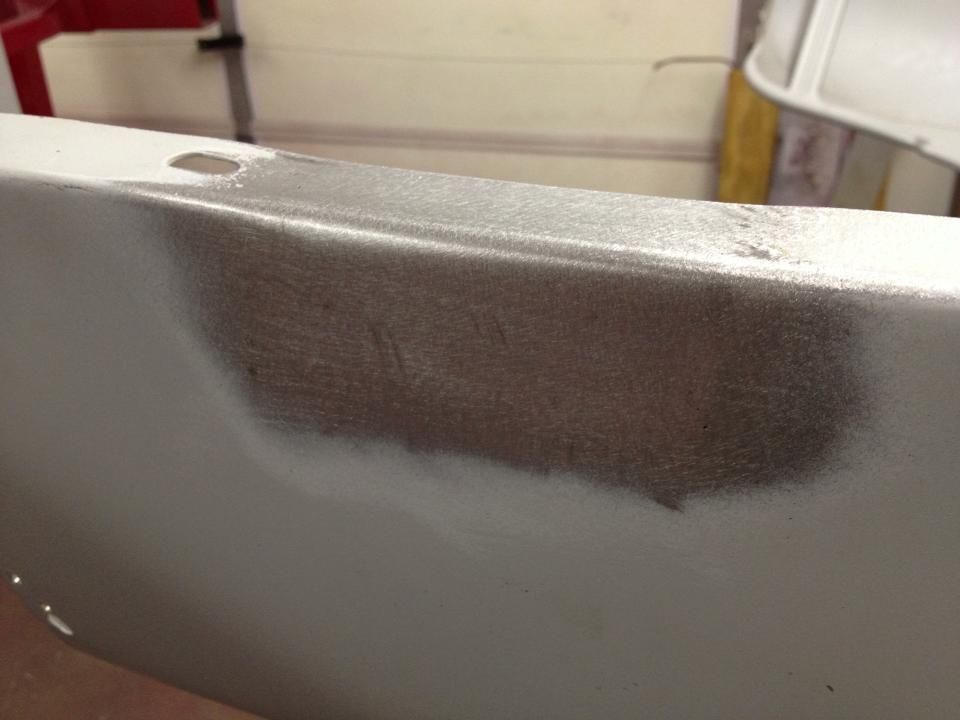 Fixing the other cracked spot. 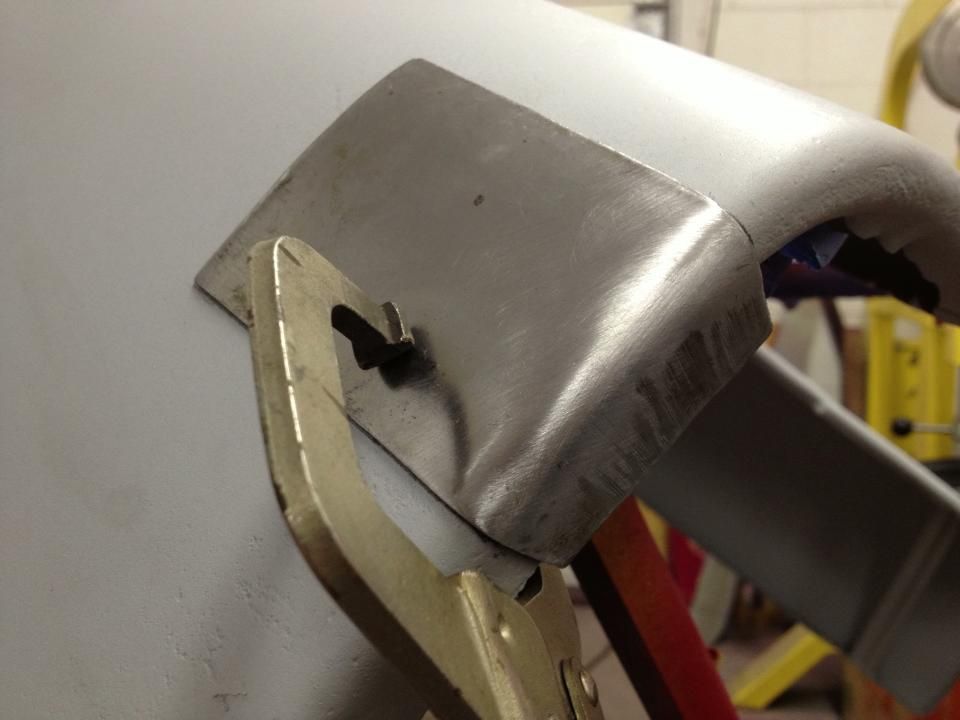 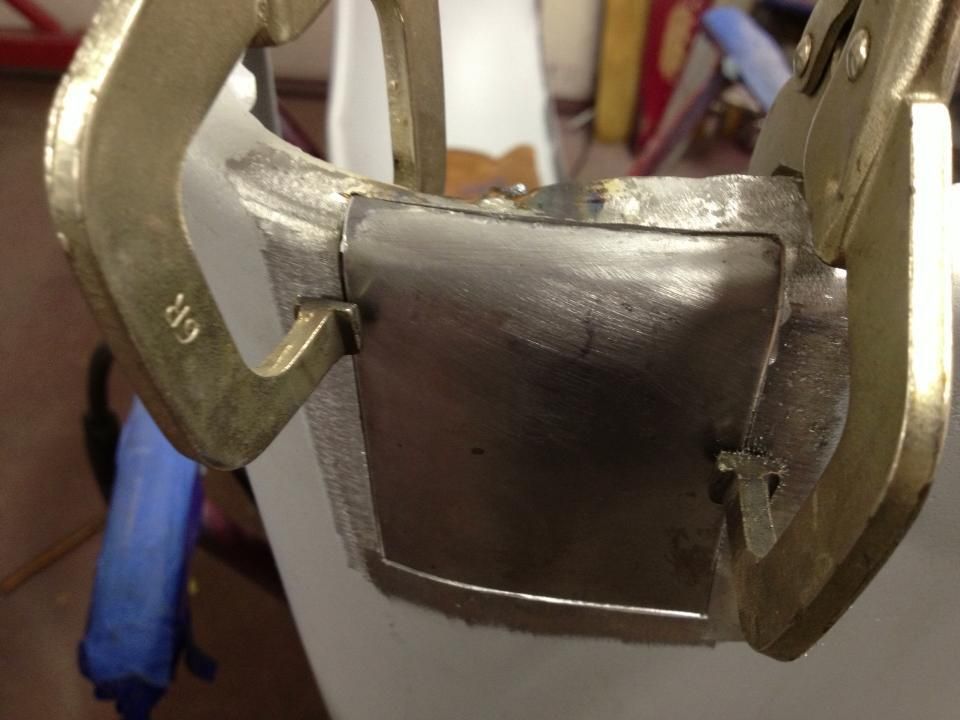 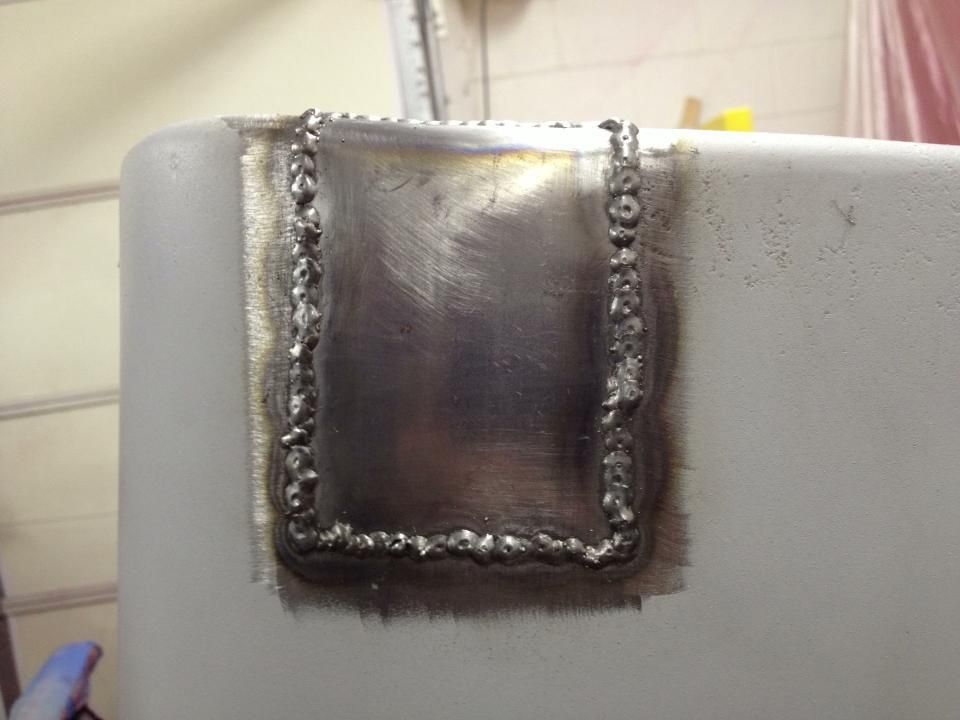 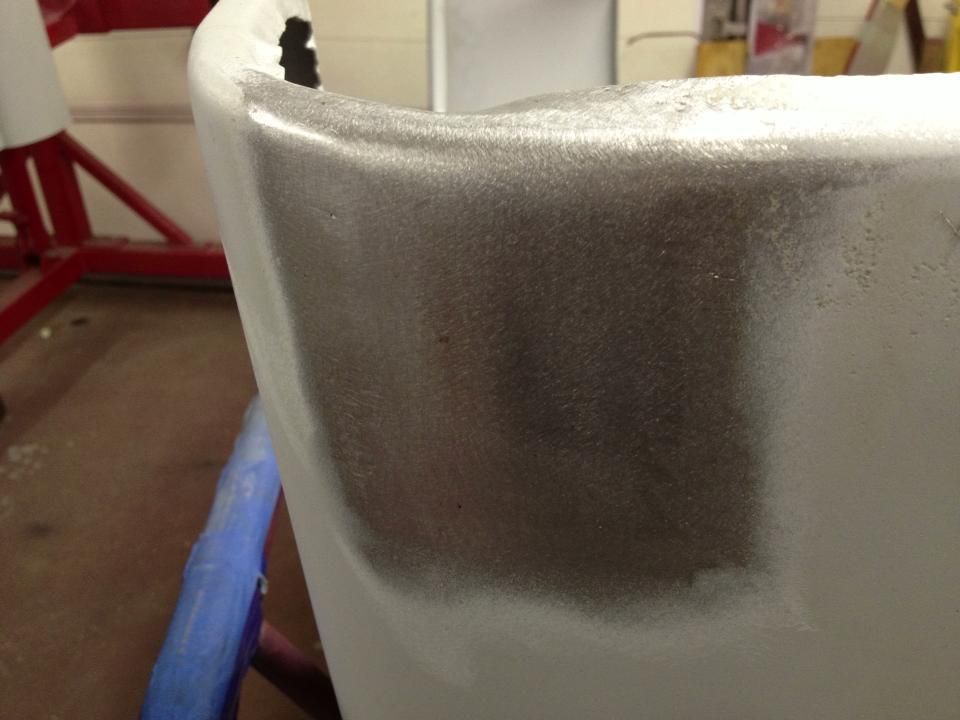 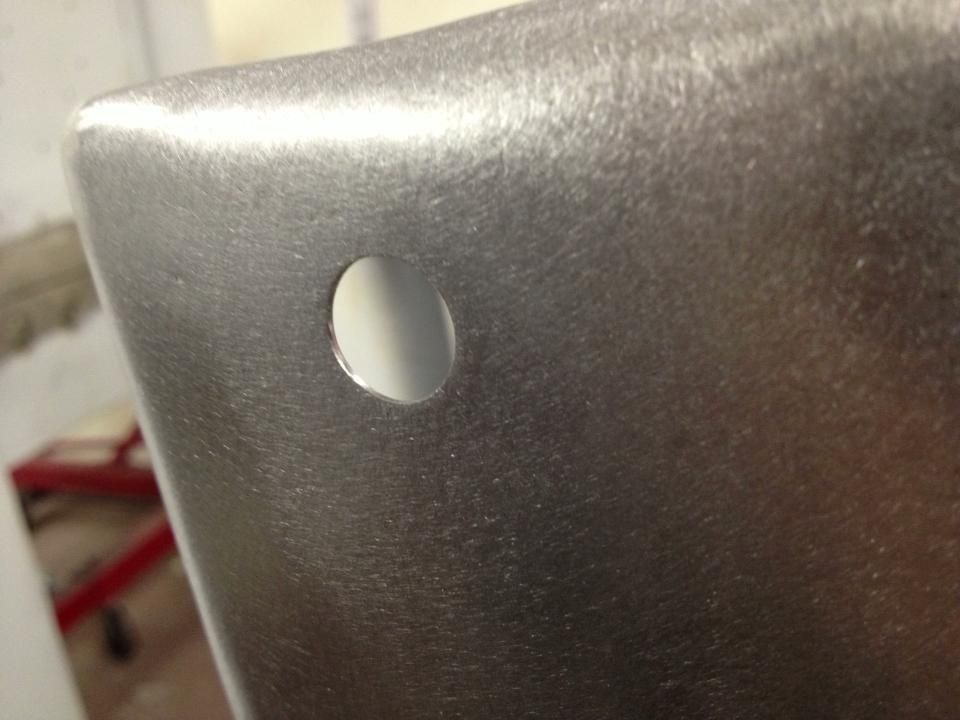 Brace welded up, backside of brace and inside of fender coated with etch primer before welding. 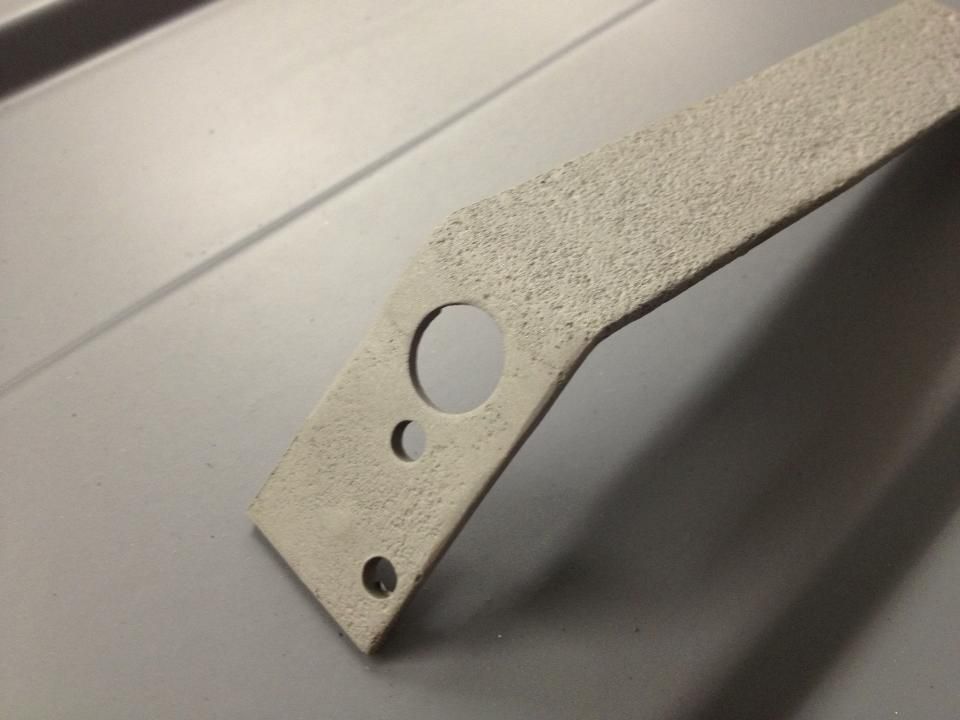 
__________________
Project Goldilocks '66 C10 Short Fleet BBW Build '65 C10 Highly Detailed Stock Restoration Thread '78 Camaro Targa Roof Build '55 International Metal/Body/Paint Work '66 F100 Full Rotisserie Restoration '40 Packard 120 Convertible Coupe Restoration How To Restore and Detail an Original Gauge Cluster How To Detail Sand Body Panels, Edges, Corners, Etc |
|
|
|
|
02-26-2013, 10:26 AM
|
#182 |
|
Registered User
Join Date: May 2011
Location: Anderson SC
Posts: 3,868
|
Re: '55 International Metal/Body/Paint Work
The right fender was in worse shape, nearly the whole back edge had to be cut out and replaced. There were tons of cracks/splits that had been reinforced with sheetmetal riveted in place.
  "Pat. Apr. 13 1920" on the patch!  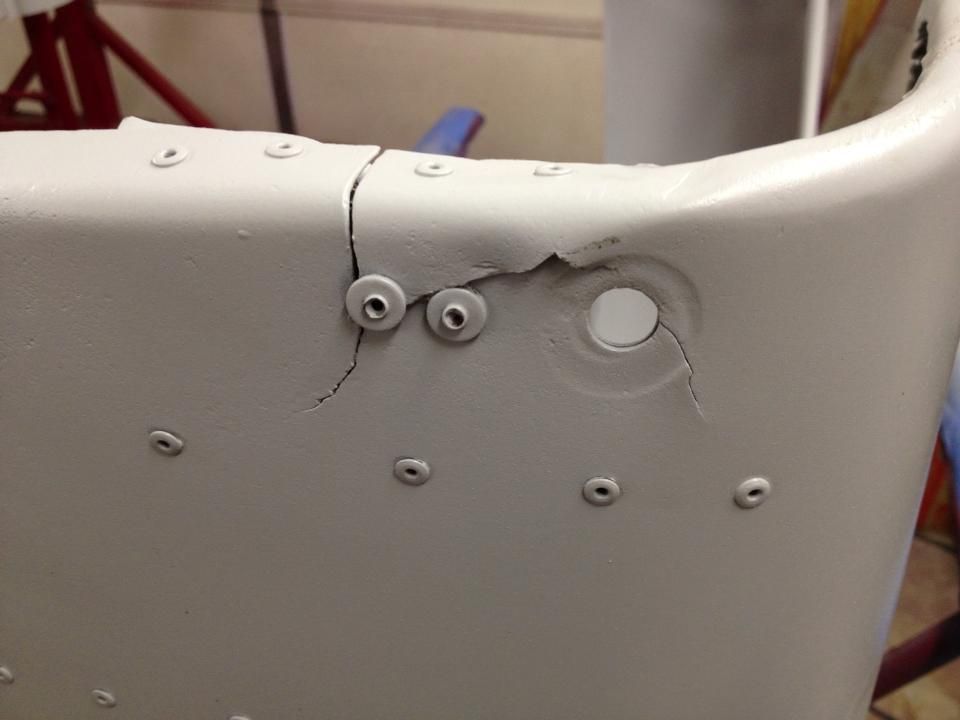 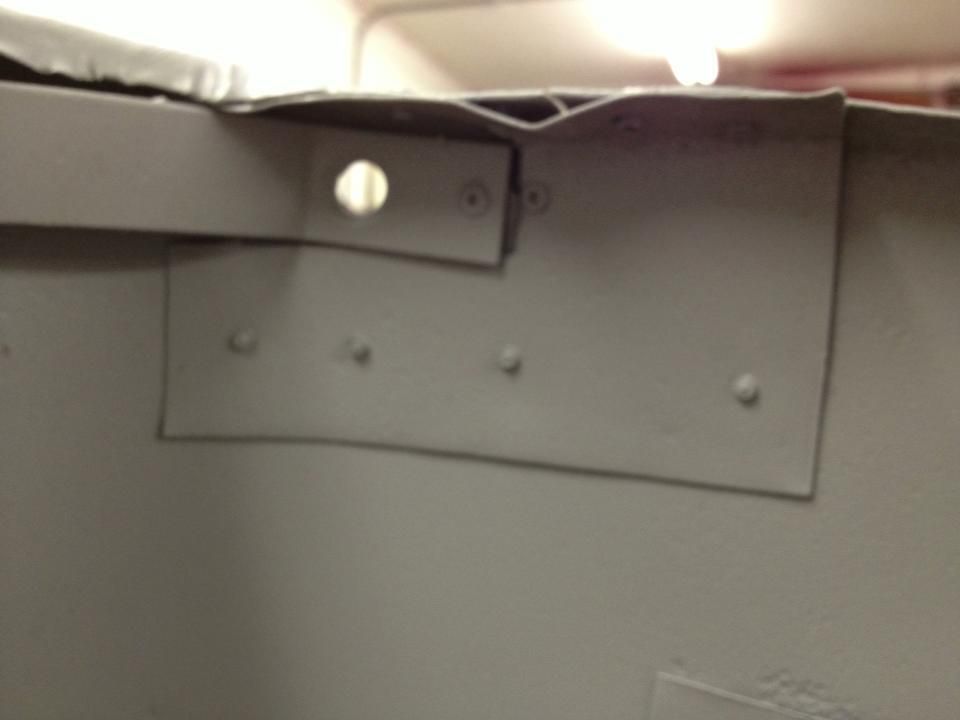 Matching the rounded edge on the patch to the original fender lip. 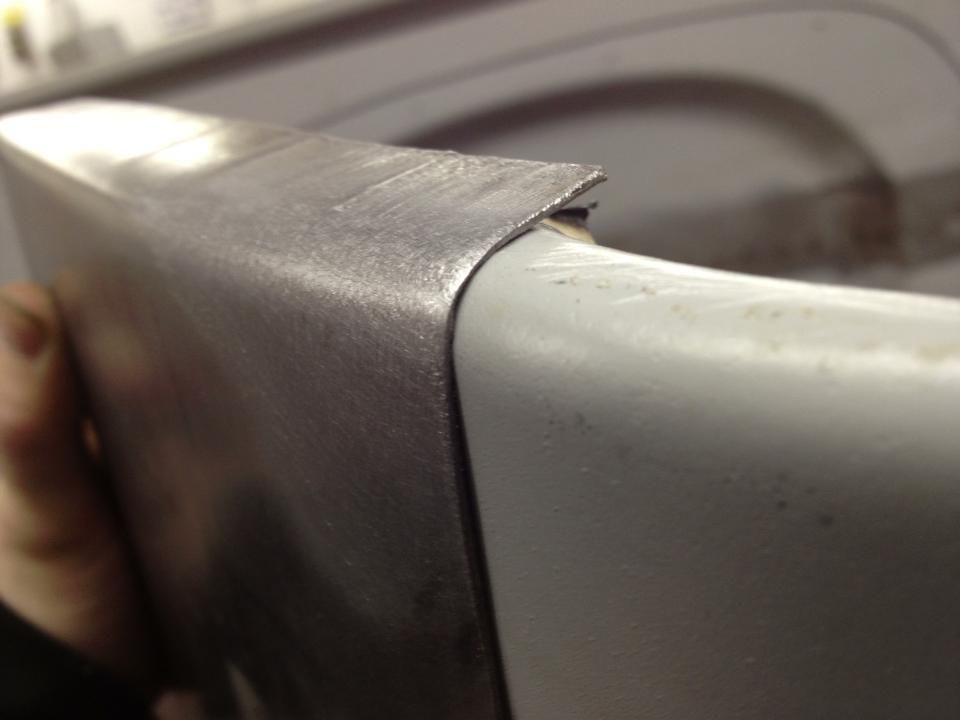 Patch welded in and smoothed. 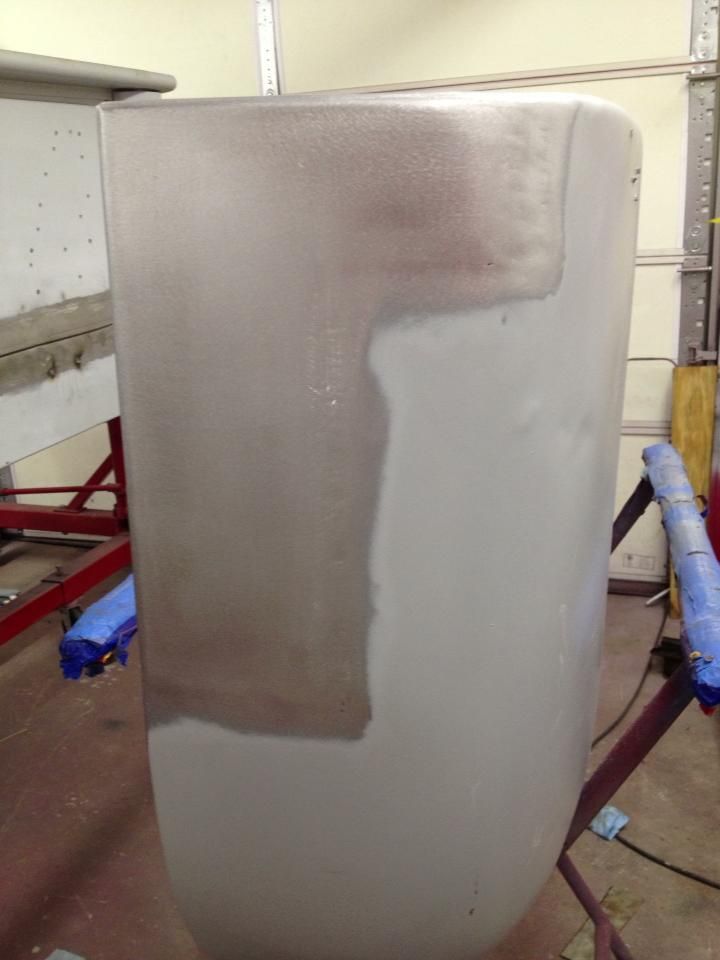 New corner brace just like the original. 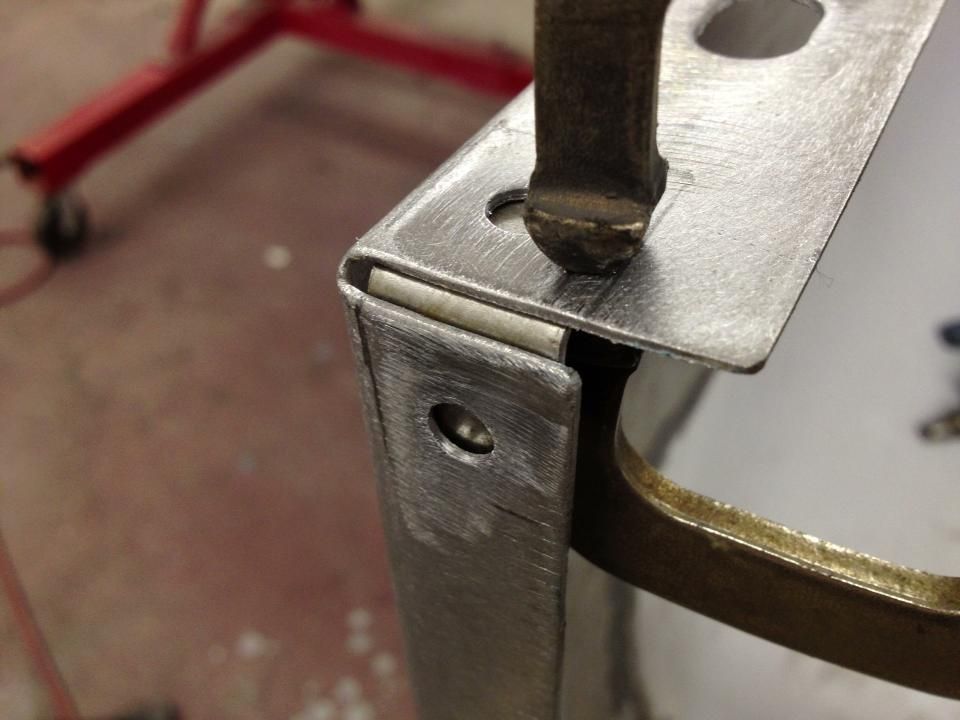 Test fit the brace and prepped it for welding. 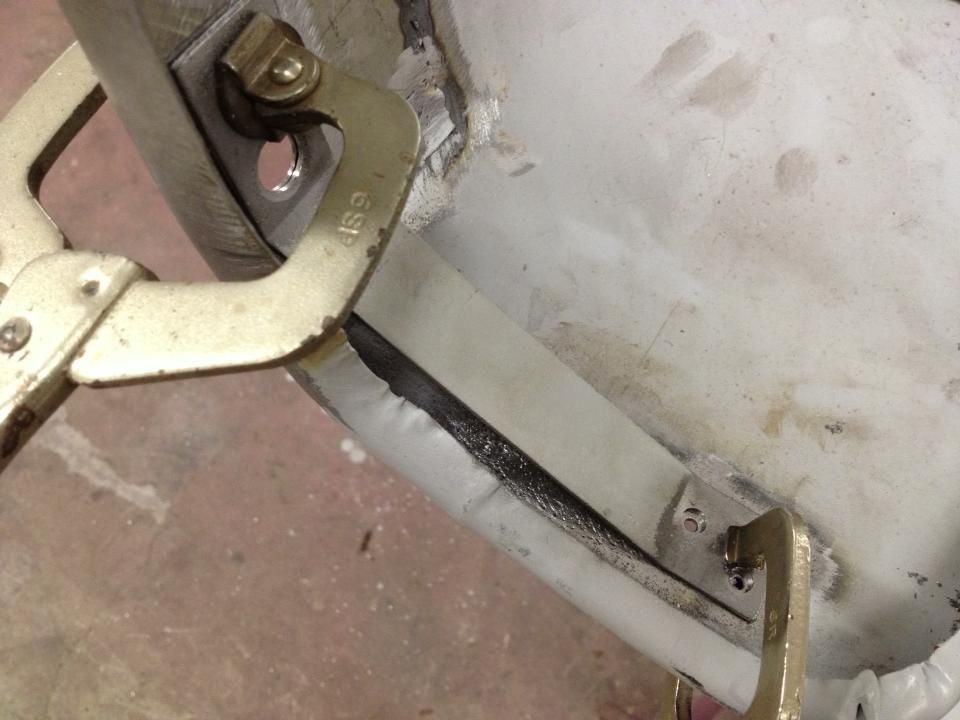 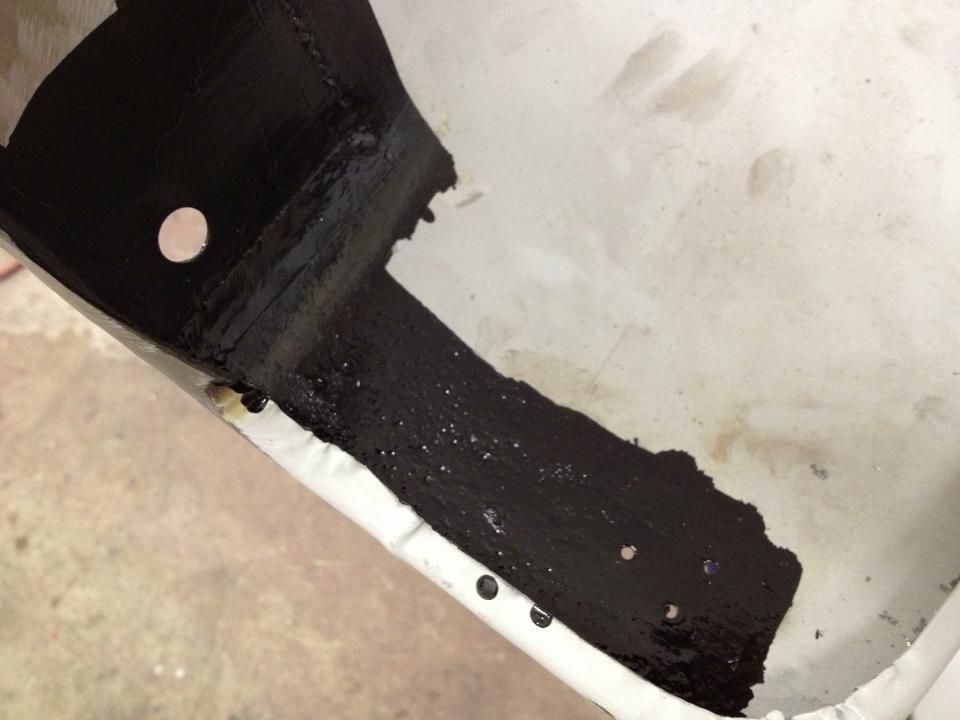
__________________
Project Goldilocks '66 C10 Short Fleet BBW Build '65 C10 Highly Detailed Stock Restoration Thread '78 Camaro Targa Roof Build '55 International Metal/Body/Paint Work '66 F100 Full Rotisserie Restoration '40 Packard 120 Convertible Coupe Restoration How To Restore and Detail an Original Gauge Cluster How To Detail Sand Body Panels, Edges, Corners, Etc |
|
|
|
|
02-26-2013, 10:32 AM
|
#183 |
|
Registered User
Join Date: May 2011
Location: Anderson SC
Posts: 3,868
|
Re: '55 International Metal/Body/Paint Work
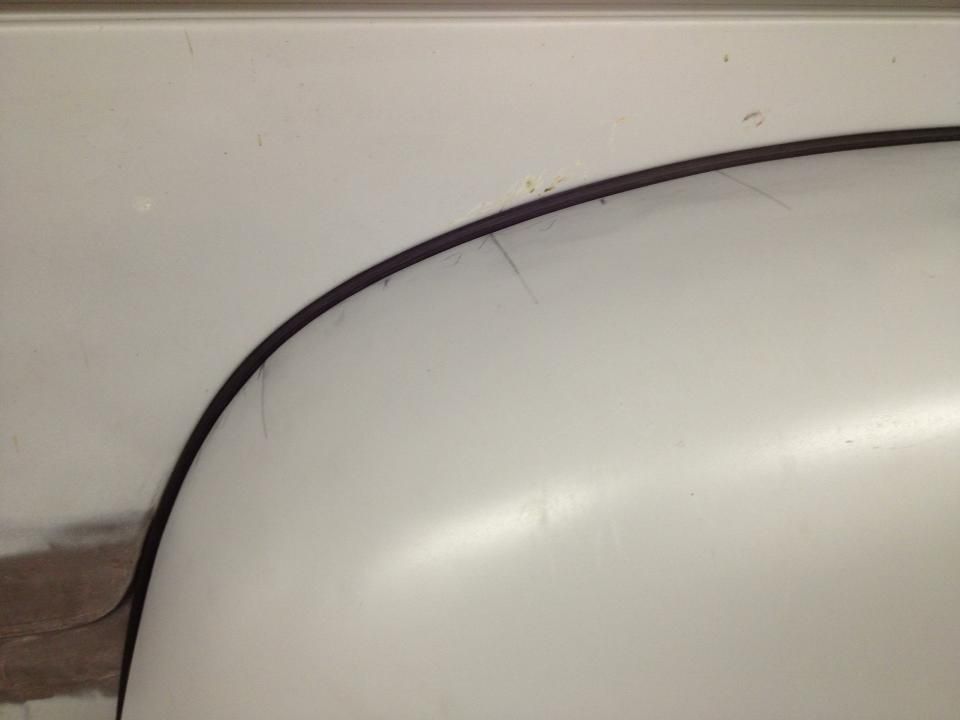
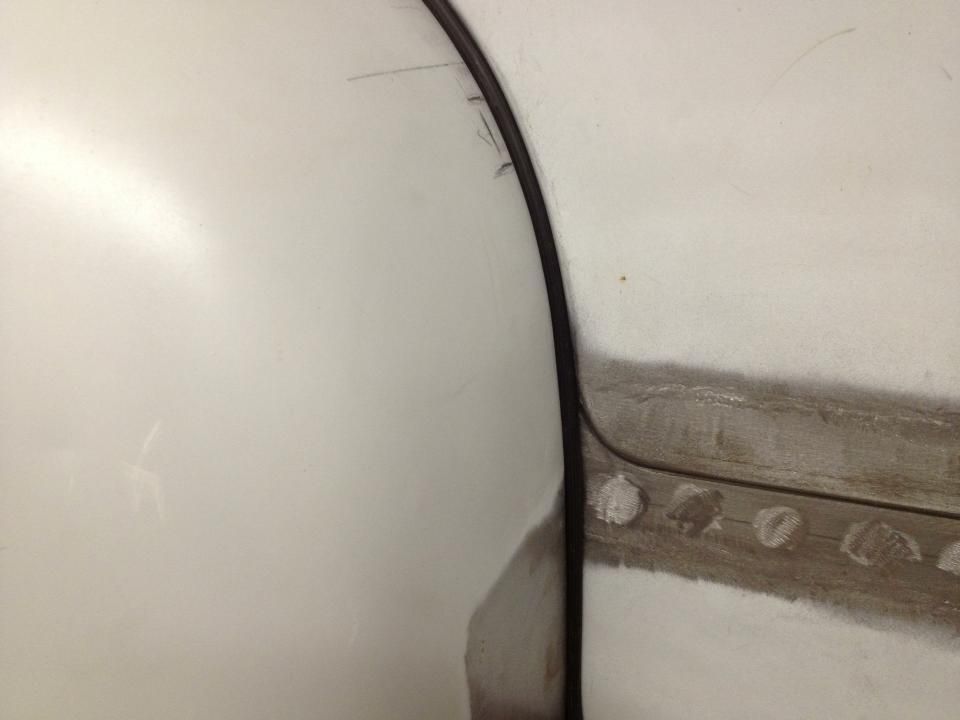
The right fender didn't fit the bedside stamping, there were dips and waves around the mounting flange.
   Made a template of the stamping shape. 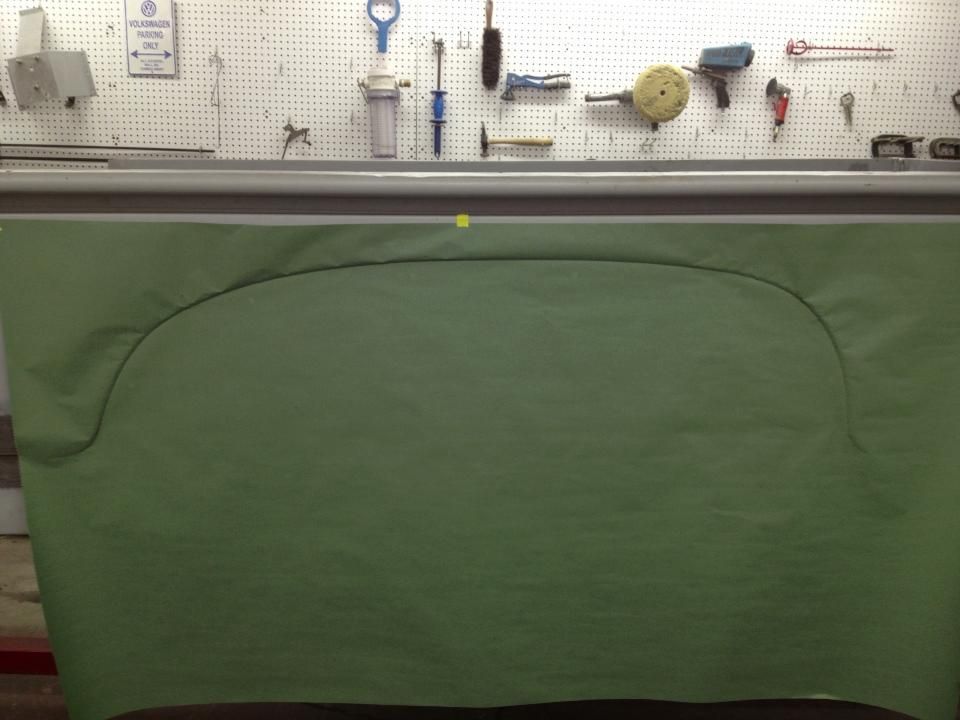 Made reference marks to line up the fender to the template. 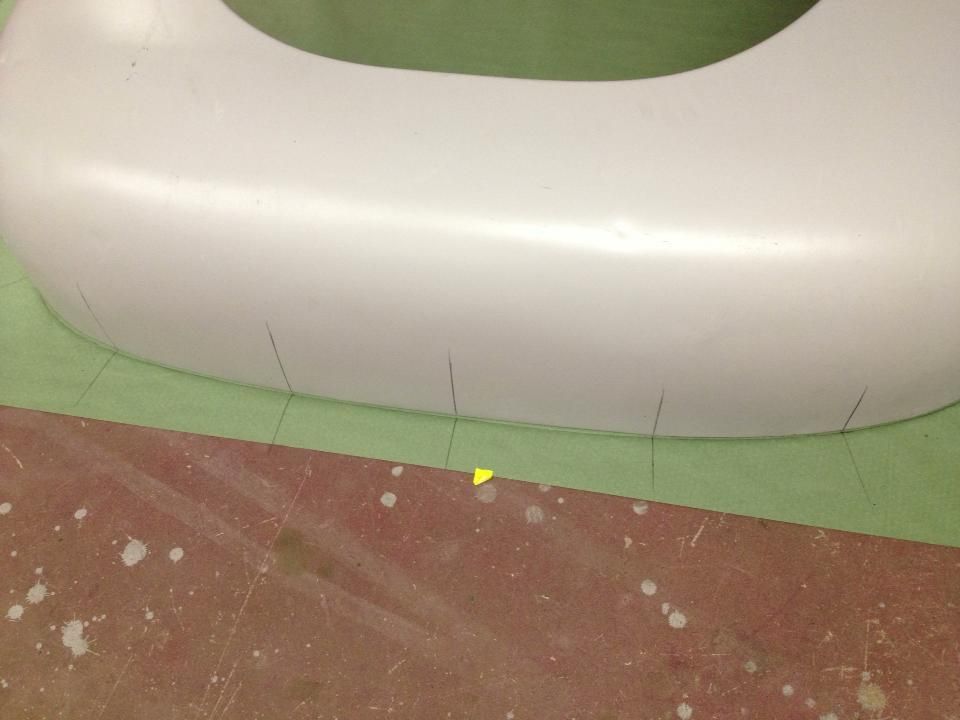 Dips show up against the template. 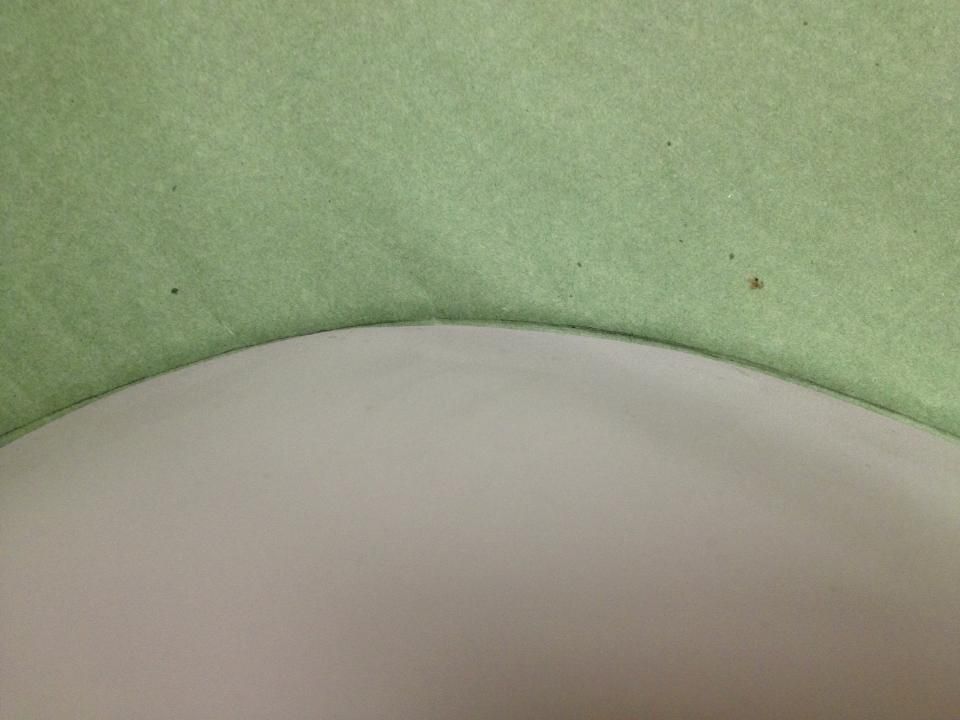 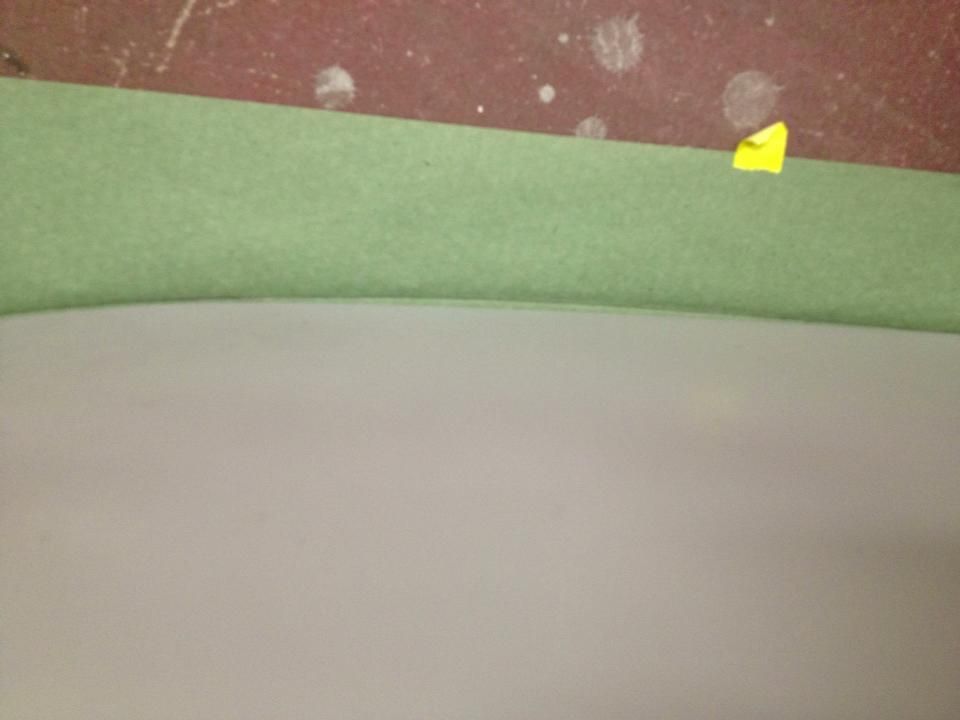 Game plan for straightening, I'll use the shrinker/stretcher. 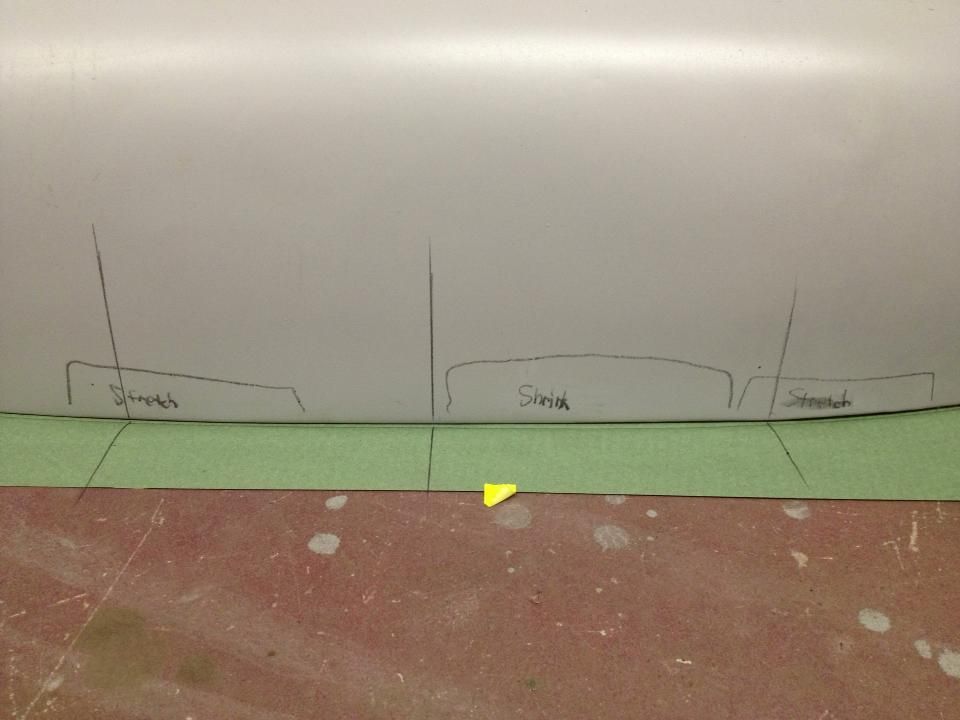 Set up a stand with the shrinker/stretcher inside. 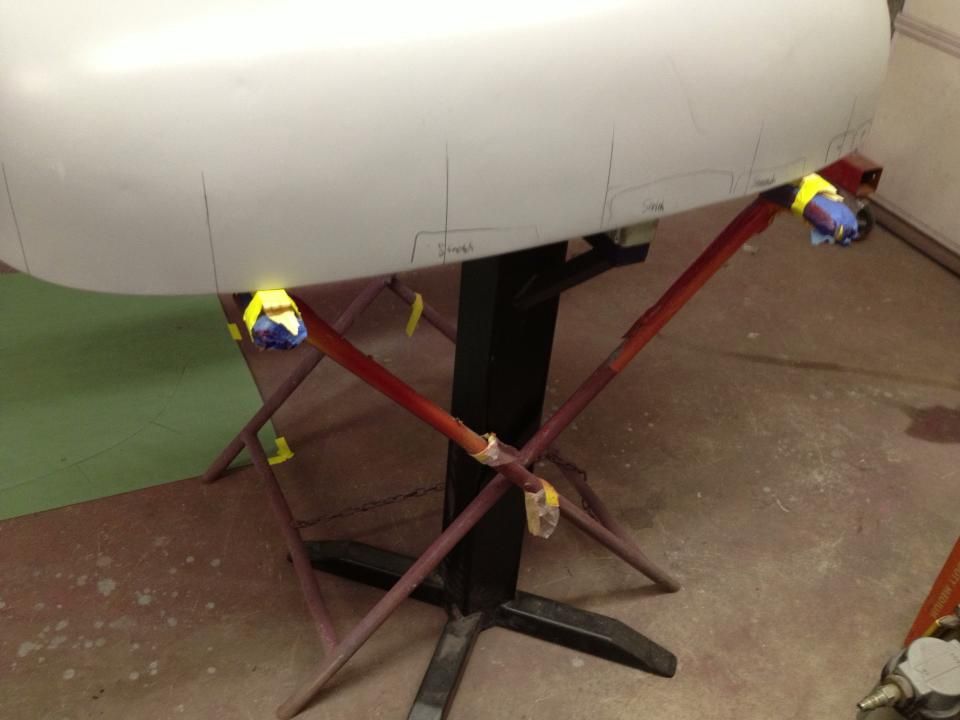 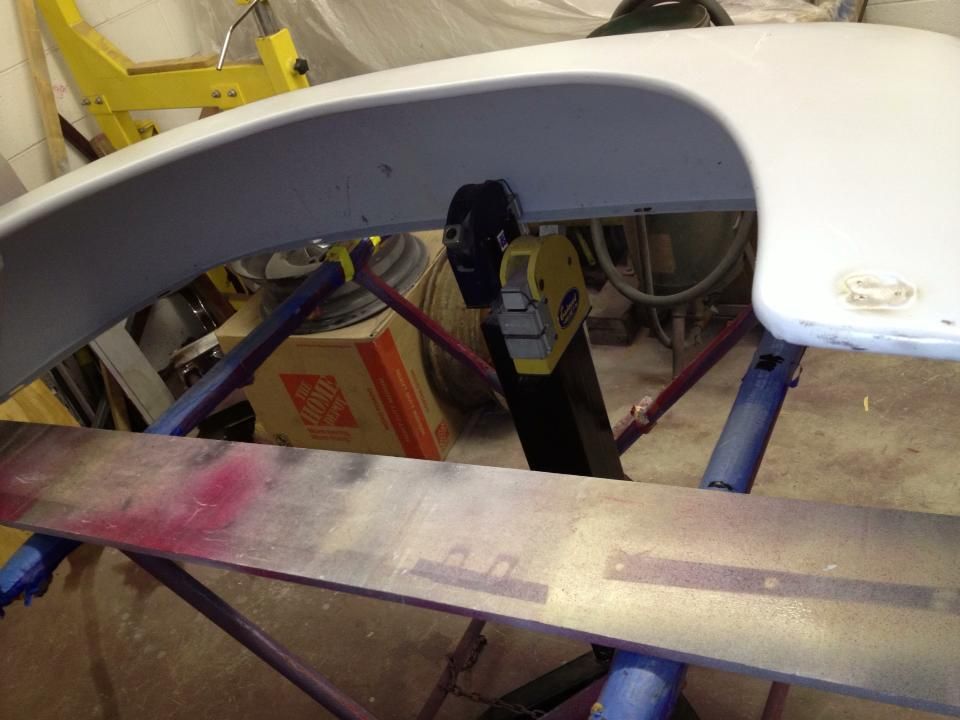 Dip gone from the top after a few rounds of shrinking/stretching. 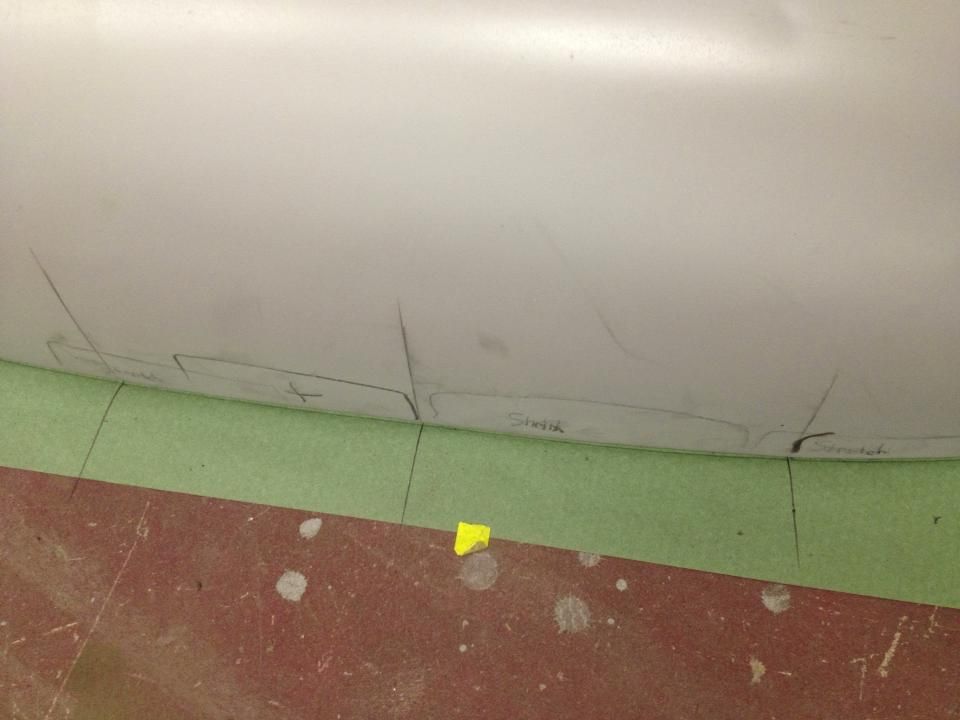 Test fit on the truck, still need to work on the corners and allow room for the fender beading. 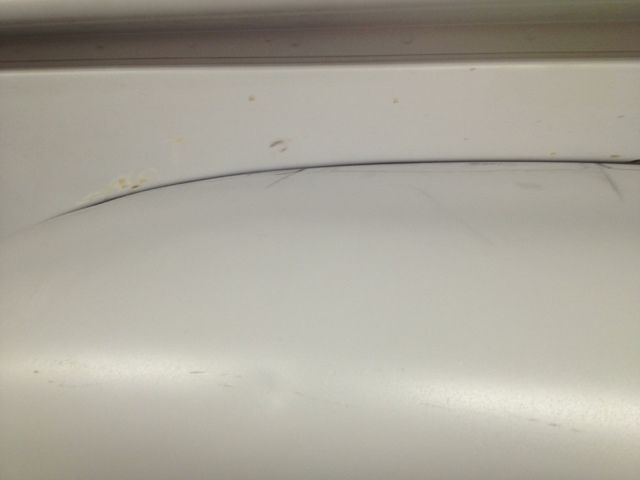
__________________
Project Goldilocks '66 C10 Short Fleet BBW Build '65 C10 Highly Detailed Stock Restoration Thread '78 Camaro Targa Roof Build '55 International Metal/Body/Paint Work '66 F100 Full Rotisserie Restoration '40 Packard 120 Convertible Coupe Restoration How To Restore and Detail an Original Gauge Cluster How To Detail Sand Body Panels, Edges, Corners, Etc Last edited by theastronaut; 02-26-2013 at 10:39 AM. |
|
|
|
|
02-26-2013, 10:35 AM
|
#184 |
|
Registered User
Join Date: May 2011
Location: Anderson SC
Posts: 3,868
|
Re: '55 International Metal/Body/Paint Work
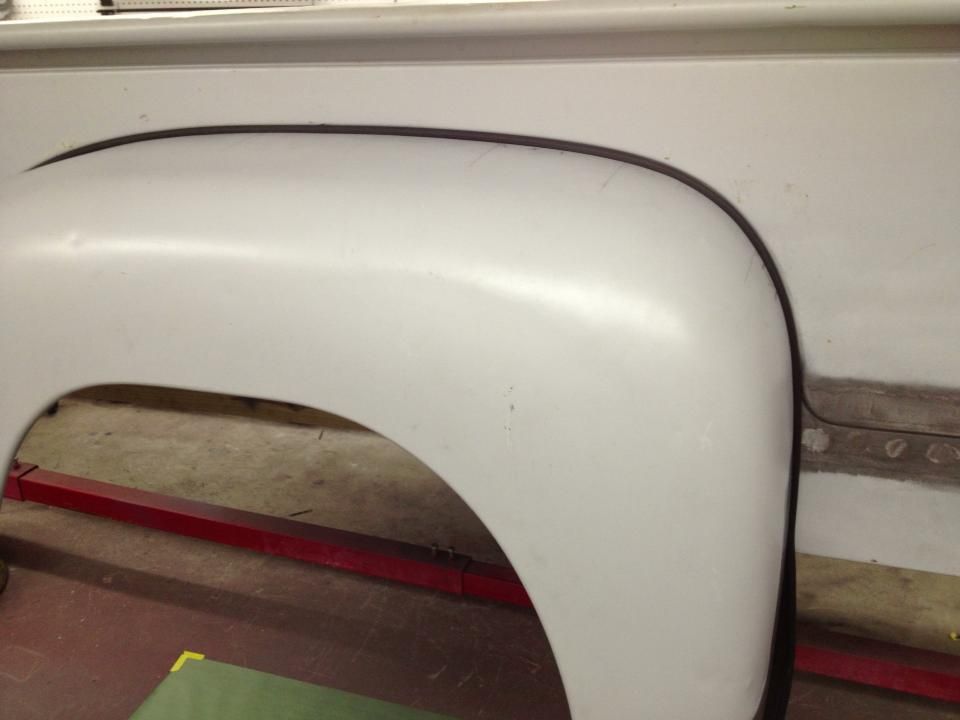
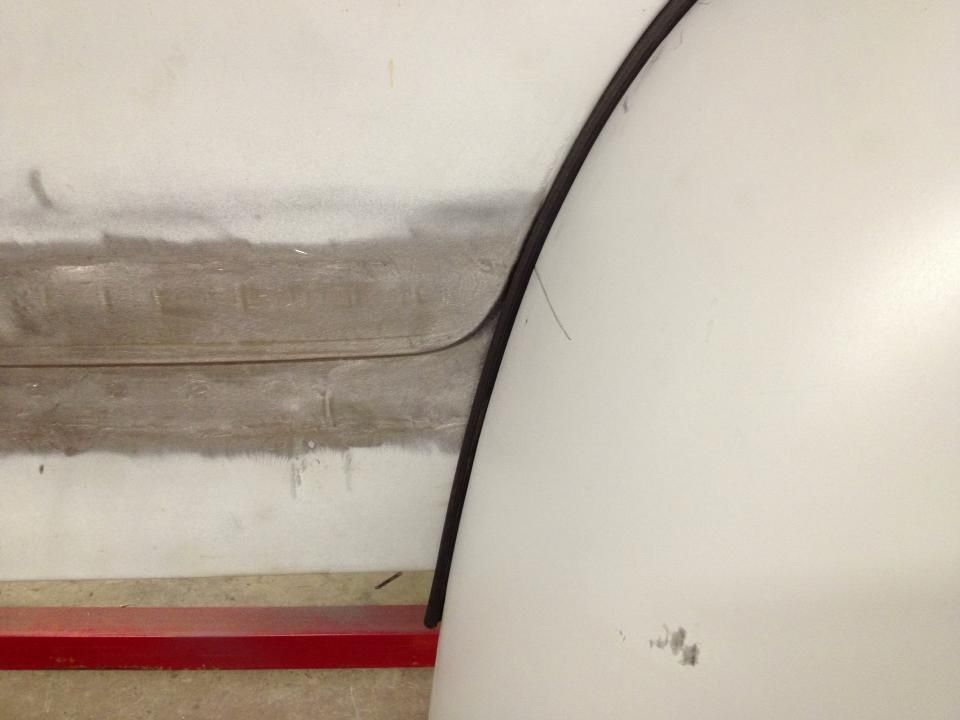
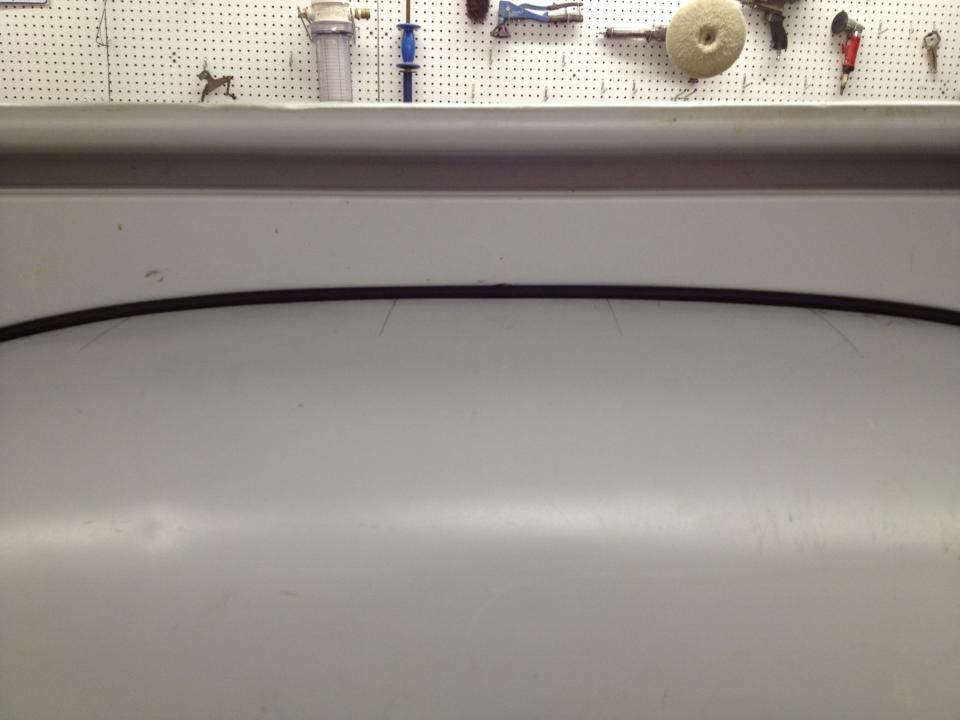
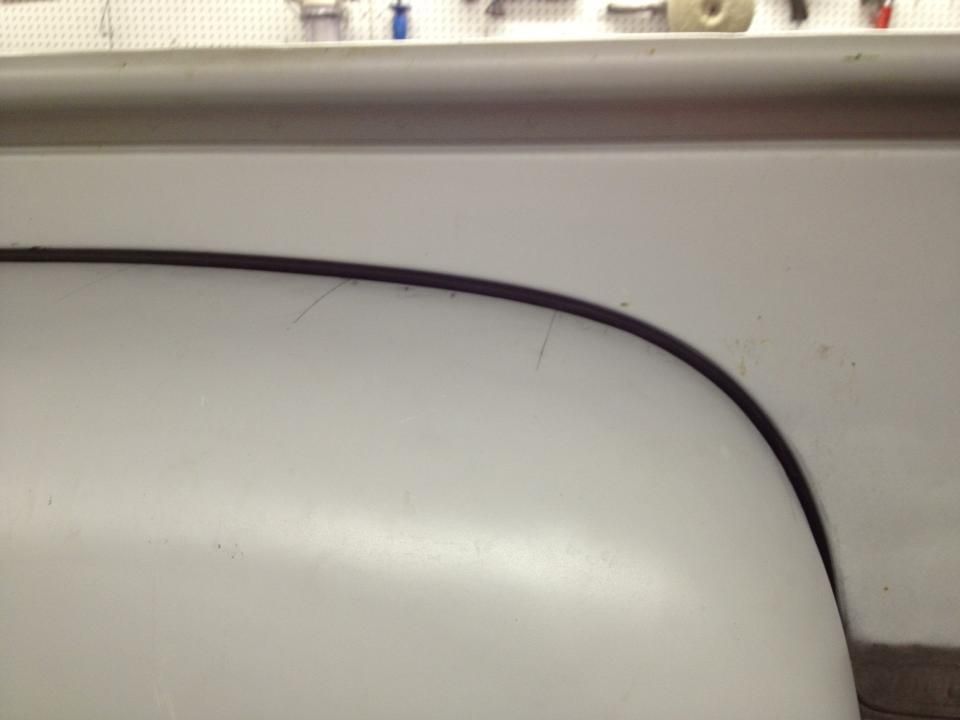
After reshaping the right fender edge, test fitting with the fender beading. Even gap and the beading fits flush against the bedside.
__________________
Project Goldilocks '66 C10 Short Fleet BBW Build '65 C10 Highly Detailed Stock Restoration Thread '78 Camaro Targa Roof Build '55 International Metal/Body/Paint Work '66 F100 Full Rotisserie Restoration '40 Packard 120 Convertible Coupe Restoration How To Restore and Detail an Original Gauge Cluster How To Detail Sand Body Panels, Edges, Corners, Etc |
|
|
|
|
02-26-2013, 12:00 PM
|
#185 |
|
Registered User
Join Date: Feb 2010
Location: Hartselle, Al.
Posts: 466
|
Re: '55 International Metal/Body/Paint Work
Very nice!
Question: What are you using to roll the edges? I am starting to look at metal working equipment so I can stop using a vise, sandbag and hammer for everything.  Steven
__________________
Life is and will ever remain an equation incapable of solution, but it contains certain known factors. - Nikola Tesla Matt. 6:27 "Who of you by worrying can add a single hour to his life? http://www.67-72chevytrucks.com/vboa...=507266&page=2 |
|
|
|
|
02-26-2013, 01:47 PM
|
#186 | |
|
Registered User
Join Date: May 2011
Location: Anderson SC
Posts: 3,868
|
Re: '55 International Metal/Body/Paint Work
Quote:
__________________
Project Goldilocks '66 C10 Short Fleet BBW Build '65 C10 Highly Detailed Stock Restoration Thread '78 Camaro Targa Roof Build '55 International Metal/Body/Paint Work '66 F100 Full Rotisserie Restoration '40 Packard 120 Convertible Coupe Restoration How To Restore and Detail an Original Gauge Cluster How To Detail Sand Body Panels, Edges, Corners, Etc |
|
|
|
|
|
02-26-2013, 04:37 PM
|
#187 |
|
Registered User
Join Date: Apr 2012
Location: Beaver, Pa.
Posts: 197
|
Re: '55 International Metal/Body/Paint Work
Fantastic job, I always look forward to updates on this truck! The picture taking and documentation is first class and I know it's gotta slow you down at times. Much appreciated.
|
|
|
|
|
02-26-2013, 06:37 PM
|
#188 |
|
Registered User
Join Date: Oct 2009
Location: canton ga
Posts: 12,728
|
Re: '55 International Metal/Body/Paint Work
Amazing attention to detail ,its going to be very nice .
|
|
|
|
|
02-26-2013, 11:27 PM
|
#189 | |
|
Registered User
Join Date: Aug 2007
Location: Redwood City, CA
Posts: 1,174
|
Re: '55 International Metal/Body/Paint Work
Quote:
__________________
66 GMC Suburban Custom 66 Chevy K10 Suburban |
|
|
|
|
|
02-27-2013, 01:30 AM
|
#190 | |
|
Senior Member
Join Date: Nov 2003
Location: Calgary Alberta
Posts: 1,936
|
Re: '55 International Metal/Body/Paint Work
Quote:
Posted via Mobile Device
__________________
67- 72 Parts collecter |
|
|
|
|
|
02-27-2013, 10:40 AM
|
#191 | ||||
|
Registered User
Join Date: May 2011
Location: Anderson SC
Posts: 3,868
|
Re: '55 International Metal/Body/Paint Work
Quote:
Quote:
Quote:
Quote:
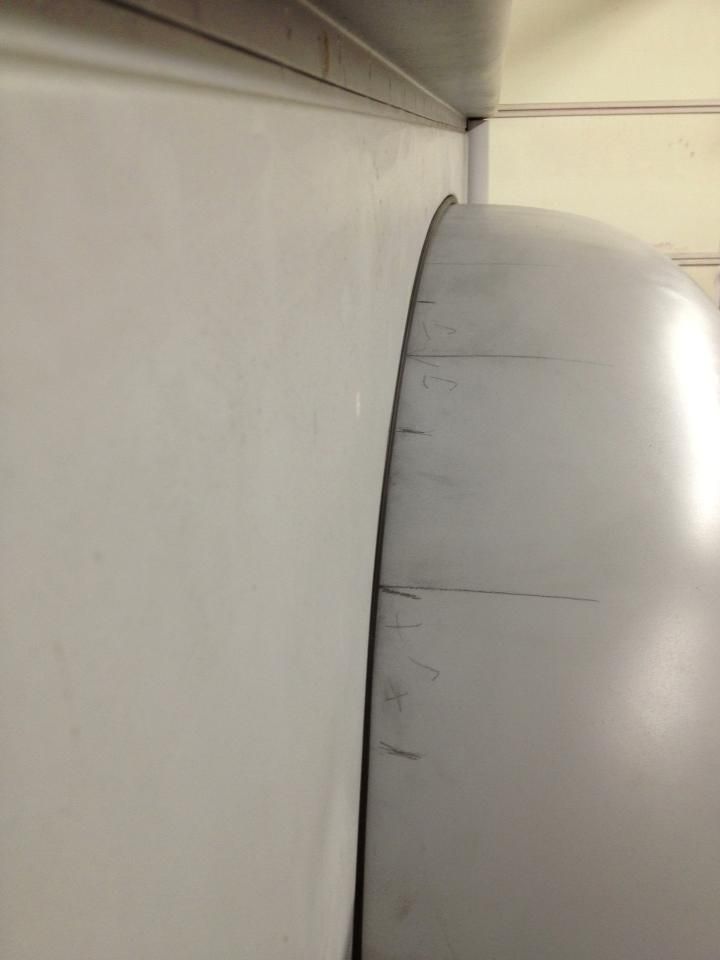
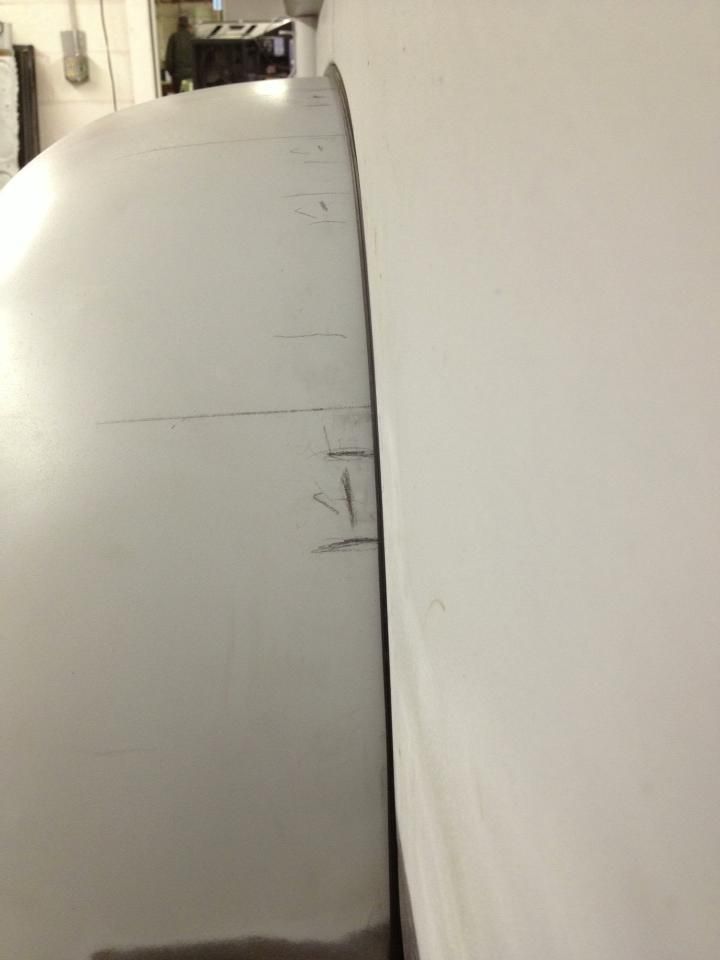
Made a rear shelf panel for a Nova that curved into the backrest and console using a slip roll.
__________________
Project Goldilocks '66 C10 Short Fleet BBW Build '65 C10 Highly Detailed Stock Restoration Thread '78 Camaro Targa Roof Build '55 International Metal/Body/Paint Work '66 F100 Full Rotisserie Restoration '40 Packard 120 Convertible Coupe Restoration How To Restore and Detail an Original Gauge Cluster How To Detail Sand Body Panels, Edges, Corners, Etc |
||||
|
|
|
|
03-13-2013, 09:35 AM
|
#192 |
|
Registered User
Join Date: May 2010
Location: Shreveport, LA
Posts: 115
|
Re: '55 International Metal/Body/Paint Work
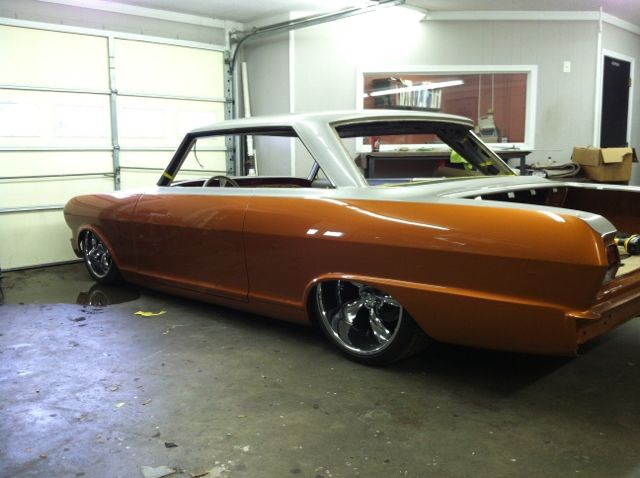
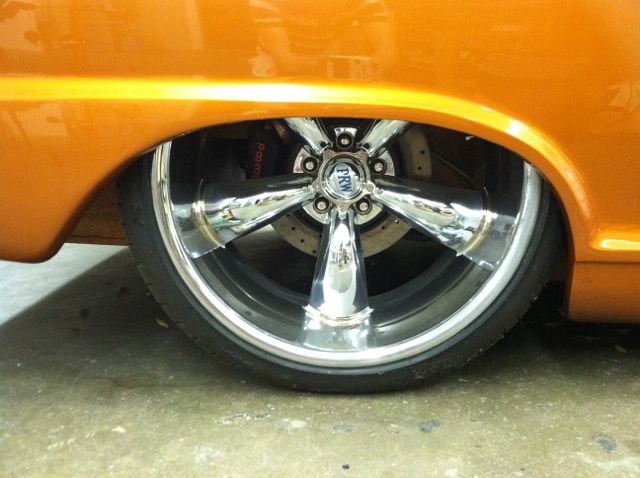
Any new updates? And what's up w/that Nova?
__________________
81 GMC C15 RC SWB 5.3L 4L80E project 
|
|
|
|
|
03-13-2013, 10:01 AM
|
#193 | |
|
Registered User
Join Date: May 2011
Location: Anderson SC
Posts: 3,868
|
Re: '55 International Metal/Body/Paint Work
Quote:
   On the '55, I've got the left fender straightened and prepped for epoxy, will be spraying it and a couple of the wheels today. Dad took in a '66 F100 for a full restoration so I'm having to split my time up now. 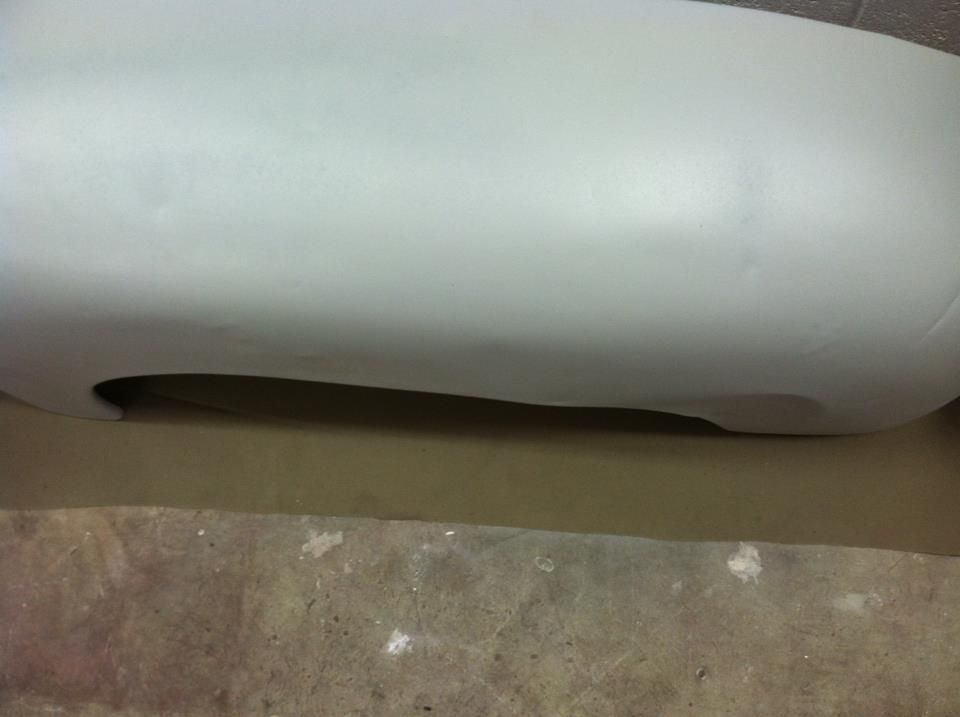  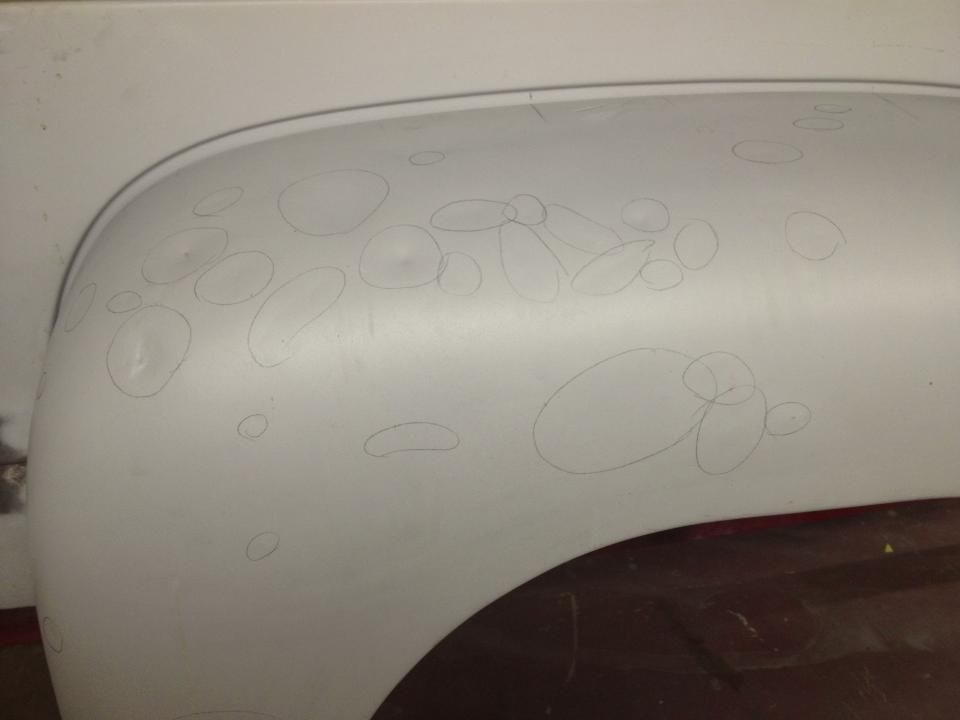 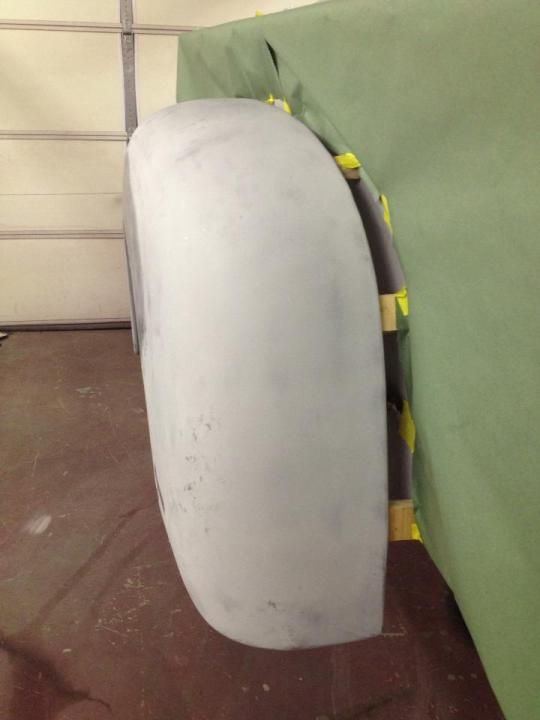 Posted via Mobile Device Posted via Mobile Device
__________________
Project Goldilocks '66 C10 Short Fleet BBW Build '65 C10 Highly Detailed Stock Restoration Thread '78 Camaro Targa Roof Build '55 International Metal/Body/Paint Work '66 F100 Full Rotisserie Restoration '40 Packard 120 Convertible Coupe Restoration How To Restore and Detail an Original Gauge Cluster How To Detail Sand Body Panels, Edges, Corners, Etc |
|
|
|
|
|
04-12-2013, 04:44 PM
|
#194 |
|
Registered User
Join Date: May 2011
Location: Anderson SC
Posts: 3,868
|
Re: '55 International Metal/Body/Paint Work
Been awhile since I updated this, I'm still working on it though progress has slowed a bit since taking more restoration projects at the shop. We started on a '66 F100 about a month ago, and that's been taking up a good bit of time.
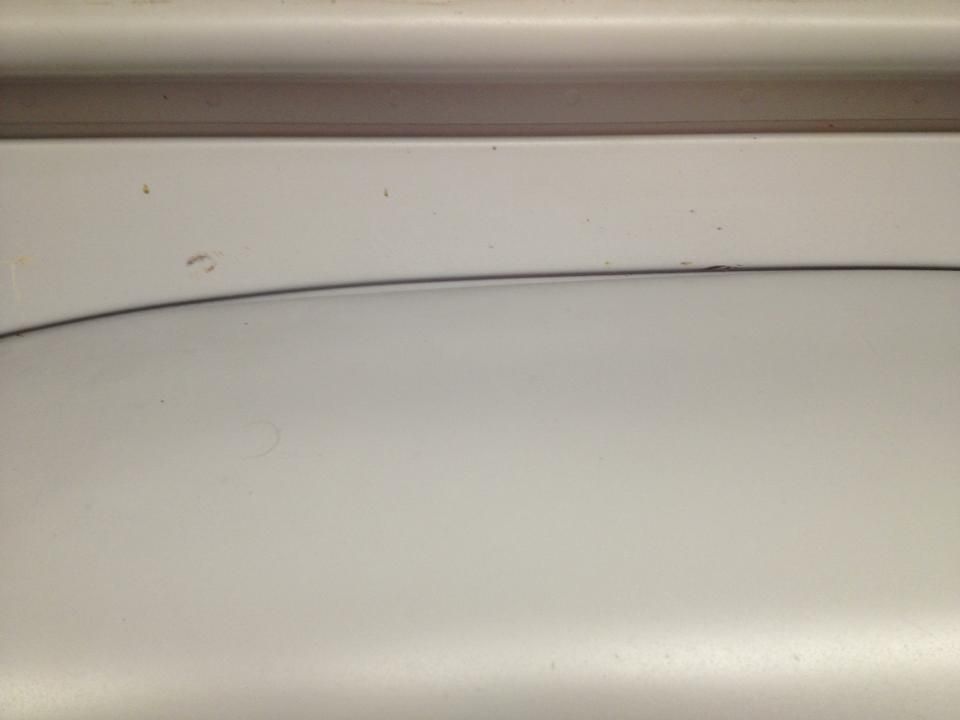
Here is the process to straighten the driver side fender. The wheel opening was crushed in on the back edge and there were dents everywhere.    Comparing the shape with the flexible straight edge, shows about a 1/4" gap.  Kink in the inner flange.  Kink straightened.  Working out the crushed spot.   Dents marked... I had to sharpen the pencil a few times to get them all      Overall shape of the crushed spot is back where it should be.  Dents fixed, metal shaping done and ready for epoxy and skim coating.   This angle shows the wheel opening shape pretty good. 
__________________
Project Goldilocks '66 C10 Short Fleet BBW Build '65 C10 Highly Detailed Stock Restoration Thread '78 Camaro Targa Roof Build '55 International Metal/Body/Paint Work '66 F100 Full Rotisserie Restoration '40 Packard 120 Convertible Coupe Restoration How To Restore and Detail an Original Gauge Cluster How To Detail Sand Body Panels, Edges, Corners, Etc |
|
|
|
|
04-12-2013, 04:56 PM
|
#195 |
|
Registered User
Join Date: May 2011
Location: Anderson SC
Posts: 3,868
|
Re: '55 International Metal/Body/Paint Work
I sprayed a couple coats of PPG DPLF and let it sit overnight, then scuffed it and skim coated the fender with 3M Platinum. Platinum is pretty thin so its great for skim coating large areas and making sure it goes on thin- only about 1/16".
 Starting to block the filler down.   First round of Slick Sand after blocking the filler with 36/80/180.  Second round of Slick Sand, ready for final blocking and shooting with tinted K93.  Here's a vid of me skim coating the front fender.
__________________
Project Goldilocks '66 C10 Short Fleet BBW Build '65 C10 Highly Detailed Stock Restoration Thread '78 Camaro Targa Roof Build '55 International Metal/Body/Paint Work '66 F100 Full Rotisserie Restoration '40 Packard 120 Convertible Coupe Restoration How To Restore and Detail an Original Gauge Cluster How To Detail Sand Body Panels, Edges, Corners, Etc |
|
|
|
|
04-12-2013, 05:00 PM
|
#196 |
|
Registered User
Join Date: May 2011
Location: Anderson SC
Posts: 3,868
|
Re: '55 International Metal/Body/Paint Work
I had two of the wheels blasted so I prepped them with PPG DX metal cleaner and metal conditioner, then shot them with PPG DPLF epoxy.
 Had a couple spots that needed filler.  Shot with three coats of PPG K36 and guide coated.  Wetsanding with masking tape to protect the center from stray sanding gouges.  And painted... 
__________________
Project Goldilocks '66 C10 Short Fleet BBW Build '65 C10 Highly Detailed Stock Restoration Thread '78 Camaro Targa Roof Build '55 International Metal/Body/Paint Work '66 F100 Full Rotisserie Restoration '40 Packard 120 Convertible Coupe Restoration How To Restore and Detail an Original Gauge Cluster How To Detail Sand Body Panels, Edges, Corners, Etc |
|
|
|
|
04-12-2013, 08:52 PM
|
#197 |
|
Registered User
Join Date: May 2007
Location: Deale Md
Posts: 4,663
|
Re: '55 International Metal/Body/Paint Work
So where's the thread for the other resto projects.
__________________
James 63 GMC V6 4speed carryall 65 chevy swb bbw V8 auto 68 K20 327/4 speed, buddy buckets 2002 GMC CC Dually Duramax 64 GMC lwb 3/4 V6 4speed SOLD 66 GMC swb bbw buddy buckets SOLD IG duallyjams The only thing that stays the same is constant change! |
|
|
|
|
04-12-2013, 09:20 PM
|
#198 | |
|
Registered User
Join Date: May 2011
Location: Anderson SC
Posts: 3,868
|
Re: '55 International Metal/Body/Paint Work
Quote:
https://www.facebook.com/media/set/?...1&l=2783d0dd09
__________________
Project Goldilocks '66 C10 Short Fleet BBW Build '65 C10 Highly Detailed Stock Restoration Thread '78 Camaro Targa Roof Build '55 International Metal/Body/Paint Work '66 F100 Full Rotisserie Restoration '40 Packard 120 Convertible Coupe Restoration How To Restore and Detail an Original Gauge Cluster How To Detail Sand Body Panels, Edges, Corners, Etc |
|
|
|
|
|
06-12-2013, 11:11 AM
|
#199 |
|
Registered User
Join Date: May 2011
Location: Anderson SC
Posts: 3,868
|
Re: '55 International Metal/Body/Paint Work
Got started back on the '55 after a bit of a break. The rear fenders are bodyworked and ready to wetsand/paint.
First round of Slick Sand. Reprimed, ready for 2nd round of blocking. The passenger fender had a crack. Forgot to take pictures of this after it was fixed.  Passenger fender primed and blocked.  Both fenders shot with tinted PPG K93, ready to wetsand and paint. 
__________________
Project Goldilocks '66 C10 Short Fleet BBW Build '65 C10 Highly Detailed Stock Restoration Thread '78 Camaro Targa Roof Build '55 International Metal/Body/Paint Work '66 F100 Full Rotisserie Restoration '40 Packard 120 Convertible Coupe Restoration How To Restore and Detail an Original Gauge Cluster How To Detail Sand Body Panels, Edges, Corners, Etc |
|
|
|
|
06-12-2013, 12:18 PM
|
#200 |
|
Registered User
Join Date: Feb 2010
Location: Hartselle, Al.
Posts: 466
|
Re: '55 International Metal/Body/Paint Work
Very slick!
__________________
Life is and will ever remain an equation incapable of solution, but it contains certain known factors. - Nikola Tesla Matt. 6:27 "Who of you by worrying can add a single hour to his life? http://www.67-72chevytrucks.com/vboa...=507266&page=2 |
|
|
|
 |
| Bookmarks |
|
|


 Linear Mode

