
|
 02-17-2012, 12:17 PM
|
#1 |
|
Registered User
Join Date: May 2011
Location: Anderson SC
Posts: 3,868
|
'55 International Pickup Metal/Body/Paint Work
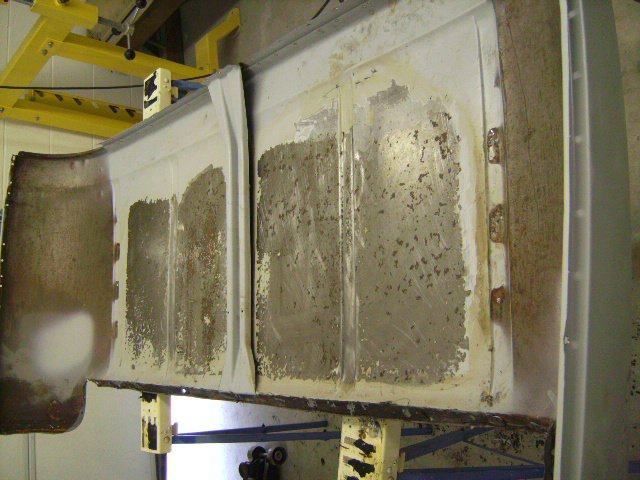
I've had a couple guys on here ask me to post other project's I've worked on, so here it goes. It's a 1955 International R-112 Pickup that the owner brought to us to do the metalwork, bodywork, and paintwork. It doesn't have a ton of rust but the body is BEAT!! The owner had already fixed the rust in the floors himself and had taken the cab and all of the panels to be blasted and primed with PPG DP series before bringing it to us. Here's some pics of when it arrived. The owner already had it on the rotisserie which is a huge plus!
You can see some of the damage in the pics. The roof looked like it had been used as a dance floor, the back of the cab was pushed in in places, there was rust deep in the seam under the back window, and dents everywhere! 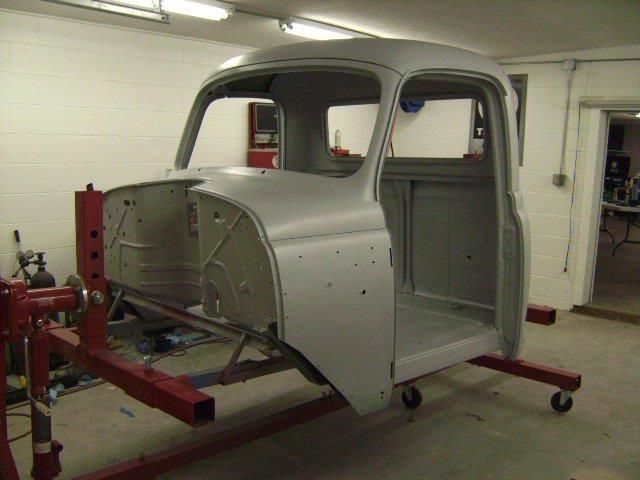 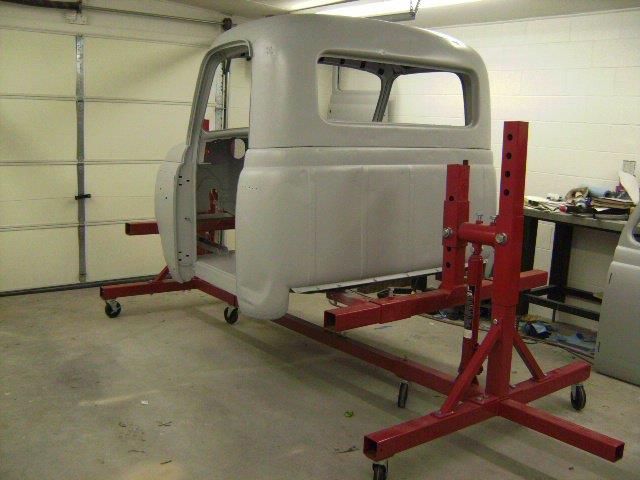  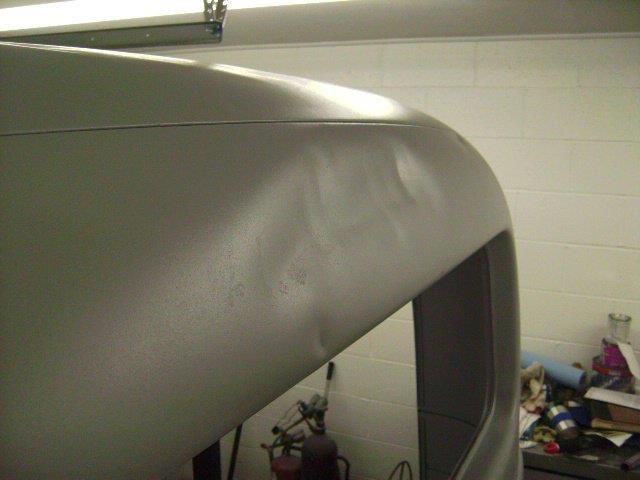 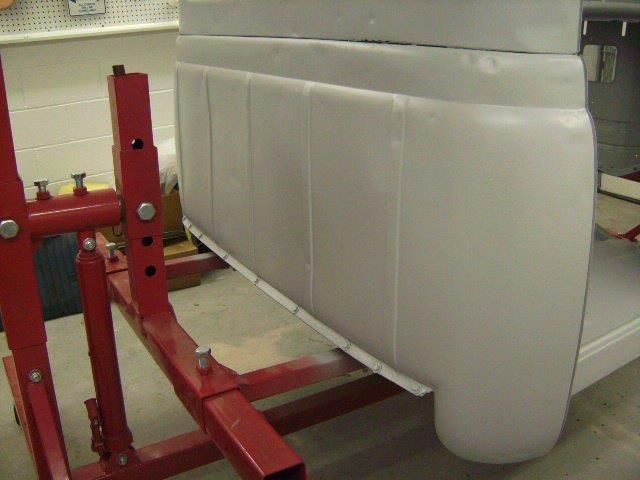 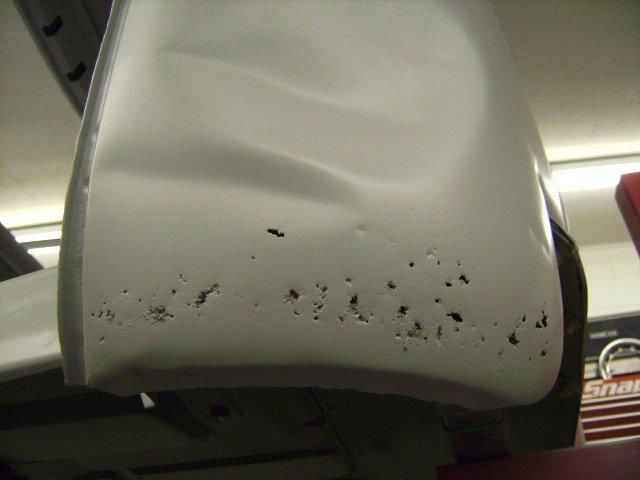 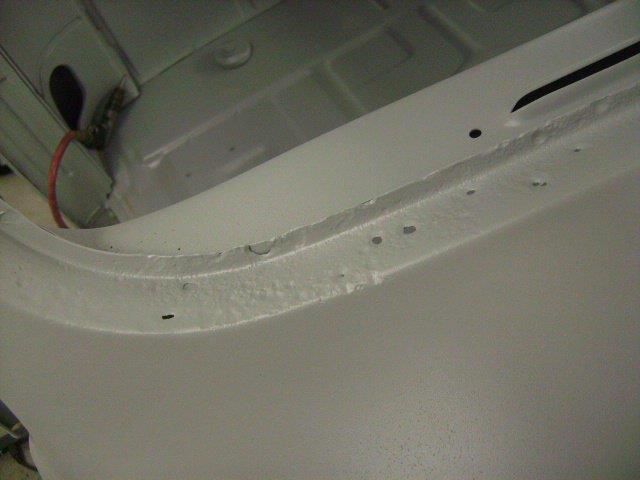 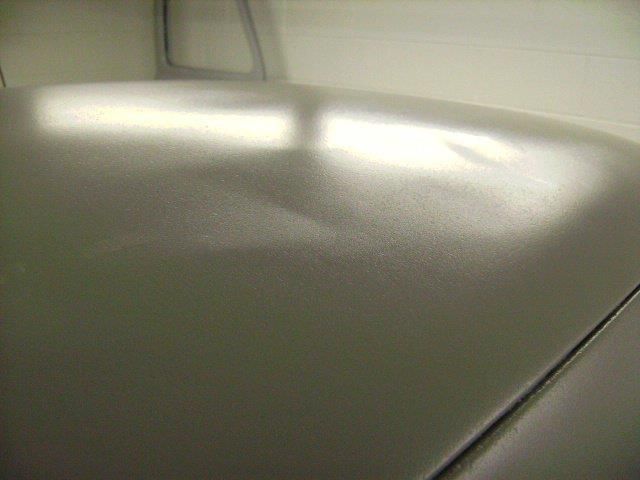
__________________
Project Goldilocks '66 C10 Short Fleet BBW Build '65 C10 Highly Detailed Stock Restoration Thread '78 Camaro Targa Roof Build '55 International Metal/Body/Paint Work '66 F100 Full Rotisserie Restoration '40 Packard 120 Convertible Coupe Restoration How To Restore and Detail an Original Gauge Cluster How To Detail Sand Body Panels, Edges, Corners, Etc Last edited by theastronaut; 10-25-2012 at 10:42 AM. Reason: Edit title/fix dead pic links |

|

|
|
02-17-2012, 12:32 PM
|
#2 |
|
Registered User
Join Date: May 2011
Location: Anderson SC
Posts: 3,868
|
Re: '55 International Metal/Body/Paint Work
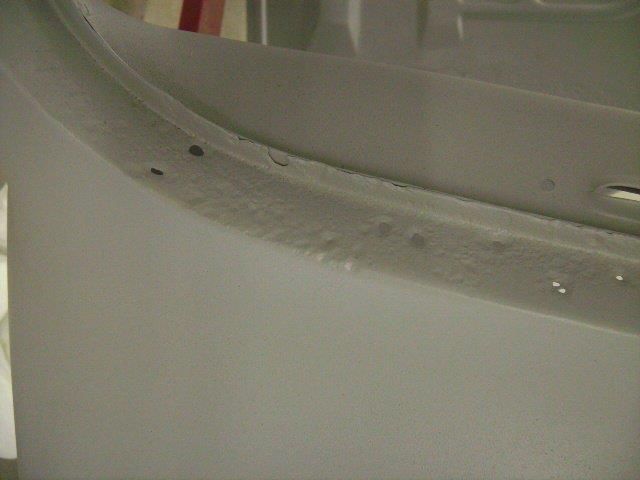
Getting started on the rear cab panel seam repairs. There were two spots rotted out in the seam itself, the cab corners were rusted out, and the gap across the upper seam itself was uneven and needed evening out. I decided to remove the rear panel to gain full access to the upper seam rust and also make it easier to work out the dents. Doing this allowed me to sandblast inbetween the seams that can't be reached normally.
The upper seam rust. 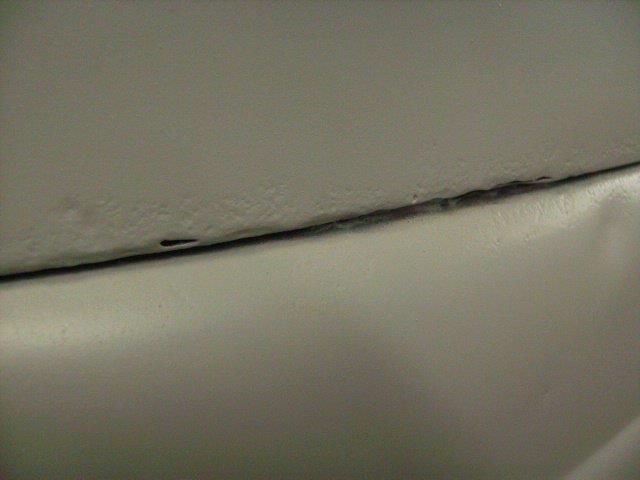 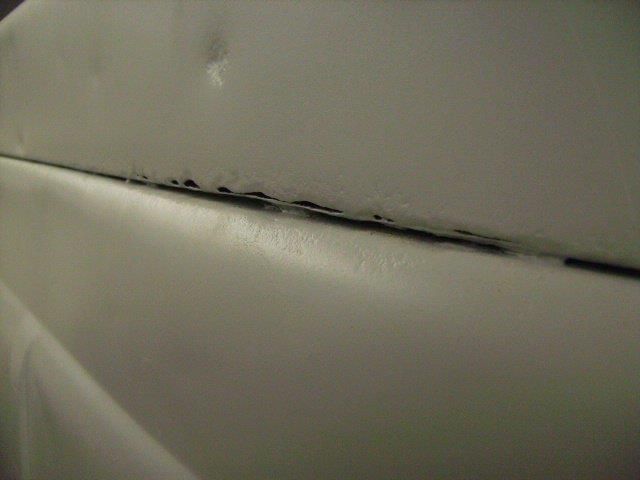 Uneven gap across the seam. 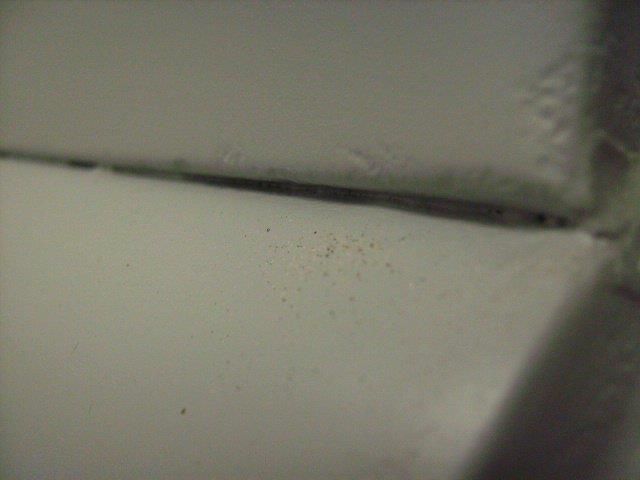 Cab corner rust. 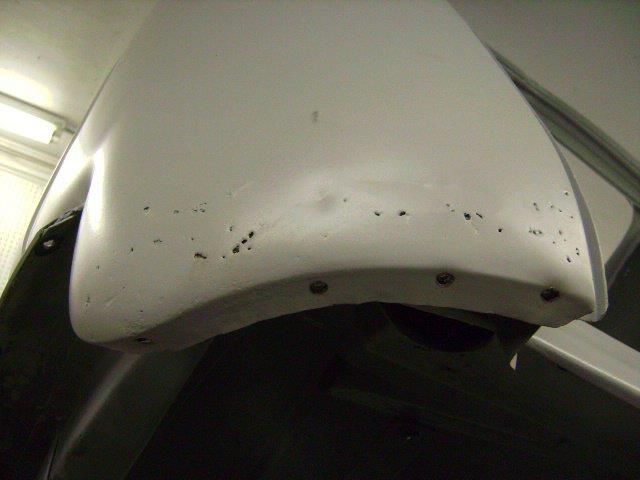 Drilling out the spotwelds that hold the rear panel on. 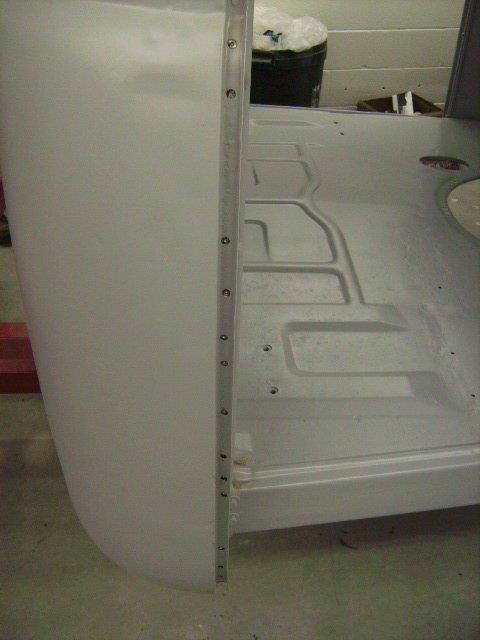 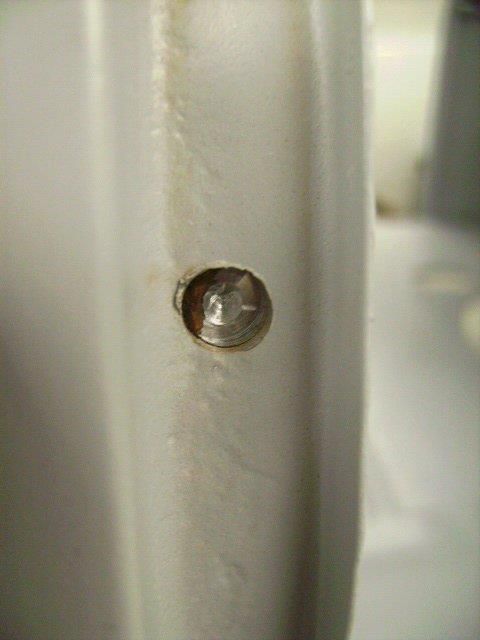 Rear panel removed. 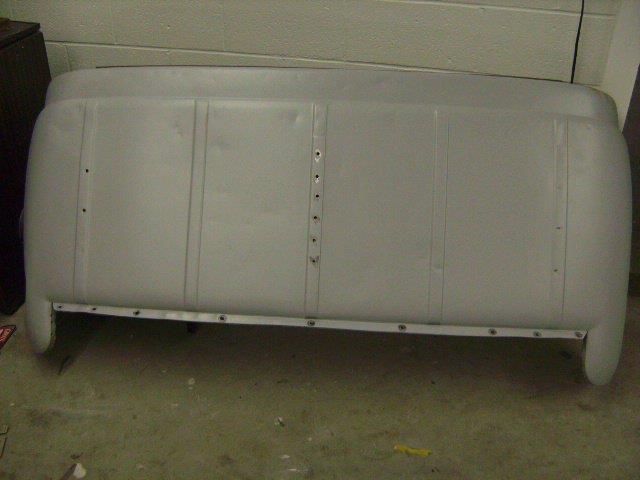  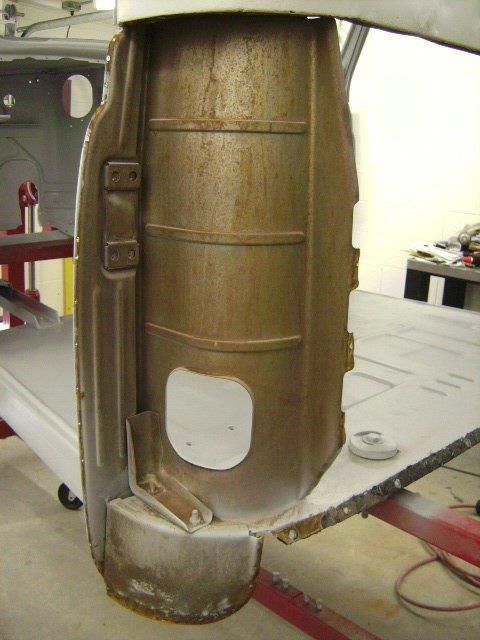 Inner cab corner rust. 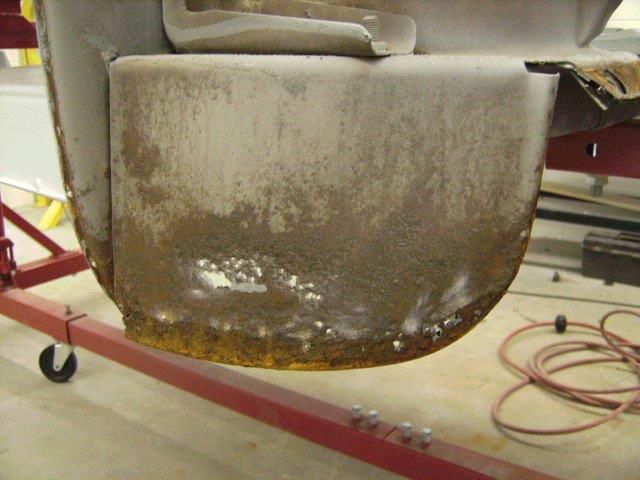 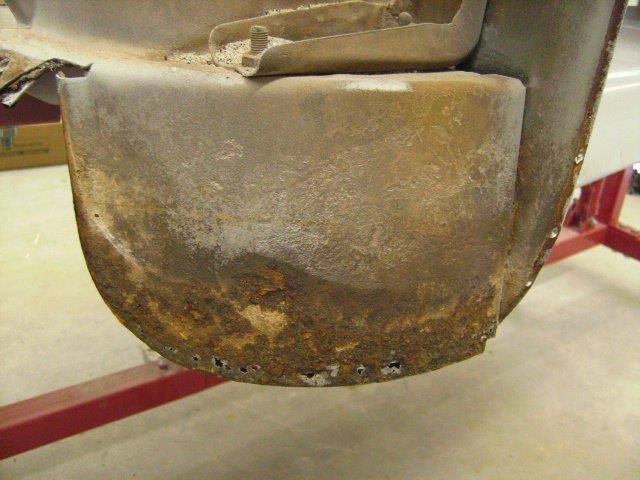 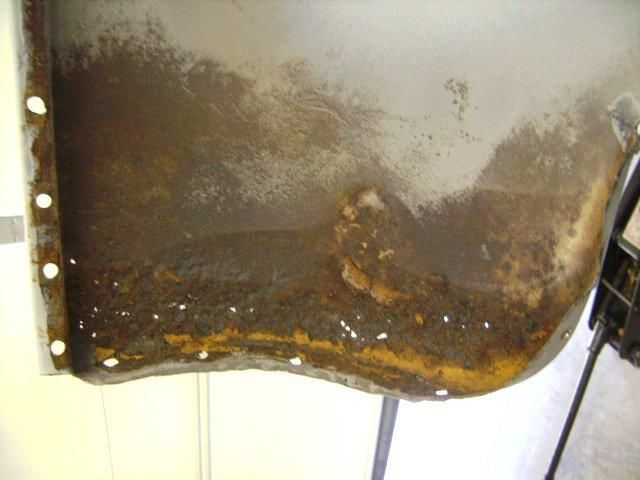 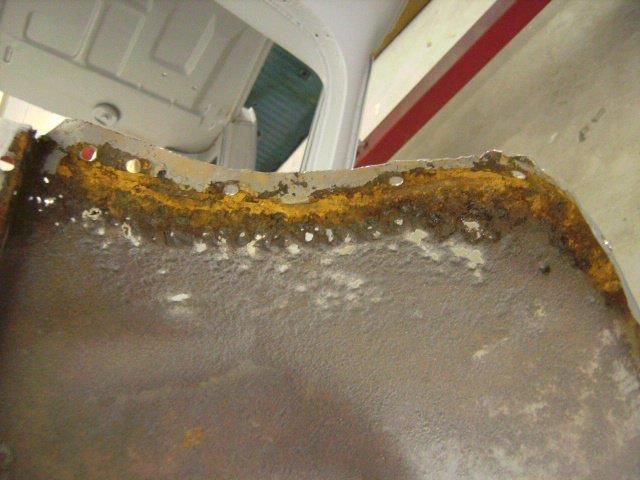
__________________
Project Goldilocks '66 C10 Short Fleet BBW Build '65 C10 Highly Detailed Stock Restoration Thread '78 Camaro Targa Roof Build '55 International Metal/Body/Paint Work '66 F100 Full Rotisserie Restoration '40 Packard 120 Convertible Coupe Restoration How To Restore and Detail an Original Gauge Cluster How To Detail Sand Body Panels, Edges, Corners, Etc Last edited by theastronaut; 10-25-2012 at 10:47 AM. |
|
|
|
|
02-17-2012, 02:01 PM
|
#3 |
|
Registered User
Join Date: May 2011
Location: Anderson SC
Posts: 3,868
|
Re: '55 International Metal/Body/Paint Work
Old sound deadener sheets removed.
 Roughly straightened and bottom marked for cutting.  Corner formed on an English Wheel. 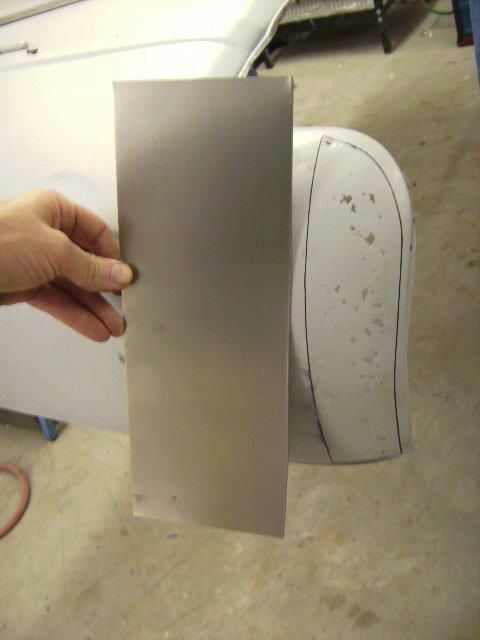 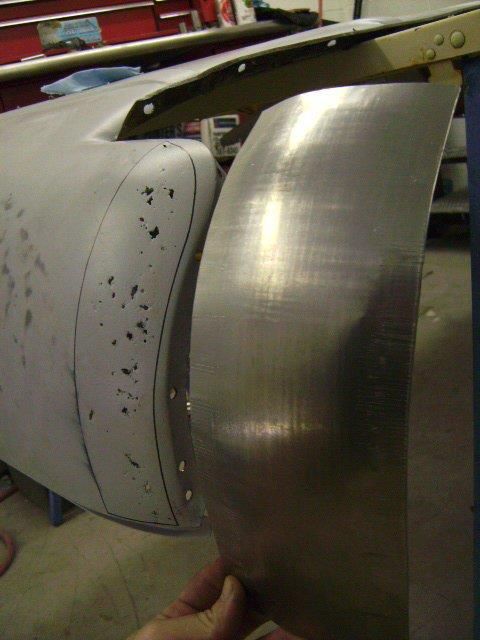 Trimmed, ready to weld in. 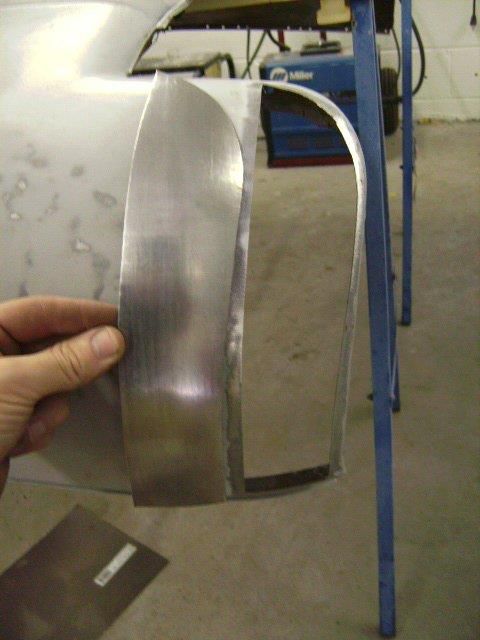 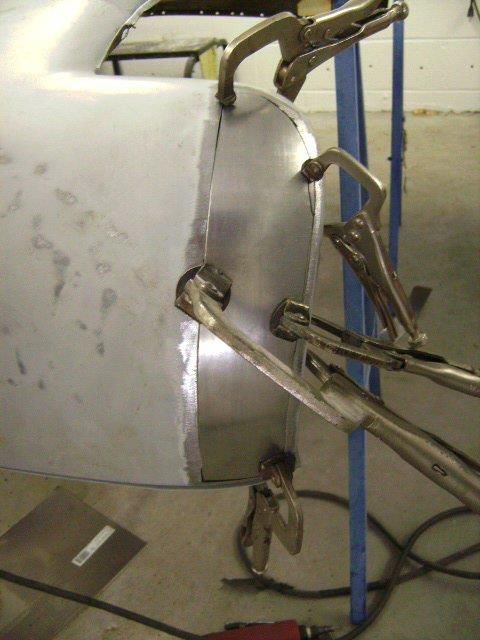 Welded up. 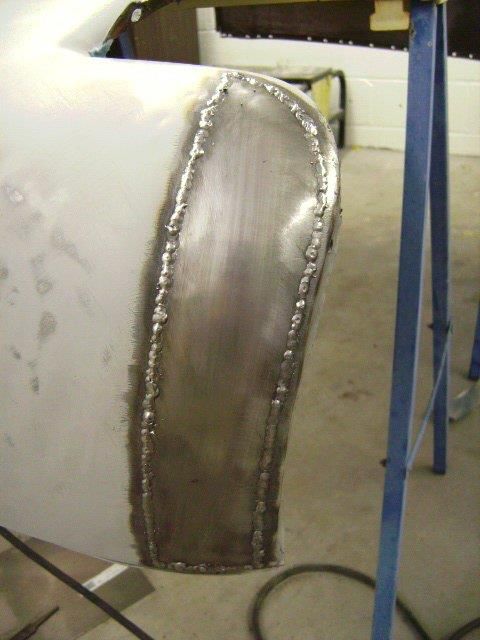 Welds ground down. 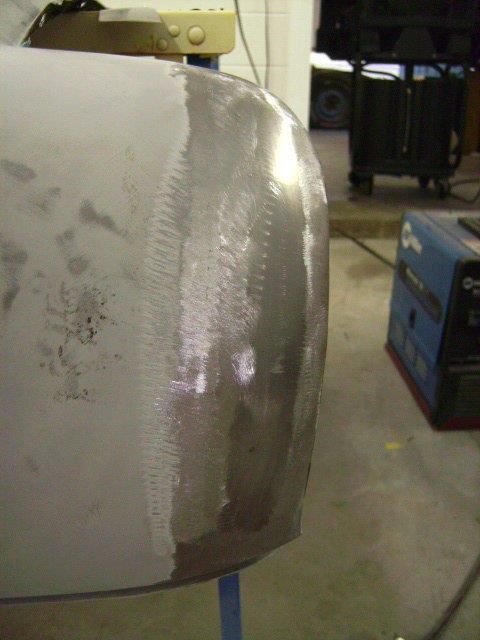 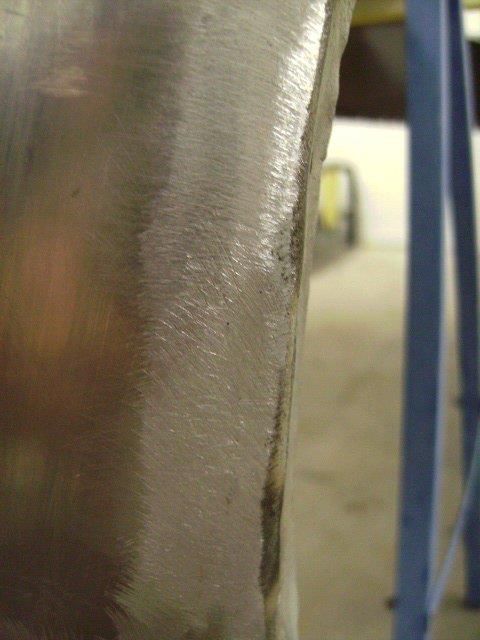 Fixing the inner cab corners. 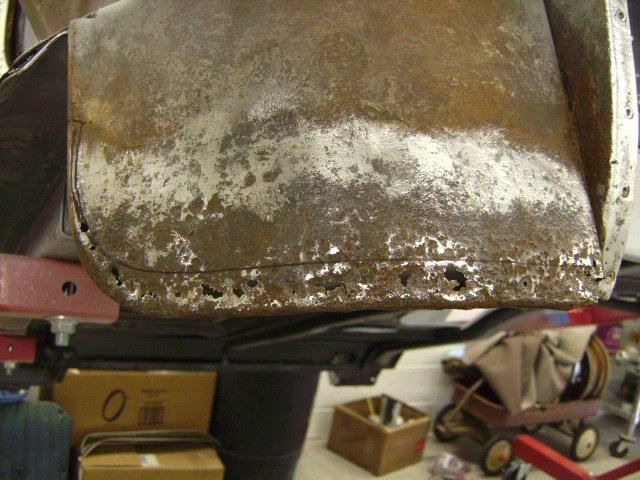 Formed a new edge on the shrinker/stretcher. 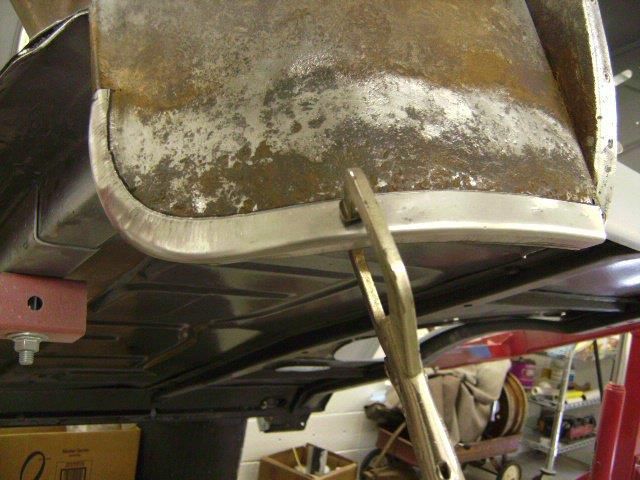 New piece welded in. 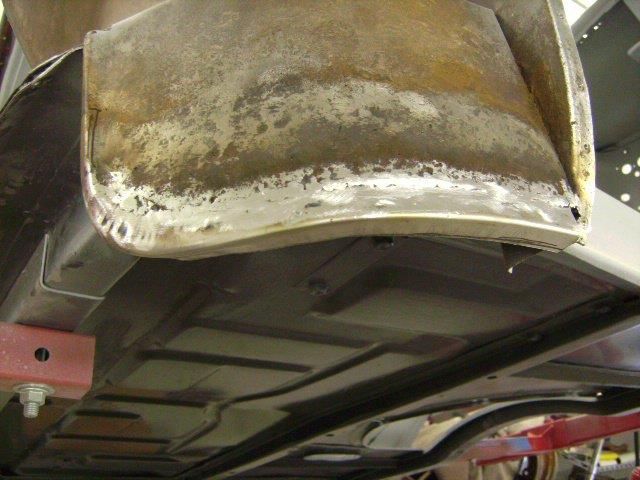 Fixing the other cab corner. 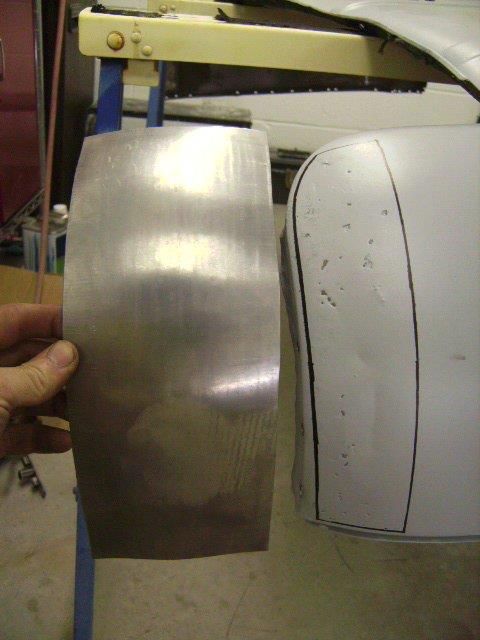 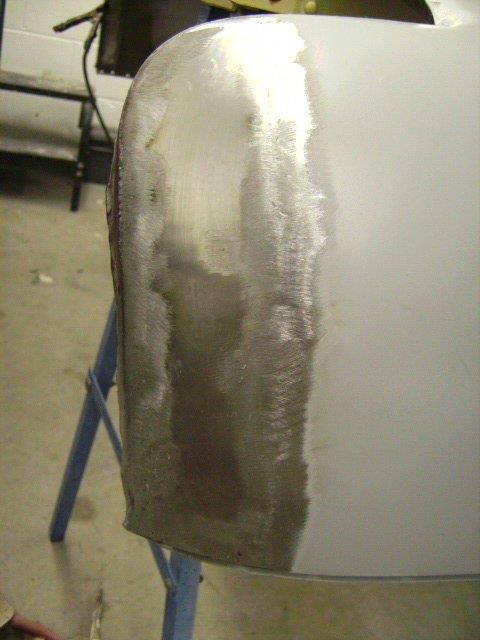
__________________
Project Goldilocks '66 C10 Short Fleet BBW Build '65 C10 Highly Detailed Stock Restoration Thread '78 Camaro Targa Roof Build '55 International Metal/Body/Paint Work '66 F100 Full Rotisserie Restoration '40 Packard 120 Convertible Coupe Restoration How To Restore and Detail an Original Gauge Cluster How To Detail Sand Body Panels, Edges, Corners, Etc Last edited by theastronaut; 10-25-2012 at 10:51 AM. |
|
|
|
|
02-18-2012, 03:13 PM
|
#4 |
|
Registered User
Join Date: Feb 2007
Location: Marana, Arizona
Posts: 3,416
|
Re: '55 International Metal/Body/Paint Work
Looks like fun! Anxious to see more!
__________________
"I feel the need for speed!"... as soon as I am done with my nap. |
|
|
|
|
02-22-2012, 01:39 PM
|
#5 | |
|
Registered User
Join Date: May 2011
Location: Anderson SC
Posts: 3,868
|
Re: '55 International Metal/Body/Paint Work
Quote:
I sandblasted everything while the rear cab panel was off. I also cut out the rust that was in the rear cab panel mating flanges and welded new metal in. 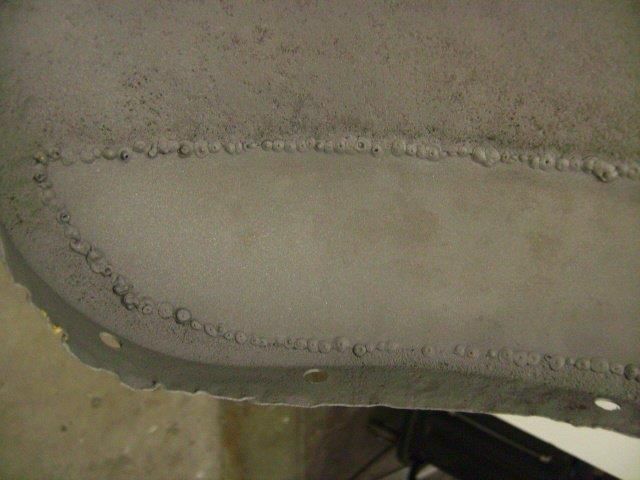 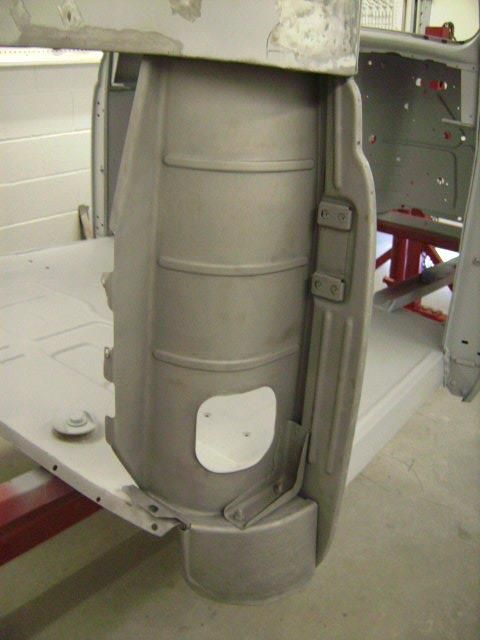 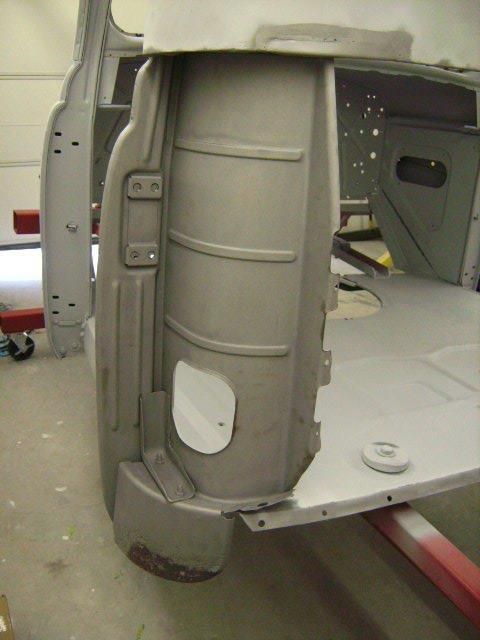 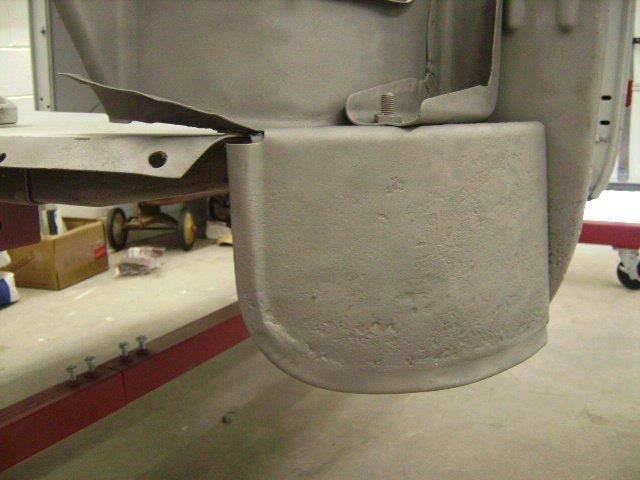 
__________________
Project Goldilocks '66 C10 Short Fleet BBW Build '65 C10 Highly Detailed Stock Restoration Thread '78 Camaro Targa Roof Build '55 International Metal/Body/Paint Work '66 F100 Full Rotisserie Restoration '40 Packard 120 Convertible Coupe Restoration How To Restore and Detail an Original Gauge Cluster How To Detail Sand Body Panels, Edges, Corners, Etc Last edited by theastronaut; 10-25-2012 at 10:56 AM. |
|
|
|
|
|
02-22-2012, 01:44 PM
|
#6 |
|
Registered User
Join Date: May 2011
Location: Anderson SC
Posts: 3,868
|
Re: '55 International Metal/Body/Paint Work
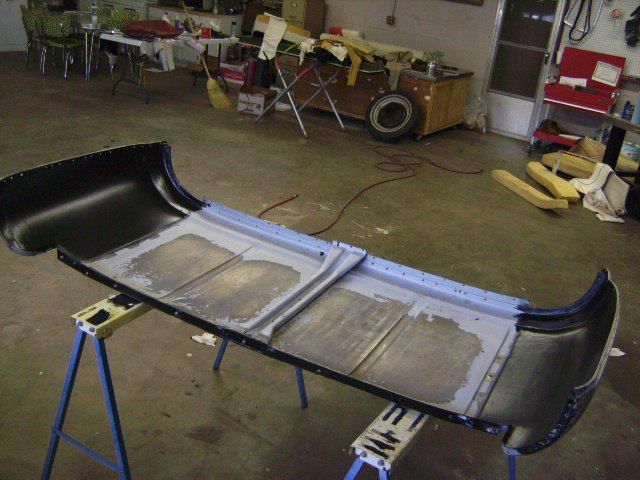
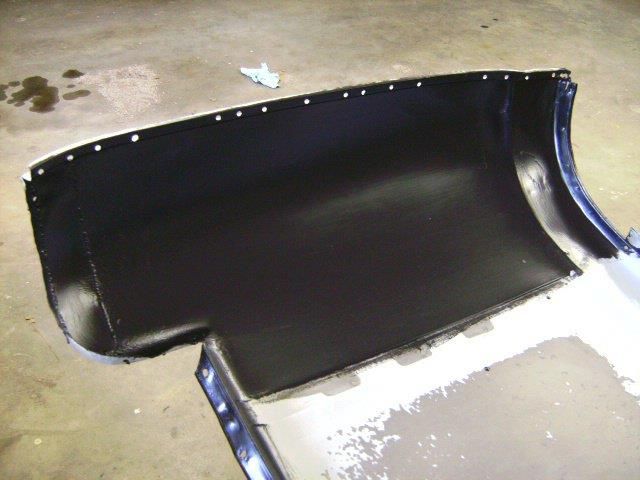
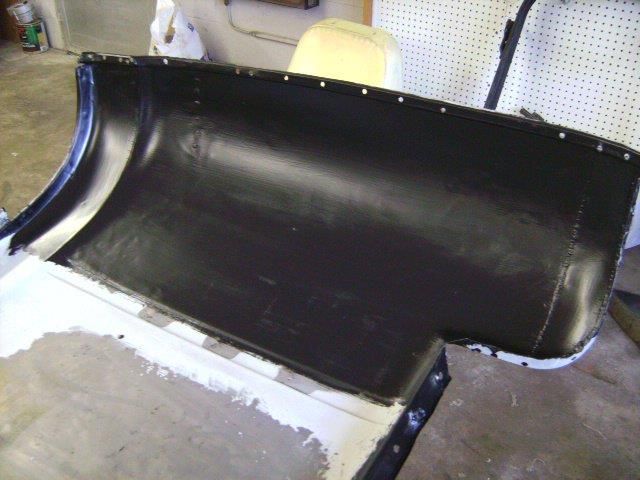
Then applied a couple coats of Chassis Saver paint to the inner panels and along the seam under the window. This should keep the seams and cab corners from rusting from the inside out.
__________________
Project Goldilocks '66 C10 Short Fleet BBW Build '65 C10 Highly Detailed Stock Restoration Thread '78 Camaro Targa Roof Build '55 International Metal/Body/Paint Work '66 F100 Full Rotisserie Restoration '40 Packard 120 Convertible Coupe Restoration How To Restore and Detail an Original Gauge Cluster How To Detail Sand Body Panels, Edges, Corners, Etc Last edited by theastronaut; 10-25-2012 at 10:59 AM. Reason: Fix pic links |
|
|
|
|
02-24-2012, 11:40 AM
|
#7 |
|
Registered User
Join Date: May 2011
Location: Anderson SC
Posts: 3,868
|
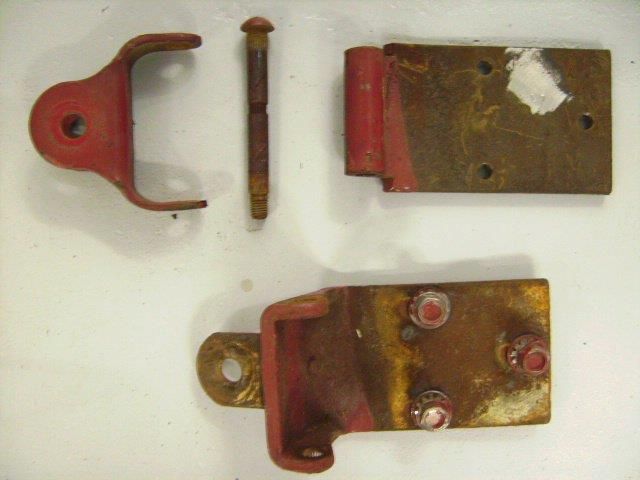
Re: '55 International Metal/Body/Paint Work
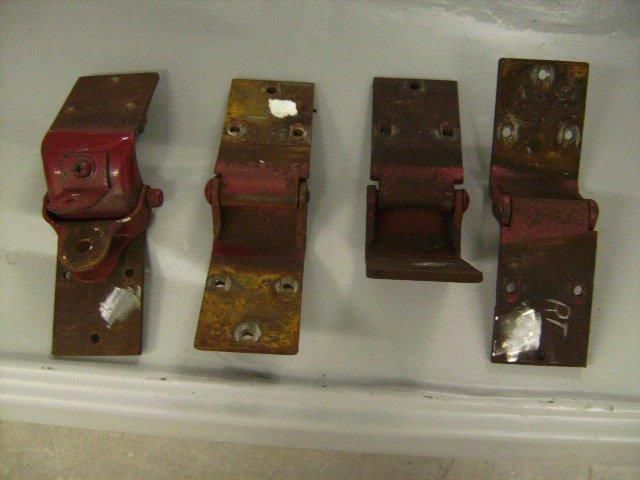
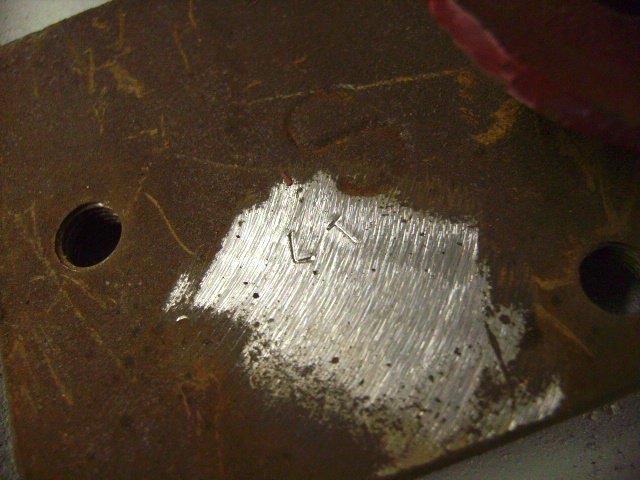
The hinges needed rebuildind, so I cleaned off a spot and stamped which the location of the hinge so the parts wouldn't get mixed up after dissasembling them. They were already marked but this way the marking won't come when they're blasted.
   Fixing rust in the bottom of the door. 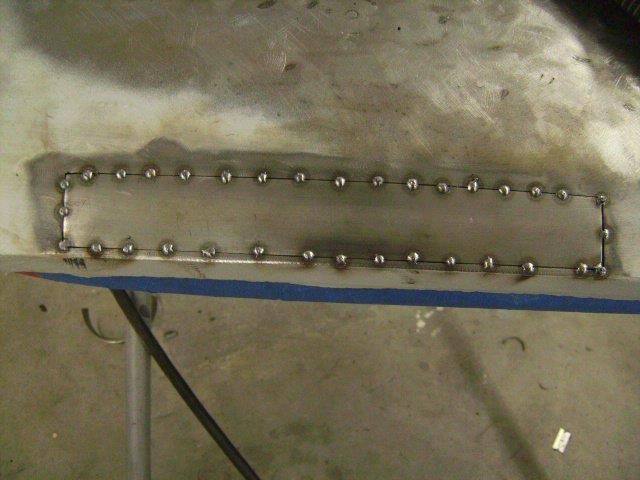 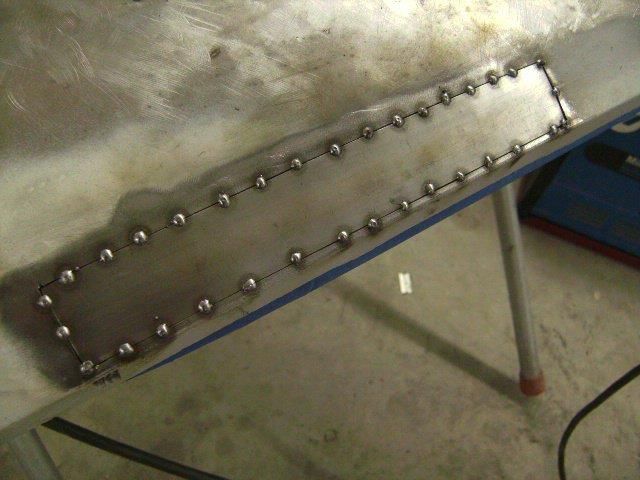 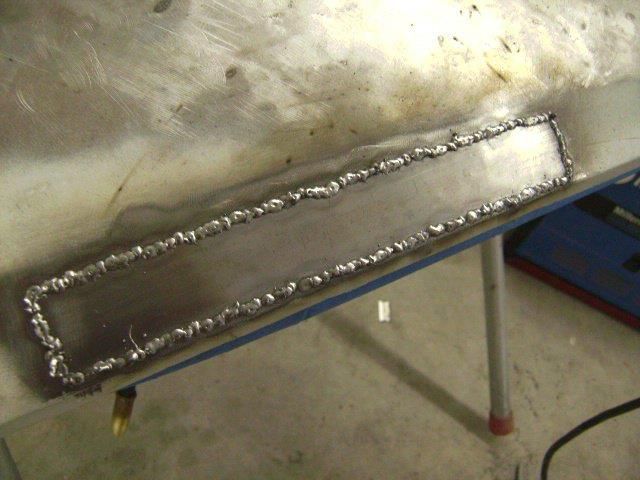 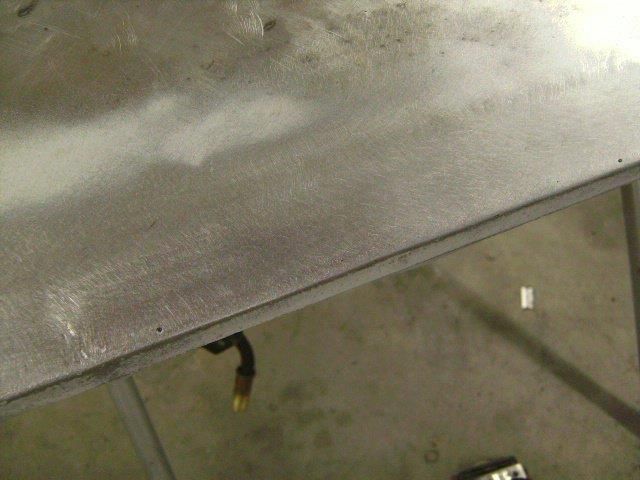 Finishing the inner cab corner. 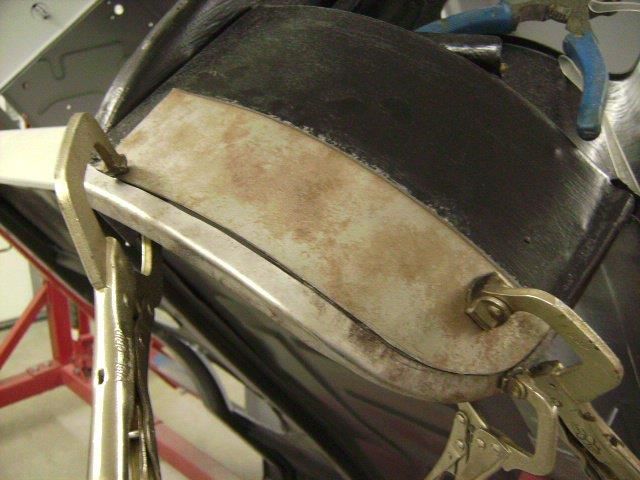 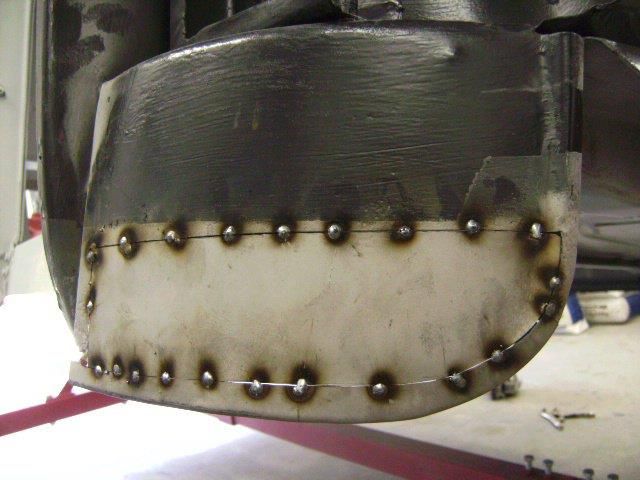 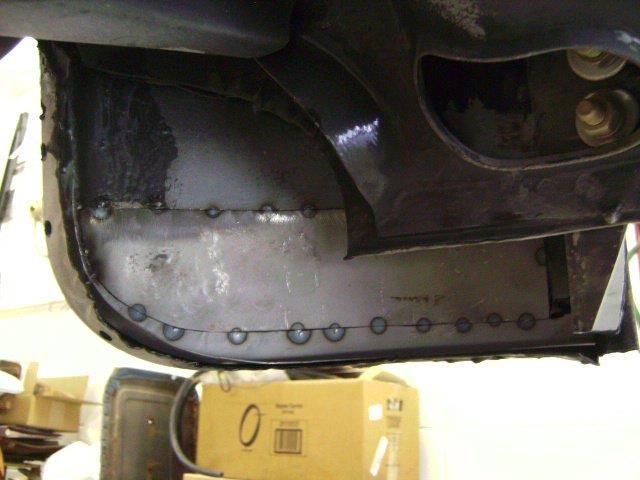 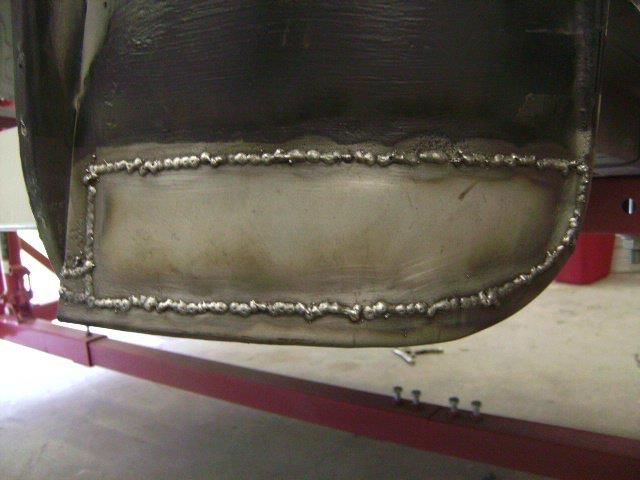 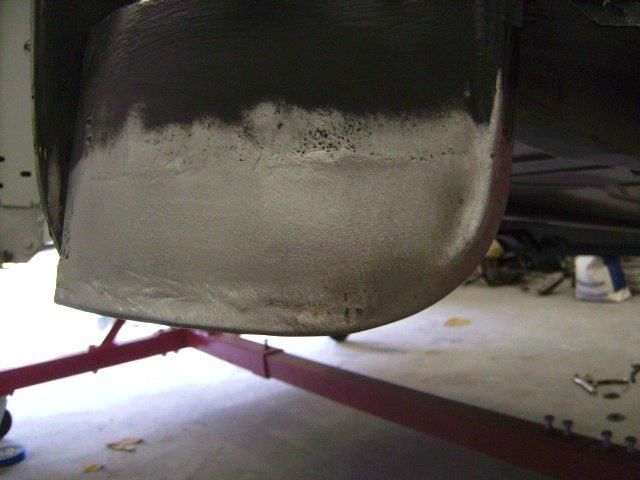 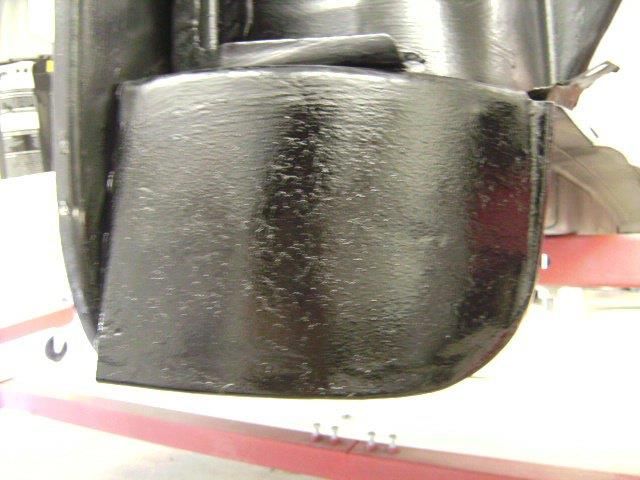
__________________
Project Goldilocks '66 C10 Short Fleet BBW Build '65 C10 Highly Detailed Stock Restoration Thread '78 Camaro Targa Roof Build '55 International Metal/Body/Paint Work '66 F100 Full Rotisserie Restoration '40 Packard 120 Convertible Coupe Restoration How To Restore and Detail an Original Gauge Cluster How To Detail Sand Body Panels, Edges, Corners, Etc Last edited by theastronaut; 12-03-2012 at 05:08 PM. |
|
|
|
|
02-24-2012, 11:48 AM
|
#8 |
|
Registered User
Join Date: May 2011
Location: Anderson SC
Posts: 3,868
|
Re: '55 International Metal/Body/Paint Work
There were some pinholes in the bottom of the front cab panels so I cut out the area and found even more rust. I cut the whole panel off to get to the inner panel to sandblast and coat the insides with Chassis Saver.
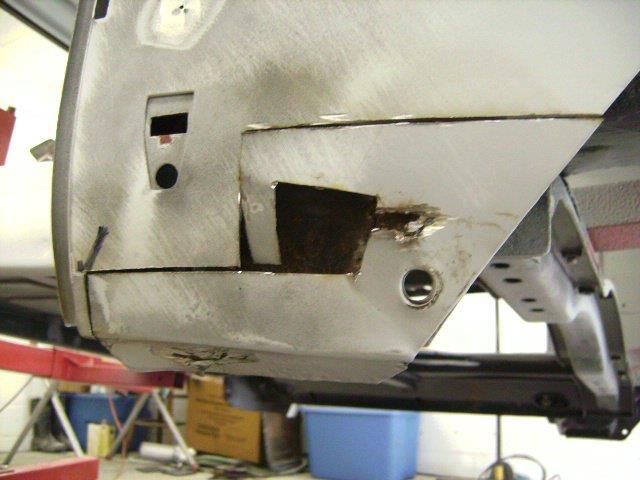 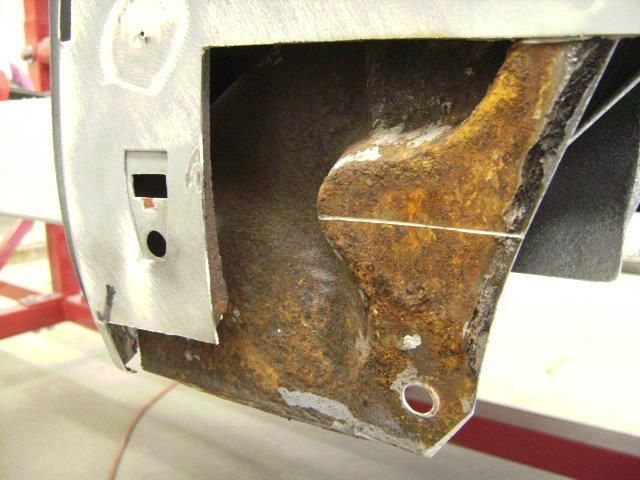 Same process for the other side. It didn't have any rust coming through but I knew if one side was bad, both would need attention. 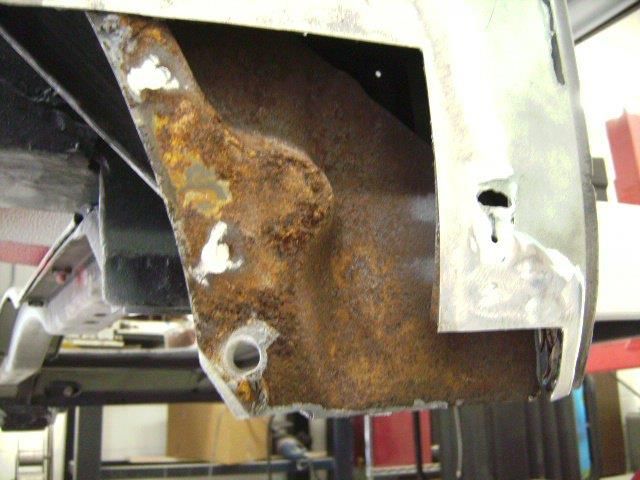 Inner panels blasted. 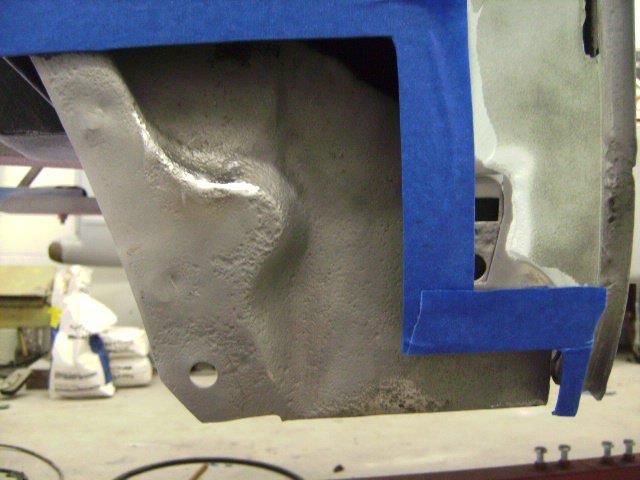 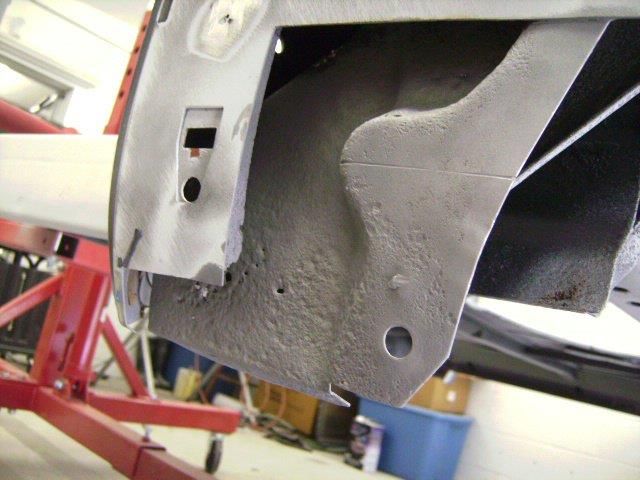 Pinholes welded up and ground down. 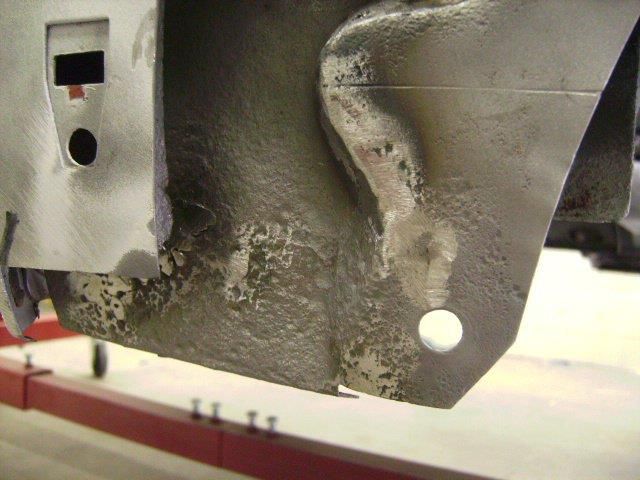 Chassis Saver applied with a daubber to reach high up inside the panels. 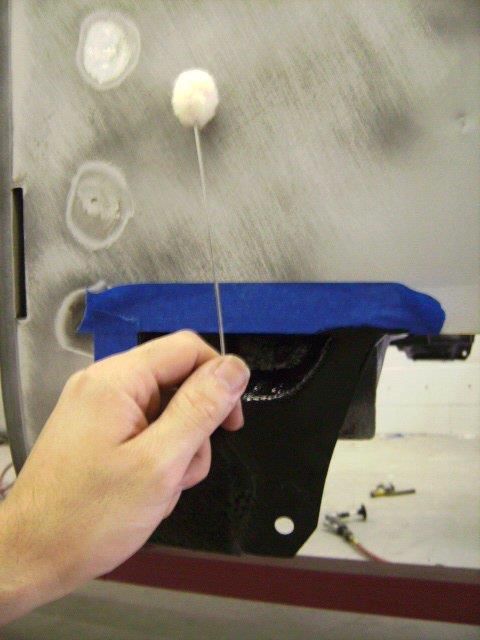 Made new panels to weld in and coated the inside with chassis saver. 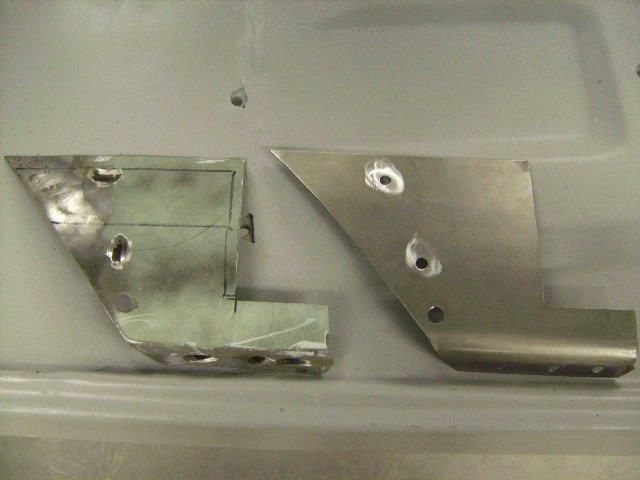 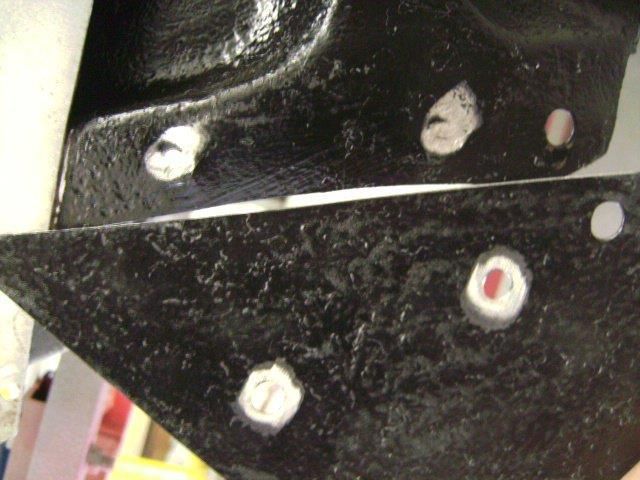 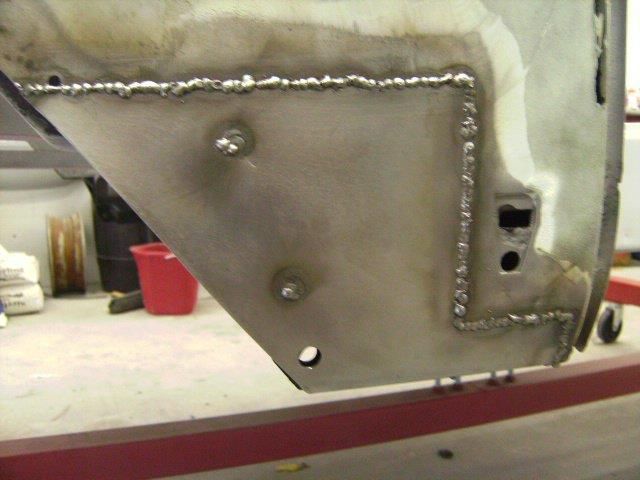 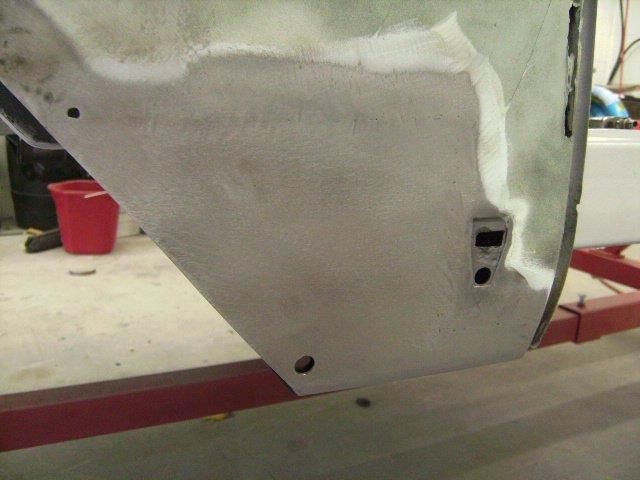 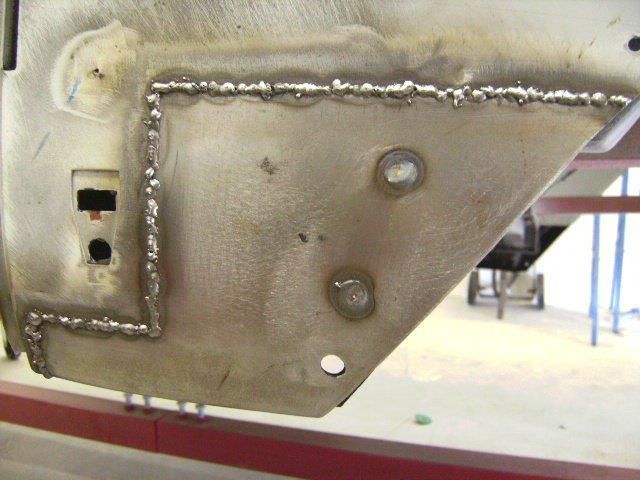 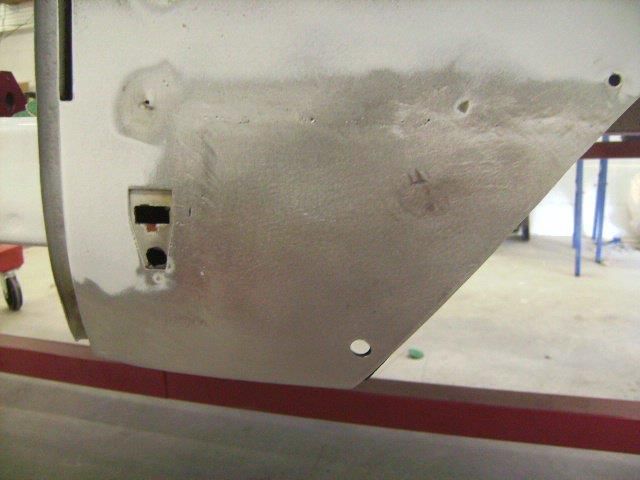
__________________
Project Goldilocks '66 C10 Short Fleet BBW Build '65 C10 Highly Detailed Stock Restoration Thread '78 Camaro Targa Roof Build '55 International Metal/Body/Paint Work '66 F100 Full Rotisserie Restoration '40 Packard 120 Convertible Coupe Restoration How To Restore and Detail an Original Gauge Cluster How To Detail Sand Body Panels, Edges, Corners, Etc Last edited by theastronaut; 12-03-2012 at 05:20 PM. |
|
|
|
|
02-25-2012, 02:24 AM
|
#9 |
|
Registered User
 Join Date: Mar 2005
Location: apple valley, ca
Posts: 2,670
|
Re: '55 International Metal/Body/Paint Work
As usual, you're doing a great job!
Those Internationals have a face only a mother could love, but they have their own charm. They've got some funky design features, which was an International characteristic. I'm glad to see someone restoring one and not making a crappy Rat Rod out of it, which sadly becomes the fate of many International trucks.
__________________
Check out my latest endeavor: https://roundsixpod.com My build threads: '55 Chevy: http://67-72chevytrucks.com/vboard/s...d.php?t=247512 '64 C-20: http://67-72chevytrucks.com/vboard/s...d.php?t=446527 |
|
|
|
|
02-25-2012, 03:58 AM
|
#10 |
|
Registered User
Join Date: Jul 2010
Location: memphis
Posts: 2,537
|
Re: '55 International Metal/Body/Paint Work
nice work
__________________
1981 C-10 (Pop's) 1978 Camaro 2006 Lacrosse |
|
|
|
|
02-25-2012, 01:19 PM
|
#11 | ||
|
Registered User
Join Date: May 2011
Location: Anderson SC
Posts: 3,868
|
Re: '55 International Metal/Body/Paint Work
Quote:
Quote:
Posted via Mobile Device
__________________
Project Goldilocks '66 C10 Short Fleet BBW Build '65 C10 Highly Detailed Stock Restoration Thread '78 Camaro Targa Roof Build '55 International Metal/Body/Paint Work '66 F100 Full Rotisserie Restoration '40 Packard 120 Convertible Coupe Restoration How To Restore and Detail an Original Gauge Cluster How To Detail Sand Body Panels, Edges, Corners, Etc |
||
|
|
|
|
02-27-2012, 05:47 PM
|
#12 |
|
Registered User
Join Date: May 2011
Location: Anderson SC
Posts: 3,868
|
Re: '55 International Metal/Body/Paint Work
Fixing the w/s opening rust.
 Cut out the old peice and made a new one on the shinker/stretcher. Test fitting it using magnets to hold it in place. 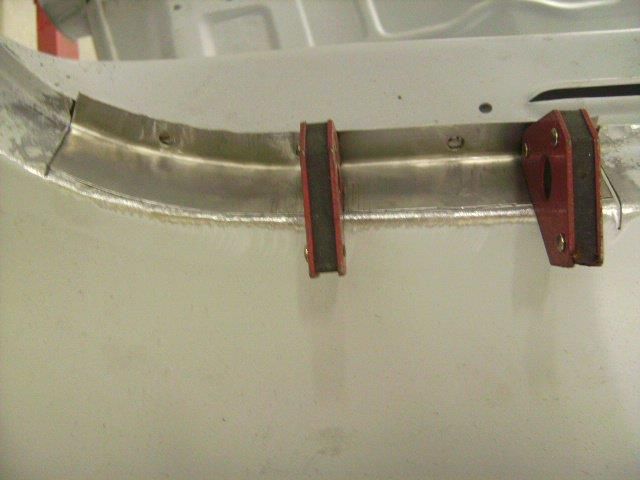 Welded in and ground smooth. 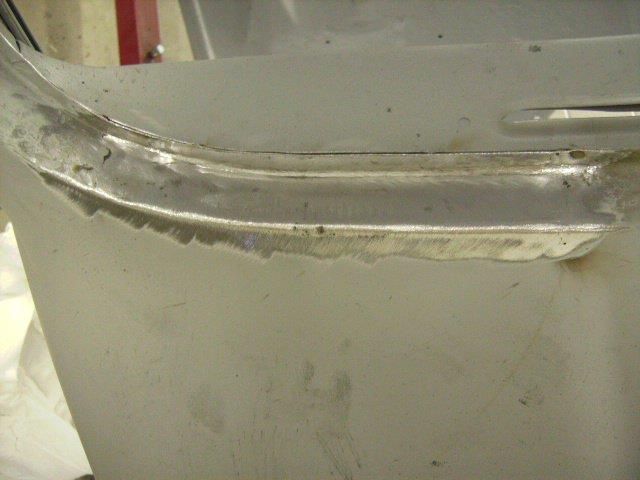
__________________
Project Goldilocks '66 C10 Short Fleet BBW Build '65 C10 Highly Detailed Stock Restoration Thread '78 Camaro Targa Roof Build '55 International Metal/Body/Paint Work '66 F100 Full Rotisserie Restoration '40 Packard 120 Convertible Coupe Restoration How To Restore and Detail an Original Gauge Cluster How To Detail Sand Body Panels, Edges, Corners, Etc Last edited by theastronaut; 12-03-2012 at 05:22 PM. |
|
|
|
|
02-27-2012, 05:56 PM
|
#13 |
|
Registered User
Join Date: May 2011
Location: Anderson SC
Posts: 3,868
|
Re: '55 International Metal/Body/Paint Work
The cowl panel had a couple seams where they meet the fender mounting panels that needed seam sealer. Most of the old sealer came out when blasting but it still needed minor prep before applying the new sealer. I also got the front and rear roof skin seams at the same time.
Drip rails were straightened before applying the seam sealer. 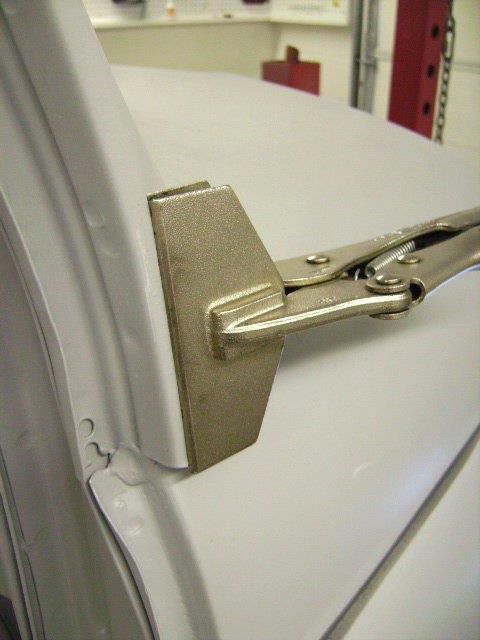 Cowl seam.  Sanded out with 180 grip paper folded in half. 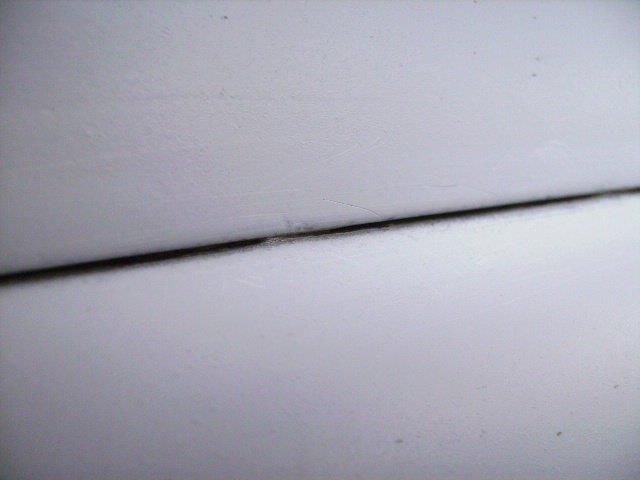 My seam sealer gun, love this thing!! 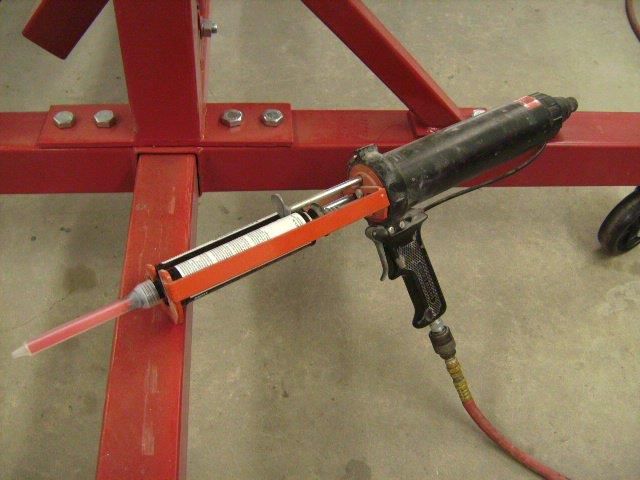 Sealer applied. 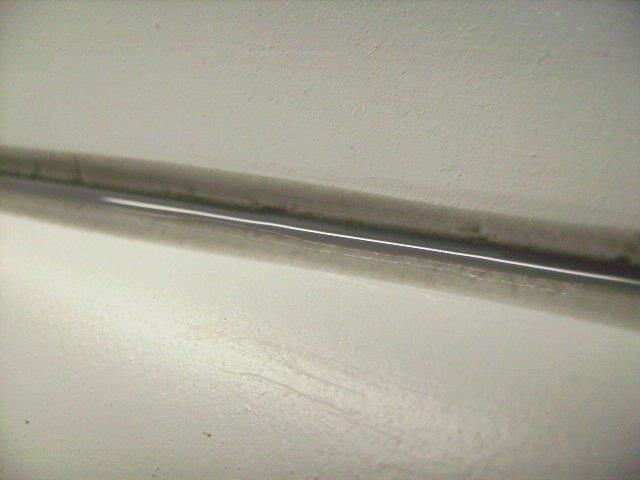 Sanded smooth. 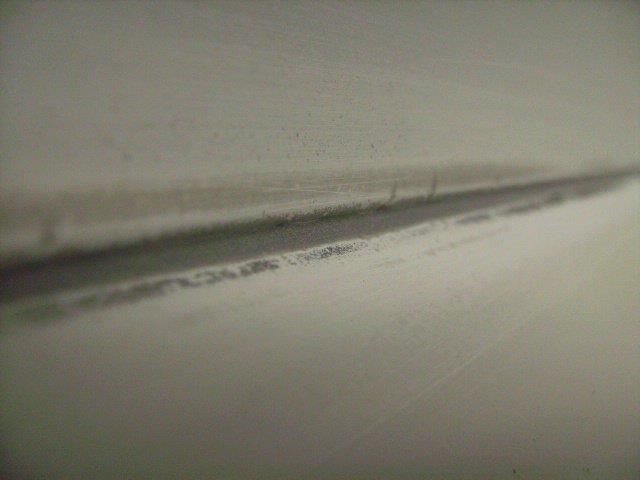 Close shot of the front roof seam, it's a good bit deeper than the cowl seams. 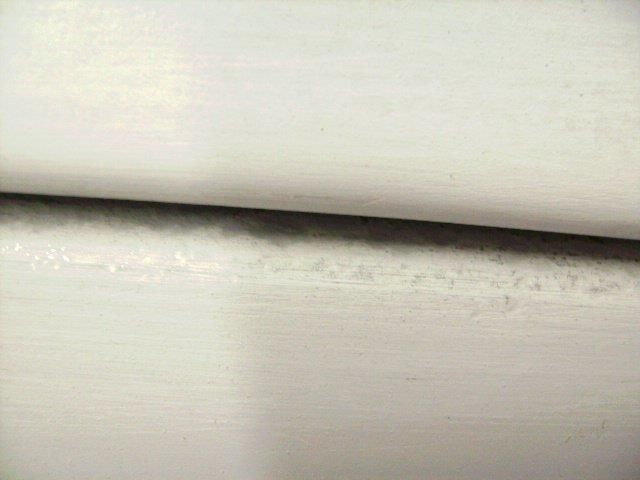 The rear roof seam after sealing and sanding smooth. 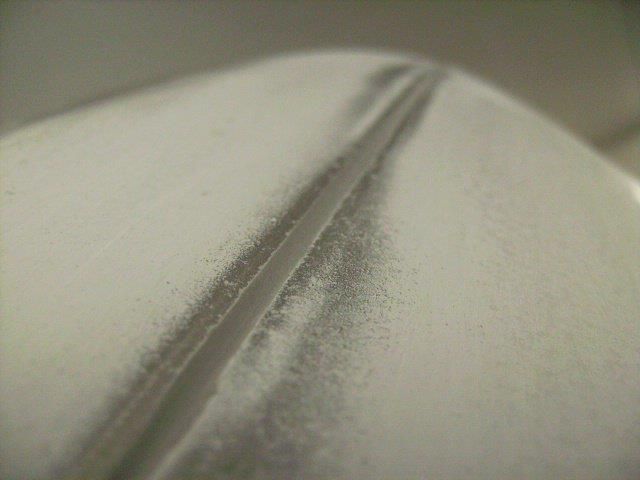
__________________
Project Goldilocks '66 C10 Short Fleet BBW Build '65 C10 Highly Detailed Stock Restoration Thread '78 Camaro Targa Roof Build '55 International Metal/Body/Paint Work '66 F100 Full Rotisserie Restoration '40 Packard 120 Convertible Coupe Restoration How To Restore and Detail an Original Gauge Cluster How To Detail Sand Body Panels, Edges, Corners, Etc Last edited by theastronaut; 12-03-2012 at 05:29 PM. |
|
|
|
|
02-27-2012, 06:12 PM
|
#14 |
|
Registered User
Join Date: May 2011
Location: Anderson SC
Posts: 3,868
|
Re: '55 International Metal/Body/Paint Work
Next I shot PPG K36 high build over the seams to get them really slick. I'll be using Slick Sand for all of the major priming and blocking but I don't like using it straight over seam sealer, so I used the K36 instead since I feel it sticks better to the sealer. Improperly sealed and shaped seams are a pet peeve of mine...
 Cowl seams. 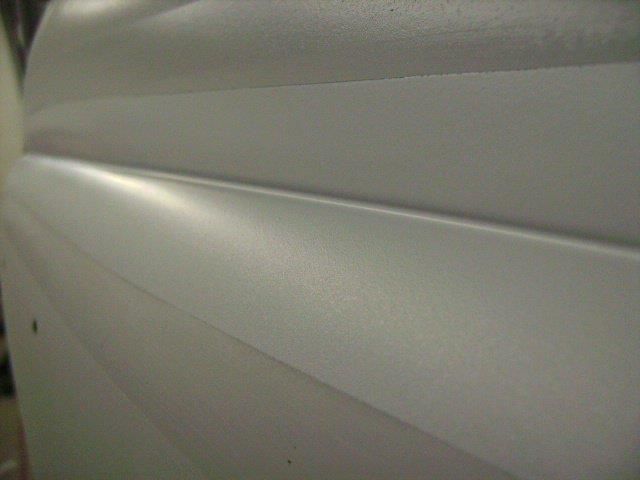 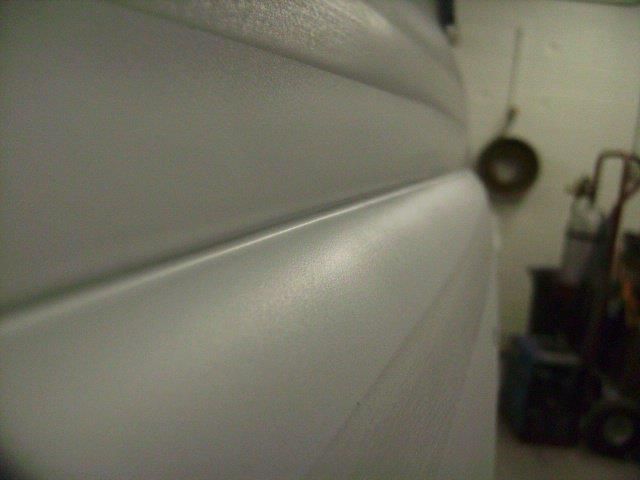 Front roof seam. 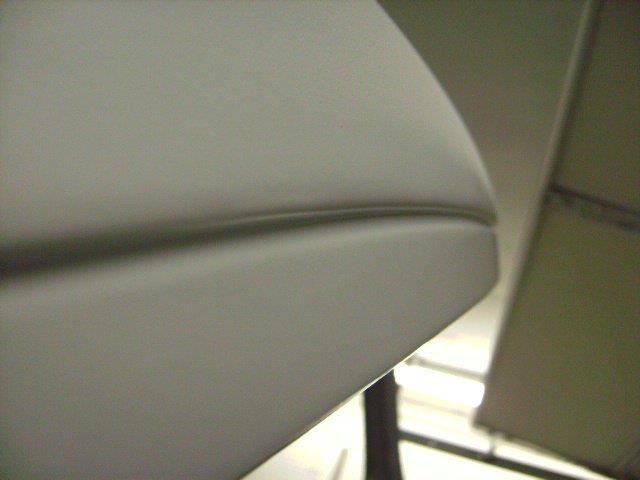 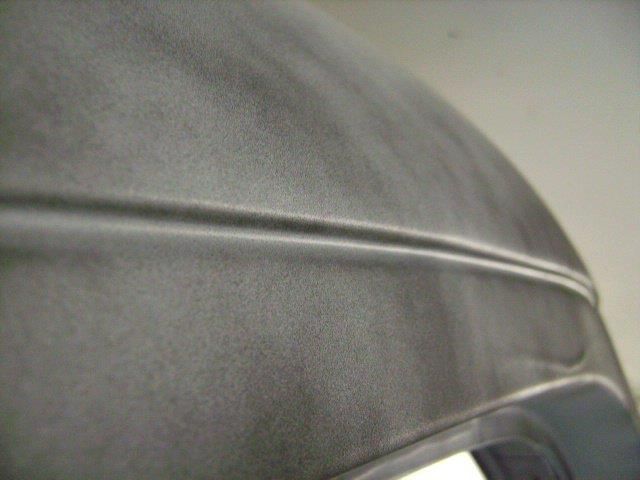 Drip rail. 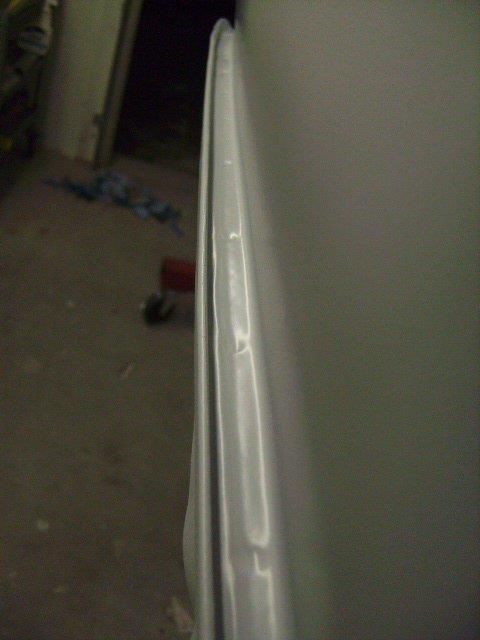 After sanding the cowl seam. I used a small diameter rod with a few layers of masking tape over it for cushion to block the seam out. This way the seam has an even diameter down its length. After the seam is blocked evenly, it gets re-guidecoated and taped on one side of the seam. Then the flat part of the panel against the seam is blocked down, and the edge of panel is rolled into the seam using the edge of a Durablock. The guide coat shows the seam, and how evenly you're cutting into it when you're rolling the edge so you can make sure it's even. Then the tape is flipped and the process is repeated on the other side. 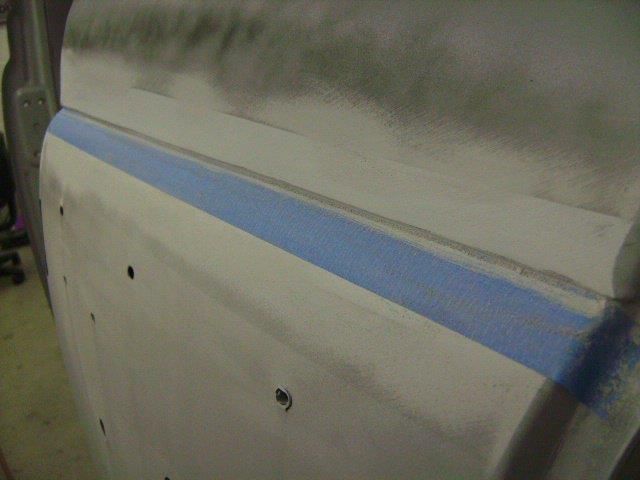 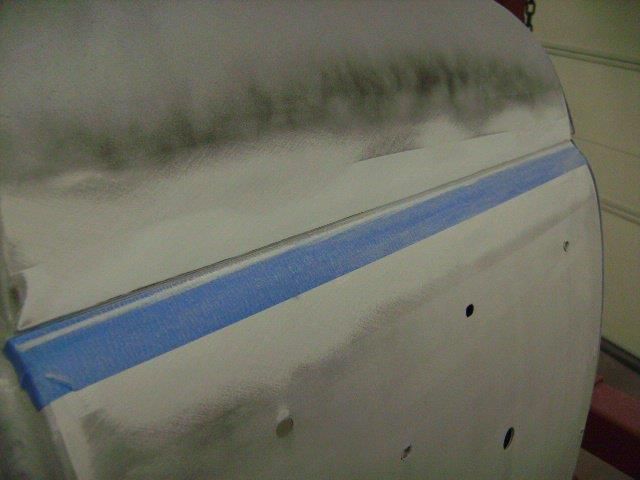 The front and rear roof seams after recieving the same treatment. 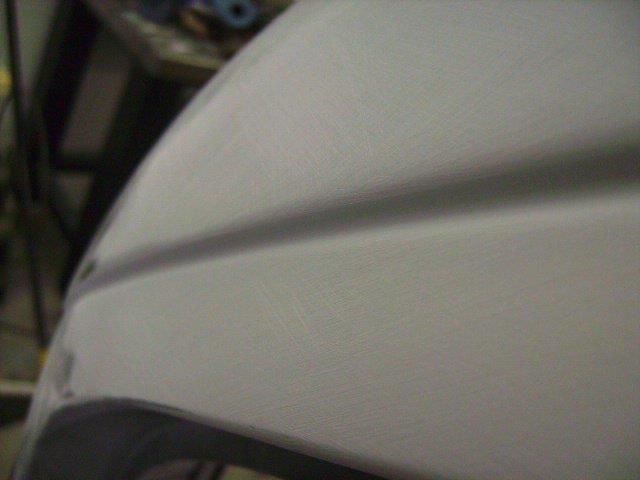 
__________________
Project Goldilocks '66 C10 Short Fleet BBW Build '65 C10 Highly Detailed Stock Restoration Thread '78 Camaro Targa Roof Build '55 International Metal/Body/Paint Work '66 F100 Full Rotisserie Restoration '40 Packard 120 Convertible Coupe Restoration How To Restore and Detail an Original Gauge Cluster How To Detail Sand Body Panels, Edges, Corners, Etc Last edited by theastronaut; 12-03-2012 at 06:21 PM. |
|
|
|
|
02-27-2012, 06:18 PM
|
#15 |
|
Registered User
Join Date: Aug 2007
Location: Redwood City, CA
Posts: 1,174
|
Re: '55 International Metal/Body/Paint Work
I applaud you for your excellent fabrication skills, picking a really cool truck and for a very informative and well thought out build/progress thread - nice clear pic's - keep up the great work!
__________________
66 GMC Suburban Custom 66 Chevy K10 Suburban |
|
|
|
|
03-03-2012, 03:31 PM
|
#16 | |
|
Registered User
Join Date: May 2011
Location: Anderson SC
Posts: 3,868
|
Re: '55 International Metal/Body/Paint Work
Quote:
__________________
Project Goldilocks '66 C10 Short Fleet BBW Build '65 C10 Highly Detailed Stock Restoration Thread '78 Camaro Targa Roof Build '55 International Metal/Body/Paint Work '66 F100 Full Rotisserie Restoration '40 Packard 120 Convertible Coupe Restoration How To Restore and Detail an Original Gauge Cluster How To Detail Sand Body Panels, Edges, Corners, Etc |
|
|
|
|
|
03-03-2012, 10:08 PM
|
#17 |
|
Registered User
Join Date: Aug 2011
Location: Lewis center, ohio
Posts: 32
|
Re: '55 International Metal/Body/Paint Work
Love this info... Makes me miss my grandpa, he owned an international dealership from the 40s to the 80s. I got tons of great IH pics at the lot
Posted via Mobile Device |
|
|
|
|
03-19-2012, 12:58 PM
|
#18 | |
|
Registered User
Join Date: May 2011
Location: Anderson SC
Posts: 3,868
|
Re: '55 International Metal/Body/Paint Work
Quote:
That's neat, I'd love to see those pics if you have copies online!
__________________
Project Goldilocks '66 C10 Short Fleet BBW Build '65 C10 Highly Detailed Stock Restoration Thread '78 Camaro Targa Roof Build '55 International Metal/Body/Paint Work '66 F100 Full Rotisserie Restoration '40 Packard 120 Convertible Coupe Restoration How To Restore and Detail an Original Gauge Cluster How To Detail Sand Body Panels, Edges, Corners, Etc |
|
|
|
|
|
03-19-2012, 12:58 PM
|
#19 |
|
Registered User
Join Date: May 2011
Location: Anderson SC
Posts: 3,868
|
Re: '55 International Metal/Body/Paint Work
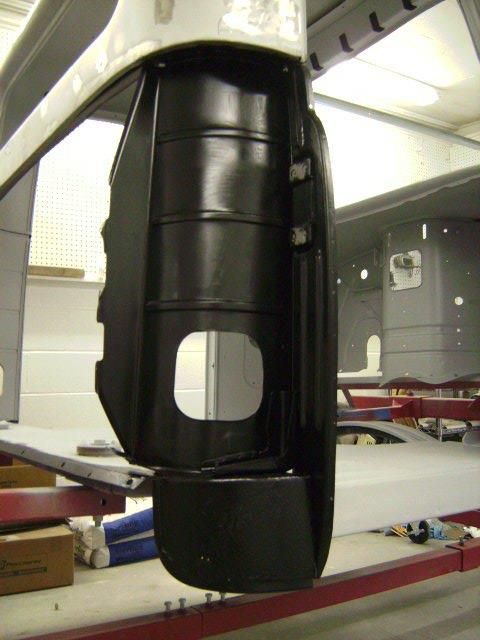
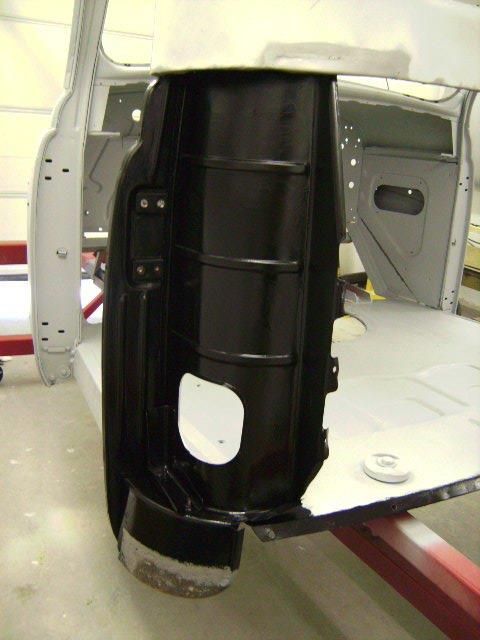
Here's the process to get the rear cab panel ready to reinstall.
The corners were cracked and needed repairing before getting the panel back in place. 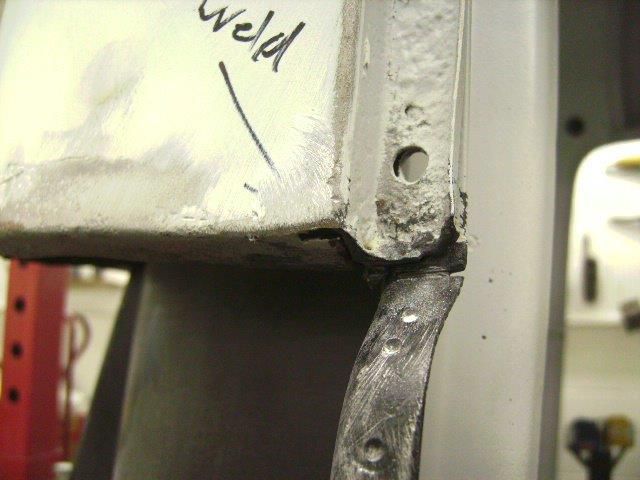 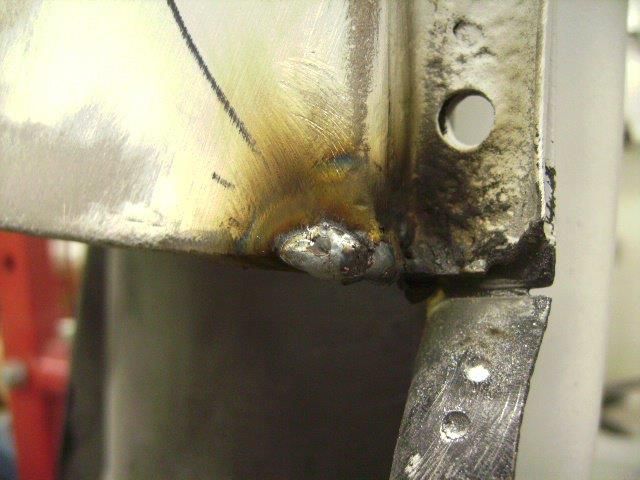 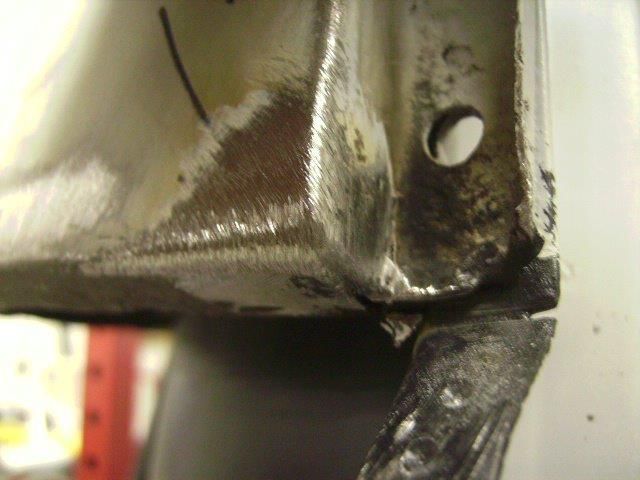 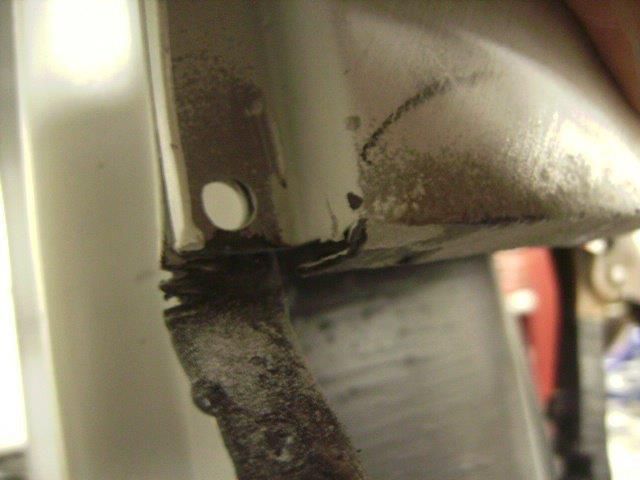 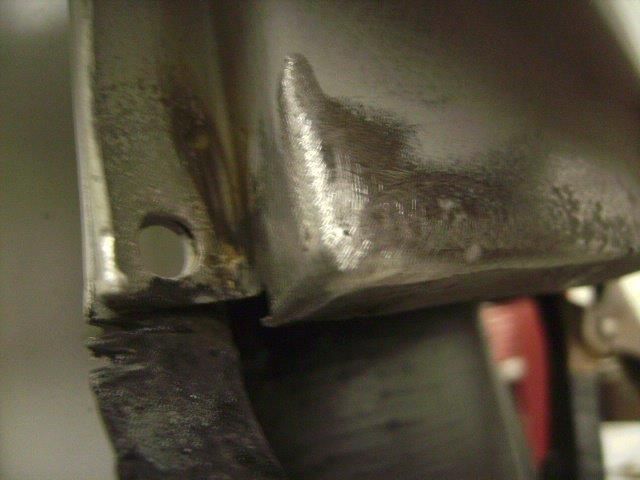 Since there was no way to reweld the upper corner flanges, I had to use SEM panel adhesive for those spots. There was also no way to clamp the flanges, so I welded on tabs and pulled the panel tightly into place with ratchet straps. This let me check the final position and work the edges to straighten out the gap before welding and glueing. I also added a few tabs and straps across the center to keep the two panels flush with each other.  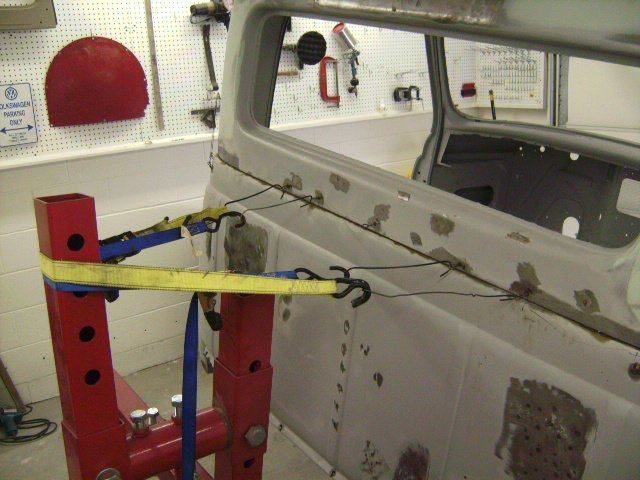 Flanges were blasted, prepped, and sprayed with PPG DP40. This will get ground off right around each spotweld area for clean welds. 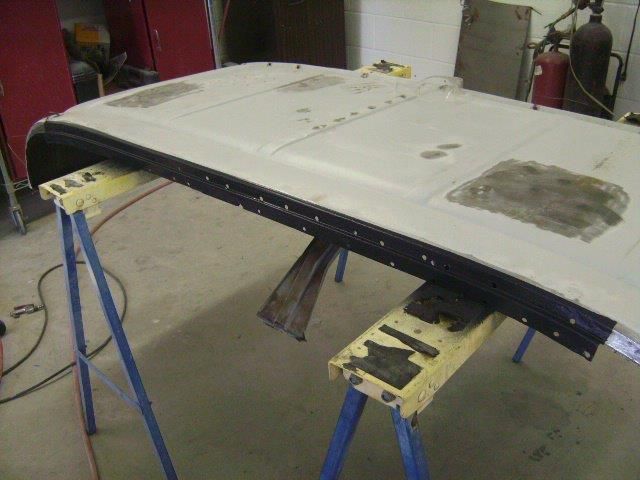 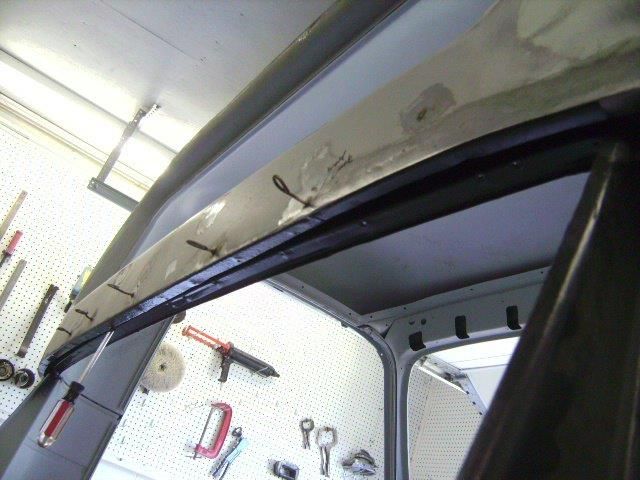
__________________
Project Goldilocks '66 C10 Short Fleet BBW Build '65 C10 Highly Detailed Stock Restoration Thread '78 Camaro Targa Roof Build '55 International Metal/Body/Paint Work '66 F100 Full Rotisserie Restoration '40 Packard 120 Convertible Coupe Restoration How To Restore and Detail an Original Gauge Cluster How To Detail Sand Body Panels, Edges, Corners, Etc Last edited by theastronaut; 03-07-2013 at 04:27 PM. Reason: Fix dead pic links |
|
|
|
|
04-11-2012, 12:27 PM
|
#20 |
|
Old and crusty
Join Date: Jan 2009
Location: Surprise, AZ
Posts: 462
|
Re: '55 International Metal/Body/Paint Work
John,
Outstanding job, as usual. Internationals are not my cup of tea but I can appreciate anything that's been restored to better than new condition. I can imagine the looks this guy will get on his drive back home. Dean Last edited by dean jendro; 04-11-2012 at 04:45 PM. |
|
|
|
|
04-11-2012, 02:09 PM
|
#21 |
|
Registered User
Join Date: May 2011
Location: Anderson SC
Posts: 3,868
|
Re: '55 International Metal/Body/Paint Work
Thanks Dean! I'm sure they'll have a blast driving back!
__________________
Project Goldilocks '66 C10 Short Fleet BBW Build '65 C10 Highly Detailed Stock Restoration Thread '78 Camaro Targa Roof Build '55 International Metal/Body/Paint Work '66 F100 Full Rotisserie Restoration '40 Packard 120 Convertible Coupe Restoration How To Restore and Detail an Original Gauge Cluster How To Detail Sand Body Panels, Edges, Corners, Etc |
|
|
|
|
04-11-2012, 02:16 PM
|
#22 |
|
Registered User
Join Date: May 2011
Location: Anderson SC
Posts: 3,868
|
Re: '55 International Metal/Body/Paint Work
Here's one I saw at the mall last week. The body was original but it was slammed on torque thrust.
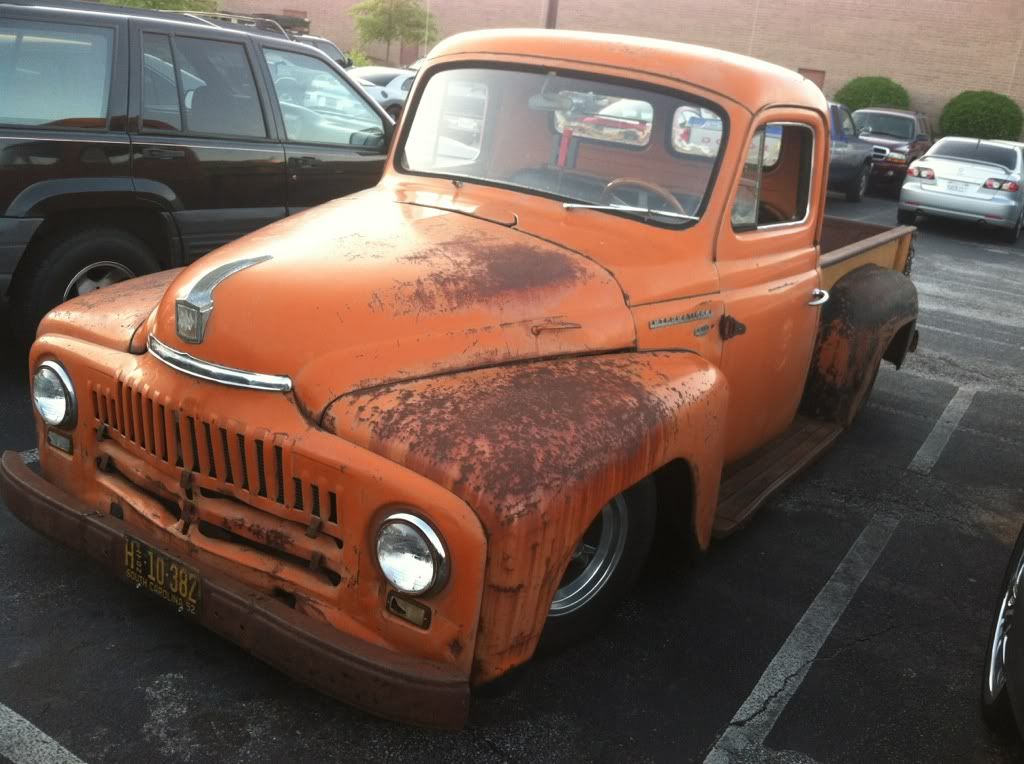 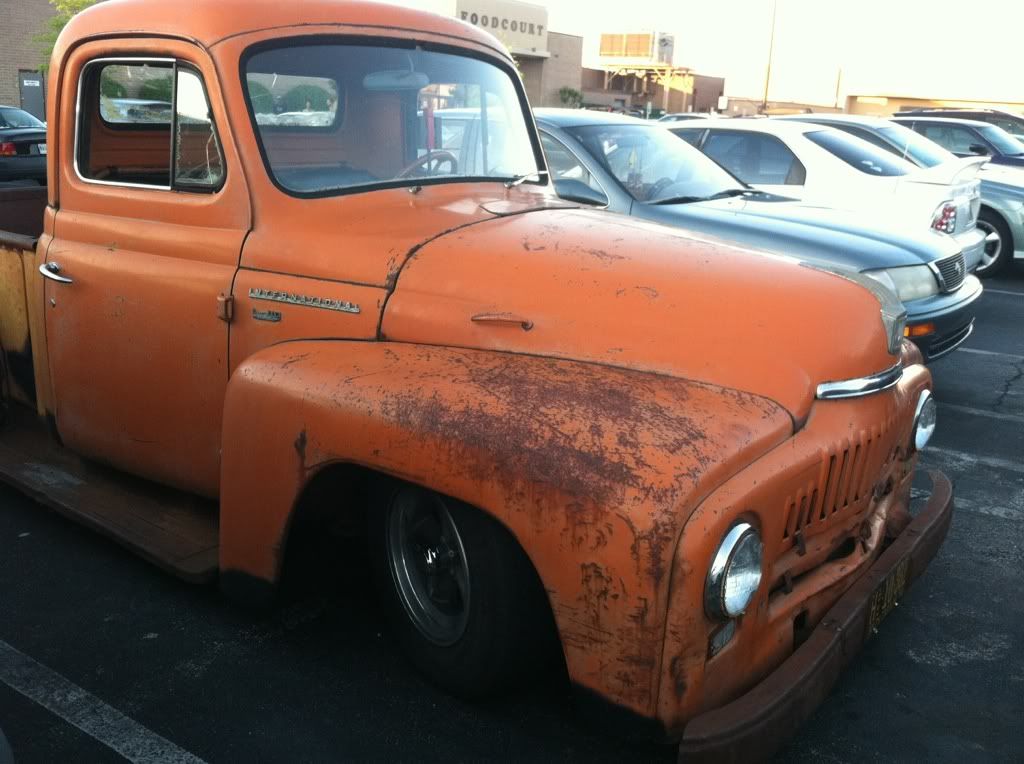 Posted via Mobile Device
__________________
Project Goldilocks '66 C10 Short Fleet BBW Build '65 C10 Highly Detailed Stock Restoration Thread '78 Camaro Targa Roof Build '55 International Metal/Body/Paint Work '66 F100 Full Rotisserie Restoration '40 Packard 120 Convertible Coupe Restoration How To Restore and Detail an Original Gauge Cluster How To Detail Sand Body Panels, Edges, Corners, Etc |
|
|
|
|
05-01-2012, 01:22 AM
|
#23 |
|
Registered User
Join Date: Jun 2010
Location: Vancouver Island BC
Posts: 652
|
Re: '55 International Metal/Body/Paint Work
Your doing such a nice job on 'Goldilocks' I thought I'd check your other builds!!! This one is unreal, thanks for the detailed pics and info, may help one day when I get some tools. Great build.
__________________

|
|
|
|
|
05-01-2012, 08:13 AM
|
#24 | |
|
Registered User
Join Date: May 2011
Location: Anderson SC
Posts: 3,868
|
Re: '55 International Metal/Body/Paint Work
Quote:
__________________
Project Goldilocks '66 C10 Short Fleet BBW Build '65 C10 Highly Detailed Stock Restoration Thread '78 Camaro Targa Roof Build '55 International Metal/Body/Paint Work '66 F100 Full Rotisserie Restoration '40 Packard 120 Convertible Coupe Restoration How To Restore and Detail an Original Gauge Cluster How To Detail Sand Body Panels, Edges, Corners, Etc |
|
|
|
|
|
05-01-2012, 08:42 AM
|
#25 |
|
Registered User
Join Date: May 2011
Location: Anderson SC
Posts: 3,868
|
Re: '55 International Metal/Body/Paint Work
Once everything was prepped and aligned for the rear cab panel, I spread SEM panel adhesive on the corners and pulled it into place with ratchet straps. I used too much which made a mess on the outside, but I wanted it to have enough to squeeze out on the inside to fully seal up the seam. The metal will tear before this stuff loses grip of the metal! It can be heated for removal if ever needed.
Last test fit. 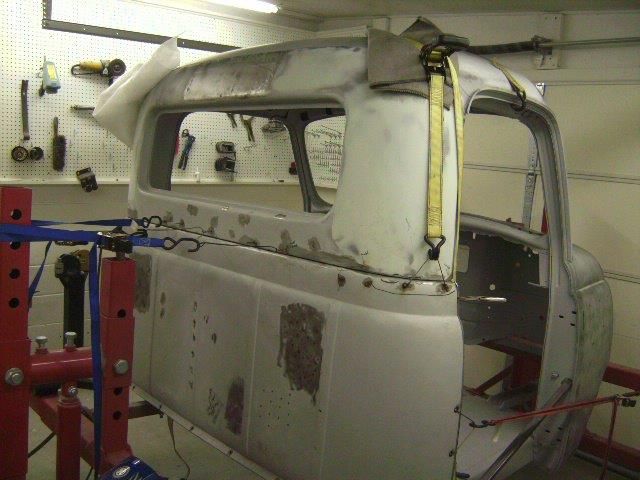  Adhesive applied and strapped in place until it cured. 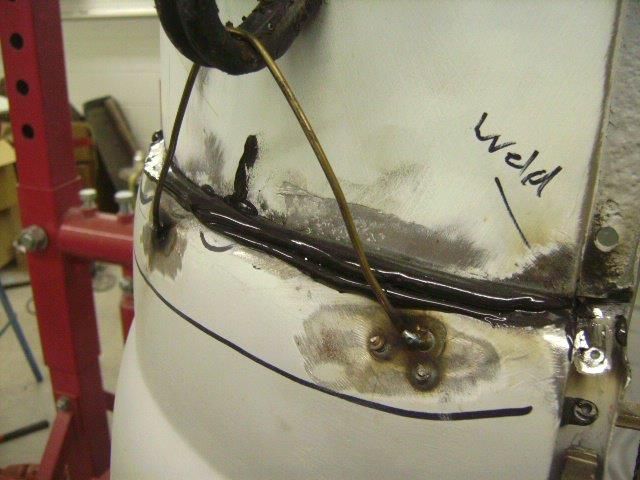 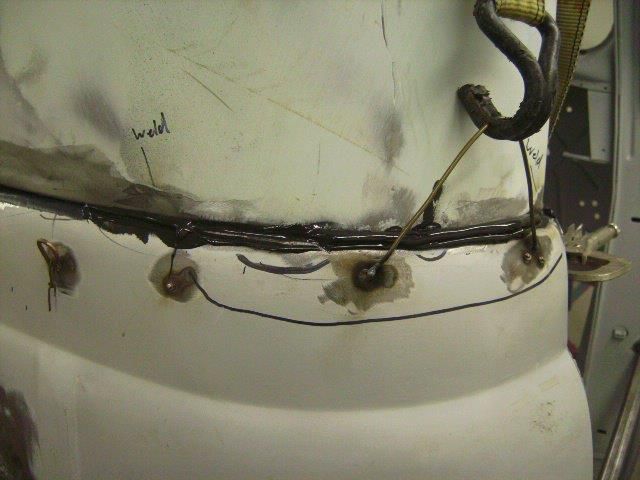 The bottom corners were clamped into place and plug welded.   Once it dried I ground/sanded off the excess adhesive. 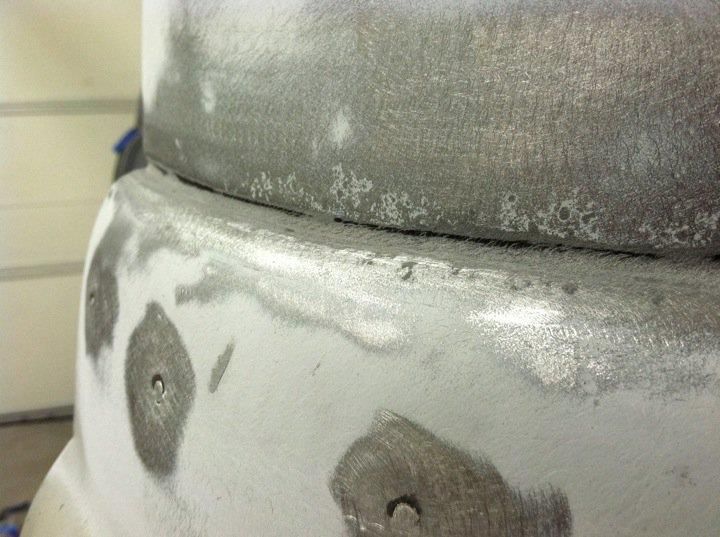 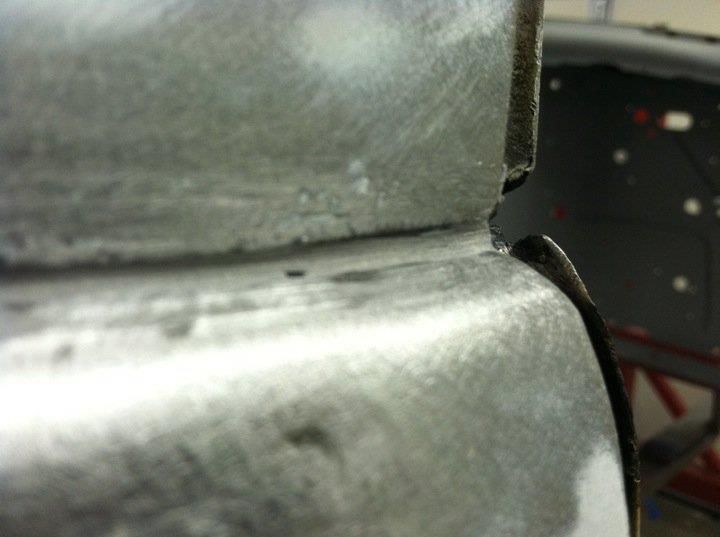
__________________
Project Goldilocks '66 C10 Short Fleet BBW Build '65 C10 Highly Detailed Stock Restoration Thread '78 Camaro Targa Roof Build '55 International Metal/Body/Paint Work '66 F100 Full Rotisserie Restoration '40 Packard 120 Convertible Coupe Restoration How To Restore and Detail an Original Gauge Cluster How To Detail Sand Body Panels, Edges, Corners, Etc Last edited by theastronaut; 03-07-2013 at 04:32 PM. Reason: Fix dead pic links |
|
|
|
 |
| Bookmarks |
|
|


 Linear Mode

