
|
Register or Log In To remove these advertisements. |
|
|
|
|||||||
 |
|
|
Thread Tools | Display Modes |
 03-01-2013, 09:46 PM
|
#26 | |
|
Senior Member
 Join Date: Jul 2007
Location: Clarksville TN 37043
Posts: 8,702
|
Re: LFD's How-To "PorterBuilt Hood Hinges"
Quote:
Were these changes added to the ones being sold now?
__________________
Chuck 68  swb Fleetside build ''Choncho'' swb Fleetside build ''Choncho'' http://67-72chevytrucks.com/vboard/s...d.php?t=374892 My trailer redo http://67-72chevytrucks.com/vboard/s...69#post5893869 Chuy my 59 bug http://67-72chevytrucks.com/vboard/s...d.php?t=653798 Putnam 87 GMC Shop truck http://67-72chevytrucks.com/vboard/s...d.php?t=707687 |
|

|

|
|
03-02-2013, 05:19 PM
|
#27 | |
|
Senior Member
Join Date: Dec 2003
Location: Mesa,Az
Posts: 3,981
|
Re: LFD's How-To "PorterBuilt Hood Hinges"
Quote:
The driver side hinge pocket has a notch in the back side of the bottom to distinguish it from the passenger side. The hood plates mounting holes were modified for an easier install. Nate
__________________
www.PorterbuiltFabrication.com Phone: 480-297-2621 E-mail: sales@pbfab.com Find us on FaceBook under Porterbuilt Fabrication Specializing in Chassis and Suspension Components for your Classic Chevrolet Truck. We offer components from the following manufacturers: Porterbuilt Accuair Ridetech (Air Ride Technologies) Air Lift Wilwood Intro Unisteer ECE Gotta Show Air Lift Borgeson CPP Supporting this forum since 2003! |
|
|
|
|
|
12-07-2013, 02:13 PM
|
#28 |
|
Registered User
Join Date: Aug 2006
Location: St. Albans, Vt
Posts: 2,520
|
Re: LFD's How-To "PorterBuilt Hood Hinges"
 This little spring is the perfect solution to popping the hood up when using the Porterbuilt hinges. They are offered by member Pickemup. http://67-72chevytrucks.com/vboard/s...d.php?t=541980
__________________
///Relaxed Atmosphere |
|
|
|
|
12-27-2015, 10:44 PM
|
#29 |
|
Registered User
Join Date: Feb 2005
Location: philadelphia pa
Posts: 124
|
Re: LFD's How-To "PorterBuilt Hood Hinges"
I had to modify minds? What a pain in the ahhh! My fire wall had a slant to it, so hinges had to be cut to fit flush, anybody else have that prob? Fits like a glove now:-)
|
|
|
|
|
12-27-2015, 10:49 PM
|
#30 |
|
Registered User
Join Date: Feb 2005
Location: philadelphia pa
Posts: 124
|
Re: LFD's How-To "PorterBuilt Hood Hinges"
....other than that little roadblock I love the product
|
|
|
|
|
01-01-2016, 08:06 PM
|
#31 |
|
Registered User
 Join Date: Sep 2012
Location: clarksville tn
Posts: 811
|
Re: LFD's How-To "PorterBuilt Hood Hinges"
How much are these now , are they still around ?
__________________
72 GMC K 1500 SWB W/ 68 CHEVY FR/CLIP -- SOLD 70 CHEVY C/10 LWB x 2 ----- SOLD 67 CHEVY SWB IN PROGRESS " ALMOST HEAVEN " Build thread : http://67-72chevytrucks.com/vboard/s...15#post6826315 |
|
|
|
|
01-01-2016, 09:31 PM
|
#32 | |
|
67-72 parts collector,
Join Date: Nov 2002
Location: Mid-MO
Posts: 22,682
|
Re: LFD's How-To "PorterBuilt Hood Hinges"
Quote:
http://pbfab.com/shop/hood-hinges
__________________
Keith Convert to disc brakes. http://67-72chevytrucks.com/vboard/s...d.php?t=444823 |
|
|
|
|
|
01-13-2016, 12:23 AM
|
#33 | |
|
Registered User
Join Date: Dec 2008
Location: Spring, TX
Posts: 54
|
Re: LFD's How-To "PorterBuilt Hood Hinges"
Quote:
__________________
Too many dreams, too little money. |
|
|
|
|
|
01-13-2016, 01:55 AM
|
#34 |
|
67-72 parts collector,
Join Date: Nov 2002
Location: Mid-MO
Posts: 22,682
|
Re: LFD's How-To "PorterBuilt Hood Hinges"
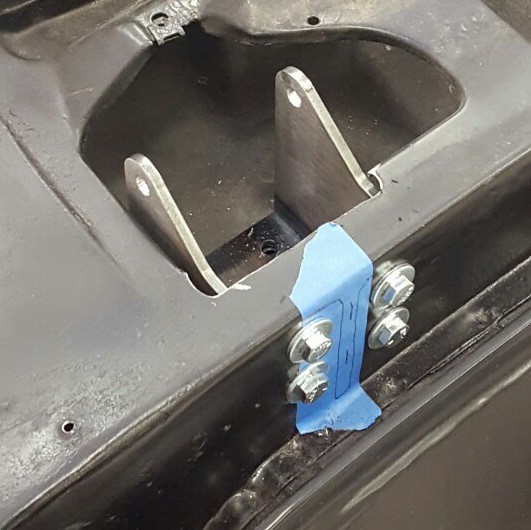
Are you sure the top of the cowl is not dented causing the front of the PB hinge pocket to lean away from the front of the firewall?
I havent heard of anyone having trouble installing these before now. I know mine went in SUPER easy. Also,... before I would cut the PB hinge pocket apart, I would shim under the bottom to make it fit the front of the firewall.
__________________
Keith Convert to disc brakes. http://67-72chevytrucks.com/vboard/s...d.php?t=444823 |
|
|
|
|
01-13-2016, 09:50 PM
|
#35 |
|
Registered User
Join Date: Oct 2013
Location: Massachusetts
Posts: 777
|
Re: LFD's How-To "PorterBuilt Hood Hinges"
Subscribing just so I can find it easier later on
__________________
______________________ www.northeastrodrun.com |
|
|
|
|
01-13-2016, 10:27 PM
|
#36 | |
|
*************
Join Date: Apr 2005
Location: Pensacola, FL
Posts: 17,827
|
Re: LFD's How-To "PorterBuilt Hood Hinges"
Quote:
Last thing, if you already have a painted truck and you don't want to weld the hinge mounting plate to your hood, I sell bolt on hood brackets that allow you us use the PB hinges without welding: http://67-72chevytrucks.com/vboard/s...d.php?t=679945 
__________________
Rob - https://www.instagram.com/hart_rod_c10 As Iron Sharpens Iron, So One Man Sharpens Another. Proverbs 27:17 FOR SALE: DBW pedal bracket - http://67-72chevytrucks.com/vboard/s...d.php?t=651123 FOR SALE: Hood Brackets http://67-72chevytrucks.com/vboard/s...d.php?t=679945 1987 Silverado SWB - 34.5K original miles http://67-72chevytrucks.com/vboard/s...d.php?t=801834 1969 SuperBurb - http://67-72chevytrucks.com/vboard/s...d.php?t=200387 1968 Farm truck - http://67-72chevytrucks.com/vboard/s...d.php?t=358692 1968 SWB - http://67-72chevytrucks.com/vboard/s...d.php?t=551258 1948 Chevy - http://67-72chevytrucks.com/vboard/s...=122164&page=3 |
|
|
|
|
|
01-17-2016, 08:52 PM
|
#37 |
|
Senior Member
Join Date: May 2009
Location: greensboro north carolina
Posts: 531
|
Re: LFD's How-To "PorterBuilt Hood Hinges"
Nice work now I see why my driver side sit higher
|
|
|
|
|
07-15-2016, 07:59 AM
|
#38 |
|
Registered User
Join Date: Mar 2016
Location: Wichita
Posts: 3
|
Re: LFD's How-To "PorterBuilt Hood Hinges"
Subscribing. Nice write up, visual learner here.
|
|
|
|
|
01-30-2017, 07:19 PM
|
#39 | ||||||||
|
Registered User
Join Date: Sep 2015
Location: Ahwatukee, AZ
Posts: 13
|
I just spent last weekend installing this kit, so I'm going to update this article from 2009 to 2016/2017 so everyone is aware on what to expect when they spend $440 on PB Fab hinges.
First of all I want to thank Paul (LFD) for taking the time to put together this awesome original thread/"instruction manual" since this kit comes with no paperwork. I have taken Paul's quotes and added my notes to them. I hope it helps others out when installing. 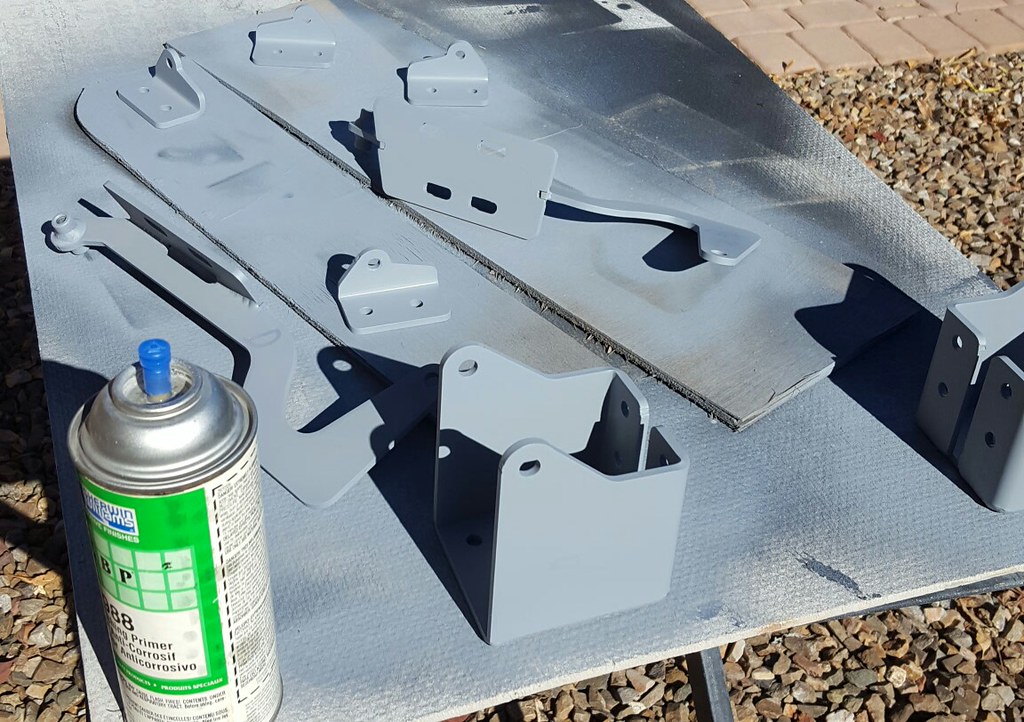 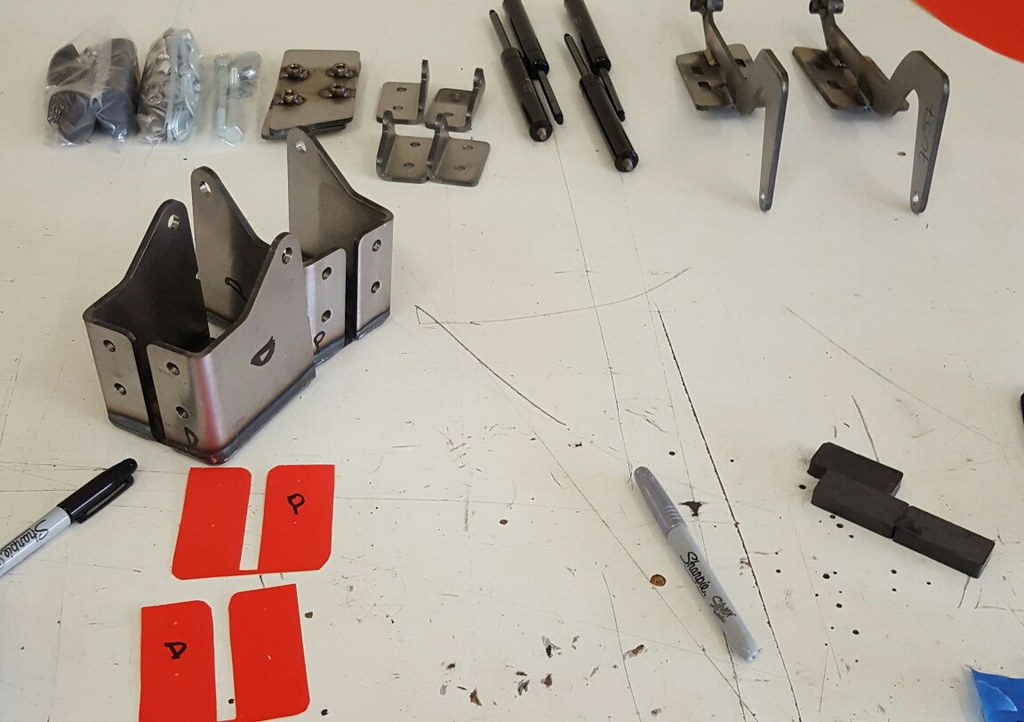 Quote:
 Quote:
  Quote:
Quote:
Quote:
Quote:
   So overall a great kit. My hood opens and closes very smooth for the first time since I have owned the truck. However I wish they would fix the few, little, and easy to change issues to make the kit perfect and drop the price to the $300 range.. $440 seems high for what you get. 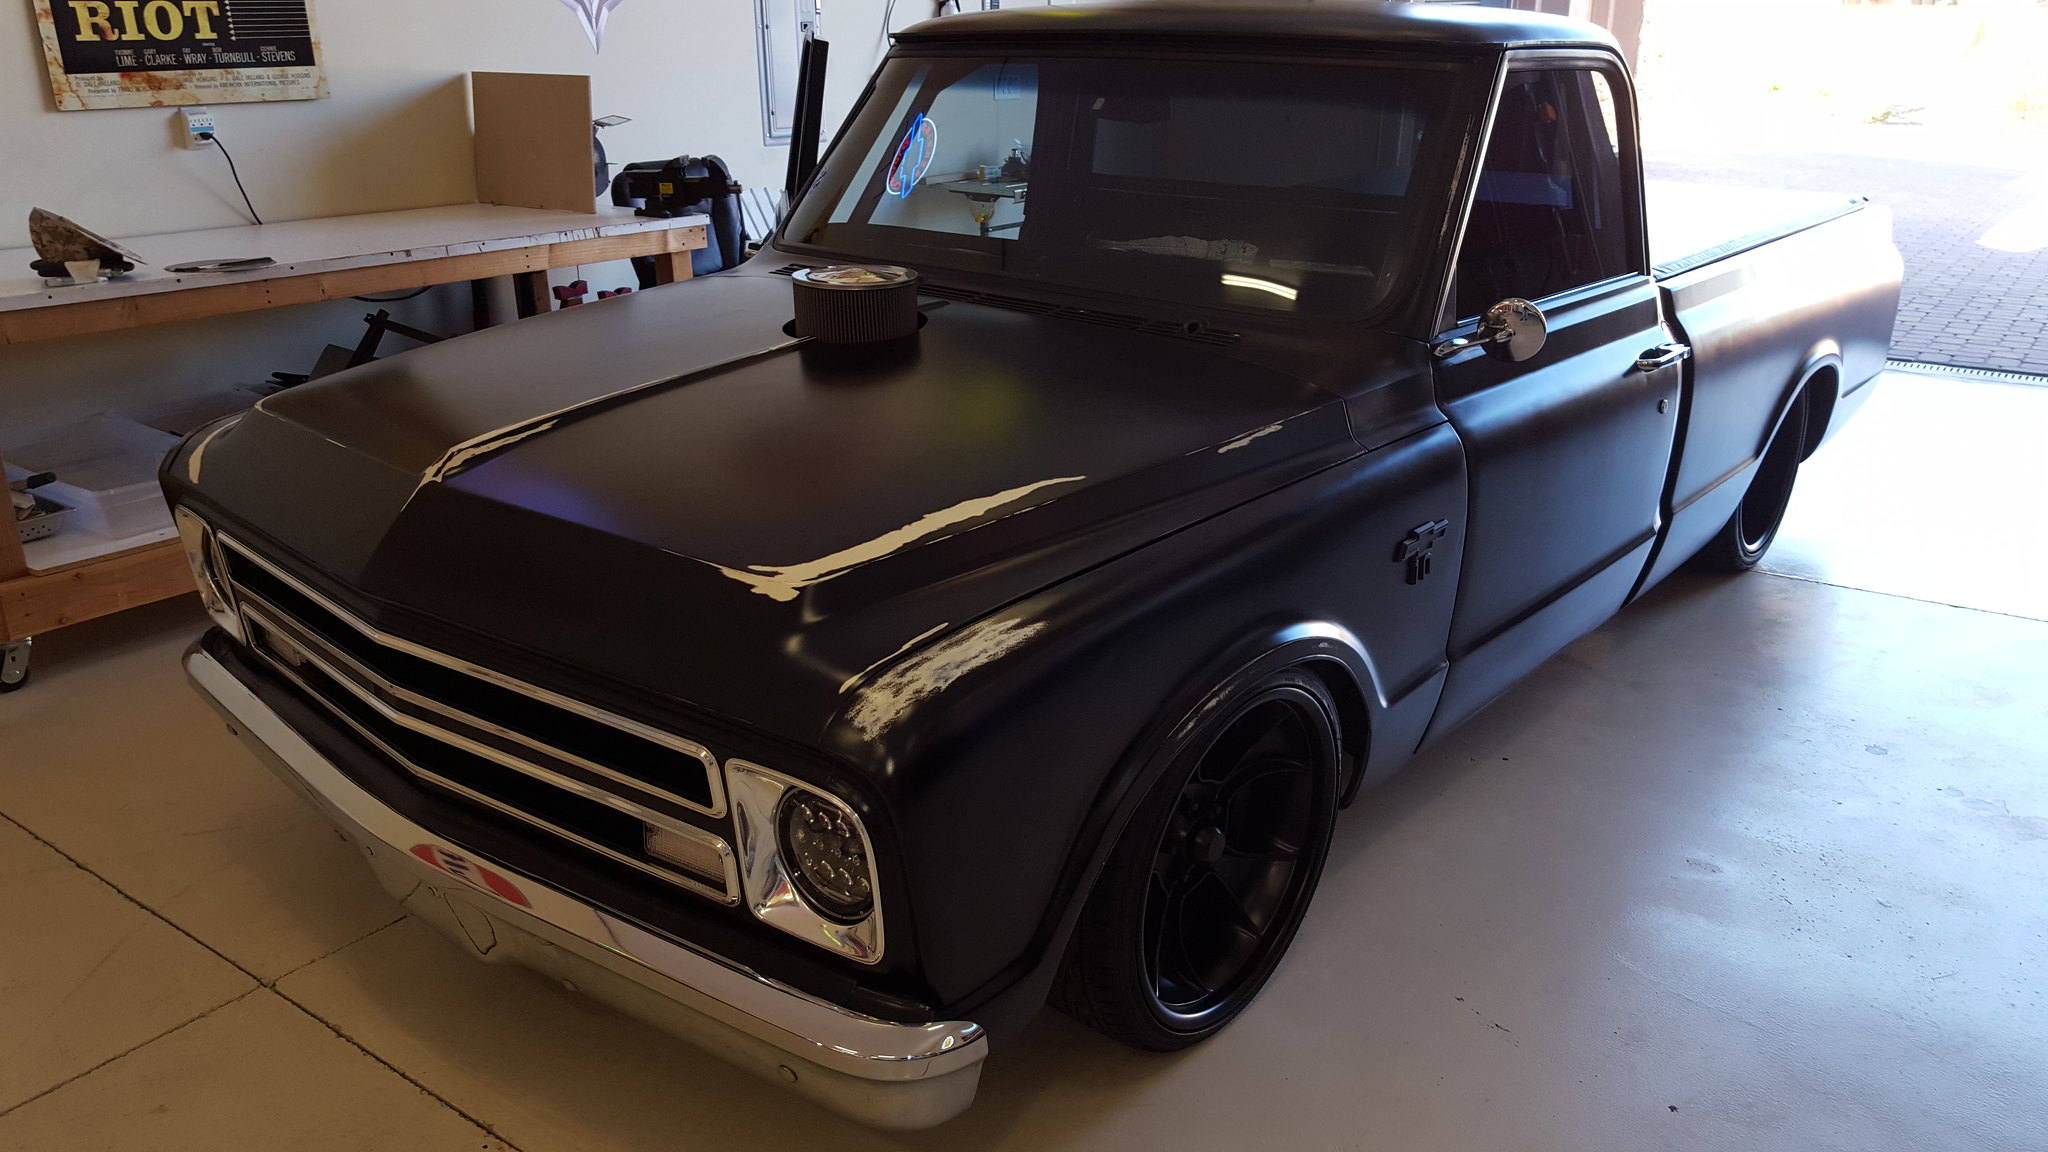  I hope my notes and pictures helps to simplify this installation for others.  Chad Last edited by chadzilla500; 01-30-2017 at 07:24 PM. |
||||||||
|
|
|
|
02-01-2017, 06:32 AM
|
#40 |
|
Registered User
Join Date: May 2007
Location: dallas ga
Posts: 1,503
|
Re: LFD's How-To "PorterBuilt Hood Hinges"
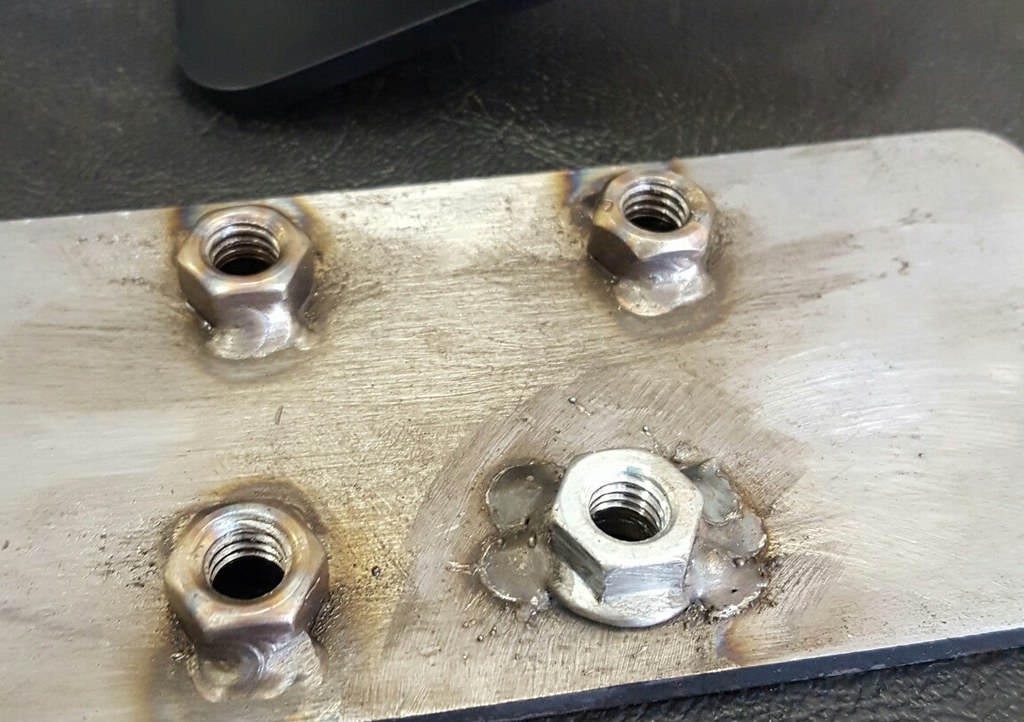
This overall a good kit, however just like every other "kit" this requires some work to make it fit each application. The manufacturing tolerances back in the day were far from good on these trucks and can account for the challenges listed earlier in the thread. The issues with having to chase the threads may have to do with the heat during welding, its and easy fix but it would be nice if they did it before shipping. Still the best solution I have seen for hinges.
|
|
|
|
|
02-05-2017, 11:14 AM
|
#41 | |
|
Registered User
Join Date: Nov 2006
Location: Sun City, Arizona
Posts: 430
|
Re: LFD's How-To "PorterBuilt Hood Hinges"
Quote:
Where did you place shims when fitting the hood? |
|
|
|
|
|
02-05-2017, 11:27 AM
|
#42 | |
|
Registered User
Join Date: Sep 2015
Location: Ahwatukee, AZ
Posts: 13
|
Re: LFD's How-To "PorterBuilt Hood Hinges"
Quote:
|
|
|
|
|
|
11-04-2022, 11:12 AM
|
#43 | |
|
Registered User
Join Date: Dec 2009
Location: Kirkland, WA
Posts: 1,302
|
Re: LFD's How-To "PorterBuilt Hood Hinges"
Quote:
__________________
1968 LWB C20 / AC / Wood Bed |
|
|
|
|
|
| Bookmarks |
|
|


 Linear Mode

